Fri-Jado TDW 5 User manual

TDW
9123875 / 1205
USER MANUAL
TDW SERIES EN (Original Instruction)

TDW
EN / 2-24 9123875 / 1205
KEEP THIS USER MANUAL FOR FUTURE USE
© 2012 Fri-Jado BV, Etten-Leur, The Netherlands.
We advise you to contact your supplier for the guarantee period and conditions. Further we
refer to our General Terms and Conditions for Sales and Delivery that are available upon
request.
The manufacturer does not accept any liability for damage or injury caused by failing to
adhere to these regulations or by not observing the usual caution or care in actions,
operation, maintenance or repair activities, even if not explicitly described in this manual.
As a result of constant commitment to improvement, it may happen that your unit deviates in
detail from what is described in this manual. For this reason, the given instructions are only
a guideline for the installation, use, maintenance and repair of the unit referred to in this
manual. This manual has been composed with the utmost care. The manufacturer shall,
however, not be held responsible for any mistakes in this manual nor for any consequences
thereof. The user is allowed to copy this manual for own use. Further all rights are reserved
and nothing in this manual may be reproduced and/or made public in any way.
Modifications:
In case of unauthorised modifications in or on the unit, every liability on the part of the
manufacturer becomes null and void.

TDW
EN / 3-24 9123875 / 1205

TDW
EN / 4-24 9123875 / 1205
CONTENTS
1. INTRODUCTION ....................................................................................................................... 5
1.1. General ............................................................................................................................ 5
1.2. Identification of the unit ................................................................................................. 5
1.3. Pictograms and symbols.................................................................................................. 5
1.4. Safety instructions........................................................................................................... 6
1.4.1. General ........................................................................................................................ 6
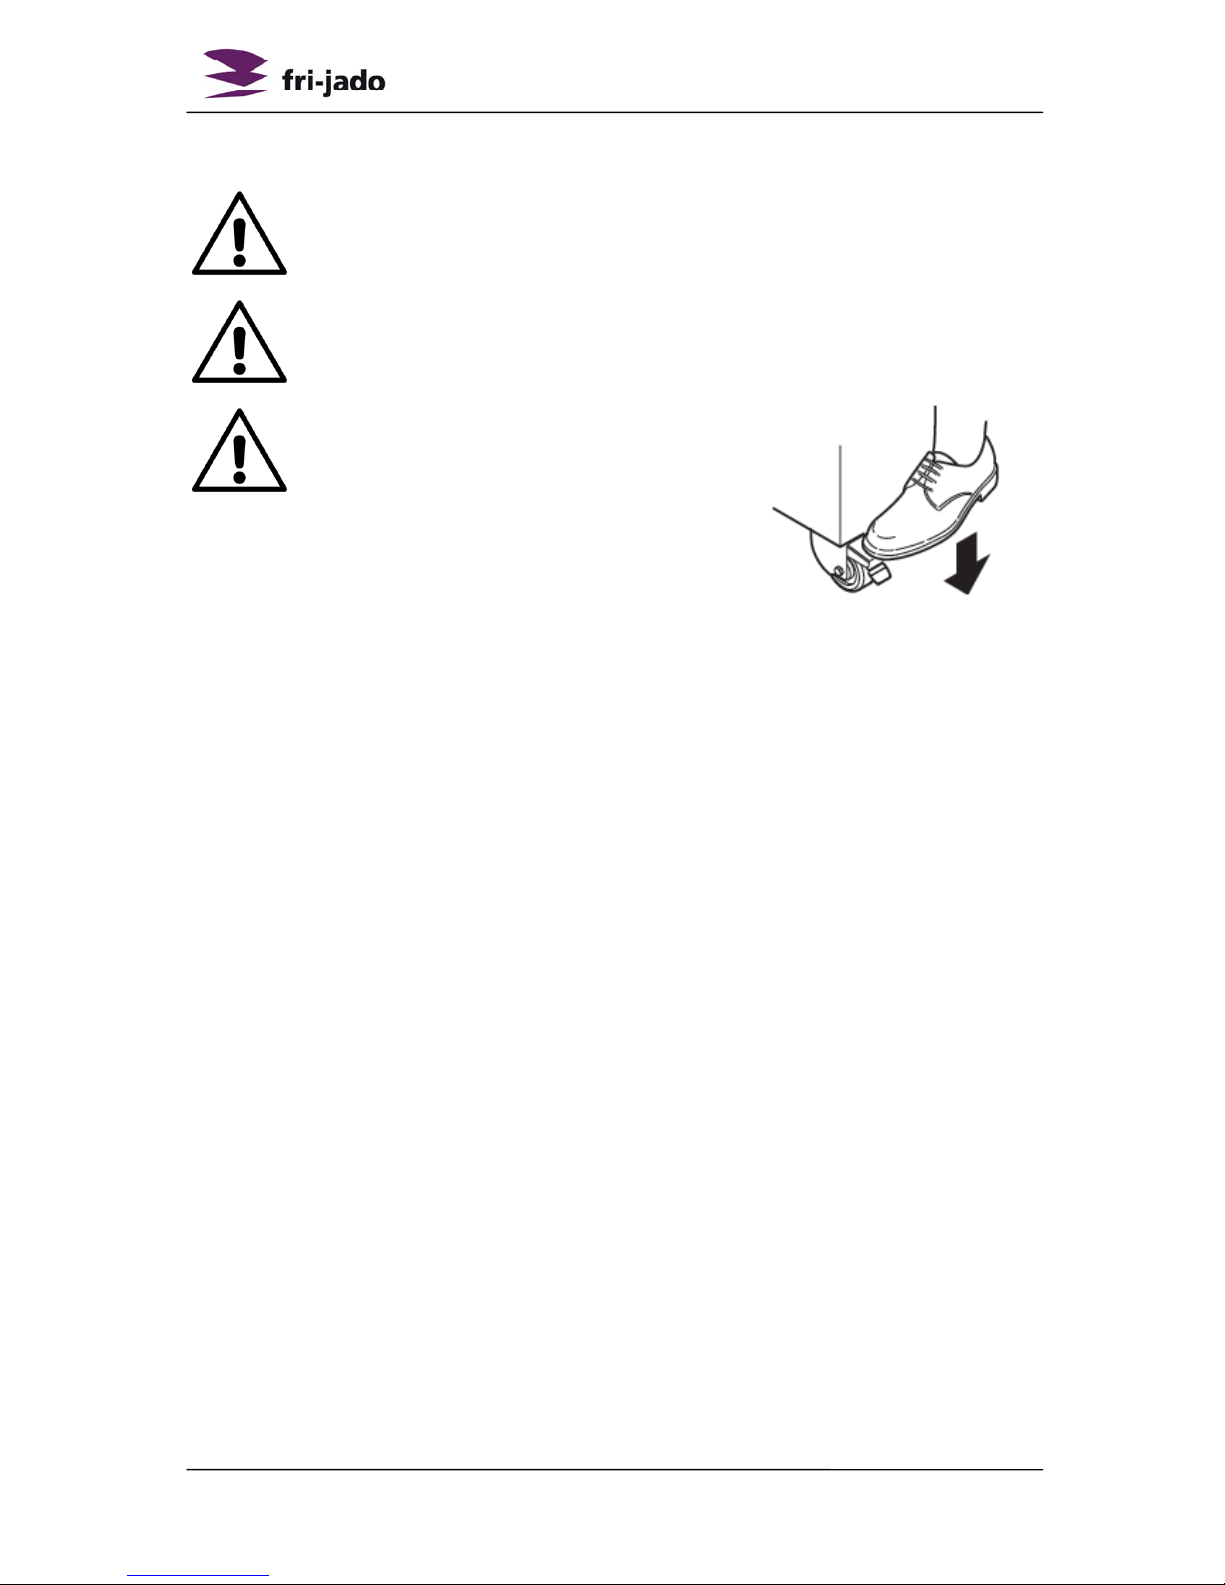
1.4.2. Moving......................................................................................................................... 7
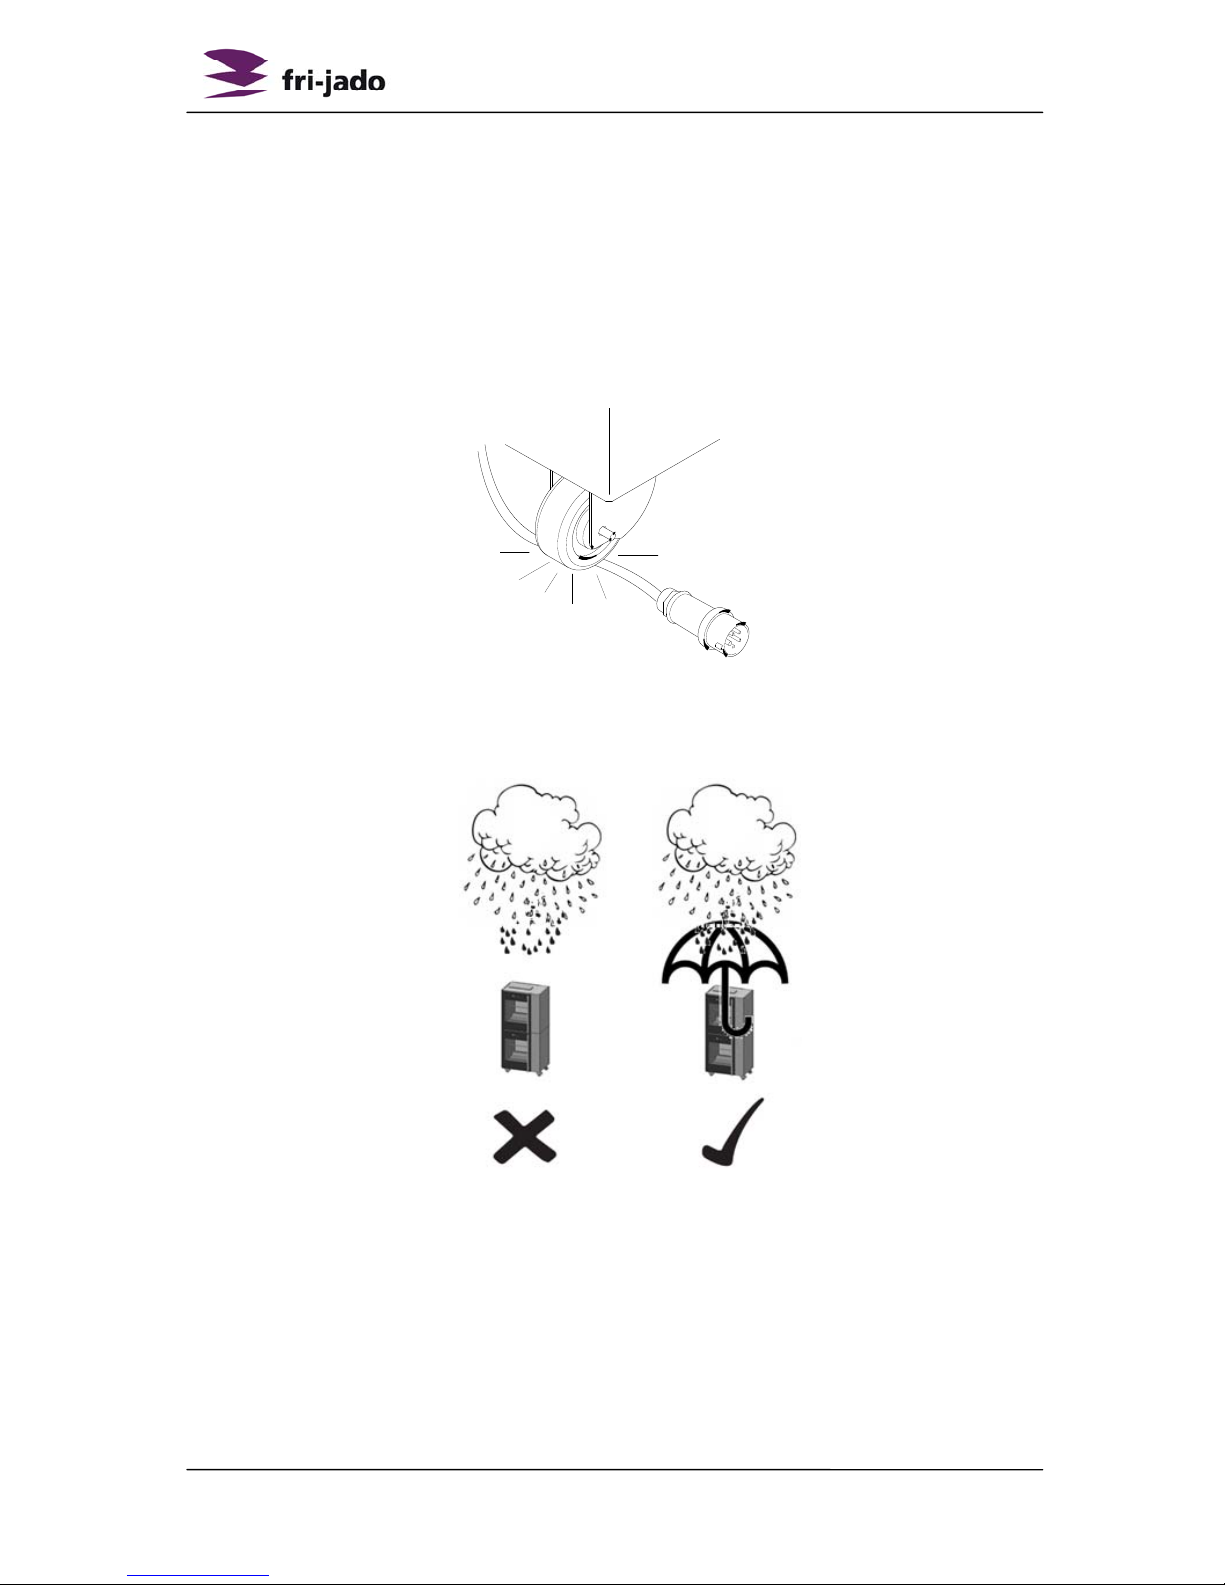
1.4.3. Outdoor use restrictions ............................................................................................. 7
1.4.4. Hygiene........................................................................................................................ 8
1.5. Service and technical support ......................................................................................... 8
1.6. Storage ............................................................................................................................ 8
1.7. Disposal ........................................................................................................................... 8
2. DESCRIPTION OF THE UNIT...................................................................................................... 9
2.1. Technical description....................................................................................................... 9
2.2. Intended use.................................................................................................................... 9
2.3. Accessories ...................................................................................................................... 9
3. INSTALLATION AND FIRST USE .............................................................................................. 10
3.1. Unpacking the unit ........................................................................................................ 10
3.2. Installation and positioning ........................................................................................... 12
3.3. First use ......................................................................................................................... 13
4. OPERATION AND USE ............................................................................................................ 14
4.1. Control panel ................................................................................................................. 14
4.2. Switching-on the unit .................................................................................................... 14
4.3. Use................................................................................................................................. 15
4.4. Switching-off the unit.................................................................................................... 15
5. CLEANING AND MAINTENANCE ............................................................................................ 16
5.1. Maintenance schedule .................................................................................................. 16
5.2. Daily cleaning................................................................................................................. 17
5.3. Weekly cleaning ............................................................................................................ 18
6. MALFUNCTIONS AND SERVICE; WHAT TO DO ...................................................................... 19
6.1. Replacing the battery of the temperature display........................................................ 19
6.2. Replacing the mains cord .............................................................................................. 19
6.3. Adjust the door.............................................................................................................. 20
6.4. Replacing a lamp ........................................................................................................... 21
7. TECHNICAL SPECIFICATIONS.................................................................................................. 22

TDW
EN / 5-24 9123875 / 1205
1. INTRODUCTION
1.1. General
This manual is intended for the user of the TDW (Turbo Deli Warmer). The features and
controls are being described, along with directions for the safest and most efficient use, in
order to guarantee a long life of the unit.
All pictograms, symbols and drawings in this manual apply to the TDW series.
1.2. Identification of the unit
The identification plate can be found on the outside of the machine, and contains the
following data:
Name of the supplier or the manufacturer
Model
Serial number
Year of construction
Voltage
Frequency
Power consumption
1.3. Pictograms and symbols
In this manual, the following pictograms and symbols are used:
WARNING
Possible physical injury or serious damage to the unit, if the instructions
are not carefully followed.
WARNING
Hazardous electrical voltage.
WARNING
Danger of getting injured by hot surfaces.
Suggestions and recommendations to simplify indicated actions.
Recycling symbol.
Direction of view symbol.

TDW
EN / 6-24 9123875 / 1205
1.4. Safety instructions
WARNING
The outside of the unit can be very hot.
WARNING
The maximum load on top of the unit may never exceed 50 kg.
WARNING
Always use the brakes on both front wheels:
1.4.1. General
The user of the unit will be fully responsible for abiding the locally prevailing safety- rules and
regulations.
The unit may be operated by qualified and authorized persons only. Anyone working on or
with this unit must be familiar with the contents of this manual and carefully follow all
guidelines and instructions. Never change the order of the steps to be performed. The
management must instruct the personnel on the basis of this manual and follow all
instructions and regulations.
The pictograms, labels, instructions and warning signs attached to the unit, are part of the
safety measures. They may never be covered or removed, and have to be clearly visible
during the entire lifetime of the unit.
Immediately repair or replace damaged or illegible pictograms, warnings and instructions.
To avoid short-circuiting, never clean the unit using a water hose. For cleaning
instructions, see section 5.
The unit must be cleaned regularly to ensure proper functioning and prevent fire hazard
(over heating).
This appliance is not intended for the use by persons (including children) with reduced
physical, sensory or mental capabilities, or lack of experience and knowledge, unless
they have been given supervision or instruction concerning use of the appliance by a
person responsible for their safety.
Children should be supervised to ensure that they do not play with the appliance.

TDW
EN / 7-24 9123875 / 1205
1.4.2. Moving
When moving the unit:
Before moving the unit, first switch off the mains voltage by pulling the plug from the
wall socket and empty the water tray. After that, cool-down the unit for at least ten
minutes.
The units equipped with wheels are not suited to pass ledges or obstacles higher than
10 mm.
When moving the unit, always push at the centre of the unit. Never on top. Never at the
bottom.
Make sure that the wheels can move freely, so they never touch the power lead (see
Figure 1).
Figure 1
1.4.3. Outdoor use restrictions
To avoid short-circuiting, the units may not be used outdoors unprotected. Placing under a
screen is allowed.
Figure 2

TDW
EN / 8-24 9123875 / 1205
1.4.4. Hygiene
The quality of a fresh product always depends on hygiene. Especially grilling products. With
the risk of salmonella contamination – especially for chicken products – you must make sure
that grilled products can never be mixed with uncooked products. Also contact between
grilled products and hands or tools that have been in contact with raw chicken meat, must be
avoided at all times.
Hands or tools that have been in contact with raw chicken meat, must be cleaned thoroughly.
1.5. Service and technical support
The electrical schematics of your unit is included. In case of malfunctions you can contact
your dealer/service agent. Make sure you have the following data available:
Model.
Serial number.
This data can be found on the identification plate.
1.6. Storage
If the unit will not be used temporarily, and will be stored, follow these instructions:
Clean the unit thoroughly.
Wrap the unit from getting dusty.
Store the unit in a dry, non condensing environment.
1.7. Disposal
Dispose of the machine, any components or lubricants removed from it safely in accordance
with all local and national safety and environment requirements.

TDW
EN / 9-24 9123875 / 1205
2. DESCRIPTION OF THE UNIT
2.1. Technical description
In the Warmer the grilled products are kept at the right temperature by means of a hot airflow
with a high humidity. Because of that the products keep their quality for a maximum of three
hours.
The clear illumination also helps toward an optimal and attractive presentation of the
products.
The unit uses a combination of direct infra red radiation and convection heat. The
temperature of this can be adjusted as desired. The fan ensures an equally divided heat.
The airflow is guided over the water tray to create a very humid atmosphere which helps to
remain the quality of the products.
The illumination of the products takes place by one halogen lamp in the top of the TDW5 and
two in the top of the TDW7/TDW8. These lamps help to heat the product.
It is possible that your Warmer is built together with an TDR of the same size on top of it and
equipped with wheels. Each piece of equipment must be operated individually.
The glass panes have a heat reflecting layer on the inside to keep in the heat. The plating of
the unit is made of stainless steel. The mains cable has connector.
2.2. Intended use
The Warmer is intended to keep warm products at the correct quality and temperature,
not to re-heat them. The temperature of meat products must always be at least 65 ºC.
Any other use will not be regarded as intended use.
The manufacturer accepts no liability whatsoever for loss or injury caused by failing to strictly
adhere to the safety guidelines and instructions in this manual or due to carelessness during
installation, use, maintenance and repair of the unit referred to in this manual and any of its
accessories.
Use the unit in perfect technical condition only.
2.3. Accessories
Your unit contains the following standard accessories:
Shelves.
User manual.

TDW
EN / 10-24 9123875 / 1205
3. INSTALLATION AND FIRST USE
3.1. Unpacking the unit
Your unit is shipped using a plastic cover with protecting corners, covered by a carton box.
All units are placed on a wooden pallet. Around the box and pallet are two tie straps.
Figure 3
Dismantling of the pallet:
Before you can unpack the unit, the pallet must be taken apart. See Figure 4.
Figure 4
1(8x)
4(2x)
2(4x)
5(2x)
3(2x)

TDW
EN / 11-24 9123875 / 1205
Figure 5
Remarks Figure 5:
1. Remove the transportation block of the water tray.
2. Remove all remaining packing materials from the unit.
3. Take out the standard accessories.
All packing materials used for this unit are suited for recycling.
After unpacking, check the state of the unit. In case of damage, store the packing material,
and contact the transporter within fifteen working days after receiving the goods.

TDW
EN / 12-24 9123875 / 1205
3.2. Installation and positioning
Figure 6
The user must have sufficient freedom of movement to properly operate the unit.
The minimum free distance must be at least 250 mm.
During grilling, the glass panes will get very hot. While positioning, keep the unit out
of children’s reach.
In case of a wheeled unit, the floor must be flat and levelled.
The unit has a mains plug, and must be connected to a wall socket with the proper
mains voltage. The wall socket must be mounted by a certified electrician.

TDW
EN / 13-24 9123875 / 1205
3.3. First use
WARNING
Ensure to push the water tray completely into the warmer and closing
the drain after placing it back to prevent damage to the window.
Clean the interior
When using the unit for the first time, clean the interior thoroughly with soap suds.
The cleaning remains will find its way to the water tray, so this drawer must be
cleaned and emptied after cleaning the unit.
Rinse with clean water to remove soap rests.
Push the water tray completely into the Warmer.
Place the shelves in the warmer compartment.
Metal odour
To remove the metal odour that will appear at first use, the unit must be heated at the
maximum temperature for at least half an hour.

TDW
EN / 14-24 9123875 / 1205
4. OPERATION AND USE
4.1. Control panel
Item Function
Display Indication temperature
Control ON/OFF and temperature setting
4.2. Switching-on the unit
➊➋
3. Set the temperature switch to the required value, see Figure 7.
The light will come on.
0 Off
1 25 °C / 77 °F
2 40 °C / 104 °F
3 60 °C / 140 °F
4 80 °C / 176 °F
5 95 °C / 203 °F
Figure 7

TDW
EN / 15-24 9123875 / 1205
4.3. Use
WARNING
Topping up the level in the water tray. This must be done carefully since
the water becomes warm during use. When opening and closing the
tray ensure that no water splashes over the edge.
Fill the water tray ¾ with clean, cold drinking water. This should preferably be done
with soft water to prevent scale forming in the water tray.
During use you should check the water tray every four hours and top up the level as
necessary. Use lukewarm water to prevent the formation of steam and shrinkage of
the bottom plate.
The set temperature in the warmer must be at least 75 ºC to maintain a product temperature
of 65 ºC.
With the thermostat set to position ‘5’, the water consumption is
approximately 1,5 liter per hour. If the surrounding temperature is higher
than 25 ºC the consumption is a little higher.
4.4. Switching-off the unit
Set the temperature switch to ‘0’, see Figure 7.

TDW
EN / 16-24 9123875 / 1205
5. CLEANING AND MAINTENANCE
WARNING
Never use a water hose for cleaning. Water can seep into the unit
through the ventilation holes of the unit.
WARNING
Ensure to push the water tray completely into the warmer and closing
the drain after placing it back to prevent damage to the window.
WARNING
Do not touch the halogen lamps with bare hands. Protect hot lamps
from cold water.
Because of hygiene aspects and optimum condition of the unit it is of
utmost importance to keep a daily cleaning pattern from first use
onwards.
5.1. Maintenance schedule
Item Action Frequency
Interior Clean the interior, see section 5.2 Daily
Water tray Empty the water tray by the special drain that is
attached to the front. For this you need to
carefully open this a bit and let the water out.
Scale can be removed with a mixture of water
and vinegar.
Daily
Exterior Clean the exterior, see section 5.3
Use Stainless Steel cleaning spray to remove
stains, and restoring the gloss
Weekly
Product area Pay attention to proper cleanness of items
inside the oven
Weekly
Glass panes Clean the glass panes, see section 5.3 Weekly

TDW
EN / 17-24 9123875 / 1205
5.2. Daily cleaning
The unit can be cleaned best shortly after use, when it is still lukewarm.
Grilling residue and fat can be removed easily in this state.
The best cleaning can be achieved by using special oven- or grill
cleaner.
The door has a magnetic lock. Regularly check the surfaces between
the door and unit, and clean if necessary, to avoid air leaks.
➊➋
Shelves and bottom plate
- Remove the shelves and bottom plate from the unit (no tools required).
- Place the detachable parts in a wide rinsing container filled with hot water and
an appropriate cleaning agent.
- Soak these parts for one night and clean them the next day.
The interior
- Clean the interior with cleaning agent or hot water combined with an appropriate
cleaning agent.
- Dry the interior thoroughly by using a dry cloth. Make sure no water or detergent
stays behind in the unit.
0

TDW
EN / 18-24 9123875 / 1205
5.3. Weekly cleaning
WARNING
The control panel may only be cleaned using a damp cloth.
Glass doors:
- Clean the panes with cleaning agent or hot water combined with an appropriate
cleaning agent.
- Dry the door thoroughly by using a dry cloth.
- If possible, leave the glass door open at night.
Infra red halogen lamps:
- Check if the lamps need cleaning.
- If necessary clean the lamps with a cloth soaked in alcohol or methylated spirits after
the lamps have cooled off.
The exterior:
- Clean the exterior with cleaning agent or hot water combined with an appropriate
cleaning agent. The use of steel wool is prohibited, because this will cause scratches
that can hold dirt remains.
- Dry the exterior thoroughly by using a dry cloth.

TDW
EN / 19-24 9123875 / 1205
6. MALFUNCTIONS AND SERVICE; WHAT TO DO
Before you contact your supplier/dealer in case of a malfunction, there are some items you
can check yourself:
Is the power supply working properly? Check fuses and differential switch.
Is the temperature switch in the correct position?
Item Malfunction Possible action
Door The door hangs at an angle
Adjust the door, refer to
section 6.3
Lamp Does not light up
Temperature set to OFF (0)
Defect, refer to section 6.4
Temperature
display
The temperature display doesn’t
show anything
Replace the battery, refer to
section 6.1
Warmer The warmer does not heat up
Set temperature at higher level
Check fuses and/or the
differential switch
Mains cord Damaged
Replace, see section 6.2
6.1. Replacing the battery of the temperature display
WARNING
Remove the power plug from the wall socket.
➊➋
3. Remove the side panel and replace the battery of the temperature display.
The lid can be removed and replaced according to the instructions on the
thermometer with a coin or a screwdriver.
4. Re-apply the side panel.
6.2. Replacing the mains cord
WARNING
Hazardous electrical voltage.
If the mains cord is damaged, it must be replaced by the manufacturer, his service agent or a
similarly qualified person in order to avoid hazards.
0

TDW
EN / 20-24 9123875 / 1205
6.3. Adjust the door
WARNING
Remove the power plug from the wall socket.
➊➋
3. Close the door and remove the side panel at the hinge side.
4. Support the door from underneath and loosen both nuts (A) in the top hinge plate on
the inside of the front by one turn.
5. Position the door correctly so that the underside of the door, in the closed position, is
parallel to the base below.
6. Loosen the lock nut (B) of the adjusting screw.
7. Turn the adjusting screw (C) to the right to rotate the position of the door.
8. Tighten the lock nut (B).
9. Tighten both bolts on the hinge plate (A).
10. Check the position of the door.
11. Re-apply the side panel.
Figure 8
A
BC
0
This manual suits for next models
5
Table of contents
Other Fri-Jado Food Warmer manuals
Popular Food Warmer manuals by other brands

Hatco
Hatco GLO-RAY QW-6 Series Installation and operating manual

Bloomfield
Bloomfield HT-527 installation instructions

Enthermics
Enthermics DC250 owner's manual

CareCo
CareCo BL06139 instruction manual

Chefman
Chefman RJ22-BLACK-L user guide

Roller Grill
Roller Grill HVC 60 B GN Instructions for use and installation