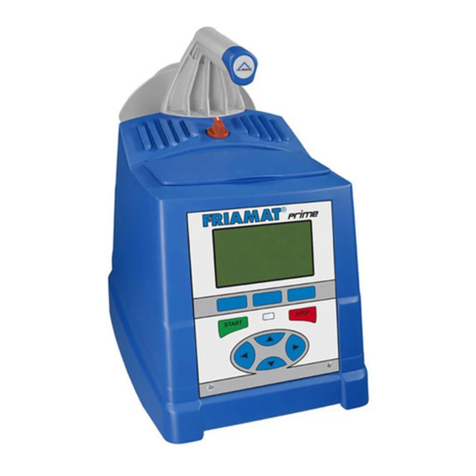
FRIATEC FRIAMAT Prime User manual

1
Update: 01.07.2014
EN
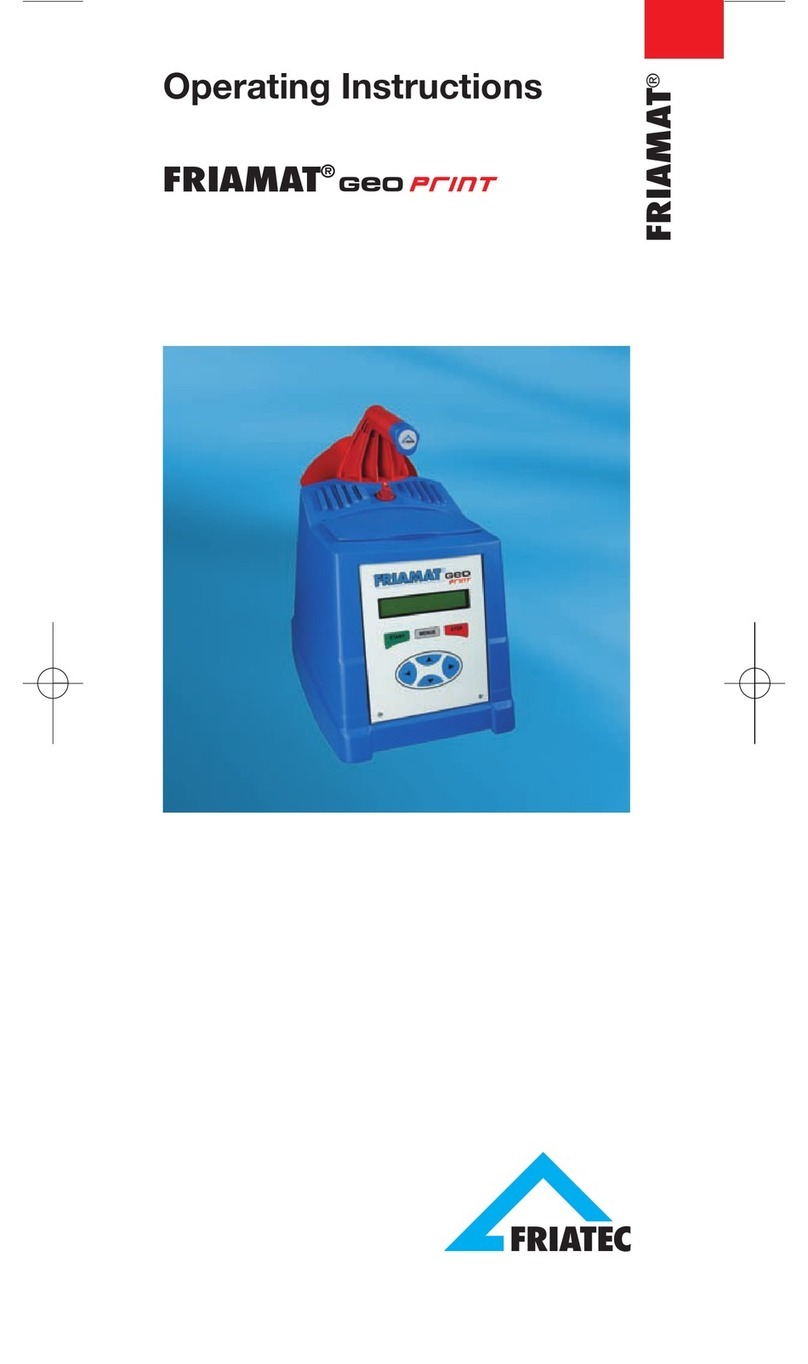
Operating instructions
Electrofusion units
FRIAMAT®Prime
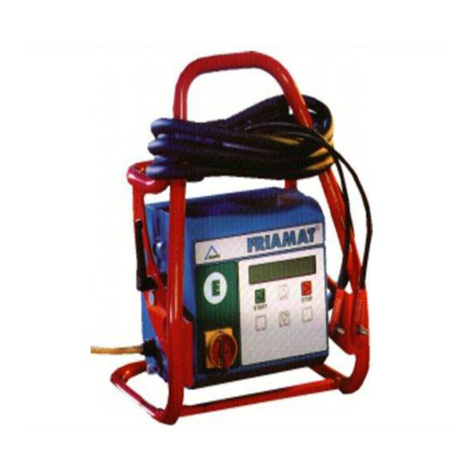
FRIAMAT®Basic
FRIAMAT
®

2
Stand/Update: 01.07.2014
EN
Contents Page
1 Preliminary remarks 6
1.1 Safety instructions and hints 6
1.2 Intended use 6
2 Safety 7
2.1 Functional reliability 7
2.2 The operator’s obligations 7
2.3 Sources of danger 8
2.4 Mains operation 8
2.5 Generator operation 9
2.6 Extension cable 10
2.7 Opening the device 10
2.8 Safety measures at the installation site 10
2.9 Emergency 10
3 Basic information 11
3.1 Layout/parts 11
3.2 Type plate 11
3.3 Reader wand 12
3.4 Barcode scanner 12
3.5 Protective cap for data interface 13
3.6 Temperature probe 13
3.7 Fan functionality 13
3.8 Signalling devices 14
3.9 Technical details 14
3.10 Automatic activation of maintenance interval 16
3.11 Transport/storage/dispatch 16
4 “Fusion” sequence 16
4.1 Siting, connection, and startup 16
4.2 Reading in the barcode 17
4.3 Starting the fusion procedure 18

3
EN
Stand/Update: 01.07.2014
Contents Page
5 FRIAMAT Basic 19
5.1 Function keys explained 19
5.2 Display symbols explained 20
5.3 “Basic Settings” menu 20
5.4 “Info” menu 21
5.5 “Emergency Input” menu 21
6 FRIAMAT Prime 22
6.1 Function keys explained 22
6.2 Display layout (main screen) 23
6.3 Function key symbols explained 24
6.4 Function status symbols explained 25
6.5 Main window symbols explained 26
6.6 “Basic Settings” menu 26
6.6.1 Documentation 27
6.6.2 Time 27
6.6.3 Date 27
6.6.4 Language 27
6.6.5 Protocol language 28
6.6.6 Volume 28
6.7 “Emergency Input” menu 28
6.8 “Fusion Sequence” menu 28
6.8.1 Commission number 29
6.8.2 Operator pass 29
6.8.3 Info Text 30
6.8.4 Comment 1 30
6.8.5 Comment 2 30
6.8.6 Subcontractor 31
6.8.7 Traceability 31
6.8.8 Pipe Number 31
6.8.9 Pipe Length 31
6.8.10 GPS Data 31
6.8.11 Seam number 31
6.8.12 Scraper tool 31

4
Stand/Update: 01.07.2014
EN
Contents Page
6.9 “Data” menu 32
6.9.1 Transfer 32
6.9.2 PDF 33
6.9.3 CSV 33
6.9.4 Delete 34
6.10 “Info” menu 34
6.11 “Formatting” menu 34
6.12 Fusion options 35
6.12.1 ID Data 35
6.12.1.1 Commission number 35
6.12.1.2 Operator pass 36
6.12.1.3 Serial number 36
6.12.1.4 Seam number 36
6.12.1.5 GPS 1 – 3 37
6.12.2 Traceability Barcodes / Pipe Number / Pipe Length 38
6.12.3 Info Text, Comment 1, Comment 2, Subcontractor 39
6.12.4 Scraper tool 39
6.13 SUPERVISOR 40
6.13.1 Basic Settings 41
6.13.1.1 Documentation 41
6.13.1.2 Time 41
6.13.1.3 Date 41
6.13.1.4 Data Protection 42
6.13.1.5 Maintenance Date 42
6.13.1.6 Mode 42
6.13.1.7 Language 42
6.13.1.8 Emergency Input 42
6.13.1.9 Energy Display 42
6.13.1.10 Volume 42

5
EN
Stand/Update: 01.07.2014
Contents Page
6.13.2 Fusion Sequence 43
6.13.2.1 Traceability 43
6.13.2.2 Info Text 43
6.13.2.3 Comment 1 43
6.13.2.4 Comment 2 43
6.13.2.5 Subcontractor 44
6.13.2.6 GPS Data 44
6.13.2.7 Seam number 44
6.13.2.8 Serial number 44
6.13.2.9 Commission number 44
6.13.2.10 Operators pass 44
6.13.2.11 Pipe Prepared? Display 44
6.13.3 Factory Settings 45
6.13.4 PIN 45
6.13.5 Display (Resistance) 46
7 Warranty/maintenance/disposal 46
7.1 Warranty 46
7.2 Maintenance and care 46
7.3 Disposal 47
8 Error messages / warnings / info 48
9 Annex 51
9.1 Recommended accessories (options) 51
9.2 Authorised service stations 51
9.3 Updates to these operating instructions 51

6
Stand/Update: 01.07.2014
EN
1 Preliminary remarks
1.1 Safety instructions and hints
In these operating instructions, the following symbols with warnings are used:
Symbol Meaning
WARNING!
Danger to people.
Failure to comply can result in death or serious injury.
CAUTION!
Danger to people.
Failure to comply can result in minor or moderate injury.
NOTE Danger to objects.
Failure to comply can result in objects damage.
INFORMATION Application hints and other useful information.
Failure to comply can not result in personal inury or
objects damage.
1.2 Intended use
FRIAMAT fusion units are designed to apply a maximum fusion voltage of
48 V on the following:
•FRIALEN®safety fittings with HDPE pressure pipes (SDR 17-7),
•derFRIALEN®XL large pipe installations with HDPE pressure pipes
(SDR 17-7), and
•FRIAFIT®sewage fittings with HDPE sewage pipes (SDR 17-33).
FRIAMAT fusion units can also be used on fittings from other manufacturers
when these components bear a 24 digit barcode complying with ISO
13950:2007-03. The power ratings and technical data of both the fittings and
the FRIAMAT fusion unit must be observed (see also Section 3.9 “Technical
data”).
Intended use also includes adherence to:
•alloftheinstructionsintheseoperatinginstructions,
•thegeneralandspecicprocessingspecicationsforelectrofusion
fittings, and
•theapplicableaccidentpreventionregulations,theenvironmental
regulations, the statutory rules, the pertinent safety provisions, and
all standards, laws, and directives applying in the country of use.

7
EN
Stand/Update: 01.07.2014
2 Safety
2.1 Functional reliability
FRIAMAT fusion units are state of the art, built in accordance with the require-
ments under ISO 12176-2 and the acknowledged safety standards and fitted
with the required safety devices. Prior to delivery, FRIAMAT fusion units are
tested for correct and safe functioning. Failure to operate or otherwise use the
equipment properly will pose a danger to:
•thehealthoftheoperator,
•theFRIAMATfusionunitorotherpropertyoftheuser,or
•theefciencyofworkwiththeFRIAMATfusionunit.
Safety considerations forbid the following:
•modicationsandchangestotheFRIAMATfusionunitand
•workingwithFRIAMATfusionunitswithbrokenleadseals.Failingto
observe the above makes all warranty claims void.
2.2 The operator’s obligations
Only trained personnel may work with the FRIAMAT fusion unit. In the work
area, the operator is responsible for all third parties. The owner is obliged:
•tomaketheoperatinginstructionsaccessibletotheoperatorand
•toensurethattheseinstructionshavebeenreadandunderstood.
The operating instructions must be kept at all times at the device’s place
of use (ideally in the mesh pocket on the transport box). They must be
accessible to the operator at all times.

8
Stand/Update: 01.07.2014
EN
2.3 Sources of danger
WARNING!
Electric shock from live parts! Danger of death!
- Never leave the FRIAMAT fusion unit unattended.
- Immediately replace damaged housings, connecting lines, and extension
cables. Stop using the FRIAMAT fusion unit.
- Before all care and maintenance work, pull out the plug connecting the
equipment.
- Maintenance and repair work must be performed by authorised FRIATEC
service stations only.
- Supply FRIAMAT fusion units only with the operating voltage specified on
the ratings plate.
- Fit a residual current protective device (RCD) when this is prescribed.
- Do not remove or otherwise put safety installations out of operation.
- Immediately eliminate identified defects.
WARNING!
Danger of fire and explosion from highly flammable materials and
potentially explosive atmospheres!
- Keep away from flammable liquids and gases.
- Do not use in potentially explosive atmospheres (e.g. in areas where
flammable gases, solvent vapours, or ignitable dusts can accumulate).
- Never leave the FRIAMAT fusion unit unattended.
2.4 Mains operation
Out of doors (building sites), power outlets must be fitted with residual
current protective devices (RCDs). The regulations governing RCDs must be
observed here.
NOTE
Before commencing fusion, check the input voltage. The FRIAMAT fusion unit
is designed for an input voltage range of 190–250 V!

9
EN
Stand/Update: 01.07.2014
2.5 Generator operation
NOTE
Only those generators must be used that have been designed for industrial
use on building sites. The operating instructions for the generator must be
observed!
The use of generators must comply with DVGW work sheet GW308, VDE
0100 Part 728, and the specifications and guidelines applying in the country
of use.
INFORMATION
The rated power output required from the generator depends on the level
needed for the largest fusion fitting, the connection conditions, the ambient
conditions, the generator type, and its control characteristics. Generators from
different series exhibit highly diverse control characteristics. The suitability of
a specific generator, therefore, cannot be safeguarded even when it provides
the required rated power output according to its technical data sheet.
In cases of doubt, e.g. when acquiring new equipment, contact our service
hotline +49 (0)621 486-1533!
Use only those generators that operate with frequencies within 44–66 'Hz.
First start the generator, and let it run for half a minute. If necessary, adjust the
no-load voltage, limiting it to the voltage specified in the technical data. The
generator (mains) fuse must be at least 16 A (slow blow).
NOTE
During fusion, do not operate any other consumer from
the same generator!
On finishing fusion work, first pull out the plug connecting the device to the
generator, and then switch off the generator.

10
Stand/Update: 01.07.2014
EN
2.6 Extension cable
When using an extension cable, make sure it has an adequate conductor
cross section:
•2.5mm2up to 50 m in length or
•4mm2up to 100 m in length.
NOTE
Danger of overheating in the extension cable!
The extension cable may be used only when it has been completely unwound and
stretched out.
2.7 Opening the device
WARNING!
Electric shock from live parts! Danger of death!
- Never open the FRIAMAT fusion unit when it is supplied with operating
voltage!
- FRIAMAT fusion units may be opened only by specialised personnel from
an authorised FRIATEC service station!
2.8 Safety measures at the installation site
The connecting and fusion cables must be protected against sharp edges. Do
not expose the FRIAMAT fusion unit to heavy mechanical loads.
FRIAMAT fusion units are splash proof. They may not, however, be immersed
in water.
2.9 Emergency
In emergencies, immediately set the main switch to OFF, and disconnect the
FRIAMAT fusion unit from the voltage supply.

11
EN
Stand/Update: 01.07.2014
3 Basic information
3.1 Layout/parts
1
2
3
4
6
7
8
5
1 Main switch 4 Ventilation slots (air intake)
2 Fusion cable with reader wand or 5 Data interface with (USB)
barcode scanner protective cap
3 Front foil with display and 6 Adapter bag
function keys (Fig shows 7 Power cable
FRIAMAT Prime) 8 Ventilation slots (air outlet)
3.2 Type plate
The type plate lists the details specific to the FRIAMAT fusion unit and
its unique device number. The type plate is found on the rear side of the
device, under the adapter bag.

12
Stand/Update: 01.07.2014
EN
3.3 Reader wand
To read in fusion barcodes and traceability barcodes, place the reader wand
under a slight angle (like a pencil) in front of the barcode on the fitting. Now
move the reader wand quickly over the whole label and a little beyond. Bar-
codes can be read in from right to left or vice versa. When the barcode has
been read in correctly, the device emits an acoustic signal to confirm this. If
the barcode cannot be read in the first time, repeat the procedure, this time
under a different angle or at a different speed.
NOTE
Protect the tip of the reader wand from dirt and damage!
The condition of the reader wand tip has a direct effect on the legibility of barcodes.
3.4 Barcode scanner
The barcode scanner uses a laser to read in fusion barcodes and traceability
barcodes without physical contact. All you need to do is aim at the barcode
and press the read button. The barcode is scanned by means of a red light
strip that must cross over the whole barcode, whenever possible at the cen-
tre. The barcode is not detected properly when the red light strip does not
cross the whole barcode.
The optimal read results are obtained when the scanner is positioned at a
small distance over the barcode.
Good legibility Failed to read Failed to read
Badly printed or slightly damaged barcodes can be read in when the scanner
is placed directly on the barcode and then, with the read button pressed,
moved away. When the barcode is read in successfully, the device emits an
acoustic signal, and a green indicator lamp lights up in the middle of the read
barcode.
NOTE
Protect the reading window from dirt and scratches!
The condition of the reading window has a direct effect on the capabilities of the
FRIAMAT barcode scanner.

13
EN
Stand/Update: 01.07.2014
3.5 Protective cap for data interface
The USB-A port is found directly behind the protective cap. This data inter-
face functions as a service port and, on the FRIAMAT Prime, is also used
to read out and transfer the fusion protocol. The protective cap for the data
interface must be screwed on at all times to prevent contaminants and
moisture from reaching it.
3.6 Temperature probe
FRIAMAT fusion units can be used only on electrofusion fittings bearing a
barcode. When this is read in, the microprocessor controlled FRIAMAT fusion
unit regulates and monitors the supplied energy fully automatically and de-
fines the fusion time as a function of the ambient temperature. This ambient
temperature is continuously measured by the temperature probe on the fusion
cable (silver coloured metal sleeve at the reader wand or scanner bag).
Make sure that both the temperature probe and the fusion fitting are exposed
to the same ambient temperatures. Avoid adverse processing situations, e.g.
where the probe is exposed to intense sunlight and the fitting is in the shade.
The temperature probe must be protected against damage.
3.7 Fan functionality
How the fans function depends on the temperatures measured at the heat
sink inside the FRIAMAT fusion unit. The fans switch ON automatically when
the heat sink reaches a certain temperature. And this not only during, but also
between fusion sessions, or after reactivation, depending on the (previous)
load levels. This safeguards reliable operations in continuous duty and during
fusion on large dimensions.
INFORMATION
Reduce cooling times!
In particular during series fusion work or work on fittings requiring high power
levels, leave the FRIAMAT fusion unit switched ON after each fusion. The fans
can then reduce the heat sink temperature.

14
Stand/Update: 01.07.2014
EN
3.8 Signalling devices
FRIAMAT fusion units confirm certain sequences of operations by emitting an
acoustic signal (1, 2, 3, or 5 beeps). These signals mean the following:
1 beep means: Read barcode confirmed.
2 beeps mean: Fusion procedure ended.
3 beeps mean: Supply voltage too low / too high.
5 beeps mean: Error! See display!
INFORMATION
Adjust the volume!
The volume of these signals can be set to “high” or “low” in the “Basic Settings”
menu. See also Sections 5.3 and 6.2.6.
3.9 Technical details
Technical details* FRIAMAT Prime FRIAMAT Basic
Input voltage range AC 190 V – 250 V
Frequency range 44 Hz...66 Hz
Input current AC 16 A max.
Output 3.5 kW
Generator rated
output for fittings
d20–d160
d180–d900 ~ AC 5.0 kW
Unit fuse 16 A slow blow
Housing international protection IP 54 DIN EN 60529
protection class I DIN EN 60335-1
Connecting cable 5 mm with contoured plug
Fusion cable 4 m with fittings plug, ø 4 mm
Barcode type code 2/5 code 2/5
interleaved according to interleaved according to
ANSI HM 10.8 M-1983 ANSI HM 10.8 M-1983
and ISO CD 13950/08.94 and ISO CD 13950/08.94
code 128 according to
ISO 12176-4

15
EN
Stand/Update: 01.07.2014
*: Specifications subject to change.
**: Fusion work on fittings from other manufacturers must comply with their respective
working temperature ranges!
Technical details* FRIAMAT Prime FRIAMAT Basic
Operating temperature range** -20°C...+50°C**
Fusion current monitoring short circuit 110 A
short circuit 1.70 x IN
interrupt 0.25 x IN
Fusion voltage max DC 48 V
Data transfer interface USB no
Service port USB USB
Documentation of fusion yes no
and traceability data
Protocol formats FRIATRACE no
format, PDF, CSV
Protocol memory 1000 protocols no
Languages Bulgarian, Croatian, Czech, Danish, Dutch,
English, Estonian, Finnish, French, German,
Hungarian, Italian, Latvian, Lithuanian, Polish,
Portuguese, Romanian, Russian, Slovakian,
Slovenian, Spanish, Swedish, Turkish
Dimensions W x D x H 260 x 500 x 340 mm
Weight approx 12.8 kg
Accessories operating instructions, operating instructions,
transport box, transport box
FRIATEC memory stick,
supervisor pass
Overvoltage classification Category II
Certificate/quality CE, ISO 9001, WEEE Reg. No. DE 49130851, RoHS

16
Stand/Update: 01.07.2014
EN
3.10 Automatic activation of maintenance interval
The maintenance interval stored in the FRIAMAT fusion unit (default: 12
months, see also Section 7.2) is not activated automatically until after the first
fusion.
INFORMATION
The leading maintenance date is always shown on the display and may differ
from the details on the service label attached to the FRIAMAT fusion unit!
3.11 Transport/storage/dispatch
The FRIAMAT fusion unit is delivered in an aluminium transport box. This alu-
minium transport box keeps it dry and protected against moisture. The alu-
minium box should always be used to transport the device. The temperature
range for storage is -20 °C to +70 °C.
4 “Fusion” sequence
4.1 Siting, connection, and startup
Before every use, you should check that the FRIAMAT fusion unit is not dam-
aged and operates properly within the specifications. All parts must be cor-
rectly installed and all conditions fulfilled. Only then can the device operate
properly.
The FRIAMAT fusion unit can be sited and operated out of doors when it is
protected against rain and moisture.
1. The FRIAMAT fusion unit must be sited on level ground.
2. Prepare the fitting and pipes for fusion in compliance with the assembly
instructions.
3. Make sure that the fitting’s contact pins are accessible for connection to
the fusion plugs.
NOTE
Danger of overheating in the cables!
Before use, all cables must always be unwound completely. This applies to the
device, fusion, and extension cables.

17
EN
Stand/Update: 01.07.2014
4. Connect the device to the power supply (mains or generator). To do so,
insert the device’s plug into the socket.
5. If necessary, use an extension cable. Make sure that the conductor cross
section is adequate (see also Section 2.6).
6. When operating with a generator, make sure that it is fused with at least
16 A (slow blow, see also Section 2.6).
7. When operating with a generator, first start the generator and let it warm
up for 30 s.
8. Switch ON the FRIAMAT fusion unit at its main switch.
NOTE
Danger of scorching!
The contact areas on the fusion plugs and fitting must be clean. Soiled contacts can
cause the plug to overheat, damaging it.
• Ifnecessary,wipecleanofanycontaminants.
• Youmustalwaysprotecttheplugsagainstsoiling.
• Whenadeposithasformedthatcannotberemovedcompletely,thefusionplugs
must be replaced.
• Firstexaminethefusionplugsandthetting’sinsertcontactsforsoiling,then
connect them.
9. Connect the fusion plugs to the contact pins on the fitting.
10.The fusion plugs must be attached completely to the fitting’s pins, i.e. over
their whole internal contact length.
4.2 Reading in the barcode
1. Read in the barcode: use exclusively the barcode affixed to or provided
with the contacted fitting.
2. If the barcode label is missing or damaged, you can use the barcode on an
identical fitting from the same manufacturer and the same charge. In cases
of doubt, contact the fitting manufacturer’s hotline.
NOTE
It is forbidden to read in a replacement barcode on a different fitting!
3. Read in the barcode with a reader wand or barcode scanner (see also
Sections 3.3 and 3.4).
4. A correctly read barcode is confirmed with an acoustic signal.

18
Stand/Update: 01.07.2014
EN
INFORMATION
When an acoustic signal is not emitted, examine the reader wand or barcode
scanner for soiling or damage. If necessary, you can also perform the fusion in
emergency input mode (see Sections 5.5 and 6.3)!
4.3 Starting the fusion procedure
CAUTION!
Danger of burning injury!
In rare cases, hot PE melt can exit when the fusion sequence malfunctions. A safety
distance of at least 1 m must be kept from the fusion site.
NOTE
Do not connect any other consumers during fusion!
Youcanstopthefusionprocedureatanytimebypressingthe(STOP)key
. Fusion can be resumed after the fusion joint has cooled completely
(and all causes of the fault have been eliminated). Observe here the process-
ing instructions from the fitting manufacturer.
Operating steps
1. “Pipe Processed?” appears on the display. When applicable, confirm
this with the (START) key or, on the FRIAMAT Prime, the guide key
O.K. .
2. Press the (START) key to initiate the fusion procedure. The ambient
temperature is measured, and the resistance of the connected fitting de-
termined. Fusion begins. The duration of fusion can be followed on the
display (the seconds are counted up to the final fusion time).
3. “End of fusion” means: Fusion procedure ended. “t:” and “tc:” mean
nominal and actual fusion time and must agree.
4. Note the fusion parameters on the pipe/fitting. This also serves to prevent
double fusions.
5. Press the (STOP) key to acknowledge the displayed “End of fusion”
with “t:” and “tc:”. On the FRIAMAT Prime, you can also confirm with the
guide key O.K. . The fusion procedure has now ended, and the
FRIAMAT fusion unit is ready for the next fusion.

19
EN
Stand/Update: 01.07.2014
5 FRIAMAT Basic
5.1 Function keys explained
1
2 3
4
5
1 Display
The FRIAMAT Basic is fitted with a two-line display.
2 START key
The START key is used to start a fusion procedure, to select sub- or indi-
vidual menus, and to save settings. This key is also used to confirm mes-
sages on the display.
3 STOP key
The STOP key is used to abort a fusion procedure, to close sub- or indi-
vidual menus, and to cancel an input (without saving).
4 MENU key
The MENU key lies between the direction keys and opens the main menu
with the submenus “Basic Settings”, “Info”, and “Emergency Input”. In the
event of an error, pressing the MENU key displays it in plain text.
5 Direction keys
The direction keys
(
UP/DOWN
)
can be used to navigate through
the sub- and individual menus. Where this navigation is possible is shown
by the respective symbols on the display (see Section 4.2). The direction
keys ( LEFT/RIGHT) move the cursor on the display to the left or
right when data are being entered, e.g. emergency input, date. The direc-
tion keys ( UP/DOWN) selects the character (letter, number, special
character) at this position.

20
Stand/Update: 01.07.2014
EN
5.2 Display symbols explained
Symbol Description
When this symbol appears in the second display line, the
direction keys ( UP/DOWN) can be used to open
further menus.
5.3 “Basic Settings” menu
The “Basic Settings” menu lets you edit the device settings.
TIME
DATE
* LANGUAGE *
VOLUME
1. Press the key.
2. Press the direction keys to open the “Basic Settings” submenu.
3. Press the key.
4. Use the direction keys to open the menu for Time, Date, Language,
and Volume.
5. Press the key.
6. Use the direction keys and to make your changes in this
menu.
7. Press the key to save your changes. Press the key to cancel
without saving.
INFORMATION
Two asterisks appear to the left and right of the top line in the “Language”
menu. This lets you find the language settings menu when, for instance, the lan-
guage was changed by accident.
This manual suits for next models
1
Table of contents
Other FRIATEC Welding System manuals
Popular Welding System manuals by other brands

Lincoln Electric
Lincoln Electric IDEALARC DC-655 Operator's manual

Telwin
Telwin ADVANCE 227 MV/PFC TIG DC-LIFT VRD instruction manual

Lincoln Electric
Lincoln Electric spirit II 150 Technical manual

Tweco
Tweco Spray Master Series Safety and operating instructions

ESAB
ESAB CUTMASTER A60 operating manual

Lincoln Electric
Lincoln Electric Fast Mate Guns Series Operator's manual