Friedman Dirty Shirley DS40 User manual

Friedman DS40 (Dirty Shirley) Plug-in
Potent emulation of 60’s and 70’s Rock-Era guitar amplifier designed by David Friedman
Owner’s Manual
Developed by Brainworx in partnership with Friedman Amplification and Distributed by Universal Audio.
The Friedman DS40 (Dirty Shirley) amp plug-in can be installed and operated like any other UAD-2 plug-in.
Please check www.uaudio.com for general info about the system requirements, etc.

Friedman DS40 (Dirty Shirley) Plug-in
Meticulously modeled guitar amp, speaker simulation and FX rack.
Dirty Shirley DS40
The Friedman DS40 has been modeled after the legendary-sounding vintage stack of
David Friedman’s design. It offers the perfect complement to any engineering session
where one seeks a faithfully emulated 60’s and 70’s rock era guitar sound – quickly
and cleanly in the box and at any volume level.
The Dirty Shirley was heavily inspired by a modified Marshall JTM-45, one of Jim Mar-
shall’s first guitar amps. It perfectly emulates the iconic Jimmy Page sound as heard
on early Led Zeppelin records.
Friedman designed the Dirty Shirley to capture Page’s famous modded-
Marshall tones while serving the requirements of today’s guitarist, without
compromising on the vintage mojo. Like many classic British amps, the Dirty
Shirley is a one-channel amp. Included are separate Gain and Master Volume
controls to allow for better control over crunch and clean sounds.
The Dirty Shirley’s ability to precisely respond to a player’s technique, and a
guitar’s volume knob makes it a must have “in the box” amp sim for any UAD
owner who records electric guitars.

The main applications for this plug-in are:
1. Achieve exceptional-sounding electric guitar
tracks at any volume level, without the need for
great-sounding rooms or expensive guitar mics.
2. Record electric guitars directly into the DAW,
and then mix, edit and process without ever leav-
ing the DAW environment
3. Re-amp less-than-perfect DI guitar tracks previously
recorded in other guitar-amp situations.
4. Faithfully emulate highly sought-after electric guitar
tones made famous by rock’s greatest guitar players.
5. Get intense amounts of distortion without the need
to maintain a high output volume.
6. Have a piece of rock and roll history right in your
DAW that feels and responds like a physical amp
when played through Apollo’s low–latency monitor-
ing.
The Basics
Use this plug-in exactly like you would operate the real Dirty Shirley amplifier. First pick an input based on your desired distortion setting - selecting ‘L’ input will provide a cleaner
tone, selecting ‘H’ input is ideal for maximum
crunch
. Start with a presence setting of ‘5’ and adjust to taste along with the Bass, Middle, and Treble tone settings.
The Dirty Shirley plug-in was developed with the Apollo series interfaces in mind. Of course the DS40 plug-in will work with any UAD-2 device, but to experience the
ultra-low latency (desirable for playing in real-time) you need an Apollo interface.
To play and record dry DI guitar tracks with the lowest latency and the highest quality possible connect your guitar to the Hi-Z Input of the Apollo Interface or connect a quality DI
Box and Mic Preamp to a line input of your Apollo series interface.
The Insert Effects Switch in the Console Software:
If you insert the DS40 plug-in in the Console software mixer (to use the plug-in with the lowest possible latency) you have to decide whether you want to record processed guitar
amp sounds (click the INSERT EFFECTS switch to REC in the Apollo console) or whether you only want to record the dry DI guitar signal, while monitoring the processed amp
sound during tracking, of course (click the INSERT EFFECTS switch to MON in the Apollo console).
The advantage of only monitoring the processed sound is that you can alter the settings of your amp and FX completely during mixdown! If you decide later that less or more Gain
or Delay would sound better for your song you can still make that happen.
The advantage of recording pre-processed guitar tracks is that you will have more DSP available for additional plug-ins during mixdown. While you can still add effects like EQ and
compression to the recorded guitar tracks, you will have committed to an amp cabinet sound. Once you know ‘your sound’ you may even save some time by recording processed
guitar tracks and using them without further tweaking or fiddling around... your band mates or your producer may even appreciate this.

The Controls of the Dirty Shirley Front Panel
POWER ON/OFF
The Dirty Shirley amp plug-in can be bypassed using this switch. Use this switch to
compare the processed settings to that of the original signal.
GAIN (Distortion):
The Gain knob on the Dirty Shirley controls the amount of distortion from the amp’s
12Ax7 driven preamp section.
MASTER:
This controls the amp’s output volume. The more you turn it up the louder it gets.
TONE CONTROL (Bass, Middle, Treble and Presence):
Bass, Middle and Treble controls boost or cut from their respective frequency
bands. 5 (midway) are the approximate null point for both Treble and Bass. 7-8
(about 2/3s-way) is the null point for the Middle band, giving players more con-
trol over scooping out mids, while plenty of headroom for boosting mids, making
the guitar more prominent in the mix.
Presence adds or removes brightness found in the upper mids and lower highs.
Just like Bass and Middle, 5 is the approximate null point.
INPUT selector (High & Low)
The Dirty Shirley’s 2 separate inputs play a role in how clean or distorted the amp
sound will be.
Input L is a lower sensitivity input that is best suited for cleaner tones and easing
in the amount of break-up.
Input H is a higher sensitivity input that is best suited for higher amounts of gain
(distortion).

The Controls of the Dirty Shirley Back Panel
1. NOISE GATE
‘CLOSED’ LED
When lit this LED indicates that the Noise Gate is CLOSED. This means the
THRESHOLD setting is higher than the incoming guitar signal and the noise gate
dims the output signal of the amplifier by the amount adjusted with the RANGE con-
trol (e.g. 15dB in the picture above).
NOISE GATE ON / OFF:
Enable or disable the Noise Gate completely. Switch up (‘on’) means the Noise Gate
is activated.
THRESHOLD:
The Noise Gate will dim the output signal of the amplifier as soon as the input signal
(your guitar signal) falls below a certain level. This level is called Threshold. Adjust
the Threshold so the noise of the overdriven amp will be reduced, but make sure you
don´t cut fading notes or chords.
RANGE:
The output level of your amplifier will be reduced or muted when the input signal is
lower than the Threshold setting. You may dim the output level only by a few decibels
(dB), or completely mute the output in pauses by setting the RANGE to its maximum.
2. AMP FILTERS (switchable pre / post)
TIGHT Filter:
With the TIGHT filter you can cut LOW frequencies of either the DI guitar signal
(PRE) or the processed amp output (POST).
PRE: If your guitar pickups produce a rumbling bass sound you can filter the low
end before the DI sound even hits the amplifier.
POST: If you want to cut some of the low end of your amplifier setting (maybe
even only temporary) you can use this studio quality high pass filter to reduce the
bass.
OFF: when set to OFF the TIGHT filter is in bypass mode.
SMOOTH Filter
With the SMOOTH filter you can cut HIGH frequencies of either the DI guitar sig-
nal (PRE) or the processed amp output (POST).
PRE: If your guitar pickups catch a lot of hiss or noise you can filter the high end
before the DI sound even hits the amplifier.
POST: If you want to cut some of the high end of your amplifier setting (maybe
even only temporary) you can use this studio quality low pass filter to reduce tre-
ble.
OFF: when set to OFF the SMOOTH filter is in bypass mode

The Controls of the Dirty Shirley Back Panel
3. RECORDING CHAINS (Speaker Selection)
REC CHAINS:
Simply select a speaker and a complete studio setup by browsing through the REC
CHAINS pull-down menu!
In the past two decades Brainworx owner Dirk Ulrich has produced and recorded
with members of DREAM THEATER, TOTO, MICHAEL JACKSON, and with many
more famous and infamous acts. The Brainworx Studio in Germany (www.brainworx-
studio.de) is equipped with one of only nine NEVE VXS 72 Consoles ever made, and it
also hosts some of the finest outboard EQs and mic pre-amps available.
Using this impressive setup Dirk has produced a huge variety of customized
‘Recording Chains’ for the Friedman amplifiers, which you can apply to your plug-in
amp settings. Imagine a selection of 66 perfectly miked and EQ-ed guitar cabinets
that you can select and use instantly with a single mouse click!
Many amp simulations give you some captured impulses of a selection of cabinets
and microphones, then they leave it up to you to EQ and further process these in-
complete setups. Mixing different microphone setups, adjusting phase and EQ, and
so on. But this really is not an easy job; it takes years of experience to get it right.
Now all you have to do is select the Recording Chain that sounds best for your amp
channel and setting, adjust the Tone Stack and Gain and you´re good to go! Recalla-
ble, reliable, flexible and fast.
And if for any reason you should not like any of the Recording Chains the plug-in of-
fers you may use the very last setting (labeled EMPTY – PLAY VIA REAL CAB) and
use your own miked cabinet. This setting will give you the sound of a tube guitar amp
wired straight into a Console, which also may be a nice effects sound.
+ / - Switches (Plus / Minus):
Browse through the REC CHAINS by either using the pull-down menu of the REC
CHAIN text box (see above) or just click through the settings using the + and -
symbols.
AUTO & BAR selection:
If you are trying to find the best sounding REC CHAIN for your song it can be a
hassle to have to play a few chords, grab the mouse to select the next REC
CHAIN, play a few notes again, grabbing the mouse again, etc.
For this reason the DS40 offers you AUTO mode:
Just select a pattern (1 Bar, 2 Bars or 4 Bars) and the plug-in will activate the
available REC CHAINS automation, following the actual tempo setting of your
DAW. You can now play uninterrupted and simply listen to the sound of the vari-
ous REC CHAINS as the plug-in switches through all of them every single bar,
every two bars or every four bars, depending on your setting.
As soon as you hear the speaker setup you like best just stop AUTO mode by
clicking the AUTO button again and manually select the desired REC CHAIN. Af-
terwards just fine-tweak the TONE Section and GAIN and there you are.

The Controls of the Dirty Shirley Back Panel
4. LO-FI DELAY
We have modeled a vintage stomp box delay and modeled the typical sound of it.
Limited frequency bandwidth, fading high frequencies on repeats, etc. Then we add-
ed modern features like a mix control, DAW controlled bpm-based tempo sync, etc.
Of course you will use your favorite selection of external effects like Chorus, Flanger,
Reverb and even other Delays to achieve your signature guitar tone, but we feel that
a nice & easy delay comes in handy even if you only want to try out presets etc.
Testing a lead / solo sound without hearing at least a touch of delay wouldn´t sound
realistic for many players, so we added this one effect. Plus, we really like the sound
of this vintage delay lay lay lay la la l.....
DELAY on/off:
Activate or deactivate the delay and all of its parameters with this switch.
Switch up: Delay is activated.
Switch down: Delay is bypassed / off.
TAP:
You can adjust the delay time by clicking rhythmically on the TAP button with your
mouse. This way you can adjust the tempo of your delay to your guitar riffs even if
you don´t play with a DAW and bpm-based tempo or click track.
TIME:
Alternatively you may just dial in a delay time based on milliseconds using the TIME
knob. Maximum Delay Time: 400 ms.
X2 & /2 (adjusting the delay time):
You may switch the actual delay time to double speed by clicking the /2 button.
You may switch the actual delay time to half time by clicking the x2 button.
Both buttons can be pressed repeatedly as long as the maximum delay time of
400 ms is not exceeded.
HOST BPM:
This LED panel indicates the actual tempo (4/4th, based on bpm, beats-per-minute)
reported by the DAW host software
MIX:
Use the MIX control to blend in as much delay signal with the dry amplifier sound
as desired. For unobtrusive delays we recommend settings around 10%, heavier
effect sounds may require settings of 50% or more.
FEEDBACK:
The FEEDBACK controls the number of repeats. While a setting of 99% will result
in an almost infinite delay loop, a typical setting for a rock lead sound may be
around 25%.
LO-FI:
With the LO-FI knob you control the amount of internal distortion, the resampling
quality, etc. The higher you go the worse the quality gets from a pure technical
stand point... but the more interesting it may sound for many guitar sounds and
styles.

The Controls of the Dirty Shirley Back Panel
5. INPUT GAIN:
If you want to drive the input of the Friedman preamp harder or softer you may ad-
just the input gain to your liking. Some single coil pickups from older or vintage gui-
tars may deliver low level output that can be compensated with the INPUT GAIN.
The opposite goes for a lot of heavy metal style humbuckers. If you have recorded
the DI signal too hot or if you are using other plug-ins before entering DS40 you may
want to dim the input signal.
With most standard guitars you can and should leave the INPUT GAIN at 0 (zero)
though.
6. Internal POWER SOAK:
In the real world power soaks are being used to reduce the volume of a guitar power
amp. This way you can crank up a (tube) guitar power amp to drive it until it starts
clipping, and still record at a volume which will protect your hearing and keep the
neighbors friendly.
A clipping tube power amp adds distortion and harmonics to the guitar amp signal
and is something most guitar players love. A fully cranked up tube guitar amp tamed
in volume with a power soak will sound different than the same amp with the master
volume turned down.
We have modeled the behavior of the Friedman tube power amp, so you may
experiment with different settings of the Master of the amp and the internal POWER
SOAK. We recommend a setting of roughly -10dB for most scenarios.
7. PRE-AMP and POWER-AMP Activation:
BYPASS PRE:
With the BYPASS PRE switch you can switch off the Friedman preamp completely,
which may be wanted if you record your own hardware (tube or solid state) guitar pre-
amp with the DS40.
In this case you may still use the internal POWER AMP and speaker / REC CHAINS
simulation and will be able to achieve amazing results recording your guitar sounds
without using an external power amp and speaker.
Switch up: Preamp is bypassed (off), Switch down: Preamp is active (on).
BYPASS POWER AMP:
If you want to use only the distortion of the Friedman preamp you may switch the power
amp simulation off. This may sound cool if you use the Friedman plug-in to distort other
signals than a guitar. For a realistic guitar recording we recommend leaving the power
amp on, as it is an integral part of the overall sound of the amp.

The Controls of the Dirty Shirley Back Panel
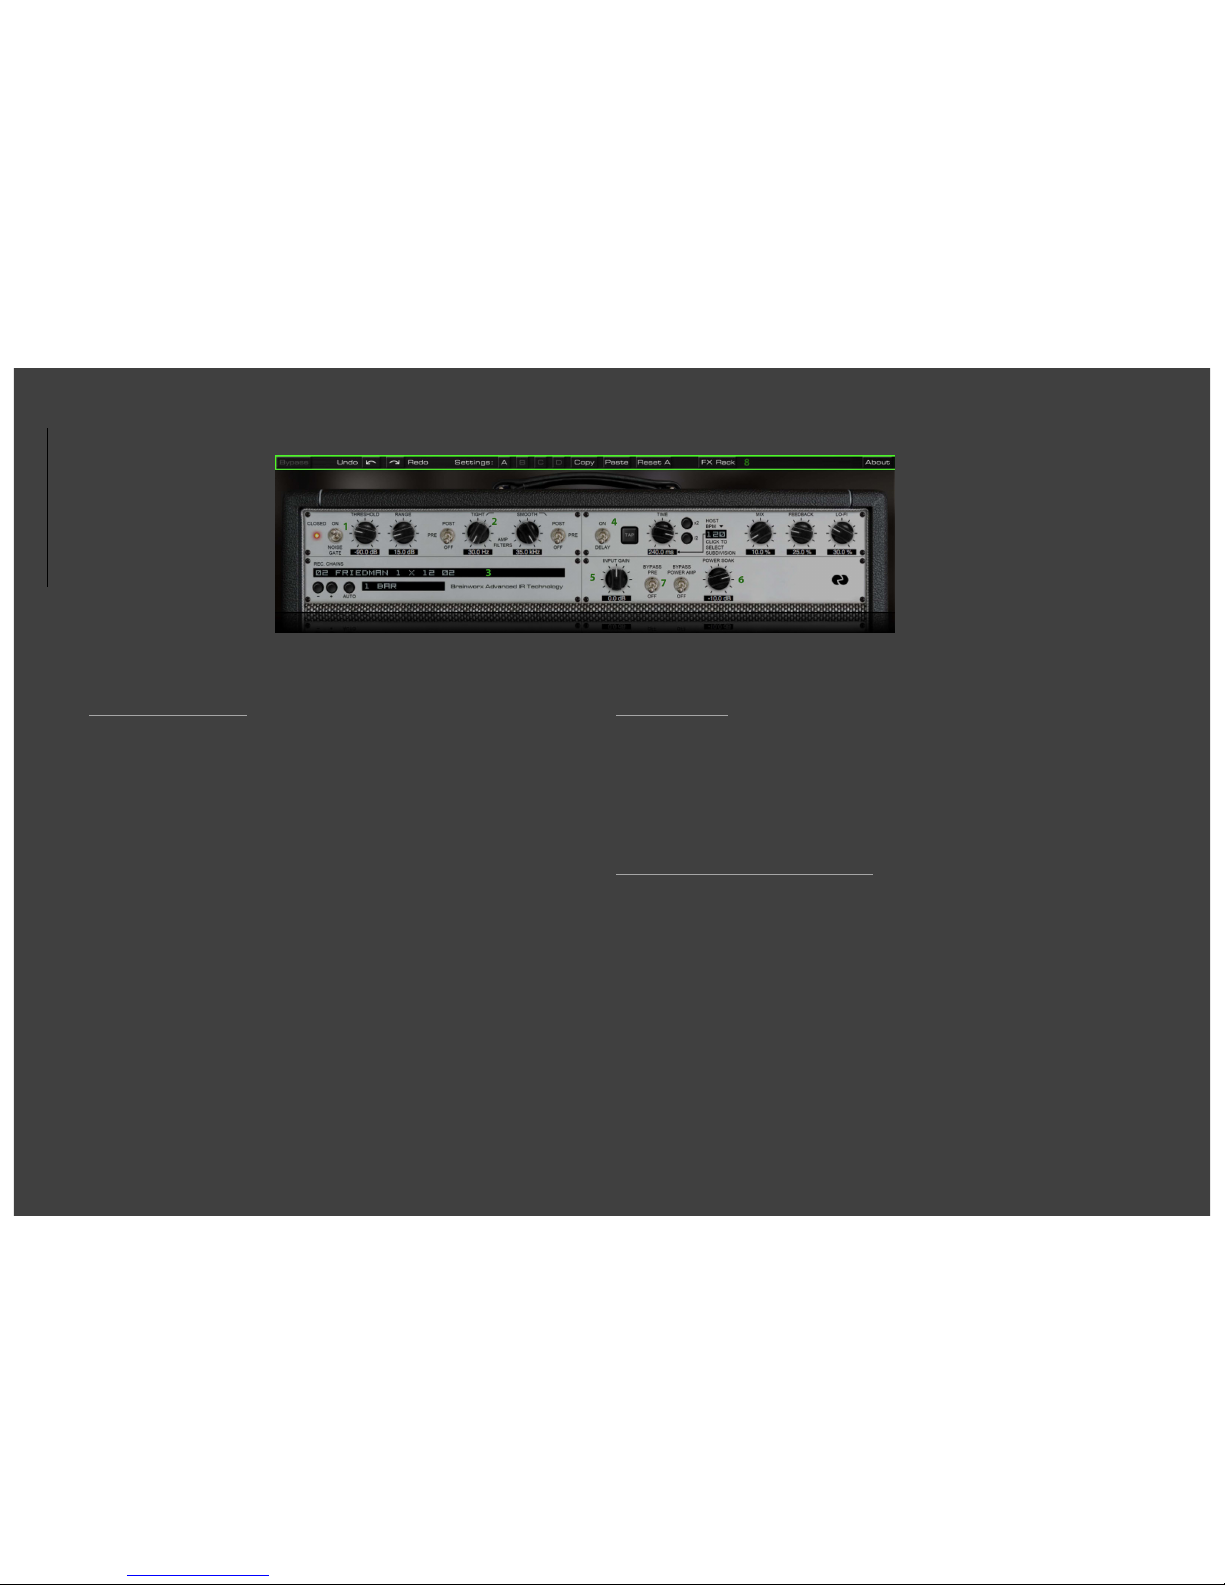
8. SETTINGS / Top Toolbar:
UNDO / REDO:
You can undo and redo changes you made to the controls of the BE100 at any time.
The undo / redo will work for as many as 32 steps. This makes experimenting and
tweaking knobs easy. If you don´t like what you did... just undo it.
SETTINGS (A/B/C/D):
The DS40 offers four internal settings (A/B/C/D) that will be stored with every
preset. So, one preset can contain up to four amp and effects settings.
You may use similar amp settings with more or less delay, different delay times, etc.,
to quickly switch between different sounds, or you can switch from clean to crunch
to lead within one setup / preset.
The settings can be automated (!) in most DAW hosts. This way it´s possible to
switch from a dry rhythm sound to a lead sound with tons of delay, for example.
COPY / PASTE:
To set up variations of similar sounds you don´t have to dial in all the parameters
several times. Let´s say you like your setting A and want to use the same sound, just
without delay, as SETTING B.
-Simply press COPY while you are in SETTING A.
-Switch to SETTING B by pressing ‘B’ in the SETTINGS section.
-Press PASTE, now SETTING B is identical to SETTING A.
-Bypass the DELAY. Done.
Now you can switch between A & B and play the same sound with or without delay.
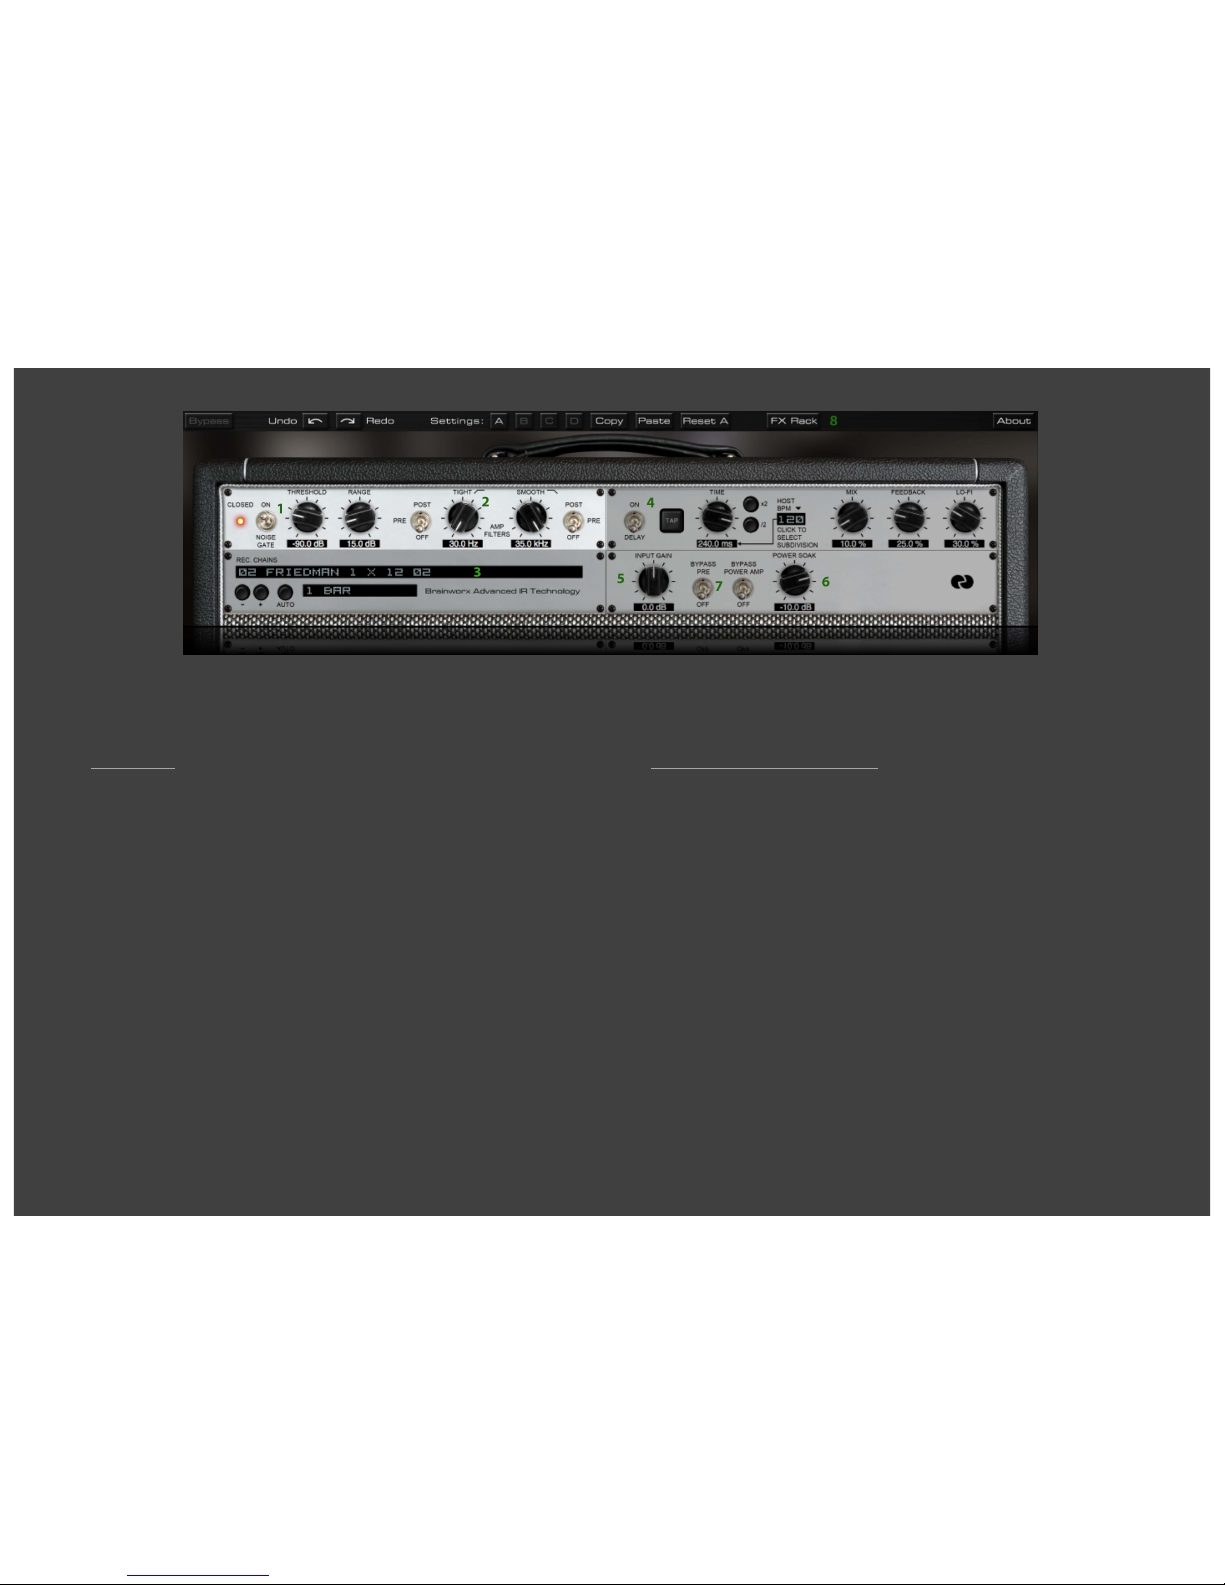
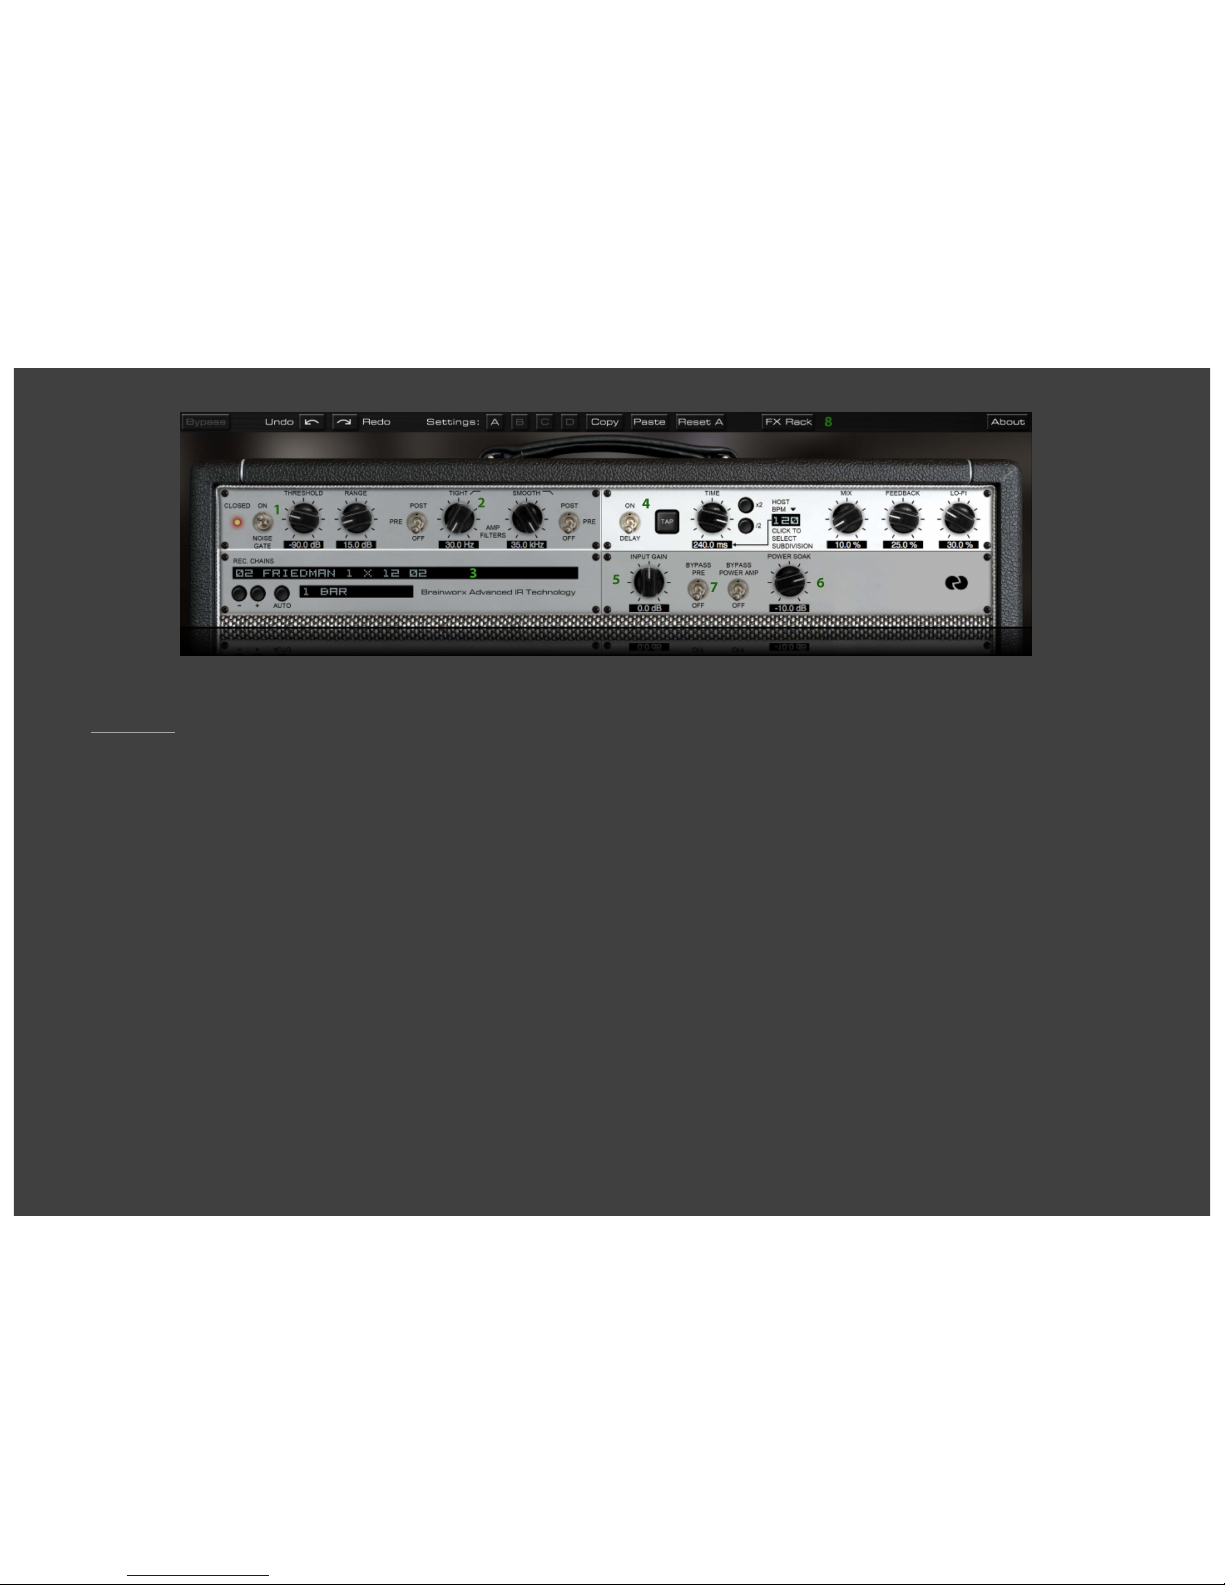
FX Rack:
Toggle between standard and zoom view.
FACTORY PRESETS
We have made a lot of presets for the Friedman amp plug-in, many of them have been
made to work perfectly with classic guitars like Strats, Teles or Paulas. All of the factory
presets offer A/B/C/D variations, do try them out!
This effectively quadruples the factory sounds you can browse through, and many simi-
lar amp settings sound quite different with different FILTER or DELAY settings.
These presets are only intended to give you an easy start and to demo some of the
tones you can get out of the Friedman amp plug-in.
CREATING YOUR OWN SOUNDS & PRESETS
When you start to create your own sounds the most important elements to adjust are
the DRIVE, TONE STACK and the REC CHAINS.
-Set the controls of the TONE SECTION (Bass, Treble) to the center position (’12-o-
clock’).
-Select an input (L for clean tones or H for more distortion)
-Dial in as much GAIN as you like.
-Play through as many REC CHAINS as you like and pick the one that sounds clos-
est to what you are looking for without altering the TONE SECTION.
-NOW start tweaking the TONE SECTION and DRIVE to fine tune your amp settings.
-Add Delay or activate filters, the noise gate, etc.
Experiment, be creative. We are confident that the different channels of the amp and
the huge selection of REC CHAINS will offer you many possible combinations that will
sound great on a big variety of musical styles and genres.
Combine the Friedman amps with other UAD-2 plug-ins (dynamics, effects, room simu-
lation), and you will be able to create countless world-class production-ready guitar
sounds in the box. Enjoy.
Table of contents
Other Friedman Musical Instrument Amplifier manuals

Friedman
Friedman smallbox User manual

Friedman
Friedman Pink Taco User manual

Friedman
Friedman Phil X Signature User manual

Friedman
Friedman BE-100 User manual

Friedman
Friedman BE-50 deluxe User manual

Friedman
Friedman JJ-100 User manual

Friedman
Friedman SS-100V2 User manual

Friedman
Friedman SS-100 User manual

Friedman
Friedman Buxom Betty User manual

Friedman
Friedman BE-100 User manual