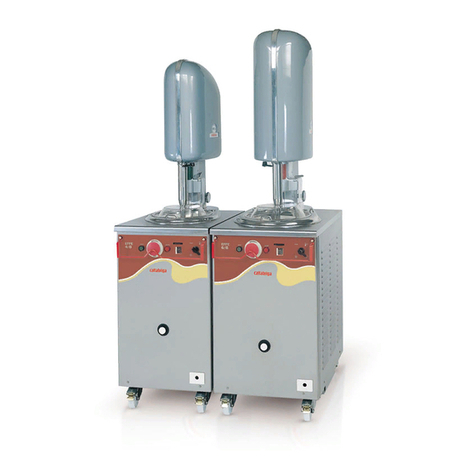
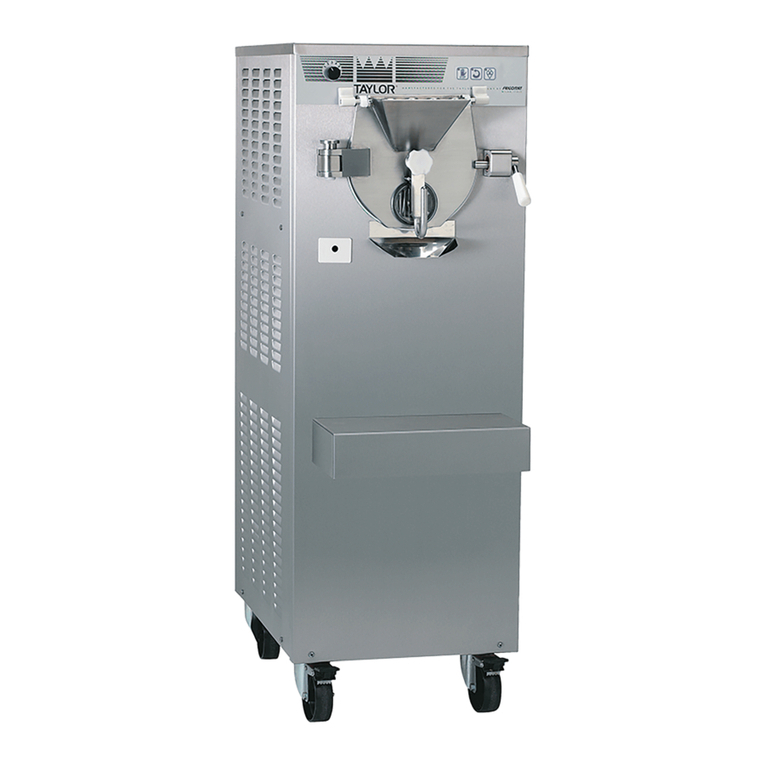
Frigomat TAYLOR IC135 Series Instructions for use

Serie-Series-Serie
C 135 01
MACCHINE MULTIFUNZIONE ELETTRONICHE
ELECTRONIC MULTI-FUNCTIONAL MACHINES
ELEKTRONISCHE MULTIFUNKTIONSMASCHINE
MANUALE D’USO E
MANUTENZIONE
OPERATING INSTRUCTIONS
AND MAINTENANCE
GEBRAUCHSANWEISUNG
UND
WARTUNGSHANDBUCH

1 - ENGLISH
Congratulations on purchasing a TAYLOR machine.
The present manual, supplied together with the machine, is an integral and essential part
of the machine and shall be delivered to the final user. Before performing any kind of
operation, it is recommended to carefully study the reported instructions, as only a careful
reading allows you to get the highest performance from your machine. The following pages
report all information necessary to correctly install, commission, adjust and service your
machine. TAYLOR reserves the right to carry out all changes necessary to improve its
product or manual without prior notice and to insert them in the subsequent issues.

ENGLISH - 2
The machine is covered by warranty according to the conditions reported in the
“WARANTY CARD “ enclosed to the machine, which shall be duly filled up and sent back
to:
FRIGOMAT s.r.l., via 1° Maggio 26862 GUARDAMIGLIO (LODI) – ITALIA
Please write your machine serial number in the following field
Serial number
Distributor’s stamp
IMPORTANT
We recommend carefully reading this manual before using your TAYLOR machine.
In your own interest, pay close attention to the following warnings:
The non-observance of this warning can jeopardize the user’s health and/or the
correct operation of the machine.
Carefully comply with these warnings to obtain the maximum performances possible
from the machine.

3 - ENGLISH
INDEX
1. TRANPORT, HANDLING AND STORAGE ………………………………. 4
1.1 Preliminary inspection ………………………………………… 4
1.2 Machine unpacking ………………………………………… 4
1.3 Packing dimension ………………………………………… 4
2. MARKINGS AND GRAPHICS ………………………………………… 5
3. INSTALLATION ………………………………………… 7
3.1 Field of use ………………………………………… 7
3.2 Limits of use ………………………………………… 7
3.3 Machine outfit ………………………………………… 7
3.4 Commissioning ………………………………………… 7
4. SAFETY DEVICES ………………………………………… 10
5. OPERATION ………………………………………… 11
5.1 Commands ………………………………………… 11
5.2 Boiler control panel ………………………………………… 12
5.3 Batch freezer control panel ………………………………………… 14
5.4 Mixtures heating cycles ………………………………………… 16
5.4.1 Automatic cycle 85°C…….. ………………………………… 17
5.4.2 Semiautomatic cycle ………………………………………… 18
5.4.3 Chocolate cycle ………………………………………… 19
5.4.4 “Mixture protection” function ……………………………… 20
5.5 Hot mixture extraction ………………………………………… 21
5.5.1 Pouring into batching cylinder ……………………………… 21
5.5.2 Pouring into a different container ………………………… 22
5.6 Batching and cooling cycles ………………………………………… 23
5.6.1 Ice cream production with consistency control ..……….. 24
5.6.2 Ice cream production with time control ..……….. 25
5.6.3 Water ice production with consistency control ………… 26
5.6.4 Water ice production with time control ………… 27
5.6.5 Cooling creams and other pastry products …..……. 28
6. MAINTENANCE ………………………………………... 29
6.1 Routine maintenance ………………………………………… 29
6.2 Extraordinary maintenance ………………………………………… 34
6.2.1 Programming of MEB-NEW electronic board …. ………… 35
6.2.2 Consistency set on batch freezer board ………………… 37
7 TROUBLE-SHOOTING INSTRUCTIONS ………………………………… 39
7.1 Batch freezer alarm management ………………………………… 39
7.2 Boiler alarm management ………………………………………… 40
7.3 Trouble-shooting ………………………………………… 41
8. APPENDICES ………………………………………… A1
8.1 Technical data ………………………………………… A1
8.2 Refrigerant circuit diagrams ………………………………………… A2
8.3 Wiring diagram ………………………………………… A3
8.4 Spare parts ………………………………………… A4

ENGLISH - 4
1 TRANSPORT, HANDLING AND STORAGE.
1.1 PRELIMINARY INSPECTION
The machine travels at the customer’s risk. In case packing is damaged, immediately
inform the carrier.
Immediately inform the carrier also in case of damage to the machine, even if you open
the packing a few days after the delivery.
It is always advisable to accept the goods SUBJECT TO INSPECTION.
The equipment should be handled with great care: falls and shocks can damage it without
showing external damages.
1.2 MACHINE UNPACKING
For a correct machine unpacking, carefully follow the instructions hereunder reported:
in case of carton packing on wooden frame:
•Remove the strap fixing the carton to the bottom and take the packing off from the top.
In case of wood case:
•Remove the case upper side and the side walls by means of a nail drawer, pay
attention not to disperse the nails and the wood splinters;
•Remove the plastic bag and put it in a safe place;
•Unscrew the machine side panels by means of a cross and/or cut screw-driver;
•Turn out the screws fixing the packing lower side by means of a 17mm wrench;
•Remove the packing lower part, lift the machine and hook it up to the lifting points
specified on the frame with the symbols;
•Reposition the side panels
The packing shall be stored in a dry place, out of children’s reach. It can be used again, if
correctly preserved, for a possible transfer of the machine.
The storing temperature shall range between -25 and +55 °C.
Humidity shall range between 30 and 95%.
Packing elements such as plastic bags, nails, expanded polystyrene, cartons, etc. must be
left out of children’s reach.
1.3 Packing dimensions
CASE
MODEL SIZES (CM) WEIGHT (KG)
C 135 96 x 52 x h. 162 240-290

5 - ENGLISH
2. MARKINGS AND GRAPHICS
Never touch the machine with hands and tools during production or maintenance and
cleaning operations, without making sure that the machine is in STOP position, the main
switch is off and/or the multipolar plug disconnected.
TAYLOR declines any liability for accidents deriving from an improper use of the machine
due to the non-compliance with the above-mentioned recommendations.
The machine is provided with a plate and some pictograms, which together with the
present manual allow using the machine in safer conditions.
Machine data plate
The adhesive label located on the back of the
machine allows identifying the model and reports the
following indications:
Manufacturer’s name and address; Machine model
and version; Serial number; Rated electrical
characteristics; Type and weight of employed Freon;
Manufacturing year.
Indication
Points of application of lifting devices.
The following plate is placed on the four sides of the
frame lower part and shows the points where lifting
hooks shall be positioned in order to perform this
operation in safe conditions. By means of a cross
screwdriver unscrew the two side panels and then
position the lifting devices into the relevant points.
Make sure that they cannot accidentally come out
during lifting operations..
Attention!
Maintenance allowed to qualified personnel only.
The following plate placed on the machine back
panel forbids extraordinary maintenance operations
and/or repairs delegating them to authorized people
only, whose address is indicated in the provided
space.

ENGLISH - 6
Attention!
Do not touch with hands.
The following plate placed on the back of air-cooled
machines shows that cleaning operations on the heat
exchanger shall be carried out only by means of a
brush or an exhauster.
Attention!
High voltage inside, danger of fulguration.
The following plate is placed on the electric box
cover and warns the operator that in no case the
cover must be removed avoiding this way the risk of
lethal fulguration. Also in this case, maintenance
operations on internal components must be
performed by authorized personnel only.

7 - ENGLISH
3. INSTALLATION
3.1 FIELD OF USE
The multi-purpose machines of the C 135 series are specifically designed and built for the
cooking, cooling and batching cycles of ice cream mixtures and pastry products.
3.2 LIMITS OF USE
Never use the machine with variable supply voltage and/or more than +/- 10% of the value
showed in the nameplate or when the power cable is damaged;
Do not use the machine for purposes different from the ones indicated in the present
manual;
Do not use the machine in explosive environment;
Do not wash the machine with high-pressure jets of water or poisonous substances;
Do not expose the machine to excessive heat or humidity;
Do not use completely unbalanced mixtures and/or quantities not in compliance with the
specifications reported on the packing.
3.3 MACHINE OUTFIT
- Cleaning rod
- Stiff paddle
- Mixer scraping blades
- Centering device plugs
- Spring Kit
- Kit O-ring
- Mixer stuffing box
- Gasket dismantling tool
- Transparent hopper cover
- Lubricator
- Manual of use and maintenance
- Conformity declaration
- Warranty
3.4 COMMISSIONING
Bring the machine to the place of employment and check that everything is all right as far
as installation concerns:
Power supply;
Water supply;
Suitable run-off pit for water.
•Lock the machine by means of the apposite lever located on the front wheels;
•Place the machine far from walls or other obstacles (at least 10 cm sideways and 30 on
the back). In case the machine is provided with water-cooled condenser, the distance
between the wall and the back panel can be reduced to 10 cm.
•Make sure that the supply voltage and power comply with the values reported on the
rating plate placed on the back panel;
•Connect the machine to the mains; upstream the machine, arrange an omnipolar main
switch with minimum contact opening equal to 3 mm and adequate power, interlocked
with fuses to allow plugging and unplugging at open circuit.
•Connect the power cable to a type-approved plug: the power cable shall be well
stretched, to avoid rolling and overlapping. It shall not be exposed to possible shocks or
tampering; attempts and far from liquids, water and heat sources. It shall not be
damaged, otherwise make it be replaced by qualified personnel with another section

ENGLISH - 8
and type 5G4 H07RN-F (for version 400 V), 5G6 H07RN-F (for version 220-230/3)
before connecting the machine to the mains.
•Arrange the connection of the yellow-green wire to a good earth connection.
•Put the machine metallic parts to earth by means
of the apposite equipotent fastening screw
located on the back under the frame and marked
by the symbol showed on the left.
•Make sure that the water supply system is
provided with sufficient pressure for a correct
operation of the condensing system. A residual
pressure ranging between 1 bar and 3 bar is
considered suitable.
•Connect the condensing water inlet hose to the
inlet showed in the picture by means of a rubber
hose Ø1/2”. Interpose a cut-off cock at the
operator’s reach.
•Connect the condensing water outlet hose to the
outlet showed in the picture by means of a hose
connector Ø1/2” and bring it to the discharge.
•Both for inlet and outlet connections it is
advisable to make use of linenized hoses suitable
to withstand pressures up to 10 bar and apposite
hose clamps DIN 3017.
•The water outlet hose shall have a min.
inclination of 3 cm for each meter of length.
•In case of water condensing it is necessary to
check that the water valve works correctly.
•After both inlet and outlet hoses have been
connected, open the cut-off cock and make sure
that the discharge does not leak liquid when the
machine is not working. If this is the case, apply
to a qualified customer service.
•After the main switch has been turned on press
the “SEMIAUTOMATIC” button to start up the
compressor motor. After a few seconds the
condensing water shall regularly come out of the
outlet hose end at a temperature of 35°C. Press
STOP to stop the machine.
•Verify the correct rotation direction of the mixer
motor: power the machine, press the “MIXING”
button and check through the hopper grid that the
mixer is rotating counter-clockwise. If the rotation
direction is not counter-clockwise exchange the
two wires of the feeder between themselves.
•Press pushbutton STOP to stop the machine. Avoid idling the machine for a long time.

9 - ENGLISH
•When the machine is on STOP unlock the door by
lifting the lever and then rotate to the left.
•Slide out the mixer, check and lubricate the mixer
stuffing box with lubricant (supplied) .
•The ideal temperature shall range between 15° and
35°C.
•The ideal humidity shall range between 30 and 60%.
TAYLOR declines any liability for damages to persons and/or things due to a wrong
installation and/or the non-compliance with the industrial accident prevention standards.
Never touch the machine with hands, both when it is on duty and during cleaning and
maintenance operations, without making sure that the machine has been stopped by
means of pushbutton STOP and the main switch has been turned off. Never clean the
machine by means of high-pressure jets of water. Never close the cut-off cock while the
machine is running. Pay attention not to damage the power cable: if it is damaged, have it
replaced.
In case the machine provided with water-cooling is left at a room temperature inferior to
0°C, it is necessary to run off all water present inside the condenser before starting up the
machine.

ENGLISH - 10
4. SAFETY DEVICES
Shearing-prevention system: realized by means of a microswitch and a safety circuit in
conformity with the European standard. It temporarily stops the machine when the boiler
cover, the batch freezer door and/or the grid on the hopper is lifted and the display shows
EME. Do not use this device to stop the machine during the batching cycle. Always use
the STOP function.
Motor reliability of service: realized by means of magneto-thermal circuit-breakers which
protect the motors against over-loads.
The machine carries out a series of controls during production:
Production control system
Realized by means of the microprocessor through an amperometric transformer. It
performs a wattmeter control on the mixer motor.
Batching safety timer
It trips 16 minutes after the batching cycle starts if the minimum consistency value set by
the manufacturer is not reached. The compressor stops, the slow mixing keeps running,
the STOP button is on, the production button and the display are flashing and an
intermittent beep goes off. Verify that there aren’t any defects in the refrigerant circuit
and/or errors in the mixiture dose.
Consistency increase control
It trips when the mixture, after exceeding the minimum alarm threshold, stops increasing in
consistency due to an error in the doses or an unbalanced mixing. The compressor stops,
the mixing keeps running, the PRODUCTION button flashes and an intermittent beep goes
off.
Logic unit auto – reset in case of power shortage
It blocks the machine which can be reset only manually.
Logic unit self-diagnosis (watch-dog)
The microprocessor controls possible internal troubles and stops the card in case of
failure.

11 - ENGLISH
5. OPERATION
5.1 COMMANDS
1. Boiler cover
It closes the boiler tank during operation. It
can easily be removed to clean.
2. Cock
Use this to extract the product from the
boiler tank. It can be poured directly into
the batching cylinder.
3. Door
It seals the cylinder during operation. It
can easily be removed to clean.
4. Safety grid – hopper cover
It allows the operator to load the product
safely. The cover prevents the mixture to
come into contact with other substances.
5. Door lock handle
It seals the door tight when the handle is
turned down.
6. Boiler pushbutton panel
Use this to select the boiler’s operating
programs.
7. Batch freezer pushbutton panel
Use this to select the batch freezer’s
operating programs.
8. Extraction door
This is used during the ice-cream
extraction phase and to drain the water
during cylinder cleaning operations.
9. Drip tray
It collects the liquids dripping from the
cylinder stuffing box.

ENGLISH - 12
5.2 BOILER CONTROL PANEL
1. Display
The 3-digit alpha-numerical display shows the information regarding
the work programs and the possible settings.
2. STOP
Whatever operating phase the machine is running, press “STOP” to
stop the machine and delete the current function.
3. MIXING / UP (▲)
This pushbutton carries out 2 functions:
1. When the machine is in STOP position, press the “MIXING”
pushbutton to start up the mixer motor and the led lights up.
When the machine is in SEMIAUTOMATIC and AUTOMATIC 85°,
press “MIXING” to stop the current function. The machine switches
to mixing mode and the led lights up.
2. When the machine is set to the SEMIAUTOMATIC programming
mode, press “MIXING (▲)” to increase the temperature and time
values shown on the display (UP function).

13 - ENGLISH
+
4. SEMIAUTOMATIC / CONFIRM (◄►)
This pushbutton carries out two functions:
1. With the machine is set to STOP, press “SEMIAUTOMATIC” to
access the semi-automatic boiling cycle. You can select the
maximum temperature of the product in the tank (105°C) and
obtain the automatic calculation of the necessary pause time.
2. When the machine is in the SEMIAUTOMATIC programming
mode, press “SEMIAUTOMATIC (◄►)” to confirm the values
shown on the display (CONFIRM function).
5. 85° HEATING / DOWN BUTTON (▼)
This pushbutton carries out two functions:
1. With the machine is set to STOP, press “85° HEATING” and the
led lights up. The automatic heating and maintenance cycle at
85°C starts up. At 85°C the buzzer releases an acoustic signal
and the product is kept at the correct temperature without limit of
time.
2. When the machine is in the SEMIAUTOMATIC programming
mode, press “85° HEATING (▼)” to decrease the values shown
on the display (DOWN function).
6. MIXTURE PROTECTION BUTTON
Whatever operating phase the machine is running, press the
“PROTECTION” button and the led lights up and the thermostat
temperature of the bain marie systems switches automatically from
115°C to 98°C.
7. TER LED
The led lights up to indicate problems in the system.
8. TEM LED
The led lights up to indicate problems in the system.
9. CHOCOLATE FUNCTION
When the machine is in STOP position, press “STOP” and
“SEMIAUTOMATIC” simultaneously to access the CHOCOLATE
cycle to select the maximum temperature of the chocolate in the tank
and automatically calculate the necessary pause time.

ENGLISH - 14
5.3 BATCH FREEZER C 135 CONTROL PANEL
1. Display
The 3-digit alpha-numerical display shows the information regarding
the work programs and the possible settings.
2. LED TER
The led lights up to warn about possible problems in the circuit.
3. STOP
Whatever operating phase the machine is running, press “STOP” to
stop the machine and delete the current function.
4. EXTRACTION / UP (▲)
This pushbutton carries out two functions:
1. When the machine is in STOP position, press the
“EXTRACTION” pushbutton to start up only the mixer motor and
the led lights up.
When the machine is in SEMIAUTOMATIC and TIME
PRODUCTION mode, press “EXTRACTION” to stop the current
function. The machine switches to mixing mode and the led lights
up.
2. When the machine is in SEMIAUTOMATIC and TIME
PRODUCTION mode, press “EXTRACTION” (▲)” to increase
the values shown on the display (UP function).

15 - ENGLISH
5. SEMIAUTOMATIC / CONFIRM (◄►)
This pushbutton carries out two functions:
1. When the machine is in STOP position, press the
“SEMIAUTOMATIC” button to access the semiautomatic batching
cycle. It is possible to choose the product’s consistency value.
2. When the machine is in SEMIAUTOMATIC and TIME
PRODUCTION mode, press the “SEMIAUTOMATIC (◄►)” button
to confirm the values shown on the display (CONFIRM function).
6. TIME PRODUCTION / DOWN (▼)
This pushbutton carries out two functions:
1. When the machine is in STOP position, press the “TIME
PRODUCTION” button to start the freezing cycle with the
possibility to choose the duration of the product’s production cycle
2. When the machine is in SEMIAUTOMATIC and TIME
PRODUCTION mode, press the “TIME PRODUCTION” (▼)”
button to decrease the values shown on the display (DOWN
function).
8. “GR1” and “GR2” WATER ICE PROGRAMMS
When the machine is in STOP position, press “GRANITA” to access
the water ice production cycles GR1 and GR2. It is possible to
choose the consistency, the times and mixing cycles.

ENGLISH - 16
5.4 MIXTURES HEATING CYCLES
The multifunction TAYLOR machines of the “C 135” series are fitted with a state-of-the-art
bain marie heating system. Thanks to this technology the heat is transferred to the
mixtures in the tank indirectly through an exchange fluid (glycol). There are several
advantages:
- Maximum maintenance of organoleptic properties of the product;
- Possibility of choosing cooking temperatures between 30°C and 105°C;
- Pause times that can be programmed up to 10 hours;
- Possibility of choosing 3 different glycol thermostatic temperatures;
- Very short heating times;
Follow this procedure to load the mixture in the boiler
tank:
- Verify that the main electric switch is closed, that
the “STOP” button is lit up and that the water
supply cock is open.
- Verify that the mixer is correctly assembled and
positioned on the propeller shaft.
- Verify that the cock piston is closed tight.
- Lift the cover and pour the mixture into the tank.
Carefully comply with the minimum and maximum
quantities allowed for each cycle and indicated in
the table below:
MODEL MIN (kg) MAX (kg)
C 135 1 4
Non-compliance with the minimum and maximum
loading values may lead to machine malfunctioning
and in some cases it may even damage the
machine.

17 - ENGLISH
5.4.1 AUTOMATIC 85°C CYCLE
Lift the cover and pour the mixture you wish to heat
up into the tank.
Press “85° HEATING” to start the automatic heating
cycle at 85°C.
If the mixture contains ingredients that could
degenerate with the high temperatures of the tank
(115°C), press “PROTECTION” to drop the
temperature of the fluid of the bain marie system to
98°C. In this case the heating times may be a bit a
longer: this is normal and is not to be considered a
machine defect.
After a few minutes and after the 85°C temperature
has been reached, the buzzer releases an
intermittent acoustic signal which warns the operator
that it is time to extract the hot mixture. If the mixture
cannot be removed promptly, the mixer will keep
mixing and the electric resistor will keep the mixture
at the right temperature, thus starting the
PRESERVATION phase.

ENGLISH - 18
5.4.2 SEMIAUTOMATIC CYCLE
Lift the cover and pour the mixture you wish to heat
up into the tank.
Press the “SEMIAUTOMATIC” button; the leds of
buttons “UP (▲)” – “CONFIRM (◄►)” – “DOWN
(▼)” will light up and the display will show the last
temperature value set. At this point the machine is
ready to program a new heating temperature value.
Press “UP (▲)” and “DOWN (▼)” to respectively
increase and decrease the temperature values
indicated on the display. After reaching the desired
value press “CONFIRM (◄►)” to save the settings.
The maximum programmable value is 105°C but this
temperature will not be reached if the
“PROTECTION” function is set.
According to the temperature selected on the
display, the machine automatically calculates the
“PAUSE” time needed to eliminate the bacterial
content of the product. If this value is satisfying press
“CONFIRM (◄►)” to start the heating cycle.
Otherwise, press “UP (▲)” and “DOWN (▼)” to set a
new time value; afterwards press “CONFIRM (◄►)”
to start the cycle.
After a few minutes and after the set temperature
has been reached, the buzzer releases an
intermittent acoustic signal which warns the operator
that it is time to extract the boiling mixture. If the
mixture cannot be removed promptly, the mixer will
keep mixing and the electric resistor will keep the
mixture at the right temperature, thus starting the
PRESERVATION phase.

19 - ENGLISH
5.4.3 “CHOCOLATE” CYCLE
Lift the cover and pour the mixture you wish to heat
up into the tank.
Press “STOP” and “SEMIAUTOMATIC” at the same
time; the “CHOCOLATE” led, the leds of the “UP” –
“CONFIRM” – “DOWN” buttons light up and the
display will show the last temperature value set. At
this point the machine is ready to program a new
heating temperature value.
Press “UP (▲)” and “DOWN (▼)” to respectively
increase and decrease the temperature values
indicated on the display. After reaching the desired
value press “CONFIRM (◄►)” to save the settings.
In the CHOCOLATE cycle the thermostat
temperature of the fluid of the bain marie system
(glycol) is set to lower values compared to the glycol
boiling cycles (set to 115°C) and the cycle with
PROTECTION function (set to 98°C).
The maximum heating temperature of the product
must not be set to values higher than 65°C.
According to the temperature selected on the
display, the machine automatically calculates the
“PAUSE” time needed to eliminate the bacterial
content of the product. If this value is satisfying press
“CONFIRM (◄►)” to start the heating cycle.
Otherwise, press “UP (▲)” and “DOWN (▼)” to set a
new time value; afterwards press “CONFIRM (◄►)”
to start the cycle.
After a few minutes and after the set temperature
has been reached, the buzzer releases an
intermittent acoustic signal which warns the operator
that it is time to extract the boiling mixture. If the
mixture cannot be removed promptly, the mixer will
keep mixing and the electric resistor will keep the
mixture at the right temperature, thus starting the
PRESERVATION phase.
Table of contents
Other Frigomat Ice Cream Maker manuals