FrontRow ezRoom ICR-01 User manual

USER GUIDE
ICR-01 Smart Receiver
ITM-02 Pendant Microphone
ISM-02 Pass-Around Microphone
IMC-01 Microphone Charger

CONTENTS
Important Safety Instructions ..........................................................................1
Electrical Warnings . . . . . . . . . . . . . . . . . . . . . . . . . . . . . . . . . . . . . . . . . . . . . . . . . . . . . . . . . . . . . . . . . . . . . . . . . . . . . . . . . . . . 2
ITM-02 Pendant Microphone ...........................................................................3
ISM-02 Pass-Around Microphone .......................................................................4
Volume ...............................................................................................5
Voice Command .......................................................................................6
Playing Audio over Bluetooth®.........................................................................7
Beacon LED Status Indicator ..........................................................................15
ITM-02 Pendant Microphone ..........................................................................16
Battery.............................................................................................17
Charging ...........................................................................................18
ISM-02 Pass-Around Microphone ......................................................................19
Labeling ...........................................................................................20
Battery.............................................................................................21
Charging ...........................................................................................22
Microphone Configuration ............................................................................23
Using Multiple Microphones...........................................................................24
IMC-01 Microphone Charger ..........................................................................26
Troubleshooting......................................................................................27
Regulatory...........................................................................................29
Batteries.............................................................................................30

1. Read these instructions.
2. Keep these instructions.
3. Heed all warnings.
4. Follow all instructions.
5. Do not use this apparatus near water.
6. Clean only with dry cloth.
7. Do not block any ventilation openings. Install in accor-
dance with the manufacturer’s instructions.
8. Do not install near any heat sources such as radiators,
heat registers, stoves, or other apparatus (including
amplifiers) that produce heat.
9. Do not defeat the safety purpose of the polarized or
grounding-type plug. A polarized plug has two blades
with one wider than the other. A grounding type plug
has two blades and a third grounding prong. The wide
blade or the third prong are provided for your safety. If
the provided plug does not fit into your outlet, consult an
electrician for replacement of the obsolete outlet.
10. Protect the power cord from being walked on or pinched
particularly at plugs, convenience receptacles, and the
point where they exit from the apparatus.
11. Only use attachments/accessories specified by the
manufacturer.
12. Use only with the cart, stand, tripod, bracket, or table
specified by the manufacturer, or sold with
the apparatus. When a cart is used, use
caution when moving the cart/apparatus
combination to avoid injury from tip-over.
13. Unplug this apparatus during lightning storms or when
unused for long periods of time.
14. Refer all servicing to qualified service personnel.
Servicing is required when the apparatus has been
damaged in any way, such as power-supply cord or plug
is damaged, liquid has been spilled or objects have
fallen into the apparatus, the apparatus has been
exposed to rain or moisture, does not operate normally,
or has been dropped.
Important Safety Instructions
1

1. Avoid Abuse to the Power Supply
To reduce risk of electric shock, unplug the power supply
from outlet before attempting any maintenance or cleaning.
Turning off controls will not reduce this risk.
WARNING: To reduce the risk of fire or electric shock, do
not expose this apparatus to rain or moisture.
DO NOT disassemble the power supply. Return the appa-
ratus to FrontRow for qualified service and repair if required.
Incorrect reassembly may result in a risk of electric shock or fire.
DO NOT expose the power supply to rain, snow, water, gas,
oil, etc.
DO NOT operate the power supply if it has received a sharp
blow, been dropped, or otherwise damaged in any way; return
the apparatus to FrontRow for qualified service and repair.
DO NOT block or cover the apparatus and impede ventilation.
DO NOT expose batteries (battery pack or batteries
installed) to excessive heat such as sunshine, fire, or the like
or excessive cold.
2. Proper Use of the Power Supply and Wiring
An extension cord should not be used unless absolutely
necessary. Use of improper extension cord could result in a risk
of fire and electric shock. The cord MUST be plugged into
a grounded outlet. Make sure it is properly wired, in good
electrical condition, and wire size is large enough for AC
ampere rating of the power supply or charger. To reduce
risk of damage to plug and cord when disconnecting the
power supply or charger, ALWAYS pull on plug - NEVER
on cord.
Locate cord so that it will not be stepped on, tripped over, or
otherwise subject to damage or stress. DO NOT lay exten-
sion cord on charger. DO NOT operate the power supply
with damaged cord or plug - replace them immediately.
Electrical Safety Information:
PRECAUTIONS & SAFETY
RECOMMENDATIONS
Follow Manufacturers' Recommendations
Before using the system and power supply, read all instructions
for, and caution markings on the receiver and power supply and in
this user guide.
!
Electrical Warnings
2

ITM-02 Pendant Microphone
1 Amazing Sound Quality
With FrontRow's digital synthesis technology, the ITM-02
uses a single cardioid microphone element to deliver
superb pickup and audio quality. And combined with a
high-isolation, low- noise, open air microphone suspension,
the ITM-02 minimizes noise from friction against clothing,
buttons or jewelry.
2 Mute Indicator
OFF/STANDBY ...........Un-muted
SOLID RED ..............Muted
3 Power Indicator
SOLID GREEN ...........Power On
OFF ....................Standby
4 Smart Button
Controls all of the features of the Pendant Microphone. Tap
the button to mute, or use with voice command to activate
the lesson capture software and control your audio system.
When the Pendant Microphone is in standby mode:
PRESS MOMENTARILY .....Awaken
When the Pendant Microphone is active:
PRESS MOMENTARILY .....Mute / Un-mute
PRESS AND HOLD...........Issue Voice Command or
trigger programmed event
5 Superior Comfort
Lightweight (just 73.7g/2.6oz) with soft backing that
provides comfort and reduces friction noise from contact
with clothing, buttons or jewelry.
6 Battery Indicator
In Use
OFF ..............Battery Charged
FLASHING RED ........Battery Low
When Charging
SOLID RED ..............Charging
SOLID GREEN .......Fully Charged
FLASHING RED/GREEN Charge fault
7 Lithium Ion Battery
3-year life expectancy, lightweight, rechargeable lithium
ion battery.
8 Charging / Programming Jack
For charging via USB cable or for configuring settings using
the FrontRow Microphone Settings application.
9 Portable Audio Interface
3.5mm audio input jack lets you use the Pendant
Microphone to transmit audio wirelessly from any
secondary audio source such as a computer or MP3 player.
10 Charge Contacts
For use with the optional IMC-01 microphone charger.
11 Adjustable power
Adjust the power to increase either battery life or range.
12 Programmable channels
Program the switch positions to 2 of 5 available channels.
6
5
7
1
3
4
Front
Bottom
2
10 98 10
3

ISM-02 Pass-Around Microphone
1 Amazing Sound Quality
With FrontRow's ClearVoice™digital synthesis technology,
the ISM-02 uses a single cardioid microphone element to
deliver superb pick up and audio quality. And combined with
a high isolation, low noise, open air microphone suspension
– the ISM-02 minimizes handling noise.
2 360˚ Emitter Diodes
360˚ emitter diodes let students hold the Pass-Around
Microphone the way it's most comfortable for them without
worry of dropout.
3 Power Indicator
SOLID GREEN ...........Power On
OFF ....................Power Off
4 Battery Indicator
In Use
OFF ..............Battery Charged
FLASHING RED........Battery Low
When Charging
SOLID RED.............. Charging
SOLID GREEN .......Fully Charged
FLASHING RED/GREEN.Charge fault
5 Small and Lightweight
At less than 15cm/6in tall and just 73.7g/2.6oz the micro-
phone is much easier for even young students to use than a
standard-sized mic.
6 Power/Push-to-talk Switch
The push-to-talk option makes transitions when passing the
microphone between students easier (e.g. no need to take
time from the conversation to turn the mic on and off dur-
ing transition).
PRESS AND HOLD .....Push-to-talk
PRESS AND SLIDE UP ....Power On
7 Name Plate
Perfect for adding a name or room number for easy identifi-
cation.
8 Lithium Ion Battery
3-year life expectancy, lightweight, rechargeable lithium ion
battery.
9 Charging/Programming Jack
For charging via USB cable or for configuring settings using
the FrontRow Microphone Settings application.
10 Portable Audio Interface
3.5mm audio input jack lets you use the Pass-Around
Microphone to transmit audio from any secondary
audio source such as a computer or MP3 player.
11 Charge Contacts
For use with the optional IMC-01 microphone charger.
12 Comfortable Hands Free Option
Easy, comfortable lavaliere clip makes reading in front of
class simple and lets the Pass-Around Microphone double
as a lightweight teacher microphone.
13 Adjustable power
Adjust the power to increase either battery life or range.
14 Programmable channels
Program the switch positions to 2 of 5 available channels.
1
2
4
6
910
Lavaliere clip
Front
Bottom
3
5
7
12
11
8
11
4

Volume
Your ezRoom is equipped with a powerful Adapto™feedback
suppression engine that helps avoid harsh squealing noise
that would normally occur when a microphone gets too close
to a speaker. Nevertheless, try to use volume settings for daily
use that give good audibility without constantly activating the
feedback suppression engine.
If more volume is required for a large or noisy room, you may
notice the Adapto engine activating and at a high volume or
short distance from a speaker and the engine may not be able
to maintain a pleasant audio quality. If feedback occurs, move
away from the speaker or lower either the master volume or the
volume for the microphone that is causing the feedback from the
Teacher Edition Software or FrontRow wall controller.
Control the volume of connected audio devices or individual
microphones via the Teacher Edition software or a FrontRow wall
controller.
Master Volume
Your ezRoom system has a master volume control that
increases or decreases the mixed volume of all devices and
microphones. Master volume can also be increased or reduced
using voice commands
Device Volume
Control the individual volume of each device connected to
your ezRoom.
*For best results, the volume on the device itself should be at
least 75% of its maximum volume.
Microphone Volume
You can separately control the volume of each microphone
used with your ezRoom.
NOTE: The ezRoom comes standard with the ability to use
two microphones simultaneously. With the optional Channel
Expansion Module your ezRoom can be used with up to five
microphones simultaneously.
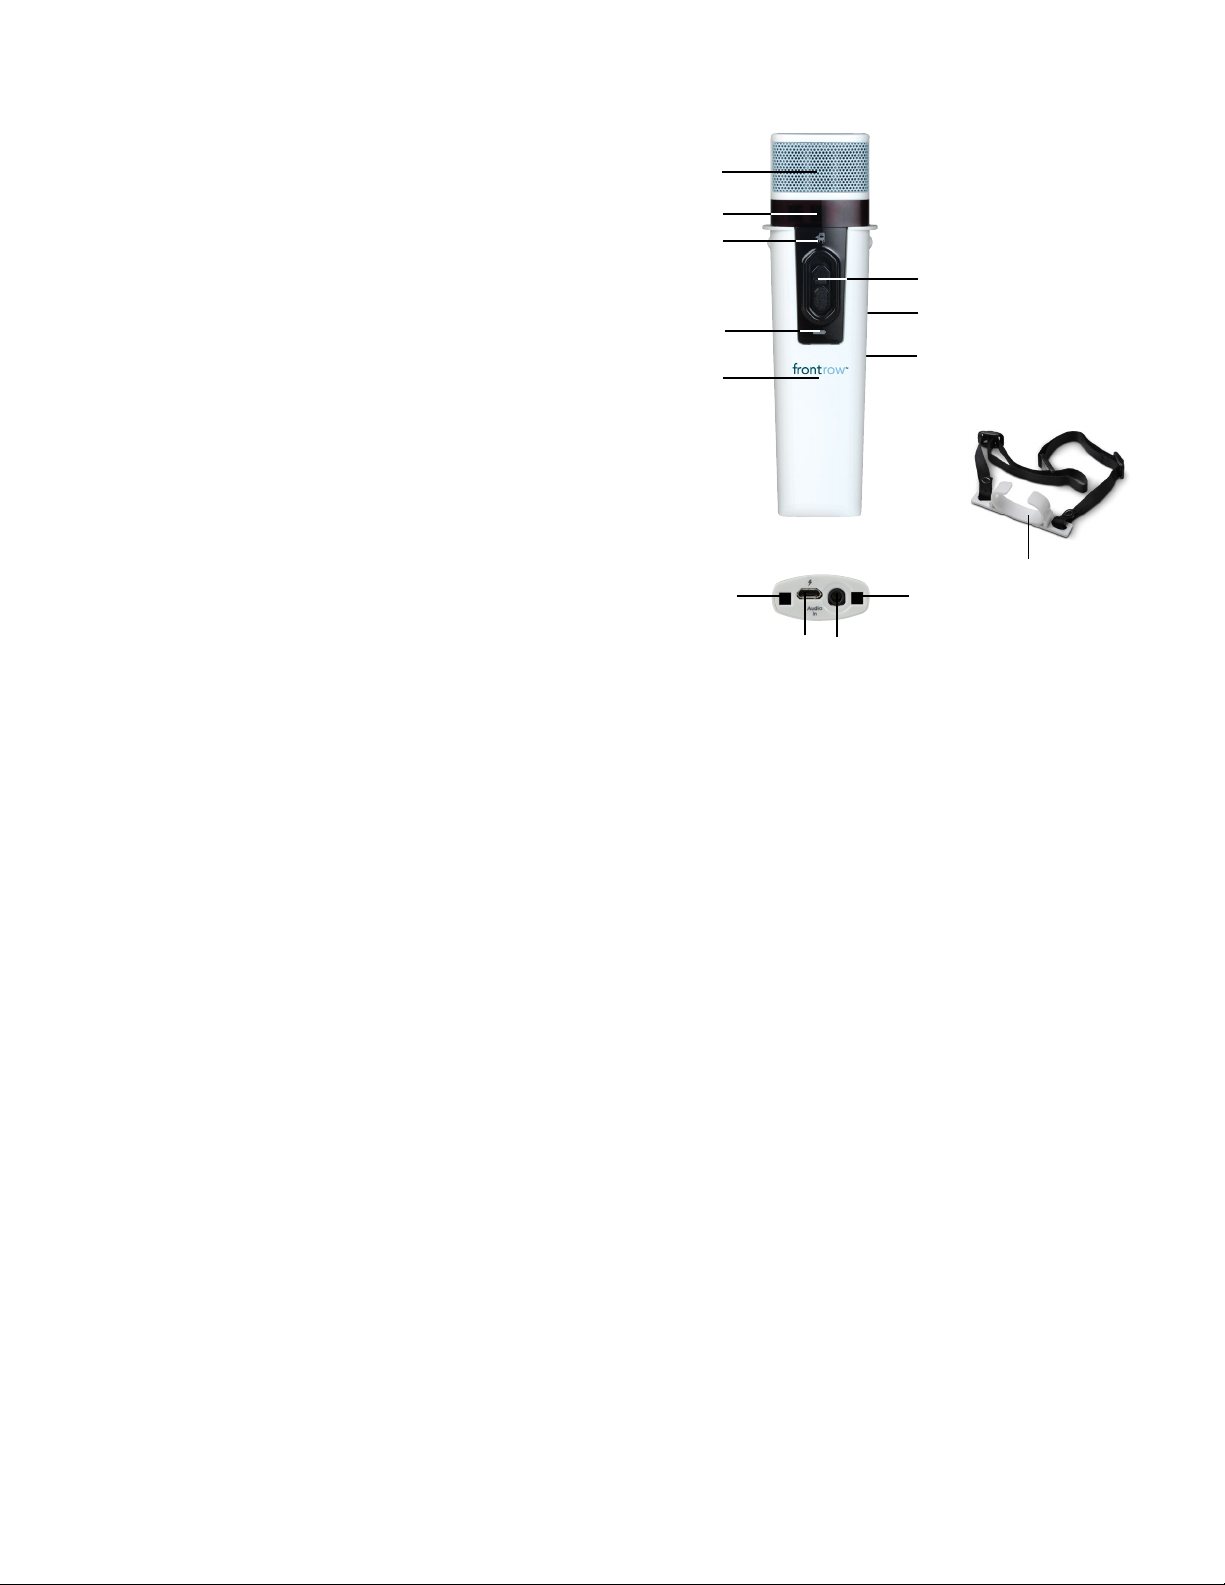
NOTE: When playing music from a device connected to the
Microphone's Audio In jack, select the Music Audio In option
in the FrontRow Teacher Edition software for best audio
performance.
Settings
OptiVoice™
A powerful tool for test taking, directions and ELL instruction.
Fragile consonant sounds carry 75% of the meaning in speech
but are easily destroyed by background noise. OptiVoice
strengthens these critical sounds, doing the work of a 12-band
equalizer with a single switch.
For low background noise environments and for a more
natural reproduction of your voice, use the low setting. For
environments with higher background noise, use the mid or
high setting. Experiment with the right mix of microphone
volume and OptiVoice setting to find the optimal solution for
your environment.
NOTE: OptiVoice affects microphone audio only; auxiliary
audio sources can be adjusted using the equalizer adjustment
in the optional Teacher Edition software application.
OptiVoice settings can be changed using a FrontRow
controller (if programmed) or using the FrontRow Teacher
Edition software.
PrioriTeach™
Use PrioriTeach to have the ezRoom automatically reduce
the volume of all other audio sources including Pass-Around
Microphones when you speak into the Pendant Microphone.
Settings for PrioriTeach are available through the FrontRow
Teacher Edition software.
NOTE: The PrioriTeach feature is only activated by a Pendant
Microphone and only when on channel A or B.
Voice Command
Your ezRoom can be controlled using your ITM-02 Pendant
Microphone and your voice. See page 6 for details, a list of
available voice commands, and instructions for use.
Voice Command can be used on only one channel at a time.
Set the command channel to A or B depending on the channel
you are using with your Pendant Microphone.
Settings for Voice Command are available through the FrontRow
Teacher Edition software application.
Restore Defaults
Your ezRoom audio settings can be restored to factory defaults
if necessary using the Teacher Edition software.
NOTE: If using a FrontRow wall controller or software to control
your ezRoom, user guides for those products are available at
gofrontrow.com/guides-resources.
5

Voice Command
Class 2 Class
PowerFlex
TeacherTalk
ClassCast
Your ezRoom System lets you remotely control parameters using
a few simple voice commands.
To issue a voice command:
1. Press and hold the Smart Button on the Pendant Microphone.
2. Wait for Voice Command tone and LED on the ceiling to turn to flashing green.
3. Keeping the button pressed, issue one of the commands below.
4. Wait for confirmation tone and LED on the ceiling to return to solid green.
5. Release the button.
For best performance:
• Follow the sequence above precisely when issuing voice command.
• Avoid brushing the microphone against clothing, jewelry, etc. while issuing voice command.
• Speak clearly with a normal conversational tone.
• When issuing the Finish command, wait until the LED returns to solid green before releasing the button.
• Avoid holding the microphone close to the mouth when speaking a command. The microphone is optimized to understand
commands when it is sitting flat on the chest.
NOTE: Voice command works only with the Pendant (teacher) Microphone, and only on either channel A or B.
NOTE: While recording, voice command tone and confirmation tones are not heard so they will not be recorded.
NOTE: In some cases, if the ezRoom does not recognize a command, the LED will remain flashing green for up to 10 seconds.
During this time, audio will not transmit from the microphones.
Increase Increase the volume by 2 steps
Reduce Reduce the volume by 2 steps
Begin Start a recording
Suspend Pause a recording
Finish Stop a recording
Intercom Make an intercom call request
Power Up Turn display on
Shut Down Turn display off
Freeze Screen Freeze/Unfreeze projector image
Blank Screen Blank/Show projector image
Source One Switch AV input
Source Two Switch AV input
Source Three Switch AV input
Source Four Switch AV input
Source Five Switch AV input
Say: When you want to:
Voice Command
6
NOTE: Projector/display voice commands must be programmed and installed to work with your equipment.

If ezRoom is equipped with the Bluetooth Audio Receiver, which allows you to stream audio wirelessly to ezRoom from phones, tab-
lets, and computers. This allows teachers to be “untethered” from the audio system and move about the room.
To play audio over Bluetooth, you will first need to pair the device you want to stream from. (You only need to pair a device once.)
After it is paired, the device can stream audio whenever “connected” to ezRoom. On the device settings you can connect and dis-
connect from ezRoom.
Pairing your Bluetooth®device with ezRoom*
*Requires FrontRow Bluetooth Audio Receiver installed
Pairing setup
1. Press the Bluetooth button on the CB55 wallplate, keypad, or
touch control (depending on your setup) to activate pairing
mode.
2. ezRoom will play a tone if using the CB55 wallplate. The
button will also flash blue.
3. Go to the Bluetooth settings on your computer, phone, or
tablet and look for FrontRow ezRoom xxxx (a 4-digit number),
then pair with the device.
Once device is paired:
1. When connected, the ezRoom will play a chime tone. If using
the CB55 wallplate, the Bluetooth button will be solid blue.
2. Your device is now ready to stream music and more!
NOTE:
• You only need to pair each device once.
• You can connect up to two devices at once, but only one can
stream at a time.
• You can disconnect and re-connect to ezRoom at any time
using your device settings or quick access menus (varies by
device).
• If you go out of range, you will need to re-connect when you
return.
Playing Audio over Bluetooth®
OR OR
7

Bluetooth settings
All devices have a Bluetooth settings screen where you can:
• Pair devices
• Connect and disconnect
• Forget devices (the opposite of pairing)
There may also be alternate, easier ways of connecting and disconnecting without going to the settings.
NOTE: Your device experience may differ, depending on the model and version of the operating system.
Bluetooth on Mac
To pair or forget devices:
Go to System Preferences, then to the Bluetooth settings.
Bluetooth Button functions
Short press
Press and hold for
3 seconds
While in pairing mode
(LED is flashing):
Double-press
While in pairing mode
(LED is flashing):
Hold for 3 seconds
Puts ezRoom in pairing mode so that you can pair your devices. If using the CB55 wallplate, the
button will flash when in pairing mode. ezRoom will remain in pairing mode for 60 seconds.
“Reboots” the Bluetooth module. Use this if you are having trouble connecting to ezRoom.
Exits pairing mode.
Clears the list of paired devices and reboots the Bluetooth module. Use this as a last resort for
troubleshooting, or if unauthorized users have paired with Juno. You will need to pair all of your
devices again.
You can also use the menu bar Bluetooth icon to easily connect or disconnect from Juno.
Once paired, you can right click (or control click) to connect or
disconnect from ezRoom.
8

Bluetooth on iOS (iPhone and iPad):
To pair or forget devices:
Go to the Settings app and select Bluetooth
Once paired, you can also connect or disconnect
by tapping the device.
To connect and disconnect:
You can also easily connect and disconnect while in range by
swiping up to get to the dashboard, then swiping right to access
the music dashboard.
You can forget the device by tapping the Info
icon then selecting Forget This Device.
9

Bluetooth on Chromebook:
To pair or forget devices:
Click on the status icons in the lower right, then make sure
Bluetooth is enabled.
You can pair, forget, connect, and disconnect devices in the settings window.
Click on the settings icon to access the Bluetooth settings.
10

Bluetooth on Android:
To pair or forget devices:
Go to the Settings app and select
Bluetooth.
To connect and disconnect:
You can connect and disconnect by
swiping down from the top, then
tapping on the status icons.
In the dashboard, tap the ezRoom
to go to the next window where you
can connect and disconnect.
You can pair or forget the device by tapping
the FrontRow ezRoom device from the list
of Bluetooth devices.
11

Bluetooth on Windows 10:
To pair or forget devices:
Go to the Settings app. Select Devices.
In the Bluetooth window you can pair, remove, connect and disconnect
from devices. You may need to right click to see options.
12

To connect and disconnect:
You can connect and disconnect by going to the action center, then selecting Connect,
and selecting the ezRoom.
Bluetooth Specifications
Standard: Bluetooth 4.1
Frequency Range: 2402-2480 MHz
Maximum RF Power: +4dBm
13

If, for some reason, you cannot get your device to connect to ezRoom even though you had previously been able to stream audio, it
is easy to “re-pair” the device to ezRoom. Simply go to your device settings and select the ezRoom, then “Forget” the device (may
be a right-click, or another button to access this ability). You may then follow the quick steps above for pairing a device.
To clear all paired devices from ezRoom, press the Bluetooth button once to enter pairing mode (pairing tone will sound), then
press again and hold until you hear the reset tone. Note that you will need to go to each device and “forget” the ezRoom, then
pair it again.
FAQs
Q: Do I still need cables to use Lesson Capture?
A: Yes, you still need at least the USB cable (for tower settings,
and voice command start and stop of recording) and the audio
out from the ezRoom to the computer.
Q: Can I upgrade an existing ezRoom?
A: Yes, the module can be installed in any ezRoom in the field
and requires no firmware updates.
Q: What is the multipoint feature of the ezRoom Bluetooth
Audio Receiver?
A: Multipoint is a feature of Bluetooth where two devices can
be connected at once, making it easy for the teacher to switch
between, say, a phone and the computer without disconnecting
each device when she wants to play audio from the other (Only
one device can stream at a time, however.)
Q: When I play video and audio at the same time from my
computer, the audio seems a little out of sync with the
video. Why?
A: The latency of the Bluetooth signal depends on many fac-
tors, including the codecs used by the Bluetooth transmitter and
receiver, the distance between them, other
wireless interference, etc. ezRoom supports the FastStream codec,
which is a low latency codec for maintaining good audio-video sync.
However, if the transmitting device does not support this codec the
audio may look out of sync. Test your environment for acceptability.
You can also try a transmitter that supports the FastStream codec,
such as the Avantree Prima III (available on Amazon).
Q: As a teacher, I allowed a student to pair to the ezRoom
but I don’t want them to play audio whenever they want.
How can I control this?
A: Once a student pairs with the ezRoom and their device they
can connect to ezRoom anytime as long as there are not already
two devices connected. To break the pair, you must either
“Forget the device” in the student’s device Bluetooth settings,
or, as a brute force method, you can clear the pairing list on the
ezRoom. Keep in mind that clearing the pairing list means that
you will need to pair all your devices again. To clear the pairing
list, press the ezRoom Bluetooth button once to put it in pairing
mode (blue button flashing), then press again and hold to reset
while in pairing mode.
Troubleshooting
14

Beacon LED Status Indicator Signals
Your ezRoom is equipped with a status indicator Beacon or LCD which helps you know the status of your device. The color of the
Beacon or LCD will change based on what is happening with your system. It is also possible for your system to be configured to
turn the Beacon off.
15
No light
White
Flashing White
Green
Blue
Purple
Color Beacon Status Notes
Power off/asleep
Power on
System on backup power
Unit on backup PoE
Back-up power is an option and
must be installed separately
Voice command ready
System re-boot required Contact your system
administrator
Intercom call active
Page/Bell/Pre-recorded
message active
Red Recording active
Alternating
Yellow/White
Flashing Red Recording paused
When used with
FrontRow Conductor
When used with
FrontRow Conductor
When used with
FrontRow Teacher Edition

Using
1. Place the microphone around your neck and
connect clasp.
2. Adjust the neck straps to position the microphone
approximately 5in (14cm) from your mouth.
3. Press the Smart Button to wake the microphone. The power
indicator should be green.
NOTE: Your microphone will go into standby mode (off)
automatically after 10 minutes in mute mode or 10 minutes
of silence. Press the Smart Button to wake it.
4. Momentarily press the Smart Button to mute as needed for
private conversations. Mute indicator light will turn red.
5. Press and hold the Smart Button to issue a voice
command or trigger a programmed event. For detailed
instructions on using Voice Commands see page 5.
6. When the battery in your microphone gets low, the battery
indicator will flash red.
7. At the end of the day, charge your microphone.
Smart
Button
battery
indicator
power indicator
mute
indicator
5in/14cm
ITM-02 Pendant Microphone
16

Installing the battery
1. Unscrew the battery door on the back of the microphone
using the supplied Phillips screwdriver.
2. Locate the charge contacts on the battery and on the
microphone.
3. Insert the battery into the compartment - battery contacts
first, then push the battery into place.
4. Replace the battery door.
5. For best performance, charge the battery in the microphone
overnight before initial use.
NOTE: When the battery is removed, it will take 2-3 charge/
discharge cycles for the battery to report accurate status to the
FrontRow Teacher Edition application.
Battery Safety
Warning: To reduce risk of fire or burns:
• Do not use batteries that have been dropped or otherwise
damaged.
• Do not attempt to open, disassemble or service the battery pack.
• Do not crush, puncture or short external contacts or dispose
of in fire or water.
• Do not use the battery if exposed to moisture. When exposed
to moisture, the red checked pattern next to the charge con-
tacts will disappear.
• Do not expose to temperatures above
40°C (104°F)
• Replace only with the battery pack designed for this product.
• Batteries shall not be exposed to excessive heat such as
sunshine, fire or the like, or excessive cold.
Battery
Moisture
indicator
Charge
contacts
17

Charging
Charge your battery in one of three ways:
• IMC-01 universal microphone charger (optional).
• USB cable connected to your computer’s USB port*.
• USB cable connected to a USB to AC power adapter.
*NOTE - When charging from a computer USB port:
If using a laptop on battery power and the battery is low, the
ITM-02 microphone will not charge. We recommend that you
always have your laptop plugged in to a power source when
attempting to charge or program your microphone.
The ITM-02 microphone will not charge from a low-power USB
port. If you are having trouble charging from a USB port on
a computer that is plugged in to a power source, try using a
different USB port on your computer.
The ITM-02 microphone will not charge unless you have first
installed the software drivers as part of the FrontRow Desktop,
Teacher Edition or Microphone Settings software application.
To download the application, visit gofrontrow.com/
guides-resources.
IMPORTANT! To maintain proper charging when using the
IMC-01 universal microphone charger, occasionally clean the
charge contacts on the bottom of the microphone using a
cotton swab dipped in rubbing alcohol.
IMPORTANT! To ensure top performance and avoid equipment
damage, batteries should be charged at room temperature.
IMPORTANT! To ensure top performance, FrontRow
recommends replacing rechargeable batteries every
three years.
IMPORTANT! Store the battery properly if it will be unused for a
period of more than 2 weeks.
1. Charge the battery in the microphone for at least 2 hours.
2. Remove battery from microphone, place it
in its own bag or envelope and store in a cool dry place.
3. Recharge battery before next use.
18
Other manuals for ezRoom ICR-01
1
This manual suits for next models
3
Table of contents
Other FrontRow Speakers manuals