REACH MAP
Field Procedures 2 13
th
Edition, 2011
Deleting Pictures
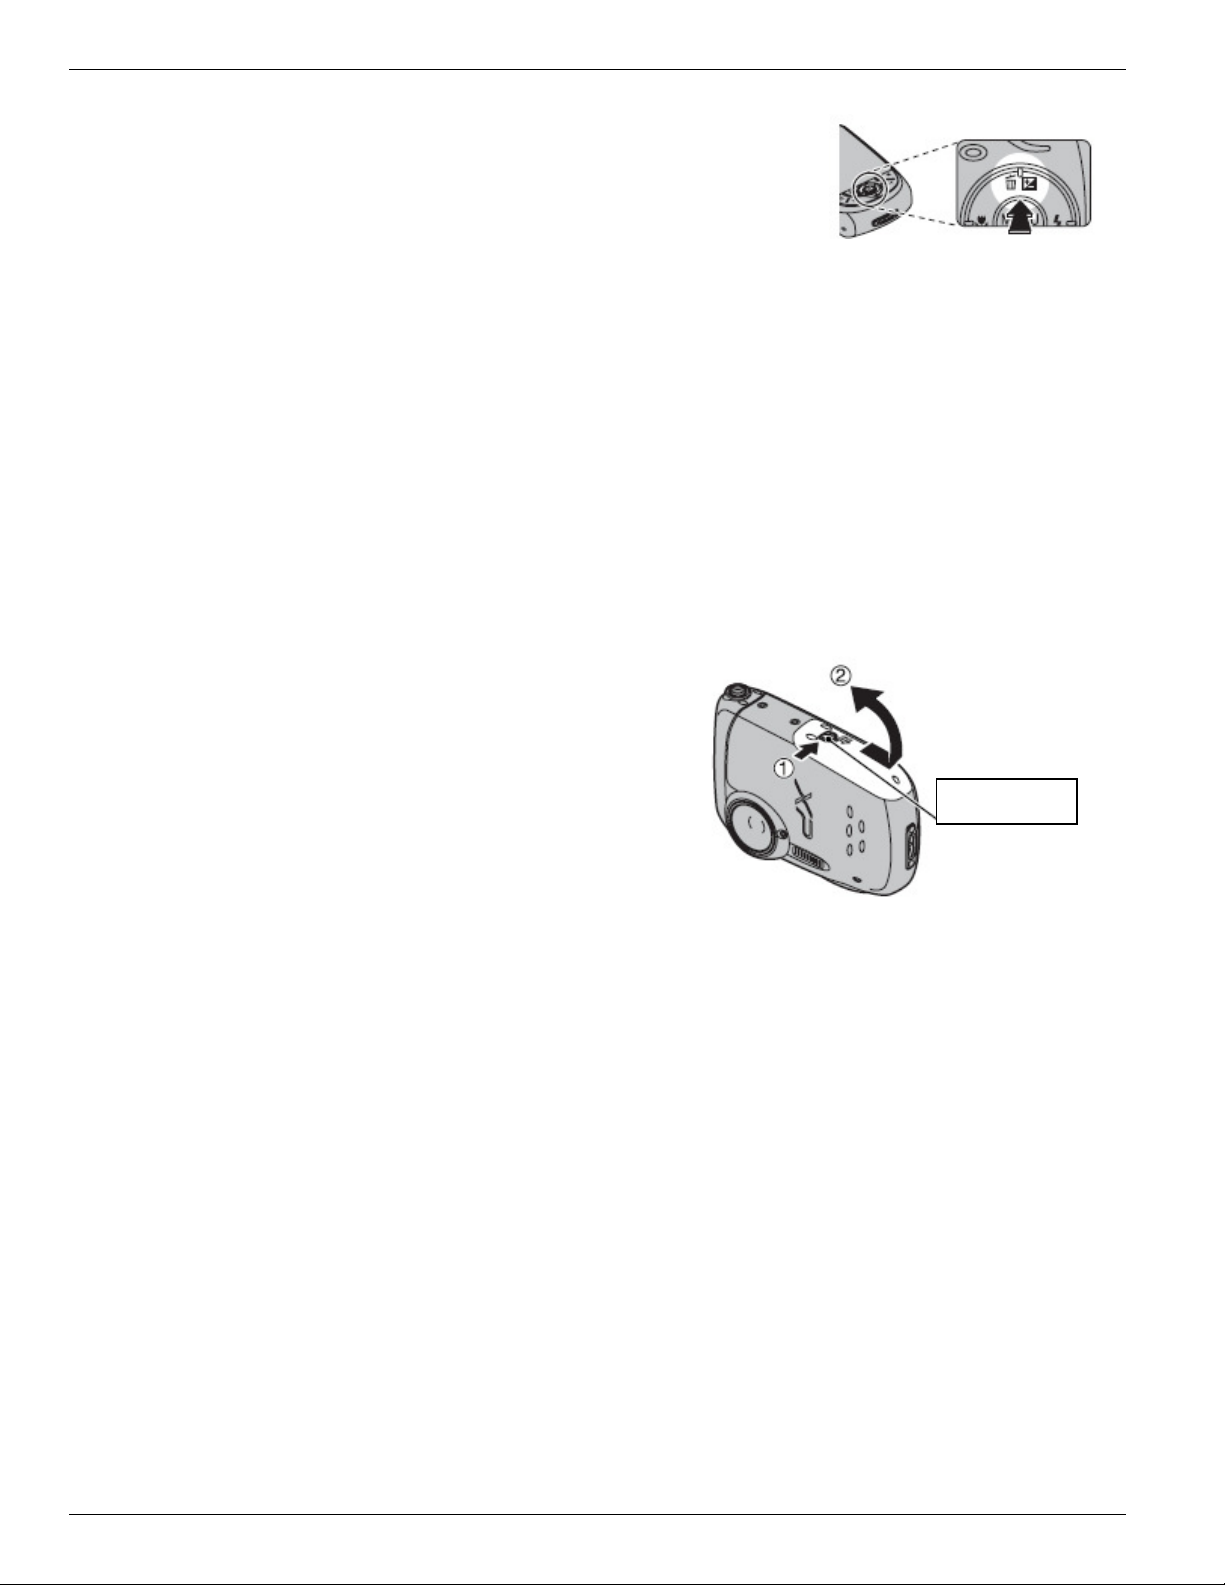
To delete a picture being viewed, push the top of the Menu/OK
button. A message will appear on the screen asking if you wish to
erase the picture. To do so, again push the top of the Menu/OK
button to select “OK” on the screen, then press the OK button. To
exit without erasing, press the bottom of the Menu/OK button to
select “Cancel” and press OK.
Entering Data On Log Sheet
When in the viewing mode, data for that picture is displayed on the screen. The frame number for
that picture appears at the upper-right corner in the format XXX-XXXX. It is critical that this be
entered on the log sheet, along with the descriptive information for the photo (see Photo
protocol), the camera number, the site name, the date, and the initials of the photographer.
If ou get lost in the Menus, don’t start randoml hitting buttons!
Get out by hitting the
“DISP/BACK” button at the bottom of the back side.
Charging the Batter
In viewing mode, a battery icon appears at the lower right side of the screen, showing the battery
state. If this is blinking or solid red, the battery needs to be recharged. The charger is in the
“treasure box” of the “clean bag” of the Streamkeeper field kit.
Turn camera off before removing the battery. With the
camera in the position shown, locate a small slider
button marked “OPEN” in the center of the bottom.
Slide this away from you and then to the right, and the
cover will release. Raise it as shown in the figure. The
battery is held in place by an orange tab. Push this to
the left and the battery will pop up. Insert the battery
into the charger with the orange stripe on the left and
the terminals facing down. The charging indicator
will glow yellow when the battery is charging and green when it is fully charged. If it blinks yellow,
remove the battery – there is a charging problem. Insert the battery with the orange stripe on the
battery next to the orange tab on the camera. Push it in and it will snap into place. Lower the
cover and push to the left to latch. Be sure that it is securely closed and snaps into place.
Monopod Mount
A monopod is supplied in your kit, which can be used to steady the camera in very low light
situations. This can be screwed into a socket on the bottom of the camera.


