manuals.online logo
Brands
  1. Home
  2. •
  3. Brands
  4. •
  5. Fujitsu
  6. •
  7. Air Conditioner
  8. •
  9. Fujitsu AS 18TF Series User manual

Fujitsu AS 18TF Series User manual

KEEP THIS OPERATION MANUAL
FOR FUTURE REFERENCE
FUJITSU GENERAL LIMITED P/N9371056012
OPERATING MANUAL
AIR CONDITIONER
OPERATING MANUAL
BEDIENUNGSANLEITUNG
MODE D’EMPLOI
MANUAL DE FUNCIONAMIENTO
MANUALE DI ISTRUZIONI
ΕΓΧΕΙΡΙ∆ΙΟ ΛΕΙΤΟΥΡΓΙΑΣ
РУКОВОДСТВО ПО ЭКСПЛУАТАЦИИ
MANUAL DE INSTRUÇÕES
Indoor Unit
AS 18TF
AS 24TF
AS 30TF
WALL MOUNTED TYPE
English
Deutsch
Français
Español
Italiano
EλληvIkά
Русский
Português
TM
En-1
CONTENTS
SAFETY PRECAUTIONS ....................................... 1
NAME OF PARTS ................................................... 2
MANUAL AUTO OPERATION ............................... 3
CLEANING AND CARE .......................................... 4
TROUBLESHOOTING ............................................ 5
OPERATING TIPS................................................... 6
SPECIFICATIONS ................................................... 7
●Do not attempt to install this air conditioner by yourself.
●This unit contains no user-serviceable parts. Always consult authorized service per-
sonnel for repairs.
●When moving, consult authorized service personnel for disconnection and installa-
tion of the unit.
●Do not become over-exposed to cold air by staying in the direct path of the airflow of
the air conditioner for extended periods of time.
●Do not insert fingers or objects into the outlet port or intake grilles.
●Do not start and stop air conditioner operation by turning off the electrical breaker or
disconnecting the power supply plug and so on.
●Take care not to damage the power supply cord.
●In the event of a malfunction (burning smell, etc.), immediately stop operation, turn
off the electrical breaker or disconnect the power supply plug, and consult authorized
service personnel.
●Provide occasional ventilation during use.
●Do not direct air flow at fireplaces or heating apparatus.
●Do not climb on, or place objects on, the air conditioner.
●Do not hang objects from the indoor unit.
●Do not set flower vases or water containers on top of air conditioners.
●Do not expose the air conditioner directly to water.
●Do not operate the air conditioner with wet hands.
●Do not pull the power supply cord.
●Turn off power source when not using the unit for extended periods.
●Always turn off the electrical breaker whenever cleaning the air conditioner or the air
filter.
●Connection valves become hot during Heating; handle with care.
●Check the condition of the installation stand for damage.
●Do not place animals or plants in the direct path of the air flow.
●When restarting after a long period of disuse in the winter, do:
Turn the power switch on at least 12 hours before starting the unit.
●Do not drink the water drained from the air conditioner.
●Do not use in applications involving the storage of foods, plants or animals, precision
equipment, or art works.
●Do not apply any heavy pressure to radiator fins.
●Operate only with air filters installed.
●Do not block or cover the intake grille and outlet port.
●Ensure that any electronic equipment is at least one metre away from either the in-
door or outdoor units.
●Avoid installing the air conditioner near a fireplace or other heating apparatus.
●
When installing the indoor and outdoor unit, take precautions to prevent access to infants.
●Do not use inflammable gases near the air conditioner.
CAUTION!
SAFETY PRECAUTIONS
●Before using the appliance, read these “PRECAUTIONS” thoroughly and operate in the correct way.
●The instructions in this section all relate to safety; be sure to maintain save operating conditions.
●“DANGER”, “WARNING” and “CAUTION” have the following meanings in these instructions:
DANGER!
WARNING!
CAUTION!
This mark indicates procedures which, if improperly performed, are most likely to
result in the death of or serious injury to the user or service personnel.
This mark indicates procedures which, if improperly performed, might lead to the
death or serious injury of the user.
This mark indicates procedures which, if improperly performed, might possibly result
in personal harm to the user, or damage to property.
DANGER!
En-2
NAME OF PARTS
Fig. 1
Fig. 5
Fig. 5 Outdoor Unit
EIntake Port
FOutlet Port
This breaker is installed during
the electrical installation.
Electrical Breaker
Fig. 6
E
F
F
E
9Intake Grille (Fig. 4)
0UP/DOWN Air Direction Flaps
AMoving Diffuser
BRIGHT/LEFT Air Direction Louvers
(behind UP/DOWN Air Direction Flaps)
CDrain Hose
DAir Filter
Fig. 4
Fig. 3
Fig. 1 Indoor Unit
1Operating Control Panel (Fig. 2)
2MANUAL AUTO button
3Indicator Lamps (Fig. 3)
4Remote Control Signal Receiver
5OPERATION Indicator Lamp (red)
6TIMER Indicator Lamp (green)
7SWING Indicator Lamp (orange)
(VERTICAL SWING)
8SWING Indicator Lamp (orange)
(HORIZONTAL SWING)
Fig. 2
A
0
1
9
3
B
C
2
D7 654 8
SWING SWINGTIMER
OPERATION
En-3
MANUAL AUTO OPERATION
Use the MANUAL AUTO operation in the event the remote control unit is lost or otherwise unavailable.
How To Use the Main Unit Controls
Press the MANUAL AUTO button on the main unit control
panel.
To stop operation, press the MANUAL AUTO button once again.
●When the air conditioner is operated
with the controls on the Main unit, it
will operate under the same mode as
the AUTO mode selected on the re-
mote control unit.
However, the Heat pump model will
follow the operating mode of the other
indoor unit.
●The fan speed selected will be “AUTO”
and the thermostat setting will be
23 °C.
Do not press the MANUAL AUTO button with wet hands or pointed objects, otherwise an electric
shock or malfunction may occur.
CAUTION!
En-4
CLEANING AND CARE
●Before cleaning the unit, be sure to stop the unit and disconnect the power supply.
●Turn off the electrical breaker.
●Be sure the intake grille is installed securely.
●When removing and replacing the air filters, be sure not to touch the heat exchanger, as per-
sonal injury may result.
CAUTION!
Cleaning the Intake Grille
1. Remove the intake grille.
1Place your fingers at the bottom of each side of the
grille panel and lift forward; if the intake grille seems
to catch partway through its movement, gently con-
tinue lifting upward to remove.
2Lift up the intake grille fully to remove.
2. Clean with water.
Remove dust with a vacuum cleaner; wipe the unit with
warm water, then dry with a clean, soft cloth.
3. Replace the intake grille.
1Holding the intake grille horizontally, fasten the two
upper hooks on the unit.
2Press the intake grille down at the lower sides to close.
Cleaning the Air Filter
1. Open the intake grille, and remove the air
filter.
Lift up the air filter’s handle, disconnect the two lower
tabs, and pull out.
2. Remove dust with a vacuum cleaner or by
washing.
After washing, allow to dry thoroughly in a shaded place.
3. Replace the air filter and close the intake
grille.
1Align the sides of the air filter with the panel, and push
in fully, making sure the two lower tabs are returned
properly to their holes in the panel.
2Close the intake grille.
(For purposes of example, the illustration shows the unit
without intake grille installed.)
●Dust can be cleaned from the air filter either with a vacuum
cleaner, or by washing the filter in a solution of mild de-
tergent and warm water. If you wash the filter, be sure to
allow it to dry thoroughly in a shady place before rein-
stalling.
●If dirt is allowed to accumulate on the air filter, air flow
will be reduced, lowering operating efficiency and increas-
ing noise.
●During periods of normal use, the air filters should be
cleaned every two weeks.
When using the optional Air Cleaning Filter
●Install the optional air cleaning filter set as instructed (installation instructions are furnished with the air cleaning filter set).
●When used for extended periods, the unit may accumulate dirt inside, reducing its performance. We recommend that the
unit be inspected regularly, in addition to your own cleaning and care. For more information, consult authorized service
personnel.
●When cleaning the unit’s body, do not use water hotter than 40 °C, harsh abrasive cleansers, or volatile agents like
benzene or thinner.
●Do not expose the unit body to liquid insecticides or hairsprays.
●When shutting down the unit for one month or more, first allow the fan mode to operate continuously for about one-half
day to allow internal parts to dry thoroughly.
Intake Grille Air filter handle
Hooks (two places)
Intake Grille
Hooks (two places)
En-5
TROUBLESHOOTING
Instructions relating to heating (*) are applicable to “HEAT PUMP MODEL”and “HEAT RECOVERY MODEL”.
In the event of a malfunction (burning smell, etc.), immediately stop operation, turn off the elec-
trical breaker, and consult authorized service personnel.
Merely turning off the unit’s power switch will not completely disconnect the unit from the power
source. Always be sure to turn off the electrical breaker to ensure that power is completely off.
Before requesting service, perform the following checks:
Symptom
Doesn’t operate immedi-
ately:
Noise is heard:
Smells:
Mist or steam are
emitted:
Airflow is weak or stops:
Water is produced from
the outdoor unit:
Problem
●If the unit is stopped and then immediately started again, the com-
pressor will not operate for about 3 minutes, in order to prevent
fuse blowouts.
●Whenever the electrical breaker is turned off then on again, the
protection circuit will operate for about 3 minutes, preventing unit
operation during that period.
●During operation and immediately after stopping the unit, the
sound of water flowing in the air conditioner’s piping may be
heard. Also, noise may be particularly noticeable for about 2 to 3
minutes after starting operation (sound of coolant flowing).
●During operation, a slight squeaking sound may be heard. This is
the result of minute expansion and contraction of the front cover
due to temperature changes.
*●During Heating operation, a sizzling sound may be heard occa-
sional. This sound is produced by the Automatic Defrosting op-
eration.
●Some smell may be emitted from the indoor unit. This smell is
the result of room smells (furniture, tobacco, etc.) which have
been taken into the air conditioner.
●During Cooling or Dry operation, a thin mist may be seen emitted
from the indoor unit. This results from the sudden Cooling of
room air by the air emitted from the air conditioner, resulting in
condensation and misting.
*●During Heating operation, the outdoor unit’s fan may stop, and
steam may be seen rising from the unit. This is due to Automatic
Defrosting operation.
*●When Heating operation is started, indoor unit’s fan may tempo-
rarily stop, to allow internal parts to warm up.
*●During Heating operation, if the room temperature rises above
the thermostat setting, the outdoor unit will stop, and the indoor
unit’s fan will stop. If you wish to warm the room further, set the
thermostat for a higher setting.
*●During Heating operation, the unit will temporarily stop opera-
tion (between 2 and 16 minutes) as the Automatic Defrosting mode
operates. During Automatic Defrosting operation, the OPERATION
indicator lamp will flash.
●The fan may operate at low speed during Dry operation or when
the unit is monitoring the room’s temperature.
●In the monitor AUTO operation, the fan will operate at low speed.
*●During Heating operation, water may be produced from the out-
door unit due to Automatic Defrosting operation.
See Page
—
—
6
—
—
6
—
6
—
—
6
NORMAL
FUNCTION
WARNING!
En-6
TROUBLESHOOTING
Instructions relating to heating (*) are applicable to “HEAT PUMP MODEL”and “HEAT RECOVERY MODEL”.
Symptom
Doesn’t operate at all:
Poor Cooling
(or *Heating)
performance:
See Page
—
—
—
CHECK ONCE
MORE
Items to check
●Has there been a power failure?
●Has a fuse blown out, or a circuit breaker been tripped?
●Is the main power switch set to the OFF position?
●Is the timer operating?
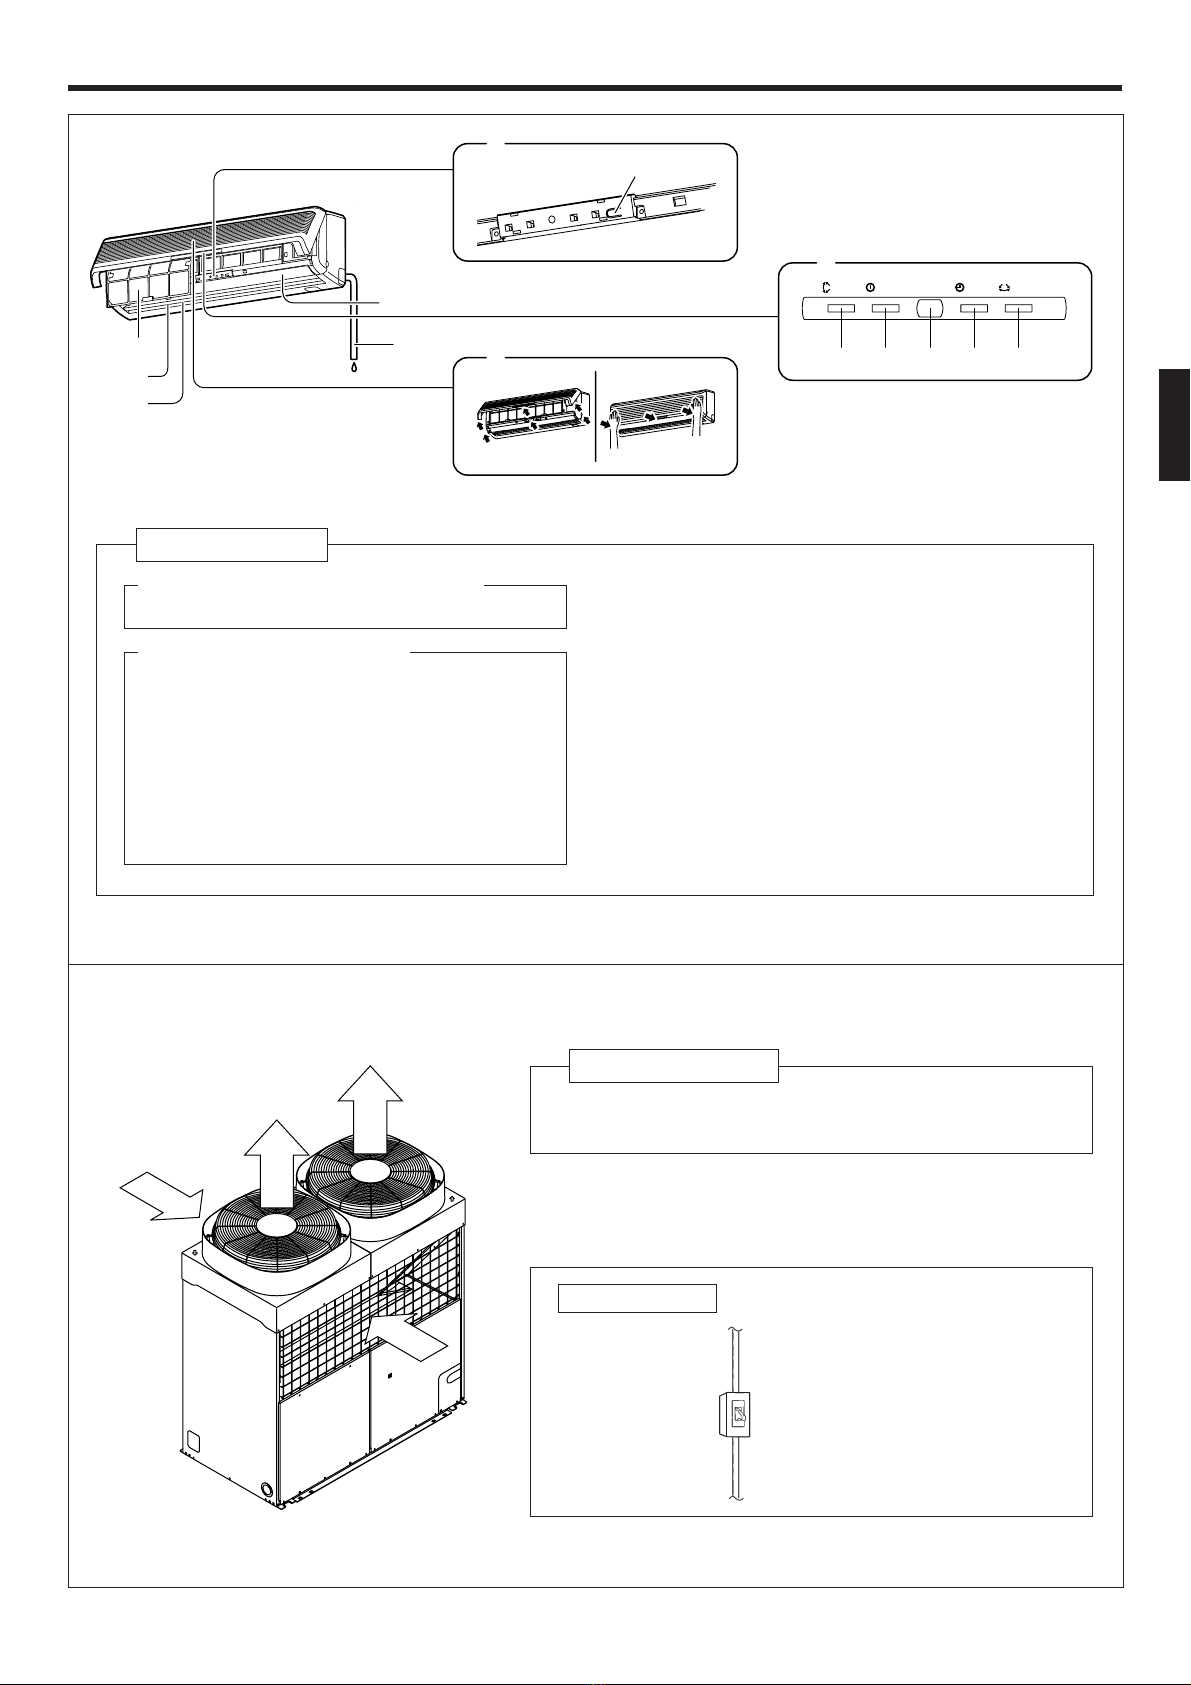
●Is the air filter dirty?
●Are the air conditioner’s intake grille or outlet port blocked?
●Did you adjust the room temperature settings (thermostat) cor-
rectly?
●Is there a window or door open?
●In the case of Cooling operation, is a window allowing bright sun-
light to enter? (Close the curtains.)
●In the case of Cooling operation, are there heating apparatus and
computers inside the room, or are there too many people in the
room?
If the problem persists after performing these checks, or if you notice burning smells, stop operation immediately, turn off the
electrical breaker, and consult with authorized service personnel.
OPERATING TIPS
*Heating Performance
●This air conditioner operates on the heat-pump principle,
absorbing heat from outdoor air and transferring that heat
indoors. As a result, the operating performance is reduced
as outdoor air temperature drops. If you feel that insuffi-
cient heating performance is being produced, we recom-
mend you use this air conditioner in conjunction with
another kind of heating appliance.
●Heat-pump air conditioners heat your entire room by
recirculating air throughout the room, with the result that
some time may be required after first starting the air con-
ditioner until the room is heated.
Cooling/Heating Priority (HEAT PUMP MODEL only)
●If another indoor unit in the same refrigerant system is
already operating in the cooling mode or dry mode, heat-
ing mode settings cannot be performed. (Operation in
the cooling or dry mode will continue.)
●If another indoor unit in the same refrigerant system is
already operating in the heating mode, cooling mode or
dry mode settings cannot be performed. (Operation in
the heating mode will continue.)
Operation and Performance
*Microcomputer-controlled Automatic Defrosting
When using the Heating mode under conditions of low out-
door air temperature high humidity, frost may form on the
outdoor unit, resulting in reduced operating performance.
In order to prevent this kind of reduced performance, this
unit is equipped with a Microcomputer-controlled Automatic
Defrosting function. If frost forms, the air conditioner will
temporarily stop, and the defrosting circuit will operate
briefly (for about 2 to 16 minutes).
During Automatic Defrosting operation, the OPERATION in-
dicator lamp (red) will flash.
Oil Recovery Operation
Periodically, the oil recovery operation is performed in or-
der to return compressor oil to the outdoor unit. Operation
is stopped during this oil recovery operation. During oil re-
covery operation, the OPERATION indicator lamp (red) will
flash.
Low Ambient Cooling
When the outdoor temperature drops, the outdoor unit’s fans
may switch to Low Speed, or one of the fans may stop inter-
mittently.
Instructions relating to heating (*) are applicable to “HEAT PUMP MODEL”and “HEAT RECOVERY MODEL”.
En-7
AS 18TF AS 24TF AS 30TF
220-240 V~50 Hz
5.30-5.40 6.80-6.90 7.80-8.00
5.50-5.60 7.70-7.80 8.55-8.80
320
1,120
220
16
OPERATING TIPS
Instructions relating to heating (*) are applicable to “HEAT PUMP MODEL”and “HEAT RECOVERY MODEL”.
●If the air conditioner is used under higher temperature conditioner than those listed, the built-in protection circuit may
operate to prevent internal circuit damage. Also, during Cooling and Dry modes, if the unit is used under conditions of
lower temperature than those listed above, the heat-exchanger may freeze, leading to water leakage and other damage.
●Do not use this unit for any purposes other than the Cooling, *Heating, Dehumidifying, and air-circulation of rooms in
ordinary dwellings.
SPECIFICATIONS
Temperature and Humidity Range
MODEL
POWER
COOLING CAPACITY [kW]
HEATING CAPACITY [kW]
DIMENSIONS & WEIGHT
HEIGHT [mm]
WIDTH [mm]
DEPTH [mm]
WEIGHT [kg]
●Acoustic Noise Information : The maximum sound pressure level is less than 70 dB (A) for both indoor unit and outdoor
unit.
According to IEC 704-1 and ISO 3744.
Cooling/Dry Mode
About 21 to 52 °C
About –15 to 52 °C
About –15 to 52 °C
About 18 to 32 °C
About 80 % or less
If the unit is used for long pe-
riods under high-humidity
conditions, condensation
may form on the surface of
the indoor unit, and drip onto
the floor or other objects un-
derneath.
*Heating Mode
—
About –15 to 21 °C
About 30 °C or less
—
COOLING ONLY MODEL
HEAT PUMP MODEL
HEAT RECOVERY MODEL
Outdoor
temperature
Indoor temperature
Indoor humidity
Refrigerant
R22
R407C
R22
R407C

This manual suits for next models

2

Other Fujitsu Air Conditioner manuals

Fujitsu ARXG22KMLA Service manual

Fujitsu

Fujitsu ARXG22KMLA Service manual

Fujitsu ASY25UI-LU User manual

Fujitsu

Fujitsu ASY25UI-LU User manual

Fujitsu ASY17AS User manual

Fujitsu

Fujitsu ASY17AS User manual

Fujitsu ABT series User manual

Fujitsu

Fujitsu ABT series User manual

Fujitsu AIRSTAGE ARTH24KHTA User manual

Fujitsu

Fujitsu AIRSTAGE ARTH24KHTA User manual

Fujitsu Inverter Halcyon ASU9RLS User manual

Fujitsu

Fujitsu Inverter Halcyon ASU9RLS User manual

Fujitsu AUXG45LRLB Original operating manual

Fujitsu

Fujitsu AUXG45LRLB Original operating manual

Fujitsu AUTH09KVLA User manual

Fujitsu

Fujitsu AUTH09KVLA User manual

Fujitsu ASUG12LZBS User manual

Fujitsu

Fujitsu ASUG12LZBS User manual

Fujitsu ARYG24LMLA User manual

Fujitsu

Fujitsu ARYG24LMLA User manual

Fujitsu ABT24AG User manual

Fujitsu

Fujitsu ABT24AG User manual

Fujitsu Lifestyle Series User manual

Fujitsu

Fujitsu Lifestyle Series User manual

Fujitsu Airstage VR-II ARUL7TLAV User manual

Fujitsu

Fujitsu Airstage VR-II ARUL7TLAV User manual

Fujitsu AU*A12LALN Original operating manual

Fujitsu

Fujitsu AU*A12LALN Original operating manual

Fujitsu AST20AG User manual

Fujitsu

Fujitsu AST20AG User manual

Fujitsu ASYG07LMCE User manual

Fujitsu

Fujitsu ASYG07LMCE User manual

Fujitsu AS*B24LDC Series User manual

Fujitsu

Fujitsu AS*B24LDC Series User manual

Fujitsu AUXG24KRLB Service manual

Fujitsu

Fujitsu AUXG24KRLB Service manual

Fujitsu AOTS18LDL User manual

Fujitsu

Fujitsu AOTS18LDL User manual

Fujitsu ASTG18KMCA User manual

Fujitsu

Fujitsu ASTG18KMCA User manual

Fujitsu FG Nordic ABYG36-54LRTA User manual

Fujitsu

Fujitsu FG Nordic ABYG36-54LRTA User manual

Fujitsu Halcyon ASU9RLS2 Service manual

Fujitsu

Fujitsu Halcyon ASU9RLS2 Service manual

Fujitsu AUU7RLF Service manual

Fujitsu

Fujitsu AUU7RLF Service manual

Fujitsu Compact Wall Mounted Type User manual

Fujitsu

Fujitsu Compact Wall Mounted Type User manual

Popular Air Conditioner manuals by other brands

Taurus Alpatec R750 manual

Taurus Alpatec

Taurus Alpatec R750 manual

CH CH-PDH12AC1 owner's manual

CH

CH CH-PDH12AC1 owner's manual

Olimpia splendid maeStro Pro Instructions for installation, use and maintenance

Olimpia splendid

Olimpia splendid maeStro Pro Instructions for installation, use and maintenance

Airwell Dakota DCI Series Service manual

Airwell

Airwell Dakota DCI Series Service manual

Mitsubishi Electric Mr.SLIM MS24WN Service manual

Mitsubishi Electric

Mitsubishi Electric Mr.SLIM MS24WN Service manual

Gree GKHD(12)ABND3A2AI Service manual

Gree

Gree GKHD(12)ABND3A2AI Service manual

Mitsubishi Electric PUZ-ZM200YKA2-ET Service manual

Mitsubishi Electric

Mitsubishi Electric PUZ-ZM200YKA2-ET Service manual

Carrier 38BA Installation, Start-Up and Service Instructions

Carrier

Carrier 38BA Installation, Start-Up and Service Instructions

Carrier ASBFE600BA owner's manual

Carrier

Carrier ASBFE600BA owner's manual

MegaLife NEBULA GREEN R32 Use and Installation Instructions

MegaLife

MegaLife NEBULA GREEN R32 Use and Installation Instructions

McQuay MDB075D owner's manual

McQuay

McQuay MDB075D owner's manual

Daikin VRV III REMQ8P8Y1B installation manual

Daikin

Daikin VRV III REMQ8P8Y1B installation manual

Frigicoll MKD-V300 Installation & owner's manual

Frigicoll

Frigicoll MKD-V300 Installation & owner's manual

Sanyo KS1822 Service manual

Sanyo

Sanyo KS1822 Service manual

Delphi OM 611 DELA installation instructions

Delphi

Delphi OM 611 DELA installation instructions

Carrier ROOM AIR CONDITIONER operating manual

Carrier

Carrier ROOM AIR CONDITIONER operating manual

Fuji Electric RD-60FA Service manual

Fuji Electric

Fuji Electric RD-60FA Service manual

Sharp AH-AP18DR Service manual

Sharp

Sharp AH-AP18DR Service manual

manuals.online logo
manuals.online logoBrands
  • About & Mission
  • Contact us
  • Privacy Policy
  • Terms and Conditions

Copyright 2025 Manuals.Online. All Rights Reserved.