Full Boar FBAC-12160 User manual

KNOW YOUR PRODUCT
• 145PSI MAX PRESSURE
• 160L/MIN MAX AIR DELIVERY
• QUICK RELEASE NITTO STYLE FITTING
• LIGHTWEIGHT PORTABLE DESIGN
INSTRUCTION MANUAL
WARNING: Read all safety warnings and all instructions. Failure to follow the
warnings and instructions may result in electric shock, fire and/or serious injury.
Save all warnings and instructions for future reference.
0621
12V AIR
COMPRESSOR

2
Power: 12V DC
Max. Current: 45A
Max. Air Delivery (MAD): 160L/min
Max. Working Pressure: 8bar (116psi)
Max. Air Pressure: 10bar (145psi)
Max. Working Time: 30 minutes at 40psi
Cylinder(s): 1 x 60mm Bore
Hose Length: 8m
Weight: 8.75 kg
Max. Noise: 85dB
SPECIFICATIONS - MODEL NO. FBAC-12160
KNOW YOUR PRODUCT
8m Rubber Hose with Gauge
1. Pressure Gauge
2. Tire Ination Connection (Schrader)
3. High Pressure Rubber Hose (8m)
4. Female Nitto Fitting
5. 3 x Ination Attachments
6. 40cm Heat Protection Air Hose
0
25
50
75
100
125
150
0
(1)00
(3)00
(5)00
(7)00
(9)00
2
46
8
10
Lb/in²
(PSI)
kPA
(BAR)
PRESSURE GAUGE
kg/cm²
2
4
3
1
5
6

3
KNOW YOUR PRODUCT
Air Compressor
1. Carry Handle
2. Circuit Breaker Button
3. Regulated Pressure Nitto Outlet
4. On/O Switch
5. 12V DC Battery Clips
6. Base
7. Suction Cup Rubber Feet
8. Pressure Release Value
6
2
5
3
4
7
1
8

4
SPECIFICATIONS...................................................... Page 02
KNOW YOUR PRODUCT........................................ Page 02
INTRODUCTION....................................................... Page 05
SAFETY INSTRUCTIONS........................................ Page 05
ASSEMBLY..................................................................Page 10
CONTROLS............................................................... Page 12
OPERATION...............................................................Page 13
MAINTENANCE........................................................ Page 15
TROUBLE SHOOTING............................................. Page 16
DESCRIPTION OF SYMBOLS................................ Page 17
CONTENTS................................................................ Page 17
WARRANTY................................................................ Page 18
TABLE OF CONTENTS

5
Congratulations on purchasing a Full Boar 12V 160L/M Air
Compressor.
Your 12V Air Compressor has been designed to inflate products up
to 145 psi and is ideal for camping, sports and 4WD applications.
INTRODUCTION
ELECTRICAL SAFETY
Read and understand the manual prior to operating this tool.
Save these instructions and other documents supplied with this tool
for future reference.
The electric motor has been designed for 12V only. Always check
that the power supply corresponds to the voltage on the rating
plate.
If the cables or air hoses are damaged, it must be replaced by an
electrician or a power tool repairer in order to avoid a hazard.

6
1. Work area safety
a. Keep work area clean and well lit. Cluttered or dark areas invite accidents.
b. Do not operate power tools in explosive atmospheres, such as in the presence of flammable
liquids, gases or dust. Power tools create sparks which may ignite the dust or fumes.
c. Keep children and bystanders away while operating a power tool. Distractions can cause you to
lose control.
2. Electrical safety
a. Power tool plugs must match the outlet. Never modify the plug in any way. Do not use any
adapter plugs with earthed (grounded) power tools. Unmodified plugs and matching outlets will
reduce risk of electric shock.
b. Avoid body contact with earthed or grounded surfaces, such as pipes, radiators, ranges and
refrigerators. There is an increased risk of electric shock if your body is earthed or grounded.
c. Do not expose power tools to rain or wet conditions. Water entering a power tool will increase the
risk of electric shock.
d. Do not abuse the cord. Never use the cord for carrying, pulling or unplugging the power tool.
Keep cord away from heat, oil, sharp edges or moving parts. Damaged or entangled cords increase
the risk of electric shock.
e. When operating a power tool outdoors, use an extension cord suitable for outdoor use. Use of a
cord suitable for outdoor use reduces the risk of electric shock.
3. Personal safety
a. Stay alert, watch what you are doing and use common sense when operating a power tool. Do
not use a power tool while you are tired or under the influence of drugs, alcohol or medication. A
moment of inattention while operating power tools may result in serious personal injury.
b.Use personal protective equipment. Always wear eye protection. Protective equipment such as dust
mask, non-skid safety shoes, hard hat, or hearing protection used for appropriate conditions will reduce
personal injuries.
c. Prevent unintentional starting. Ensure the switch is in the off-position before connecting to
power source and/or battery pack, picking up or carrying the tool. Carrying power tools with your
finger on the switch or energising power tools that have the switch on invites accidents.
d. Remove any adjusting key or wrench before turning the power tool on. A wrench or a key left
attached to a rotating part of the power tool may result in personal injury.
e. Do not overreach. Keep proper footing and balance at all times. This enables better control of the
power tool in unexpected situations.
f. Dress properly. Do not wear loose clothing or jewellery. Keep your hair, clothing and gloves away
from moving parts. Loose clothes, jewellery or long hair can be caught in moving parts.
g. If devices are provided for the connection of dust extraction and collection facilities, ensure
these are connected and properly used. Use of dust collection can reduce dust-related hazards.
h. Do not let familiarity gained from frequent use of tools allow you to become complacent and
ignore tool safety principles. A careless action can cause severe injury within a fraction of a second.
4. Power tool use and care
a. Do not force the power tool. Use the correct power tool for your application. The correct power tool
will do the job better and safer at the rate for which it was designed.
GENERAL POWER TOOL SAFETY WARNINGS
WARNING! Read all safety warnings and instructions. Failure to follow all
instructions listed below may result in electric shock, fire and/or serious injury. The
term ‘Power Tool’ in all of the warnings listed below refers to your mains operated
(corded) power tool or battery operated (cordless) power tool.

7
GENERAL POWER TOOL SAFETY WARNINGS
b. Do not use the power tool if the switch does not turn it on and off. Any power tool that cannot be
controlled with the switch is dangerous and must be repaired.
c. Disconnect the plug from the power source and/or the battery pack from the power tool before
making any adjustments, changing accessories, or storing power tools. Such preventive safety
measures reduce the risk of starting the power tool accidentally.
d. Store idle power tools out of the reach of children and do not allow persons unfamiliar with the
power tool or these instructions to operate the power tool. Power tools are dangerous in the hands
of untrained users.
e. Maintain power tools. Check for misalignment or binding of moving parts, breakage of parts and
any other condition that may affect the power tool’s operation. If damaged, have the power tool
repaired before use. Many accidents are caused by poorly maintained power tools.
f. Keep cutting tools sharp and clean. Properly maintained cutting tools with sharp cutting edges are
less likely to bind and are easier to control.
g. Use the power tool, accessories and tool bits etc. in accordance with these instructions, taking
into account the working conditions and the work to be performed. Use of the power tool for
operations different from those intended could result in a hazardous situation.
h. Keep handles and grasping surfaces dry, clean and free from oil and grease. Slippery handles and
grasping surfaces do not allow for safe handling and control of the tool in unexpected situations.
5. Service
a. Have your power tool serviced by a qualified repair person using only identical replacement
parts. This will ensure that the safety of the power tool is maintained.

8
This appliance is not intended for use by young or infirm persons unless supervised by
a responsible person to ensure that they can use the appliance safely. Young children
should be supervised to ensure that they do not play with the appliance.
¥ To reduce the risk of fire or explosion, never spray flammable liquids in a confined area. It is normal
for the compressor motor and pressure switch to produce sparks during use. If sparks come into
contact with petrol vapours or solvents, they may ignite the vapours and cause a fire or explosion.
¥ Always operate the compressor in a well ventilated area. Do not smoke while spraying. Do not spray
where sparks or flames are present. Keep the compressor as far away from the spray area as possible.
¥ The solvents trichloroethane and methylene chloride can chemically react with the aluminium used
in some paint spray guns and form an explosion. If these solvents are used, ensure that only stainless
steel spray equipment is connected. The compressor is not affected by the use of these solvents.
¥ Never directly inhale the compressed air produced by a compressor and do not use it for charging
breathing tanks.
¥ Do not use welding equipment in close proximity to the compressor. Do not weld anything to the air
tank of the compressor: this could dangerously weaken the tank and will void the warranty.
¥ Do not use the compressor outdoors when it is raining or on a wet surface; either situation could
cause an electric shock.
¥ Always shut off the compressor after use and before servicing.
¥ Check the maximum pressure rating of any tools or accessories that you intend using with the
compressor. The output pressure of the air from the compressor must be regulated so that it never
exceeds the rated pressure of the tool or accessory.
¥ To avoid the risk of burns and injury from moving parts, do not operate the compressor with the
safety shield removed. Allow hot parts to cool before handling or servicing.
¥ Be certain to read all the labels on the containers of paint or other materials to be sprayed. Closely
follow all safety instructions. Use a respirator mask if there is a chance that you might otherwise inhale
the spray material. Carefully check the effectiveness of any respirator mask you intend using.
¥ Always wear safety goggles or glasses when using the air compressor. Never point the nozzle of an
accessory towards any part of your body or towards another person.
¥ Keep the compressor at least 300mm from the nearest wall to ensure adequate ventilation for cooling
purposes.
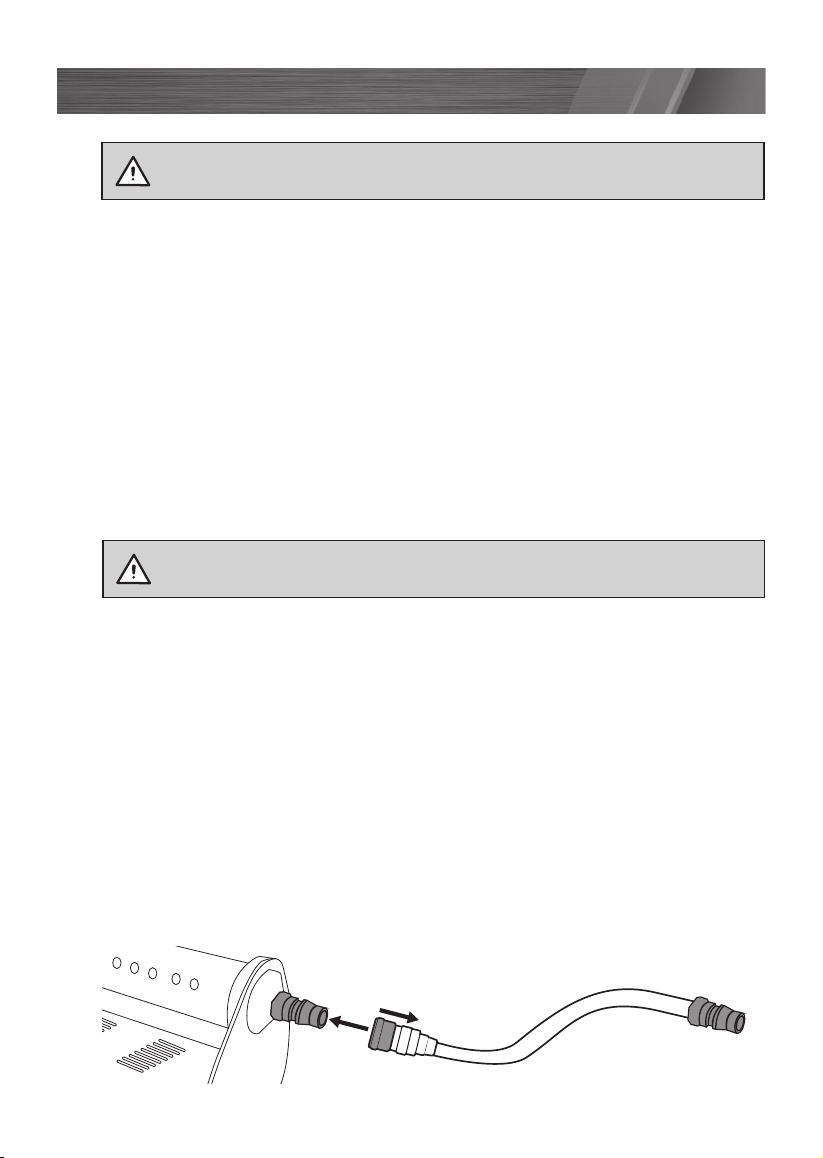
¥ Protect the air hose and cordset from damage. Inspect for weak or worn spots regularly and replace if
necessary.
¥ After long working periods external metal parts could be hot.
¥ Always press the on/off button down to switch off the compressor before switching off the power or
removing the power plug.
¥ After using the compressor, switch off the on/off button, disconnect the power supply.
Wear goggles, wear ear muffs, wear a breathing mask
Never apply the outlet air of this compressor directly on to any part of a persons body. Do not attempt to
block the air outlet with your finger or any part of your body.
The tool must be used only for its prescribed purpose. Any use other than those mentioned in this Manual
will be considered a case of misuse. The user and not the manufacturer shall be liable for any damage or
AIR COMPRESSOR SAFETY WARNINGS
WARNING! Before connecting a tool to a power source (mains switch, power
point, receptacle, outlet, etc.) be sure that the voltage supply is the same as that
specified on the nameplate of the tool. A power source with a voltage greater
than that specified for the tool can result in serious injury to the user, as well as
damage to the tool. If in doubt, do not plug in the tool. Using a power source
with a voltage less than the nameplate rating is harmful to the motor.

9
AIR COMPRESSOR SAFETY WARNINGS
injury resulting from such cases of misuse.
The manufacturer shall not be liable for any changes made to the tool nor for any damage resulting from
such changes.
Even when the tool is used as prescribed it is not possible to eliminate all residual risk factors. The
following hazards may arise in connection with the tools construction and design:
¥ Damage to the lungs if an effective breathing mask is not worn.
¥ Damage to hearing if effective earmuffs are not worn.
¥ Damage to the eyes if effective safety goggles or shield are not worn.
WARNING! In the event that an air line is cut or broken, the air supply must be
turned off at the compressor. A broken air line which is not supported is extremely
dangerous and can whip around very quickly, both with the capability of striking
people and blowing foreign particles into the air.
Do not attempt to catch the air line but immediately keep bystanders well clear,
turn off the compressor at the On/Off Switch, and then remove the hose from the
compressor.

10
KNOW YOUR PRODUCT
Pre-Setup Checks
Examine the machine for signs of transit damage. If there are any signs of damage, please
contact the Customer Support on:
Australia 1800 951 371
New Zealand 0800 647 840
¥ The compressor should be set up near the working area.
¥ Make sure the intake air is dry and dust-free.
¥ Do not set up the compressor in damp or wet areas.
¥ The compressor may only be used in suitable areas (with good ventilation and an
ambient temperature from 5¼C to +40¼C). There must be no dust, acids, vapours,
explosive gases or flammable gases in the room.
Attaching Air Tools
1. Align the Nitto head on the short 40cm air hose with the pressure outlet on the air
compressor.
2. Press the air hose head into the outlet coupling until it clicks into place.
Note: If the Nitto coupling is tight and does not click into place, pull the sleeve back on the
female Nitto head and then press the fittings together until they click into place.
3. Repeat the same process above to connect the 8m air hose onto the male end of the
short 40cm air hose. You are now ready to attach your air tools
ASSEMBLY
WARNING! Ensure the tool is turned off and disconnected from the power
supply before performing any of the following operations.
WARNING! Ensure the tool is turned off and disconnected from the power
supply before performing any of the following operations.

ASSEMBLY
Disconnecting Air Tools
1. To remove an air tool from the unit, retract the sleeve on the female Nitto fitting and
disconnect the air hose from the air compressor.
2. Repeat the same procedure with the air tool and air hose.
WARNING! Ensure you have a firm grip on the air hose when disconnecting it from
the air compressor, as pressurised air in the tank may cause it to whip around and inflict
injury or damage.
OPERATION
WARNING! Before connecting the compressor to the power source, check for broken
components and accessories. Also check for damage to the hose. Do not proceed if
any component or part shows sign of wear or damage. Replace the part or take it to an
authorised repairer.
WARNING! Keep the vehicle running while using the air compressor to prevent the
vehicles battery from going flat.
WARNING! Ensure the battery clamp cords do not get tangle in any rotating parts
within the engine bay. Take car not to touch any other metal parts within the vehicle
with the battery clamps as these can lead to electrical shorts and damage the air
compressor.
Overload Reset Button
If the compressor overloads the air compressor automatically
shuts off during operation. In this case, remove the source of
the overload and press the overload reset button to resume
operation.
If the compressor stops again immediately after resetting
the overload, stop using the air compressor and take it to an
qualified repairer.
Overload Reset Button

12
KNOW YOUR PRODUCTOPERATION
Starting The Compressor
Before attaching the air compressor’s power cord to a 12V power source, check to make
sure the On/Off switch is in the Off position. Ensure the compressor is in an upright
position.
1. Attach the positive battery clamp to (Red) to the positive terminal of the battery.
2. Attach the negative battery clamp to (Black) to the negative terminal of the battery.
3. Turn the compressor on by flicking the power switch to the On position.
+ -
2.
1.
+ -
ON OFF
WARNING! Please wear ear protection when the compressor is in use.

13
KNOW YOUR PRODUCT
Switching The Compressor On/Off
1. To switch the compressor on, push the rocker switch into the ON position. The compressor
should turn on and air will begin to flow.
2. To switch the compressor off, push the rocker switch into the OFF position.
CONTROLS
WARNING! Do not leave the compressor unattended while the On/Off Switch is
in the ‘On’ position.
In-Line Pressure Gauge
The in-line pressure gauge allows you to conveniently monitor the air pressure in the object
during ination/deation without needing to change between accessories.
Note: You will need to momentarily halt ination/deation in order to obtain accurate pressure
readings.
0
25
50
75
100
125
150
0
(1)00
(3)00
(5)00
(7)00
(9)00
2
46
8
10
Lb/in²
(PSI)
kPA
(BAR)
PRESSURE GAUGE
kg/cm²
ON OFF

14
Shutting Down The Compressor
Do not turn the air compressor off by disconnecting it from the power source as it may
result in damage to the motor.
1. Turn the compressor off by pushing the power switch to the Off position.
2. Disconnect the black (negative) power cord then the red (positive) from the 12V power
source.
3. Remove the air hose and any other connected accessories.
OPERATION
ON OFF
+ -
1.
2.
Safety Relief Valve
The safety relief valve has been set for the highest permitted pressure of the tank. It is
prohibited to adjust the safety relief valve or to remove its seal. The safety relief valve works
automatically and requires no maintenance by the user.
WARNING! Keep your face away from the Safety Relief Valve. Air can be
discharged at high pressure.
WARNING! Do not attempt to adjust/modify the Safety Relief Valve in any way.
The Safety Relief Valve installed on this air compressor is designed to automatically
release pressure in case of excess pressure build up in the tank. Air can be
discharged at high pressure.
MAINTENANCE

15
MAINTENANCE
Cleaning
1. Keep the safety devices free of dirt and dust as much as possible. Wipe the equipment
with a clean cloth or blow it with compressed air at low pressure.
2. We recommend that you clean the appliance immediately after you use it.
3. Clean the appliance regularly with a damp cloth. Do not use cleaning agents or solvents;
these may be aggressive to the plastic parts in the appliance. Ensure that no water can get
into the interior of the appliance.
4. You must disconnect the hose and any spraying tools from the compressor before
cleaning. Do not clean the compressor with water, solvents or the like.
Storage
Switch off the compressor and place in soft carry bag along with any additional attachments.
Store the compressor only in a dry location which is not accessible to unauthorised persons.
Supply Cords
If the replacement of the supply cord is necessary, this has to be done by the manufacturer
or his agent in order to avoid a safety hazard.
Note: TB Imports will not be responsible for any damage or injuries caused by the repair of
the tool by an unauthorised person or by mishandling of the tool.
WARNING! Before cleaning your air compressor or carrying out any maintenance
procedure, make sure that it is disconnected from the power supply to prevent
accidental starting.

16
CARING FOR THE ENVIRONMENT
Power tools that are no longer usable should not be
disposed of with household waste but in an environmentally
friendly way. Please recycle where facilities exist. Check with
your local council authority for recycling advice.
Recycling packaging reduces the need for landfill and raw
materials. Reuse of recycled material decreases pollution in the
environment. Please recycle packaging where facilities exist.
Check with your local council authority for recycling advice.
TROUBLE SHOOTING
Symptom Possible Cause Suggested Solution
The compressor does
not start
No power supply Check the power supply, the
power cord and the battery
connections
Outside temperature is too
low
Never operate with an
outside temperature of
below 5¼
Battery Is flat Turn the vehicle on and
charge the battery
Motor is overheated Allow the motor to cool
down. If necessary, remedy
the cause of the overheating
The compressor starts but
there is no pressure
The seals are damaged Check the seals and have
any damaged seals replaced
by a service centre
The compressor starts,
pressure is shown on the
pressure gauge, but no
pressure to the air tool
Loose hose connections Check the compressed air
hose and tools and replace
if necessary
Leak in a quick-lock coupling Check the quick-lock
coupling and replace if
necessary

17
KNOW YOUR PRODUCT
VVolts Hz Hertz
~Alternating current WWatts
Revolutions or
reciprocation per minute
no No load speed
Warning
Wear hearing protection
Read instruction manual
Beware of electrical voltage
Beware of hot parts.
Sound power level
Pressure rating
Do not open the outlet before
the air hose is attached
bar
L
/min
Litres
Electrical Emissions
Conformity (EMC)
No protection against ingress
from water
lP20
Warning! The equipment is
remote-controlled and may
start-up without warning.
DESCRIPTION OF SYMBOLS
CONTENTS
Distributed by:
TB Imports
AUSTRALIA (Head Office)
25 Fox Drive, Dandenong South Victoria, Australia, 3175
Telephone: 1800 951 371 (Aus), 0800 647 840 (NZ)
1. 8m Rubber Hose with Gauge
2. 3 Inflation Attachments
3. Soft Cary Bag
4. Single Cylinder Air Compressor
5. 40cm Heat Protective Air Hose

18
WARRANTY EXCLUSIONS
The following actions will result in the warranty being void.
If the tool has been operated on a supply voltage other than that specified on the tool.•
If the tool shows signs of damage or defects caused by or resulting from abuse, accidents•
or alterations.
Failure to perform maintenance as set out within the instruction manual.•
If the tool is disassembled or tampered with in any way.
The warranty excludes damage resulting from product misuse or product neglect.
•
•
This warranty is given by TB Imports.
ABN: 17 050 731 756
Ph. 1800 951 371 (AUS)
0800 647 840 (NZ)
Australia/New Zealand (Head Office)
25 Fox Drive, Dandenong South, Victoria, Australia 3175
FB3
WARRANTY
TO ENSURE A SPEEDY RESPONSE PLEASE HAVE THE MODEL NUMBER AND DATE OF
PURCHASE AVAILABLE. A CUSTOMER SERVICE REPRESENTATIVE WILL TAKE YOUR CALL
AND ANSWER ANY QUESTIONS YOU MAY HAVE RELATING TO THE WARRANTY POLICY
OR PROCEDURE.
The benefits provided under this warranty are in addition to other rights and remedies which
are available to you under law. The warranty covers manufacturer defects in materials,
workmanship and finish under normal use.
1 YEAR WARRANTY
Your product is guaranteed for a period of 12 months from the original date of purchase.
If a product is defective it will be repaired in accordance with the terms of this warranty.
Warranty excludes consumable parts, for example: wheels, bearings.
Our goods come with guarantees that cannot be excluded under Australian Consumer law &
Consumer Guarantees Act 1993 (NZ). You are entitled to a replacement or refund for a major
failure and to compensation for other reasonably foreseeable loss or damage. You are also
entitled to have the goods repaired and replaced if the goods fail to be of acceptable quality
and the failure does not amount to a major failure.
Australia 1800 951 371
New Zealand 0800 647 840
YOUR WARRANTY FORM SHOULD BE RETAINED BY YOU AT ALL TIMES. IN ORDER TO MAKE A
CLAIM UNDER THIS WARRANTY YOU MUST RETURN THE PRODUCT TO YOUR NEAREST
BUNNINGS WAREHOUSE (see www.bunnings.com.au or www.bunnings.co.nz for store locations)
WITH YOUR BUNNINGS REGISTER RECEIPT. PRIOR TO RETURNING YOUR PRODUCT FOR
WARRANTY PLEASE TELEPHONE OUR CUSTOMER SERVICE HELPLINE:
Table of contents
Other Full Boar Air Compressor manuals
Popular Air Compressor manuals by other brands

Native Instruments
Native Instruments VC 160 quick start guide

Michelin
Michelin MB 10 Instruction manual and safety instructions

Ashly
Ashly LIMITER/COMPRESSORS CL-100 owner's manual

Makita
Makita MAC700 owner's manual

Mouvex
Mouvex B200 quick start guide

Boss Industries
Boss Industries Bullet 2 Service and maintenance user manual

Bambi
Bambi PT5 Operator's handbook

EINHELL
EINHELL TE-AC 24 Silent Original operating instructions

EKOM
EKOM DK50 Z Installation, operation & maintenance manual

Danfoss
Danfoss MLZ Series instructions

Emerson
Emerson Copeland 4MTL-05 Application guidelines

Corken
Corken F291 Installation, operation & maintenance manual