Full Boar FBWDV-40PTU User manual

KNOW YOUR PRODUCT
INSTRUCTION MANUAL
WARNING: Read all safety warnings and instructions before use. Failure to
follow the warnings and instructions may result in electric shock, fire and/or
serious injury. Save these instructions for future reference.
0717
• 40L STAINLESS
STEEL TANK
• 1150W MOTOR
• TRANSPORT
TROLLEY
• 3M SUCTION HOSE
WET
& DRY
VACUUM

2 3
KNOW YOUR PRODUCT (cont.)SPECIFICATIONS - MODEL NO. FBWDV-40PTU
KNOW YOUR PRODUCT
1. Main handle
2. Carry handle
3. ON/OFF/Automatic
switch
4. Automatic power
outlet
5. Cable hook
6. Motor securing clip
7. Suction hose connection
8. Tank
9. Wheels
10. Water drain outlet
11. Castors
12. Motor
13. Filter cage
14. Safety float valve
15. Blow outlet
16. Accessory holder
17. Suction tube
18. Tube handle
19. Hose adaptor
20. Crevice tool
21. Floor tool
22. Upholstery tool
23. Air regulator
24. Pleated filter (dry)
25. Cap
26. Dust bag
27. Foam filter (wet)
28. 2 x covers for fitting the
wheels
29. 2 x R-clips for fitting the
wheels
30. 4 x washers for fitting
the wheels
31. 2 x bolts for fitting the
main handle
32. Axle for fitting the
wheels
33. Suction hose
1
1
2
5
21
22
19
20 24
26
27
30 3129
23
25
18
10
4
15
11
13
14
16
3
5
8
6
7
9
11
28
9
17
32
Mains voltage: 220 - 240V ~ 50Hz
Input power: 1150W
Power outlet max.: 1450W
Psum: 2600W
Suction power max.: 230 mbar
Tank capacity: 40 l
IP rating IP24
Weight: 11 kg
12
33

4 5
SPECIFICATIONS....................................................... Page 02
KNOW YOUR PRODUCT........................................... Page 02
INTRODUCTION........................................................ Page 05
SAFETY INSTRUCTIONS........................................... Page 05
ASSEMBLY.................................................................. Page 09
SUCTION TOOLS.......................................................Page 12
OPERATION............................................................... Page 13
MAINTENANCE......................................................... Page 15
DESCRIPTION OF SYMBOLS.....................................Page 16
CONTENTS................................................................ Page 17
WARRANTY................................................................ Page 20
TABLE OF CONTENTS INTRODUCTION
WARNING! When using mains-powered equipment, basic safety precautions,
including the following, should always be followed to reduce risk of fire, electric
shock, personal injury and material damage.
SAFETY INSTRUCTIONS
ELECTRICAL SAFETY
Read and understand the manual prior to operating this appliance.
Save these instructions and other documents supplied with this appliance for future
reference.
Congratulations on purchasing a Full Boar wet and
dry vac.
It has been designed for wet and dry vacuuming using
the appropriate filter. The appliance is not suitable for
the vacuuming of combustible, explosive or harmful
substances.
Read the whole manual carefully and make sure you know how to switch the appliance off in
an emergency, before operating.
Save these instructions and other documents supplied with this appliance for future
reference.
Before you connect the equipment to the mains supply make sure that the data on the rating
plate is identical to the mains data.
If the supply cord is damaged, it must be replaced by an electrician or an appliance service
centre, in order to avoid a hazard.
Using an extension lead
Always use an approved extension lead suitable for the power input of this appliance. Before
use, inspect the extension lead for signs of damage, wear and ageing. Replace the extension
lead if damaged or defective. When using an extension lead on a reel, always unwind the
lead completely. Use of an extension lead not suitable for the power input of the appliance,
or which is damaged or defective may result in a risk of fire and electric shock.

6 7
GENERAL SAFETY WARNINGS WET AND DRY VACUUM SAFETY WARNINGS
SAVE THESE INSTRUCTIONS
¥Important: Read the operating instructions before assembling and using the appliance
for the first time.
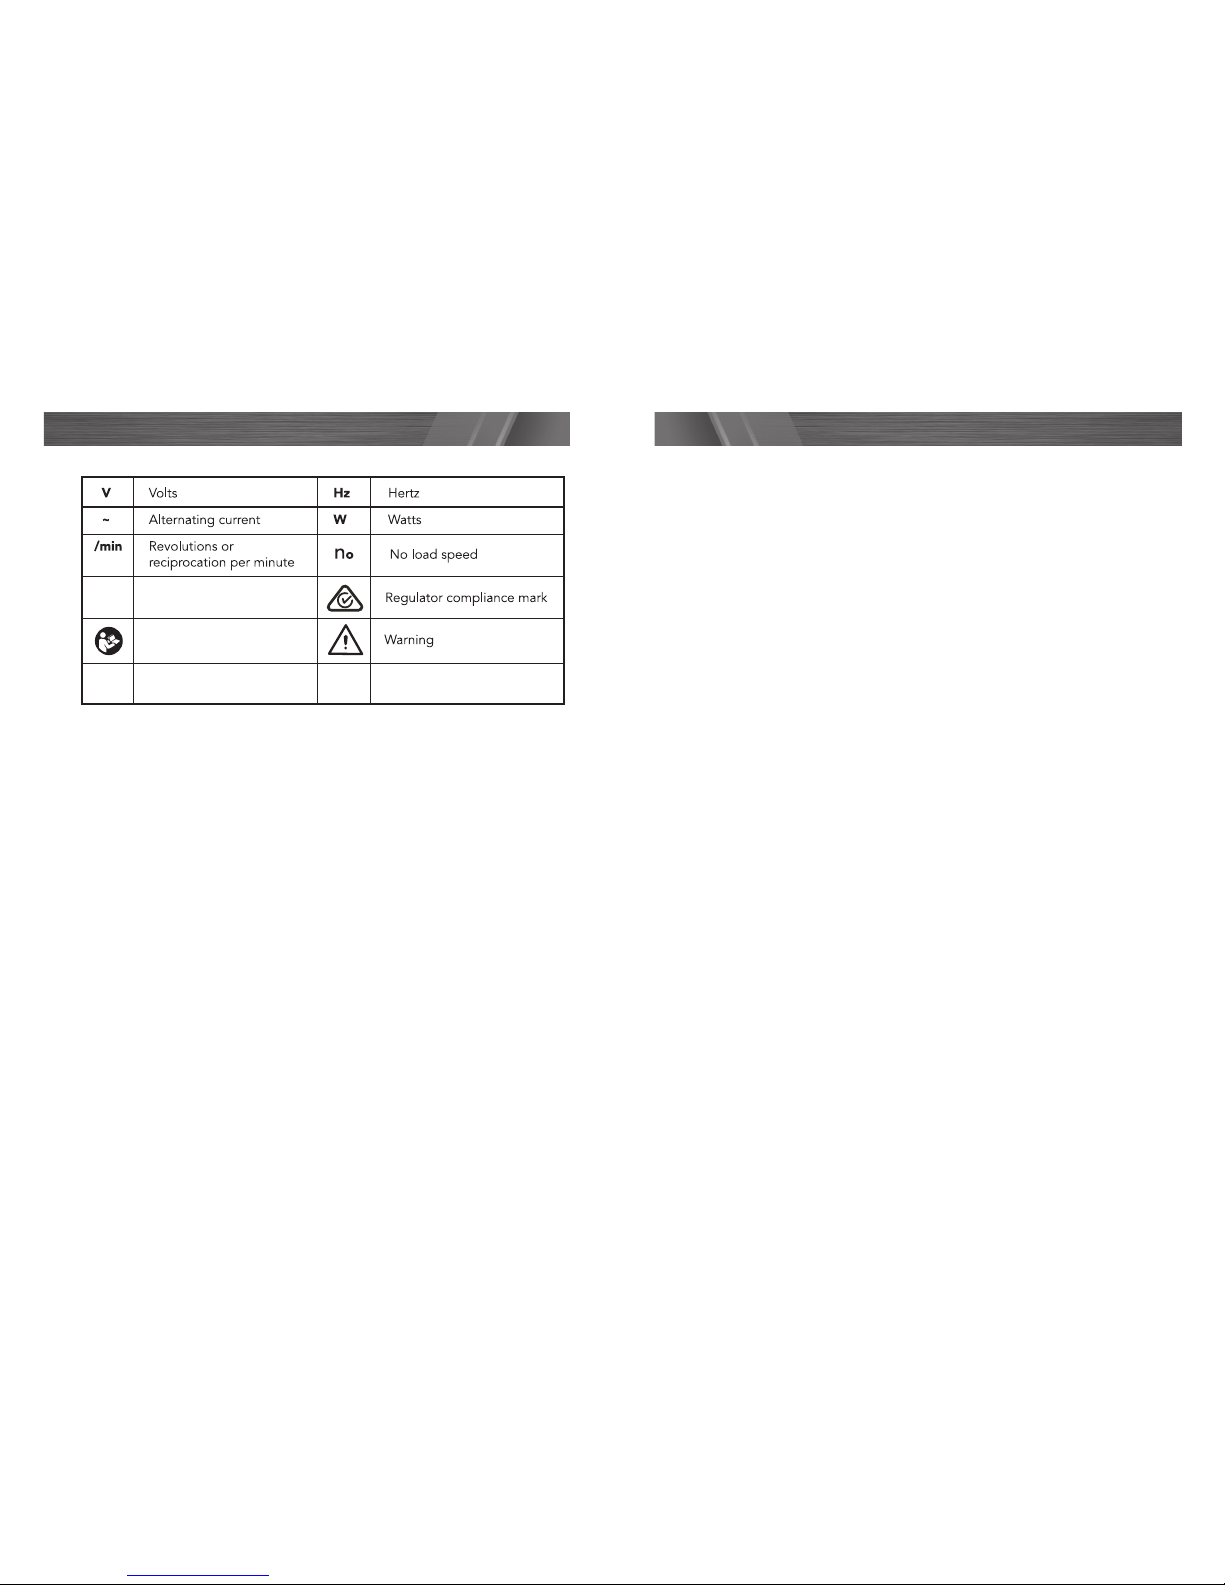
¥Check that the mains voltage is the same as the mains voltage specified on the rating
plate.
¥Pull out the power plug in the following circumstances: Whenever the appliance is not in
use, before opening the appliance and before all cleaning and maintenance work.
¥Never clean the appliance with solvents.
¥Never pull the plug out of the socket by pulling the cable.
¥Never leave the appliance unattended when operational.
¥Keep away from children.
¥Take care to ensure that the power cable does not get damaged by being run over,
crushed, pulled or suchlike.
¥Do not use the machine if the power cable is in a less than perfect condition.
¥If the power cable has to be replaced, the replacement must comply with the design
specifications of the manufacturer. Power cable: H 05 VV - F 3 x 1.5 mm².
¥Never vacuum the following: Burning matches, smoldering ash and cigarette butts,
combustible, caustic, inflammable or explosive substances, vapour or liquids.
¥This appliance is not suitable for vacuuming dust which can be harmful to health.
¥Store the appliance in a dry indoor location.
¥Never use the appliance if it is damaged.
¥Only allow the appliance to be serviced by an authorised after sales service outlet.
¥Only use the appliance to carry out work for which it has been designed.
¥Take extra care when cleaning steps.
¥Use only genuine accessories and spare parts.
This appliance is not intended for use by persons (including children) with reduced physical,
sensory or mental capabilities, or lack of experience and knowledge, unless they have been
given supervision or instruction concerning use of the appliance by a person responsible
for their safety. Children should be supervised to ensure that they do not play with the
appliance.
• Do not leave the appliance unattended when plugged in. Unplug from the outlet
when not in use and before servicing and cleaning.
• To avoid electric shock, do not expose to rain. Store indoors.
• Never use in the presence of explosive liquids, vapours or explosive dust
-such as coal.
• Never pick up asbestos or asbestos dust.
• Wood dust and chips in a confined area can give risk to fire or an explosion. Guard
against possible ignition sources.
• Do not pick up anything that is burning or smouldering – such as metal grinding dust,
cigarette ends, hot coals, matches or similar.
• The appliance is not intended for use by young children or infirm persons without
supervision. Young children should be supervised to ensure they do not play with the
appliance.
• Use only manufacturer’s recommended attachments and consumables.
• Never modify the cleaner in any way - this is dangerous and will invalidate the warranty.
• Do not use the appliance without the filter in place.
• If the motor sound becomes higher pitched always check for the following:
- a blocked hose or accessory, a blocked filter or a full container.
• Never try to move the appliance by pulling with the mains lead.
• Always check that the filter is clear and not blocked. Keep all openings clear of any
blockages.
• When lifting the appliance, always lift it with the handle or under the rim of the
bucket.
Beware of excess weight.
• Always switch the unit off before changing attachments or connecting different
devices.
• If the cord is damaged have it repaired by an authorised service centre.
IMPORTANT! When using the equipment, a few safety precautions must be
observed to avoid injuries and damage. Please read the complete operating manual
with due care. Keep this manual in a safe place so that the information is available at
all times. If you give the equipment to any other person, give them these operating
instructions as well.
The manufacturer cannot accept any liability for damage or accidents which arise
due to a failure to follow these instructions and the safety information.

8 9
ASSEMBLYWET & DRY VACUUM SAFETY WARNINGS (cont.)
• This appliance is not intended for use by persons (including children) with reduced
physical, sensory or mental capabilities, or lack of experience and knowledge,
unless they have been given supervision or instruction concerning use of the appliance
by a person responsible for their safety.
• Children should be supervised to ensure that they do not play with the appliance.
• The equipment is to be used only for its prescribed purpose. Any other use is
deemed to be a case of misuse. The user / operator and not the manufacturer will be
liable for any damage or injuries caused as a result of this.
Fitting the wheels (9):
1. Place an R-clip (29) for fitting the wheels through the appropriate hole in the axle (32),
(fig. 1).
2. First fit a washer (30) and a wheel (9), then another washer (30) to the axle (32), (fig. 2).
3. Now slide the axle (32) through the guides provided for it on the underside of the tank
(8), (fig. 3).
4. Fit a washer (30) and second wheel (9) to the empty end of
the axle (32), and secure it with the remaining washer (30)
and the R-clip (29).
5. Push the covers (28) on to the outside of the wheels (9) so
that the hooks on the covers (28) clip into the slots in the
wheel (9), (fig. 4).
Fitting the castors (11):
1. Fit the castors (11) into the appropriate mountings on
the underside of the tank (8). Push the castors (11) firmly
into the mounting until they engage with a clicking noise,
(fig. 5).
Fitting the main handle (1):
1. Place the main handle (1) onto handle mounts. Secure in
place with bolts (31) and cable hooks (5), (fig. 6).
Fig. 1 Fig. 2
WARNING! During assembly ensure the wet and dry vac is switched OFF and
disconnected from the power supply.
Fig. 5
Fig. 6
Fig. 4
Fig. 3

10 11
KNOW YOUR PRODUCT KNOW YOUR PRODUCT
Fitting the motor head (12):
1. The motor head (12) is fastened to the tank (8) by the
motor securing clips (6), (fig. 7).
2. To remove the motor head (12), open the securing clips
(6), (fig. 8) and lift the motor head (12) by the carry handle
(2).
3. When fitting the motor head (12), make sure that the securing clips (6) lock
into place correctly.
Fitting the filter
Fitting the foam filter (27) - vacuuming liquid:
1. For wet vacuuming, slip the supplied foam filter (27) over
the filter cage (13), (fig. 9).
Note. The pleated filter (24), already fitted upon delivery is
not suitable for wet vacuuming.
Fitting the pleated filter (24) - vacuuming dry matter:
1. For dry vacuum cleaning always use the pleated filter. If it is not fitted, slip it over the
filter cage (13), (fig. 10). Place the cap (25) on the base of the pleated filter (24), turn in a
clockwise direction to lock in position (fig. 11). The pleated filter (24) is suitable for
dry-vacuuming only.
Note: Do not use the foam
filter (27) when vacuuming
dry mater.
ASSEMBLY (cont.) ASSEMBLY (cont.)
Fig. 8
Fig. 9
Fig. 10
IMPORTANT! Never use the wet and dry vacuum cleaner without a filter. Check
that the filter is securely fitted at all times.
Fig. 7
Fig. 11
Fitting the dust bag (26) - vacuuming dry matter:
Place the dust bag (26) inside the tank (8), then slip the
opening over the vacuum inlet, (fig. 12).
Fitting the suction hose (33):
Connect the suction hose (33) to the corresponding connector on the wet and dry vacuum
cleaner, depending on the application required.
Vacuuming
Connect the suction hose (33) to the suction hose connector
(7), (fig. 13).
Blowing
Connect the suction hose (33) to the blow
connector (15), (fig. 14).
Air regulator (23):
The air regulator (23) on the tube handle (18) can be fitted
between the suction hose (33) and the suction tube (17),
(fig. 15). The suction power of the nozzle can be adjusted by
using the air regulator (23).
When wet vacuuming, make selective use of the air regulator
to suck in air as well as liquids. This will help to take some
strain off the equipment when vacuuming liquids.
Fig. 15
Fig. 12
Fig. 13
Fig. 14

12 13
Floor tool (21):
The floor tool (21) is for vacuuming solids and liquids over
medium to large areas (fig. 16).
Crevice tool (20):
The crevice tool (20) is designed for vacuuming solids and
liquids in corners, edges and other areas that are difficult to
access (fig. 17).
Upholstery tool (22):
The upholstery tool (22) is specially designed for vacuuming
solids on upholstery and carpets (fig. 18).
SUCTION TOOLS
Fig. 16
Fig. 17
Fig. 18
OPERATION
This vacuum must be used with a residual current device
with a rated residual current of 30mA or less.
ON/OFF/AUTO switch (3) (fig. 19)
Switch position 0: Off
Switch position I: Normal operation
Switch position AUTO: Automatic mode
Dry vacuuming (fig. 20 & 21)
Use the pleated filter (24) for dry vacuuming (see Fitting the
pleated filter).
The dust bag (26) can also be fitted for removal of particularly
heavy dirt (see Fitting the dust bag).
Always ensure that the filters are perfectly secure.
Wet vacuuming (fig. 22)
For wet-vacuuming, use the foam filter (27), (see Fitting the
foam filter).
Check that the filter is securely fitted at all times.
Water drain outlet (10)
To make the tank (8) easier to empty after wet vacuuming, it is
fitted with a water drain outlet (10).
Open the water drain outlet (10) by turning it anti-clockwise
(fig. 23) and drain the liquid.
AUTO
Fig. 19
Fig. 20
Fig. 21
Fig. 22
Fig. 23
IMPORTANT! When wet vacuuming, the floating safety valve (14) turns off the wet
and dry vacuum cleaner automatically when the maximum level is reached.
IMPORTANT! The wet and dry vacuum cleaner is not suitable for the vacuuming of
combustible liquids. For wet vacuuming, use only the supplied foam filter.

14 15
Automatic mode (1450W max.)
Connect the power cable on your device
to the automatic power outlet (4) and
connect the suction hose (33) to the
extractor connector on your device
(fig. 24). Check that the connections are
secure and airtight.
You can use the supplied hose adaptor
(19) to connect the suction hose (33) to the
device. To do so, fit it between the suction
hose and the extractor port on the device.
Set the switch (3) on the wet and dry vacuum cleaner to
position AUTO, automatic mode (fig. 25). The moment
you switch on the device, the wet and dry vacuum cleaner
switches on as well. When you switch off the device, the wet
and dry vacuum cleaner switches off as well, after a preset
delay.
Blowing
Connect the suction hose (33) to the blow connector (15) on
the wet and dry vacuum cleaner (fig. 26).
AUTO
OPERATION (cont.) MAINTENANCE
Fig. 24
Fig. 25
Fig. 26
Cleaning
Keep all safety devices, air vents and the motor housing free of dirt and dust as much as
possible.
We recommend that you clean the appliance immediately after you use it.
Cleaning the motor head (12)
Clean the appliance regularly with a damp cloth and some liquid soap. Do not use cleaning
agents or solvents; these may be aggressive to the plastic parts in the appliance.
Cleaning the tank (8)
The container can be cleaned with a damp cloth and some liquid soap or under running
water, depending on the amount of dirt.
Cleaning the filters
Cleaning the pleated filter (24)
Clean the pleated filter (24) regularly by carefully patting it and cleaning it with a fine brush
or hand brush.
Cleaning the foam filter (27)
Clean the foam filter (27) with a little liquid soap under running water and allow it to air-dry.
Maintenance
At regular intervals and before each use, check that the filters in the wet and dry vacuum
cleaner are securely fitted.
IMPORTANT! Before cleaning your wet & dry vac or carrying out any maintenance
procedures, make sure that the motor is off and the vac is disconnected from the
power supply to prevent accidental starting.

16 17
KNOW YOUR PRODUCT
DESCRIPTION OF SYMBOLS CONTENTS
Read instruction manual
Ingress protection from water
Litres
l
lP24 mbar Pressure rating (millibar)
1 x FBWDV-40PTU Wet & dry vac
1 x Main handle
2 x Wheels
2 x Castors
2 x Wheel covers
2 x Securing R-clips for wheels
4 x Washers for fitting the wheels
1 x Axle
2 x Bolts for fitting the main handle
2 x Cable hooks
1 x Suction tube
1 x Tube handle (air regulator)
1 x Hose adaptor
1 x Crevice tool
1 x Upholstery tool
1 x Floor tool
1 x Pleated filter
1 x Cap for pleated filter
1 x Dust bag
1 x Foam filter
1 x Suction hose
1 x Instruction manual
HHGL Limited, Witan Gate House, 500-600 Witan Gate, Milton Keynes, MK9 1BA

18 19

20
FB3U
WARRANTY
All of our products undergo strict quality checks to ensure that they reach you in perfect condition. In
the unlikely event that your appliance develops a fault, please contact our service department at the
address shown on this guarantee card. You can also contact us by telephone using the customer service
number shown. Please note the following terms under which guarantee claims can be made:
1. These warranty terms regulate additional warranty services, which the manufacturer (mentioned
below) promises to buyers of its new products. In addition to their statutory guarantee, claims are not
affected by this guarantee. Our guarantee is free of charge to you.
2. The warranty services only cover defects due to material or manufacturing faults on this product
which you have bought from the manufacturer (mentioned below) and are limited to either the
rectification of said defects on the product or the replacement of the product, whichever we prefer.
3. The following are not covered by our guarantee:
- Damage to the appliance caused by a failure to follow the assembly instructions or due to incorrect
installation; a failure to follow the operating instructions (for example, connecting it to an incorrect
mains voltage or current type) or a failure to follow the maintenance and safety instructions; or by
exposing the appliance to abnormal environmental conditions, or by lack of care and maintenance.
- Damage to the appliance caused by abuse or incorrect use (for example, overloading the appliance, or
the use of unapproved tools or accessories), ingress of foreign bodies into the appliance (such as sand,
stones or dust, transport damage), the use of force or damage caused by external forces (for example,
by dropping it).
- Damage to the appliance or parts of the appliance caused by normal or natural wear or tear, or by
normal use of the appliance.
4. Your product is guaranteed for a period of 12 months from the original date of purchase. Warranty
excludes consumable parts. Guarantee claims should be submitted before the end of the guarantee
period and within two weeks of the defect being noticed. No guarantee claims will be accepted after
the end of the guarantee period. The original guarantee period remains applicable to the appliance
even if repairs are carried out or parts are replaced. In such cases, the work performed or parts fitted will
not result in an extension of the guarantee period, and no new guarantee will become active for the
work performed or parts fitted. This also applies if an on-site service is used.
Your statutory rights remain unaffected, in particular, any rights you have under the
Consumer Rights Act 2015.
IN ORDER TO MAKE A CLAIM UNDER THIS WARRANTY, YOU MUST RETURN THE
PRODUCT TO THE PLACE OF PURCHASE WITH YOUR RECEIPT.
Please refer to the restrictions of this warranty concerning wearing parts, consumables and
missing parts, as set out in the service information in these operating instructions.
CUSTOMER SERVICE HELPLINE
GB: 0151 294 4488
IRL: 1850 882711
OZITO UK
Unit 9 Stadium Court, Wirral International Business Park, Plantation Road,
Bromborough, Wirral, CH62 3QG
Table of contents
Other Full Boar Vacuum Cleaner manuals