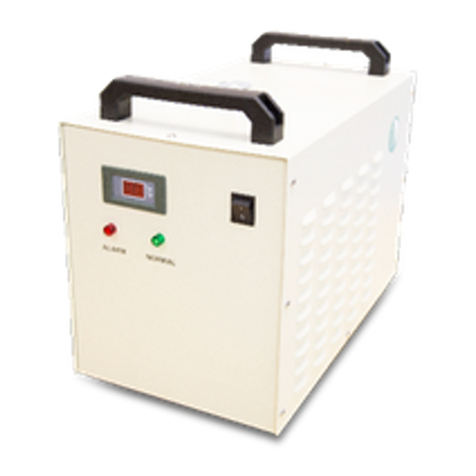
Full Spectrum Laser CW-5000 User manual


Safety Warning: Specications:
Looking for financing or eager to buy, contact Sales:
Need help, visit us at our Help Center or contact Support:
28mm
43mm
55mm
Dimension: 47mm X 37mm x 27mm
Voltage: AC 100 - 110V
Frequency: 60 Hz
Current: 3.5 - 5.6 A
Cooling: 50W/°C
Water Capacity: 6 Liters
Max Flow: 10L/min
Do not leave your machine unattended.
Avoid using any water but distilled in your machine as it can
damage it over time.
Always keep a fire extinguisher and first aid kit nearby.
Do not attempt to access any electrical areas while the
machine is on. Unplug the machine and wait for an hour
before accessing panels.
If your machines alarm is ringing, then don’t start any
projects until the issue has been resolved.
Inspect your machine before each use. Do not use if the
machine of it the tubes are damaged in any way.
Always maintain a clean work area.
1

Note: The flow alarm is connected to an open and closed relay, therefore it required the
operating current to be less than 5 A and the working voltage to be less than 300V.
The chart below can assist in becoming acquainted with the various alert indicators of the
machine and the possible problems that may occur.
Red
Indicator
Green
Indicator
Buzzing Out
H1 , H2
Out
H1 , H3
Condition
✔ ✔Normal
✔✔ ✔ Water Stopped
✔✔ ✔ Water Shortage
✔✔ ✔ Pump Issues
✔✔ ✔ Machine temperature
exceeded 60°C
✔Faulty circuit
✔Power Outage
Alarm Description:
Diagrams:
Temperature Display
Alarm Indicator
Power Switch
Running Indicator
Injection Port
Signal Terminal
Power Socket
Outlet
Inlet
Radiator Fans
Drain Plug Machine Details
Water
Indicator
2

Temperature Display:
The thermostat has the following indicators: D1 and D2, shown above.
If D1 is ON, then the thermostat operates in intelligent control mode. If D1 is OFF, then the thermostat operates
in temperature control mode. If D1 FLASHES, then the thermostat is in parameters setting mode or displaying
the value of the room temperature.
On the other hand, if D2 is ON, then the chiller is in refrigerating state. If D2 is OFF, then the chiller is in the
insulation working state. If D2 FLASHES, then the chiller is in the energy-saving state.
By pressing the 🠟 button, the room temperature is displayed. Six seconds later, the thermostat displays the
restore defaults while D1 is flashing, indicating the room temperature. The 🠟🠟 keys are used for adjusting the
display status of the controller, parameters selection, and adjustment. The RST key is the enter key, while the
SET key is the function setting key.
Alarm Codes:
The CW-5000 has multiple display codes designed to alert the user about potential
issues. In the next section, we will provide a list of the commonly displayed codes
and the corresponding potential alarm problems they signify.
F0 - Temperature Setting - Sets main temperature
F1 - Temperature Values - Set the temperature range
F2 - Cooling Hysteresis - Set the lag between the input and output
(only for Intelligent Mode)
F3 - Temperature Control - Set the machine to a constant temperature
F4 - High Water Temperature Alarm - activates when the water temperature
exceeds set maximum. It is recommended to replace water with cooler water.
F5 - Low Water Temperature Alarm - activates when the water temperature is
below set minimum
F6 - High Room Temperature Alarm - activates when the room temperature
exceeds set
F7 - Password - Set a password
F8 - Max. Temp. - Set highest water temperature
F9 - Min. Temp. - Set lowest water temperature
Error Codes:
E1 - Room temperature exceeded set range
E2 - Water temperature exceeded set maximum.
E3 - Water temperature is below set minimum.
E4 - Room Temperature Sensor has failed.
E5 - Water Temperature Sensor has failed.
3
Switching From Intelligent Mode to Manual:
1. Hold down the up and down arrows, then turn on the Chiller with the power switch.
2. The code re should appear briefly become disappearing.
3. Enter the settings mode by holding the up arrow and pressing the set button for 5 seconds.
4. The machine will beep and the display will change to zero, indication the password input. Input the
default password (8) using the up arrow and selecting it with the set button.
5. Go to Function 9 (F9) and use the set button to enter the temperature display and set your minimum
temperature.
6. Go to Function 0 (F0) and use the set button to enter the temperature display and set your temperature.
7. Then enter Function 2 (F2) to set your temperature different. We recommend setting the temperature
different to 2 degrees or less.
8. Go to Function 3 (F3) and set the value to 0 for manual mode.

Troubleshooting:
Issue Cause Potential Solution
Machine turns on but is not electrified The machine is not getting proper electricity. Check to make sure the power cord is plugged in
property. If that is the working then the fuse must be
burnt out and needs to be replaced.
Water Tubes are properly connected but the red
light is on and there’s no water flow
There is not enough water inside the system. Check water level. If the water is full, then check for
leakage.
The water is flowing but the red light is on There is not enough water inside the system. Check the water tubes for leakage.
High water temperature The water chiller has reached a high temperature
either by poor ventilation or due to excessive heat.
Replace the water will room temperature water.
Make sure the chiller is placed in a well ventilated
area to draw in air.
High room temperature The room temperature is high enough to raise the
machines temperature to above 40℃.
Work to improve ventilation so that the machine is
below 40℃.
Alarm is still on after adding/replacing water There is a possibility that water is inside the
machine.
Check the water tubes for leakage. Make sure the
injection cap and its surroundings are dry before
covering the port.
Water is draining slow There is no air to help with draining Open the Injection port to let in air.
For help setting your machine to constant mode, select the following link here. For other issues, go to the Help Desk.
The following chart lists some of the common issues experience with water chillers.
4
Table of contents
Other Full Spectrum Laser Chiller manuals