3
Installation
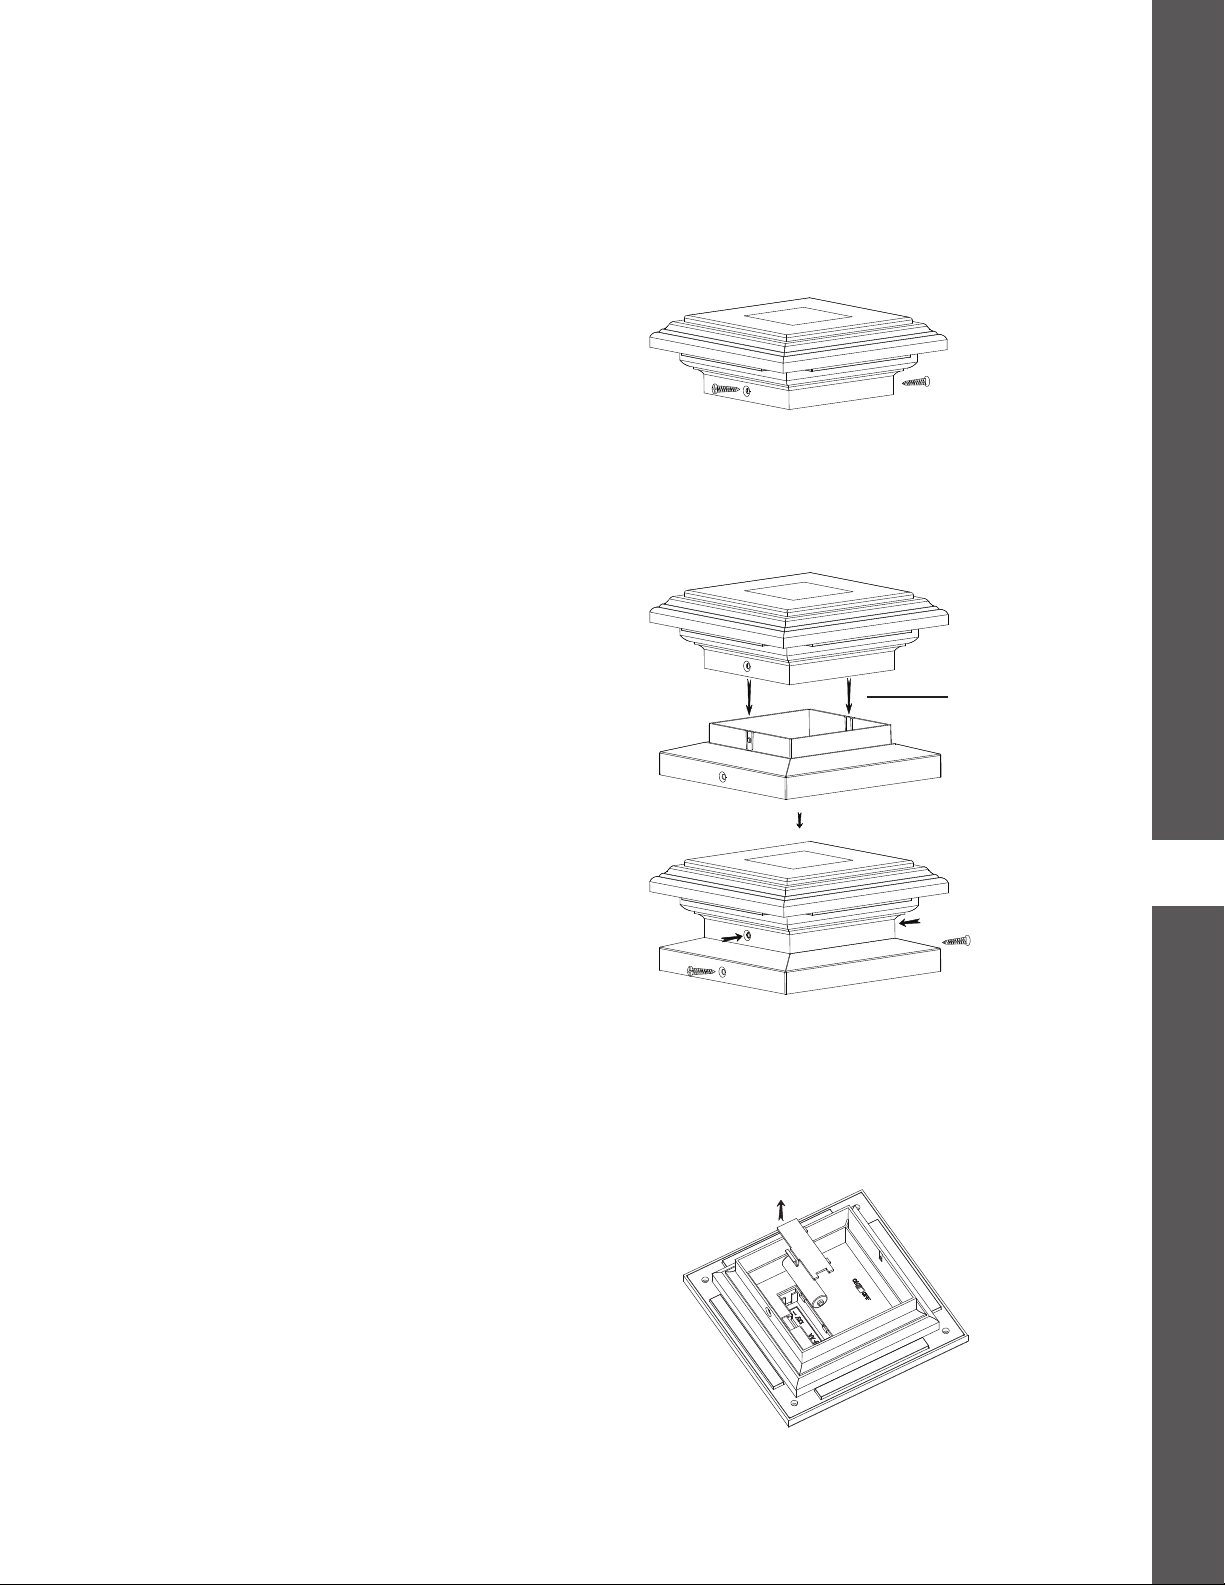
STANDARD 4 X 4” WOOD FENCE POST (Figure 3)
Step 1: Place post cap onto post and mark holes (2)
for screws as required.
Step 2: Remove fixture temporarily and pre-drill holes
if necessary.
Step 3: Replace fixture onto post and secure with
provided screws in both locations.
WITH ADAPTER TO FIT 6 X 6” WOOD FENCE POST
(Figure 4)
Step 1: Secure post cap to adapter as shown (No
screws or fasteners required).
Step 2: Place post cap onto post and mark holes (2)
for screws as required.
Step 3: Remove fixture temporarily and pre-drill holes
if necessary.
Step 4: Replace fixture onto post and secure with
provided screws in both locations.
figure 3
figure 5
Battery Replacement
Step 1: Remove the solar housing from the base by
turning in a counter clockwise direction (Figure 1).
Step 2: Move the switch to the OFF position.
Step 3: Remove the battery compartment cover. Carefully
remove the old battery (Figure 5).
Step 4: Replace battery with an equivalent new solar
rechargeable battery, ensuring the correct polarity
is observed.
Step 5: Move the switch to the ON position.
Step 6: Reassemble the unit by reversing the above
procedure.
Step 7: Allow the unit to fully charge in direct sunlight
for up to 2 days in the ON position. Once fully
charged, your solar light will automatically turn on
once it gets dark.
CAUTION: Rechargeable batteries contain nickel-cadmium
or nickel-metal hydride and must be recycled or disposed
of properly. Do not mix old and new batteries. Do not mix
alkaline, standard (carbon-zinc), or rechargeable batteries.
Do not dispose of batteries in fire. Batteries may explode or
leak.
INSTALLATIONBATTERY REPLACEMENT
LINE UP. PRESS
DOWN TO SECURE
figure 4