CONTENTS
• USER INTERFACE
AND
CONTROLS
.................................
pg
4
Control Panel Layout
.............................................
pg
4
Key
Names
.....................................................
pg
4
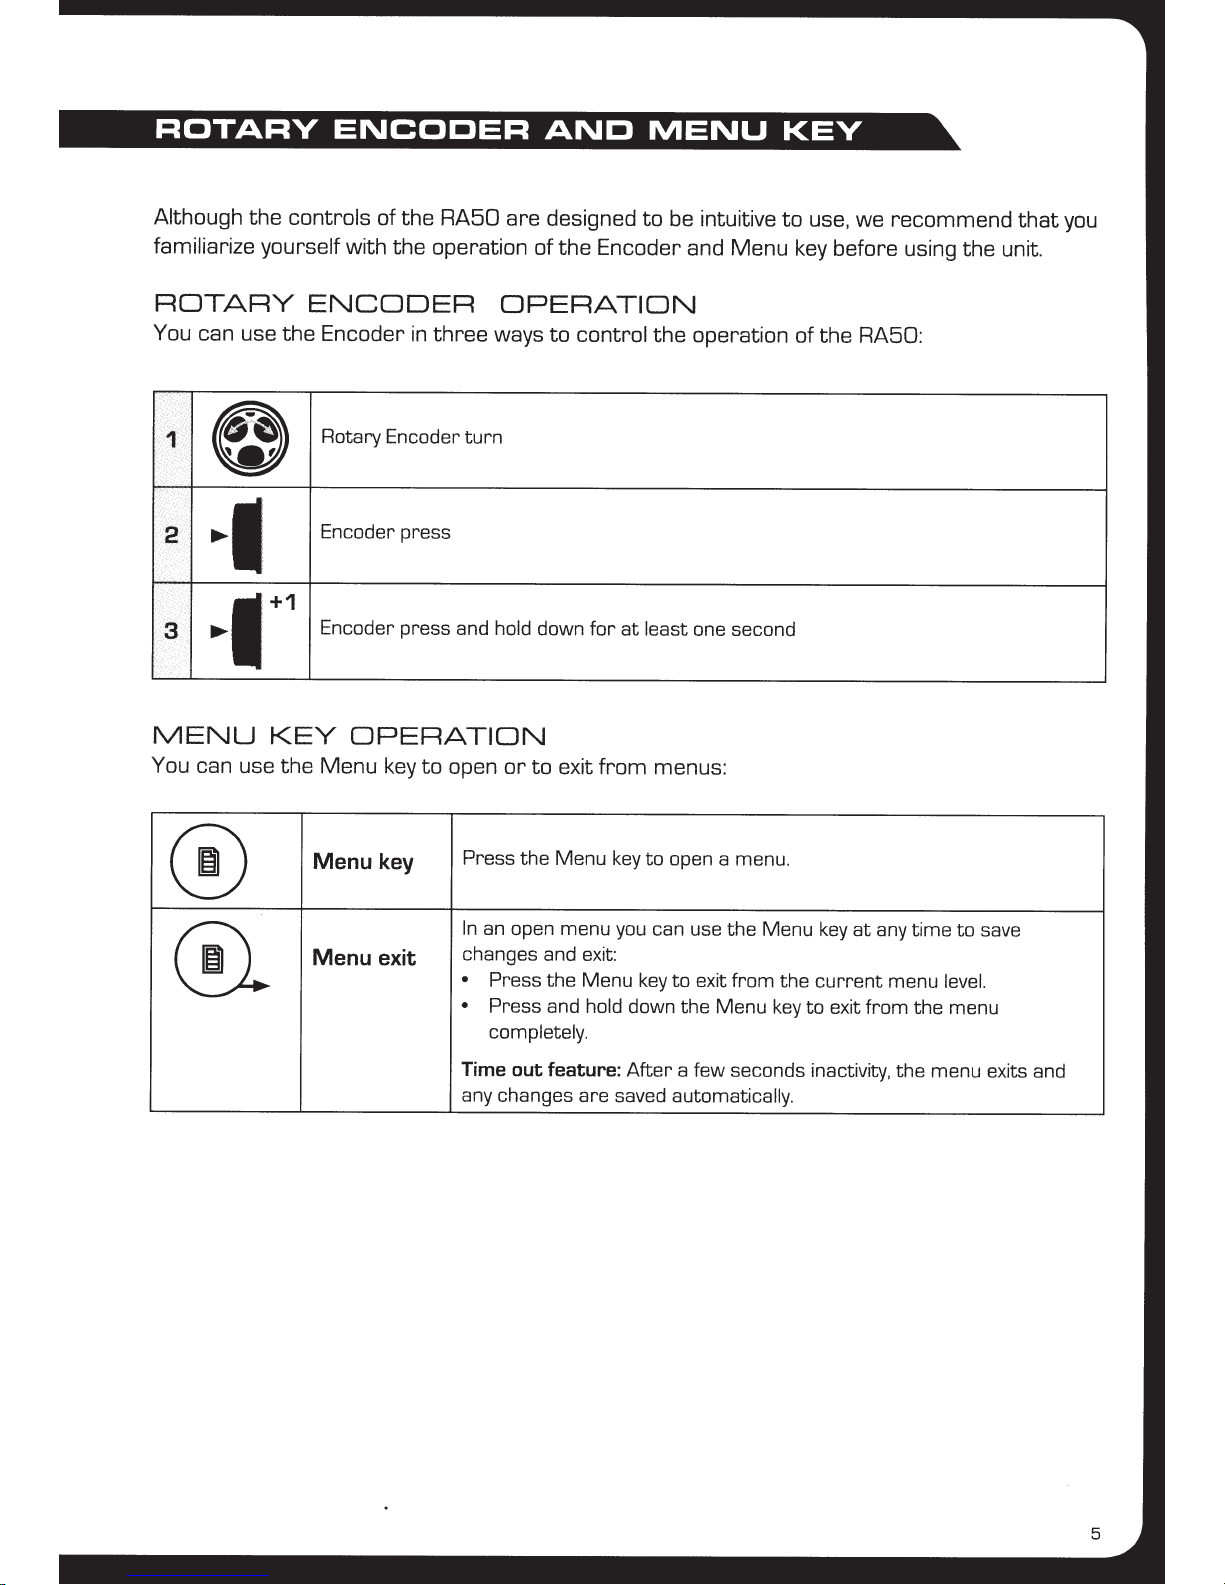
• ROTARY ENCODER
AND
MENU
KEY .
...............................
pg
5
Rotary Encoder Operation
........................................
pg
5
Menu
Key
Operation
.............................................
pg
5
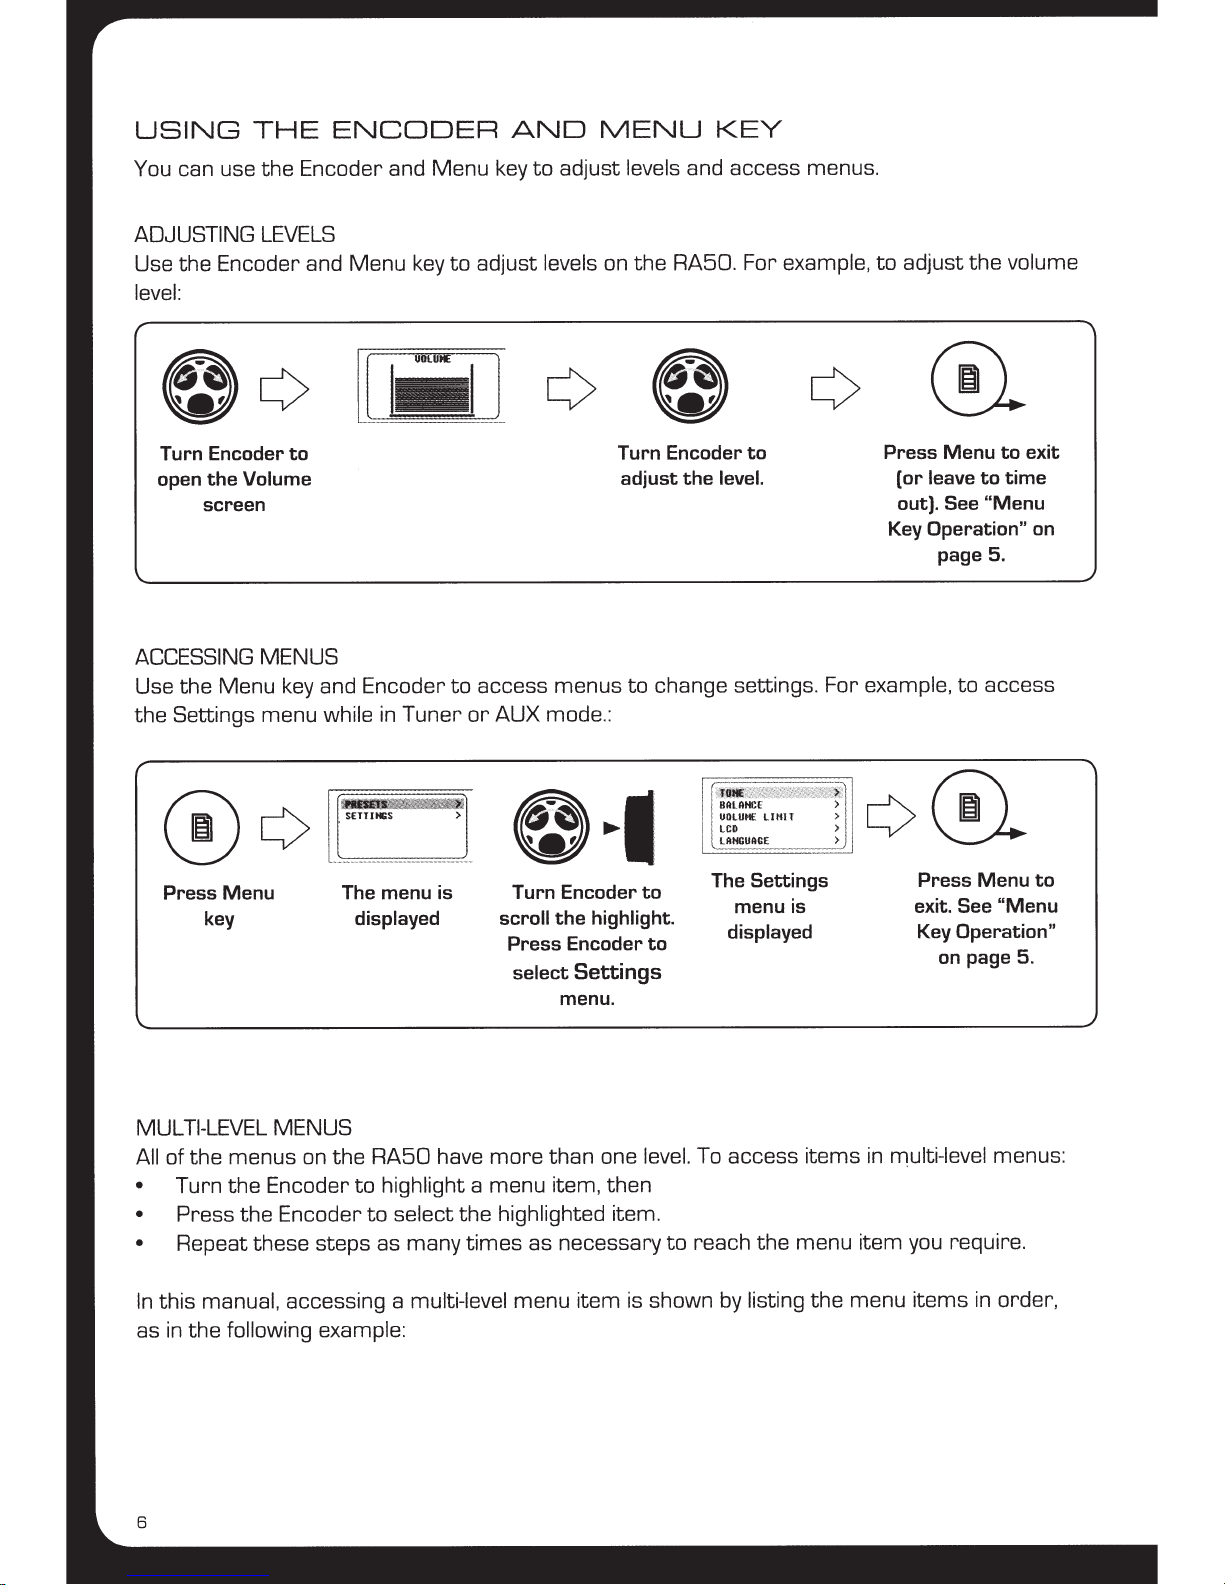
Using the Encoder and Menu
Key
.................................
pg
6
• GETTING STARTED.
................................................
pg
7
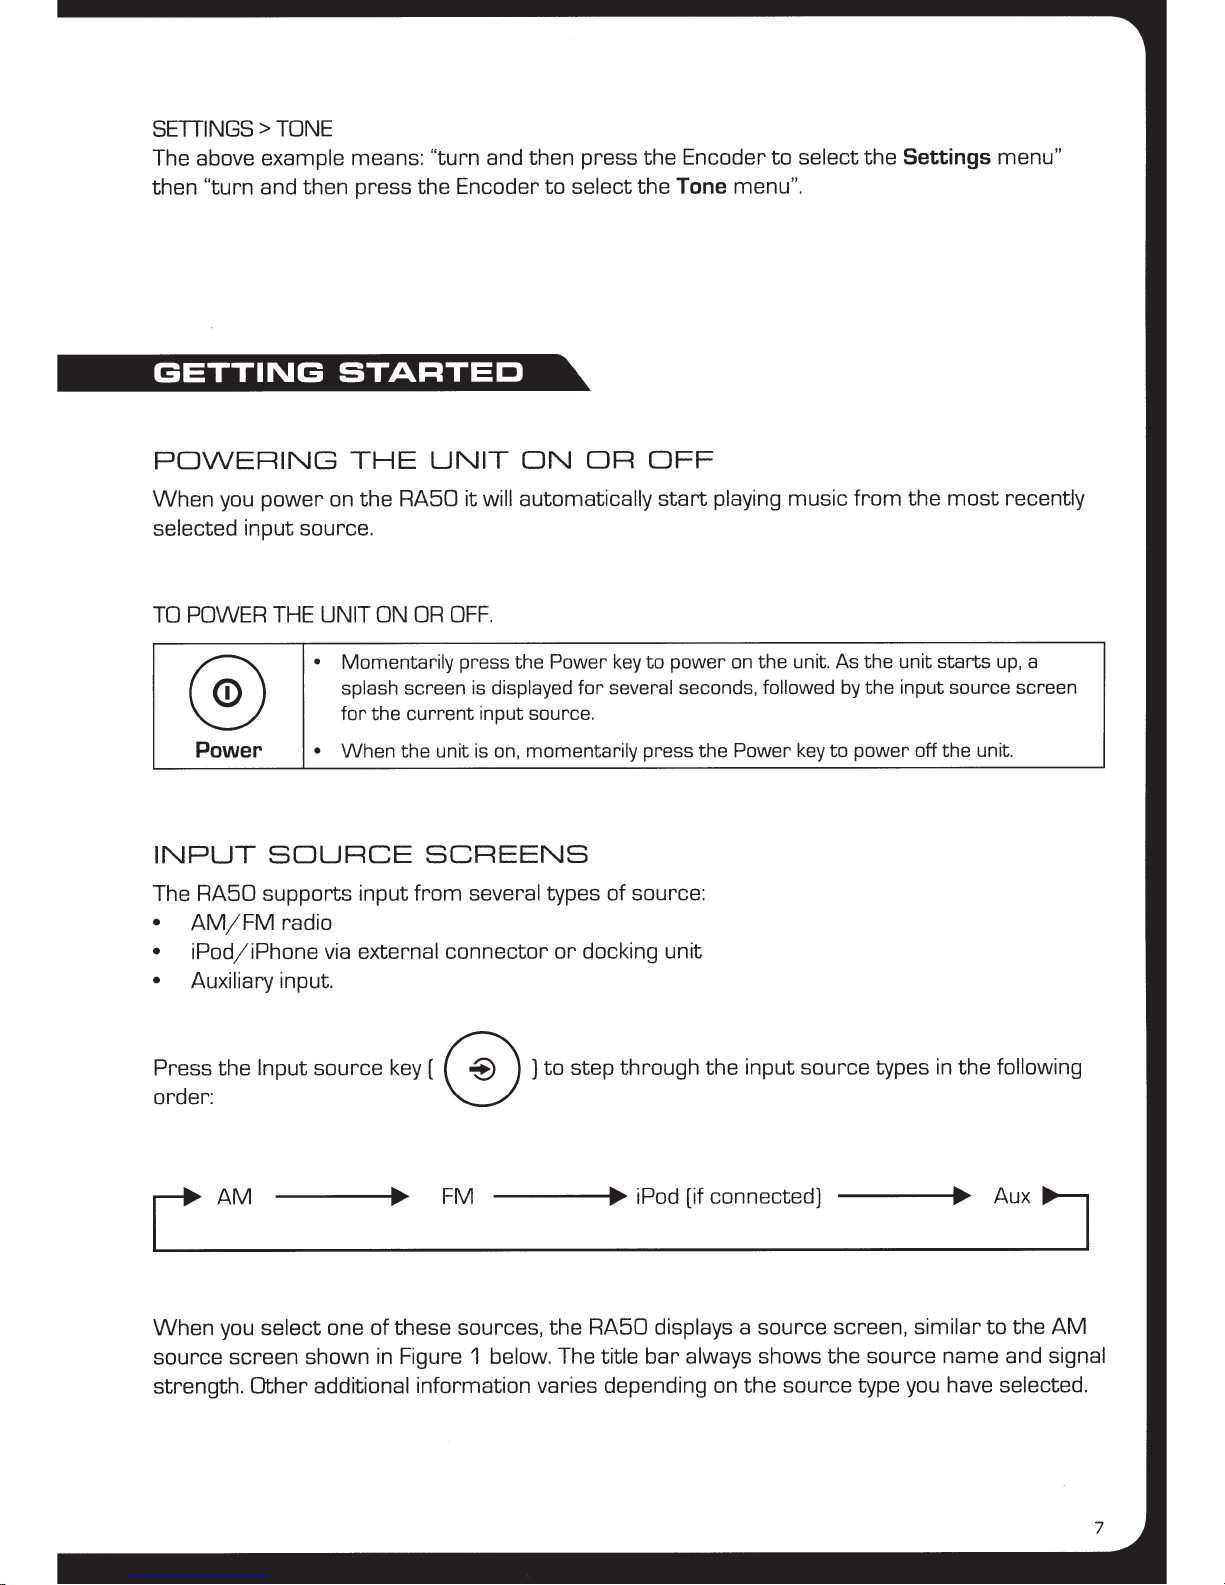
Powering the Unit
On
or
Off
.......................................
pg
7
Input Source Screens
............................................
pg
7
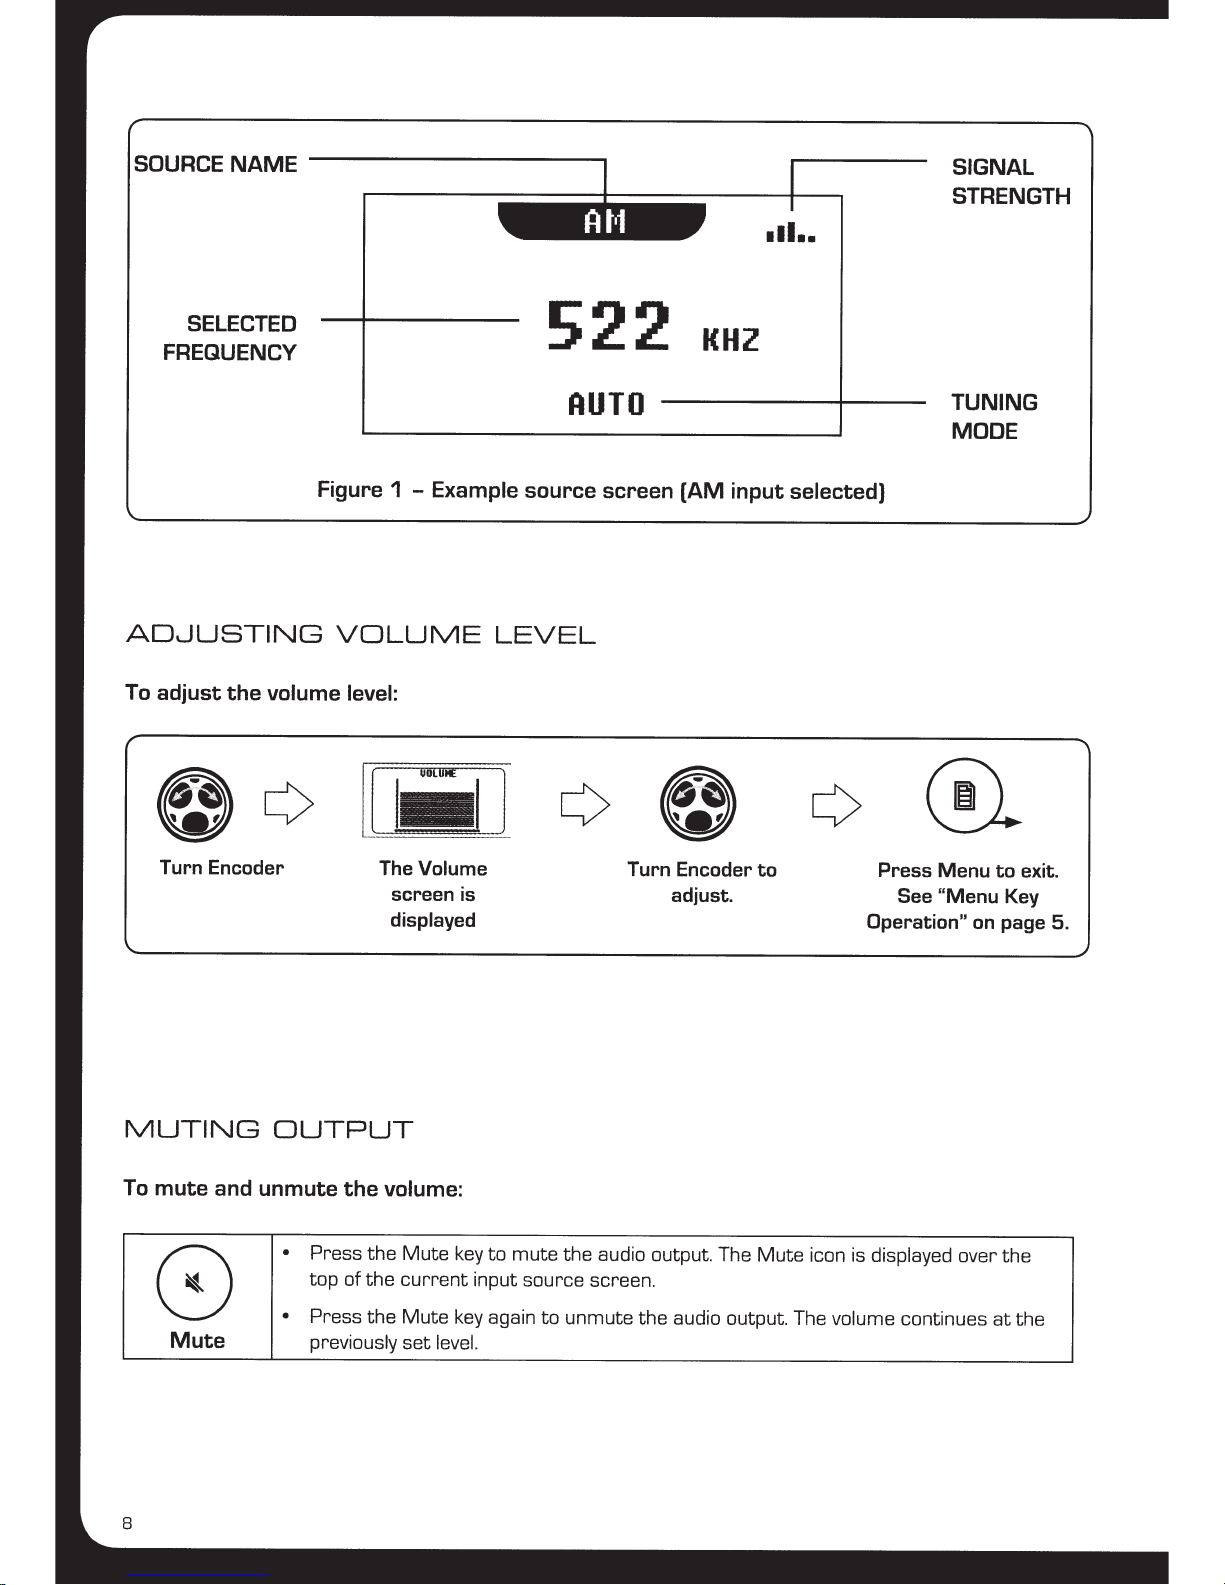
Adjusting Volume
Level
...........................................
pg
8
Muting Output
.............
:
.....................................
pg
8
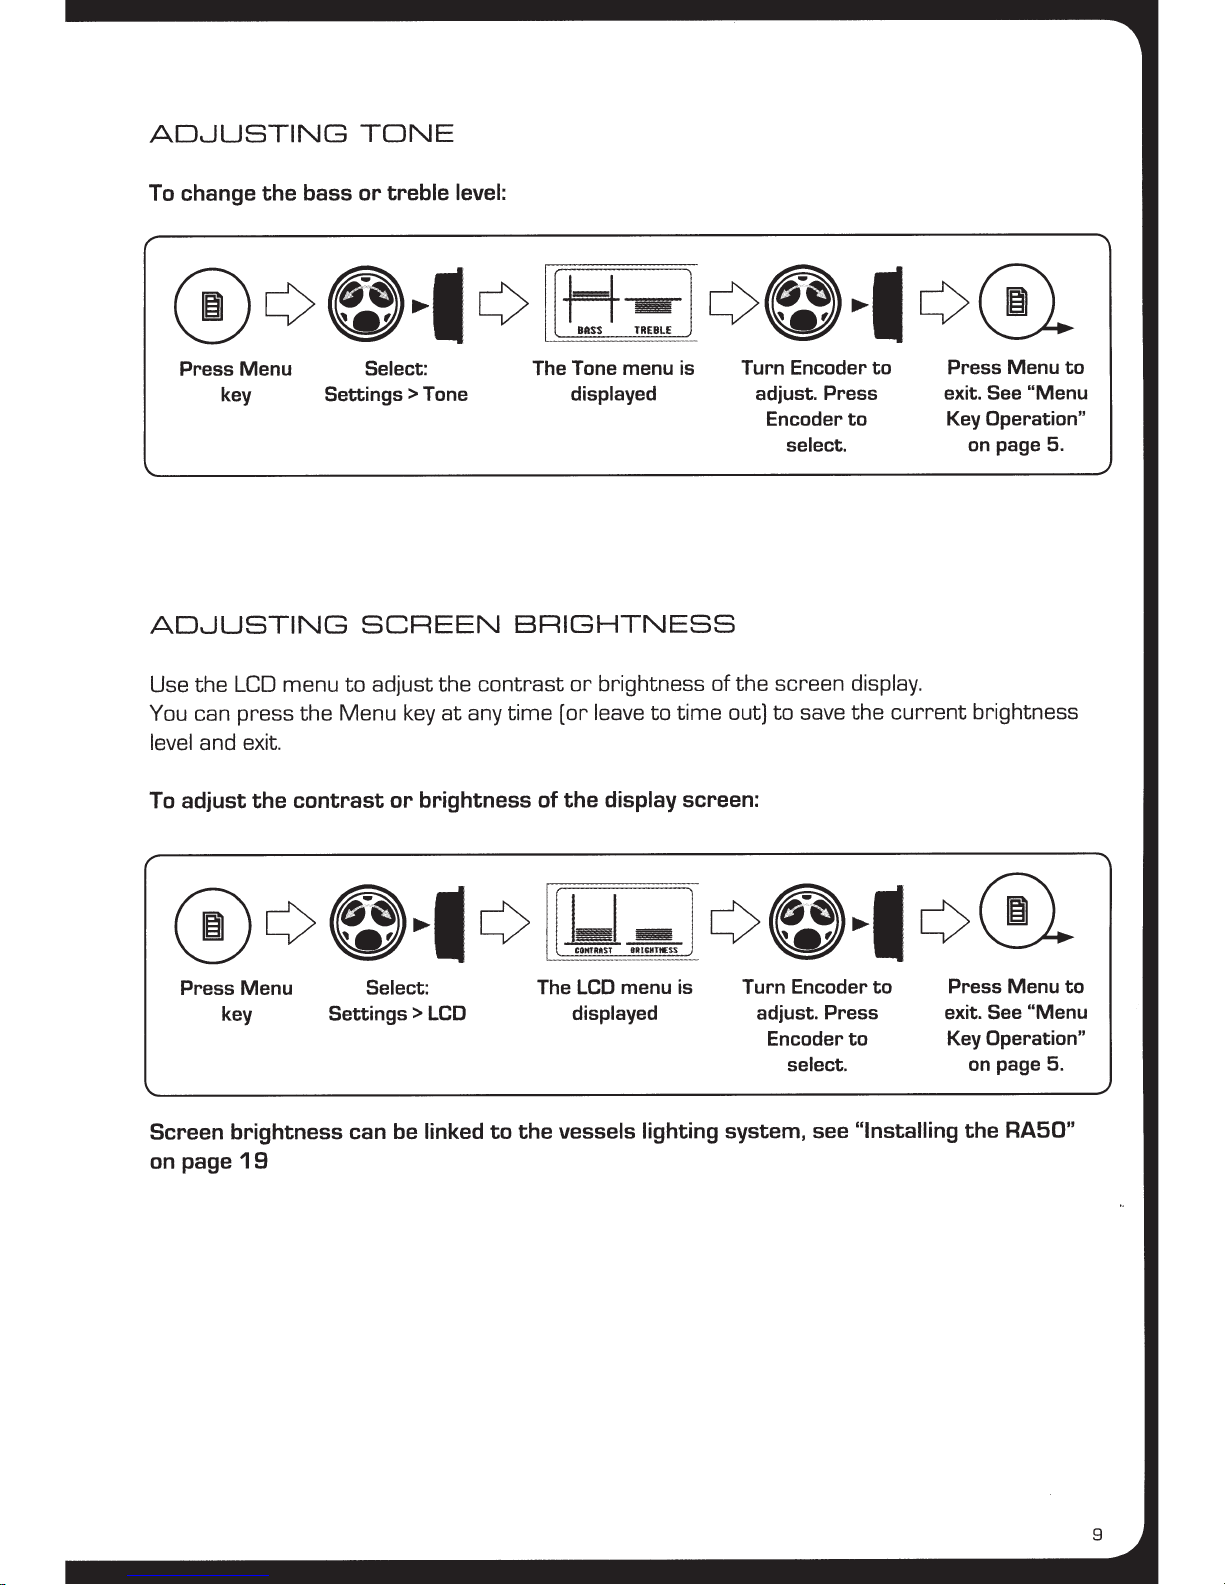
Adjusting Tone
..................................................
pg
9
Adjusting Screen Brightness
......................................
pg
9
• TUNER
............................................................
pg
10
Listening
to
the Tuner
............................................
pg
10
Tuner Source Screens
...........................................
pg
10
Tuning Methods
.................................................
pg
11
Adding and Removing Presets
....................................
pg
12
•
iPod
...............................................................
pg
13
Playing Content
..................................................
pg
13
iPod Source Screen
..............................................
pg
13
Controlling iPod Playback
.........................................
pg
14
Changing iPod Settings
...........................................
pg
15
• AUXILIARY
INPUT
.. .
...............................................
pg
16
Listening
to
Auxiliary Input
........................................
pg
16
Auxiliary Source Screen
..........................................
pg
16
• INSTALLING THE
RA50
.............................................
pg
17
Mounting the Unit
...............................................
pg
17
Mounting Diagram
...............................................
pg
1
8
Installation
Warning
.............................................
pg
19
Connections
.....................................................
pg
19
Cables
..........................................................
pg
20
RA50
Cable Connection Diagram
.................................
pg
21
• SETTING
UP
THE
RA50
.
............................................
pg
22
Preparing
for
iPod Input
..........................................
pg
22
Advanced Settings
...............................................
pg
22
• APPENDICES
......................................................
pg
24
Troubleshooting
.................................................
pg
24
RA50
Accessories
...............................................
pg
25
Support, Sales and Service
.......................................
pg
26
Specifications
...................................................
pg
26
Licensing
.......................................................
pg
27
3