0505FLATLINE VAN CO • SUPPORT@FLATLINEVANCO.COM • 888-667-5576FLATLINE VAN CO • SUPPORT@FLATLINEVANCO.COM • 888-667-5576
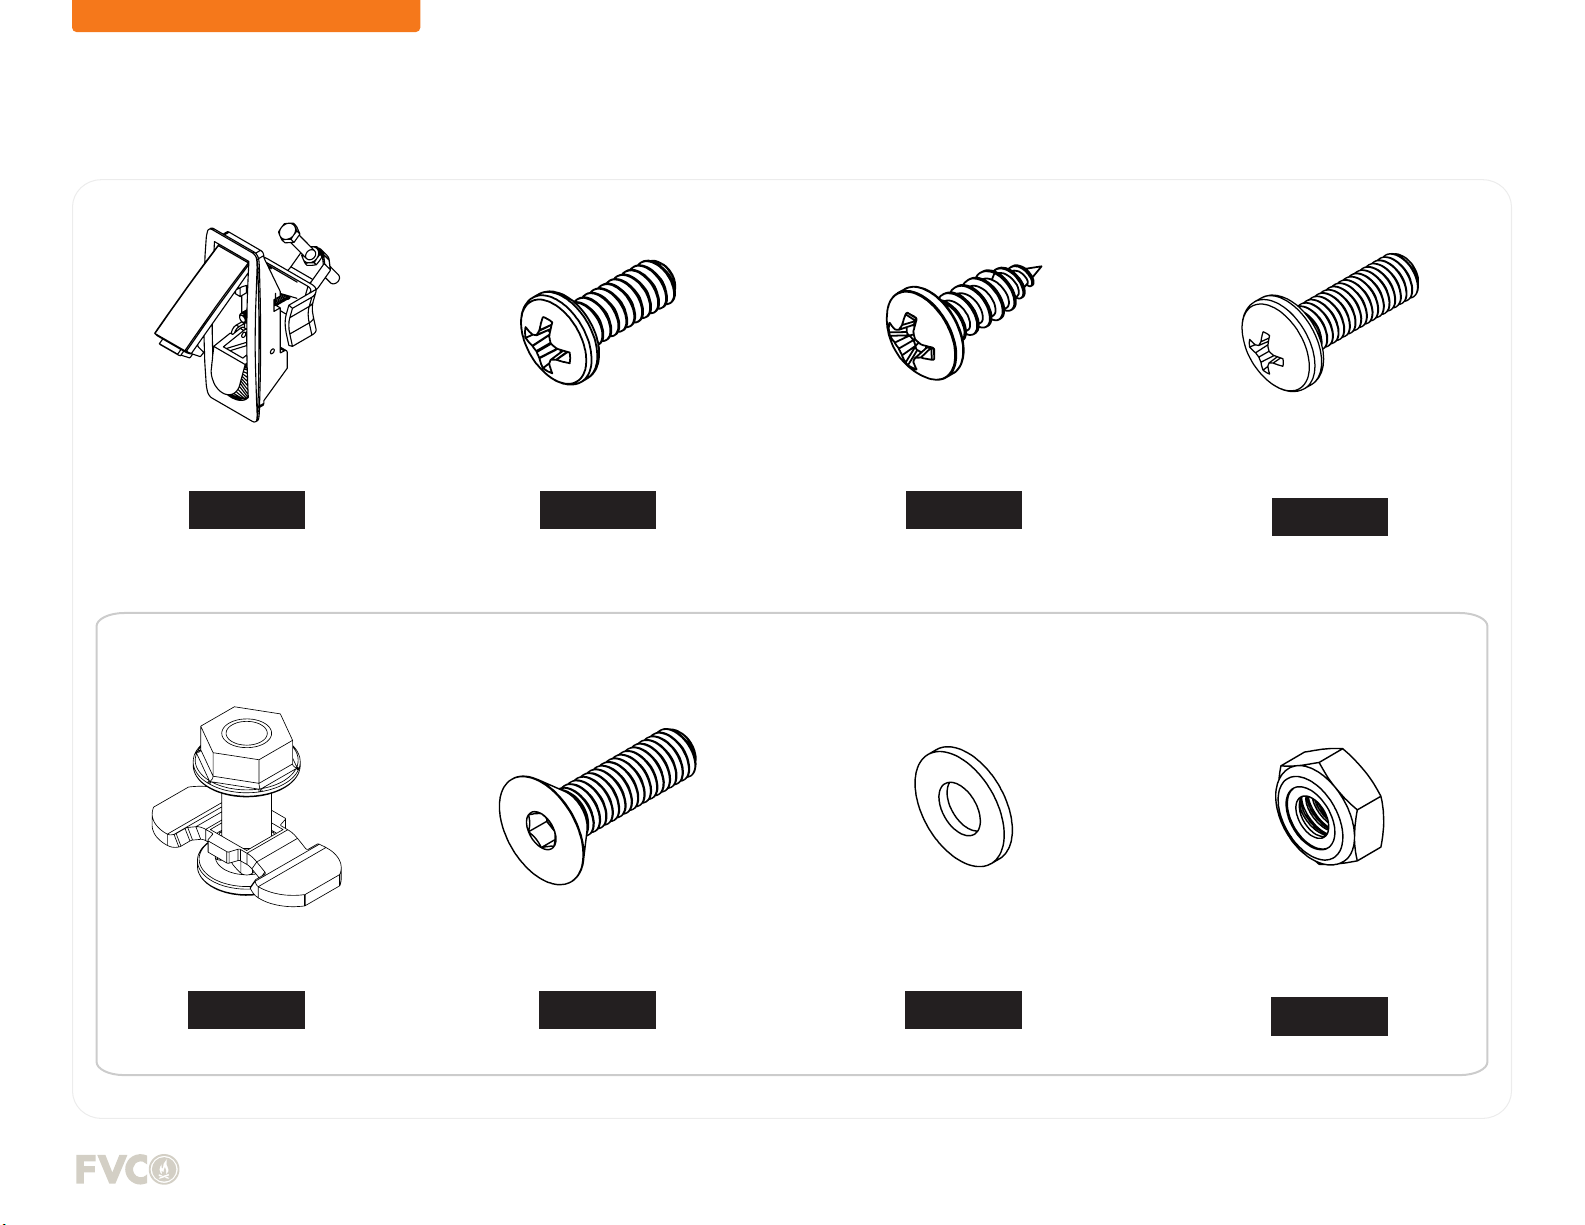
TOOLS REQUIRED FOR THIS STEP:
0505FLATLINE VAN CO • SUPPORT@FLATLINEVANCO.COM • 888-667-5576FLATLINE VAN CO • SUPPORT@FLATLINEVANCO.COM • 888-667-5576 0505
120”
65”
65” 55”
HR 77.25”
LR 66.5”
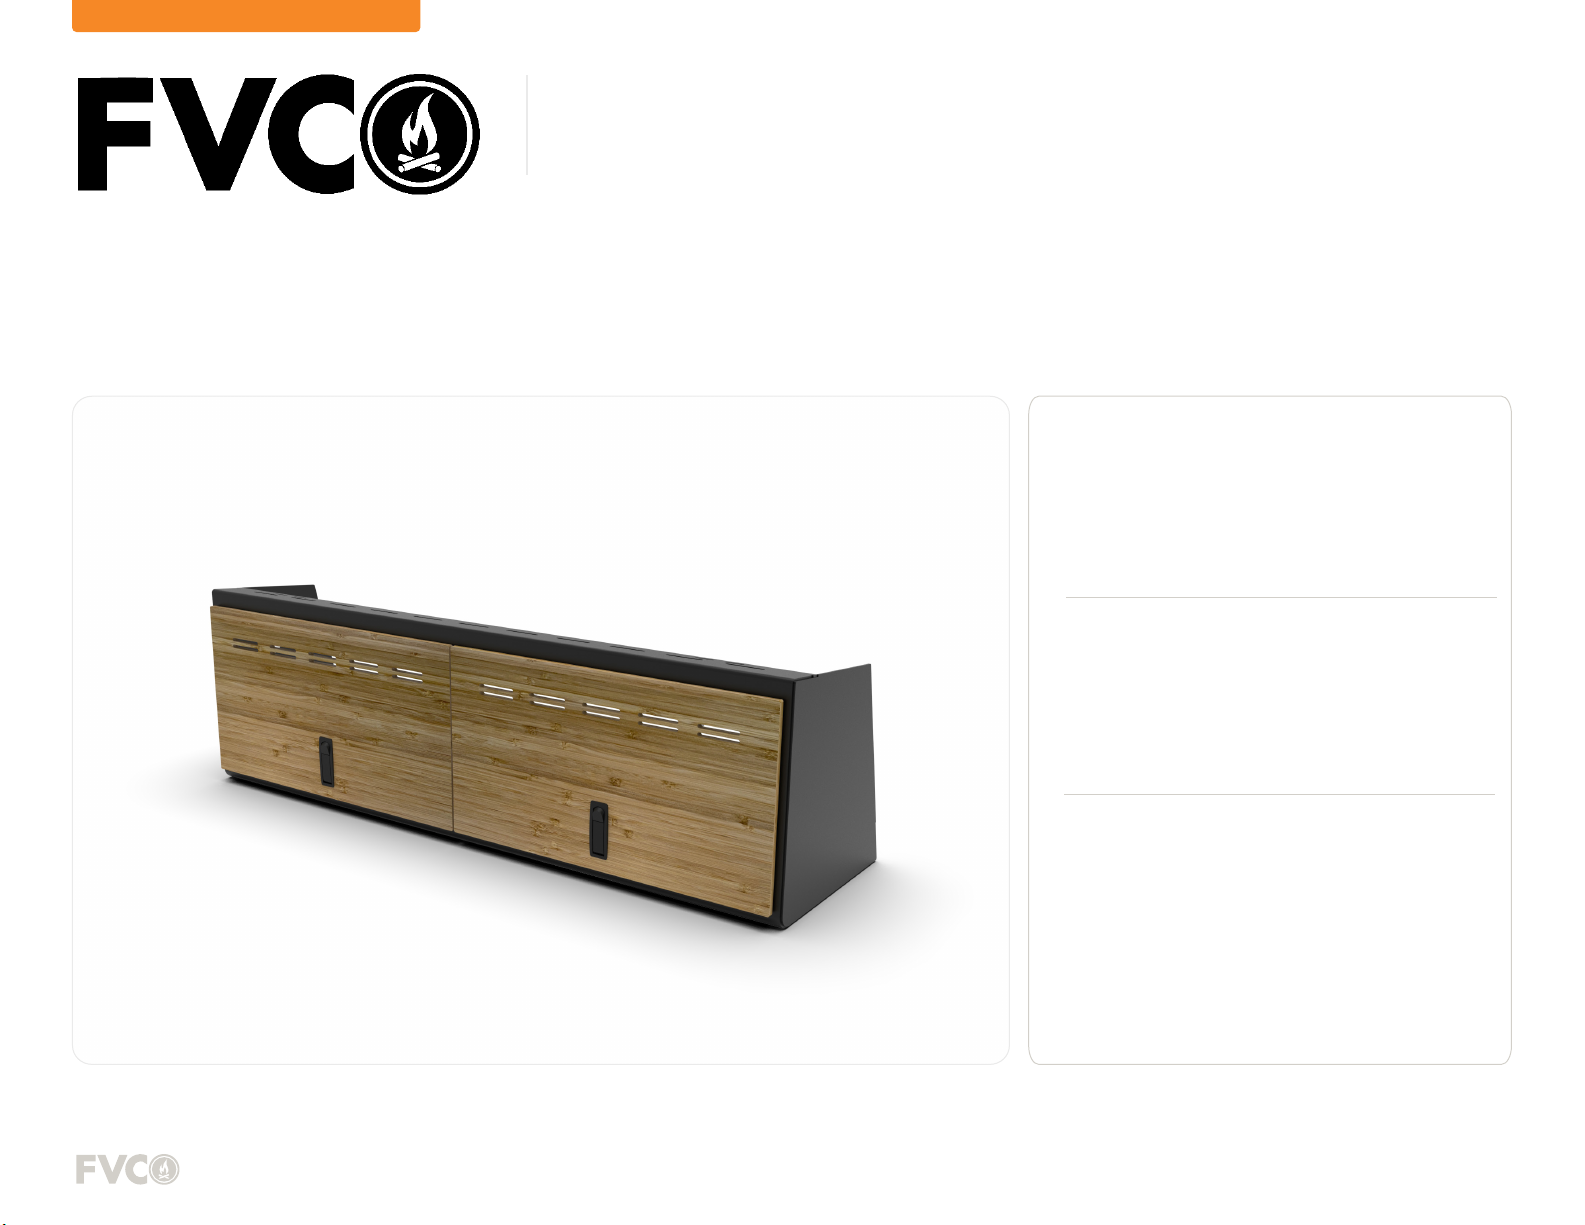
STEP | 01 LAYOUT & INSTALL PREP
Determining where you’d like to install your cabinet is up to
you, however there are some tips that make choosing the
location a little easier.
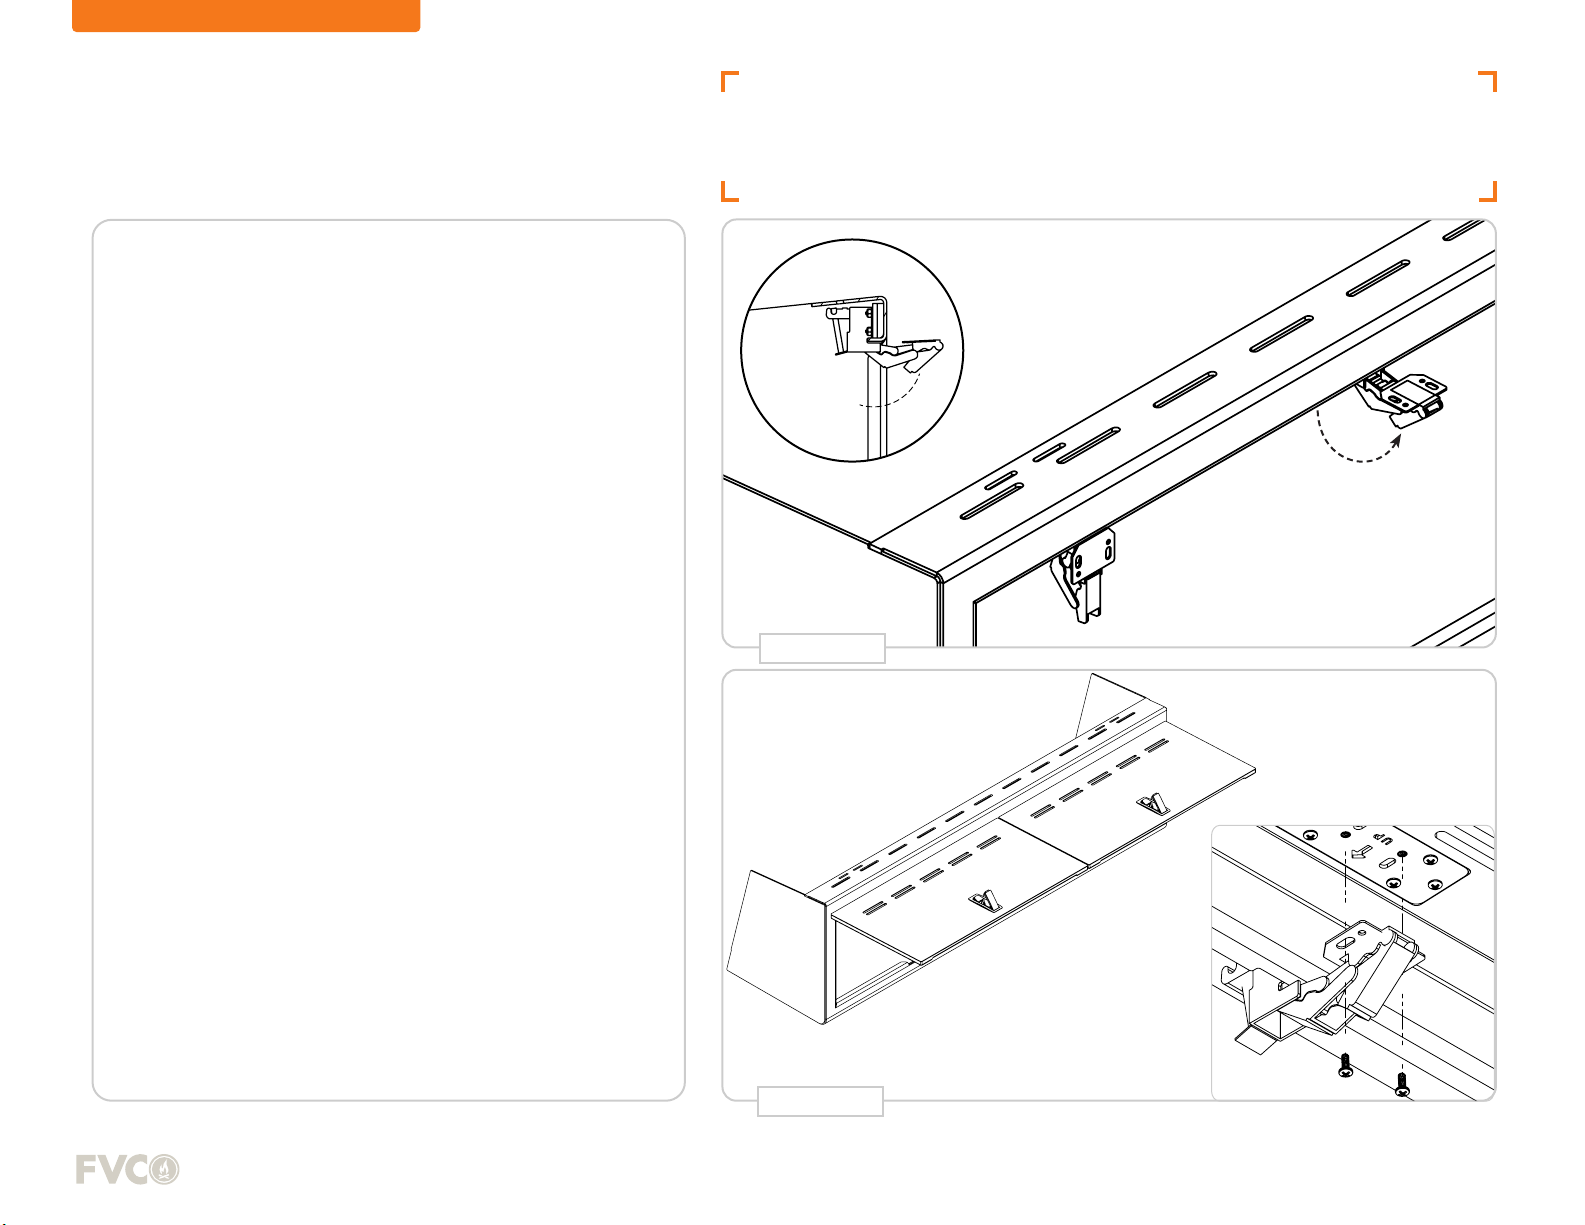
See the diagrams FIG 1 and FIG 2. Notice the centerline ribs
depicted as a dotted line. This centerline is standard across
all sizes of Sprinter Van and can be used as a reference point
when measuring your available wall space.
Take the time to measure your available wall space and layout
potential cabinet locations before installing.
NOTE - Due to the amount of variability and specific needs of
each vehicle, we do not supply hardware for DIY installs. See
page 7 for more info.
NOTE - Mounting hardware is included if you purchased the
optional Adwag Mounting Kit.
NOTE - Doors come boxed and shipped separately.
NOTE - Install the cabinet shell to the van body before adding
doors.
-This will make the cabinet be lighter and easier to lift.
-Door alignment will change slightly once cabinet is
tightened to the van.
[SKIP TO PAGE 7 FOR DIY INSTALL]
INSTALL
144” HIGH ROOF + LOW ROOF SPRINTER VAN
CENTERLINE RIB
CENTERLINE RIB
170” HIGH ROOF SPRINTER VAN
+ TAPE MEASURE
FIG 1
FIG 2