1 2 3 4 5 6
The programme has ended when \lights up in the display panel.
Interrupt programme to load/unload laundry.
The drying operation can be interrupted briefly to load or unload laundry. The programme selected
must then be resumed and completed.
Never switch the dryer off before
the drying process has ended.
1. Open door, the drying process is interrupted.
2. Load or remove laundry and close door.
3. If required, select a new programme and additional functions.
4. Press the START/STOP button.
Emptying condensation
Empty container after each drying operation, and not when drying is in
progress!
1. Pull out condensation container keeping it horizontal.
2. Pour out condensation.
3. Always push container in fully until it clicks into place.
If āflashes in the display panel -> Page 6/10.
Cleaning the fluff filter
The fluff filter consists of two parts.
Clean the inner fluff filter after every drying cycle.
Clean the outer fluff filter after every 5 drying cycles.
1. Open the door. Remove any fluff from the door/around the door.
2. Pull out the inner fluff filter and open it out.
3. Remove any fluff (rub your hand over the fluff filter).
If the fluff filter is very dirty or clogged, rinse it under running
water and dry well.
4. Fold the fluff filter shut and refit it.
To clean the outer fluff filter, if required:
5. Remove the inner fluff filter and then take out the outer fluff filter.
6. Open it and remove any fluff. Rinse under running water.
7. Fold it shut and replace both fluff filters in the reverse order.
Switching off the dryer
Turn the programme selector to OFF.
Do not leave laundry in the dryer.
Removing the laundry
Your dryer is equipped with an automatic anti-crease function. The drum is moved at specific time intervals
for 30 minutes once the programme has ended. The laundry stays loose and fluffy (60 or 120 minutes if
the additional (Easy iron) function is selected).
... and adapt to individual requirements
Never start the dryer if it is damaged!
Inform your after-sales service. Inspecting the
dryer
Sorting and loading laundry
Remove all items from pockets.
Check for cigarette lighters.
The drum must be empty prior to loading.
Your new dryer
Congratulations - You have chosen a modern, high-quality Gaggenau
domestic appliance.
The condensation dryer with heat exchanger and automatic cleaning
function is outstanding in terms of efficient energy consumption and
low maintenance requirements.
Every dryer which leaves our factory is carefully checked to ensure
that it functions correctly and is in perfect condition.
Should you have any questions, our after-sales service will be pleased
to help.
Disposal in an environmentally-responsible manner
Dispose of packaging in an environmentally-responsible manner.
This appliance is labelled in accordance with the European
guideline 2002/96/EC on waste electrical and electronic
equipment - WEEE.
The guideline provides an EU-wide framework for the return and
recycling of old appliances.
Intended use
Contents Page
ʋPreparation . . . . . . . . . . . . . . . . . . . . . . 2
ʋSetting the programmes . . . . . . . . . . . . . 2
ʋDrying . . . . . . . . . . . . . . . . . . . . . . . . 3/4
ʋNotes on laundry . . . . . . . . . . . . . . . . . . 5
ʋMaintenance and cleaning . . . . . . . . . . . 6
ʋOverview of programmes . . . . . . . . . . . . 7
ʋInstallation . . . . . . . . . . . . . . . . . . . . . . . 8
ʋFrost protection/transport . . . . . . . . . . . . 8
ʋTechnical data . . . . . . . . . . . . . . . . . . . .9
ʋOptional accessories . . . . . . . . . . . . . . . . 9
ʋWhat to do if... . . . . . . . . . . . . . . . . . . . .10
ʋSafety instructions . . . . . . . . . . . . . . . . 11
Preparing for installation, see Page 8
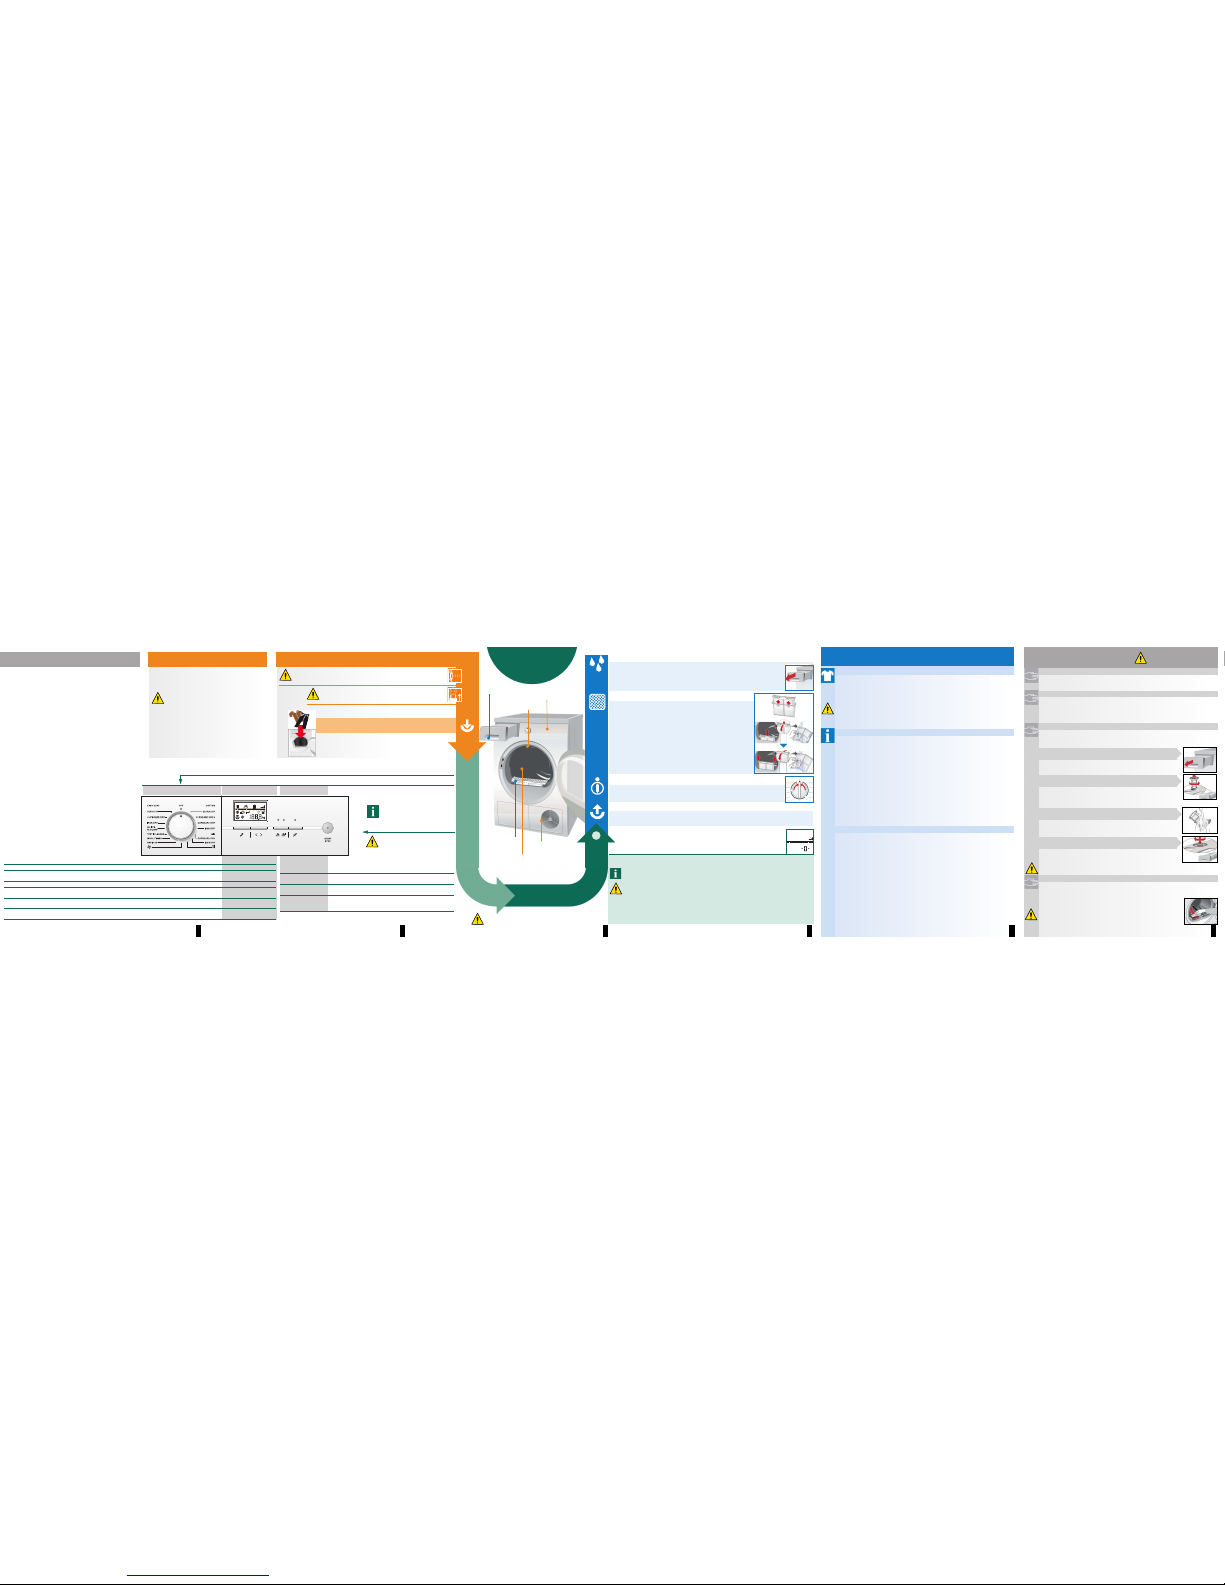
Selecting and adjusting the programme
Drying
Condensation container
with filter Control panel
ʋfor domestic use only,
ʋonly to be used for drying fabrics that have been
washed with water.
Do not leave children unsupervised near the dryer.
Keep pets away from the dryer.
Care and cleaning
Heat exchanger
The heat exchanger of the dryer is cleaned automatically when drying is in progress,
Cln appears in the display panel. Do not pull the condensation container out during the
cleaning process.
Dryer housing, control panel, air inlet
– Wipe off with a soft, damp cloth.
– Do not use caustic cleaning agents and solvents.
– Remove detergent and cleaning agent residue immediately.
– Water may occasionally accumulate between the window and the seal.
This does not impair the functions of your dryer in any way.
Filter in condensation container
The filter is cleaned automatically when the condensation container is emptied. Cleaning is
only required if the symbol āflashes again in the display panel once the condensation
container has been emptied.
1. Pull out the condensation container.
2. Twist the filter to release it from the catch.
3. Clean the filter under a continuously-running stream of water.
4. Insert the filter and turn it until the limit stop is reached.
5. Slide in the condensation container until it clicks into place.
Only operate the dryer with the filter inserted!
Moisture sensors
The dryer is equipped with stainless steel moisture sensors. Moisture sensors measure the
moisture level of the laundry. After sustained, repeated operation, a fine layer of scale may
form on the moisture sensors.
1. Open the door.
2. Clean the moisture sensors with a damp scouring sponge.
.
Do not use steel wool or abrasive materials!
Select the drying programme ...
Press the Start/Stop button
Make sure your hands are dry.
Hold the plug only. Connecting the
mains plug
Drying
Information on laundry ...
Labelling of fabrics
Follow the manufacturer's care information.
(cDrying at normal temperature.
'cDrying at low temperature -> also select (Low heat).
)cDo not machine dry.
Observe safety instructions without fail -> Page 11!
Do not tumble-dry the following fabrics for example:
– Impermeable fabrics (e.g. rubber-coated fabrics).
– Delicate materials (silk or curtains made from synthetic material) -> they may crease
– Laundry contaminated with oil.
Drying tips
– To ensure a consistent result, sort the laundry by fabric type and drying programme.
– Always dry very small items (e.g. baby socks) together with large items of laundry (e.g.
hand towel).
– Fold up large items of laundry (bed sheets) before drying.
– Close zips, hooks and eyelets, and button up covers.
Tie fabric belts, apron strings, etc. together
– Do not over-dry easy-care laundry -> risk of creasing!
Allow laundry to finish drying in the air.
– Do not dry woolens in the dryer, only use to freshen them up -> Page 7, WOOL FINISH
Programme.
– Do not iron laundry immediately after drying, fold items up and leave for a while -> the
remaining moisture will then be distributed evenly.
– Machine-knitted fabrics (e.g. T-shirts or jerseys) often shrink the first time they are dried ->
do not use the EXTRA DRY programme.
– Starched laundry is not always suitable for dryers -> starch leaves behind a coating that
adversely affects the drying operation.
– Use the correct dosage of fabric softener as per the manufacturer's instructions when
washing the laundry to be dried.
– Use the timer programme for small loads -> this improves the drying result.
Environmental protection/energy-saving tips
– Before drying, spin the laundry thoroughly in the washing machine -> the higher the spin
speed the shorter the drying time will be (consumes less energy), also spin easy-care
laundry.
– Put in, but do not exceed, the maximum recommended quantity of laundry ->
programme overview -> Page 7.
– Make sure the room is well ventilated during drying.
– Do obstruct or seal up the air inlet.
Only when switched off!
Drum
All buttons are sensitive and only
need to be touched lightly.
Do not pull out/empty the condensation container
when drying is in progress!
Only operate the dryer with
the fluff filter inserted! Air inlet
Two-part
fluff filter
Display of max. loading
capacity for programme selected
Drum interior light
See programme overview -> Page 7
For selecting the settings. ˎW(Menu)
To change all settings in the display panel. ˎ%&(Change)
1 -24 hrs End of the programme following... (depending on the programme selected,
e.g. duration 1:54h -> 2h; the nearest whole hour is always selected).
Electronic start timer 0, 1, 2, 3 Signal volume selectable in four stages: 0 (off), 1 (quiet), 2 (normal), 3 (loud). Signal 3On-Off Protection against accidental adjustment of functions that have been set (hold WMenu button down
for 5 seconds).
Appliance lock #0, 1, 2, 3 Fine adjustment of degree of dryness, selectable in four stages for COTTON, EASY CARE, MIX
and RAPID 40:0 (low) - 3 (very high).
Degree of dryness 9600-1800 Speed at which the washing machine was spun;
only used if the anticipated drying time needs to be displayed more accurately.
Spin speed ˎ(Low heat) Reduced temperature for delicate fabrics 'that require a
longer drying time; e.g. for polyacrylics, polyamide, elastane or
acetate.
ˎ(Easy iron) Reduces creasing and extends the anti-creasing phase once
the program has ended; two settings available.
Status indicators
Ic+c\Programme sequence displays:
drying, iron dry, cupboard dry, slackening/ready.
Service displays
Fluff filter 4Container āClean the fluff filter under running water.
Empty the condensation container.
Additional
functions
Display panel
Programme selector