manuals.online logo
Brands
  1. Home
  2. •
  3. Brands
  4. •
  5. Gaggenau
  6. •
  7. Grill
  8. •
  9. Gaggenau Vario 400 Series User manual

Gaggenau Vario 400 Series User manual

VR 414 610
Stainless steel
Width 15" (38 cm)
Included accessories
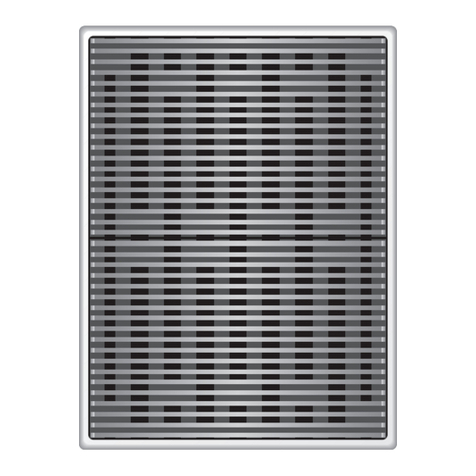
2 cast-iron grills
1 lava stone
1 cleaning brush
1 grease collecting insert
1 cast-iron griddle, half size
Installation accessories
In combination of several Vario
cooktops or VL 414 downdraft,
connecting strips must be used.
Choose respective VA 420 strip from
one of the below, depending on type
of installation.
VA 420 010
Connection strip for surface-mount
installation without appliance cover.
VA 420 011
Connection strip for surface-mount
installation with appliance cover.
VA 420 000
Connection strip for flush installation
without appliance cover.
VA 420 001
Connection strip for flush installation
with appliance cover.
VA 440 010
Stainless steel cover with mounting
strip.
VA 450 400
Stainless steel adjustment strip, width
15". Necessary accessory in a combi-
nation of 15" Varios with at least one
appliance cover to compensate for the
appliance depth.
Optional accessories
LV 030 000
Lava stones for refilling.
VA 461 000
Cast-iron griddle, enameled, half size
For Vario electric grill 400 series. For
simultaneous searing and grilling on
two separate surfaces.
VA 461 001
Cast-iron griddle, enameled, full size
For Vario electric grill 400 series.
For searing large quantities on one
surface.
Vario 400 series electric grill
VR 414
– 2 zones, independently controlled
– Half size cast-iron griddle included
for simultaneous searing and
grilling on two separate surfaces
– Open cast-iron grill, lava stones
– Solid stainless steel control knobs
– Precision-crafted ⅛-inch stainless
steel frame
– For surface-mount installation with
a visible edge or for flush
installation
– Can be perfectly combined with
other Vario 400 series products
Operation
Control knobs with illuminated
ring, cooking zone and output level
markings.
Electronic control in 12 output levels.
Features
Cooktop, lavastone container and
grease drip tray are made from
stainless steel.
2 independently controlled heating
elements (1,500 W), front and rear.
Two-part cast-iron grill.
Safety
Safety shut-off.
Planning notes
Depending on the type of installation —
surface-/ or flush-mounted, with or
without cover —the specific location of
the control knob positions may vary.
When using the appliance cover
VA 440 or adjustment strip VA450
additional space for cut-out depth
needs to be considered.
In a combination of Vario cooktops
with at least one appliance cover, the
adjustment strip VA450 is required.
In a combination of several Vario 400
series cooktops a connection strip
must be used. Depending on the type
of installation — surface-/ or flush-
mounted, with or without cover— the
respective VA 420 connecting strip
must be used.
For flush installation the edge height
in the cut-out needs to be at least ½"
and for surface-mount ⅜". Ensure a
continuous cut surface of 90°.
The weight capacity and stability,
especially in case of thin countertops,
must be supported using suitable
substructures. Take the appliance
weight and additional loads into
account.
Flush installation is possible in
countertops made of stone, synthetics
or solid wood. Heat resistance and
watertight sealing of the edges must
be observed. For other materials,
please consult with your countertop
manufacturer.
The groove must be continuous and
even, so that uniform placing of the
appliance on the gasket is ensured.
Do not use discontinuous lining.
The joint width may vary due to size
tolerances of the combinations and of
the countertop cut-out.
If installing several Vario products in
individual cut-outs allow for a minimum
distance of 2" between the cooktops.
Built-in control panel can be integrated
in the bottom cabinet at drawer level.
Front panel thickness ⅝" – 1".
The adjacent drawing “Installation of
the control knobs” must be observed
if the panel is more than 1" thick (there
must be a recess at the rear for proper
control module installation).
Above the countertop minimum
clearance of 21" from adjacent
heat-sensitive cabinets or contact 1"
surfaces must be observed or thermal
insulation must be installed.
Appliance can be snapped into the
countertop from above.
Please read additional planning notes
on pages 82 – 87.
Rating
Total rating: 3.0 kW.
Total Amps: 15 A.
208/220–240V / 60 Hz
Plan for a 70" connecting cable
without plug (hardwire required).
Numbers indicated
inside parenthesis ( ) = mm
R
1
/
8
" (R 3)
90°
70" (1.8 m)
*
with appliance cover or adjustment strip.
See separate planning notes.
**
4
1
/
8
" (105 mm) in the area of the cable clip (right, center).
min. 4
1
/
8
" (105)
max. 6
3
/
8
" (162)
min. 2"
(50)
dia. 2
1
/
8
"
(60)
dia. 1
3
/
8
" (35)
min. 1
3
/
8
" (35)
19
3
/
8
"
±1
/
16
" (492
±2)
*20
1
/
4
"
+1
/
16
" (*515
+2
)
14
15
/
16
"
(380)
20
1
/
2
" (520)
*21
1
/
16
" (*535)
1
/
8
" (3)
14
3
/
16
"
±1
/
16
"
(360
±2
)
3
9
/
16
" (90)
**3
5
/
8
" (92)
5
1
/
2
"
(140)
8
15
/
16
"
(227)
11"
(280)
3" (76)
1
/
8
"
(3.5
-0.5
)
R
1
/
8
" (3)
R
3
/
16
"
(5
+1
)
*
with appliance cover or adjustment strip.
See separate planning notes.
**
4
1
/
4
" (108 mm) in the area of the cable clip (right, center).
min. 1
3
/
8
" (35)
min. 4
1
/
4
" (109)
max. 6
1
/
2
" (166)
min. 2"
(50)
dia. 2
1
/
8
"
(60)
dia. 1
3
/
8
" (35)
70" (1.8 m)
90°
14
15
/
16
"
(380)
20
1
/
2
" (520)
*21
1
/
16
" (*535)
19
3
/
8
"
±1
/
16
" (492
±2
)
*20
1
/
4
"
+1
/
16
" (*515
+2
)
20
11
/
16
"
+1
/
16
" (526
+2
)
*21
1
/
4
"
+1
/
16
" (*541
+2
)
**3
3
/
4
" (95)
1
/
8
"
(3)
14
3
/
16
"
±1
/
16
"
(360
±2
)
15
3
/
16
"
+1
/
16
"
(386
+2
)
3
9
/
16
"
(90)
5
1
/
2
"
(140)
8
15
/
16
"
(227)
11"
(280)
3" (76)
Surface-mount Installation Flush-mount Installation
Control knob installation, surface-mounted installation
ø 1
3
/
8
" (35)
ø 1
3
/
8
" (35)
min.
3
/
16
" (5)
min.
3
/
16
" (5)
4
1
/
8
"-6
3
/
8
"
(105-162)
4
1
/
8
"-6
3
/
8
"
(105-162)
5
/
8
"-1"
(16-26)
D =1" (26)
D
>
1" (26)
3
1
/
8
"x12
3
/
16
"
(80x310)
Installation of the control knob; surface-mount installation
Control knob installation, flush-mounted installation
ø 1
3
/
8
" (35)
ø 1
3
/
8
" (35)
min.
3
/
16
" (5)
min.
3
/
16
" (5)
4
1
/
4
"-6
1
/
2
"
(109-166)
4
1
/
4
"-6
1
/
2
"
(109-166)
5
/
8
"-1"
(16-26)
D =1" (26)
D
>
1" (26)
3
1
/
8
"x12
3
/
16
"
(80x310)
Installation of the control knob; flush-mount installation
fill with
silicone
Longitudinal section
1
/
8
" (
3,5
-0,5
)
14
3
/
16
"
±1
/
16
"
(360
±2
)
14
15
/
16
"
(380)
15
3
/
16
"
+1
/
16
"
(386
+2
)
1
/
2
"
(13)
1
/
2
"
(13)
1
/
8
"
(3
+1
)
1
/
8
"
(3
+1
)
Longitudinal section
Cross-section
fill with
silicone
1
/
8
" (
3.5
-0.5
)
19
3
/
8
"
±1
/
16
"
(492
±2
)
20
11
/
16
"
+1
/
16
"
(526
+2
)
11
/
16
"
(17)
11
/
16
"
(17)
1
/
8
"
(3
+1
)
1
/
8
"
(3
+1
)
20
1
/
2
"
(520)
When installing with appliance cover or adjustment strip, pay attention to
the deeper cut-out and the front and rear groove width.
Cross-section
* with appliance cover or adjustment bar
(observe front and rear asymmetrical assembly,
see separate notes "assembly with
appliance cover/adjustment bar").
View from above
R
3
/
16
"
(R 5
+1
)
R
1
/
8
"
(R 3)
14
3
/
16
"
±1
/
16
"
(360
±2
)
15
3
/
16
"
+1
/
16
"
(386
+2
)
20
11
/
16
"
+1
/
16
"
(526
+2
)
*21
1
/
4
"
+1
/
16
"
(*541
+2
)
19
3
/
8
"
±1
/
16
"
(492
±2
)
*20
1
/
4
"
+1
/
16
"
(*515
+2
)
View from above
* With appliance cover or adjustment strip. See separate planning notes on page 87.
** 4 ⅛" (105) in the area of the cable clip (right, center).
* With appliance cover or adjustment strip. See separate planning notes on page 87.
** 4 ¼" (108) in the area of the cable clip (right, center).
* with appliance cover or adjustment
strip (observe front and rear
asymmetrical assembly. See
separate notes “assembly with
appliance cover/adjustment strip”
on page 87).

Other manuals for Vario 400 Series

6

This manual suits for next models

1

Other Gaggenau Grill manuals

Gaggenau 400 Series User manual

Gaggenau

Gaggenau 400 Series User manual

Gaggenau VR 230 Product guide

Gaggenau

Gaggenau VR 230 Product guide

Gaggenau VR 230 User manual

Gaggenau

Gaggenau VR 230 User manual

Gaggenau VR 230-912 Product guide

Gaggenau

Gaggenau VR 230-912 Product guide

Gaggenau VR 230 934 User manual

Gaggenau

Gaggenau VR 230 934 User manual

Gaggenau VR 230 614 User manual

Gaggenau

Gaggenau VR 230 614 User manual

Gaggenau VR 230 614 User manual

Gaggenau

Gaggenau VR 230 614 User manual

Gaggenau VP 230 614 User manual

Gaggenau

Gaggenau VP 230 614 User manual

Gaggenau VR 414 User manual

Gaggenau

Gaggenau VR 414 User manual

Gaggenau Vario 400 Series User manual

Gaggenau

Gaggenau Vario 400 Series User manual

Gaggenau VR414115 User manual

Gaggenau

Gaggenau VR414115 User manual

Gaggenau VR 421-611 Product guide

Gaggenau

Gaggenau VR 421-611 Product guide

Gaggenau VR 414 611 User manual

Gaggenau

Gaggenau VR 414 611 User manual

Gaggenau VR 421-610 Product guide

Gaggenau

Gaggenau VR 421-610 Product guide

Gaggenau VR 230 620 User manual

Gaggenau

Gaggenau VR 230 620 User manual

Gaggenau VR 414 111 User manual

Gaggenau

Gaggenau VR 414 111 User manual

Gaggenau VR 230-612 Product guide

Gaggenau

Gaggenau VR 230-612 Product guide

Gaggenau VR 230 120 User manual

Gaggenau

Gaggenau VR 230 120 User manual

Gaggenau VR 230 614 User manual

Gaggenau

Gaggenau VR 230 614 User manual

Gaggenau VR 230 620 User manual

Gaggenau

Gaggenau VR 230 620 User manual

Gaggenau VR230120 User manual

Gaggenau

Gaggenau VR230120 User manual

Gaggenau VR 414 611 User manual

Gaggenau

Gaggenau VR 414 611 User manual

Gaggenau VR 230 User manual

Gaggenau

Gaggenau VR 230 User manual

Gaggenau VR 414 610 User manual

Gaggenau

Gaggenau VR 414 610 User manual

Popular Grill manuals by other brands

Klarstein Gatsby manual

Klarstein

Klarstein Gatsby manual

George Foreman GBZ201RCDS owner's manual

George Foreman

George Foreman GBZ201RCDS owner's manual

Napoleon 325 instruction manual

Napoleon

Napoleon 325 instruction manual

AOG IRB-18 quick start guide

AOG

AOG IRB-18 quick start guide

Nexgrill G4NEXDX operating instructions

Nexgrill

Nexgrill G4NEXDX operating instructions

TM Electron TMPGR004 manual

TM Electron

TM Electron TMPGR004 manual

Char-Broil PERFORMANCE 463330521 Product guide

Char-Broil

Char-Broil PERFORMANCE 463330521 Product guide

Grillstream GGH46SS manual

Grillstream

Grillstream GGH46SS manual

Char-Broil 16601514-A1 Product guide

Char-Broil

Char-Broil 16601514-A1 Product guide

Campingaz Compact L 2 Series Operation and maintenance

Campingaz

Campingaz Compact L 2 Series Operation and maintenance

Oster 4770 user manual

Oster

Oster 4770 user manual

Unold 48735 Instructions for use

Unold

Unold 48735 Instructions for use

KitchenAid 1902340 Installation Instructions and Use & Care Guide

KitchenAid

KitchenAid 1902340 Installation Instructions and Use & Care Guide

Pit Boss PB820FB instructions

Pit Boss

Pit Boss PB820FB instructions

Napoleon R365-1 manual

Napoleon

Napoleon R365-1 manual

COOKOUT INFINITY INF-001-SS instruction manual

COOKOUT

COOKOUT INFINITY INF-001-SS instruction manual

Gasmate ODYSSEY2T BQ1062 manual

Gasmate

Gasmate ODYSSEY2T BQ1062 manual

Cosori VeSync Aeroblaze CAG-A601S Series user manual

Cosori

Cosori VeSync Aeroblaze CAG-A601S Series user manual

manuals.online logo
manuals.online logoBrands
  • About & Mission
  • Contact us
  • Privacy Policy
  • Terms and Conditions

Copyright 2025 Manuals.Online. All Rights Reserved.