GAI-Tronics 13382 WiFi Owner's manual

Pub. 42004-462C
G A I - T R O N I C S
®
A H U B B E L L C O M P A N Y
Models 13382 WiFi and 13383 VoIP
Addressable Amplified Speakers
Installation Operation and Maintenance
Manual
TA B L E O F CO N T E N T S
GAI-Tronics 3030 Kutztown Road Reading, PA 19605 USA
610-777-1374 800-492-1212 Fax: 610-796-5954
VISIT WWW.GAI-TRONICS.COM FOR PRODUCT LITERATURE AND MANUALS
Forward...........................................................................................................................................1
Confidentiality Notice.............................................................................................................................1
Computer Software Copyrights.............................................................................................................1
Scope of Manual......................................................................................................................................1
Nomenclature..........................................................................................................................................1
Safety and General Information............................................................................................................2
User Instructions...................................................................................................................................2
Exposure to Radio Frequency Energy ..................................................................................................2
Electromagnetic Interference/Compatibility......................................................................................... 2
Safe Handling of CMOS Integrated Circuit Devices...........................................................................3
General Information.......................................................................................................................4
Product Overview ...................................................................................................................................4
Features and Functions .......................................................................................................................... 5
System Requirements and Limitations.................................................................................................5
Available Models.....................................................................................................................................6
Installation ......................................................................................................................................7
Important Safety Information...............................................................................................................7
Outdoor Installation Product................................................................................................................. 7
Antenna Care ........................................................................................................................................7
Electromagnetic Interference/Compatibility......................................................................................... 7
Mechanical Receipt Inspection..............................................................................................................7
Cable Installation Safety Considerations..............................................................................................8
Required Tools........................................................................................................................................8
Opening the Addressable Amplified Speaker ......................................................................................8
Mounting..................................................................................................................................................9
Cable Installation....................................................................................................................................9
Field Wiring Connections................................................................................................................... 10
VoIP PCBA Connection in the Model 13383.....................................................................................11

Table of Contents Pub. 42004-462C
GAI-Tronics 3030 Kutztown Road Reading, PA 19605 USA
610-777-1374 800-492-1212 Fax: 610-796-5954
VISIT WWW.GAI-TRONICS.COM FOR PRODUCT LITERATURE AND MANUALS
VoIP PCBA Connections in the Model 13382 ...................................................................................11
Connectors ..........................................................................................................................................11
Closing the Addressable Amplified Speaker......................................................................................13
Programming and Set Up.............................................................................................................13
Opening the Addressable Amplified Speaker ....................................................................................14
First Time WiFi Interface Setup (Model 13382)................................................................................14
Resetting the WiFi Interface Configuration.......................................................................................17
VoIP PCBA Configuration...................................................................................................................18
VoIP PCBA Initial Network Configuration .......................................................................................18
Closing the Addressable Amplified Speaker......................................................................................18
Field Installed Options..................................................................................................................19
Model 12506-001 Remote Volume Control Assembly.......................................................................19
Model 190-003PS Weatherproof Power Supply Kit..........................................................................20
Maintenance..................................................................................................................................21
Service and Repair................................................................................................................................21
Replacement Parts and Kits.................................................................................................................21
Ordering Replacement Parts ...............................................................................................................22
Specifications ................................................................................................................................23
Power Options.......................................................................................................................................23
Audio......................................................................................................................................................23
Network (Ethernet)...............................................................................................................................23
Mechanical.............................................................................................................................................24
Environmental.......................................................................................................................................24
Approvals.......................................................................................................................................24

Pub. 42004-462C
G A I - T R O N I C S
®
A H U B B E L L C O M P A N Y
Models 13382 WiFi and 13383 VoIP
Addressable Amplified Speakers Installation
Operation and Maintenance Manual
GAI-Tronics 3030 Kutztown Road Reading, PA 19605 USA
610-777-1374 800-492-1212 Fax: 610-796-5954
VISIT WWW.GAI-TRONICS.COM FOR PRODUCT LITERATURE AND MANUALS
Forward
Confidentiality Notice
This manual is provided solely as an installation, operation, and maintenance guide and contains sensitive
business and technical information that is confidential and proprietary to GAI-Tronics. GAI-Tronics
retains all intellectual property and other rights in or to the information contained herein, and such
information may only be used in connection with the operation of your GAI-Tronics product or system.
This manual may not be disclosed in any form, in whole or in part, directly or indirectly, to any third
party.
Computer Software Copyrights
This product contains copyrighted computer programs stored in semiconductor memory. These programs
are copyrighted by GAI-Tronics Corporation and may not be reproduced in any form without expressed
written permission from GAI-Tronics.
Scope of Manual
This manual offers descriptive data, installation, and service information for the VoIP and WiFi
Addressable Amplified Speaker Assemblies.
Nomenclature
The model number is located on the nameplate on top of the speaker that specifically identifies GAI-
Tronics equipment.

Pub. 42004-462C
Models 13382 WiFi and 13383 VoIP Addressable Amplified Speakers Page 2 of 24
P:\Standard IOMs - Current Release\42004 Instr. Manuals\42004-462C.docx
09/18
Safety and General Information
Installation should only be performed by qualified service personnel in accordance with the
National Electrical Code or applicable local codes.
Power Sources—Operate this unit only from the type of power source indicated on the label.
If unsure of the type of power supply to use, contact qualified service personnel.
Battery Operated Units—Refer to the operating instructions.
External Power Supply Units—Use only the recommended approved power supplies.
Limited Power Source Units—The power source must comply with EN60950. Substitutions may
damage the unit or cause fire or shock.
Outdoor Product:
Power Lines—An outdoor system should not be located in the vicinity of overhead power lines, electric
lights, or power circuits, or where it may contact such power lines or circuits, as this contact might be
fatal. Refer to the National Electrical Code Article 800 regarding installation.
User Instructions
This equipment has been tested and found to comply with the limits for a Class A digital device, pursuant
to part 15 of the FCC Rules. These limits are designed to provide reasonable protection against harmful
interference when the equipment is operated in a commercial environment. This equipment generates,
uses, and can radiate radio frequency energy and, if not installed and used in accordance with the
instruction manual, may cause harmful interference to radio communications. Operation of this
equipment in a residential area is likely to cause harmful interference in which case the user will be
required to correct the interference at his own expense.
Exposure to Radio Frequency Energy
This equipment complies with FCC’s RF radiation exposure limits set forth for an uncontrolled
environment. The antenna(s) used for this transmitter must be installed and operated to provide a
separation distance of at least 20 cm from all persons and must not be collocated or operating in
conjunction with any other antenna or transmitter. Installers must ensure that 20 cm separation distance
will be maintained between the device and users.
Antenna Care
Unauthorized antennas, modifications, or attachments could damage the radio and may violate FCC
regulations.
Do NOT hold the antenna when the radio is IN USE. Holding the antenna affects the effective
range.
Approved Accessories
Use only GAI-Tronics Corporation approved accessories. Please visit https://www.gai-tronics.com.
Electromagnetic Interference/Compatibility
Electronic equipment may be susceptible to electromagnetic interference. If you experience interference,
visit the FCC website at http://www.fcc.gov for possible solutions.

Pub. 42004-462C
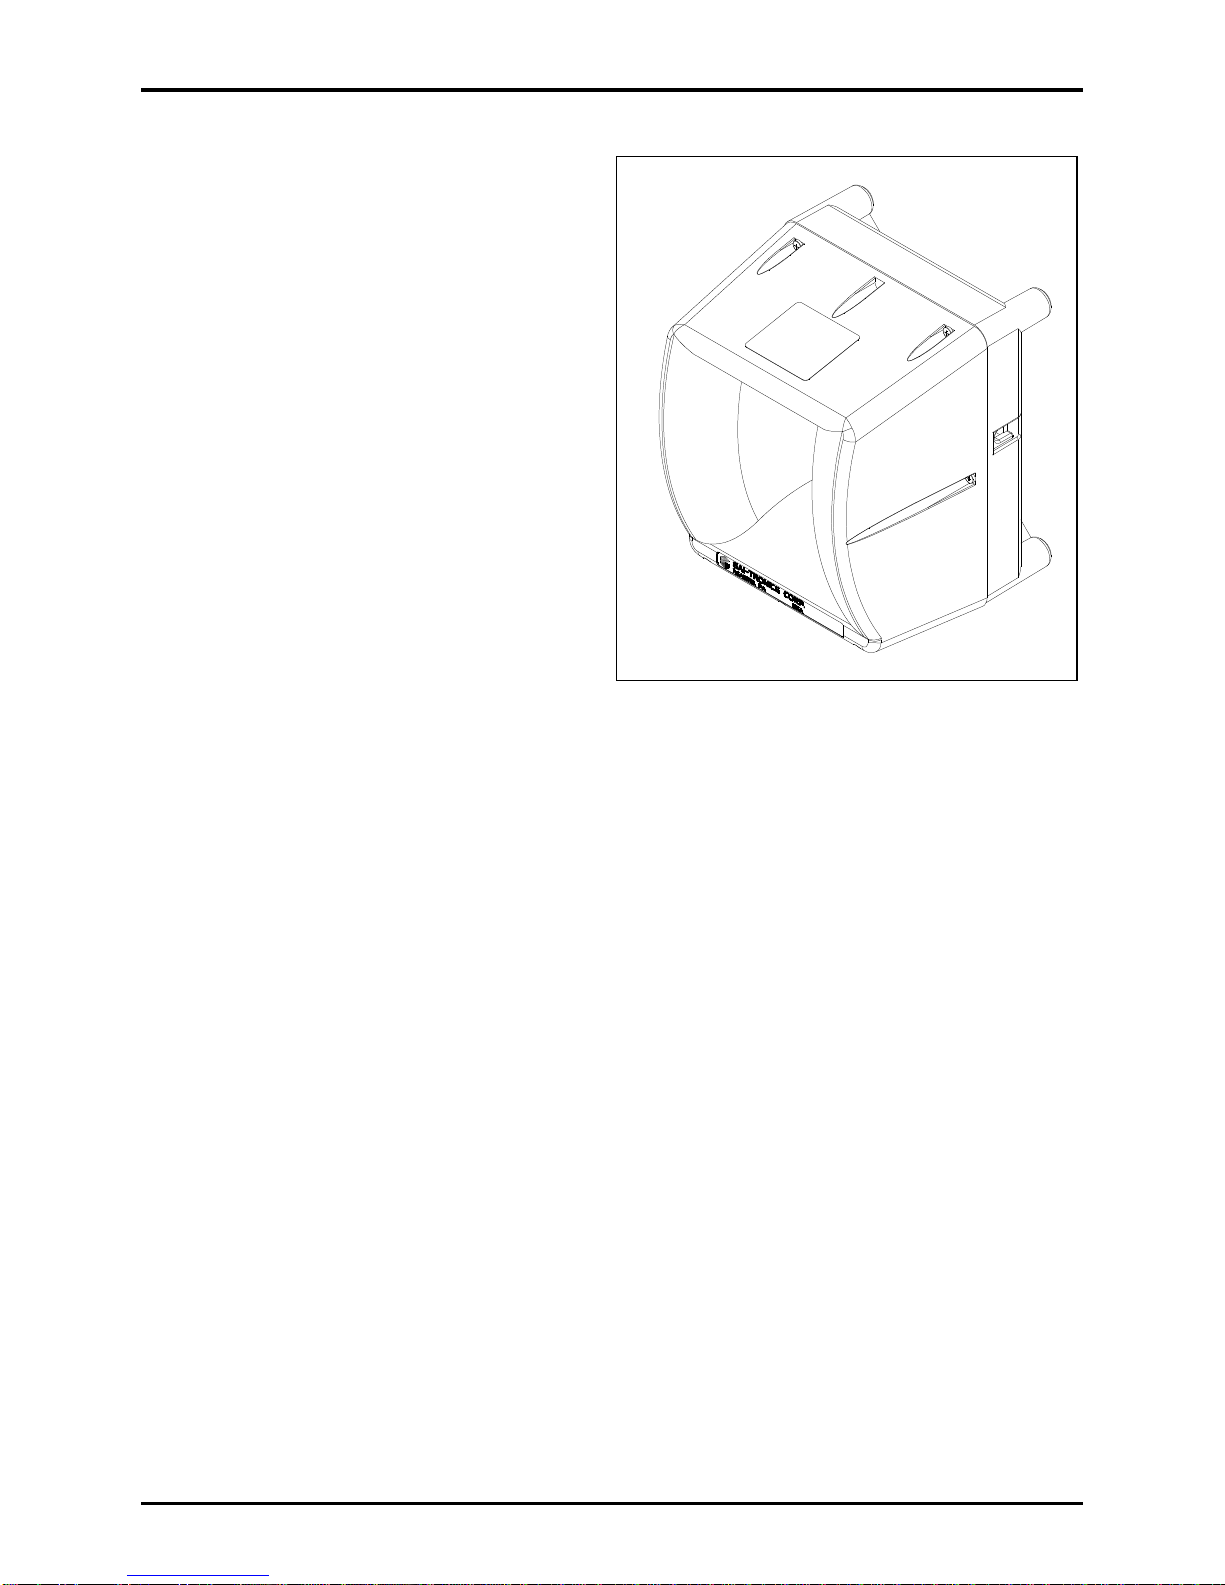
Models 13382 WiFi and 13383 VoIP Addressable Amplified Speakers Page 3 of 24
P:\Standard IOMs - Current Release\42004 Instr. Manuals\42004-462C.docx
09/18
Safe Handling of CMOS Integrated Circuit Devices
Many integrated circuit devices used in communications equipment are CMOS (Complementary Metal
Oxide Semiconductor) type devices. Because of their high open circuit impedance, CMOS integrated
circuits are vulnerable to damage from static charges. Care must be taken when handling, shipping, and
servicing them and the assemblies in which they are used.
Even though protection devices are provided in CMOS integrated circuit inputs, the protection is effective
only against overvoltage in the hundreds of volts range such as is encountered in an operating system. In
a system, circuit elements distribute static charges and load the CMOS circuits, decreasing the chance of
damage. However, CMOS circuits can be damaged by improper handling of the modules, even in a
system.
To avoid damage to circuits, observe the following handling, shipping, and servicing precautions:
1. Prior to and while servicing a circuit module, particularly after moving within the service area,
momentarily touch both hands to a bare metal, earth-grounded surface. This will discharge any static
charge that may have accumulated on the person doing the servicing.
NOTE:Wearing a conductive wrist strap will minimize static build-up during servicing.
2. Whenever possible, avoid touching any electrically conductive parts of the circuit module with your
hands.
3. Power down the unit before installing or removing the circuit module.
4. When servicing a circuit module, avoid carpeted areas, dry environments, and certain types of
clothing (silk, nylon, wool, etc.) because they contribute to static build-up. Similarly, disconnect the
test probe prior to removing the ground lead.
5. All electrically powered test equipment should be grounded. Apply the ground lead from the test
equipment to the circuit module before connecting the test probe.
6. If a circuit module is removed from the system, it is desirable to lay it on a conductive surface (such
as a sheet of aluminum foil) which is connected to ground through 100 kilohms of resistance.
7. When soldering, be sure the soldering iron is grounded and has a grounded tip.
8. Prior to connecting jumpers, replacing circuit components, or touching CMOS pins (if this becomes
necessary in the replacement of an integrated circuit device), be sure to discharge any static build-up
as described in step 1. Since voltage differences can exist across the human body, it is recommended
that only one hand be used if it is necessary to touch pins on the CMOS device and associated board
wiring.
9. When replacing a CMOS integrated circuit device, leave the device in its conductive rail container or
conductive foam until it is to be inserted into the printed circuit module.
10. All low impedance test equipment (such as pulse generators, etc.) should be connected to CMOS
device inputs after power is applied to the CMOS circuitry. Similarly, such low impedance
equipment should be disconnected before power is turned off.
11. Replacement modules shipped separately from the factory will be packaged in a conductive material.
Any modules being transported from one area to another should be wrapped in a similar material
(aluminum foil may be used). Never use non-conductive material for packaging these modules.

Pub. 42004-462C
Models 13382 WiFi and 13383 VoIP Addressable Amplified Speakers Page 4 of 24
P:\Standard IOMs - Current Release\42004 Instr. Manuals\42004-462C.docx
09/18
General Information
Product Overview
The Model 13383 VoIP Addressable Amplified Speaker enables broadcasting to personnel throughout a
facility via an existing LAN (Local Area Network). The Model 13382 WiFi Addressable Amplified
Speaker provides the same capability as the Model 13383 but permits connection to an existing WLAN
(Wireless LAN).
These speaker assemblies are completely self-contained and can easily be added to an existing LAN
(10/100 Base-T Ethernet) or WLAN (IEEE 802.11 b/g/n) with minimal cost or effort.
Each speaker model includes an integral VoIP interface and speaker amplifier. The Model 13382
additionally includes a WiFi interface circuit and antenna.
Power can be provided via a PoE connection (Model 13383 only, 802.3af compliant) or the external
power supply provided with each unit. Each speaker is capable of providing a maximum 115 dB spl
output at 1 meter when powered via PoE or the 15 V dc power supply provided with each unit; or 118
dB spl output at 1 meter via an external 24 V dc power supply.
Each addressable amplified speaker also provides a 600-ohm, 0 dBm audio output for additional design
flexibility. This output can be connected to the audio input of a central amplifier or any equipment that
requires a 600-ohm audio input, to further expand the broadcast system.
Each VoIP or WiFi Speaker is capable of providing two dry contact NO (normally open) outputs. Each
output is programmable for a variety of uses such as activation of a strobe in a high noise area or initiating
a door latch remotely.
The GAI-Tronics VoIP and WiFi Speakers provide the flexibility to address a diverse range of
applications. A wide variety of functions can be achieved by altering the configuration data stored in the
non-volatile memory. Configuration options include:
web page configuration
configuration file
CLI (Command Line Interface)

Pub. 42004-462C
Models 13382 WiFi and 13383 VoIP Addressable Amplified Speakers Page 5 of 24
P:\Standard IOMs - Current Release\42004 Instr. Manuals\42004-462C.docx
09/18
Features and Functions
The GAI-Tronics Models 13382 WiFi and 13383
VoIP Addressable Amplified Speakers are
equipped with the following features:
wired or WiFi VoIP
one-way broadcasting from VoIP network
weatherproof enclosure
POE (Power-over-Ethernet, 802.3af
compliant) (Model 13383 only)
wireless 802.11b, IEEE 802.11g compliant
(Model 13382 only)
high-efficiency (>80%) Class D amplifier
600-ohm audio output
two dry contact closure outputs
SIP compatible (RFC3261)
real-time status reporting via TMA software
(purchased separately)
configurable via web page, serial link, or
download
multicast capability, up to eight addresses
universal ac input power supply provided, 15 V dc
optional local volume control
provides up to 8 watts into an 8-ohm load (115 dB spl), measured at 1 meter on axis, with PoE power
input (or 15 V dc)
provides up to 30 watts into an 8-ohm load (118 dB spl), measured at 1 meter on axis, with 24 V dc
power input
System Requirements and Limitations
A 100 Base-T Ethernet network with SIP Server is required for systems containing three or more VoIP
addressable amplified speaker assemblies. The operation of this equipment is limited by the customer’s
LAN media capabilities and the services available at each end point. The performance of the VoIP
speaker assembly is dependent on the provision of sufficient bandwidth and prioritization on the network
to give the quality of service required. In addition, the setup, installation, and software version of key
components such as switches and routers can have a significant effect on the operation of this equipment.
Improper connections or loose cables can also affect their operation.
The addressable amplified assemblies require a local 15 V dc or 24 V dc power source for operation.
Each unit is provided with a universal (120/240 V ac) power supply that provides a 15 V dc output. GAI-
Tronics Model 190-003PS Weatherproof Power Supply Kit is available (purchased separately) to provide
a 24 V dc output.
Figure 1. VoIP/WiFi Addressable Amplified
Speaker Assembly

Pub. 42004-462C
Models 13382 WiFi and 13383 VoIP Addressable Amplified Speakers Page 6 of 24
P:\Standard IOMs - Current Release\42004 Instr. Manuals\42004-462C.docx
09/18
The following network facilities should be provided (This may vary widely depending on how your
network is deployed):
SIP proxy server (to route calls)
SIP registrar server (frequently combined with proxy servers)
TFTP server (for downloading configuration files).
TCP Syslog server (for reporting alarms and external inputs)
SMTP server (for reporting via email)
STNP server (to synchronize the internal clock)
STUN server (for NAT firewall traversal)
Dedicated systems, such as Gatekeepers, VoIP-enabled PABXs or soft PABXs may also provide these
functions.
The GAI-Tronics VoIP/WiFi Addressable Amplified Speakers only support SIP (Session Initiation
Protocol) to RFC3261 call control signaling.
In addition to direct access, peer-to-peer or via a SIP server, each amplified speaker is capable of
receiving multicast broadcasts. Multicast allows a single audio stream to be sent to multiple end points
simultaneously, to achieve multi-point paging or public address functionality over IP. Multicast requires
the use of a SIP server that specifically supports multicast functionality and each speaker must be
configured (enabled) to receive multicast packets.
Available Models
Table 1. VoIP/WiFi Addressable Amplified Speakers Model Chart
Part No.
Description
13382
WiFi VoIP Addressable Amplified Speaker
13383
VoIP Addressable Amplified Speaker

Pub. 42004-462C
Models 13382 WiFi and 13383 VoIP Addressable Amplified Speakers Page 7 of 24
P:\Standard IOMs - Current Release\42004 Instr. Manuals\42004-462C.docx
09/18
Installation
Important Safety Information
Install equipment without modification and according to all applicable local and national electrical codes.
Consult the National Electrical Code (NFPA 70), Canadian Standards Association (CSA 22.1), and local
codes for specific requirements regarding your installation. Class 2 circuit wiring must be performed in
accordance with NEC 725.55.
Read, follow, and retain instructions—All safety and operating instructions should be read and
followed before operating the unit. Retain instructions for future reference.
WARNING
—This product can contain hazardous voltages. Always remove power to this
station and any associated equipment before beginning any installation.
WARNING
—Do not install this equipment in areas other than those indicated on the approval
listing in the Approvals section of this manual. Such installation may cause a
safety hazard and consequent injury or property damage.
Heed warnings—Adhere to all warnings on the unit and in the operating instructions.
Attachments—Attachments not recommended by the product manufacturer should not be used, as they
may cause hazards.
This permanently connected apparatus must have an ALL-POLE MAINS switch with a contact separation
of at least 3 mm in each pole incorporated in the electrical installation of the building.
Outdoor Installation Product
Power lines—Outdoor systems should not be located in the vicinity of overhead power lines, electric
lights, or power circuits, where it may contact such power lines or circuits, as this contact might be fatal.
Refer to the National Electrical Code Article 800 regarding installation.
Antenna Care
Unauthorized antennas, modifications, or attachments could damage the radio and may violate FCC
regulations.
Electromagnetic Interference/Compatibility
Electronic equipment may be susceptible to electromagnetic interference. If you experience interference,
visit the FCC website at http://www.fcc.gov for possible solutions.
Mechanical Receipt Inspection
The addressable amplified speaker is shipped in a cardboard container, protected from movement and
distress by a self-forming packaging material. Thoroughly inspect it as soon as possible after delivery.
In-transit damage should be immediately reported to the transportation company.

Pub. 42004-462C
Models 13382 WiFi and 13383 VoIP Addressable Amplified Speakers Page 8 of 24
P:\Standard IOMs - Current Release\42004 Instr. Manuals\42004-462C.docx
09/18
Cable Installation Safety Considerations
Interconnecting, communications, and Class 2 dc power cables should be separated from electrical light
or other Class 1 circuits by at least 2 inches. The exception is where Class 1 wiring or power circuits are
run in a raceway, or are metal-sheathed or metal-clad, or are permanently separated from the conductors
of the other circuitry by a continuous and firmly fixed nonconductor such as porcelain tubes or flexible
tubing in addition to the insulation on the wire. Communications cables and in-building wiring should be
listed and marked for the purpose according to NEC Article 800.
Required Tools
#1 Phillips screwdriver
1/16-inch flat blade screwdriver (for TB101, TB1 and TB3 connections only)
Opening the Addressable Amplified Speaker
The addressable amplified speaker must be opened for programming and installation. Bench
programming and testing is recommended.
1. Remove the speaker from the carton and position it on a flat surface with the front of the speaker
facing up.
Although the front section attaches to the rear section with six Phillips screws, only two screws have
been secured during the production process.
2. Back out the two screws on the left and right side of the speaker.
All screws are captive and will remain in the front section.
3. Lift the front section straight up and flip to the left-hand side of the rear section (see Figure 2).
Figure 2: Addressable Amplified Speaker (Model 13382 shown)

Pub. 42004-462C
Models 13382 WiFi and 13383 VoIP Addressable Amplified Speakers Page 9 of 24
P:\Standard IOMs - Current Release\42004 Instr. Manuals\42004-462C.docx
09/18
Mounting
After opening the addressable amplified speaker:
1. Untwist the nylon tie used for wire management.
2. Unplug the quick-connect fastons from the speaker.
3. Unplug the dual 7-point connectors (TB1), 2-point connector (TB2), and 4-point connector (TB3)
from the PCBA.
The front section can now be completely separated from the rear section (see Figure 3).
4. Mount the rear section to any flat surface using 1/4-inch diameter customer-provided screws in each
of the four 0.280-inch mounting holes in the corners of the rear section (see Figure 3 for the mounting
hole pattern dimensions).
A Model 231-001 Pole Mounting Kit can also be used for pole or surface mounting. Two customer-
provided mounting screws are required to surface mount this kit. The kit includes four mounting screws
needed to secure the speaker to the kit’s bracket.
Figure 3. Mounting Detail
Cable Installation
The speaker assemblies are designed for bottom cable entry, where two ¾-inch conduit entries are
located. Field wiring can enter the speaker housing using the installed ¾-inch NPT cable bushing
(bottom right), or with rigid or flexible conduit, by removing the installed bushing. The ¾-inch male
conduit plug (bottom left) can be removed for additional conduit connections (see Figure 4). The speaker
is completely rain-tight when the conduit entries are closed and sealed.

Pub. 42004-462C
Models 13382 WiFi and 13383 VoIP Addressable Amplified Speakers Page 10 of 24
P:\Standard IOMs - Current Release\42004 Instr. Manuals\42004-462C.docx
09/18
Figure 4. Bottom view of speaker assembly
Install the necessary cable for wiring the speaker.
Field Wiring Connections
The addressable amplified speaker provides terminal blocks inside the rear portion of the housing for
most field wiring. Each terminal block is labeled to indicate its functionality (see Figure 5). Use spade or
ring lug connectors for connections to TB101.
Figure 5. TB101 Wiring Location

Pub. 42004-462C
Models 13382 WiFi and 13383 VoIP Addressable Amplified Speakers Page 11 of 24
P:\Standard IOMs - Current Release\42004 Instr. Manuals\42004-462C.docx
09/18
VoIP PCBA Connection in the Model 13383
Power the unit by either local power or PoE.
For local power, connect dc power to the terminal blocks on the back box (observing polarity) and
connect Ethernet port of VoIP PCBA to a 10/100 Base-T Ethernet Network. PoE would be applied via
the RJ45 connection.
VoIP PCBA Connections in the Model 13382
The Model 13382 WiFi PCBA must be configured prior to configuring the assembly (See the First Time
WiFi Interface Setup (Model 13382) section).
Power the unit by local power by connecting dc power to the terminal blocks on the back box.
Terminal Block TB101 is located on the rear section of the speaker assembly. The screw terminal
designations for all models are as shown below (see Figure 5 for the terminal block location).
Table 2. TB101 Wiring Description
Terminal Strip
Label
Connection
Gauge
Wire
Function
DC POWER +
TB2-1
No. 20 AWG
ground reference (local supply)
DC POWER −
TB2-2
No. 20 AWG
ground reference (local supply)
SPARE
SPARE
OPTO OUTPUT NO (2)
TB1-7
No. 22 AWG
solid state relay positive output
OPTO OUTPUT C(2)
TB1-14
No. 22 AWG
solid state relay negative output
AUDIO OUT 600 L1
TB1-8
No. 22 AWG
positive audio output
AUDIO OUT 600 L2
TB1-1
No. 22 AWG
negative audio output
RELAY C(1)
TB3-4
No. 18 AWG
common relay connection
RELAY NO (1)
TB3-3
No. 18 AWG
normally open relay
Connectors
TB1 WiringConnector
The pin-out for the dual, seven-point wiring connector (14 points total) on the front section of the speaker
assembly is described below (see Figure 6 for the numbering orientation).

Pub. 42004-462C
Models 13382 WiFi and 13383 VoIP Addressable Amplified Speakers Page 12 of 24
P:\Standard IOMs - Current Release\42004 Instr. Manuals\42004-462C.docx
09/18
Table 3. TB1 Wiring Description
Pin No.
Pin Name
Connection
Function
1
LINE OUT −
TB101-8
600-ohm audio output
2
INPUT 2
Not used
Monitored Input 2
3
INPUT 4
Not used
Monitored Input 4
4
INPUT 3
Not used
Monitored Input 3
5
INPUT 1
Not used
Monitored Input 1
6
SPARE
7
OUTPUT CLOSURE +
TB101-5
Solid state relay output
8
LINE OUT +
TB101-7
600-ohm audio output
9
INPUT 2GND
Not used
Monitored Input 2 ground reference
10
INPUT 4GND
Not used
Monitored Input 4 ground reference
11
INPUT 3GND
Not used
Monitored Input 3 ground reference
12
INPUT 1GND
Not used
Monitored Input 1 ground reference
13
SPARE
14
OUTPUT CLOSURE −
TB101-6
Solid state relay output
TB2 WiringConnector
The numbering orientation is shown in Figure 6.
Table 4. TB2 Wiring Description
Pin No.
Pin Name
Connection
Function
1
LOCAL POWER +
TB101-1
24 V dc positive power supply input
2
LOCAL POWER −
TB101-2
24 V dc negative power supply input
TB3 WiringConnector
The numbering orientation is shown in Figure 6.
Table 5. TB3 Wiring Description
Pin No.
Pin Name
Connection
Function
1
SPEAKER OUT +
Internal Speaker
class D audio speaker audio
2
SPEAKER OUT −
Internal Speaker
class D audio speaker audio
3
RELAY OUT NO
TB101-10
NO relay connection
4
RELAY OUT COM
TB101-9
common relay connection

Pub. 42004-462C
Models 13382 WiFi and 13383 VoIP Addressable Amplified Speakers Page 13 of 24
P:\Standard IOMs - Current Release\42004 Instr. Manuals\42004-462C.docx
09/18
Figure 6. TB1 (A & B), TB2, and TB3 Connector Orientation Diagram
Closing the Addressable Amplified Speaker
When wire terminations have been completed:
1. Reconnect the dual 7-point connectors (TB1A and TB1B) to their associated terminal block plug on
the PCBA.
2. Reconnect the 2-point connector (TB2) to its associated terminal block plug on the PCBA
3. Reconnect the 4-point connector (TB3) to its associated terminal block plug on the PCBA.
4. Route the wires through the nylon tie.
5. Re-twist the nylon tie to secure the wires (see Figure 3 for wire routing).
6. Assemble the speaker sections and torque the front panel screws to 16 to 20 in∙lb.
Programming and Set Up
The network must be configured to allow VoIP communications (using the SIP protocol) between the
desired locations before attempting to configure the GAI-Tronics VoIP Addressable Amplified Speakers.
NOTE: The Model 13382 VoIP WiFi and 13383 VoIP Addressable Amplified Speakers include the same
embedded browser as do GAI-Tronics’ VoIP and VoIP WiFi telephones. There are many
programmable parameters utilized by our telephones that are not utilized by the VoIP Amplified
Speakers. All speakers are factory programmed for maximum operating proficiency. Please do
not make any programming changes other than those directed in this manual.

Pub. 42004-462C
Models 13382 WiFi and 13383 VoIP Addressable Amplified Speakers Page 14 of 24
P:\Standard IOMs - Current Release\42004 Instr. Manuals\42004-462C.docx
09/18
Opening the Addressable Amplified Speaker
The addressable amplified speaker must be opened for programming and installation. Bench
programming and testing is recommended.
1. Remove the speaker from the carton and position it on a flat surface with the front of the speaker
facing up.
Although the front section attaches to the rear section with six Phillips screws, only two screws have
been secured during the production process.
2. Back out the two screws on the left and right side of the speaker.
All screws are captive and will remain in the front section.
3. Lift the front section straight up and flip to the left-hand side of the rear section (see Figure 7).
Figure 7: Addressable Amplified Speaker (Model 13382 shown)
First Time WiFi Interface Setup (Model 13382)
Configuration of the WiFi interface is required to set up security of the WLAN unit’s connection:
1. Power the unit by connecting 24–48 V dc to P5.
The factory default configuration of the VoIP Addressable Speaker’s WiFi interface is an access point
to a network named (SSID) HF-A11_AP.
2. Connect to the HF-A11_AP network using a PC/laptop with wireless capability.
The yellow LED on the speaker’s WiFi interface should be ON when the PC is connected to the HF-
A11_AP network.
3. Open a web browser on the PC and enter 10.10.100.254 into the address field and press ENTER.
The HF-A11_AP WIFI LOG IN window will open.
4. Enter admin for both the user and password and then log in.
The WORKING MODE CONFIGURATION web page will open:

Pub. 42004-462C
Models 13382 WiFi and 13383 VoIP Addressable Amplified Speakers Page 15 of 24
P:\Standard IOMs - Current Release\42004 Instr. Manuals\42004-462C.docx
09/18
Figure 8. WiFi Interface Working Mode Configuration Web Page
5. Select STA Mode then click the APPLY button.
NOTE:If you are having a problem connecting to the HF-A11_AP network verify that the PC’s
wireless network adapter is set to DCHP (Obtain an IP address automatically).
The Web page will show Set Successfully, Restart to use new setting.
6. Restart to use the new setting, and then click on the STA Interface Setting selection.
The STA INTERFACE SETTING web page will open:
Figure 9. WiFi Interface STA Interface Setting Web Page
7. Click the SEARCH button in the AP’s SSID section to find the WiFi network that the VoIP addressable
amplified speaker will operate in.
The Site Survey Web page will open showing all available networks.

Pub. 42004-462C
Models 13382 WiFi and 13383 VoIP Addressable Amplified Speakers Page 16 of 24
P:\Standard IOMs - Current Release\42004 Instr. Manuals\42004-462C.docx
09/18
Figure 10. WiFi Interface Site Survey Web page
8. Select the desired network and click the APPLY button.
A reminder window for entering the WEP Key will pop up.
9. Click the OK button.
The AP’s SSID, Security Mode, and Encryption Type fields will automatically be filled in when the
STA Interface Setting web page opens again.
10. Enter the WEP Key or Pass Phrase for the selected network and click the APPLY button.
NOTE:The AP’s SSID, Security Mode, Encryption Type, and WEP Key or Pass Phrase fields will
need to be manually entered before clicking the APPLY button if the VoIP Addressable
Amplified Speaker is not within the range of the wireless network that it is being configured
to operate in.
The web page will show Set Successfully, Restart to use new setting after the configuration has
updated.
11. Restart to use the new setting, and then click on the Device Management selection.
The DEVICE MANAGEMENT web page will open:

Pub. 42004-462C
Models 13382 WiFi and 13383 VoIP Addressable Amplified Speakers Page 17 of 24
P:\Standard IOMs - Current Release\42004 Instr. Manuals\42004-462C.docx
09/18
Figure 11. WiFi Interface Device Management Web page
12. Click the RESTART button in the Restart Module section.
When the WiFi module is restarting the web page will show Rebooting…. Both LEDs on the RJ45 Jack
J2 will turn OFF for several seconds while the WiFi interface is restarting. The green LED will turn ON
first when the WiFi interface is done restarting. The yellow LED will turn ON if the WiFi interface can
connect to the newly configured network.
If the VoIP Telephone does not connect to the wireless network due to an incorrect WEP Key or Pass
Phrase, follow the instructions in the next section, (Resetting the WiFi Interface Configuration).
NOTE:The WiFi module is no longer an access point to its own network (HF-A11_AP). The WiFi
module should now be connected to or trying to connect to the newly configured wireless
network. The browser Web page will not change from showing Rebooting…because the PC is
no longer connected to the HF-A11_AP network.
Resetting the WiFi Interface Configuration
The RLOAD button (PB1) is used to reset the addressable amplified speaker’s WiFi interface to its
factory default settings. It is located on the VoIP PCBA near the WiFi module and J2. Press and hold
the RLOAD button (PB1) for 10 seconds to return the WiFi interface to its default settings. Both LEDs
on the RJ45 Jack J2 will turn OFF for several seconds while the WiFi interface is resetting. Wait for the
green LED to turn ON before trying to connect to the HF-A11_AP network.
With the default settings loaded and the green LED on the RJ-45 Jack (J2) on, follow the instructions in
the First Time WiFi Interface Setup (Model 13382) section to connect the HF-A11_AP network and
change the configuration settings.
NOTE:After changing the WiFi Interface configuration, if the VoIP addressable amplified speaker has
been configured for DHCP, the power must be cycled before it will connect to the wireless
network. After power is reapplied, the green and yellow LEDs on the RJ45 Jack (J2) are ON,
and the Heart Beat LED on the VoIP PCBA is flashing, proceed to the next section, VoIP PCBA
Configuration to set up the VoIP Addressable Amplified Speaker configuration.

Pub. 42004-462C
Models 13382 WiFi and 13383 VoIP Addressable Amplified Speakers Page 18 of 24
P:\Standard IOMs - Current Release\42004 Instr. Manuals\42004-462C.docx
09/18
VoIP PCBA Configuration
For the first time configuration of the VoIP PCBA:
1. Power the unit by connecting dc power to TB101.
2. Connect the Ethernet port of the VoIP PCBA to a 10/100 Base-T Ethernet network (see Figure 5)
3. Verify the PC is connected to the same network as the VoIP addressable amplified speaker.
4. Log onto the unit via a web browser.
The unit is initially set with a static IP address:
IP address 192.168.1.2
A user name and password will be requested. The initial factory settings are:
User Name user
Password password
5. Change the user name and password.
This security measure helps to prevent unauthorized changes to the VoIP PCBA Interface’s
configuration.
NOTE:The audio output level is set by configuring the Hands-free Output on the AUDIO SETTINGS
webpage during the configuration of the speaker.
VoIP PCBA Initial Network Configuration
Each VoIP PCBA must be set up for the network prior to installation. Assign a local ID, domain, proxy,
and registrar:
Assign a host name The host name provides identification of the different VoIP PCBAs on the
network.
Test Verify that calls can be made successfully.
Maintain Monitor alarms. Set up auto-updates.
GAI-Tronics Pub. 42004-482 contains detailed programming instructions of this VoIP device.
Closing the Addressable Amplified Speaker
Assemble the speaker sections and tighten the front panel screws to 16 to 20 in∙lb of torque.
This manual suits for next models
1
Table of contents
Other GAI-Tronics Speakers manuals

GAI-Tronics
GAI-Tronics 13373 User manual

GAI-Tronics
GAI-Tronics 13380-001 Troubleshooting guide

GAI-Tronics
GAI-Tronics 13354-001 User manual

GAI-Tronics
GAI-Tronics 13350 User manual

GAI-Tronics
GAI-Tronics 13360 User manual

GAI-Tronics
GAI-Tronics 13352 User manual

GAI-Tronics
GAI-Tronics 670-001 User manual

GAI-Tronics
GAI-Tronics RigCom 400-001 Operating manual

GAI-Tronics
GAI-Tronics 13310-311 Troubleshooting guide