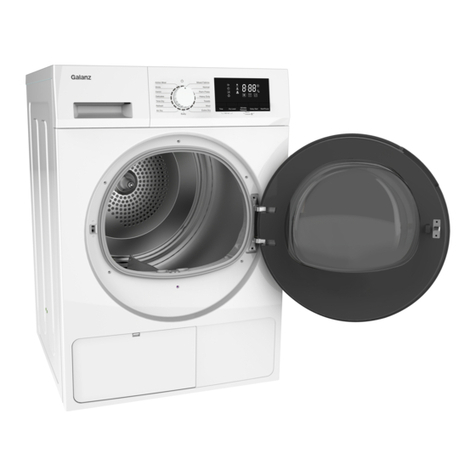
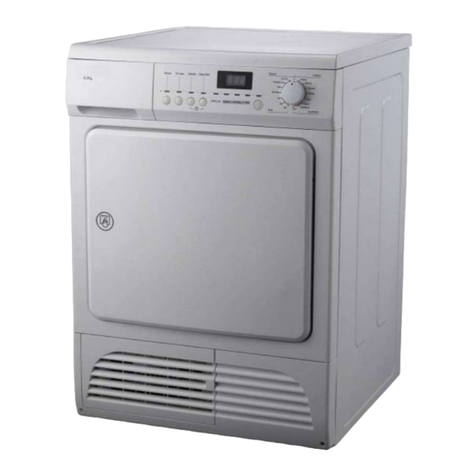
Galanz DV-60Q1E User manual

Air Vent Type dryer Service Manual
Please read this manual carefully before servicing,Fault estimation,convenient for
repairing。
Model:
DV-60Q1E DV-60Q2ME
DV-60Q1K DV-60Q2MK
DV-60Q1S DV-60Q2MS
DV-60Q3E DV-60Q3ME
DV-60Q3K DV-60Q3MK
DV-60Q5E DV-60Q5K
DV-60Q5S DV-60Q6ME
DV-60Q6MK DV-60Q8E
DV-60Q9E DV-60Q9K

1
Contents
1.Safety information -----------------------------------------------------------------------------2
2.Technical data-----------------------------------------------------------------------------------3
3.Function and Technical-------------------------------------------------------------------------5
4.Parts Name----------------------------------------------------------------------------------------5
5.Installation -------------------------------------------------------------------------------------6
6.Control panel ----------------------------------------------------------------------------------7
7.Electric diagram---------------------------------------------------------------------------------10
8.Fault indication and estimation-----------------------------------------------------------------11
9.Fault estimation and repairing------------------------------------------------------------------12
10. Explode view-------------------------------------------------------------------------------------13

2
This service manual is suit for Galanz dryer series, only used for service instruction.
Because of development and being perfect in the future,a part of dryer data would be adjusted,
specific data are subject to the dryer instruction.
1.Safety Information(Must be following)
In order to safe and avoid injure of people or damage of facility pls follow the following
instructions:
Warning Please pay attention to the warning content,if not probably effect badly hurt or died
Warning
●Safety
1.It is very dangerous to try to modify the machine 。
2.Always unplug the appliance after use, clean and maintenance。
3. Any objects such as coins, safety pins , nails , screws , stones or an other hard , sharp material can
cause extensive damage and must not be placed into the machine;
4.When the machine be broken,or have a screw loose,or spread loss of damaged parts or
components, do not operate the dryer .
5.Please separate use three-core power outlet upwards 220V,10A ,do not use a power strip. The
power plug must be connected to a three-core socket with and earth wire and is grounded properly and
reliably。
6. In order to avoid danger of fires caused by excessive drying , do not use the appliance to dry the
following items: Cushions, quilts and the like (these items accumulate heat )
7. Do not repairing the machine by yourself in anytime,to avoid effect injury and serious fault.
8. Items such as foam rubber(latex foam), shower caps, waterproof textiles , rubber backed articles
and clothes or pillows fitted with foam rubber pads should not be dried in the tumble dryer;
9.Please keep your pet go into the drum,in order to avoid this phenomenon, please check before
using .
10. The clothes mix with acetone oil, gasoline, kerosene, detergents, turpentine, wax or paraffin removal
etc. should be washed by hot water with detergent ,and then put them into the machine for drying.
Warning
●Possible Explosions
⒈Because these substances can effect an explosion, the clothes can put into the dryer after washed. Do
not put combustible liquid such as gasoline, petrol and alcohol into the appliance or nearby. Don’t put
clothes with that liquid in to the appliance. Because of possible explosions

3
●Fire accidents/ short circuit or electric leakage may occur
⒈Items that have been spotted or soaked with vegetable or cooking oil constitute a fire hazard and
should not be placed in the tumble dryer。
2.If you have washed your laundry with stain remover, you must execute an extra rinse cycle before
loading your tumble dryer.
3.Please make sure that no gas lighters or matches have accidentally been left in pockets of garments
to be loaded into appliance。
4.Never stop a tumble dry before the end of the drying cycle unless all items are quickly removed
and spread out so that the heat is dissipated。
Warning
● Other instruction
1. This appliance is designed for domestic use, It must not be used for purposes other than
those for which it was designed;
2. Only wash fabrics which are designed to be machine dried. Follow the instructions on each
garment label.
3. Do not dry unwashed items in the tumble dryer.
4. Clothes which are dripping wet should not be placed in the dryer.
5. Garments which have been in contact with volatile petroleum products should not be
machine dried. If volatile cleaning fluids are used, care should be taken to ensure that the fluid is
removed from the garment before placing in the machine;
6. Never use the tumble dryer if the power supply cable , the control panel, the working
surface or the base are damaged so that the inside of the tumble dryer is accessible。
7. Do not disconnect the power plug by pulling the supply cord, Hold the power plug with
your had;
● Personal injury may occur
1. The package materials may be dangerous to children. Put all package materials to places
unreachable to children。
2. Do not keep children or pets nearby when the dryer is working.
3. Do not touch laundries in the drying drum till the dryer stops working completely。
2.Technical specification
File1
Modle No
DV-60Q1E DV-60Q2ME
DV-60Q1K DV-60Q2MK
DV-60Q1S DV-60Q2MS
DV-60Q3E DV-60Q3ME
DV-60Q3K DV-60Q3MK
DV-60Q6ME DV-60Q5E
DV-60Q6MK DV-60Q5S
DV-60Q9E DV-60Q5K

4
DV-60Q9K DV-60Q8E
Voltage E serial 220-240V~ 500Hz,K Seria 220V-60Hz,SSeria 110-127V-60HZ
Product weight(kg) 38
Po
wer
(W)
Max E,K Seria 2000W, S serial1400W
heating E,K Serial 1800, S Serial 1200W
Unit dimention
(mm)WxDxH 595*555*850
Energy efficiency E Serial C
Error estimation 5
File2
program program Max
loading description
cotton
Extra 6kg Tower cotton working suit
Heavy 6kg Tower cotton working suit, swear
Normal 6kg Shirt, T shirt
Damp 6kg ,cotton shirt
Iron 6kg Over let
synthetic
Extra 3kg Over let
Cupboard 3kg Synthetic products
Iron 3kg shirt
time 30min,60min,90min 6kg tower
special
Anti-Bac 3kg Inner clothes
Freshen-up 3kg shirt
Silk 1.5kg silk
Air-Dry 2kg Inner clothes
File 3
Bathrobe 1200g
Napkin 100g
Quilt cover 700g
Sheet 500g
Pillow case 200g
Table cloth 250g
Toweling towel 200g
Tea cloth 100g
Night dress 200g

5
Ladies’briefs 100g
Men’s work shirt 600g
Men’s shirt 200g
Men’s pyjamas 500g
Blouse 100g
Men’s underpants 100g
3.Functions and Technical
●buzzer
This function is used to indicate end of cycle
●delay function
This function need to press before but start/ pause
●speed up function
·In "Heavy","Strong","Normal"program ,you can start (Quick) button
●Delicate function
In (Cotton),(Synthetics) program,can open(Delicate)。
●LED function
When select a program indicate time,
Showing delay time
When select not correct program,can show error code
●start/ pause
After select program ,press this button to start machine。If the door was open during drying,after close
the door press this button, machine continue to work。Under this situation,“start/pause”indicator
shinning to tell you press this button
●Indicator light function
Indicator Drying,shows it is drying clothes。
Indicator Cooling,means the machine is cooling。After drying,there will have 5 – to mins cooling
program
Indicator ”End”。Aftter cooling, this indicator work
Indicator ”Filter”,after use this machine, this indicator will work and tell you to clean the filter
All drying program will have 5-10 mins cooling time
After cooling if you did not take the clothes out the machine will go to anti crease program (time
lasting:longest 30 min)
After anti crease, even you did not take the clothes out, the machine will stop automatically 。
Indicator closed,buzzer works 15 seconds。
Turn the program to“O”,all indicator closed
4.Part name:
Control
p
anel
buble
Adjust leg

6
系列
attachment name quantity
hose 1
usermanual
1
5.installation
5.1、unpack all packing,including bottom foam,check the machine situation
5.2、installation should follow the step。
Install hose
● Use the spanner to lose
the bolt
● Keep the bolt for future
use
Put the cover into the hose
(A),keep it tight with the
connector and then vent 。
cover the not used cover(B)
Install in the good and
solid floor and adjust the
level
Pls select peace floor,do not
put on the soft floor and more
than 2 degree
● Adjust the leg to make the
machine steady
5.2.1、installation
●any installation do not follow the instruction or trying to change the machine are danger。
●pls do not overload the machine on the plug。
●the electric installation should be finish by professional people。
5.2.2、checking procedure
①put on the plug ②select program ③press Start/pause
④confirm running ⑤turn off power,
filter
Side
i

7
6.Control panel description
DV-60Q1E/DV-60Q1K/DV-60Q1S/DV-60Q3E/DV-60Q3K control panel
1 Buzzer
2 Quick
3 Delicate
4 Delay Start
5 Display(LED
6 Start/Pause()
DV-60Q2ME/DV-60Q2MK/DV-60Q2MS/DV-60Q3ME/DV-60Q3MK control panel
1 2 3 4 5 6 7 8
7 Indicator Lights
Drying
Cooling
End
Filter
8 Programme selector dia
123
4

8
1. Start 2. Pause 3.Timer 4. Indicator Lights
DV-60Q8E control panel
1. Program selector
2. Indicators
Drying
Cooling
End
Filter
3. Delay start and indicators
4. Buzzer
5. Quick
6. Delicate
7. Start/Pause
DV-60Q9E/DV-60Q9K/DV-60Q9S control panel
Program selector Program sequence
Turn this knob to select drying program

9
Turn to start drying Over dry ->Drying->Anti-crease ->End of cycle
Protection
Indicators
Overdryprotection
The indicator lamp lights up when a humidity controlled program is selected, to indicate the working
protection function. Function is not active in time controlled programs 10’,20’,30’,40’,60’,90’, and
Buzzer: Signals/sounds end of drying cycle
Delicate: Reduce drying intensity
DV-60Q6ME/DV-60Q6MK Control panel
DV-60Q5E/DV-60Q5K/DV-60Q5S Control panel
1
3 2456
1.Programme selector Dial 3.Start/Pause

10
2.Sequence lindicator Lights 4.Delay Button and Lights
Drying 5.Delicate
Cooling 6.Quick
End
Filter
7.Schematic diagram
DV-60Q1E/DV-60Q1K/DV-60Q1S/,DV-60Q3E/DV-60Q3K/,DV-60Q8E/DV-60Q9E/DV-60Q9K
Schematic diagram
DV-60Q2ME/DV-60Q2MK/DV-60Q2MS/,DV-60Q3ME/DV-60Q3MK/DV-60Q6ME/DV-60Q6MK
Schematic diagram

11
DV-60Q5E/DV-60Q5S/DV-60Q5K Schematic diagram
8.Fault indication and diagnosis
8.1、DV-60Q1E/DV-60Q1K/DV-60Q1S/DV-60Q2ME/DV-60Q2MK/DV-60Q2MS/
DV-60Q3E/DV-60Q3K/DV-60Q3ME/DV-60Q3MK/DV-60Q5E/DV-60Q5S/DV-60Q5K/
DV-60Q6ME/DV-60Q6MK/DV-60Q8E/DV-60Q9E/DV-60Q9K/ Fault Indication:

12
No. Fault Possible cause Solution
1 Dryer dose not
work。
·Mains plug is not plugged in
·Loading door is open
·Plug in at mains
socket;
·Close loading door
2
Drying results
unsatisfactory ·Wrong program selected
·Filter clogged
·Incorrect volume of laundry
·Sediment in the humidity sensor;
·Select a different
program the next time
you dryer.
·Clean lint filter
·Observe
recommended loading
volumes
·Clean the humidity
sensor surface
3 Drum light does
not work ·Light bulb is defective ·Replace light bulb
4
The drying cycle
ends in a very
short time after
program started,
“End” indictor is
on.
The weight is not enough or the clothes
is already dry enough for the selected
program
·Choose a program
with higher drying
level. For example:
Choose Extra i/o
Strong
5
Drying cycle
lasts an
unusually long
time。
Load volume is too big
Reduce load volume
Fault
code E1 E2 E3
E5 dOP ErS
Fault Temperature
sensor problem Heater does
not work Humidity
sensor problem Motor
problem Door is
open Choose wrong
program
DV-60Q1E/DV-60Q1K/DV-60Q1S/DV-60Q2ME/DV-60Q2MK/DV-60Q2MS/
DV-60Q3E/DV-60Q3K/DV-60Q3ME/DV-60Q3MK/DV-60Q5E/DV-60Q5S/DV-60Q5K/
DV-60Q6ME/DV-60Q6MK/DV-60Q8E/DV-60Q9E/DV-60Q9K Abnormal operation diagnosis.
Fault Tel. service Solution
Without power
1.The power supply is 220V-240V ?
2.Whether the fuse blow out or short circuit
of power supply?
1.Connected to the
right power source
2.Visit replace
Motor 1.Is the clothes overload the capacity?
2. The power is whether normal(220-240VAC)?
3.All not。
1 . Reduce clothes
capacity
2 . Connected the
normal voltage
3.Visit replace

13
Temperature
sensor 1.Whether the temperature sensor is short-circuit ?
2.All not。
1.Reconnect
2.Visit replace
Heater 1.Heater is short-circuit?
2.All not。
1.Reconnect
2.Visit replace
Door lock 1.Door is opening。
2.All not。
1.Close the door
2.Visit replace
9.Fault diagnosis and repairing
9.1、Fault diagnosis and repairing, be careful of electric shock, unplug the power plug before
servicing.
9.2、Firstly,check the wiring harness connection for each terminal。
9.3、If need to replace the control board, please correct arrange .
9.4、Please specific realize the fault before repair。
No power
1 AC power is measured 220V-240V?No connected to right
power source
2 Measure voltage value of control board,is the AC voltage
for 220V-240V?No check wiring harness
As
3 Replace control board As。
Abnormal noise
1 Micro- V belt bolts loose?Yes Tighten bolts
2 Micro-V belt with wear ?Yes replace micro-V belt
3 Is it a noise from Yes replace motor
No heating
1 Is there any problem from temperature sensor? Yes replace temperature sensor
2 Off the power, measuring heat pipe at both ends of
resistance is between 20-30?Yes Normal
3 Replace the heater。
Door lock fault
1 Is the door closed when start, any E02 or E2 signal? No close the door
2 Change the door lock
Motor fault
1 Clothes capacity is over loaded when the machine
is operating with the voltage 220-240V?Yes reduceclothes
2 Motor connection cable is connected properly?No Reconnect
3 Check whether the motor has burned out?Yes replacemotor
4 All not,replace control board 。
10.DV-60Q1E/DV-60Q1K/DV-60Q1S/DV-60Q2ME/DV-60Q2MK/DV-60Q2MS/

14
DV-60Q3E/DV-60Q3K/DV-60Q3ME/DV-60Q3MK/DV-60Q5E/DV-60Q5S/DV-60Q5K/
DV-60Q6ME/DV-60Q6MK/DV-60Q8E/DV-60Q9E/DV-60Q9K exploded view
10.1、Machine As
DV-60Q1E/DV-60Q1K/DV-60Q1S/DV-60Q3E/DV-60Q3K/DV-60Q5E/DV-60Q5S
DV-60Q5K/DV-60Q8E/DV-60Q9E/DV-60Q9K
DV-60Q2ME/DV-60Q2MK/DV-60Q2MS/DV-60Q3ME/DV-60Q3MK/DV-60Q6ME/DV-60Q6MK
No. Part Code Part name Units Material Note
1 DV60Q1E.5 Door As 1
2 DV60Q1E.3/DV60Q5E.3
DV60Q8E.3/DV60Q9E.3 Control panel As 1
3 DV60Q1E.1-4 Door Gasket 1 EPDM
4 DV60Q1E.1-1 Cabinet 1 SPCC
5 DV60Q1E.2 Top cover As 1
6 DV60Q1E.1.2 Door lock As 1
7 DV60Q1E.1.3 Drum Supporter As 1
8 DV60Q1E.1.4 Motor As 1
9 DV60Q1E.1-7 Micro-V Belt 1 Poly belt
10 DV60Q1E.7 Drum As 1
11 DV60Q1E.1-5 Vent Pipe 1 PP
12 DV60Q1E.1.6-1 Vent Pipe Cuff 1 ABS
13 DV60Q1E.1.6-2 Back Cover 1 SGCC
14 XDQ05-04 Power Cord 1
15 DQ12-08 Terminal board 1
16 DV60Q1E.1-6 Vent Pipe cover 1 ABS
17 DV60Q1E.1-2 Under Base 1 SGCC
18 DV60Q1E.1.1 Adjustable Leg 2
19 DV-60Q1E.1-3 Leg 2 PP
20 DV60Q1E.2-4 Screw Cap 4 ABS
21 DV60Q1E.1.5 Idler As 1

15
No. Part Code Part name Units Material Note
1 DV60Q1E.5 Door As 1
2 DV60Q2ME.3/DV60Q6ME.3 Control panel As 1
3 DV60Q1E.1-4 Door Gasket 1 EPDM
4 DV60Q1E.1-1 Cabinet 1 SPCC
5 DV60Q2E.2 Top cover As 1
6 DV60Q1E.1.2 Door lock As 1
7 DV60Q2E.1.1 Drum Supporter As 1
8 DV60Q1E.1.4 Motor As 1
9 DV60Q1E.1-7 Micro-V Belt 1 Poly belt
10 DV60Q1E.7 Drum As 1
11 DV60Q1E.1-5 Vent Pipe 1 PP
12 DV60Q1E.1.6-1 Vent Pipe Cuff 1 ABS
13 DV60Q1E.1.6-2 Back Cover 1 SGCC
14 XDQ05-04 Power Cord 1
15 DQ12-08 Terminal board 1
16 DV60Q1E.1-6 Vent Pipe cover 1 ABS
17 DV60Q1E.1-2 Under Base 1 SGCC
18 DV60Q1E.1.1 Leg Fixture 2
19 DV-60Q1E.1-3 Leg 2 PP
20 DV60Q1E.2-4 Screw Cap 4 ABS
21 DV60Q1E.1.5 Idler As 1
10.2、Control Panel As
DV-60Q1E/DV-60Q1K/DV-60Q1S/DV-60Q3E /DV-60Q3K

16
No. Part Code Part name Units Material Note
22 DV60Q1E.3.1-1 Switch Button 1 ABS
23 DV60Q1E.3.1-2 Knob Bracket 1 ABS
24 DV60Q1E.3-1 Control Panel 1 ABS
25 DV60Q1E.3.1-3 Knob Shaft 1 POM
26 DV60Q1E.3-3 Select Button 4 ABS
27 DV60Q1E.3-5 Display Window 1 PC
28 DV60Q1E.3-4 Power Button 1 ABS
29 DV60Q1E.3-2 Button Bracket 1 POM
30 DV60Q1E.3-6 LED Display 1 PC
31 DV60Q1E.3.2-1 PCB Case 1 ABS
32 DV60Q1E.8.2(144)/
DV60Q1S.8.3(074) PCB AS 1
33 DV60Q1E.3.2-2 PCB Cover 1 ABS
DV-60Q2ME/DV-60Q2MK/DV-60Q2MS/, DV-60Q3ME /DV-60Q3MK/DV-60Q3MS
No. Part Code Part name Units Material Note
1 DV60Q2ME.3-4 LED Display 1 PC
2 DV60Q2ME.3-1 Control panel 1 ABS

17
3 DV60Q2ME.3-2 Knob 1 ABS
4 DV60Q2ME.3-8 Timer Bracket 1 SGCC
5 DV60Q2ME.3-6 Switch Bracket 1 SGCC
6 XDQ09-02 Push Switch 1 AC250V16A
7 XDQ13-03 Relay 1
8 XDQ14-04/XDQ14-05
XDQ14-06 Timer
9 DV60Q2ME.3-7 Switch Button 2 ABS
10 DV60Q2ME.3-3 Knob Connector 2 POM
DV-60Q6ME/DV-60Q6MK
No. Part Code Part name Units Material Note
22 DV60Q6ME.3-8 Control panel 1 ABS
23 DV60Q2ME.3-7 Switch Button 1 ABS
24 DV60Q2ME.3-4 LED Display 1 PC
25 DV60Q2ME.3-2 Knob 1 ABS
26 DV60Q2ME.3-3 Knob Connector 2 POM
27 DV60Q6ME.3-5 Switch Bracket 1 SGCC
28 DV60Q2ME.3-8 Timer Bracket 1 SGCC
29 XDQ13-03 Relay 1
30 XDQ09-02 Push Switch 1 AC250V16A
31 XDQ14-04/XDQ14-05
XDQ14-06 Timer 1
DV-60Q5E/DV-60Q5K/DV-60Q5S

18
No. Part Code Part name Units Material Note
22 DV60Q5E.3-6 Select Knob 1 ABS
23 DV60Q5E.3-2 Control Panel 1 ABS
24 DV60Q5E.3-4 Select Button 1 POM
25 DV60Q5E.3-5 Power Button 3 ABS
26 DV60Q5E.3-7 LED display 1 PC
27 DV60Q5E.8-4(246) Main circuit board 1
28 DV60Q5E.3-3 Button Bracket 1 POM
29 DV60Q5E.8-3(246) Operating circuit board 1
DV-60Q8E
No. Part Code Part name Units Material Note
22 DV60Q1E.3.1-1 Switch Button 1
23 DV60Q1E.3.1-2 Knob Bracket 1 ABS
24 DV60Q8E.3.7 Knob Shaft 1 POM
25 DV60Q8E.3-1 Control Panel 1 ABS
26 DV60Q8E.3-2 Button 1 ABS
27 DV60Q8E.3-6 Lamp Bracket1 1 ABS
28 DV60Q8E.3-5 Lamp Bracket 1 ABS
29 DV60Q8E.3-3 PCB Case 1 ABS
30 DV60Q8E.8-2 PCBAS 1

19
31 DV60Q8E.3-4 PCB Cover 1 ABS
DV-60Q9E/DV-60Q9K
No. Part Code Part name Units Material Note
22 DV60Q1E.3.1-1 Switch Button 1
23 DV60Q1E.3.1-2 Knob Bracket 1 ABS
24 DV60Q8E.3-7 Knob Shaft 1 POM
25 DV60Q9E.3-3 Option Button 2 ABS
26 DV60Q9E.3-1 Control Panel 1 ABS
27 DV60Q9E.3-5 Lamp Bracket 1 1 PC
28 DV60Q9E.3-4 PCB Case 1 ABS
29 DV60Q9E.8.2 PCBAS 1
30 DV60Q8E.3-4 PCB Cover 1 ABS
31 DV60Q9E.3-2 Select Button 1 ABS
32 DV60Q9E.3-8 Button Spring 3 65Mn
33 DV60Q9E.3-6 Lamp Bracket 2 2 PC
10.3 Motor assy DV-60Q1E/DV-60Q1K/DV-60Q1S/DV-60Q2ME/DV-60Q2MK/DV-60Q2MS/
DV-60Q3E/DV-60Q3K/DV-60Q3ME/DV-60Q3MK/DV-60Q5E/DV-60Q5S/DV-60Q5K/DV-60Q6ME/
DV-60Q6MKDV-60Q8E/DV-60Q9E/DV-60Q9K
Other manuals for DV-60Q1E
1
This manual suits for next models
17
Table of contents
Other Galanz Dryer manuals
Popular Dryer manuals by other brands

GE
GE GFD65 Owner's Manual & Installation Instructions

American Dryer Corp.
American Dryer Corp. ES35 Installation & operator's manual

Whirlpool
Whirlpool Duet YGEW9200LQ2 Use & care guide

Whirlpool
Whirlpool LGR4634JQ0 installation instructions

Hyco
Hyco BLADE Product instruction manual

Kenmore
Kenmore 63012 Features