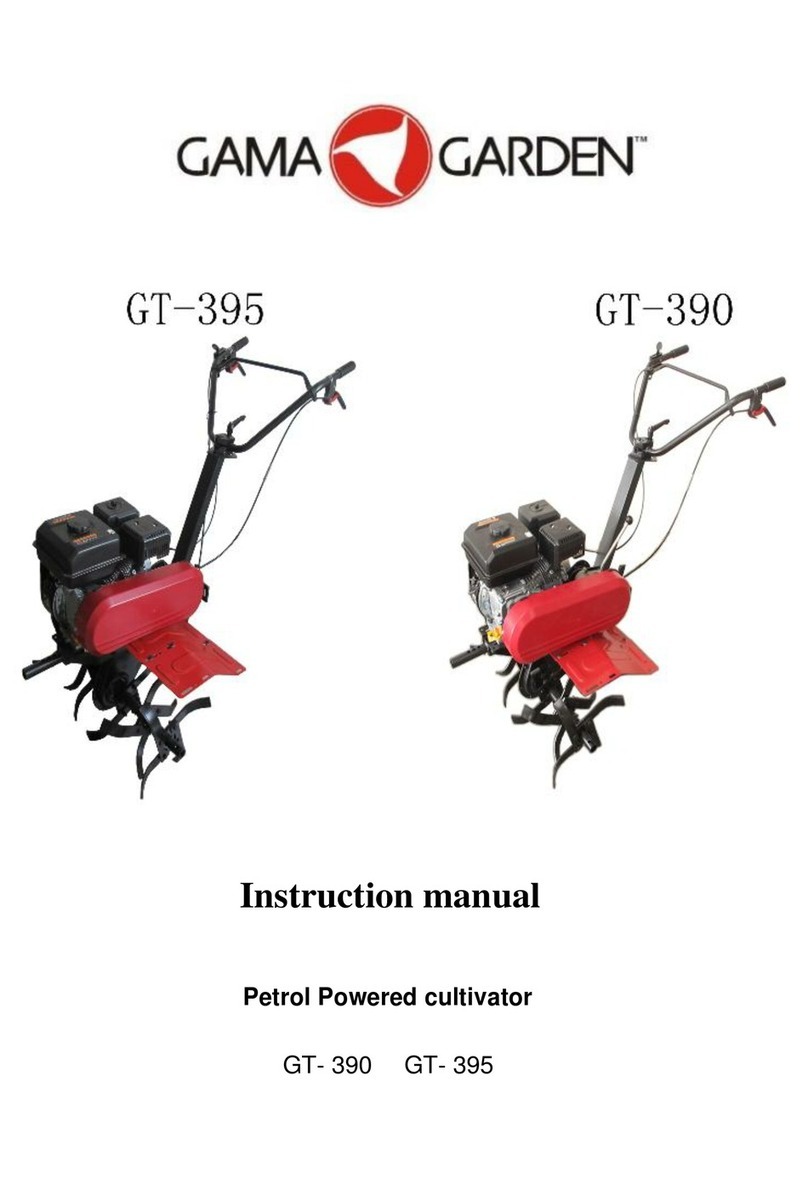
Gama Garden GT 250C User manual

Acquaer Ltd. www.gamagarden.eu
H-4900, Fehérgyarmat, Szatmári út 11.
GT 250C Tiller
Instruction manual

Acquaer Ltd. www.gamagarden.eu
H-4900, Fehérgyarmat, Szatmári út 11.
1
TABLE OF CONTENTS
TECHNICAL DATA ............................................................................................................................................................................. 4
DESCRIPTION ................................................................................................................................................................................... 5
ASSEMBLY ........................................................................................................................................................................................ 6
USE................................................................................................................................................................................................... 9
PREPARATIONS ............................................................................................................................................................................ 9
STOPPING THE ENGINE.............................................................................................................................................................. 10
CULTIVATING ............................................................................................................................................................................. 11
SURFACE WORKING................................................................................................................................................................... 12
TRANSPORT................................................................................................................................................................................ 12
MAINTENANCE............................................................................................................................................................................... 14
CLEANING .................................................................................................................................................................................. 14
CHANGING THE OIL.................................................................................................................................................................... 15
AIR FILTER MAINTENANCE......................................................................................................................................................... 15
GEARBOX MAINTENANCE.......................................................................................................................................................... 18
STORAGE.................................................................................................................................................................................... 18
TROUBLESHOOTING .................................................................................................................................................................. 19

Acquaer Ltd. www.gamagarden.eu
H-4900, Fehérgyarmat, Szatmári út 11.
2
Congratulations on your purchase of a GAMA GARDEN petrol tiller!
SAFETY INSTRUCTIONS
Read these instructions carefully and familiarize yourself with the controls on the machine and how they are used
and the applicable safety instructions. Persons who are not familiar with these instructions should not use the
machine.
Save these instructions for future reference.
•The machine is only intended for household use.
•Never use the machine when you are tired or under the influence of drugs, alcohol or medication.
•The machine must not be used by persons under 16. Keep other people, especially children, and pets at a
safe distance from the work area.
•The machine must only be used as it is intended to be used and in accordance with these instructions.
•The manufacturer cannot accept any liability for damage resulting from modifications to the machine that
have not been approved by the manufacturer.
When working
•Always wear suitable clothing, safety gloves, approved safety glasses and non-slip shoes.
•Turn off the engine before filling with fuel. Only fill with fuel outdoors, never indoors.
•Keep away from sparks or naked flames, and do not smoke nearby.
•Keep your hair, clothing, hands, jewellery and other foreign objects away from moving parts. Do not touch
the engine, gearbox or silencer as these parts become very hot during operation.
•Switch off the engine in the following situations.
After finishing the work.
Prior to maintenance, adjustment, changing accessories, etc.
When moving the machine from one place to another.
•Store the machine and fuel containers out of the reach of children, away from ignition sources such as
open flames and equipment that can emit sparks.
•Allow the machine to cool before putting it away. Only use spare parts and accessories recommended by
the manufacturer.
•Repairs must only carried out by an authorized service center.
Safety devices
•Always check that all the safety devices are correctly fitted and in working order before use.
•Never dismantle or bypass the machine’s guards and other safety devices.
Clutch lever
•The rotating blades stop when the clutch lever is released.
Guard
•Protects the user from soil and objects that are thrown out by the rotating blades.
Crossbar
•Prevents the user from coming too close to the rotating blades

Acquaer Ltd. www.gamagarden.eu
H-4900, Fehérgyarmat, Szatmári út 11.
3
Warning symbols
Description of the symbols found on the machine.
Read these instructions before use.
Keep your hands and feet away from moving parts –risk of serious personal
injury and/or death.
Risk of personal injury and/or damage to objects in the vicinity. Keep other
people, especially children, and pets at a safe distance from the work area.
Never use the machine without the guards fitted.
Switch off the engine, release the spark plug lead from the spark plug and allow
the machine to cool before cleaning and/or maintenance.
Symbols
Description of the symbols found on the machine.
Refueling
Position: on the fuel tank cap
OHV
Overhead valve engine
Position: On the valve guard
IMPORTANT: Risk of burn injury
Position: on the valve guard
START
Placement of the starter cord handle

Acquaer Ltd. www.gamagarden.eu
H-4900, Fehérgyarmat, Szatmári út 11.
4
TECHNICAL DATA
Type
GT 250C Basic (Rato)
GT 250C Basic (Honda)
Engine type
Rato RV225
4-stroke vertical engine
GCV 160
4-stroke vertical engine
Fuel
Petrol
Petrol
Output
5,5 HP
4,4 HP
Displacement
223 cm³
160 cm³
Fuel tank capacity
1.6 l
1.5 l
Engine oil volume
0.6 l
0.6 l
Sound power level, LwA
100 dB(A)
92 dB(A)
Sound pressure level, LpA
88 dB(A), K = 1.5
80 dB(A), K = 1.5
Vibration (m/s²)
2.7, K = 1.5
2.6, K = 1.5
Air filter
Oil-impregnated foam
Weight
48 kg
46,8 kg
Ignition system
Type
Electronic, contactless
Control
Starting device
Manual cord start with
automatic winding
Manual cord start with
automatic winding
Adjustable handle
Yes
Yes
Propulsion system
Number of gears
1 (forwards)
1 (forwards)
Max. working width
33/53/73 cm
33/53/73 cm
Rotating blade diameter
33 cm
33 cm
Rotating blade speed
120/min
120/min

Acquaer Ltd. www.gamagarden.eu
H-4900, Fehérgyarmat, Szatmári út 11.
5
DESCRIPTION
1 Crossbar 10 Wheel
2 Rubber grip 11 Side disc
3 Clutch lever 12 Rotating blade attachment
4 Upper handle 13 Gearbox
5 Clutch cable 14 Protective guard
6 Handle tube 15 Engine
7 Handle holder 16 Throttle cable
8 Loop 17 Throttle lever
9 Depth stop

Acquaer Ltd. www.gamagarden.eu
H-4900, Fehérgyarmat, Szatmári út 11.
6
ASSEMBLY
WARNING:
Make sure not to damage the clutch cable when unpacking. Assemble the machine as shown in the diagrams in these instructions.
1. Remove all parts from the packaging.
2. Unpack the top handle, handle tube, handle bracket, metal discs as well as left and right guard extensions, shear pins and other
parts and accessories.
Assembly of the handle bracket and depth stop
1. Loosen the 2 screws M12 x 60 from the handle bracket (pos. 4, fig. 2) and click the handle bracket into position on the front of the
gearbox with the support plate upwards (pos. 3, fig. 2).
2. Align the hole in the handle bracket with the holes in the gearbox. Secure using 2 screws M12 x 60, 2 nuts M12, 2 washers Ø 12
and 2 spring washers Ø 12. Tighten the joints firmly.
3. Loosen the split pins and guide pins from the handle bracket (pos. 1 and 2, fig. 2.) Place the depth stop in the bracket, and align
the holes with each other and lock in place with split pins and guide pins. The bottom edge of the blades should touch the ground.
2. Assembly of the handle
The handle consists of the following parts.
•Upper handle
•Crossbar
•Handle tube

Acquaer Ltd. www.gamagarden.eu
H-4900, Fehérgyarmat, Szatmári út 11.
7
Assembly of the handle
1. Loosen the 4 screws M8 x 25 from the handle tube (pos. 1, fig. 3) and align the holes in the handle tube with the holes in the
support plate.
2. Secure using 4 screws M8 x 25, 4 nuts M8, 4 washers Ø 8 and 4 spring washers Ø 8.
3. Use 1 set of clamps (the serrated section is placed above the handle), 1 hex bolt M12 x 75, 1 carriage bolt M12 x 75, 1 locking
lever (fig. 4) and 2 washers Ø 12 to mount the upper handle to handle tube (pos. 3, fig. 5).
4. Loosen the cable bracket from the upper handle with a 4 mm Allen key (sold separately). Insert both ends in the crossbar (pos. 1,
fig. 1). Align the holes in the crossbar and the cable bracket.
5. Secure both ends of the crossbar and cable bracket with 2 screws M5 x 25 and 2 screws M5 (pos. 2, fig. 5).
Assembling the handle
The handle can be adjusted to suit the user.
1. Loosen the upper handle’s lock lever and adjust the handle vertically and laterally (pos. 1, fig. 6).
Assembly of the guards
1. Remove the jointing plate (pos. 1, fig. 6a) before the guard is mounted.
2. Place the guard on the gearbox and secure with 2 screws (pos. 2).
3. Fit the jointing plate on the guard.
4. When used with 6 rotating blades, both left and right-hand guard extensions are used.
5. Install as shown below.
Loosen the 3 screws M8 x 16 from the left-hand guard extension (pos. 1, fig. 6b).
Align the holes on the guard extension with the holes in the left-hand side of the guard are secure using 3 screws M8 x 16,
3 Nyloc nuts M8, 6 washers Ø 8.

Acquaer Ltd. www.gamagarden.eu
H-4900, Fehérgyarmat, Szatmári út 11.
8
Fit the right-hand guard extension in the same way.
WARNING:
Never use the machine without the guards fitted.
Assembly of the rotating blades
Fit the rotating blades with screws M8 x 25, lock washers Ø 8 and nuts M8 (fig. 7). The rotating blades in fig. 7 must be placed on the right-
hand side of the machine, as seen from the direction of travel. Always fit the rotating blades with the edges in the direction of travel. If the
rotating blade has been fitted correctly, the blade closest to the gearbox will curve outwards from the gearbox. The rotating blades on the
left-hand side are fitted in the same way.
NOTE: The right and left sides of the machine are specified as viewed from the driving position behind the
handle. NOTE: The letters L (left) and R (right) on the rotating blades specify the assembly position.
Assembly of the rotating blades and side discs on the gearbox
1. Place the inner rotating blade mounts with the rotating blades on the gearbox output shaft (pos. 4, fig. 7a). Align the holes in the
rotating blade mounts with the holes in the shaft and lock in place with the clamps and split pins (pos. 3 and 2).
2. Remove the split pins and clamps from outer rotating blade mounts, fit the side discs, align the holes in the rotating blade mounts
and the discs and lock in place with the split pins and clamps.
3. Position the outer rotating blade mounts and side discs (pos. 1, fig. 7a) on the inner rotating blade mounts from both sides, align
the holes with each other and lock in position with pins and clips.

Acquaer Ltd. www.gamagarden.eu
H-4900, Fehérgyarmat, Szatmári út 11.
9
Assembly of the engine on the machine
(see the transport section)
Assembling the clutch cable
The clutch cable is fitted at the factory.
Clutch adjustment
The clutch cable is adjusted at the factory. Any clutch cable adjustment must be carried out by an authorized service center.
USE
Before using for the first time
WARNING: Check all screws joints on the machine, including the motor attachment.
Filling with engine oil
WARNING: There is no oil in the engine on delivery.
Always fill with the right grade engine oil before using for the first time. Use oil according to the diagram below. For normal operations at
normal temperature, oil grade SAE 10W-30 is recommended.
.
The engine’s oil volume is about 0.6 liters. Check the oil level with the dipstick.
WARNING: Do not run the engine without enough oil –risk of serious engine damage.
Always check the oil level before using the machine. Check the oil level when the engine has been stopped and is cold. Position the
machine with the rotating blades and wheels on a level, stable surface.
Oil level inspection
1. Switch off the motor.
2. Unscrew and pull out the dipstick.
3. Wipe off the dipstick with a cloth.
4. Refit the dipstick without tightening.
5. Pull out the dipstick again and check the oil level. Fill with oil if the oil level is at or below the minimum mark.
PREPARATIONS
WARNING: There is NO oil in the gearbox on delivery.
Before the first start, fill the gearbox with the right amount of the right grade of oil. For normal operations at normal temperature, oil grade
SAE 80W-140 is recommended.
Position the machine with the rotating blades and wheels on a level, stable surface. Depending on the design of the oil filler cap, unscrew
the cap using a hex key (sold separately) (fig. 17) and check that the oil reaches the lower edge of the filling hole. Replace the oil filler cap.
Fuelling
Fill the fuel tank before starting the engine. Do not open the fuel tank cap when the engine is running or is hot. Avoid sources of heat and
do not smoke when refueling.
DANGER: The fuel and fuel vapours are flammable and can explode.
•Switch off the engine and allow it to cool before refilling with fuel.
•Wipe up any spilled fuel before starting the engine.
•Check that the fuel tank is properly secured and that the tank cap is tightened.
•Only fill with fuel outdoors, never indoors.

Acquaer Ltd. www.gamagarden.eu
H-4900, Fehérgyarmat, Szatmári út 11.
10
•SMOKING IS FORBIDDEN.
•Do not start the machine if fuel has been spilled. Move the machine away from any fuel spill before starting. Exercise care to
ensure spilt
fuel does not ignite.
•In order to avoid a fire hazard, remove contaminants from all parts, including the engine, silencer and fuel tank.
•Use at least 90 octane unleaded petrol.
•Fill no more than 1 cm from the edge of the fuel strainer.
WARNING: The engine may stop if the machine is tilted towards the user when the fuel level is low. Always refill the fuel before the tank
is empty.
STARTING THE ENGINE
Before starting
Check the fuel and oil level in the engine.
Check that the clutch lever is not locked in the depressed position.
DANGER: Never start the engine indoors or in an enclosed area - risk of carbon monoxide poisoning. Keep other people, especially children,
and sets at a safe distance from the work area. Make sure the machine is stable before the engine is started.
1. Turn the fuel tap to the ON (open) position.
2. Turn the ignition control to the ON position.
3. Move the throttle slightly (fig. (8)) to choke the engine. The black ignition button is released and can be turned to the ON position.
Otherwise the ignition is turned off (pos. 1, fig. 9).
4. Move the throttle to the end position and let the ignition control remain in the OFF position. Pull the starter cord once or twice to
start the engine (pos. 2, fig. 9).
5. Move the control back when the engine has started.
6. Let the engine run warm for a few minutes.
7. When the engine is warm, set the throttle to the required speed. Run the engine with the throttle in the FAST position (high
speed).
WARNING: If these instructions are not followed, the starter may be damaged.
WARNING: Do not press the clutch lever when the engine is running and the rotating blades are in contact with the ground, as this
causes the rotating blades to begin to rotate and the machine will start to move.
STOPPING THE ENGINE
Move the throttle to the lowest speed position to stop the engine. Turn off the ignition.
1. Move the throttle/choke lever to the SLOW position.
2. Turn the ignition control to the OFF position.
3. Turn the fuel tap to the OFF position.
Use
DANGER: Keep other people, especially children, and pets at a safe distance from the work area.
Check that none of the parts are damaged before use.
•Check that the guards are correctly installed.
•Carefully inspect the area where the machine is to be used and remove any stones, wires, bones or other foreign objects.

Acquaer Ltd. www.gamagarden.eu
H-4900, Fehérgyarmat, Szatmári út 11.
11
•Only use the machine in daylight, or in good artificial lighting.
Do not cultivate ground where there are large stones, or where there are mounds of earth or ditches.
DANGER: Fire hazard! Avoid sources of ignition, e.g. smoking, naked flames, electrical sparks, etc.
when working.
Adjusting the cultivating depth
The cultivating depth is controlled by the plough bar (depth of the stop), which is located below the handle. The transport wheels are
mounted on the plough bar. When cultivating the plough bar is fitted with the wheels upwards (fig. 10).
•Pull out the split pin (pos. 1, fig. 10), remove the pin (pos. 2, fig. 10) and loosen the plough bar with the wheels (pos. 3, fig. 10)
from the mount.
•Insert the plough bar in the bracket with the wheels upwards (pos. 4, fig. 10).
•Align the hole in the bracket with the hole in the plough bar (pos. 5, fig. 10) and lock in place with the pin (pos. 6, fig. 10) and
screw (pos. 7, fig. 10).
Lower the plough bar for a greater cutting depth.
NOTE: make sure to fit the plough bar correctly in the plough bar bracket for the best performance (fig. 10).
CULTIVATING
DANGER: Risk of material damage.
1. Start the engine (see start the engine section).
2. Press in the clutch lever on the handle to start the rotating blades.
DO NOT USE THE MACHINE NEAR BURIED PIPES OR CABLES.
Do not cultivate too close to trees or their roots as these can damage and/or block the rotating blades.
Do not work on wet, muddy earth.
Hard clods of earth can block the rotating blades.
If the rotating blades are blocked, turn off the engine, loosen the spark plug lead, remove the blockage and check that
the machine is not damaged.
The best result is achieved if you cultivate several times at greater and greater depths. The worked soil will then be
spread evenly. Ideally work in vegetation that gives the soil nutrients.
Work across the previous working direction (fig. 11).
Adapt the cultivating depth to the soil. Hard soil should be processed multiple times.

Acquaer Ltd. www.gamagarden.eu
H-4900, Fehérgyarmat, Szatmári út 11.
12
SURFACE WORKING
Reduce the cultivating depth to work the surface.
Working on slopes
DANGER: Risk of personal injury and/or material damage if the machine rolls over.
•Be very careful when changing direction, and when on slopes. Work across slopes, never up or down.
•Remove foreign objects from the area where the machine is to be used. Do not work close to large stones.
•Do not use the machine on slopes with a gradient greater than 20%.
5. Auxiliary equipment
At the rear of the machine there is a welded plate with holes, mounted on the plough bar: the auxiliary equipment plate. This is used to
attach auxiliary equipment.
TRANSPORT
Transport over short distances
The wheels on the plough bar are used to transport between work areas.
1. Insert the plough bar in the bracket with the wheels facing down (fig. 1).
2. Press down on the handle so that the rotating blades are lifted off the ground.
3. Move the machine with caution.
Transport over longer distances
WARNING: Do not transport the machine upside down or on its side. The machine must stand on the rotating blades and wheels.
WARNING: Do not tilt the gearbox and do not put it on the side or upside down.
Prior to transport
•Turn off the engine. Allow the engine to cool.
•Release the spark plug lead from the spark plug.
If the machine is transported on a trailer or the like, it should be secured so that it cannot move and cause damage. Remove the engine
from the gearbox to transport it in smaller spaces, such as the boot of a car,
Dismantling the engine from the gearbox
Transport over longer distances is facilitated if the engine is removed from the gearbox.
WARNING: Exercise care to ensure that the clutch lever is not damaged when the engine is removed and reassembled.
1. Release the spark plug lead from the spark plug.
2. Disconnect the clutch cable from the engine.
Unscrew the clutch cable’s screw.
Loosen the clutch cable and the spring from the hole in the handle.
3. Loosen the screw (pos. 2, fig. 12) from the bracket (pos. 1, fig. 12.
4. Loosen the bracket from the mount ring on the gearbox and the clutch.
5. Loosen the engine and clutch.

Acquaer Ltd. www.gamagarden.eu
H-4900, Fehérgyarmat, Szatmári út 11.
13
Assembly of the engine
1. Align the clutch’s mount ring (pos. 2, fig. 13) with the guide pin on the gearbox’s mount ring (pos. 3, fig. 13).
2. Press down the engine and clutch so that the clutch’s mount ring and (pos. 2, fig. 13) and the gearbox’s mount ring (pos. 3, fig. 13)
rest against each other.
3. Fit the locking device (pos. 1, fig. 12) on the mount rings on the clutch and gearbox and lock with screw (pos. 2, fig. 12).
WARNING: Check that the clutch’s friction elements are clean before the motor is assembled on the gearbox. Do not tilt the engine and
do not put it on the side or upside down.
NOTE: Two persons are required to assemble the engine on the machine.

Acquaer Ltd. www.gamagarden.eu
H-4900, Fehérgyarmat, Szatmári út 11.
14
MAINTENANCE
Follow these maintenance instructions for the best performance and service life. Carry out maintenance after the specified calendar period
or specified hours of operation (whichever comes first). In demanding conditions, maintenance should be carried out more frequently.
DANGER:
•Risk of personal injury as a result of accidental starting.
•Risk of burn injury as a result of a hot engine or silencer.
Prior to maintenance
•Switch off the engine and wait until all moving parts have completely stopped.
•Release the spark plug lead from the spark plug.
•Allow the engine to cool.
Before using
•Check the oil level in the engine.
•Check that the output shaft’s bearings is correctly lubricated.
•Check the air filter.
•Check that all screw connections are properly tightened. Tighten, if necessary. Check that all the safety devices are correctly fitted
and in working order before use.
Once per season
•We recommend that the machine is maintained by an authorized service center.
IMPORTANT: For models equipped with engines from Honda or Briggs & Stratton, perform engine maintenance according to
manufacturer's instructions.
Maintenance measures
Before
using
Every 20 hours of
operation or once
a month.
Every 50 hours
of operation or
once a season.
Once
per
season
Every 100 hours of
operation or once
a year.
After each
use
Check the oil level in the engine
•
Change the engine oil (1, 2)
•
•
Check the air filter
•
Clean or replace the air filter (2)
•
Check and clean the spark plug (3)
•
Replace, if necessary.
•
Check or adjust the valve clearance (4)
•
Clean the cylinder head (4)
•
Clean the rotating blades and side discs
•
Lubricate moving/rotating parts
•
Clean the engine’s cooling system.
•
Cleaning the inside of the clutch
Change the oil in the gearbox
Every
other year
1. The oil change should be done after 2 hours of operation.
2. In demanding conditions, maintenance should be carried out more frequently.
3. Never scrape or grind the spark plug’s electrodes.
4. Should be carried out by an authorized service center.
WARNING: Never lubricate the clutch’s friction surfaces.
CLEANING
DANGER: Risk of personal injury when handling the rotating blades.
Wear safety gloves.
•Clean the guards, side discs and rotating blades with water after each use and wipe with a cloth.
•Clean the engine with a brush and cloth.

Acquaer Ltd. www.gamagarden.eu
H-4900, Fehérgyarmat, Szatmári út 11.
15
WARNING: Never rinse the machine, especially not the gearbox, with a water jet or high pressure washer.
CHANGING THE OIL
NOTE: Drain the engine oil when the engine is hot so that all the oil quickly runs out.
1. Unscrew and remove the oil filling cap (fig. 14).
2. Tilt the machine and let the oil drain into a suitable container. Used oil must be disposed of in accordance with local regulations.
3. Fill with the correct amount of new engine oil and check the oil level.
4. Replace and tighten the oil filling cap.
AIR FILTER MAINTENANCE
WARNING: Do not start the engine without the air filter.
Inspection
DANGER: Never use petrol or solvents to clean the filter –risk of fire or explosion.
1. Remove the air filter cover and take out the paper or foam filter (fig. 15).
2. Check the filter in terms of contamination and any foreign objects. Check carefully with regard to holes and other damage.
Replace, if necessary.
3. Wash the filter in warm water with a mild detergent and allow to dry. Soak the filter with 1 tablespoon of clean engine oil.
Squeeze out the filter to distribute the oil evenly and so excess oil runs out.
4. Replace the paper filter.
5. Return the paper or foam filter and the air filter cover.

Acquaer Ltd. www.gamagarden.eu
H-4900, Fehérgyarmat, Szatmári út 11.
16
Check the spark plug
Check that the spark plug is clean and free of combustion residue and has the right electrode gap.
The correct electrode gap is 0.7-0.8 mm.
1. Disconnect the spark plug lead from the spark plug and unscrew the spark plug using a spark plug spanner.
2. Inspect the spark plug visually.
3. Clean the spark plug if it is to be used again.
4. Measure the electrode gap with a feeler gauge (sold separately). Adjust, if necessary, by gently bending the electrode.
5. Check the spark plug’s gasket and thread.
6. Replace the spark plug if it is worn or if the insulator is damaged.
7. Screw in the spark plug by hand and tighten with the spark plug spanner.
WARNING: Tighten the spark plug correctly, otherwise the spark plug will become very hot, which can damage the engine.
Dismantling and assembly of the rotating blades and side discs
DANGER: Risk of personal injury as a result of accidental starting.
Prior to working on the rotating blades.
•Switch off the engine and wait until all moving parts have completely stopped.
•Release the spark plug lead from the spark plug.
Replacing the rotating blades
1. Remove the split pins (pos. 3, fig. 16) and remove the mounts (pos. 2, fig. 16), which hold the rotating blades on the drive shaft.
2. Remove the rotating blades from the drive shafts.

Acquaer Ltd. www.gamagarden.eu
H-4900, Fehérgyarmat, Szatmári út 11.
17
3. Assemble the new rotating blades by following the instructions in the reverse order.

Acquaer Ltd. www.gamagarden.eu
H-4900, Fehérgyarmat, Szatmári út 11.
18
4. NOTE: Side discs (pos. 1, fig. 16) should be disassembled and assembled the same way.
GEARBOX MAINTENANCE
WARNING: Do not tilt the gearbox and do not put it on the side or upside down.
Gearbox oil should be changed every year.
Position the machine with the rotating blades and wheels on a level, stable horizontal surface. Depending on the design of the oil filler hole,
unscrew the cap using a hex key (sold separately) (fig. 17) and check that the oil reaches the lower edge of the filling hole. Top up the oil, if
necessary and refit the cap.
WARNING: Do not slip the clutch, so that the rotating blades stop temporarily even though the engine is running - risk of overheating the
clutch.
STORAGE
DANGER! The fuel and fuel vapours are flammable and can explode.
WARNING: Do not tilt the machine and do not put it on the side or upside down.
Follow the instructions below if the machine is not going to be used for some time:
•Drain the petrol into a suitable container.
•Loosen the carburetor’s drainage screw (pos. A, fig. 18), if fitted, and drain the petrol from the carburetor.
•Refit the washer and drainage screw on the carburetor.
•Change the engine oil.

Acquaer Ltd. www.gamagarden.eu
H-4900, Fehérgyarmat, Szatmári út 11.
19
•Unscrew the spark plug and pour a tablespoon of fresh engine oil into the cylinder through the spark plug hole. Pull the starter
cord slowly several times to distribute the oil in the engine. Replace the spark plug, but do not connect the spark plug lead.
•Clean the cultivator.
•Store the machine in a clean, dry place.
TROUBLESHOOTING
PROBLEM
CAUSE
ACTION
The engine cannot be stared.
No petrol in the tank.
Fill the tank with clean, fresh unleaded
petrol.
Old petrol.
Drain cut the old fuel and fill the tank with
clean, fresh unleaded petrol.
Incorrect choke settings.
Close the choke.
The spark plug lead is not connected to the
spark plug.
Connect the ignition cable to the spark
plug.
The spark plug is dirty or damaged, or the
wrong electrode gap is set.
Clean the spark plug and check the
electrode gap. Replace, if necessary.
The engine does not run smoothly.
The spark plug lead is not connected
correctly to the spark plug.
Connect the spark plug lead to the spark
plug.
Old petrol. Water or contamination in the
fuel system.
Drain cut the old fuel and fill the tank with
clean, fresh unleaded petrol.
Contaminated air filter.
Clean or replace the air filter.
The rotating blades do not rotate.
The rotating blades are blocked by stones,
clods of earth or the like.
Shut off the engine and disconnect the
ignition cable from the spark plug. Clean
the rotating blades.
Incorrectly adjusted clutch cable.
Take the appliance to an authorized service
center.
The clutch is worn.
Take the appliance to an authorized service
center.
Heavy vibrations.
The rotating blades are damaged or not
properly secured.
Shut off the engine immediately and
disconnect the spark plug lead from the
spark plug. Replace damaged components.
Loose screw connections.
Shut off the engine immediately and
disconnect the spark plug lead from the
spark plug. Tighten or replace the bolted
joints.
IMPORTANT: Contact your dealer if you cannot rectify the problem by using the troubleshooting chart.
We reserve the right to change the technical data without prior notice.
Guarantee terms
Please carefully retain the guarantee card completed by the seller, or the proof of purchase.
Pre-conditions for the 12-month guarantee entitlement:
Table of contents
Other Gama Garden Tiller manuals