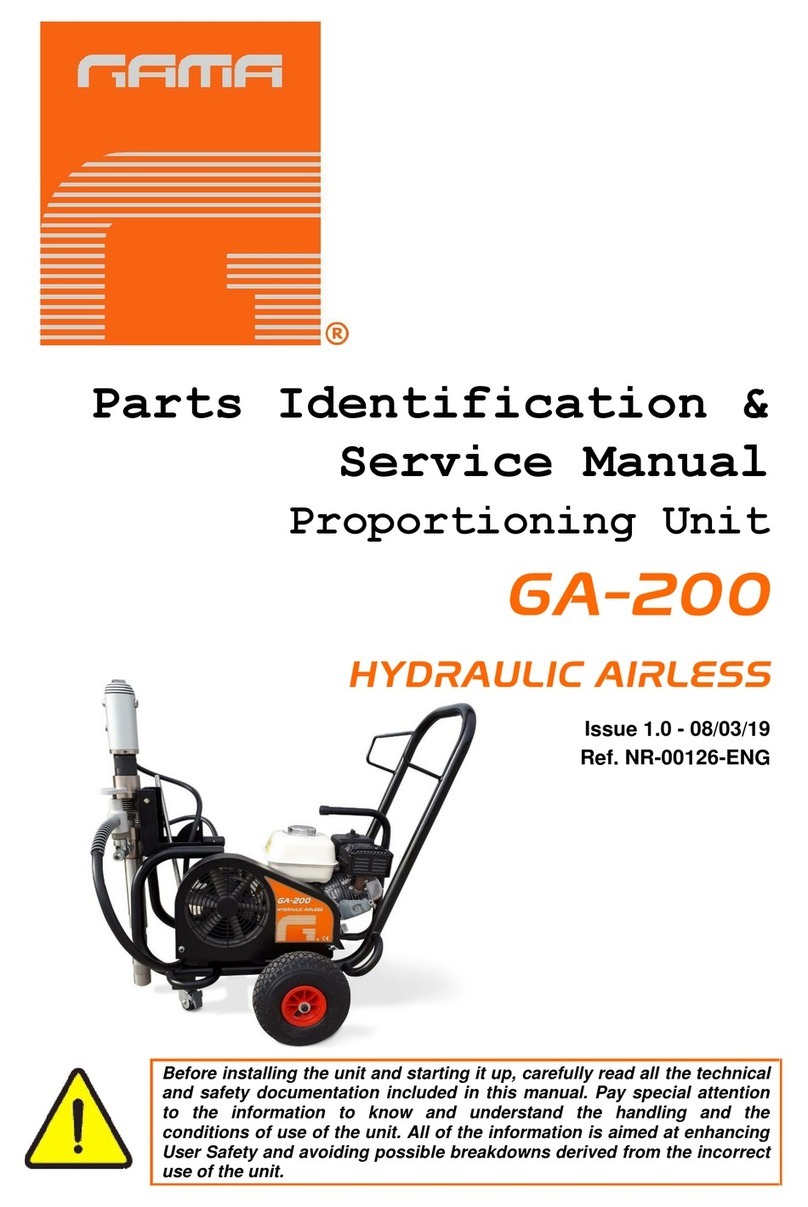
GAMA Easy Spray-H User manual

Service Manual
Spray Unit
Easy Spray-H
Issue 1.915/02/19
Ref. NR-00088-ENG
Before preparing the unit and starting it up, please take the
time to read all the technical and safety instructions in this
manual. It is essential that you follow these instructions
carefully so that you can handle and use the unit properly.
These instructions are intended to maximize user safety and
avoid malfunctions deriving from the incorrect use of the unit.

Easy Spray-H
Service manual
2/48 Issue 1.9 Ref. NR-00088-ENG
http://www.gamapur.com/
HI-TECH SPRAY EQUIPMENT, S. A. (“HI-TECH”) provides this LIMITED WARRANTY (“Warranty”) to the
original purchaser (“Customer”) covering the equipment and the original accessories delivered with the
equipment (“Product”) against defects in the design, materials or manufacture of the Product from the
moment of initial purchase by the user and for a period of two (2) years from this date.
If during the Warranty Period and under conditions of normal use, the Product stops working correctly for
reasons connected with its design, materials or manufacture, the authorized dealer for the country where
the Product was purchased or the HI-TECH technical assistance service shall repair or replace the Product
in accordance with the following
CONDITIONS
a) This Warranty is only valid if accompanied, on presentation of the Product for its repair or
substitution, by the original invoice issued by a HI-TECH dealer authorized to sell the Product,
and which should indicate the date of purchase and serial number. HI-TECH reserves the right to
withhold the provision of Warranty where the aforementioned information does not appear on the
invoice or has been altered after the purchase of the Product.
b) The repaired or replaced Product shall be covered by the original Warranty for the time remaining
until its expiry or for three (3) months subsequent to the repair date, where the remaining
Warranty period is shorter.
c) This Warranty does not apply to Product malfunctions caused by: its defective installation, natural
wear of parts, its use for purposes other than those considered normal for this Product or in a
manner which does not strictly comply with the instructions for use provided by HI-TECH;
accident, recklessness, or adjustments, alterations or modifications to the Product not authorized
by HI-TECH; or the use of accessories, heating devices, pumping apparatus and/or dispensers
not approved or manufactured by HI-TECH.
d) Parts and accessories which are part of the Product and not manufactured by HI-TECH are
covered by the warranties offered by their original manufacturers.
HI-TECH SHALL HONOUR NO VERBAL OR WRITTEN WARRANTY OTHER THAN THE PRESENT LIMITED WARRANTY IN ITS
PRINTED FORM. ALL IMPLIED WARRANTIES, INCLUDING AND WITHOUT LIMIT FITNESS FOR A PARTICULAR PURPOSE,
EXPIRE WHEN THIS WRITTEN GUARANTEE EXPIRES. HI-TECH SHALL NOT BE HELD LIABLE FOR ANY DAMAGE OR LOSSES
CAUSED BY THE DEFECTIVE PERFORMANCE OR OPERATION OF THE PRODUCT, OR BY THE MATERIAL DISPENSED BY
THE PRODUCT, INCLUDING ALL LOSSES DERIVING FROM DAMAGES TO PERSONS OR PROPERTY. HI-TECH SHALL NOT IN
ANY CIRCUMSTANCES BE HELD LIABLE FOR LOSSES IN SPECULATIVE GAINS OR PROFITS. THE REPAIR OR
REPLACEMENT OF THE DEFECTIVE PRODUCT SHALL CONSTITUTE THE FULL DISCHARGE OF HI-TECH’S
RESPONSIBILITIES TOWARDS THE CUSTOMER. HI-TECH CANNOT GUARANTEE THE SUITABILITY OR FITNESS FOR
PURPOSE OF ITS PRODUCT FOR ANY GIVEN USE OR APPLICATION.
All information on parts not manufactured by HI-TECH and based on the statements of the original
manufacturer is given without warranty or liability of any kind, express or implied, even if considered
accurate and reliable.
Under no circumstances shall the transfer, sale or financial leasing of the Product by HI-TECH constitute
express or implied authorization, assent or permission for the use of rights or patents, or provide grounds
for, encourage or endorse their violation.
Warranty restrictions do not limit the legal rights of the consumer as provided in applicable national
legislation or affect the rights deriving from the purchase agreement between consumer and provider.
WARRANTY

Easy Spray-H
Service Manual
3/48 Issue 1.9 Ref. NR-00088-ENG
http://www.gamapur.com/
All of the information in this Service Manual is given in good faith, but is not subject to any
implied or explicit warranty. HI-TECH reserves the right to make the necessary improvements
and modifications to this Service Manual, at any time and without prior notice, with the intention
of rectifying possible typographical errors, expanding on existing information or incorporating
changes to the characteristics and performance of the unit.
The Easy Spray-H proportioning unit is designed and manufactured in accordance with the
European “Machinery” Directive 89/392/EEC as modified by the legislation which transposed it
to national statutes. It also complies with European directives on electromagnetic compatibility
and electrical safety, as well as applicable Harmonized Standards.
This section contains important information on the safe handling and operation of the Easy
Spray-H proportioning unit.
Before preparing the unit and starting it up, please take the
time to read all the technical and safety instructions in this
manual. It is essential that you follow these instructions
carefully so that you can handle and use the unit properly.
These instructions are intended to maximize user safety and
avoid malfunctions deriving from the incorrect use of the unit.
A DANGER! indication alerts you to situations which may result in serious injury if the
instructions are not followed.
A WARNING! indication gives information on how to avoid damaging the unit and
situations likely to cause minor injury.
A NOTE indication provides useful information on the procedure in question.
Read this manual carefully to familiarize yourself with the unit’s characteristics and operating
procedures. By following the instructions and recommendations contained in this manual you
will reduce the risk of accidents in the preparation, use and maintenance of the unit, ensuring
incident-free operation for a longer time, improved performance and the quick and easy
detection of problems.
Keep this Service Manual handy for reference at all times. If you lose this manual, ask for a new
copy from your local HI-TECH distributor or directly contact HI-TECH SPRAY EQUIPMENT,
S.A.
WARNING! The Easy Spray-H proportioning unit is not designed for use in potentially
explosive environments. Pressure and temperature must not exceed the limits indicated
in the technical specifications of this manual.
SAFETY AND HANDLING

Easy Spray-H
Service manual
4/48 Issue 1.9 Ref. NR-00088-ENG
http://www.gamapur.com/
When working with the unit, it is essential that you wear suitable clothing and personal
protective equipment including but not limited to gloves, protective goggles, safety footwear and
face masks. Use breathing equipment when working with the unit in enclosed spaces or in
areas with insufficient ventilation. The safety measures given in in this manual are part of a
wider safety procedure. Before powering up the unit, you must perform a comprehensive
analysis of the risks associated with the products it dispenses, the type of application, and the
working environment.
To avoid bodily damage caused by the incorrect handling of
the substances and solvents used with this unit, read
carefully the safety information provided by their suppliers.
Dispose of waste as required by applicable legislation.
Disconnect the unit from the power supply before opening
the electrical console.
Electrical maintenance should only be carried out by a
qualified electrician.
To avoid exposure to pressurized fluids, do not release any
connectors or perform maintenance work on parts subjected
to pressure until the pressure has been completely
eliminated.
Use suitable protection when using or performing
maintenance on the unit, or when in its vicinity. This
protection includes, but is not limited to, the use of masks,
protective goggles, gloves, safety footwear and safety
clothing.
This unit includes parts which reach temperatures likely to
cause burns. Do not touch or handle the hot parts of the unit
until they have cooled down.
To avoid the risk of crushing or amputation, only use this unit
when its moving parts are fitted with correctly installed safety
guards. Make sure all safety guards are correctly mounted
after completing repair or maintenance work.

Easy Spray-H
Service Manual
5/48 Issue 1.9 Ref. NR-00088-ENG
http://www.gamapur.com/
The Easy Spray-H proportioning unit is designed for the application of polyurea chemical
systems for polyurethane foaming and certain two-component epoxy systems.
Principal heating system
Consists of two independent heaters without gaskets. Each heater has two 900 W heating
elements delivering total power of 1800 W, and the necessary control and safety mechanisms
for the correct operation of the system. Their special configuration permits a temperature
differential (ΔT) of 30º C and application temperatures of 80ºC under normal ambient
temperature conditions.
Hose heating system
The unit features two systems for keeping the products hot
while in the hoses:
Recirculation hoses (maximum length 11 metres)
Hose heated by woven elements at 230V fitted with
temperature sensor (maximum length 15 metres)
If longer hoses are required, a standard HI-TECH hose
(maximum length 48 metres) heated by transformer can be
used.
Proportioning pumps
This assembly comprises two positive-displacement piston pumps operated by a dual-piston
hydraulic cylinder.
The parallel piston pump configuration ensures constant volume and guarantees uniformity of
pressure in both directions of pump movement.
CHARACTERISTICS

Easy Spray-H
Service manual
6/48 Issue 1.9 Ref. NR-00088-ENG
http://www.gamapur.com/
Electrical
Voltage: ________________________________________________________________ 230V
Frequency: ____________________________________________________________ 50/60Hz
Connections 1 and 2:________________________ 2 x 220V phases /1 x 400V phase + neutral
Connection 1 power consumption:__________________3.3 kW (1.8 kW motor + 1.5 kW hoses)
Connection 2 power consumption: _____________________________ ______3.6 kW (heaters)
Connection 1 consumption:__________________________________________________ 16A
Connection 2 consumption:__________________________________________________ 16A
Mechanical
Maximum working pressure: ____________________________ 175 bar (17.5 MPa) / 2,540 psi
Maximum output at 1:1 ratio: _____________________________________4 kg/min / 8,8 lb/min
Minimum output:_______________________________________________1 kg/min / 2,2 lb/min
Length of recirculation hose: ____________________________________________ 11 m / 36 ft
Maximum heated hose length (230V): _____________________________________ 15 m / 49 ft
Recommended compressor: ______________________________________ 1 HP single-phase
Approximate weight:________________________________________________ 172 kg / 380 lb
Dimensions: ___________________________________ H: 1165 mm / W: 605 mm / D: 744 mm
_________________________________________________ H: 45,9 in / W: 23,8 in / D: 29,3 in
TECHNICAL SPECIFICATIONS

Easy Spray-H
Service Manual
7/48 Issue 1.9 Ref. NR-00088-ENG
http://www.gamapur.com/
Figure 1.General view
OVERVIEW

Easy Spray-H
Service manual
8/48 Issue 1.9 Ref. NR-00088-ENG
http://www.gamapur.com/
1. Isocyanate tank
Contains chemical component “A”. Capacity 30 litres.
2. Polyol tank
Contains chemical component “R”. Capacity 30 litres.
3. Isocyanate recirculation valve (recirculation hoses only)
Enables selection between recirculation and spray for the isocyanate circuit.
4. Polyol recirculation valve (recirculation hoses only)
Enables selection between recirculation and spray for the polyol circuit.
5. Hoses with built-in heating (230V)
Keeps spray products at the right temperature.
6. Hose temperature sensor (heated hoses only)
Monitors the temperature of the spray products.
7. Control panel
Controls the correct operation of the unit.
8. Isocyanate proportioning pump
Delivers metered quantities of isocyanate to the system.
9. Polyol proportioning pump
Delivers metered quantities of polyol to the system.
10. Isocyanate heater
Heats the isocyanate to the pre-set temperature.
11. Polyol heater
Heats the polyol to the pre-set temperature.
12. Isocyanate pressure gauge
Indicates the pressure in the isocyanate circuit.
13. Polyol pressure gauge
Indicates the pressure in the polyol circuit.
14. Isocyanate heater sensor
Provides information on the temperature of the isocyanate heater.
15. Polyol heater sensor
Provides information on the temperature of the polyol heater.
16. Isocyanate intake filters
Prevent solid particles from the entering the unit’s isocyanate pump.
17. Polyol intake filters
Prevent solid particles from the entering the unit’s polyol pump.
18. Hydraulic pressure gauge
Indicates the pressure of the hydraulic circuit.
19. Isocyanate circuit safety pressure switch
Shuts off the solenoid valve in the event of excess pressure in the isocyanate circuit.
20. Polyol circuit safety pressure switch
Shuts off the solenoid valve in the event of excess pressure in the polyol circuit.

Easy Spray-H
Service Manual
9/48 Issue 1.9 Ref. NR-00088-ENG
http://www.gamapur.com/
21. Hydraulic pressure regulator
Enables the pressure of the hydraulic circuit to be increased or
reduced.
With VK Pump.- To increase pressure, turn the tap clockwise;
to reduce pressure, turn the tap anti-clockwise.
With BR Pump.- The pressure is set with the pressure setting screw (position D).
Undo the lock nut with a short length screwdriver to set the pressure range by turning the
pressure screw with hexagon socket 4 mm. Turning the setting screw clockwise increases the
flow. Turning the setting screw counter clockwise decreases the flow. One turn of the setting
screw corresponds to 50 bar pressure.
When the setting screw cannot be turned clockwise or counter clockwise easily, is because the
lock nut is jammed up against the setting screw. In this case, turn clockwise the setting screw to
unlock the lock nut.
The flow regulation (standby pressure) setting screw (position F) should not require adjustment
In both cases the NORMAL or RETRACT commands must be active before you can adjust the
pressure of the hydraulic circuit.
The hydraulic circuit should be regulated to ensure that the
unit’s output pressure never exceeds the working pressure of
the product hoses fitted to the unit.

Easy Spray-H
Service manual
10/48 Issue 1.9 Ref. NR-00088-ENG
http://www.gamapur.com/
22. Hydraulic oil tank
Contains the oil used by the unit’s hydraulic system.
23. Hydraulic cylinder
Drives the pumps.
24. Oil level and thermometer
Displays the fluid level and temperature of the hydraulic oil tank.
25. Electric motor
Drives the hydraulic pump.
26. Hydraulic pump
Axial piston pumps are swash plate design variable displacement pumps.
The flow and pressure compensator control, also known as a load sensing control, matches
pump output flow and pressure to the system demand.
Pumps oil to the hydraulic cylinder.
27. Hydraulic return filter
Filters impurities from the hydraulic oil.
28. Hydraulic oil fill cap
For topping up the oil tank.
29. Heated hose sensor switch
Enables control of the temperature in the hoses.
30. TCS DIP switches
Enables selection of the hose heater control mode depending on
whether hoses incorporate a temperature control sensor (TCS).
See page 11 point 2 of this manual for instructions on selecting the
correct control mode. The unit must be disconnected before
operating the DIP switch.
31. Temperature units DIP switch
Enables selection of temperature units on the control panel
displays. Set this switch to the “EU” position to display the
temperature in degrees Celsius (ºC), or “USA” to display the
temperature in degrees Fahrenheit. The unit must be disconnected before operating the
DIP switch.
32. Motor DIP switch
Activates/deactivates the hydraulic drive. Factory settings depend
on the model. The “Motor DIP” selector function is only active
in units with hydraulic drive. The unit must be disconnected
before operating the DIP switch.

Easy Spray-H
Service Manual
11/48 Issue 1.9 Ref. NR-00088-ENG
http://www.gamapur.com/
Figure 2.Control panel
The control panel enables you to set the optimum operating conditions for the characteristics
and requirements of the products dispensed. Press the MODE button to enter the desired
settings for temperature, intensity and number of cycles to run. The selected parameter remains
flashing for a few seconds, allowing you to change the values by touching the UP / DOWN
buttons. After changing the value, press the MODE button again to confirm your selection.
The parameter modification function automatically cancels after a few seconds if there is no
further activity on the buttons.
The parameters that can be selected and viewed are:
Hose temperature in automatic control mode (maximum 80ºC)
Hose heating intensity in manual control mode (maximum 5.0 amps)
Isocyanate heater temperature (maximum 90ºC)
Polyol heater temperature (maximum 90ºC)
Number of cycles to run.
Number of cycles completed.
CONTROL PANEL

Easy Spray-H
Service manual
12/48 Issue 1.9 Ref. NR-00088-ENG
http://www.gamapur.com/
1. Power switch
Connects and disconnects the unit from the electricity supply. This switch must be in the ON
position for the unit to work. When this switch is in the ON position, the green pilot light above
the switch lights up.
2. Hoses / Mangueras
Hose heating control can be automatic (optional) when a
temperature control sensor is used for direct temperature control,
or manual where no temperature control sensor is used. The
control mode is selected via a DIP switch on the printed circuit
board. Set the “HOSE TEMP” DIP to ON if the isocyanate hose incorporates a temperature
control sensor. If the isocyanate hose does not incorporate a temperature control sensor, or if it
is not working due to malfunction or other reasons, set the DIP to OFF.
In automatic control mode, the temperature in the isocyanate (ISO) hose is shown on the
corresponding display. In manual control mode, only the selected amperage value is shown.
The unit must be disconnected before operating the DIP selector.
HOSE TEMP ON
with temperature control sensor in ISO
hose
HOSE TEMP OFF
manual control
To select the temperature when the unit is working in automatic heating control mode, touch the
MODE button, select the desired temperature using the UP/DOWN buttons and touch the
MODE button again to confirm the setting. Follow the same procedure to select the amperage.
When the unit is operating in automatic control mode, this value should be set to between 4.5
and 5.0 amps.
The temperature setting of the hoses cannot be higher than the temperature setting of the
heaters.
In cases where only one automatic temperature control system is working (ISO or POL), the
limit temperature value is the higher of the two heater settings.
Maximum temperature settings are 80ºC for hoses and 90ºC for heaters.

Easy Spray-H
Service Manual
13/48 Issue 1.9 Ref. NR-00088-ENG
http://www.gamapur.com/
The sequence for entering commands is as follows:
First we set the temperature of the ISO and POL heaters.
Next, we set the temperature of the ISO hoses.
Then we set the hose current consumption in amps.
Finally, we enter the cycle preselector setting.
If the temperature control sensor is not active, the symbol (---) appears on the display and the
heating switches off.
In versions with a transformer, the lower pushbutton on the
transformer switches the hose heating on and off. This
pushbutton incorporates an LED which lights up when the
heating is operating; a flashing LED indicates that the heater
is on but is not heating up.
Turn the potentiometer clockwise to increase amps, and anti-
clockwise if you wish to decrease amps. Adjustment ranges
from 0 to 50 amps.
Take the values below as an approximate reference to select
the intensity that allows reaching the requested application
temperature.
30 A 38º C 100º F
35 A 48º C 118º F
40 A 60º C 140º F
45 A 75º C 167º F
50 A 80º C 176º F
Turn the potentiometer clockwise until the screen shows the required amps for a quick pre-
heating.
NOTE: The circuit breaker software of the transformer has a safety system to prevent
the hoses from being exposed to high temperatures during long periods of time.
If you have selected a potential over 35 amperes, after 20 minutes, the potential will
automatically regulate to 35 amperes.
This potential cannot be set above 35 amperes until the heater is disconnected from the
hoses and reconnected..

Easy Spray-H
Service manual
14/48 Issue 1.9 Ref. NR-00088-ENG
http://www.gamapur.com/
3. Heaters / Calentadores
This display shows the temperatures in the isocyanate (ISO) and polyol (RESIN) heaters. To
enter new temperature settings, press the MODE button,select the desired temperature by
pressing the UP/DOWN buttons and press the MODE button again to confirm the selected
value.
The lower pushbuttons switch the heater of each product on and off. Each pushbutton
incorporates an LED which lights up when the heater is operating; a flashing LED indicates that
the heater is on but is not heating up.
The heater will temporarily stop working in the event of excess pressure in either of the heating
circuits, and will switch on again once the problem has disappeared.
If the temperature control sensor is not active, the symbol (---) will appear on the display and the
heater will switch off.
The hose heating command is not memorized by the unit and therefore it must be activated on
every power-up.
4. Mode button
Press this button to modify the different control parameters.
5. Up / Down buttons
Increase or decrease the value of each parameter.
6. Counter / Contador
This display indicates the number of cycles completed, and the number of cycles remaining.
The cycle counter is incremental and can be reset to zero by pressing the UP and DOWN
buttons simultaneously.
The system offers a certain number of work cycle pre-selects. When the unit completes the pre-
selected number of cycles, it stops dispensing product.
To enter the desired number of cycles, press and hold the MODE button until the cycle counter
starts flashing, then select the number of cycles by pressing the UP / DOWN buttons as
required. Then press the MODE button again to confirm the number of cycles.
When the unit starts, the number of completed cycles is deducted from the number of pre-set
cycles. When all the pre-set cycles have completed, the counter displays zero and the unit
stops.
The counter display alternately shows (at intervals of two or three seconds) the number of
cycles completed (totalizer) and cycles remaining (preselector). The remaining cycles are
displayed with a minus sign (-) in front (-XXXXX).
The cycle counter display also shows alerts in the event of malfunction.
You can use the programmable counter cycles as minimum product level in the tanks, setting
the counter to 620 cycles and ensuring that the tanks are full. When the counter reaches zero
the machine stops in order not to pump air into the system and alerting the lack of product in the
tanks. Once the 620 cycles you should reset the counter and fill the tank if you want to reuse as
a low level of product tanks.
7. Control / Power button
This button controls the power switch providing electrical power to the heating circuits of the
heaters and hoses. When pressed, this button lights up. To disconnect the power supply, press
this button again. The power supply automatically cuts out in the event of an alarm for excess
temperature in the heaters (alarms 6 and 7) or an alarm for excess intensity in the hose heating
(alarm 9).

Easy Spray-H
Service Manual
15/48 Issue 1.9 Ref. NR-00088-ENG
http://www.gamapur.com/
8. Motor button
This button starts and stops the hydraulic motor. When pressed, this button lights up. To switch
off the hydraulic motor, press this button again. The hydraulic motor switches off automatically
in the event of hydraulic motor overload (alarm 8). The “Motor” function is only available on
units with hydraulic drive.
9. Normal button
Press this button to activate normal operation. When pressed, this button lights up.
10. Retract button
Pressing this button sets the piston of the isocyanate proportioning pump to the retracted
position to prevent product residue from crystallizing on the piston. Press the RETRACT button
every time you stop the unit. When pressed, this button lights up.
11. Direction indicator lights
These lights indicate the direction of movement of the proportioning pumps. When there is
excess pressure in the system, both these lights go out and alarms 3 and 4 are activated. The
NORMAL and RETRACT buttons remain active.

Easy Spray-H
Service manual
16/48 Issue 1.9 Ref. NR-00088-ENG
http://www.gamapur.com/
In the event of a malfunction affecting the operation of the unit, it emits an audio signal and
shows an alarm code on the COUNTER/CONTADOR display. An alarm cannot be cleared until
the problem which caused it has been resolved. After clearing the alarm, press the MODE
button.
Procedures for determining the causes of alarms are given below:
1. Operating voltage under 170V
Check the electrical power connection.
Check the transformer’s thermomagnetic protection.
2. Operating voltage above 270V
Check the electrical power connection.
3. Excess pressure ISO (solenoid valve and heating system cut-out)
Check product pressure.
Check LED no. 10 on the printed circuit board: it should be on.
Check the safety pressure switch.
4. Excess pressure POL (solenoid valve and heating system cut-out)
Check product pressure.
Check LED no. 11 on the printed circuit board: it should be on.
Check the safety pressure switch.
5. Excess temperature ISO (CONTROL/POWER cut-out)
Check the heater heating system.
Check the safety pressure switch connection and allow it to cool down so it can
automatically reset.
Check LED no. 12 on the printed circuit board: it should be on.
6. Excess temperature POL (CONTROL/POWER cut-out)
Check the heater heating system.
Check the safety pressure switch connection and allow it to cool down so it can
automatically reset.
Check LED no. 13 on the printed circuit board: it should be on.
7. Button malfunction (only active when machine is connected to the power supply)
Check the buttons.
8. Motor malfunction (motor stoppage)
Check the consumption of the hydraulic motor.
Check the electrical connections of the hydraulic motor.
Check LED no. 15 on the printed circuit board: it should be off.
NOTE: Alarm 8 (“motor malfunction”) is only included in units with hydraulic drive.
ALARMS

Easy Spray-H
Service Manual
17/48 Issue 1.9 Ref. NR-00088-ENG
http://www.gamapur.com/
9. Hose heating system malfunction (CONTROL/POWER cut-out)
Replace the faulty triac.
000000 Preselected cycles completed (solenoid valve cut-out)
Press the MODE button to reset the counter.
Set the cycle selector to zero.
Disconnect the unit from the power supply before opening
the electrical console. Electrical maintenance of the machine
should only be carried out by a qualified electrician.

Easy Spray-H
Service manual
18/48 Issue 1.9 Ref. NR-00088-ENG
http://www.gamapur.com/
WARNING! Use suitable protective gear and follow the safety recommendations of the
suppliers of the chemical components when preparing or working with the unit.
HI-TECH provides some accessories. This set comprises the following elements:
Tube of grease, magnet holder, parts manual and service manual.
NOTE: To ensure the correct operation of the unit, the electrical power supply must
meet the specifications given on p 6of this manual and on the unit’s rating plate.
The hoses have been subjected to a vacuum-drying treatment and are delivered with their ends
joined to prevent humidity from entering them. Do not separate them until the moment they are
to be fitted to the unit.
Proceed as follows to prepare the unit:
a) Remove the front protective covering from the pump guides
and fill the lube reservoir of the isocyanate pump with DOTP
plasticizer.
b) Connect the hose for each product to the outlet of its respective
heater (the isocyanate hose to the isocyanate heater and the
polyol hose to the polyol heater).
NOTE: The hoses are colour-coded for easy identification: red for isocyanate and blue
for polyol. To prevent connection errors, the isocyanate and polyol hose couplers are of
different sizes, which makes it impossible to connect a hose to the wrong heater.
Figure 3.Hose coupling method
PREPARING THE UNIT FOR OPERATION

Easy Spray-H
Service Manual
19/48 Issue 1.9 Ref. NR-00088-ENG
http://www.gamapur.com/
WARNING! To join hoses to each other, to the heaters, or to the gun, hold each hose
end in place with a spanner (1), and with a third spanner tighten or loosen the coupling
nut (2) as required (see Figure 3 18.These couplers should be tightened to a torque of 20
Nm.
c) Put 18 litres of hydraulic oil in the unit’s oil tank. The oil should comply with the
characteristics and specifications of standard DIN 51524 sections 1 and 2 (for example
ISO VG 46).
NOTE: Do not fill the tank to its maximum capacity (22
litres); the oil level should not exceed 85% of the maximum
capacity (18 litres approx.). Use the visor of the oil
thermometer to check the oil level, as this should always be
completely full (18 litres).
d) Check the oil level in the hydraulic pump by removing
the drain coupler from the pump and making sure the oil
level reaches the top of the filler neck. Add oil if
necessary and reconnect the coupler.
Preparation (units with recirculation hose)
WARNING! Use suitable protective gear and follow the safety recommendations of the
suppliers of the chemical components when preparing or working with the unit.
NOTE: To ensure the correct operation of the unit, the electrical power supply must
meet the specifications given on p 6 of this manual and on the unit’s rating plate.
After following steps a), b), c) and d) of the preparation procedure (see p.18), follow the
procedure given below to prepare the unit for recirculation:
a) Connect the recirculation hose of each product to the recirculation valves located in the
respective product tanks (the
isocyanate hose to the
isocyanate tank valve and the
polyol hose to the polyol tank
valve).

Easy Spray-H
Service manual
20/48 Issue 1.9 Ref. NR-00088-ENG
http://www.gamapur.com/
b) Connect the air hose to the supply connector.
c) Connect the pressure hoses to the gun couplers, making sure the gun’s manual valves
are closed (the isocyanate hose to the isocyanate coupler and the polyol hose to the
polyol coupler).
d) Connect the recirculation hoses to the gun couplers (the isocyanate hose to the
isocyanate coupler and the polyol hose to the polyol coupler).
e) Fill the tanks with their respective product.
WARNING!
When handling chemical products, always follow the supplier’s safety and storage
instructions.
To prevent splash contamination between one tank and the other, open only the cap of
the tank being filled with product.
Never swap parts between one tank and the other, and always use the same tank for the
same product.
WARNING!
To prevent cross-contamination of products, make sure the tanks are properly closed.
To avoid spillage during transportation of the unit, never fill the tanks completely: always
leave about 20% of the tank capacity free (each tank holds 30 litres).
We recommend using small vessels (10-15 litres maximum) for pouring product into the
tanks.
Fill the tanks with the amount of product required for each application.
Purge method for hoses with recirculation
Before using the unit, all air pockets and residual oil from in-factory testing must be eliminated.
To purge the full circuit, proceed as follows:
a) Disconnect the isocyanate and polyol recirculation tubes and place them in separate
waste recipients.
b) Open the manual purge valves located under each tank.
c) Open the manual recirculation valves.
d) Rotate the power switch to the ON
position. The upper pilot light goes
on.
e) Press the CONTROL/POWER
button. The LED will light up.
f) Press the button located under the
HOSES/MANGUERAS display. The
LED inside the button will light up.
Table of contents
Other GAMA Paint Sprayer manuals