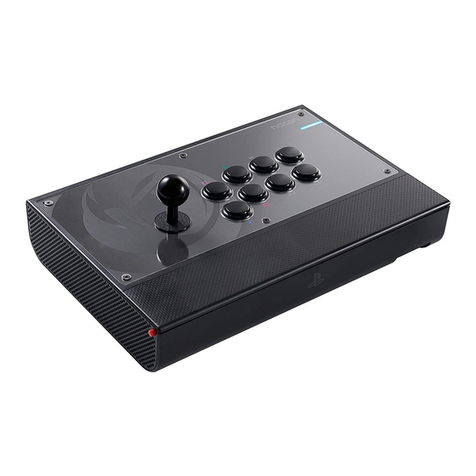
GameSir C2 User manual

GameSir • Gaming is Winning.™
© 2018 GameSir Inc. All rights reserved.
Product may vary slightly from those pictures. User Manual
GameSir C2
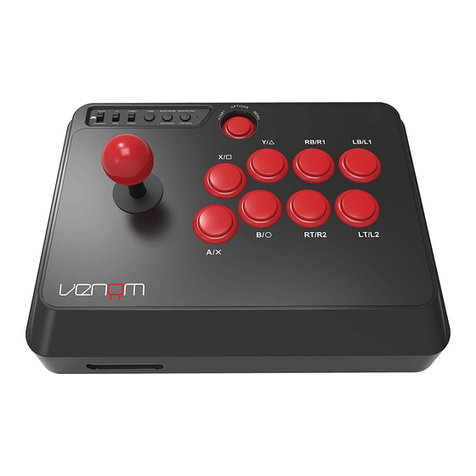
Universal Arcade Fightstick

PACKAGE CONTENTS
GameSir C2 Universal Arcade Fightstick
Hex Screw Driver
USB Cable
User Manual
SYSTEM REQUIREMENTS
PS4/PS4 Slim/PS4 Pro
Xbox One/Xbox One S/Xbox One X
Nintendo Switch
Windows 7 or above
Android 4.0 or above
REGISTRATION
Register your GameSir ID online at https://gamesir.hk/ to get real-time information on your product's
warranty status and a series of exclusive benefits from GameSir.
YOUR BENEFITS
* 12-month replacement of the same model from the date you received it.
* Free online technical support at https://gamesir.hk/

DEVICE LAYOUT
Turbo Switch
Control Stick Switch
Home Button
Options Button
Share Button
Key Lock Button
Key Lock Light
L3/R3 Button
Switch Button(Long Press)/ Touchpad Button(Short Press)
Action Buttons
Joystick
USB Port
Cable Outlet
Storage Space
Hex Screw Driver
USB Cable

USING YOUR DEVICE
TURBO SWITCH
Pressing one of the 8 action buttons and setting Turbo switch to ON
simultaneously will enable the Turbo function of this button.
CONTROL STICK SWITCH
Use the Control Stick Switch to shift the joystick’s controller function to
either left analog stick(LS),D-pad(DP),or right analog stick(RS).
LOCK/UNLOCK BUTTON
Setting this button to lock ( ) will disable the HOME,SHARE,OPTIONS,
L3 and R3 buttons.
CONNECTION
a. Take out the built-in USB cable from the storage space at the back of the GameSir C2 arcade
fightstick.
b. Plug the USB end into the USB port of the PS4 console.
c. Press and hold the switch button for 2 secs, the two key lock lights will flash alternately,
indicating hat it has changed to console mode and can be connected to PS4 controller.
d. Plug the micro USB end of the 1m USB cable into the micro USB port of the PS4 controller, then
plug the other USB end into the USB port at the back of the GameSir C2 arcade fightstick. The
two key lock lights will both stay on for 3 secs, indicating that the PS4 controller has been
connected successfully. Then the two key lock lights will return to normal to indicate the key lock
status. Please press the “HOME” button to start to play the game.
e. If the PS4 controller can not be connected successfully, the two key lock lights will both flash
3 times then return to normal to indicate the key lock status. Please remove all the USB cables and
repeat the steps b, c, d.
* Please turn off the PS4 controller before the connection.
* Please keep the PS4 controller connected to the GameSir C2 arcade fightstick while playing.
* Short press of the Touchpad button will trigger the same function as pressing the PS4 controller
touchpad.
Connect to PS4/PS4 Slim/PS4 Pro
Video tutorial

Please press and hold A + X buttons on the GameSir C2 arcade fightstick and plug the USB cable
into the USB port of switch dock simultaneously.
a. Take out the built-in USB cable from the storage space at the back of the GameSir C2 arcade
fightstick.
b. Plug the USB end into the USB port of the Xbox One console.
c. Press and hold the switch button for 2 secs, the two key lock lights will flash alternately,
indicating that it has changed to console mode and can be connected to Xbox One controller.
d. Plug the micro USB end of the 1m USB cable into the micro USB port of the Xbox One controller,
then plug the other USB end into the USB port at the back of the GameSir C2 arcade fightstick.
The two key lock lights will both stay on for 3 secs, indicating that the Xbox One controller has
been connected successfully. Then the two key lock lights will return to normal to indicate the key
lock status. Please start to play the game.
e. If the Xbox One controller can not be connected successfully, the two key lock lights will both
flash 3 times then return to normal to indicate the key lock status. Please remove all the USB
cables and repeat the steps b, c, d.
* Please keep the Xbox One controller connected to the GameSir C2 arcade fightstick while playing.
Connect to Nintendo Switch
Connect to Xbox One/Xbox One S/Xbox One X
Connect to Windows PC / Android
a. Take out the built-in USB cable from the storage space at the back of the GameSir C2 arcade
fightstick.
b. Plug the USB end into the USB port of the Windows PC or Android device.
c. The default mode is Xinput mode, please start to play the game.
d. If you want to switch to Dinput mode, please press and hold the switch button for 2 secs, then
the two key lock lights will flash alternately, indicating that it has changed to Dinput mode. The
two key lock lights will flash 3 times after 30 secs, then return to normal to indicate the key lock
status. You can also press and hold the switch button for 2 secs to switch back to Xinput mode.
Video tutorial
Video tutorial
Video tutorial
BUTTON REPLACEMENT
a. Take out the hex screw driver from the storage space at the back of the GameSir C2 arcade
fightstick.
b. Unscrew the 7 screws at the bottom of GameSir C2 arcade fightstick and remove the base plate.
c. Disconnect the cable from the button you would like to replace. Press the plastic tabs on each
side of the button to remove the button from the top panel.
d. Install the new button from the top panel and rotate the button until you hear a click sound. The
button is now locked in the top panel.
e. Reconnect the correct color cable to the button according to the following cable assignment label.
Yellow
Orange
LB
LT
RB
RT
Y
B
X
A
Blue Black Purple
Green Red Brown

PANEL WALLPAPER REPLACEMENT
a. Take out the hex screw driver from the storage space at the back of the GameSir C2 arcade
fightstick.
b. Unscrew the 7 screws at the bottom of GameSir C2 arcade fightstick and remove the base plate.
c. Disconnect all cables from the buttons and press the plastic tabs on each side of the buttons to
remove all buttons from the top panel.
d. Use a flat screw driver to secure the center shaft at the bottom of the joystick. Then rotate off the
small ball at the top of the joystick.
e. Unscrew the 6 screws on the top panel and remove the top panel.
f. Replace the panel wallpaper.
g. Install the top panel, action buttons and top screws.
h. Reconnect the correct color cable to the button according to the following cable assignment label.
Yellow
Orange
LB
LT
RB
RT
Y
B
X
A
Blue Black Purple
Green Red Brown
Top Panel
Action Buttons
Screws
Replaceable Panel Wallpaper
i. Install the base plate and screws.

PS4/PS4 Slim/PS4 Pro
Xbox One/Xbox One S/Xbox One X
Nintendo Switch
PC Windows 7(以降)
Android4.0(以降)
GameSirC2ユニバーサルアーケードファイトスティック
USBケーブル
六角ドライバー(専用)
取扱説明書
日本語
パッケ ージ 内 容
システム 要 件
ユーザー登録
https://gamesir.hk/にてGameSirIDを作成して、ご購入の製品を登録すると、当製品の品質保証の状態
に関するリアルタイム情報と、GameSir会員専用のメリットを得ることができます。
登録による特典
12ヵ月のメーカー限定保証
https://gamesir.hk/でのマニュアルの閲覧と無料オンラインテクニカルサポート(英語/日本語対応)
各部の名称

TURBOスイッチ
ロックインジケータライト
三和電子製ジョイスティック
三和電子製押しボタン
PS4タッチパッドボタン(短押し)/モード切り替えボタン(長押し)
HOMEボタン
SHAREボタン
OPTIONSボタン
L3/R3ボタン
ロック/ロック解除ボタン
コントローラーと接続専用USB端子
ケーブルアウト
収納ボックス
六角ドライバー
USBゲーブル
TURBOさせたいボタンを押しながらTURBOスイッチをオンになるとTURBOになります。
TURBOスイッチ
コントロールステックスイッチで、ジョイスティックのコントローラー機能を左スティック(LS)、方向パッド(DP)、
または右スティック(RS)のいずれかにシフトします。
コ ントロ ー ル ステックス イッ チ
コントロールステックスイッチ
このボタンを、ロック()に設定すると、HOMEボタン、SHAREボタン、OPTIONSボタン、L3ボタンとR3ボタンが
無効 になります。
ロック/ ロック解 除 ボタン
デ バイスのご 利 用

機能説明
a.USBケーブルを収納ボックスから取り出します。
b.PS4のUSB端子にケーブルを差し込んでください。
c.モード切替ボタンを2秒押し続けると、ロックインジケータライトが交互に点滅して、GameSir
C2をPS4接続準備状態になります。
d.もう一つのUSBケーブルは接続専用USB端子に差し込んで、PS4Dualshockコントローラーと接続
してください。(PS4Dualshockコントローラーは接続する前にオフ状態を確認してください。)
e.ロックインジケータライトは同時に3秒点灯なりますと、PS4DualshockコントローラーのHOMEボ
タンを押して、接続成功です。
PS4/PS4Slim/PS4Proへの接続
*接続失敗する場合では,ロックインジケータライトは3回点滅して、キーロック状態に戻ります。
ステップb〜eをもう一度繰り返して、やってみください。
使用中にPS4DualshockコントローラーがGameSirC2と接続した状態を保持してください。
*接続失敗する場合では,ロックインジケータライトは3回点滅して、キーロック状態に戻ります。
ステップb〜eをもう一度繰り返して、やってみてください。
使用中にXboxOneコントローラーがGameSirC2と接続した状態を保持してください。
a.USBケーブルを収納ボックスから取り出します。
b.XboxOneのUSB端子にケーブルを差し込んでください。
c.モード切替ボタンを2秒押し続けると、ロックインジケータライトが交互に点滅して、GameSir
C2をXboxOne接続準備状態になります。
d.もう一つのUSBケーブルは接続専用USB端子に差し込んで、XboxOneコントローラーと接続してくだ
さい。
e.ロックインジケータライトは同時に3秒点灯なりますと、接続成功です。
XboxOne/XboxOneS/XboxOneXへの接続
ビデ オ チュートリアル
ビデ オ チュートリアル

NintendoSwitchへの接続
a.USBケーブルを収納ボックスから取り出します。
b.WindowsPC/AndroidデバイスのUSB端子にケーブルを差し込んでください。
c.GameSirC2は自動的にWindowsPC/Androidデバイスと接続します。(Xinputモード)
d.接続成功です。
*Dinputモードを切り替える場合では、モード切り替えボタンを2秒押し続けると、ロックインジケータ
ライトが交互に点滅して、Dinputモードになります(ロックインジケータライトは30秒後急速に3回点
滅してから消灯し、キーロック状態に戻ります)。Xinputモードに戻る場合では、もう一度モード切り替え
ボタンを2秒押してください。
WindowsPC/Androidへの接続
a.USBケーブルを収納ボックスから取り出します。
b.GameSirC2のAとXボタンを同時に押してください。
c.AとXボタンを押しながらUSBケーブルをNintendoSwtichドックのUSB端子に差し込みます。
d.GameSirC2はNintendoSwtichをコントロールできます。
a.収納ボックスからス六角ドライバーを取り出します。
b.六角ドライバーが底のネジ(7本)を外し、ボトムプレートを取り外します。
押しボタンの 置き換え
c.ボタンを置き換え必要なケーブルを引き出して、両側のクリップを押し止めてGameSirC2からボタン
を取り外します。
ビデ オ チュートリアル
ビデ オ チュートリアル

LB
LT
RB
RT
Y
B
X
A
a.収納ボックスからス六角ドライバーを取り出します。
b.六角ドライバーが底のネジ(7本)を外し、ボトムプレートを取り外します。
d.新しいボタンを上から取り付け、「カタ」という音が聞こえるまでボタンを調整して、ボタンを天板にロッ
クされることを確認します。
e.下記ののゲーブルカラーマップを従って、対応ケーブルをボタンに接続します。
f.ボトムプレートを取り付け、ネジをロックします。
アートワークの置き換え
c.すべてのケーブルを引き出して、両側のクリップを押し止めてGameSirC2からのボタンを取り外します。
d.マイナスドライバーでジョイスティックの中軸をしっかり固定して、ジョイスティックのトップからボー
ルを回転して取り外します。

e.六角ドライバーが上のネジ(6本)を外し、天板を取り外します。
押しボタン
アートワーク
天板
f.アートワークを置き換えます。
g.ボタンを上から取り付け、「カタ」という音が聞こえるまでボタンを調整して、ボタンを天板にロックされ
ることを確 認します。
h.下記ののゲーブルカラーマップを従って、対応ケーブルをボタンに接続します。
i.ネジをロックします。
*PlayStation4 and PS4™ are registered trademark or trademarks of Sony Computer Entertainment Inc. Windows™ and Xbox One™ are registered
trademarks of Microsoft Inc. Nintendo Switch™ is a registered trademark of Nintendo Inc. Android™ is a registered trademark of Google Inc. SANWA™ is a
registered trademark of Sanwa Denshi Co., Ltd. All rights reserved; all other trademarks are the property of their respective owners. Photos and illustrations
are not binding. Contents, designs and specifications are subject to change without notice and may vary from one country to another. This product is not
distributed under an approved official license and is not sponsored or endorsed by Sony Computer Entertainment Inc. This product is not manufactured by
Sony Computer Entertainment Inc or Microsoft Inc or Google Inc.
NOTICE Please read this Precautions carefully.
CONTAINS SMALL PARTS. Keep out of reach of children under the age of 3. Seek immediate medical attention if swallowed or inhaled.
DO NOT use the product near fire.
DO NOT expose to direct sunlight or high temperatures.
DO NOT leave the product in a humid or dusty environment.
DO NOT impact the product or cause it to fall due to strong impact.
DO NOT touch USB port directly or it might cause malfunctions.
DO NOT strongly bend or pull cable parts.
Use a soft, dry cloth while cleaning.
DO NOT use chemicals such as gasoline or thinner.
DO NOT disassemble, repair or modify.
DO NOT use for purposes other than its original purpose. We are NOT responsible for accidents or damage when used for non-original purposes.
DO NOT look directly at the optical light. It might damage your eyes.
If you have any quality concerns or suggestions, please contact GameSir or your local distributor.

**PlayStation4およびPS4™はSonyComputerEntertainmentInc.の登録商標または商標です。Windows™およびXboxOne™はMicrosoftInc.の登録商標です。NintendoSwitch™
はNintendoInc.の登録商標です。Android™はGoogleInc.の登録商標です。SANWA™はSanwaDenshiCo.,Ltd.の登録商標です。その他、記載されている会社名、製品名は、各社の登録
商標または商標です。写真やイラストは拘束力がありません。内容、デザイン、仕様は予告なしに変更されることがあり、国によって異なる場合があります。
*この製品は、SonyComputerEntertainmentInc、MicrosoftInc、NintendoIncまたはGoogleIncによって製造されたものではありません。
ご注意:保護者の方へ必ずお読みください。
小さいな部品がありますので3歳未満のお子様には絶対に与えないでください。
乳幼児の手の届くところに置かないでください。万一飲み込んだ場合は、すぐに医師に相談してください。
火気のある場所では絶対に使用しないでください。
長時間直射日光当てたり、高温となる場所に置かないでください。
本品を湿気やホコリの多いところに置かないでください。
本品に物を当てたり、落下させるような強い衝撃を与えないでください。
故障の原因になりますので、USB端子を直接手で触ないでください。
ケーブル部を強く曲げたり引っ張ったりしないでください。
お手入れの際には、乾いた柔らかい布を使用してください。
ベンジン、シンナーなどの薬品は使用しないでください。
分解や修理、改造は絶対にしないでください。
本来の目的以外には使用しないでください。本来の目的以外に使用した場合の事故や損害に対し、弊社は一切その責任を負いません。
光学式ライトの光を直接見ないでください。強い光より、目を痛める可能性があります。
Table of contents
Other GameSir Video Game Controllers manuals

GameSir
GameSir GameSir-T1s User manual

GameSir
GameSir T4 User manual

GameSir
GameSir G5 User manual

GameSir
GameSir M2 User manual

GameSir
GameSir G5 User manual

GameSir
GameSir T3 User manual

GameSir
GameSir Z2 User manual

GameSir
GameSir X2 User manual

GameSir
GameSir G3 User manual

GameSir
GameSir G3w User manual

GameSir
GameSir T4 pro User manual

GameSir
GameSir G3f User manual

GameSir
GameSir M2 User manual

GameSir
GameSir T4 User manual

GameSir
GameSir GameSir-G4s User manual

GameSir
GameSir GameSir-G3w User manual

GameSir
GameSir T1s Advanced Edition User manual

GameSir
GameSir T1 User manual

GameSir
GameSir G4 pro User manual

GameSir
GameSir GameSir T6 User manual