6
section 5: control panel functions
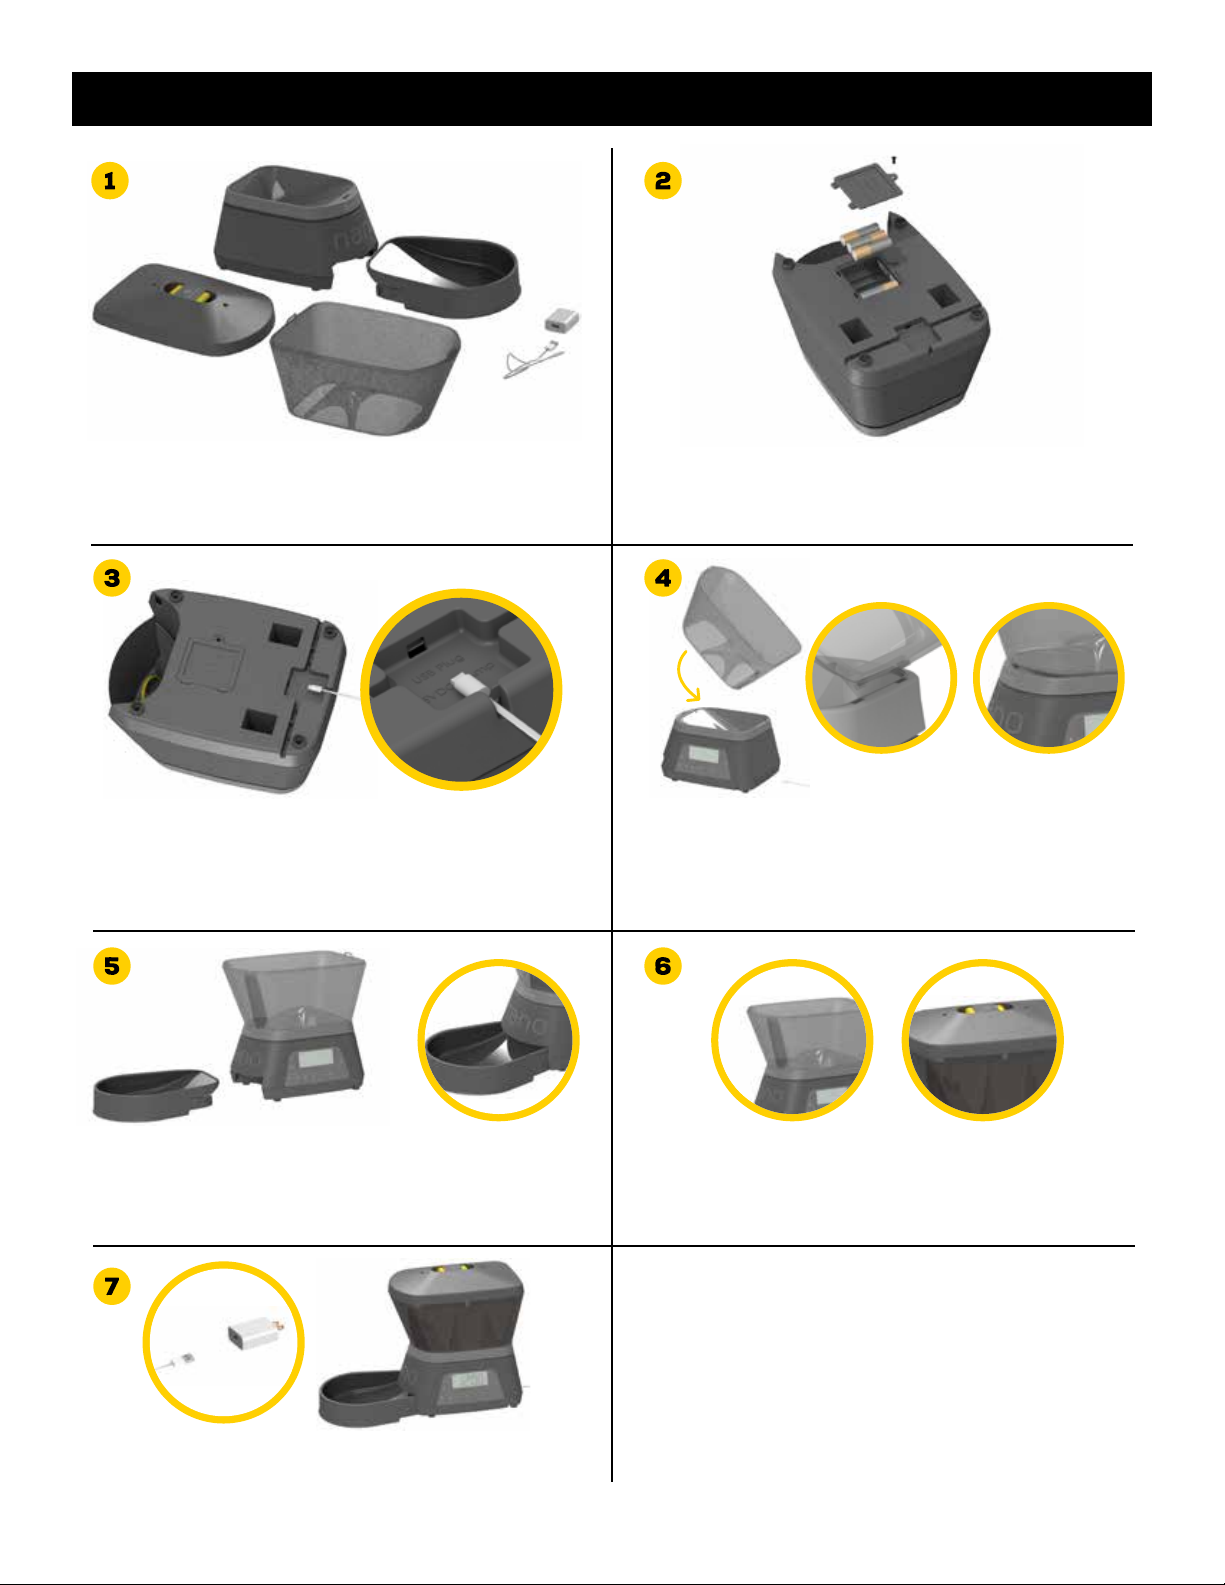
The CLOCK function programs the real-time clock on the unit. Once the CLOCK
has been set, the unit will retain the time if the unit is plugged in or powered
by battery backup. The unit will retain CLOCK time even if it is turned o.
Power Failure: In the event of a complete loss of power (Wall Outlet &
Backup Battery), the unit will lose all user defined program settings. This
will be indicated by the CLOCK time flashing. Resetting CLOCK, MEAL TIME and
MEAL SIZE programming will be necessary.
clock
preset meals
The PRESET MEALS function is the quickest way of selecting a customized
daily meal schedule. The NANO has (6) Preset Meal options to choose from.
Once selected, it will override the DEFAULT MEAL SETTINGS.
Note: If a Preset Meal option is selected, it will become your meal schedule.
It can then be further customized as desired in MEAL TIME AND MEAL SIZE
programming. (page 3)
IMPORTANT: Pressing “PRESET MEALS” button in the middle of adjusting
setting will exit PRESET MEALS programming, WITHOUT saving any changes.
If no keys are pressed in 30 seconds, PRESET MEALS programming will end
WITHOUT saving any changes.
The MEAL TIME function allows the user to program the exact time of day
meals are dispensed. The NANO can program up to (6) Meal Times per day.
If a Preset Meal option was previously selected, it will start as your MEAL
TIME programming. It can be further customized as desired. Each day of the
week will be programmed with the same MEAL TIME schedule.
It is NOT possible to program dierent Meal Times based on the day of the
week. For example, to alter Meal Times on the weekends.
Note: If a MEAL TIME is accidentally created, it can be erased by selecting
the flashing MEAL TIME #, and holding ENTER for 2 seconds. Once a meal is
erased - DASHES will replace the MEAL TIME.
The MEAL SIZE function allows the user to adjust how much food is dispensed
at programmed meal times.
Note: Each MEAL TIME will dispense the same MEAL SIZE.
Tip: MEAL SIZE is dispensed in either Ounces or Grams. To convert to Cups refer
to CALCULATING MEAL SIZE FROM OUNCES OR GRAMS TO CUPS. (page 5)
meal time
meal size
slow
The SLOW feed function reduces the speed at which food is dispensed, for
pets that have issues with eating too fast.
Note: The full MEAL SIZE programmed will still be dispensed, only at
a slower speed.
1) Press “SLOW” to toggle the SLOW feed function ON/OFF.
Note: SLOW feed is ON if the Turtle icon is illuminated on the LCD display.
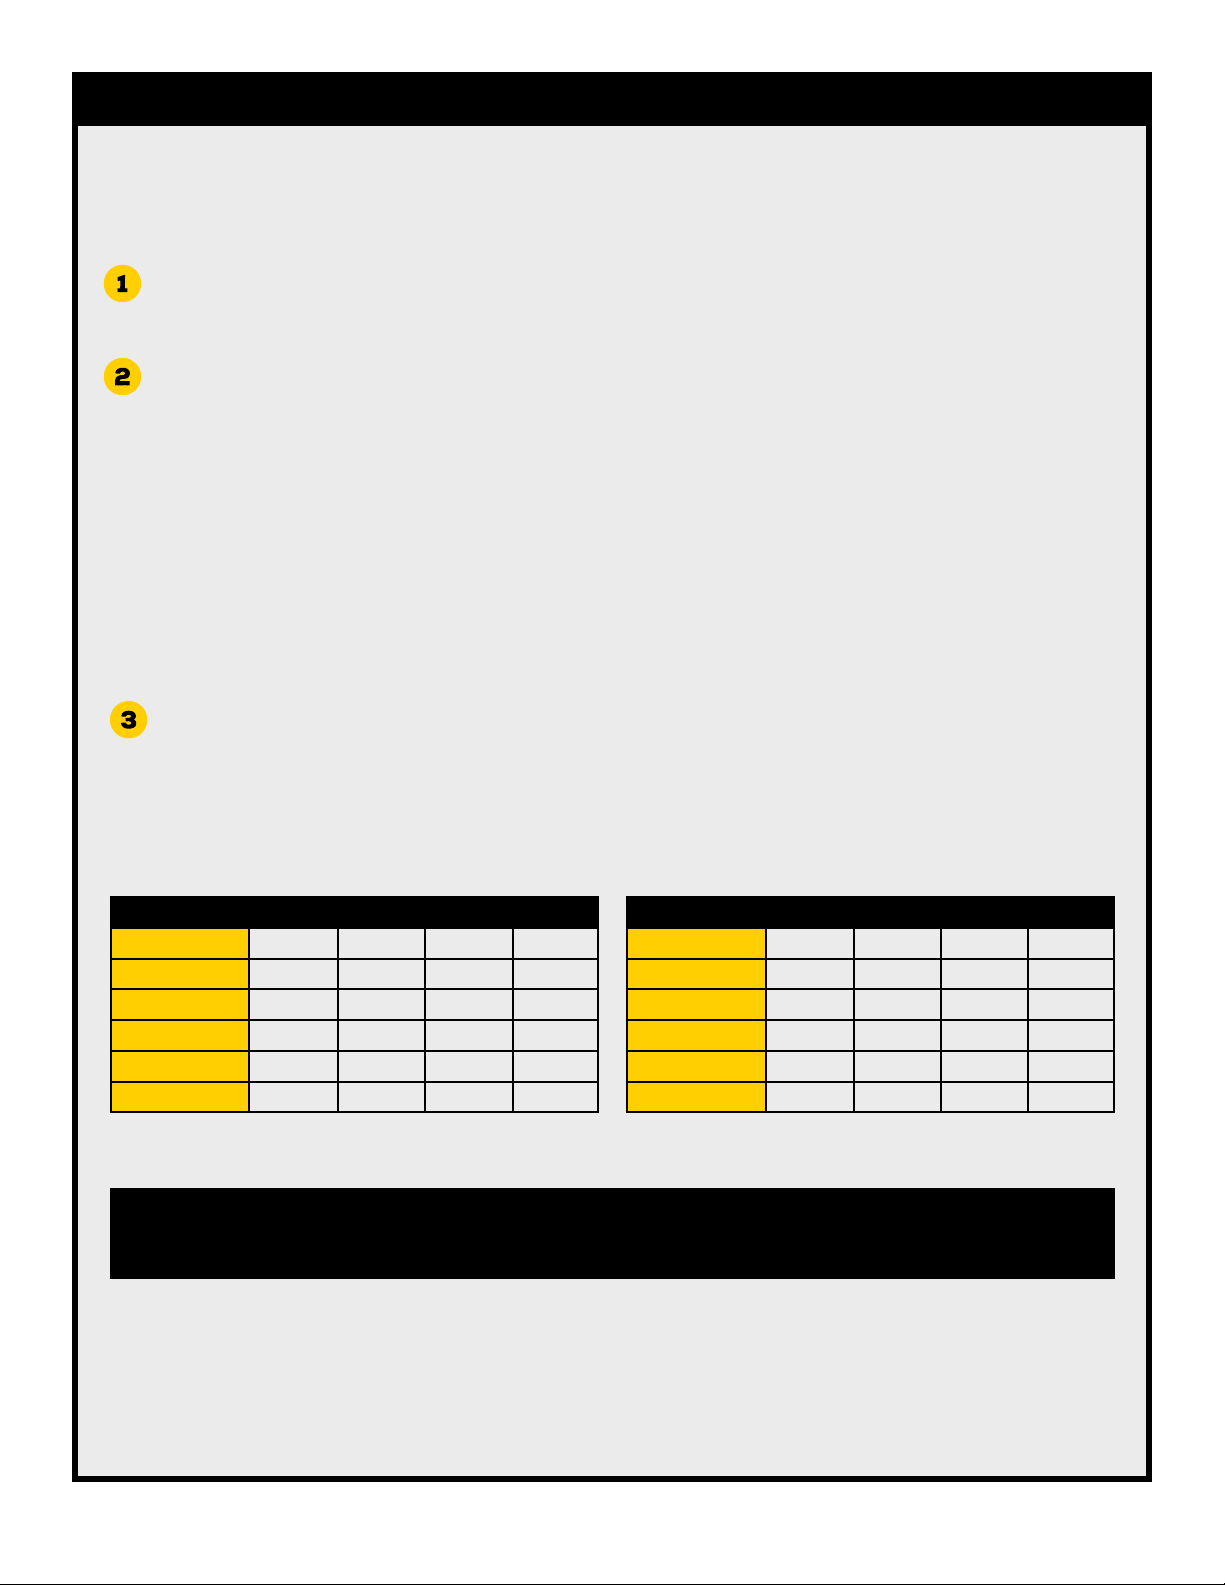
1 2 3 4
P1 - 3 to 12 LB PET 6:00 AM 6:00 PM
P2 - 3 to 12 LB PET 6:00 AM 12:00 PM 6:00 PM
P3 - 13 to 20 LB PET 12:00 PM
P4 - 13 to 20 LB PET 6:00 AM 6:00 PM
P5- 21 to 35 LB PET 6:00 AM 6:00 PM
P6- 21 to 35 LB PET 6:00 AM 11:00 AM 5:00 PM 10:00 PM
PRESET MEAL TIMES
MEALS/DAY OZ/MEAL G/MEAL CUPS/MEAL
P1 - 3 to 12 LB PET 2 1.0 OZ 28 G 1/4
P2 - 3 to 12 LB PET 3 1.0 OZ 28 G 1/4
P3 - 13 to 20 LB PET 1 4.0 OZ 112 G 1
P4 - 13 to 20 LB PET 2 2.0 OZ 56 G 1/2
P5- 21 to 35 LB PET 2 4.0 OZ 112 G 1
P6- 21 to 35 LB PET 4 2.0 OZ 56 G 1/2
PRESET MEALS CHART