Brush Cutter
GBC26C 6
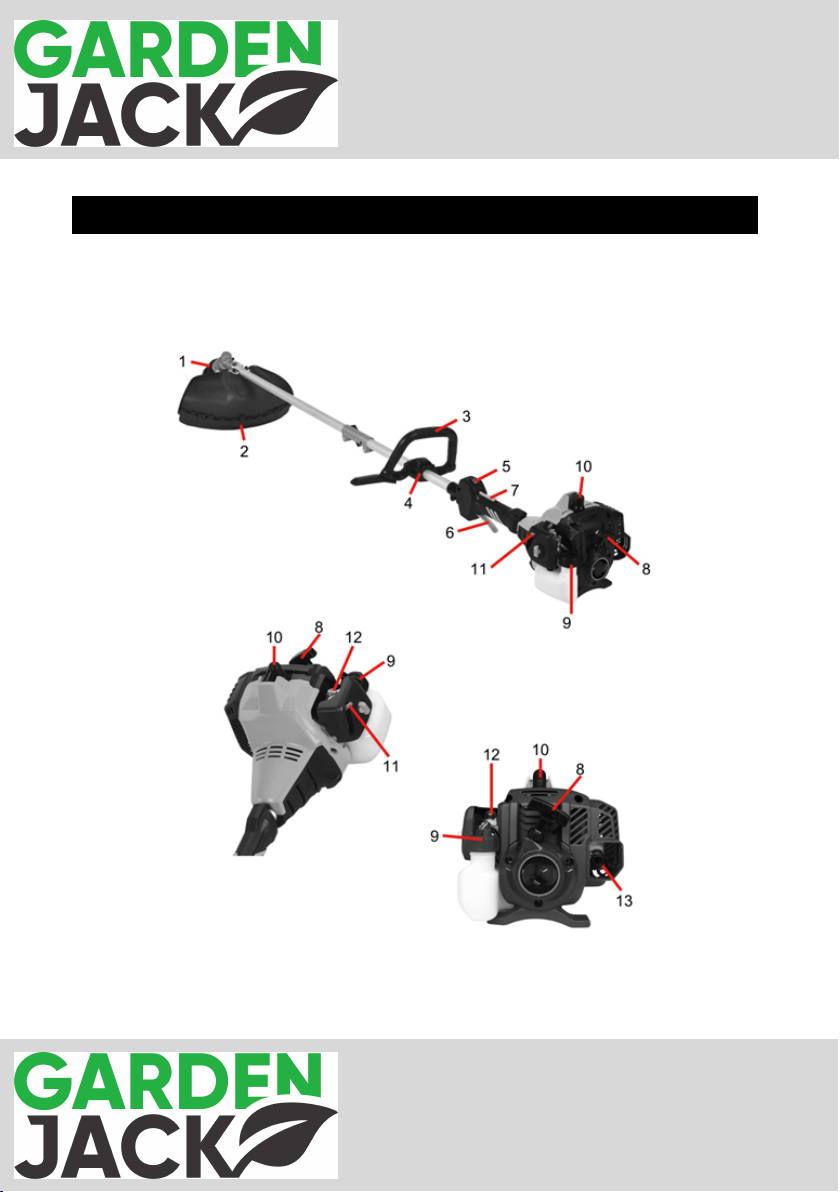
Mounting
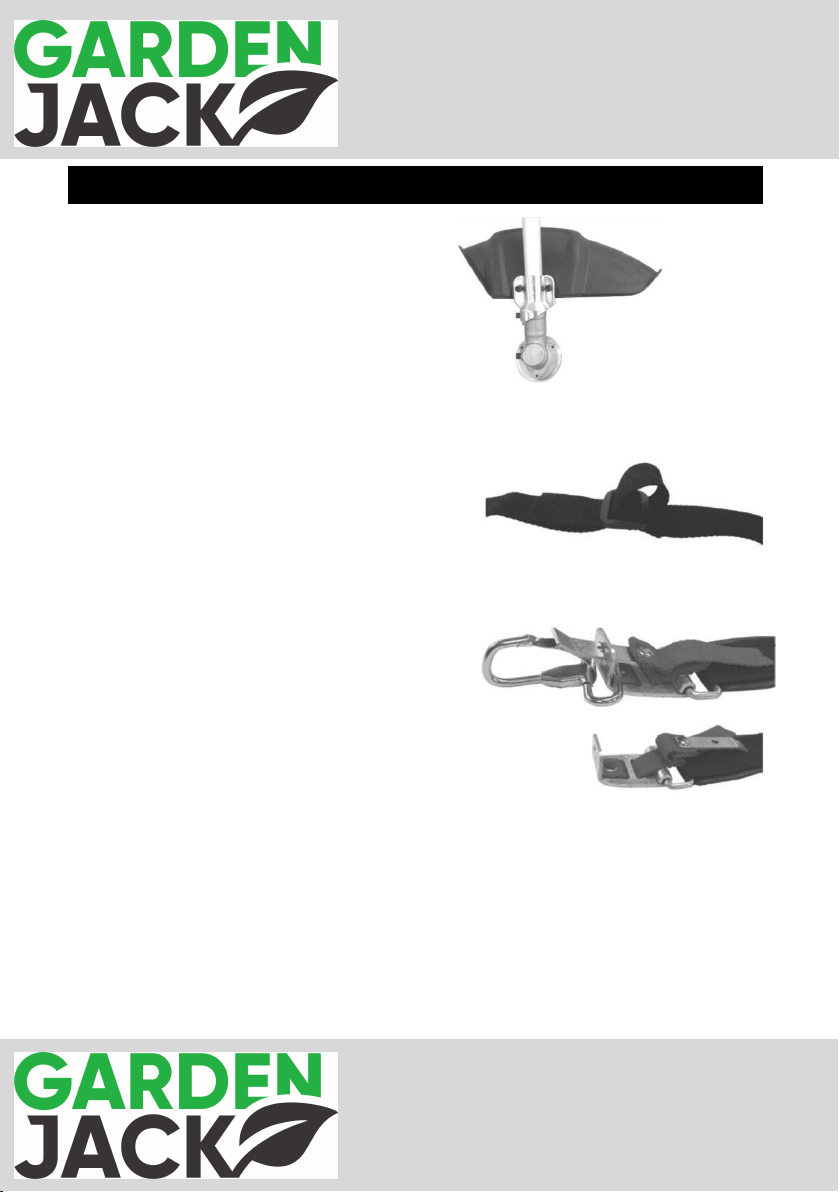
5. Mount the protective hood (2) on
the provided holder, as shown in the
figure.
6. Use the included hex key to tighten
the hex screws.
Using the Shoulder Strap
The machine has to be operated with a suitable shoulder strap.
1. Hook the machine on the carabiner
hook and allow the machine to
balance on the shoulder strap. By
doing this, the machine must be
switched off.
2. For better stability, thread the end of
the strap over the buckle, as shown
in the picture. Tighten the end.
This will prevent the strap from
slipping out of the buckle due to the
weight of the device.
3. Slide the pin into the opening. Thus,
the carabiner hook is securely
fastened.
4. Pull out the pin to remove the carabiner hook.
·Always switch off the machine before removing the carabiner hook from
the shoulder strap.
·Hang the machine on the carabiner hook. The cutting tool must evenly
touch the ground when working in comfortable working position. If
necessary, loosen the suspension eye (10) by using the hex key, move it
back or forth & re-position the suspension eye.