8
3. Installation Instructions
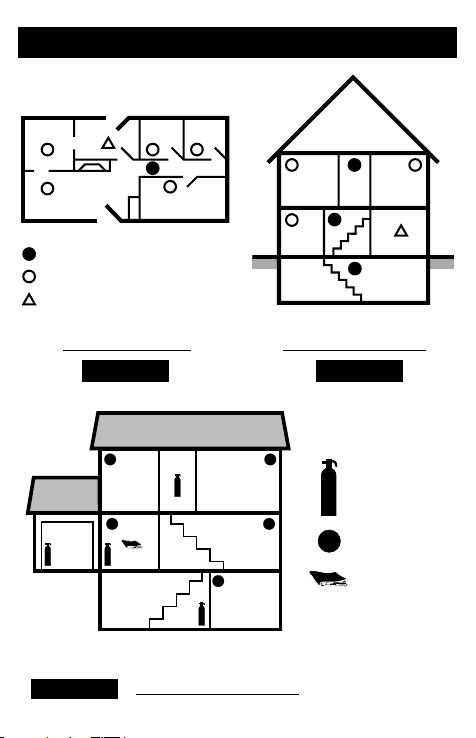
4. Locations To Avoid
To minimise nuisance alarms avoid these locations:
• Do not install within 900mm of the following: The door to a kitchen, or a
bathroom that contains a tub or shower, forced air supply ducts used for
heating or cooling, ceiling or whole house ventilating fans, or other high
air-flow areas.
• Areas where curtains or other objects will block the sensor. Smoke must
be able to reach the sensor to accurately detect conditions.
• Install at least 300mm away from fluorescent lights.
• Keep out of insect infested areas.
• Avoid excessively dusty, dirty or greasy areas.
• Do not install in areas where the temperature is colder than 0°C or hotter
than 40°C.
• Do not install in areas where the relative humidity (RH) is greater than 93%.
• If a kitchen alarm is desired, it should have an ionisation alarm silencer
feature or be a photoelectric alarm or heat alarm.
• Do not place in the garage.
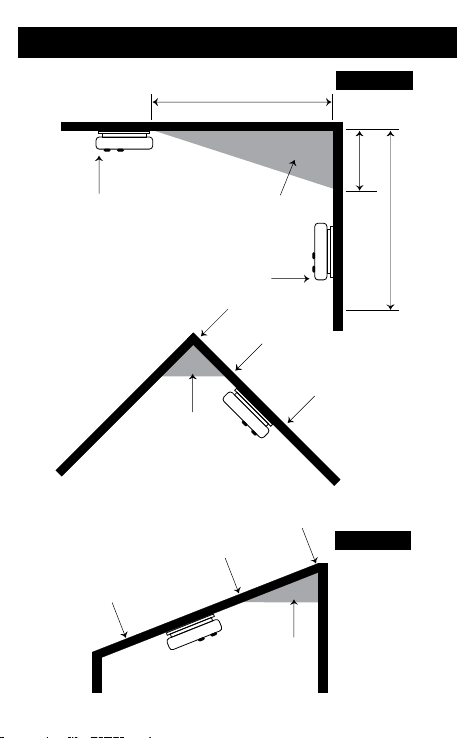
Mobile Home Installation:
For Well Insulated Mobile Homes
Install smoke alarms as recommended on the previous pages.
In mobile homes that are not well insulated extreme heat or cold can
be transferred from the outside to the inside through poorly insulated
walls and roof. This may create a thermal barrier which can prevent
the smoke from reaching an alarm mounted on the ceiling.
For Poorly Insulated Mobile Homes
Install the smoke alarm on an inside wall with the top edge of the
alarm at a minimum of 100mm and a maximum of 600mm below
the ceiling (Figure 2A).
For minimum protection, install at least one alarm close to the
bedrooms. For additional protection, see Figure 1A.
Warning: test your smoke alarm operation after caravan or
mobile home vehicle has been in storage, before each trip and at
least once a week during use.