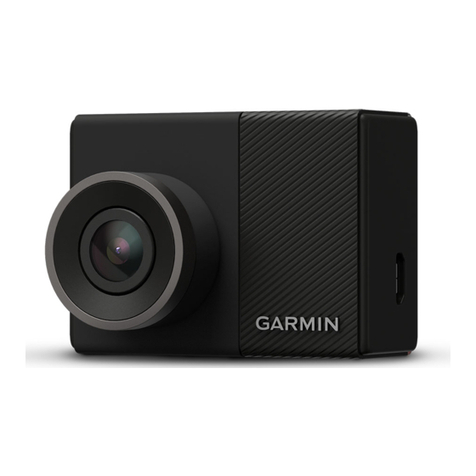
Garmin gdr 45 Instruction manual

GDR 45
Driving Recorder
Quick Start Manual

1
Package contains
1. GDR 45 Driving Recorder
2. GDR Mount (adhesive mount and replacement adhesive pad
included)
3. GDR exclusive car charger

2
1. Overview of Functions
The GDR 45 driving recorder employs Garmin's unique dual-camera de-
sign that supports front and rear image* recording. In addition to its built-
in GPS positioning capability, the unit also provides complete tracks and
information. The GDR 45 is also integrated with FCWS image recognition
technology to detect distances with other vehicles when in motion.
*NOTE: GBC 30, secondary camera is an optional subscription for rear
image recording.

3
2. Description of Product Appearance and
Indicator Lights
GDR 45 Appearance
➊
➋
➌
➍
➒
➎
➏
➐
➓
➑
1. Manual File Protection
Usedformanuallyprotectingles.SeeCollisionWarningsection
for protection rules.

4
2. Function Key
See Function Settings for details.
3. Image Calibration Key
This function can be used to detect and calibrate the image cap-
tured based on what the camera is pointing at, and is compatible
with the front collision warning system (FCWS).
4. Snapshot Key
Captures a still image.
5. GBC 30 (Secondary Camera) Connector
6. miniUSB Power Connector
7. Power switch/Camera toggle
When using a single camera, this button functions as the power
switch. If a GBC 30 (secondary camera) is attached, the button
toggles between viewing screens.
8. microSD Memory Card Slot
Supports SDHC up to 32GB (for SDHC, recommended specs are
8GB, Class 6 or above)
9. Speaker
10. Microphone

5
11. LED Status Indicator
LED color Action indicated
Flashing Green Booting up or updating software
Red Recording
Flashing Red Rapid Flashing: Collision sensor activated
Slow Flashing: Parking mode activated
Green Idle (unable to record due to absence of memory
card, formatting issue, or other reason)

6
3. Product Specications
GDR 45 Specs
Dimensions (Length) 8.19 cm × (Width) 6.57 cm × (Depth)
4.16 cm
Weight 122g
GPS Yes
Screen 2.3-inch TFT LCD
Lens F=2.0
Recording area Visible diagonal viewing angle of 132 degrees
(horizontal viewing angle: 120 degrees)
Photosensitive com-
ponents
3M, 1/3-inch, CMOS
Frame rate 30 FPS
Video format AVI (H.264 compression)
Gravity sensor Yes, with collision sensitivity settings
Battery Yes
Microphone Yes
Speaker Yes

7
Memory card slot microSDHC (8GB Class6 memory card or
above is recommended)
Recording mode Continuous recording; when the card is full, old
lesareoverwritten(exceptforprotectedles).
■1080p (1920 × 1080 pixels) at 30fps; re-
cord about 1.5 hours of footage (256MB
for each video file)
■720p (1280 × 720 pixels) at 30fps; re-
cord about 4.1 hours of footage (256MB
for each video file)
■WVGA (848 × 480 pixels) at 30fps,
record about 9 hours of footage (256MB
for each video file)
■720p Dual (1280 × 1440 pixels) at
30fps, record about 2 hours of footage
(256MB for each video file)
Operating ambient
temperature
0 to 60 degrees Celsius

8
4. Installation Instructions
I. Installing GDR 45
Step 1:
Afxtheadhesivepadtothetop
side of the mount. Position the
mount in the desired location on
the inside of the windshield and
press the adhesive side of the
mount rmly against the glass.
Then mount the GDR 45 onto
the mount's ball-shaped con-
nector.
Step 2:
Afxtheadhesivepadtothetop
side of the GBC 30's mount.
NOTE: The secondary
camera GBC 30 is an optional
subscription.

9
Step 3:
Connect the GBC 30 to the
mount.
Step 4:
Attach the GBC 30 mount to the
rear window.
NOTE: Inordertopreventreducedadhesivestrength,doNOTafxtheadhesivepad
ontothedefoggergrid.Ifinstallingonave-doorhatchbackoravehiclewithavery
steep rear window, remove the bracket labeled "Garmin" and the ball-shaped connector
andreassembleinthereverseinordertotdifferentangles.Iftheuserwishesto
secure the unit with screws, simply attach it to the vehicle's roof by applying screws
through the holes located on the top of the bracket.
Step 5:
Connect the cable (labeled
"GARMIN DUAL CAM").

10
➊
➋
Step 6:
Connect the USB cables in the
correct order: the one num-
bered "1" is the USB cable that
connects to GBC 30 (labeled
"GARMIN DUAL CAM"), while
the one numbered "2" is the
USB cable that connects to the
vehicle's charger.
Step 7:
Turn on the unit to begin record-
ing with the front and rear cam-
eras.

11
II. Image Recognition
Recommended shooting angles for the Driving Recorder
➊
➋
➌
➍
As the main camera of GDR 45 has a horizontal viewing angle of 120
degrees, it is recommended that the unit be installed at the windshield's
centerline. In order to be able to capture camera images with a more
satisfactory view, divide the viewscreen into four equal areas from top
to bottom and align the top edge of the 4th viewing quarter against the
vehicle's hood. *This allows recording of the front as well as the left and
right sides of the vehicle.
*NOTE: Due to the variety of shapes and sizes of various automobile
makes and models, the shooting angle may differ when mounted on the
windshields of different vehicles. If the vehicle's hood cannot be seen on-
screen, use the lower edge of the front windshield as the reference line
for alignment.

12
Image Calibration
Once the GDR 45 has been installed and turned on, the user will be
prompted to complete an initial image calibration, and the camera will
automatically determine the vehicle's center position. During calibration,
the unit will automatically recognize the lane that the vehicle is traveling
on (indicated by the solid green lines) and extend the two reference lines
until they intersect. The point of intersection will be used as the screen's
center position.
NOTE: When calibrating, re-position the vehicle so that the lanes can be
recognized accurately.

13
After Calibration Is Complete
Upon completion of calibration, a green crosshair will be shown on the
top left of the driving recorder's screen to indicate that the image recogni-
tion function has been enabled. Intersection of the two extended lines will
be marked on-screen with a green cross.
If the calculated intersection is inaccurate, the driver may also perform
a manual calibration by pressing the "Image Calibration" button. Upon
conrmationofimagecalibration,theunit's"FCWS"built-inimagerecog-
nition system can be activated.
FCWS Warning
The front collision warning system gathers speed information using GPS
and is activated whenever the vehicle's speed exceeds 40 km/hr. It also
detects its distance from the front vehicle and warns the driver when ap-

14
proaching too close.
1. When a vehicle enters the detected area, the screen will prompt the
user by displaying a white cross and frame.
2. If the system detects that the driver is not maintaining an adequate
safe distance with the car in front given the current speed, a red
cross and frame will be displayed along with a warning sound to
alert the driver.

15
5. Settings
The settings page provides two options: Driving Recorder Settings and
General Settings.
NOTE: Press and hold the up/down buttons to quickly scroll through the
options
I. Driving Recorder Settings
1. Recording Modes
Four modes are available: 1080p, 720p, WVGA, and 720p
Dual (when connecting secondary camera). Image quality can
be adjusted according to preference. When only one camera
is present, the default resolution is 1080p; if the secondary
camera is attached, the default mode is 720p Dual.
2. Viewing Camera Screens
This option is available after the GBC 30 (optional subscrip-
tion) is connected. There are three options available: main
camera, secondary camera and dual cameras (dual-camera
viewing is available only when recording). The user can select
which camera image to view or have both displayed at the
same time.
3. Mirroring with the Secondary Camera

16
This option is available after the GBC 30 (optional subscrip-
tion) is connected. The secondary camera's image capture
orientation is set to the opposite of the main camera by default.
If it is desirable to display image in the same direction, enable
the mirroring function. The default setting is off.
For example: when the secondary camera is mounted onto
the rear window, the image of a vehicle on the left side will be
displayed on the right side of the screen. Enable the mirroring
function if it is necessary to change the orientation. It is recom-
mended that this calibration be redone if GDR 45 is reinstalled
at a later time.
4. Collision Sensor Calibration
Oncetheunithasbeenmountedtothexedposition,select
"Collision Sensor Calibration". The system will automatically
record data from 3 axes to enable more accurate estimates.
Be sure to perform this function immediately after initial instal-
lation.
5. Collision Sensitivity
Four options are available: High Sensitivity, Normal Sensitivity,
Low Sensitivity, and Off. Sensitivity can be adjusted according
to preference. The unit's default setting is Normal Sensitivity.
Files are more likely to be stored by selecting High Sensitivity.

17
Note that when sensitivity is set to Low, it is possible that a col-
lision might fail to be recorded.
6. FCWS Sensitivity
There are four options regarding the sensitivity of FCWS:
High Sensitivity, Normal Sensitivity, Low Sensitivity, and Off.
Sensitivity can be adjusted according to preference. The unit's
default setting is Normal Sensitivity.
The front collision warning system gathers speed information
using GPS, and is activated whenever the speed exceeds
40 km/hr. The system also detects its distance from the front
vehicle and warns the driver when approaching too close.
7. Collision Warning
The unit has a built-in G-sensor that detects collision accidents
andtriggersrecording.Recordedvideolesarestoredina
protected state. This function is turned on by default. When the
collision sensor is on (i.e. when set at High, Normal, or Low
sensitivity), the unit will sound three "beeps" whenever a colli-
sion is detected.
After the sensor detects a collision, the system will automati-
callylockdownthecurrentlebeingrecorded,aswellasthe
previousleandtheleafterthecollision,thereforeensuring
continuity of the accident.

18
12 3
Recording timelinePoint of event
Previous video file
is automatically
locked
Current video
file is locked
Subsequent
video file is
locked
8. File protection cycle
The unit provides 15 storage spaces for protected images.
When overwrite is turned on, the system will overwrite from the
rstleonceallstoragespacehasbeenusedup.Thisfunction
is turned on by default.
9. Audio recording
The unit features a built-in microphone. The user may choose
whether to turn audio recording on or off.
10. Exposure Compensation
The camera's exposure value features 7 adjustable settings
(Normal, ±1/3, ±2/3, and ±1).
II. Parking Recording Mode
The GDR 45 is able to record images after the engine is switched off. Two
recording options are offered:

19
Car Charger
1. Continue recording using built-in battery
Usermaycongurewhetherthedrivingrecordershouldrecord
images using the built-in battery after the external power
source is disconnected.
Connecting GDR Dedicated Power Supply Cable (Optional Subscription)
Once connected to an external power supply cable,, the GDR will turn
on its motion detection mode and begin recording whenever it detects
movement in front of the camera or senses collisions. This recording
mode stores images up to 10 seconds before an accident and up to 20
seconds after movement is detected. The recording time will be extended
for as long as the movement is detected.
060
-10 20 50 80
Point of event Detected movement
while parked - recording
started
Continuous movements
detected - extended
recording
1. Automatic Switch
Usermaycongurewhethertoactivateparkedrecordingmode
Table of contents
Other Garmin Dashcam manuals
Garmin
Garmin nuviCam User manual
Garmin
Garmin Dash Cam 30 User manual
Garmin
Garmin GDR E530 User manual
Garmin
Garmin BC 30 User manual
Garmin
Garmin DASH CAM 54 User manual
Garmin
Garmin DASH CAM TANDEM User manual

Garmin
Garmin BC 30 Operating instructions

Garmin
Garmin BC 35 User manual
Garmin
Garmin Dash Cam 10 User manual

Garmin
Garmin Dash Cam 30 User manual
Garmin
Garmin Dash Cam Mini User manual
Garmin
Garmin A03571 User manual
Garmin
Garmin FORERUNNER 45 User manual
Garmin
Garmin DASH CAM 46 User manual
Garmin
Garmin GMR Fantom 56 User manual
Garmin
Garmin Dash Cam Mini 2 User manual
Garmin
Garmin DASH CAM 45 User manual
Garmin
Garmin AA3110 User manual

Garmin
Garmin Dash Cam 10 User manual
Garmin
Garmin BC 40 User manual

