Akaso P4 User manual

USER
MANUAL
P4 Dash Camera

What’s in the box?
Camera overview
Icons introduction
How to power on
Parking monitor
Lock current video
Playback
Multi-mode setting
Setup
Specifications
Precautions
Troubleshooting
Contact US
1
1
2
3
4
4
6
8
9
12
12
12
13
CONTENTS

P4 Dash Camera Rear Camera Rear Extension Cable
Car Charger Adapter Bracket * 2 Electronstatic stickers *2
Crowbar + Five Cable Clips Quick User Manual
WHAT’S IN THE BOX?
QUICK
REFERENCE
GUIDE
P4Car Dash Camera
CAMERA OVERVIEW
TF AV-IN USB
RESET
1 2 3
4
6
8
Please tear off the
film before installing it.
12
34
5
7
32GB Micro SD Card
ICONS INTRODUCTION
1. Micro SD Card Slot
2. Rear Camera IN
3. USB Power Port
4. Reset
5. Speaker
6. Power Button
7. MIC
8. Front Camera
9. LCD Touch Screen
Stop Recording
Start Recording
Setup
Playback
Multi-Mode Setting
Wide Mode
Ball Mode
Around Mode
Four Mode
Lock Video
Back
System Setting
Recording Settings
Rear File
Front File
9
01 02

HOW TO POWER ON
1
2
① Insert the car charger with cable into your car’s cigarette lighter socket.
② Insert the USB port of car charger into the dash cam’s mini USB power port (Charger is
Input DC12-24V, Output DC 5V 2A).
Note:
① After powering on dash cam through the car charger, the dash cam will automatically
turn on and start recording (if the card has been inserted). If wanting to do some
settings, please firstly stop recording.
② The built-in battery has to take about four hours to be charged fully.
③ When the battery is charging, a icon is displayed on the top right corner of the
screen.
④ The built-in battery can last for about 10 minutes after it is charged fully.
⑤ The built-in battery is only used to power the "parking monitor" function.
In normal use, please plug the car charger into the cigarette lighter of the car to power
the dash cam. The built-in battery is not recommended as a normal use of power
supply to the dash cam, in order to avoid the battery no power when parking, and
cause the parking monitoring function to fail.
⑥ To avoid damaging the dash cam, please do not charge the battery via the USB data
cable with other adapters.
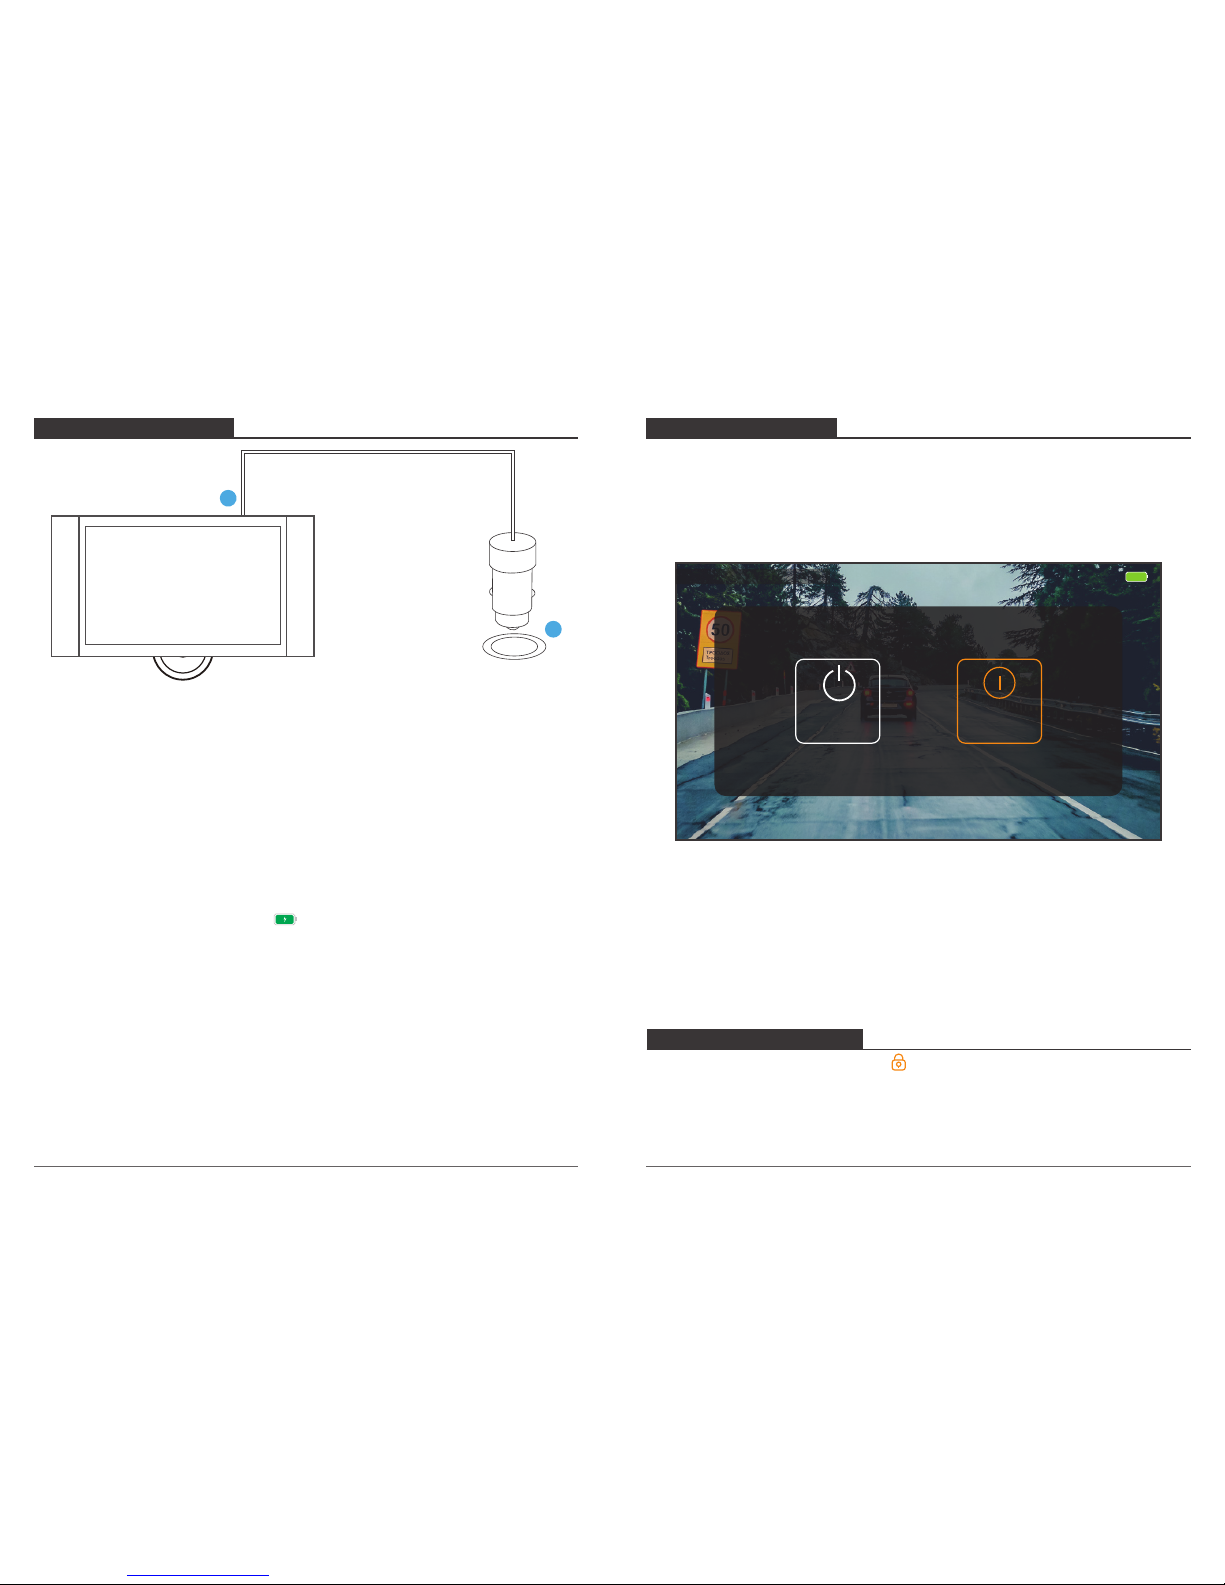
PARKING MONITOR
When the car stops or the car charger is unplugged from the car's cigarette lighter, the
dashcam's screen immediately shows a image to select "Power off" or "Parking monitoring".
Please select “Parking monitoring” to enable this function.
The dash cam will be in a sleeping state, and it will automatically record when there is a hit
of the car during parking.
03-19-2019 14:59:59
Power off Parking
monitoring
Note:
① If you want the dash cam always to remain the parking monitoring mode,
When you park, please don’t do anything when the image shows on screen again. After
seconds, the dash cam will automatically turn off the screen to the sleeping state.
② If you don't want the camera to be in the parking monitoring mode, please select the
power off when you park.
LOCK CURRENT VIDEO
When recording, click the unlocked-icon to lock current recording video, a “SOS”word is
shown on the top of screen, and the the locked video will record for 30seconds, after
30seconds, the recording become the normal recording (unlocked video) automatically.
03 04

03-19-2019 14:59:59
03-19-2019 14:59:59 SOS
Note: when recording, the number “3” shown means the time of loop recording.
PLAYBACK
How to play the recorded videos on the card?
Click to enter into Playback Interface, here you can play the recorded videos.
03-19-2019 14:59:59
1/1File
20190319_133449A.ts
20190319_133419A_SOS.ts
20190319_115310A.ts
20190319_115250A_SOS.ts
20190319_115205A.ts
This icon is for saving the videos of front camera;
This icon is for saving the videos of rear camera;
A video with the SOS word means the video is locked, do not be overwritten when the
card is full.
05 06

20190319_143951A.ts
00:12 00:37
Back to enter video list.
Click to pause the currently playing video.
Click to option playback mode (please refer to part 6).
Click to the previous video.
Click to the next video.
How to delete the unlocked video?
Long press the video you want to delete, then press confirm.
Note: The locked video can not delete on the cam, if you need to delete it, please format
the card or delete it on the computer
1/1File
20190319_133449A.ts
20190319_133419A_SOS.ts
20190319_115310A.ts
20190319_115250A_SOS.ts
20190319_115205A.ts
Confirm delete
20190319_133449A.ts?
Confirm Cancel
MULTI-MODE SETTING
Four modes can be selected to record or view videos for the front camera.
03-19-2019 14:59:59
Wide Mode Ball Mode Around Mode Four Mode
Wide Mode: One image displayed, the view is flat, can not slide the image on screen.
Ball Mode: One image displayed, the view is curved, can slide the image 360° on screen.
Around Mode: Two images displayed, can slide every image 360° on screen, double clicks
one of twos images to show one big image.
Four Mode: Four images displayed, can slide every image 360° on screen by finger,
double clicks one of four images to show one big image.
03-19-2019 14:59:59
07 08

MULTI-MODE SETTING
Click to enter Recording Setting
03-19-2019 14:59:59
Setting
Loop
Recording
G-sensor Low
Boot
Recording
Video
Sound
Rear view
mirror
Screen
Save
High
Off On
Medium
B
B
1 min 5 min.
3 min.
30s Off
1 min 2 min
Off On
Off On
1. Recording Setting
Loop Recording: 1 Min. / 3 Min. / 5 Min. for optional, default is 3 Min. .
The files will be saved every 3 minutes if you choose 3 minutes. When the memory card is
full, the new files will cover the old one if the loop recording is on; If it is off, the camera
won’t record any more when the card is full, need to format the SD card or change a new
one.
G-Sensor: Low / Medium / High for optional, default is Low.
Gravity Sensor means when any collision will activate, the camera will auto-record, and the
videos will be locked which will never be covered by new files.
The video will be stored as a file based on the time you set in the loop recording. When
driving, if the road is bumpy, please adjust it to low or turn off it directly to prevent the
camera doesn’t work because of the memory card is full. When parking, recommend you
to adjust it to medium.
Boot Recording: Off / On for optional, default is On
If select “On”, no matter the camera is turned on through plugging the car charger into
the cigarette lighter or press the power button to turn on the camera, it will start recording
automatically.
If select “off ”, the camera will not record automatically when the car charger is inserted
into the cigarette lighter or press the power button to turn on the camera.
Recording Audio: Off / On for optional, default is On.
Allows the recorded videos with sound or no sound.
Rear view mirror: Off / On for optional, default is On.
When the camera is turned on, the screen automatically shows the rear image of the car,
comprehensive monitoring of the rear traffic conditions in the real time, without delay.
Screen Save: 30seconds / 1 minute / 2 minutes / Off for optional, default is 1 minute.
The screen will be turned off automatically after the time you set.
After turning off, the screen will reduce power consumption, the camera still work and
record under the display off. Just double clicks the screen, it will turn on.
09 10

2. System Setting
Setting
SFortmat
Fortmat
Factory
2019-01-19 15:02
Language
Sound Low
Frequency
Time
Seting
Sys
Seting
Software
Version P4-BSAL30V-V01 20190109
High
50HZ 60HZ
Min
Language: Japanese / English / Chinese / German / French / Spanish / Italian for optional.
Set the language of the system.
Sound: Low / Medium / High for optional, default is Medium.
Adjust playback video and button sound.
Frequency: 50Hz / 60Hz for optional, default is 60Hz.
Time setting: Set the time shown on screen of this camera.
System reset:
• Format: Format the Micro SD card.
Note:
① All data will be deleted. Before formatting your memory card, please remember to
backup your important data on your other devices.
② Every time you insert a SD card, please format it in the camera to ensure that the SD
card is compatible with the camera.
• Restore Factory: Restore factory default settings.
Software Version: Check the camera’s version information.
SPECIFICATIONS
Name AKASO Dash Cam Model
Viewing Angle 360° (Front),
170°(Rear)
Working
Temperature
Battery
-4°F - 158°F
2K(Front),
480P (Rear)
Support
500mAh
P4
Max Video
Resolution
WDR
13.5*9cm
179g
5” HD Touch Screen
16GB-128GB
(included 32GB)
Built-in
Size
Net Weight
Screen
Micro SD Card
MIC
PRECAUTIONS
1. Please safekeeping, prevent the lens from scratching and dirty.
2. Please pay attention to anti-fouling and moisture-proof.
3. Do not exposure the machine to the sun directly, prevent the built-in battery from
damage.
TROUBLESHOOTING
Q: Why the camera always say “no card inserted”?
A: 1. Please ensure that the memory card is class 10 and above.
2. Format the memory card on computer firstly. When you format it on computer,
please choose "FAT32(Default)" on File system, and choose "32 kilobytes" on
Allocation unit size.
3. Format it in the camera.
Q: The camera don’t work any more.
A: Please check whether the memory is full, if yes, please save the files and format the SD
card.
11 12

Q: The image is blurry.
A: The windshield will reflect the light, please adjust the camera.
Q: The camera lose power often.
A: Due to different vehicle designs, please rotate the car charger to adjust it keep stable.
Q: The camera is unable to be turned on.
A: Please make sure that whether the charge indicator light is on or off, if off, please
re-insert the car charger and reset the camera.
Q: The camera doesn’t record automatically after turning on.
A: Check whether the memory card is full or reformat the card, if this problem exists,
please change a new card.
Q: The video has no voice.
A: Please confirm whether recording audio is off on the recording setting, please refer to
Recording Audio.
Q: The camera keeps turning on and off automatically.
A: Please charge the camera via USB car charger, do not charge the battery via the USB
data cable with other adapters
For any inquires, issue or comments concerning our products, please send E-mail to the
address below, and we will respond as soon as possible.
E-mail: [email protected]
CONTACT US
13
Table of contents
Other Akaso Dashcam manuals
Popular Dashcam manuals by other brands

Sceptre
Sceptre CCR2000 Feature overview

Dometic
Dometic Waeco PerfectView CAM33C Installation and operating manual

Zetronix
Zetronix zBlackBox-HDi quick start guide

Transcend
Transcend DrivePro 550B user manual

Super Circuits
Super Circuits DVR-30 Installation & operation manual

RVS systems
RVS systems RVS-082506 product manual