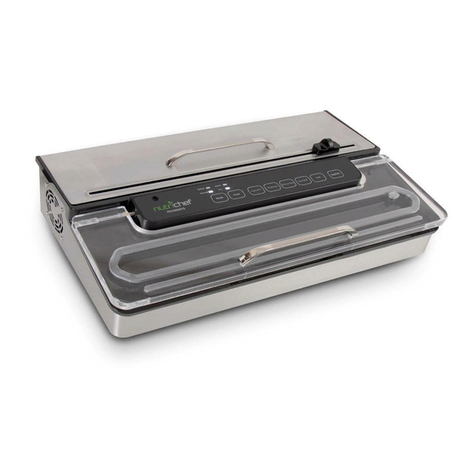
Gastro WIMEX 78600 Parts list manual

WIMEX.eu
READY-MEAL
TRAY SEALER
Instruction & operating manual

Introducing our easy to use and maintain, professional tray-sealer with
digital temperature control, for perfect film-sealed ready-meal trays. The
fast switch over of tray-mounts and 4-second bonding time allows for
higher-volume meal packaging to meet peak demand.
Get ready for ready-meal packaging that your customers will love.
Please read this entire manual before you start using the sealer
for the first time.
1.0 INDEX
2 Machine layout
3 Installation
4 Installing the sealing film
5 Installing the tray-mount
6 The temperature controller
7 Using the temperature controller
8 Sealing your ready-meal trays
9 Safety
10 Maintenance
11 Repair
12 FAQ
13 Troubleshooting
14 Instructional video
15 Specifications
16 Ancillaries & consumables
17 Declaration of conformity

2.0 MACHINE LAYOUT
1. Handle
2. Lid
3. Heated pressure-plate
4. Roll-holder
5. Serrated cutting blade
6. Film holder
7. Film-grips
8. Tray-mount locating studs
9. Temperature controller
10. Power switch
1
2
4
3
5678910
3.0 INSTALLATION
3.1 Place the sealer on a well-lit firm level surface with a
suitable working height.
3.2 It is best to position the sealer away from direct sunlight
and other direct heat sources such as ovens.
3.3
A distance of at least 10 cm from walls and other appliances
will help with ventilation and ease of use.

3.4 Assemble and attach the sealing-film roll holder: -
a) Loosen the set of four screws at the rear of the sealer
by 3 complete turns,
b) then assemble the four
roll-holder components,
c) and whilst holding them together, position over the
screw heads, lower and then slide the assembly back
towards you.
d) The final step is to re-tighten the four screws.

4.0 INSTALLING THE ROLL OF SEALING FILM
4.1 Place the roll on the roll-holder at the rear of the sealer,
with the start of the roll facing up.
4.2 Unwind 15 – 20 cm of the roll and feed it under the film
holder and over the film-grips. Please note that it is the
inside of the film that should be in contact with the
ready-meal tray.
3.5 The power lead should be plugged into a compatible
earthed socket to which you have access to at all times for
emergency unplugging.

5.0 INSTALLING THE TRAY-MOUNT
5.1 The tray-mount holds and supports the ready-meal tray
so that a perfect seal is created around each compartment.
5.2 Each tray configuration (1-compartment, 2-compartment
or 3-compartment) has its own specific tray-mount.
5.3 Lift up the lid of the sealer and identify the two tray-
mount locating studs. You will see one on either side,
just in front of the film grips.
5.4 Select the appropriate tray-mount and position it, silicon
beading side uppermost, so that the locating holes fit
over the locating studs.

6.0 THE TEMPERATURE CONTROLLER
6.1 The temperature controller displays:
a) The target temperature of the pressure-plate.
b) The actual temperature of the pressure-plate.
c) The status of the actual temperature compared to the
target temperature (above, below or the same)
7.0 USING THE TEMPERATURE CONTROLLER
7.1 After switching the sealer on, the display will show the
actual temperature of the pressure-plate.
7.2 To set the target temperature, press button A (The
indicator light SP will illuminate.)
a) Press button Cto increase the value,
b) and button Bto decrease it.
Once you have set the target temperature, press button Ato
confirm it. (The indicator light SP will extinguish, and the target
temperature will be stored in the memory.)
The indicator light OUT will illuminate to show that the
pressure-plate is heating, and will extinguish as the actual
temperature approaches the target temperature.

SP STOP OUT
APress to toggle between actual and target temperature.
BPress to decrease the target temperature.
CPress to increase the target temperature.
SP Lit = Display is showing target temperature.
Unlit = Display is showing actual temperature.
OUT Lit = the pressure-plate is heating.
IUp arrow: The actual temperature is > target
II Green: The actual temperature = target + / - 4˚C
III Down arrow: The actual temperature is < target
B CA
II
III
I

8.0 SEALING YOUR READY-MEAL TRAYS
8.1 Switch on the sealer, open the lid and insert the
appropriate tray mount.
8.2 Set and confirm the target temperature. (We recommend
150˚C)
8.3 Wait 7 – 8 minutes for the pressure plate to achieve the
target temperature.
8.4 Place the filled ready-meal tray into the tray-mount.
8.5 Using both hands, pull sufficient sealing film over the tray
to cover it.
8.6. Pull the lid down by the handle and apply moderate
pressure.
8.7 Wait for 3 – 4 seconds for the film to bond to the tray.
8.8 Open the lid and remove tray.
Remember that the pressure plate is HOT!

1 2
3 4
5 6
150 ºC
3–4 s.

9.0 SAFETY
9.1 As with all electrical equipment please be careful! If used
incorrectly electrical equipment can cause fire, electric
shocks and personal injury, so please follow the instructions
in this manual carefully to minimise the risk of accidents.
9.2 Your power supply should be earthed, fitted with a circuit
breaker, and compatible with providing 700 Watts.
9.3 Switch off the sealer before unplugging, and keep it
disconnected when not in use.
9.4 Avoid any contact with water, either directly on the sealer
itself, or indirectly such as wet hands.
Be aware that the pressure-plate will remain hot for
some time after the sealer is switched off.
1
0.0
MAINTENANCE
10.1 Clean the sealer after use with a damp cloth using mild
detergent. Any contamination on the pressure-plate
should be removed with a soft sponge and mild detergent
after the pressure-plate has cooled down. Do not flush
the sealer with water, or use harsh detergents.
10.2 Tray-mounts can be cleaned by hand with a soft sponge
and mild detergent. (They must NOT be cleaned in a
dishwasher.)

11.0 REPAIR
11.1
In case of malfunction, switch the machine off immediately
and unplug it. Then check the Troubleshooting guide.
If the problem persists please contact your WIMEX
distributor.
11.2 Contact your WIMEX distributor for spare parts or for
professional part replacement.
12.0 FAQ
Q: Can I change the tray-mount?
A: Yes. Changing the tray-mount is easy. Simply lift out the old
one and put in the new one. Be careful not to burn yourself
on the pressure-plate.
Q: Can I use the same tray-mount for different tray
configurations?
A: No. Each tray configuration requires its own special mount
to ensure that a perfect seal is created around each
compartment.
Q: Where can I purchase new tray-mounts?
A: Please contact your WIMEX distributor.
Q: Can I use non-WIMEX tray-mounts, ready-meal trays or
sealing film?
A: You can try but WIMEX tray-mounts, ready-meal trays and
sealing film are specially matched for the best performance.

13.0 TROUBLESHOOTING
The tray is not sealing, or the sealing is incomplete.
The tray-mount is upside-down with the silicon beading
facing down.
Solution: Turn the tray-mount over with the beading facing up.
The silicon beading on the tray-mount is missing.
Solution: Insert new beading.
There are undulations in the silicon beading on the tray-mount.
Solution: Turn the tray-mount upside down and press it against
a firm flat surface, or re-insert the beading completely.
The roll of sealing film is upside-down.
Solution: Turn the roll over so that the inside of the film comes
into contact with the tray.
The sealing film and the ready-meal tray are not compatible
with each other.
Solution: Only use Wimex ready-meal trays and sealing film.
The pressure plate temperature is too low.
Solution: Increase the temperature. (We recommend 150˚C)
The sealing time is too short.
Solution: Hold the lid in the closed position for longer. (We
recommend 3 – 4 seconds.)
The pressure-plate does not heat up.
The sealer is not plugged in, or not turned on.
Solution: Check that the sealer is plugged in and the power
switch is turned on.

The sealing film is not being cut.
The film-grips are missing or damaged.
Solution: Insert new grips.
The cutting blade is dirty, dull or damaged.
Solution: Clean the blade or return the machine to your WIMEX
distributor for a new blade to be fitted.
15.0 SPECIFICATIONS
Product number: 78600
Dimensions: L 68 cm, W 27 cm, H 26 cm
Weight: 11.7 kg (16.8 kg with packaging)
Power: 700 W
Electrical input: 220 V / 50 Hz
Disposal of your old product
This marking on the device or its packaging means that it must
not be disposed of with normal household waste. Return it to a
collection center for the recycling and disposal of waste electrical
and electronic equipment. Proper disposal will not cause negative
effects on the environment and public health. This equipment is
marked according to the European Directive 2002/96/EC (WEEE).
This Directive provides a reason for Europewide collection and
recycling of electronic waste and electronic equipment.
14.0 INSTRUCTIONAL VIDEO
https://wimex.eu/productinfo/tray_sealer

16.0 ANCILLARIES & CONSUMABLES
Ready-meal tray
1-compartment / 1100 ml
78401 50 pcs
Ready-meal tray
1-compartment / 1400 ml
78501 50 pcs
Ready-meal tray
2-compartment / 1070 ml
78402 50 pcs
Ready-meal tray
3-compartment / 980 ml
78403 50 pcs
Ready-meal tray
2-compartment / 1260 ml
78502 50 pcs
Ready-meal tray
3-compartment / 1120 ml
78503 50 pcs
Tray-mount
1-compartment
78611 1 pc
Tray-mount
2-compartment
78612 1 pc
Tray-mount
3-compartment
78613 1 pc
Sealing film for ready-meal trays
185 mm x 250 m
78618 2 pcs
50
40
50
40
50
40

WIMEX.eu 02-2021
17.0 DECLARATION OF CONFORMITY
Table of contents
