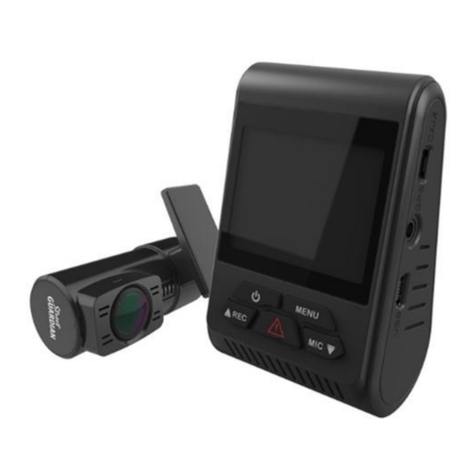
Gatekeeper Y62DC Operation instructions

Y62DC
User Operating Manual
Document Ref. No.
: DN3136
Version No. : 4.0
Document Date : February 2019

2 of 29
TABLE OF CONTENTS
INTRODUCTION
......................................................................................................................................... 4
Y62DC DEVICE ........................................................................................................................................... 4
SD CARD .................................................................................................................................................... 6
Y62C PERIPHERAL CAMERA (OPTIONAL) ....................................................................................................... 6
Y62DC CELL (OPTIONAL) ............................................................................................................................ 7
Y62 DOWNLOAD KIT (OPTIONAL) ................................................................................................................. 7
‘QUICK START’ GUIDE
................................................................................................................................ 8
STEP 1: POWERING THE Y62DC ON AND OFF ................................................................................................. 8
STEP 2: IDENTIFYING THE Y62DC NETWORK BROADCAST ID (SSID) ................................................................. 8
STEP 3: CONNECTING TO THE Y62DC DEVICE ................................................................................................. 8
Step 3a: G4 Connect™
............................................................................................................................ 8
Step 3b: Internet Explorer – View IPC Interface
...................................................................................... 9
VIEWING VIDEO WITH G4 CONNECT™
................................................................................................. 10
THE ‘COMMON’ TAB –
YOUR DEVICE’S STATUS
.............................................................................................. 11
THE ‘PREVIEW’ TAB –
VIEWING YOUR VIDEOCLIPS
........................................................................................ 11
THE ‘PLAYBACK’ TAB –
MANAGING RECORDED VIDEOCLIPS
........................................................................... 12
Using ‘Video Export’ to export a videoclip
............................................................................................. 14
THE ‘PREFERENCES’ TAB –
CONFIGURING YOUR DEVICE
................................................................................. 15
VIEWING VIDEO WITH INTERNET EXPLORER (VIEW IPC)
................................................................... 15
THE ‘PLAYBACK’ TAB –
MANAGING RECORDED VIDEOCLIPS
........................................................................... 15
THE ‘CONFIG’ TAB –
CONFIGURING YOUR DEVICE
......................................................................................... 18
THE ‘LIVE VIEW’ TAB -
VIEWING YOUR VIDEOCLIPS
...................................................................................... 18
THE ‘LOG’ TAB –
VIEWING AND MANAGING DEVICE LOGS
.............................................................................. 20
Y62DC CONFIGURATION AND SETTINGS
............................................................................................... 21
ACCELEROMETER CALIBRATION .................................................................................................................. 21
CONFIGURATION OVERVIEW ...................................................................................................................... 22
DOWNLOADING VIDEOCLIPS
................................................................................................................. 26
Y62DC INSTALLATION INSTRUCTIONS
................................................................................................... 26
Y62DC OPERATING CONDITIONS ................................................................................................................ 26
MOUNTING THE Y62DC ............................................................................................................................. 26
WIRING INSTRUCTIONS .............................................................................................................................. 27
Connecting the Power Supply
............................................................................................................... 27
Fuse Connection
.................................................................................................................................. 27
SENSOR CABLING ....................................................................................................................................... 28
IP Camera Connection
......................................................................................................................... 28
External GPS Connection
..................................................................................................................... 28
Additional Sensor Connections
............................................................................................................. 28
RS232 Connection inputs
..................................................................................................................... 28
External Sensor Module (ESM) Connection
........................................................................................... 28

3 of 29
CABLING DIAGRAM ................................................................................................................................... 29

Y62DC User Operating Manual Version 4.0
4 of 29
Introduction
The Gatekeeper Systems Y62DC device features a Digital Video Recorder (DVR), a High-
Definition (1080P) Internet Protocol (IP) Camera, an onboard microphone, and an integrated Wi-
Fi transmitter/receiver. The Y62DC is built to withstand the shocks, vibration and environmental
stresses inherent in vehicle operation, while making video data easily accessible to mobile devices
and web browsers using the Wi-Fi wireless protocol.
Videoclips are recorded to an onboard removable Secure Digital (SD) card, offering a stable,
compact, and portable memory format that is not threatened by information loss when the
Y62DC is powered-off.
Videoclips can be viewed, and device settings can be configured, wirelessly using either an
Internet Explorer web browser, or through the ‘G4 Connect™’ software application running on
an Android compatible mobile device.
The Y62DC comes with an (optional) Y62C interior facing peripheral IP camera (720P), and the
(optional) Y62 Download Kit. Optional support for cellular radio compatibility on the AT&T
network is available as the “Y62DC cell” variant device.
Y62DC Device
The Gatekeeper Systems Y62DC
DVR video recording and
management device.
1. Mounting plate security screw
2. Wi-Fi transmitter / receiver
3. Speaker
4. Alignment set screw
5. Outside facing lens

Y62DC User Operating Manual Version 4.0
5 of 29
Side-View: Port Door Closed
6. Port door
7. Port door security screw
Side-View: Port Door Open
8. SIM card port
9. Mini USB port
10. SD card port
Y62DC Technical Specifications
Video and Audio
AV Recording
Video up to 2 Channels
Audio up to 2 channels
Main Stream Resolution
and Frame Rate
Internal 1080P @ 30FPS
Image Setting
Brightness, Chroma, Contrast, Saturation, Sharpness
Video Coding
H.265 / H.264
Video Compression Bit Rate
500 Kbps – 8 Mbps
Audio Compression Std
ADPCM
Built in Speaker
Included
Storage
SD Card
32GB / 64GB / 128GB / 256GB optional
Camera Parameters
Sensor
1/2.9" 2M pixel CMOS Sensor
Electronic Shutter
1/30 Second - 1/100000 Second
Lens
4mm M12
S/N
≥48db
Network

Y62DC User Operating Manual Version 4.0
6 of 29
Wi-Fi
802.11 b/g/n 2.4GHz
Bluetooth
Included
Cellular (*optional)
AT&T Network Supported (Requires G4 Enterprise Server)
SIM Card (*optional)
Full-size SIM (1FF – 1ST Form Factor)
Location
GPS Included
Sensor
6-axis Sensor Included
Ports
RS232
2 channel inputs
Sensors
2 channel inputs. Expandable using the Gatekeeper External
Sensor Module (ESM)
Power
Power Output
12VDC@500mA
Power Supply
DC 9~36V
Normal Power Consumption
6W
Peak Power Consumption
Less than 9W
* available with the “Y62DC cell” variant device
SD Card
It is recommended that the Y62DC makes use of a Gatekeeper Systems SD card, in either a 32GB /
64GB / 128GB / 256GB size format. Gatekeeper Systems SD cards have been manufactured and
tested to perform at the widest range of temperature tolerances; exceeding the performance of
consumer grade SD cards.
SD Card File Formatting
: The Y62DC uses a propriety SD card file format, and should not be
reformatted using a Windows operating system. If you encounter a prompt to reformat the SD
Card (in a Windows environment), click CANCEL. Reformatting the SD Card will delete all
recorded videoclips, and will require that the SD card be re-formatted into the Y62DC format
before video recording can occur.
Y62C Peripheral Camera (Optional)
The Gatekeeper Systems Y62C interior facing
peripheral video camera.

Y62DC User Operating Manual Version 4.0
7 of 29
1. Infrared (IR) sensor
2. Camera lens
3. Alignment set screw
4. Microphone
Y62C Peripheral Camera Technical Specifications
Sensor
1/3" 1.23M pixel CMOS Sensor
Main Stream Resolution and Frame Rate
720p @ 30fps
Electronic Shutter
1/30 Second - 1/100000 Second
Lens
2.3mm M12
Day / Night IR-Cut
Included
S/N
≥48db
Power
Power Supply: DC 9~36V
Y62DC Cell (Optional)
The Y62DC Cell variant device offers support for cellular radio compatibility using the AT&T
network. The device makes use of a standard full-sized SIM card (1st Form Factor type), and is
certified PTCRB and AT&T compliant. Please note that the Y62DC Cell requires a G4 Enterprise
Server in order to operate.
Y62 Download Kit (Optional)
The Y62 Download Kit can be used to quickly download and administer your videoclip library.
The download kit includes the high-speed hardware required to connect the Y62DC device or SD
card to your computer, and download and sync videoclips quickly and easily. The Download Kit
includes:
§ 1 Mini USB to USB 2.0 cable (female connector)
§ 1 SD card reader
§ 1 USB Flash Memory Drive
§ 1 Installation CD

Y62DC User Operating Manual Version 4.0
8 of 29
‘Quick Start’ Guide
The Quick Start guide is intended to get you up and running with your new Y62DC system, and
assumes that the device has been installed in your vehicle by a Gatekeeper Installation
Technician. If you prefer to mount the device yourself, please refer to the ‘Installation’ section
(page 24) for detailed hardware and cabling instructions.
Step 1: Powering the Y62DC On and Off
Turning on your vehicle ignition will power up the Y62DC. Turning off your vehicle will power
down the device after a five-minute shutdown delay. (Note: The duration of the five-minute
shutdown can be modified using the device configuration settings.)
Step 2: Identifying the Y62DC Network Broadcast ID (SSID)
Before a Wi-Fi connection can be established with the Y62DC, you must first identify the device’s
network broadcast ID (or SSID). The default SSID is identified on the sticker attached to the
casing of your Y62DC device. Make sure you have correctly identified the SSID before
proceeding.
NOTE
:
If your Y62DC device fails to recognize your SSID (or the SSID does
not appear), please restart the device. The Y62DC will stop broadcasting its
SSID after a two-minute interval if a device has not been connected to it.
Step 3: Connecting to the Y62DC device
You can connect wirelessly to the Y62DC in one of two ways. By using either;
§ The G4 Connect™ application (‘app’) installed on any Android operating system compatible
mobile device (Recommended approach).
§ An Internet Explorer web browser on a Windows operating system device.
Step 3a: G4 Connect™
The G4 Connect app can be installed to an
Android device by using the provided installer
package ‘*.apk’ file, or by downloading the app
through the ‘Google Play’ digital distribution
service (play.google.com)
Once the G4 Connect app is installed, start your vehicle to power on the Y62DC. Using your
Android device, search for the broadcast network ID (e.g. 000035000AE6) from its Wi-Fi settings

Y62DC User Operating Manual Version 4.0
9 of 29
list, and connect to this network.
Refer to Step 2 is you are having problems identifying the
correct broadcast network ID.
Once you have connected your Android device to the Y62DC, launch the G4 Connect app. When
presented with a login screen supply the following credentials:
Username:
admin
Password:
30131127
You are now successfully connected through the G4 Connect app and can begin using your
Y62DC device.
Step 3b: Internet Explorer – View IPC Interface
Start your vehicle to power on the Y62DC device. Using a PC or laptop with an active Wi-Fi
connection, search for and connect to your Y62DC’s broadcast network ID (e.g. 000035000AE6).
Refer to Step 2 is you are having problems identifying the correct broadcast network ID.
Once connected, launch the Microsoft Internet Explorer web browser.
Note: Other browsers such
as Google Chrome or Mozilla Firefox are not currently supported, and may have compatibility
issues when used with Gatekeeper Systems devices.
From your Internet Explorer web browser, type in one of the following IP addresses:
192.168.88.2
or
192.168.240.1
These default IP addresses will open the View IPC web interface to access your Y62DC device.
Upon initial load you will receive the following prompt: “This website wants to install the
following add-on “N9M_ACTIVEX” from ‘GIEC Electronics Co., Ltd.’”. Click INSTALL to
proceed.

Y62DC User Operating Manual Version 4.0
10 of 29
Once the Active-X installer has completed, supply the following login credentials:
User name:
admin
Password:
30131127
You are now successfully connected through the Internet Explorer View IPC interface and can
begin using your Y62DC device.
Viewing Video with G4 Connect™
Connecting to the Y62DC through the G4 Connect app is the recommended method for viewing
and managing videoclips, and configuring the device. The G4 Connect app makes navigating the
Y62DC’s functionality easy through its four tabs: ‘Common’, ‘Preview’, ‘Playback’, and
‘Preferences’.

Y62DC User Operating Manual Version 4.0
11 of 29
The ‘Common’ tab –
Your Device’s Status
Device status settings can be viewed by using the ‘Common’ tab in the G4 Connect app. This tab
provides insight into the basic operating information for your Y62DC device, and includes
technical details such as:
§
Basic Info
: The current / historical / server / Input &
Output operating status.
§
Device Module
: The modules currently in operation on
your device. The G4 Connect app supports a cellular phone
enabled 'Communication' module (using the “Y62DC cell”
variant device), a wireless 'Wi-Fi' module, and a GPS-
enabled 'Satellite' module.
§
Storage Device
: Details regarding the Y62DC’s internal
SD card including; the memory currently available /
memory being used, and its operating status.
§
Version Info
: The firmware version currently being used
by the device, as well as details for the firmware for any
device peripherals.
§
Other
: A listing of system and settings logs, and
configuration files currently stored to the device.
The ‘Preview’ tab –
Viewing Your Videoclips
Viewing video data in ‘real-time’ (as occurring) is done through the ‘Preview’ tab. The Preview
tab provides a view panel for each camera configured with the device. The preview tab also
provides the option to enable or disable the playback of sound being recorded through the
device’s built-in microphone.

Y62DC User Operating Manual Version 4.0
12 of 29
The ‘Playback’ tab –
Managing Recorded Videoclips
Video playback, or viewing data that has been previously recorded, is done through the ‘Playback’
tab. When opening the tab, you will be presented with a calendar view of all the videoclip data
recorded to the internal SD card. Select a date by clicking on the calendar.
Clicking on a date in the calendar will open a panel displaying the ‘Stream Type’ and ‘Channel’.

Y62DC User Operating Manual Version 4.0
13 of 29
Select the Stream Type and Channel to filter the video data, and then click ‘Next’ to open the
video playback timeline.
By moving the playback slider (located near the bottom of the panel) you can specify where your
video playback will begin.
The ‘Plus’ and ‘Minus’ buttons can be used to zoom-in and out of the timeline to give you fine
detail control of your video playback.
Clicking ‘Play’ will begin playback of a videoclip.

Y62DC User Operating Manual Version 4.0
14 of 29
The speed button allows you to control the speed of video playback.
Using ‘Video Export’ to export a videoclip
1. Click ‘Video Export’.
2. Drag the slider to the position in the timeline where you
would like to begin the export. Click ‘Start Time’.
Notice that
the button changes from ‘Start Time’ to ‘End Time’
3. Drag the slider to the position in the timeline where you
would like to end your export.
Notice that a transparent blue
bar appears above the recorded video (green bar). This
indicates the start time and duration of the video to be
exported
. Click ‘End Time’ to complete your selection.

Y62DC User Operating Manual Version 4.0
15 of 29
Clicking ‘Backup’ completes the export process.
The backup panel also allows you to define the file format to be used on export (‘Proprietary’,
requiring G4 Viewer Plus™ to view, or the generic ‘*.avi’ video file format).
The ‘Preferences’ tab –
Configuring Your Device
For details on configuring the device using the ‘Preferences’ tab refer to the ‘Y62DC
Configuration and Settings’ section found on page 18.
Viewing Video with Internet Explorer (View IPC)
A Microsoft internet Explorer web browser can be used to access the ‘View IPC’ interface. The
View IPC interface shares many of the same features as the G4 Connect app, and includes four
tabs: ‘Playback’, ‘Live view’, ‘Log’, and ‘Config’.
The ‘Playback’ tab –
Managing Recorded Videoclips
Recorded videoclips can be viewed by using View IPC’s ‘Playback’ tab. When opening the tab,
you will be presented with a calendar view of all the video data recorded to the internal SD card.

Y62DC User Operating Manual Version 4.0
16 of 29
§ Select the target date for playback.
§ Filter your video by ‘Video type’, ‘Start time’ and ‘End time’, and ‘Channel’ (configured
cameras) to narrow your search.
§ Press the ‘Play’ button on the toolbar to begin playback.
Playback timeline and toolbar
Buttons on the playback toolbar are used to control the speed of videoclip playback. Additional
controls can be used to take snapshots, or modify how information is presented in the timeline.
§
Play

Y62DC User Operating Manual Version 4.0
17 of 29
§
Pause
§
Stop
§
Slow
: Playback the videoclip in reverse. Each time the button is clicked will increase the
slow speed x2.
§
Speed
: Increase the speed of playback by a factor of x2. Each time the button is clicked
speed will increase x2.
§
Next Frame
: Advances the playback forward by a single frame.
§
Snapshot
: Creates and exports an image ‘snapshot’ (*.bmp file format) from the video
frame currently displayed.
§
Digital Zoom
: Increases the digital zoom level of the camera.
§
Timeline Zoom-in
: Magnifies the playback timeline, and displays playback at a smaller
time interval.
§
Timeline Zoom-out
: Decreases the size of the playback timeline, and displays playback at
a larger time interval.
Record List View
Clicking on the ‘Record List’ label will change how
information is displayed in the playback panel.
Rather than displaying videoclips, a list of all
available records (for the selected date) will be
displayed in a log format.
The Record List view also allows you to backup any selected video (to the internal SD card).

Y62DC User Operating Manual Version 4.0
18 of 29
The ‘Config’ tab –
Configuring Your Device
For details on configuring the device using the ‘Config’ tab refer to the ‘Y62DC Configuration and
Settings’ section found on page 18.
The ‘Live view’ tab -
Viewing Your Videoclips
Viewing videoclips in ‘real-time’ (as occurring) is done through the ‘Live view’ tab.
Toolbar
:

Y62DC User Operating Manual Version 4.0
19 of 29
The Live view toolbar includes controls for video playback, taking snapshots, or modifying image
appearance.
§
Previous
: Reverses playback by a single frame.
§
Next
: Advances playback by a single frame.
§
Capture
: Captures an image snapshot (*.bmp file
format) from the video frame currently
displayed.
§
Video Parameters
: Adjusts the video settings of
the camera for; Brightness (BRI), Colour (COL),
Contrast (CON), Saturation (SAT), and
Sharpness (SHA).
§
Original/Full
: Changes the display’s aspect ratio
to that of the camera (Original), or stretched
(Full).
§
Record
: Toggles recording On / Off.
Video Playback Quality
:
The Live view interface provides controls for optimizing your video playback quality and bit
sample rate. Recorded image quality, and the size of the resulting file, can be selected to take into
consideration the optimal file sizes for playback on desktop, tablet, and small form factor mobile
devices.

Y62DC User Operating Manual Version 4.0
20 of 29
The ‘Log’ tab –
Viewing and Managing Device Logs
The View IPC log tab provides a view into the log information being collected by your Y62DC
device. Log information can be useful for tracking the operation of a vehicle, or reviewing any
alarms (events) encountered while the vehicle is in operation.
The log panel provides query tools that can be used to
filter log files including:
§ Filtering by Date and Time (from-to-hour),
§ Filtering by Log Type: ‘Alarm log’, ‘Operation
log’, or ‘Locked log’.
§ Once a Log Type is chosen, additional filter
parameters become available through the drop-
down menu located beneath.
§ Once your filter parameters have been set, click
‘Search’ to apply the filter.
Clicking the ‘Export’ button will save the log information displayed to a text file (*.txt) format.
Other manuals for Y62DC
1
Table of contents
Other Gatekeeper DVR manuals
