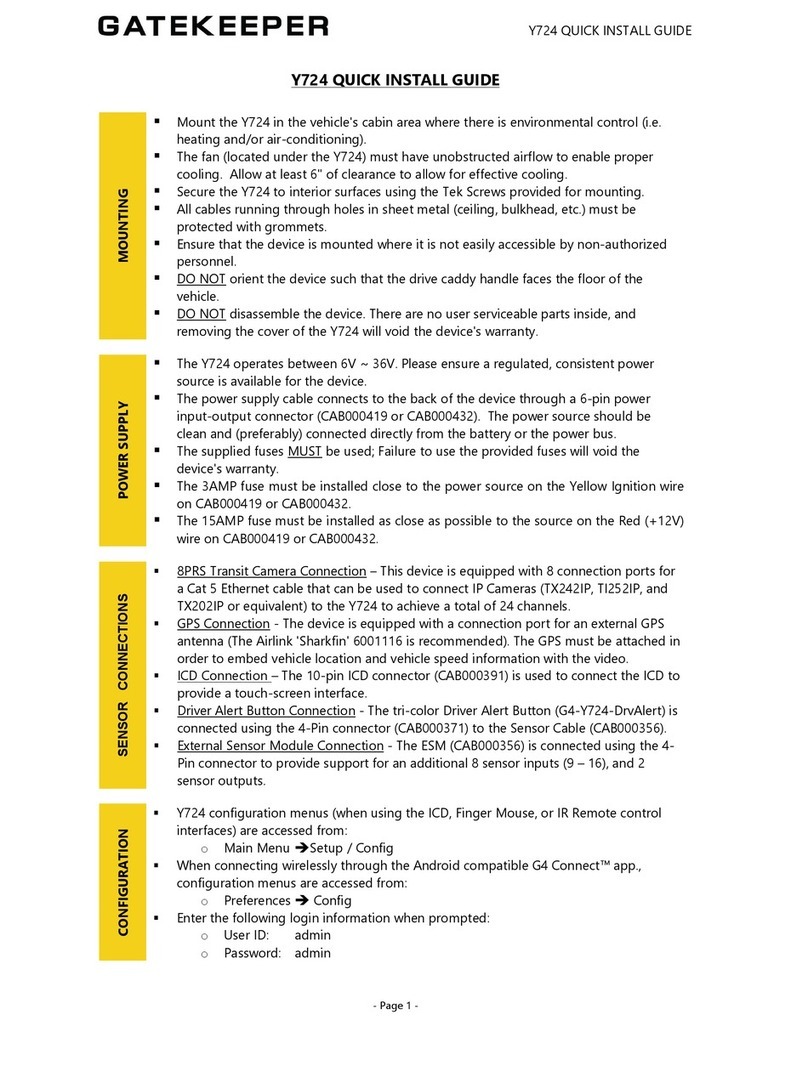
Gatekeeper Y724 Operation instructions

Y724
User Operating Manual
Document Ref. No. : DN3089
Version No. : 2.2
Document Date : March 2019

2 of 149
TABLE OF CONTENTS
1 – INTRODUCTION
.................................................................................................................................... 7
1.1 - WELCOME TO YOUR Y724 DEVICE ......................................................................................................... 7
1.2 - IMPORTANT SAFETY AND HANDLING INFORMATION ................................................................................. 7
1.2.1 - Preparing to Install
...................................................................................................................... 7
1.2.2 - Installing the Y724
....................................................................................................................... 7
1.2.3 - Operating the Y724
...................................................................................................................... 7
1.2.4 - Updating the Y724
....................................................................................................................... 8
1.2.5 - Repairing the Y724
...................................................................................................................... 8
2 – THE Y724 AT A GLANCE
........................................................................................................................ 9
2.1 - TECHNICAL SPECIFICATIONS .................................................................................................................. 9
2.2 - Y724 FRONT VIEW: SECURITY DOOR OPEN ........................................................................................... 10
2.3 - Y724 REAR VIEW: PORTS & CONNECTORS ............................................................................................ 11
2.4 - WHAT’S IN THE BOX ........................................................................................................................... 12
2.5 - OPTIONAL PERIPHERALS & ACCESSORIES .............................................................................................. 13
3 – GETTING STARTED WITH THE Y724
.................................................................................................. 14
3.1 – POWERING UP ................................................................................................................................... 15
3.2 – LOGGING ON ..................................................................................................................................... 15
3.2.1 - Default Login Credentials
........................................................................................................... 16
3.2.2 – Login Step-by-Step
.................................................................................................................... 17
3.3 – NAVIGATING THE Y724 ...................................................................................................................... 18
3.3.1 - The Interactive Control Display (or ‘ICD’)
.................................................................................. 19
3.3.2 -
The Finger Mouse
...................................................................................................................... 20
3.3.3 - The IR Remote Control
.............................................................................................................. 20
3.4 – NAVIGATING ON-SCREEN VIEWS ......................................................................................................... 21
3.4.1 – Single Camera On-Screen View
................................................................................................. 21
3.4.2 - Double Camera On-Screen View
................................................................................................ 22
3.4.3 – Nine Camera On-Screen View
................................................................................................... 23
3.4.4 – The “Video Loss” Display
........................................................................................................... 24
3.5 - GUIDE TO COMMON NAVIGATION ACTIONS .......................................................................................... 24
3.6 – Y724 STARTUP SCREEN LAYOUT .......................................................................................................... 27
4 – THE Y724 MENU SYSTEM
.................................................................................................................... 28
4.1 - SINGLE CAMERA ON-SCREEN VIEW ...................................................................................................... 29
4.2 - DOUBLE CAMERA ON-SCREEN VIEW .................................................................................................... 30
4.3 - 9 CAMERA ON-SCREEN VIEW .............................................................................................................. 30
4.4 - THE PLAYBACK FUNCTION ................................................................................................................... 31
4.5 - SYSTEM INFORMATION (“BIZ MENU”) ................................................................................................... 31
4.5.1 – System Information: Version Info
.............................................................................................. 32
4.5.2 – System Information: Modules Wi-Fi
.......................................................................................... 32
4.5.3 – System Information: Modules Location
...................................................................................... 32
4.5.4 – System Information: Server Status
.............................................................................................. 33

3 of 149
4.5.5 – System Information: Environment
............................................................................................. 33
4.5.6 – System Information: Storage
...................................................................................................... 34
4.5.7 – System Information: ECO-Driving Status Info
............................................................................ 34
4.5.8 – System Information: ECO-Driving OBD Data
............................................................................. 35
4.5.9 – System Information: ECO-Driving 6Axis Data
............................................................................ 35
4.5.10 – System Information: T&H Sensor
............................................................................................. 35
4.6 – THE MAIN MENU ............................................................................................................................... 36
5 – INITIAL SETUP
..................................................................................................................................... 37
5.1 – DATE & TIME SETTINGS ...................................................................................................................... 37
5.2 - VEHICLE IDENTIFICATION INFORMATION .............................................................................................. 39
5.3 - SETTING BASIC PREFERENCES ............................................................................................................... 40
5.3.1 – Ignition On/Off Delay Time
....................................................................................................... 40
5.3.2 – Speed Measurement
................................................................................................................... 40
5.4 – USER ACCOUNTS ................................................................................................................................ 41
5.5 – VIDEO RECORDING SETTINGS .............................................................................................................. 42
5.6 - SETTING UP IP CAMERAS .................................................................................................................... 45
6 – VIEWING RECORDED DATA
.............................................................................................................. 45
6.1 – PLAYBACK ........................................................................................................................................ 45
6.1.2 - On-Screen Playback Controls
..................................................................................................... 46
6.2 - REC SEARCH ..................................................................................................................................... 48
6.3 - LOG SEARCH ..................................................................................................................................... 52
7 - INTERACTING WIRELESSLY WITH G4 CONNECT™
.......................................................................... 55
7.1 - THE G4 CONNECT INTERFACE .............................................................................................................. 56
7.2 - THE ‘COMMON’ TAB:
YOUR DEVICE’S STATUS
........................................................................................ 57
7.3 - THE ‘PREVIEW’ TAB:
VIEWING LIVE VIDEO
........................................................................................... 57
7.4 - THE ‘PLAYBACK’ TAB:
MANAGING RECORDED VIDEOCLIPS
...................................................................... 58
7.4.1 - Using ‘Video Export’ to export a videoclip
.................................................................................. 60
7.5 - THE ‘PREFERENCES’ TAB:
CONFIGURING YOUR DEVICE
........................................................................... 61
8 - CONFIGURATION
................................................................................................................................ 61
8.1 – CONFIGURATION MENU QUICK REFERENCE .......................................................................................... 62
8.2 – NAVIGATING THE CONFIGURATION MENU ............................................................................................ 62
8.3 - INTERFACE CONTROLS USED FOR CONFIGURATION ................................................................................. 64
8.4 - BASIC SETUP ...................................................................................................................................... 66
8.4.1 - Regist(ration) Info
...................................................................................................................... 66
8.4.2 - Time Setup
................................................................................................................................ 68
8.4.3 - Startup
...................................................................................................................................... 72
8.4.4 - User Setup
................................................................................................................................. 74
8.4.5 - Network
.................................................................................................................................... 77
8.4.6 - Application
................................................................................................................................ 84
8.4.7 - Network
.................................................................................................................................... 84
8.5 - SURVEILLANCE ................................................................................................................................... 84
8.5.1 - Live View
.................................................................................................................................. 85
8.5.2 - Record
....................................................................................................................................... 91
8.5.3 - IPC Setup
................................................................................................................................ 101
8.6 - COLLECTION .................................................................................................................................... 103

4 of 149
8.6.1 - General
................................................................................................................................... 104
8.6.2 - Snap Setting
............................................................................................................................. 111
8.7 - ALARM ........................................................................................................................................... 115
8.7.1 - Base
......................................................................................................................................... 115
8.7.2 - Video
...................................................................................................................................... 123
8.7.3 - Advanced
................................................................................................................................ 127
8.8 - MAINTENANCE ................................................................................................................................ 129
8.8.1 - Config
..................................................................................................................................... 130
8.8.2 - Filedata
................................................................................................................................... 131
8.8.3 - Upgrade
................................................................................................................................... 132
8.8.4 - Storage
.................................................................................................................................... 133
8.8.5 - Reset
....................................................................................................................................... 133
9 - SPECIAL TOPICS
................................................................................................................................. 133
9.1 - SETTING UP AN IP CAMERA ............................................................................................................... 133
9.2 - SD CARDS ....................................................................................................................................... 135
9.2.1 - SD Card File Formatting
........................................................................................................... 135
9.3 - CONFIGURING SUBSTREAM RECORDING QUALITY ................................................................................ 136
9.4 - UPGRADING Y724 FIRMWARE ........................................................................................................... 138
10 - Y724 INSTALLATION INSTRUCTIONS
............................................................................................. 138
10.1 - MOUNTING THE Y724 ..................................................................................................................... 139
10.2 - CAMERA MOUNTING ...................................................................................................................... 139
10.3 - WIRING INSTRUCTIONS ................................................................................................................... 140
10.3.1 - Connecting the Power Supply
................................................................................................ 140
10.3.2 - Fuse Connections
................................................................................................................... 141
10.4 - SENSOR CONNECTIONS .................................................................................................................... 141
10.4.1 - DB26 Sensor / Serial Cable Connection (CAB000356)
.............................................................. 141
10.4.2 - ICD Connection
..................................................................................................................... 142
10.4.3 - GPS Connection
..................................................................................................................... 142
10.4.4 - IP Camera Connection
........................................................................................................... 142
10.4.5 - Driver Alert Button Connection
............................................................................................. 143
10.4.6 - External Sensor Module (ESM) Connection
............................................................................. 143
10.5 - CONNECTING INTERFACE PERIPHERALS ............................................................................................. 144
10.5.1 - Infrared Remote Control
........................................................................................................ 144
10.5.2 - Finger Mouse
......................................................................................................................... 144
10.5.3 - Interactive Control Display (ICD)
........................................................................................... 144
10.6 - CABLING DIAGRAM ........................................................................................................................ 145
11 - USING THE COMRAD™ DOCKING STATION
.................................................................................. 146
12 - MAINTENANCE AND TROUBLESHOOTING ................................................................................. 147
13 - CUSTOMER LIMITED WARRANTY ................................................................................................ 148
14 - CONTACT INFORMATION .............................................................................................................. 149

Y724 User Operating Manual
5 of 149
GLOSSARY
Term/Abbreviation
Description
ACC
Accelerometer
DVR
Digital Video Recorder – a device which records audio and video
input from the cameras and stores it to a hard disk drive and/or an
SD card for retrieval and viewing.
GPS
Global Positioning System – it is a radio navigation system that
allows land, sea, and airborne users to determine their exact
location, velocity, and time 24 hours a day, in all weather
conditions, anywhere in the world.
H.264
Also known as MPEG-4 Part 10, Advanced Video Coding (MPEG-
4 AVC), this is a video coding format that is currently one of the
most commonly used formats for the recording, compression, and
distribution of video content.
H.265
Also known as MPEG-H Part 2, High Efficiency Video Coding
(HEVC), this video coding format is the successor to H.264
commonly used for the recording, compression and distribution of
video content.
HDD
Hard Disk Drive – a high capacity data storage mechanism used
for storing and retrieving large amounts of digital data. It is one of
the primary storage mediums used by the digital video recorder
for storing the recorded audio and video, the other being SD
cards.
ICD / ICD2
Interactive Control Display, purpose-built touch screen monitors
for operating Gatekeeper Systems DVRs.
IO
Input/output
IP Camera
An Internet protocol camera, or IP camera, is a type of digital
video camera commonly employed for surveillance, and which,
unlike analog closed circuit television cameras, can send and
receive data via a computer network and the Internet.
IR Remote
A handheld, wireless controller used to operate the DVR using
light signals in the infrared (IR) range. Infrared light requires line
of sight to its destination.
LAN
Local Area Network – it is a computer network that interconnects
computing devices within a limited area such as a work area or an
office building.
LCD Monitor
Liquid Crystal Display Monitor – it is a display screen that uses
electronically modulated segments controlling a layer of liquid
crystals and arrayed in front of a light source (backlight) or
reflector to produce images and text.

Y724 User Operating Manual
6 of 149
MAC Address
Media Access Control address – it is a unique identifier assigned to
network interfaces for communications on the physical network
segment.
OSD
On Screen Display – an image superimposed on a screen
commonly used to display information such as volume, channel,
date/time, device status, etc. It also forms the basis of the menu
system display which is used to configure the system settings of
the digital video recorder.
SD
Secure Digital Card – an ultra-small flash memory card designed
to provide high-capacity memory in a small form factor. It is a
commonly used high performance portable storage standard for
video and audio capture devices.
TCP
TCP is one of the main protocols in TCP/IP networks which
enables two hosts to establish a connection and exchange streams
of data. TCP guarantees delivery of data and also guarantees that
packets will be delivered in the same order in which they were
sent.
UDP
UDP is a simple connectionless transmission model with a
minimum overhead of protocol mechanisms.
USB
Universal Serial Bus – it is an industry standard that defines the
cables, connectors and communications protocols used in a bus for
connection, communication, and power supply between
computers and electronic devices.
UTC
Coordinated Universal Time is a time standard based on
International Atomic Time with leap seconds added at irregular
intervals to compensate for the Earth’s slowing rotation. It is the
primary time standard by which the world regulates clocks and
time.

Y724 User Operating Manual
7 of 149
1 – Introduction
1.1 - Welcome to Your Y724 Device
The Gatekeeper Systems Y724 Digital Video Recorder was designed to deliver best-in-class video
performance and reliability. With support for up to 24 video camera channels, the Y724 provides
high-definition video recording (1080P), high-efficiency video compression (H.264), and smart
thermal management technology. The state-of-the-art suspension system will compensate for the
shocks, vibrations, and environmental stresses your vehicle will encounter over the course of its
daily operations.
The Y724 maximizes flexibility in its support for touch-screen, wired, and infrared remote-
control interfaces. In addition, Gatekeeper’s ‘G4 Connect™’ application will provide wireless
(WiFi) access to your video data via an Android compatible mobile device (not included).
1.2 - Important Safety and handling Information
Before using the product, please ensure that you observe the safety precautions described below.
These safety precautions pages are intended to prevent injury to yourself or others, and to prevent
damage to the equipment. Always ensure that the Y724 is used correctly and in accordance with
the listed instructions, and be sure to also check the manuals included with any other Gatekeeper
product accessories (or third-party equipment) that you may use.
1.2.1 - Preparing to Install
§ Customers shall be responsible for addressing any systems on the vehicle that require
attention as a result of disconnecting the vehicle battery. This includes, but is not
limited to, entering a radio theft code, programming radio stations etc.
1.2.2 - Installing the Y724
§ All Gatekeeper Systems employees or contractors who perform electrical work (e.g.
installing, servicing or removing a DVR, installing a backup camera system, etc.) on a
customer vehicle shall ensure that the battery in the vehicle is disconnected before
work commences.
1.2.3 - Operating the Y724
§ The Y724 has an operating temperature range of -40°C to +65°C. It is good practice to
ensure that the product is mounted in a suitable location which does not exceed
acceptable temperature ranges during the course of normal operations.
§ Do not remove the cover of the product as this will void the warranty.
§ When a system has shipped with a GPS antenna, please ensure that the GPS antenna
is mounted externally on the roof of the vehicle with a clear view of the sky, and with
the magnetic side facing down.

Y724 User Operating Manual
8 of 149
§ The HDD is specially formatted for use in your DVR. Please do not format it yourself
using Microsoft Windows.
§ The SD Card is specially formatted for use in your DVR. Please do not format it
yourself using Microsoft Windows.
1.2.4 - Updating the Y724
§ Firmware updates (available from www.gatekeeper-systems.com) are system and
product model specific. These firmware updates must be applied to the Y724 system
only. Applying this firmware to any other Gatekeeper Systems DVR will void the
product warranty.
1.2.5 - Repairing the Y724
§ Your Y724 does not have any user-serviceable parts. Do not open or disassemble it or
attempt to repair it or replace any components.
§ Disassembling the Y724 may damage the device, or cause injury to your person. If
your product needs servicing, is damaged, or malfunctions, contact Gatekeeper
Systems for assistance. If you attempt to open it, you risk damaging your Y724 and
voiding the warranty.
If at any time there is a question about how to proceed, please contact Gatekeeper Systems
immediately at either 1-888-666-4833 or 1-604-864-6187 for assistance. Review all available
installation documentation, including technical bulletins. Additional resources, technical
bulletins and product tutorials can be found in the Support section of www.gatekeeper-
systems.com.

Y724 User Operating Manual
9 of 149
2 – The Y724 at a Glance
2.1 - Technical Specifications
Front: Security Door Closed
Rear: Ports and Connectors
Y724 Technical Specifications
Video
Video Channels
24 channels supported. IP Camera (16 channels directly on
DVR, plus 8 channels with 8 port switch)
Output
1 channel analog NTSC
Video Compression
H.264
Video Quality
User configurable – to 8 different quality levels
Resolution
Digital: Camera Dependent
Gatekeeper TI, TW, TX IP Cameras:
1080p (1920 x 1080), 720p (1280 x 720)
WD1 (928x480), WHD1 (928x240), WCIF (464x240),
HD1(704x240), CIF (352x240)
Video Resource
16 x 1080p @ 30FPS, 24 x 1080p @ 15FPS
On-Screen Display (OSD)
User configurable
Video Streams
Dual Streaming
Audio
Audio Channels
24 channels (16 channels (IP data stream) directly on DVR plus
8 channels (IP data stream) with 8 port switch)
Output
1 channel
Audio Compression
ADPCM
Storage
2 x 2.5" SATA HDD or SSD
HDD max size = 2TB
SDD max size = 4TB
Compatible drive thickness 7mm / 9.5mm / 15mm
Recording
Record Trigger
Schedule, alarms, sensor triggers (includes ignition)
Pre-Recording
Max 30 min
Post-Recording
Max 30 min
Playback
DVR Video Playback
1 channel local up to 6 channels using G4 Viewer Plus
Search Method
Date/Time, channel, event
Backup Mode
eSATA, and USB
Network
Ethernet
Ethernet RJ 45 port (10 / 100M / 1000M)

Y724 User Operating Manual
10 of 149
Cellular
Currently Unsupported
WiFi
802.11ac 5Ghz external, optional
GPS
GPS Location, Speed, Time Sync
Power
Input
Input 8V to 36V Ignition
Output
5V @ 500mA and 12V @ 500mA
Standby Current
<1 mA @ 12.6V
Physical
Dimensions
8.3” x 9.4” x 4.6” (211 mm x 238 mm x 116 mm)
Dimensions (incl. Cable Cover)
12.8” x 9.4” x 4.6” (325 mm x 238 mm x 116 mm)
Weight
9.26 lbs. (4.2Kg)
Environmental
Operating Temperature
+14°F to +158°F (-10℃ to +70℃)
Operating Relative Humidity
8%-90% non-condensing
2.2 - Y724 Front View: Security Door Open
1.
Hard Drive Retaining Screws
(x3): Remove to access on-board SSDs.
2.
SD Card / SIM Card Port
: Slide the door to the right to access the port. Ensure that the door is
closed prior to powering up the Y724 device.
3.
Infrared Remote Receiver
: IR port used to receive control signals from the remote control.
4.
LED Status Indicator
: Status indicator lights to communicate the device’s operational or alarm
status:

Y724 User Operating Manual
11 of 149
PWR
Illuminated BLUE indicates power supplied to device.
VLOSS
Illuminated RED indicates video loss.
ALM
Illuminated RED indicates that a sensor alarm.
REC
Illuminated GREEN indicates that the device is recording.
ERR
Illuminated / flashing RED indicates a hardware error.
LAN
Illuminated GREEN indicates an available network connection.
5.
eSATA Port
: Port to connect an external eSATA format drive.
6.
USB Port
: Port to connect external USB flash memory drive.
7.
Y724 Handle
: Handle for use in removing the hard disk (SSD) drive enclosure.
2.3 - Y724 Rear View: Ports & Connectors
1.
USB Port
: Standard USB 2.0 B connection.
2.
6 Pin Power Port
: 6 PIN 8~36V.
3.
ICD Port
(Panel Port): Connection for ICD2 user interface Panel.
4.
Serial Port
: 8 x colour coded input sensors; 2 x output; 2 x RS232; 2 x RS485.
5.
RJ45 Ports
: WAN/LAN connections. LAN connection to connect 8-port switch to permit
additional 8 x 1080P IP cameras to be connected.
6.
IP Camera RJ45 Ports
: Supporting up to 16 IP cameras.

Y724 User Operating Manual
12 of 149
7.
GPS Antenna Port
: Positioning; Speed detection; Time synchronization.
8.
WIFI Port
: 2 x 802.11 b/g/n Connections.
(Currently Unsupported, please speak with your
Gatekeeper sales manager about a Gatekeeper’s Wireless solution).
9.
3G/4G Port
: EVDO/TD-SCDMA/WCDMA/TDD-LTE/FDD-LTE
(Currently Unsupported,
please speak with your Gatekeeper sales manager about Gatekeeper’s MWM solution).
2.4 - What’s in the Box
Y724 Digital Video Recorder
(Y724 Assembly)
Mobile digital video recorder with best-in-
class video performance in a stable, reliable,
and secure form factor.
Cable Clamps (x2)
Power Cable
(part number: CAB000419 or CAB000432)
Vehicle ignition power cable to provide
power to the Y724 and its peripheral devices
and accessories.
Sensor Cable
(part number: CAB000356)
Sensor cable for use in connecting sensor
inputs to the Y724.

Y724 User Operating Manual
13 of 149
§
Power Line Fuse - Red
§
Ignition Line Fuse - Black
§
Fastening Screws
§
Hard Disk Drive Key
2.5 - Optional Peripherals & Accessories
Interactive Control Display
(part number: G4-ICD2 Assy)
The interactive control display (ICD2) is a
touchscreen LCD display used to access the
Y724’s menu system through an intuitive
touch-screen interface.
IR Remote Control
(part number: G4-304 RemoteCtrl)
* Includes accompanying LCD monitor
The infrared (IR) remote control can be used
to access the Y724’s menu system
Finger Mouse
(part number: FDM-G51)
* Includes accompanying LCD monitor
The trackball mouse can be used to access the
Y724’s menu system through a simple point-
and-click interface.

Y724 User Operating Manual
14 of 149
Gatekeeper External Sensor Module (ESM)
(part number: CAB000444)
Expanded sensor compatibility using the
Gatekeeper ESM; with support for an
additional 8 sensor inputs, and 2 sensor
outputs.
8-Port Switch
(part number: G4-IPDVR-8PSWITCH)
The 8-port switch can be used to connect up
to 8 IP cameras, and its engineered clamps
will keep cables securely fastened.
Tri-Coloured Driver Alert Button
(part number: G4-Y724-DrvAlert)
COMRAD™ Docking Station
(part number:)
External docking station for use in retrieving,
viewing, and administering recorded video
data.
3 – Getting Started with the Y724

Y724 User Operating Manual
15 of 149
3.1 – Powering Up
The Y724 is installed to make use of your vehicle’s power supply, and the device will be powered
on when your vehicle is in operation. The device will automatically shut down after a 5-minute
interval after the vehicle is powered off (default setting).
The Gatekeeper Project Team are able to mount and install the device into the vehicle based on
your requirements and in accordance with industry best practices from years of experience. If you
prefer to mount the device yourself, please refer to section 10 “Y724 Installation Instructions”
(page 141) for detailed hardware installation instructions.
Once the device has powered up, please verify that you can see the display on your LCD monitor
or ICD2 with live video from connected cameras shown.
3.2 – Logging On
Some of the tabs, and their associated system settings, require a login before they can be accessed
or modified. This is a security measure to ensure that system access is restricted to only
authorized users. The Y724 also keeps an operations log as an additional security and audit
measure.
A valid user account and associated login is required in order to access the following content on
the Y724:
Access from the Quick Menu:
§ Playback
NOTE: If the front-side security door of the Y724 is left open for longer than 30
seconds, the device will power itself off.

Y724 User Operating Manual
16 of 149
Access from the Main Menu:
§ REC Search
§ Log Search
§ Setup (* this function requires the user to be logged in as an administrator)
When attempting to access any of these functions, the system will check the user status of before
granting access. If the user is not already logged in, the system will prompt for log in credentials.
3.2.1 - Default Login Credentials
§ The system ships with two default user credentials:
Default administrator account
User name : admin
Password : admin
Default user account
User name : user
Password : user
Default user passwords may be changed by your system administrator through the user
management function found in the configuration section 8.4.4 "User Setup" (page 75).

Y724 User Operating Manual
17 of 149
3.2.2 – Login Step-by-Step
Step 1
§ The system will display the log-in dialog box as shown below.
§ Click on the drop down
(v)
button at the right corner of the
User Name
field.
§ A drop-down menu will appear which will list all the users who are set up to
access the system.
§ Select the user name to use for this log-in by clicking on the desired user name in
the list.
§ Your selected user name will be displayed in the
User Name
field.
Step 2
§ Click on the
Password
field to enter the password. This will open the on-screen
keyboard.
§ Use the on-screen keyboard to input your password.
§ When done, press the Enter
( 8 )
key on the on-screen keyboard.

Y724 User Operating Manual
18 of 149
Step 3
§ Click the
(Login)
button.
§ If the user credentials that were input are valid, the user will be logged-in and
given access to the advanced functions of the DVR.
§ Users may cancel out of the log-in process at any time by clicking the
(Cancel)
button.
3.3 – Navigating the Y724
Users can choose from three intuitive navigation devices with which to operate the Y724.
Depending on your product package, your Y724 will have come bundled with one of the three
following devices:
1) The Interactive Control
Display
2) The Finger Mouse
3) The IR Remote Control

Y724 User Operating Manual
19 of 149
3.3.1 - The Interactive
Control Display (or ‘ICD’)
§ The ICD operates using a
touch screen interface and
numeric keypad. Actions
can be performed by
touching or tapping the
on-screen buttons /
options, or by using the
appropriate keypad
buttons.
§
Touch Screen
: A single tap anywhere on the screen
(when showing video streams) will bring up the on-
screen quick menu. Another single tap anywhere on the
screen will hide the quick menu again. At all times,
tapping on an on-screen field, tab or button in the menu
system will select it. Tapping, holding and dragging will
also work for sliders and moveable items – allowing you
to perform click-and-drag actions.
§
Menu Key
: When viewing video streams, pressing this button will immediately jump to
the main menu screen.
- Access to the main menu requires that the user is logged into the system with
correct username and password.
§
Exit Key
: Pressing this button will move the user back to the previous screen. If viewing
video streams, then pressing this button will toggle between showing and hiding the on-
screen quick menu (similar to a single tap on the touch screen).
§
Arrow Keys
: These buttons can be used to move the cursor or menu highlight to the left
and right as well as up and down in order to select a button or menu item.
§
Enter Key
: Pressing this button will select the highlighted menu item (similar to tapping
on it).
§
Numeric Keypad
: These buttons are used for entering numeric input.
- When viewing video streams, pressing any button (from 1-9) will immediately
jump to the video stream from the corresponding camera. Pressing the button
zero (0) will cycle through the camera channels iteratively.

Y724 User Operating Manual
20 of 149
3.3.2 -
The Finger Mouse
§ Use the finger mouse track-ball to position the on-
screen pointer over the buttons / options, and click
the trigger or mouse buttons to execute an action.
§ Right Button: When viewing video streams,
pressing this button will toggle between
showing and hiding the on-screen quick
menu.
§ Trigger Button: Pressing this button will select
the screen area, button or menu item that the
on-screen pointer is currently pointed at.
§ Pressing and holding the trigger button whilst
simultaneously moving the track-ball will
perform a click-and-drag action.
§ Screens and menu options are displayed on the
accompanying LCD monitor.
3.3.3 - The IR Remote Control
§ The IR Remote Control enables you to move
an on-screen cursor to click a button or select
an option (by highlighting).
§ Screens and menu options are displayed on the
accompanying LCD monitor.
Other manuals for Y724
1
Table of contents
Other Gatekeeper DVR manuals
