manuals.online logo
Brands
  1. Home
  2. •
  3. Brands
  4. •
  5. Digital ID View
  6. •
  7. DVR
  8. •
  9. Digital ID View 5700 Series User manual

Digital ID View 5700 Series User manual

QUICK START GUIDE
5700 Series
&
VAX Series
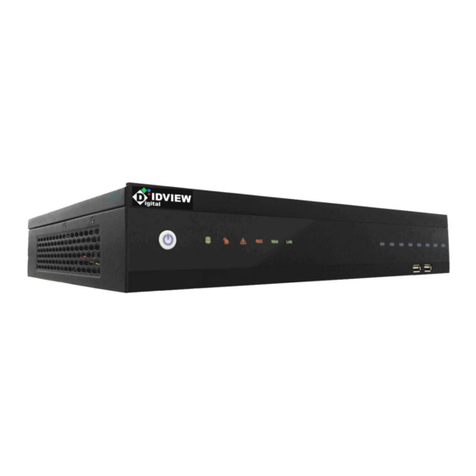
PC Linux Embedded DVR
Unpack the DVR then connect the cameras, mouse, network cable (if used) and monitor.
Connect the power cord.
The DVR will normally power up when the power cord is connected, if not, power
the unit on with the switch above the power cord – it will take approximately 1½ to
2 minutes for the DVR to complete the full boot cycle.
When fully booted, you will obtain the live view screen seen below and the DVR will be
recording. Most functions are disabled until you login.
If you move the mouse cursor over the Digital ID View logo , a window will appear
showing the product information which includes DVR firmware version, release date,
CPU, and clock speed.
When the cursor is positioned over the HD symbol in the upper right corner, it will
provide the hard drive size and usage (the DVR will overwrite the oldest data – circular
recording).
And, with the cursor over the computer network symbol , it will show the current IP
address (DCHP - obtain an IP address automatically - is on by default and if the network
cable is plugged in and connected to a switch or router, the DVR will acquire an address).
This address can then be used to access the DVR remotely (see the section on remote
access).
1
By clicking on the key button in upper right corner, the login screen will
appear as seen below. Login using the factory defaults:
User Name: ADMIN
Password: 0000
1. Using the mouse click on the Edit button and a virtual keyboard will appear – use
the mouse to type in the User Name (the user login is case sensitive – for the
default User Name make sure the caps key is on) and click OK.
2. Follow the same procedure for the Password.
3. Click OK on the login window.
If the unit was just powered up the menu will appear, otherwise, click on the menu button
to access the menu from the live screen view.
Below is a view of the menu. It has multiple tabs – one for the setup of each function.
For detailed configuration setup please refer to the user manual.
2
Network setup
If the DCHP is turned on (default) the DVR will acquire an IP address automatically. If
not, then go to the Network tab in the menu:
You can set the Network Status to ‘Obtain an IP address automatically’ or as in the above
example, enter the IP, NetMask, GateWay and, if used, the DNS. The areas on this page
have default settings – see the manual for more detailed information.
3
Playback of recorded video data.
On the main live view screen:
Make sure you have logged in - move the mouse cursor to the playback button and left
click on the icon. The Playback mode window will appear.
Click on the Refresh button, this will refresh the Date / Time window with all
available recorded data information.
Click on any Date/Time record or multiple records in the Recorded Video window and
click the Play button - the video will start to playback. At this time, all buttons - Stop,
Pause, Direction, Step, and Speed are active and can be used to control the playback.
To view another video record, press the Stop button, unselect the current video record
and repeat the steps above to replay any other record.
To save a video, select the video record(s) as in the above steps, click on the Save
button, a window will pop up and you can choose either a USB drive, CD writer, or a
CD-RW rewritable.
Click on the device you want to write the video file to and click on the enter button.
When the files have been transferred, click again on the enter button to return back
to the playback program.
To return to the live view screen, click the Exit button to stop and quit the playback
mode.
4
Logout, Reboot, or Shutdown
To lock the system controls, reboot the DVR, or power down the DVR you must first
stop recording. To stop recording, press the record button (the button will change from
a square to a round button), then press the power button which will activate
the screen shown below:
Logout: Clicking on the logout button will close the current user account and deactivate
most functions - a new login will be required to reactivate the controls.
Reboot: Clicking on the reboot button will exit the current operation and re-start the DVR.
Shutdown: Clicking on the shutdown button will turn the DVR off – the DVR can be
turned on by pressing the power switch above the power cord at the back of the DVR.
5
Remote viewing the DVR from LAN/WAN
The 5700 series allows users to monitor and control the DVR via the network. Entering
the IP address of the DVR in address bar of the Internet Explorer browser, a connection
between a PC and the DVR will occur. If you are having difficulty connecting to the
DVR, see the section on ActiveX.
In this example, the IP address of the 5700 series is 59.125.74.131. The functions on the
menu bar are briefly explained in the text boxes. These messages will also pop up by
moving the mouse cursor over them.
After the connection between 5700 series and the PC client is set up, a connection
window will pop up as shown in the next picture.
Usually, accepting the default settings and entering the Username and Password, the
DVR and PC will be connected. A detailed explanation of the features on the remote
connection window, are in the user manual.
6
ActiveX Setup
If you receive an error message similar to the one below:
Then follow the steps listed, there may be some variations due to different Internet
Explorer versions or setups but the instructions are similar in most versions of IE.
Step 1: To download and install ActiveX component, open an Internet Explorer window,
go to the Tools menu then Internet Options.
7
Step 2: Go to the security tab and click on the custom level button in the Internet Options
window. Click on the Custom Level button near the bottom of the window.
Step 3: If possible, change the custom setting to Low. If not, change the ‘Download
unsigned ActiveX controls’ to ‘Enable’ or ‘Prompt’ as shown below.
8
c
Also, it would be best to add the IP of your DVR as a trusted site in the security tab.
Step 4: If you login to http://xxx.xxx.xxx.xxx (DVR IP) you may see a security warning
on an unsigned ActiveX control. Click on ‘Install’.
9
5. If you see the Windows message about blocking the program, click on ‘Unblock’.
6. You should now be able to log into the DVR with your Username and Password. If
you are connecting to a router, you could also be required to port forward the video ports
(9000 – 9999). For more information on port forwarding go to www.portforward.com.
Upon a successful login the following Screen will be displayed:
10
Fast Forward and Rewind
Click on the Direction button, this button allows you to fast forward (left direction)
and rewind (right direction). Click on Speed button to increase the speed of fast
forward/rewind to X¼, X½, X2, X4 (x 4 means 4 times faster than the current speed).
Format Hard Drive
1. When a new hard drive is installed, the system will automatically format the hard
drive after rebooting the system.
2. Whenever the system boot up, a window will pop up and asking you if you would
like to reformat the hard drive. Click “Yes”, if you want to reformat the hard drive.
11

This manual suits for next models

1

Other Digital ID View DVR manuals

Digital ID View IV-MX4POENVR User manual

Digital ID View

Digital ID View IV-MX4POENVR User manual

Digital ID View SV+ User manual

Digital ID View

Digital ID View SV+ User manual

Digital ID View IV-411ECO User manual

Digital ID View

Digital ID View IV-411ECO User manual

Digital ID View 960H Series Operating instructions

Digital ID View

Digital ID View 960H Series Operating instructions

Digital ID View Real-time NETWORK VIDEO RECORDER User manual

Digital ID View

Digital ID View Real-time NETWORK VIDEO RECORDER User manual

Digital ID View NW-STA-5016 User manual

Digital ID View

Digital ID View NW-STA-5016 User manual

Popular DVR manuals by other brands

Boyo VTR1004 user guide

Boyo

Boyo VTR1004 user guide

JB Systems Light USB 1.1 REC Operation manual

JB Systems Light

JB Systems Light USB 1.1 REC Operation manual

Q-See QT5116 user manual

Q-See

Q-See QT5116 user manual

Az-Box Elite user manual

Az-Box

Az-Box Elite user manual

Samsung XRN-2010 user manual

Samsung

Samsung XRN-2010 user manual

Lorex LH150 ECO4 SERIES instruction manual

Lorex

Lorex LH150 ECO4 SERIES instruction manual

Wharfedale Pro 250DTRHDMI user manual

Wharfedale Pro

Wharfedale Pro 250DTRHDMI user manual

Appro DVR-3704 Installation & operation manual

Appro

Appro DVR-3704 Installation & operation manual

Samsung SRD-830 user manual

Samsung

Samsung SRD-830 user manual

Honeywell HRDP DVR user guide

Honeywell

Honeywell HRDP DVR user guide

TECHVIEW QV-3039 user manual

TECHVIEW

TECHVIEW QV-3039 user manual

D-Link mydlink DNR-202L/A2A user manual

D-Link

D-Link mydlink DNR-202L/A2A user manual

Four-Faith F-DVR200 user manual

Four-Faith

Four-Faith F-DVR200 user manual

Moxa Technologies MxNVR-MO4 user manual

Moxa Technologies

Moxa Technologies MxNVR-MO4 user manual

Hyundai HSS-880HCI user manual

Hyundai

Hyundai HSS-880HCI user manual

GE MobileView user manual

GE

GE MobileView user manual

Citizens Connected ADB 3800 Instructional manual

Citizens Connected

Citizens Connected ADB 3800 Instructional manual

Hunt Electronic HBD-09EE user manual

Hunt Electronic

Hunt Electronic HBD-09EE user manual

manuals.online logo
manuals.online logoBrands
  • About & Mission
  • Contact us
  • Privacy Policy
  • Terms and Conditions

Copyright 2025 Manuals.Online. All Rights Reserved.