Gates EZ ALIGN RED 7420-1000 User manual

EZ ALIGN™RED
PRECISION LASER ALIGNMENT
OPERATING INSTRUCTIONS
PART NUMBER 7420-1000
2 3
EZ ALIGN™RED PRECISION LASER ALIGNMENT OPERATING INSTRUCTIONS
Thank you for your purchase of the Gates EZ Align™
laser alignment system. These instructions will
introduce you to your new laser pulley alignment
components and their operation. We are confident
that Gates EZ Align™will bring you many years of
productive service if used properly.
The system consists of two units: the laser
transmitter and the reflector. Each unit is equipped
with powerful magnetic brackets that mount to
almost any pulley or sprocket.
Gates EZ Align™is the answer to misalignment
in belt driven machinery. It replaces older, less
accurate methods of pulley alignment such as
using a straight edge, string line, or the human eye
-- all techniques that lend themselves to error.
In today’s demanding maintenance arena where
tighter specifications and speedier results are a
must, Gates EZ Align™provides the accuracy and
reliability that traditional methods cannot. With
time and manpower at a premium, Gates EZ Align™
is your solution. Using the system requires no
training and a single operator can do the job!
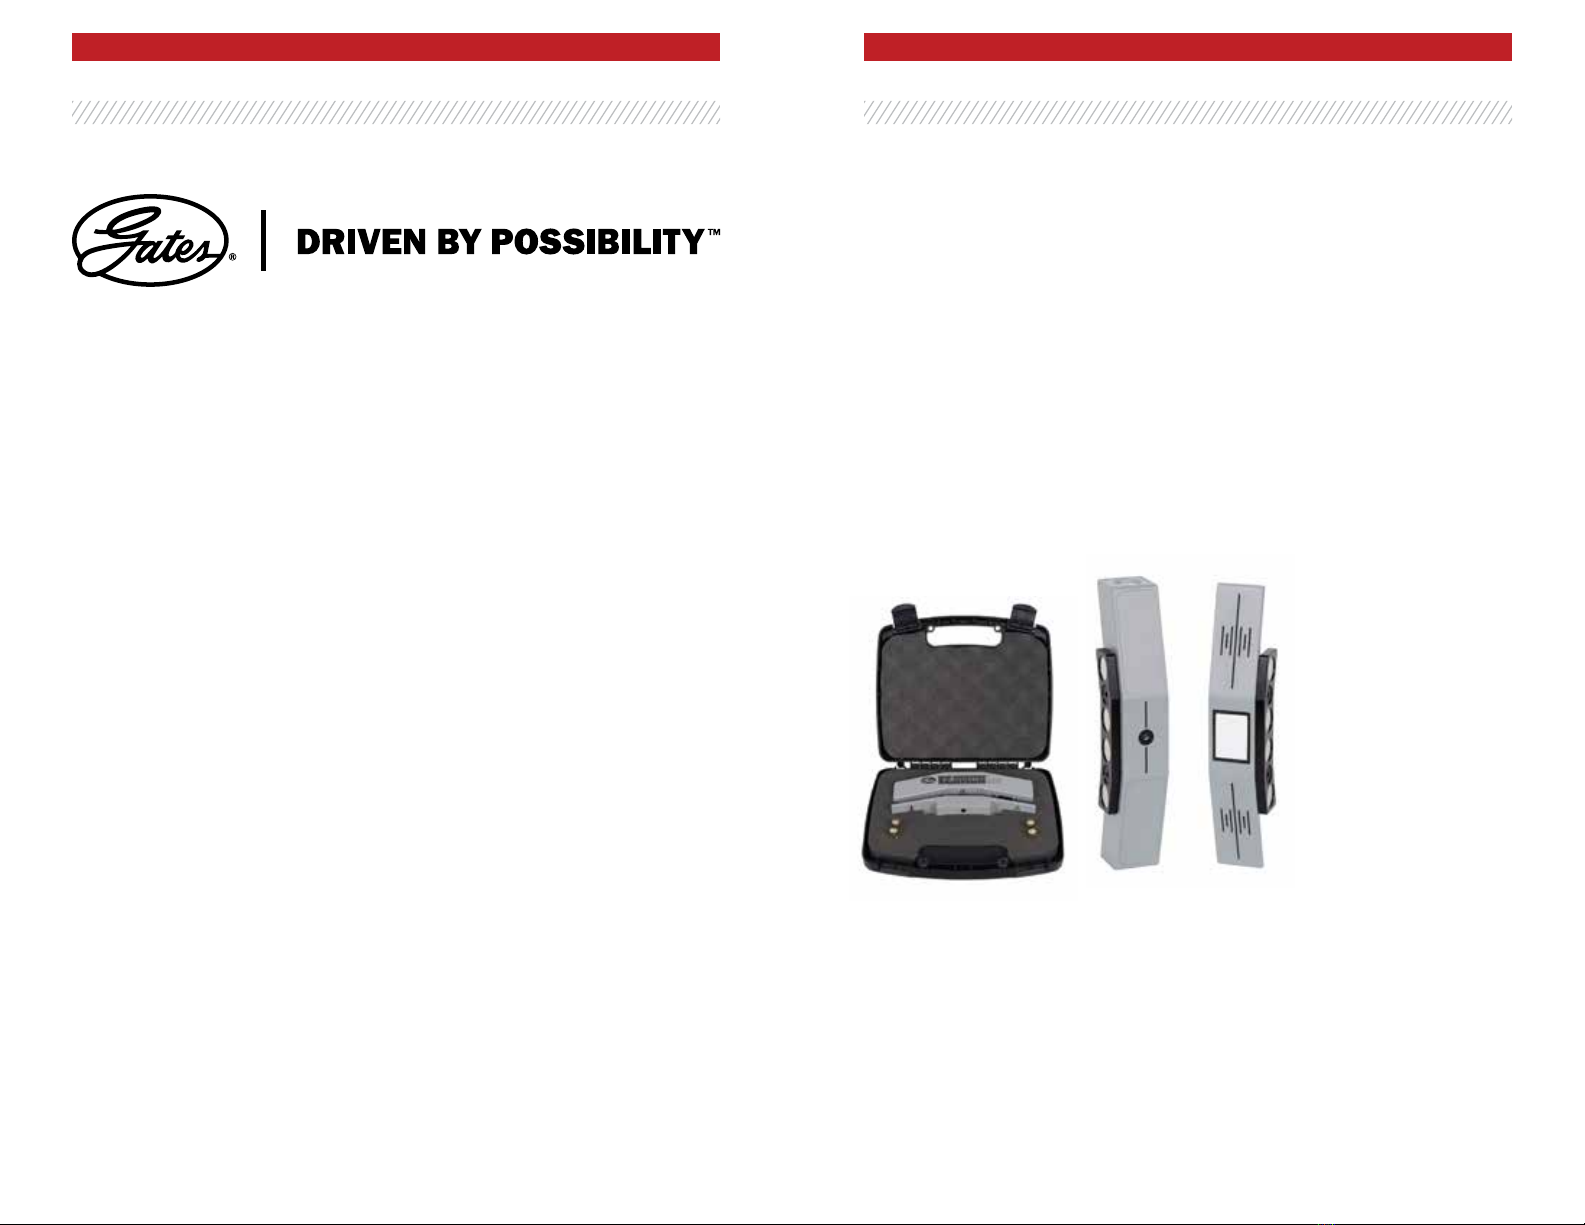
GATES EZ ALIGN™RED
7420-1000
System consists of:
• EZ Align™Laser Transmitter with AAA
alkaline batteries and class II laser diode
• EZ Align™Reflector Unit
• High density polyethylene Carrying Case with
die cut foam insert
• User Manual
7420-1000 Gates
EZ Align™Red with
carrying case and cut
foam insert
EZ Align™Laser
Transmitter (left) and
EZ Align™Reflector
(right)

4 5
EZ ALIGN™RED PRECISION LASER ALIGNMENT OPERATING INSTRUCTIONS
FOREWORD
Welcome to laser pulley alignment using Gates
EZ Align™. This patented, easy-to-use device from
Gates Corporation will enable you to perform pulley
alignment tasks with ease and precision.
This document is intended not only to guide you
on the operation of the system, but also to provide
useful and related information about belt and
pulley alignment.
An aligned pulley system reduces both pulley and
belt wear, and reduces equipment vibration, which
in turn leads to improved machine performance.
Proper pulley alignment reduces unscheduled
downtime, and improves the reliability of your
equipment.
Gates EZ Align™provides an innovative approach
to alignment, using Gates tested, proven reflected
laser beam technology.
At Gates Corporation, we strive to produce high
quality documentation, and therefore welcome your
feedback. If you have comments or suggestions to
help us improve our documentation, please let us
know by emailing PTPAsupport@gates.com.
CAUTION
Always lock-out
the electrical
power to the motor
prior to performing
any maintenance
Failure to do so
could result in
serious injury or
death to personnel
and may cause
damage to
equipment
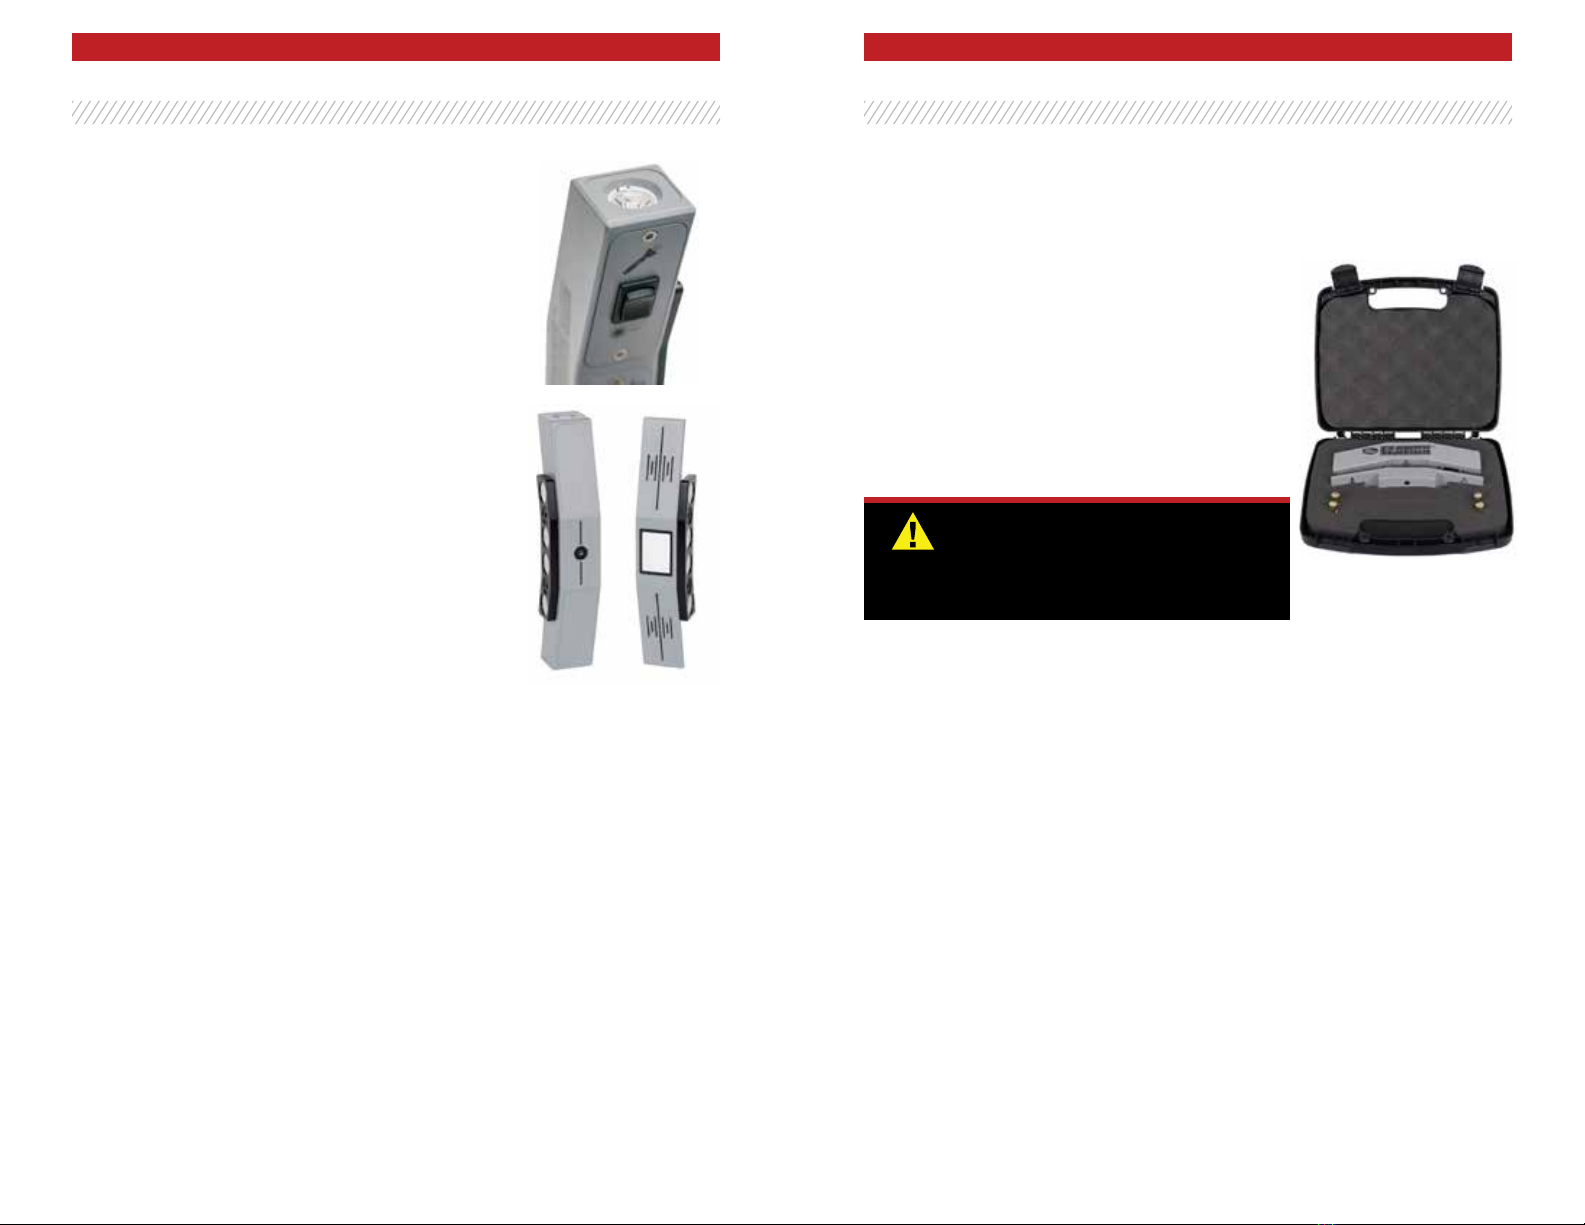
Battery
Thumb
Screw Hole
Location
Rocker Switch
Laser / Off / Flashlight
2 AAA Alkaline Batteries
INTENDED USE
Gates EZ Align™is designed for aligning belt
drives in industrial environments. This simple
alignment system requires only one operator.
Gates Corporation assumes no liability for damage
or injury resulting from uses other than those
described in this document.
COMPLIANCE
Gates EZ Align™conforms to all relevant CE
requirements. Per Annex II.B of the Machinery
Directive (98/37/EC) IEC608-25-1 EN 60825-1
LASER SAFETY
The Gates EZ Align™system uses a Class II laser.
Class II lasers comply with the requirements
outlined in the FDA specification 21 CFR Ch. 1, Parts
1040.10 and 1040.11, as well as ANSI standards.
The Gates EZ Align™operates at a wavelength of
532nm. DO NOT look into the laser beam at any
time, including during set-up and adjustment of
operation.
CALIBRATION
The Gates EZ Align™is factory calibrated and
therefore should not require any adjustments. It is
recommended however, that the unit be returned
to the factory or an authorized service center each
year for calibration.
BATTERY OPERATION
Gates EZ Align™is powered with 2 AAA alkaline
batteries with an operating time of approximately
25 hours. To replace the depleted batteries,
simply turn and remove the two thumb screws on
the back of the transmitter to expose the battery
compartment. Remove the old batteries and
replace them with new ones.
6 7
EZ ALIGN™RED PRECISION LASER ALIGNMENT OPERATING INSTRUCTIONS
LED FLASHLIGHT
Built-in LED flashlight combined in one convenient,
compact design. Ultra-bright white LED with
100,000 hour bulb life, 150 lumens and 5000K
LED Color.
Due to the powerful magnets on the Gates EZ Align™
units, we recommend handling the assembly with
care. The units should be kept away from magnetic
materials such as watches, spectacle frames and
other items that could be damaged.
When not in use, the Gates EZ Align™magnetic
units should be stored in their durable case.
For maximum performance, ensure that the optics
on the laser transmitter, the reflecting surface
on the reflector and the outside housing of both
units are kept clean and dust free. The units may
be cleaned with a lint-free cloth or a swab using a
premium glass cleaner solution.
MAGNETIC BRACKETS
Powerful magnetic brackets hold the Gates EZ
Align™firmly in place
GETTING STARTED
Mount the units on the pulley faces to be aligned.
The reflector should be mounted onto the pulley to
be moved or adjusted, while the laser transmitter
should be mounted onto the stationary pulley. The
operator should determine which pulley is movable
and which is stationary. The movable pulley is
often the smallest one, and is often mounted to
the motor shaft. In some cases both pulleys and
shafts may need to be adjusted to achieve the
desired alignment.
Check to see if the offset distance from the pulley
mounting face to the groove is the same for both
pulleys. If not, the optional Offset Bracket Kit may
be very helpful.
GATES EZ ALIGN™SET-UP
Pulley alignment has never been so simple. Open
the Gates EZ Align™case and remove the two
compact and durable units that comprise the
alignment system. Turn the laser unit on using
the rocker switch located on the back of the
transmitter.
Do not look into the laser beam at
any time! Ensure that the machinery
or equipment to be aligned has been
locked out and tagged out.

8 9
EZ ALIGN™RED PRECISION LASER ALIGNMENT OPERATING INSTRUCTIONS
OFFSET BRACKET KIT (OPTIONAL)STANDARD MAGNETIC
MOUNTING
The Gates EZ Align™is equipped with a powerful
magnet bracket assembly, allowing the operator
to mount the system on almost any pulley face,
quickly and easily.
NONFERROUS PULLEYS AND
SPROCKETS MOUNTING
When mounting Gates EZ Align™to a nonferrous
pulley or sprocket, use the optional QUICK-GRIP
Micro One-Handed Bar Clamp.
Standard Bracket ½ Offset Bracket ¾ Offset Bracket
Use the optional Offset Bracket Kit with pulleys
when a large offset is required. The kit includes a
1/2-inch and a 3/4-inch offset bracket. Combine
both offset brackets to achieve a 1 1/4-inch offset.

10 11
EZ ALIGN™RED PRECISION LASER ALIGNMENT OPERATING INSTRUCTIONS
ALIGNMENT
CONDITION CHECK
Vertical Angularity Axial Offset Horizontal Angularity
MISALIGNMENT CONDITIONS AS
DISPLAYED ON THE GATES EZ ALIGN™
Vertical Angularity Axial Offset Horizontal Angularity
Offset
marks
Alignment Reference Lines
For different pulley edge thicknesses, use the
offset marks on the face of the reflector to establish
the amount of offset. The marks are in 1/8-inch
increments.
Alignment processes should be carried out in
an area protected from bright sunlight, or in
a shaded area, to allow easy viewing of the
laser line on the Gates EZ Align™units.
Misalignment conditions include vertical angularity,
horizontal angularity and axial offset. The position
of the transmitted laser line on the reflector
indicates vertical angularity and axial offset.
Horizontal angularity is indicated by the position of
the reflected laser line on the transmitter.
TYPICAL MACHINE
MISALIGNMENT CONDITIONS

12 13
EZ ALIGN™RED PRECISION LASER ALIGNMENT OPERATING INSTRUCTIONS
CORRECTING PULLEY
MISALIGNMENT
1. Correct vertical angularity by shimming
the movable machine using precut 304
stainless steel shims. Correction of this
angular misalignment can be observed on the
reflector.
2. Correct axial offset by adjusting the movable
pulley or machine axially. This correction can
also be observed on the reflector unit.
3. Correct horizontal angularity by adjusting the
movable machine laterally. The correction
can be viewed on the laser transmitter during
adjustment.
By following the three steps above, aligning the
belt drive should be completed quickly. However,
one alignment correction may affect other
alignment conditions, so these steps may need to
be repeated until the system is completely aligned.
Good alignment is achieved when the transmitter
laser line and the corresponding reflected laser line
coincide with the reference lines on the reflector
and laser transmitter respectively.
Good Alignment
IMPORTANCE OF GOOD
PULLEY ALIGNMENT
Good pulley alignment increases belt drive
reliability and efficiency by reducing premature
wear or failure of pulleys, belts and bearings.
Pulleys can be aligned using conventional string
and straight-edge methods, but this is often time
consuming and prone to error.
Gates EZ Align™is a laser system specifically
designed for the alignment of belt driven
equipment. Patented and proven reflected laser
beam technology significantly helps to reduce drive
installation time, manpower and potential errors
associated with pulley alignment and installation.
The Gates EZ Align™system uses a return beam
angle that is twice the angle of incidence, so
the reflected beam travels twice the distance,
dramatically enhancing accuracy. Alignment is
indicated with great precision, resulting in labor
savings and increased production uptime.
Straight-Edge Method
String Line Method

14 15
EZ ALIGN™RED PRECISION LASER ALIGNMENT OPERATING INSTRUCTIONS
MACHINE PREPARATION
Before commencing any work ensure basic safety
rules are adhered to.
CAUSES OF BELT FAILURE
Before beginning pulley alignment, examine
potential causes of belt or pulley failure and correct
them to prevent recurrence. Some causes of failure
could include poor drive maintenance (wrong
belt tension, pulley misalignment), environmental
factors (sunlight, harsh temperature fluctuations),
improper installation (wrong belts/sheaves,
belts forced onto grooves), or operating factors
(overload, shock load).
INSPECTION
Perform a visual inspection of the belts and of
each pulley and its grooves. Look and feel for
cracks, chips, or excessive groove wear. Proper
contact between the belts and the pulleys must be
ensured.
SOFT FOOT
Inspect the movable machine for “soft foot.”
Feeler gauges can be used under a loosened foot
to measure the gap. Shim the machine foot with
the largest amount of gap (the amount indicated
with the feeler gauges) until no reading is larger
than 0.05mm (0.002” or 2 mils). Use precut 304
stainless steel shims. Severe “soft foot” distorts
the machine frame when bolted down, causing
damage to seals and bearings. It could also lead to
high vibration levels on the machine bearings.
Loose
clothing or long
hair must never be
allowed anywhere
near belt-driven
machinery. All
equipment MUST
be locked out and
tagged out.
Worn belts or
pulleys and other
components should
be replaced before
proceeding with
pulley alignment.
DRIVE BELTS
The condition of the worn belt is a good indication
of the type of misalignment or other problems that
may be present. Belts must be changed as soon as
undue wear is detected. For a multiple-belt drive,
all belts must be replaced together. Only belts
from the same manufacturer should be combined
together in order for the belts to share the load
equally.
In order to replace the belts on a belt drive
system, they must first be loosened. This is often
accomplished by simply loosening the driver or
driven unit and reducing the center distance.
In other cases, an idler pulley may need to be
loosened and moved. Belts must never be forced
or rolled onto a pulley as this can damage the
pulley as well as the belt tensile cord.
New belts must be properly stored. They should be
kept in a cool, dry place with no exposure to direct
sunlight or heat. They also should not be hung
from single pegs. For further information, refer to
Gates Belt Drive Preventive Maintenance & Safety
Manual.
PULLEYS
If installing new pulleys and belts, ensure that the
correct belt/pulley combination and the correct size
belts have been selected. Existing pulleys should
be inspected carefully for wear and replaced if
necessary. Consult Gates Belt Drive Preventive
Maintenance & Safety Manual.
PULLEY RUN-OUT
Axial pulley run-out will influence alignment
readings. Axial run-out should be confirmed to be
within recommended limits.

16 17
EZ ALIGN™RED PRECISION LASER ALIGNMENT OPERATING INSTRUCTIONS
PULLEY ALIGNMENT
There are three basic parameters that describe
pulley misalignment. These include vertical
angularity, horizontal angularity, and axial offset,
and may occur in any combination.
There are several pulley alignment methods. The
most common include the straightedge or string
methods, in which the straightedge or strings
must touch the two edges of each pulley face
simultaneously (four-point contact for drives with
two pulleys). The pulleys should be rotated half a
turn and checked again. Since a string can bend
around corners, it is not easy differentiating
between axial offset and horizontal angularity when
only three-point contact is made. A straightedge or
string also cannot always detect twist angle.
Vertical Angularity Axial Offset Horizontal Angularity
Straight-Edge Method
By contrast, the Gates EZ Align™units mount
magnetically to the face of most pulleys. The
transmitter unit projects a laser line onto the
reflector unit, which is magnetically attached to the
other pulley face. Alignment involves ensuring that
the transmitted and reflected laser lines match
with the respective reference lines.
Stationary Pulley
Laser Transmitter Reflector
Movable Pulley
String Line Method
18 19
EZ ALIGN™RED PRECISION LASER ALIGNMENT OPERATING INSTRUCTIONS
Shown Vertical
Angularity
After Vertical
Angularity Correction
Shown Horizontal
Angularity
After Horizontal
Angularity Correction
Shown Axial Offset
After Axial Offset
Correction
The sequence
in which the
misalignment
correction is
carried out may
vary from one
situation to the
next.
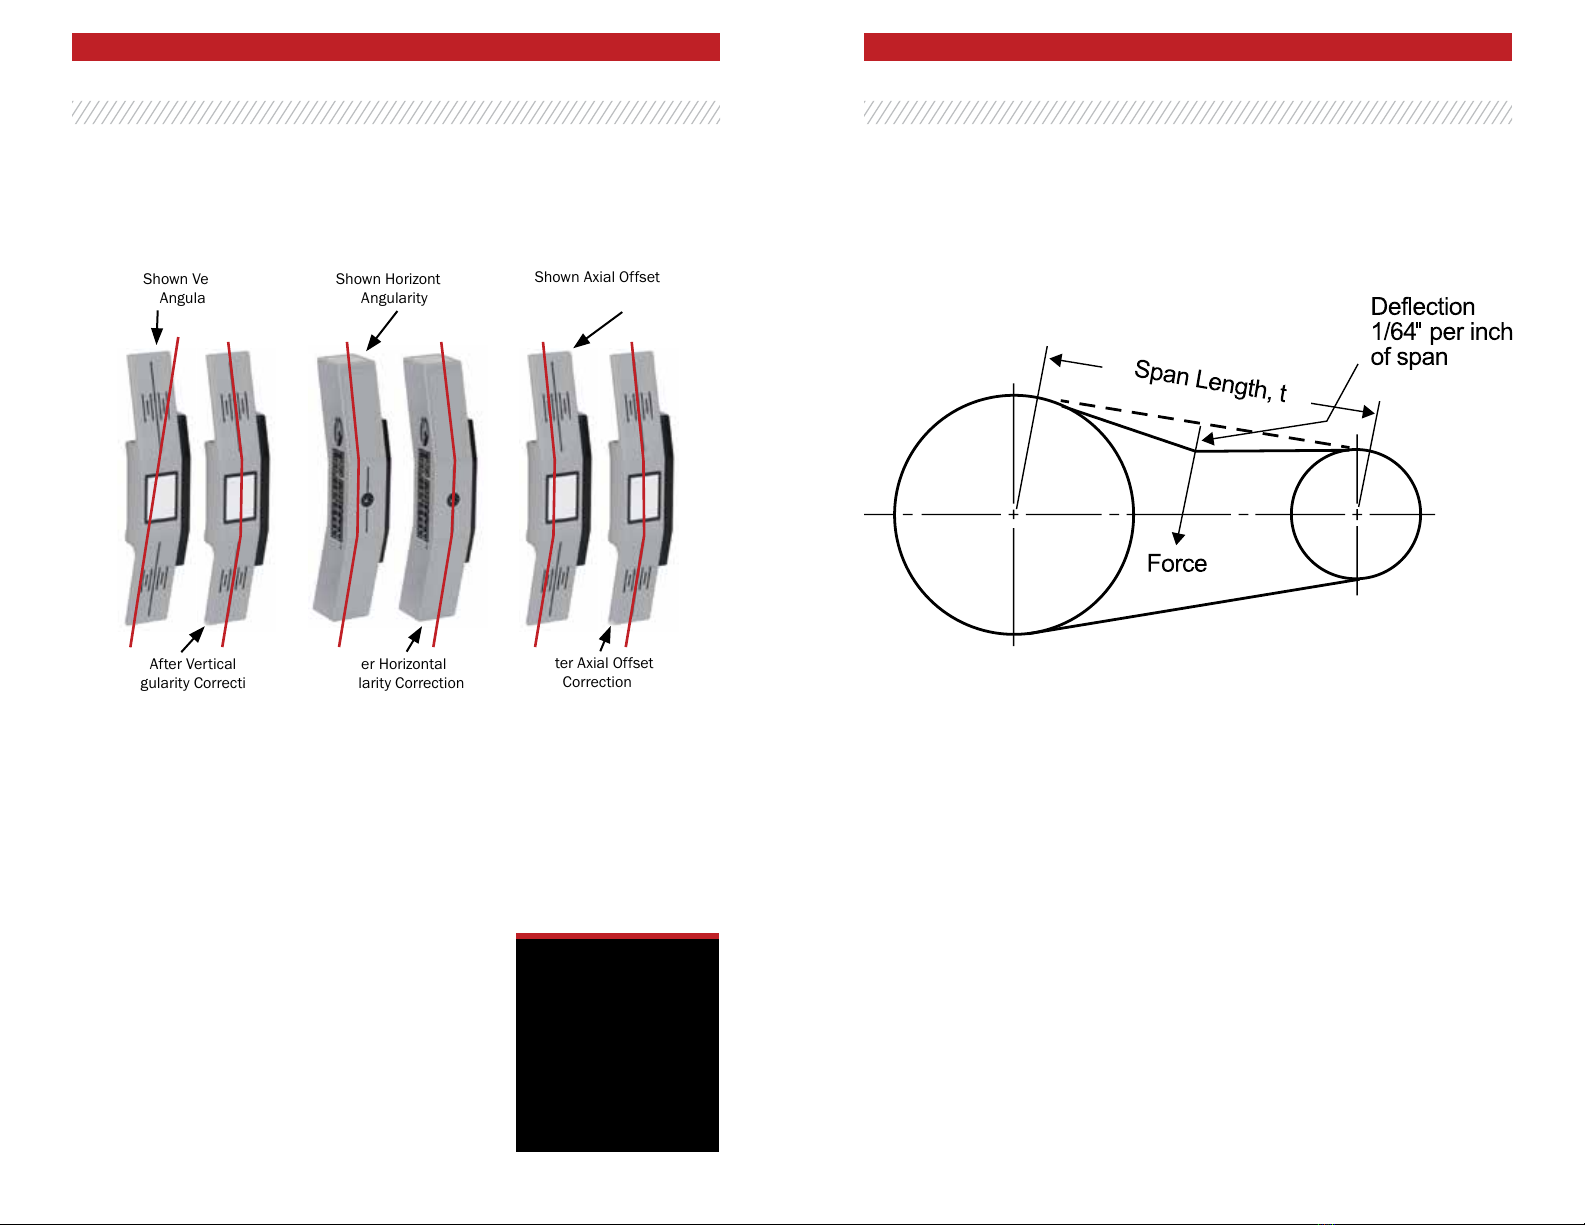
FORCE–DEFLECTION METHOD
OF BELT TENSIONING:
1. Measure the belt span length and calculate
the desired deflection distance (1/64" per
inch of span length).
2. Using a spring scale, press down on the belt
in the approximate center of the span, and
deflect the belt to the desired level. When
the desired deflection distance has been
reached, note the force registered on the
spring scale.
3. Adjust belt tension until the force required
to achieve the desired deflection distance is
within the belt manufacturer’s recommended
force values for the type of belts being used.
New belts generally require higher tension
levels than used belts because they have not
been run in.
Incorrect belt tension (as well as pulley
misalignment) adversely affects belt drive
reliability and efficiency. After the pulleys have
been aligned, it is very important to tension the
belts to manufacturer’s recommendations.
The following diagrams depict misalignment
conditions using the Gates EZ Align™and the
corresponding corrections as observed on the units.
Vertical angularity should be corrected first. This
is done by shimming the unit that the movable
pulley is mounted to. The next step is to correct
horizontal angularity. This is accomplished by
shifting or twisting the position of the unit that
the movable pulley is mounted to. Use lateral
jackscrews if available, otherwise the unit will need
to be loosened and re-positioned. Finally, correct
axial offset by moving the unit that the movable
pulley is mounted to axially or reposition one of
the pulleys on its shaft. Since performing one
alignment correction almost invariably affects the
other alignment conditions, this process may have
to be repeated several times.
Gates EZ Align™enables all three alignment
conditions to be monitored simultaneously. The
accuracy of the alignment is greatly increased and
the process can be completed quickly and easily.
20 21
EZ ALIGN™RED PRECISION LASER ALIGNMENT OPERATING INSTRUCTIONS
It is possible for belt tension adjustments to
alter pulley alignment, and for pulley alignment
adjustments to alter belt tension levels. The Gates
EZ Align™tool will help monitor the pulley alignment
condition as belts are adjusted for the correct
tension level.
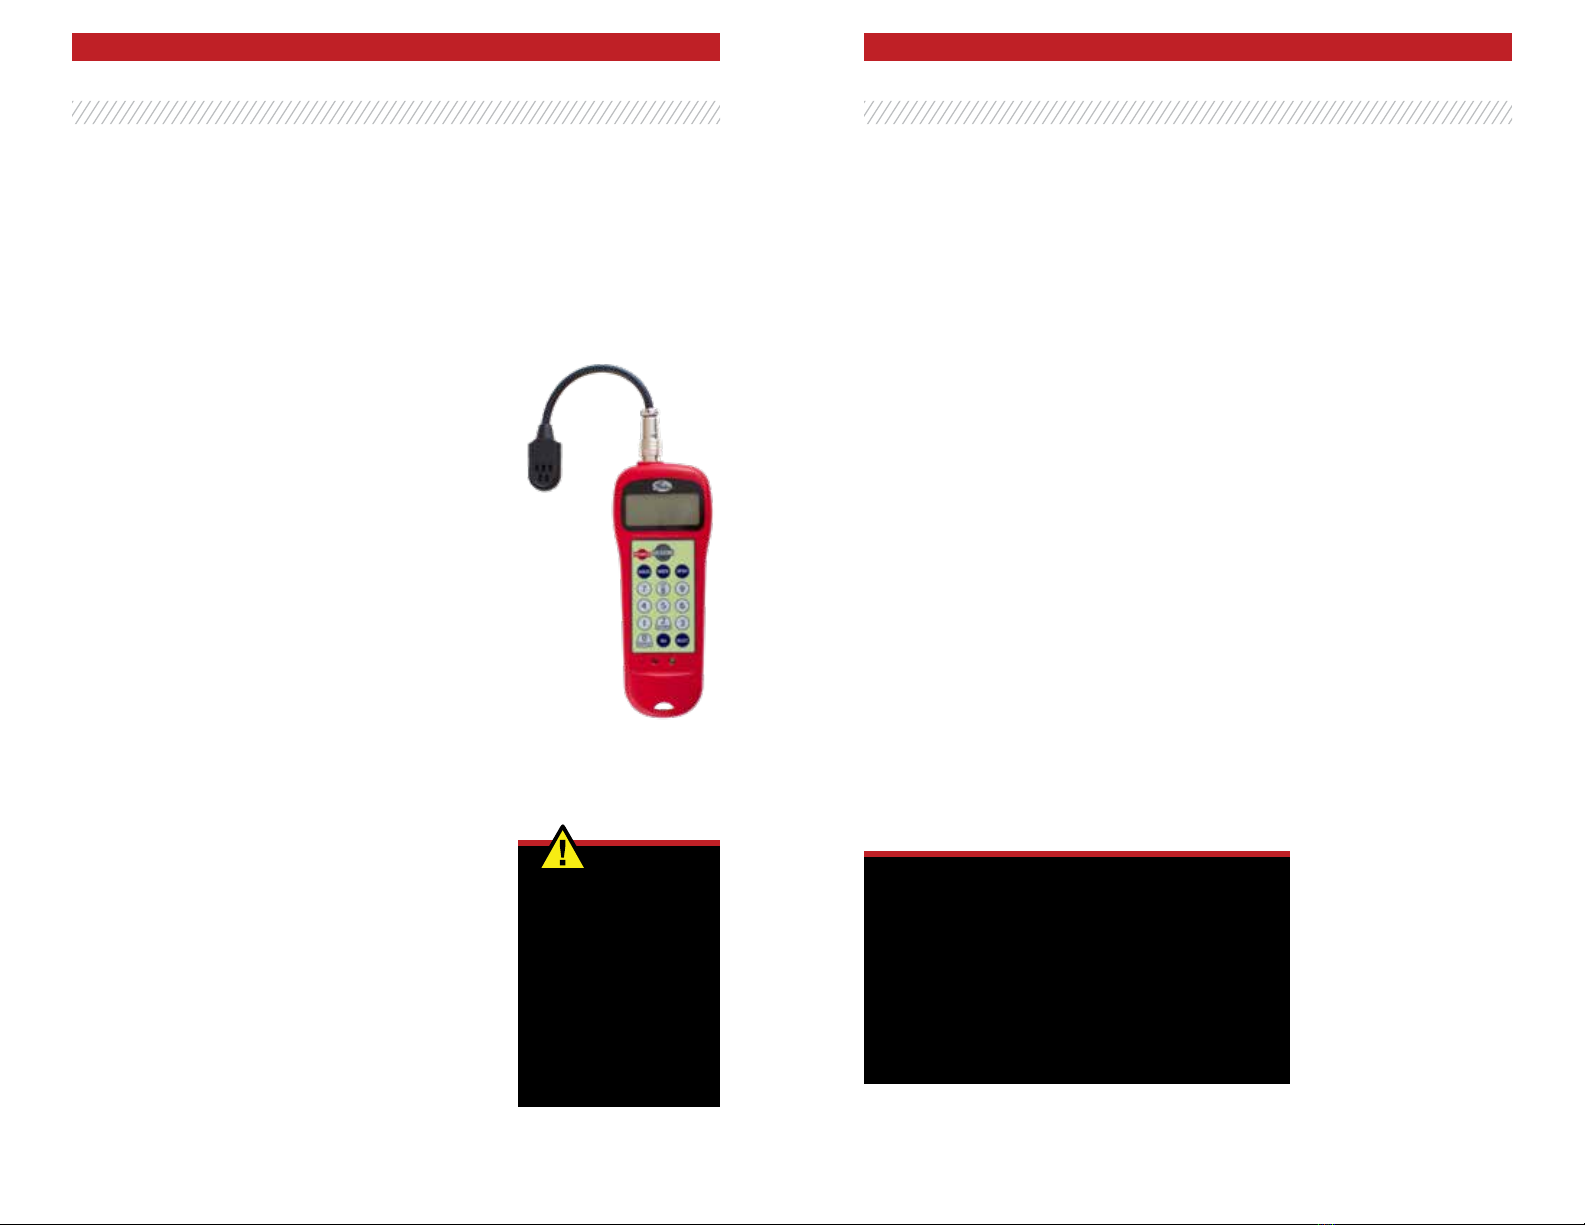
MEASURING BELT TENSION
WITH THE GATES SONIC
TENSION METER:
The Gates Sonic Tension Meter measures belt
span tension easily and accurately. Belt tension is
measured by plucking the belt span while holding
a sensor close by. Belt tension is adjusted until the
belt span frequency, or measured tension level, is
within manufacturer’s recommendations.
The final step is to operate the belt drive system for
a few hours, allowing the belts to stretch and seat
properly in the pulley grooves. The belt tension
level should then be checked to make sure it is
within manufacturer’s recommendations for new
belts. Now operate the belt drive for at least 72
hours. The belt tension level should be checked
again to make sure it is within manufacturer’s
recommendations for used belts.
Before
operating the
machinery check
to make sure
all tools and
equipment have
been properly
stowed and all
guards have been
securely replaced.
MAINTENANCE
Gates EZ Align™is designed with durable aluminum
housing designed to withhold harsh environments.
However, as with any precision instrument, care
should be taken to avoid unnecessary abuse.
1. The lenses of the transmitter and reflector
windows are coated with high performance
film. To clean, use a lint-free cloth or swab
using a premium glass cleaner solution.
2. The outside aluminum housing may be
cleaned with a clean damp cloth.
REPAIR / SERVICE
INSTRUCTIONS
1. Pack the equipment securely for shipment in
the original carrying case.
2. Enclose a note or letter including contact
information and the nature of the request or
problem. If the unit is under warranty, provide
confirmation of the purchase date.
3. If requested, estimates for non-warranty
repairs will be provided, otherwise work will
begin as soon as possible.
4. Return the equipment prepaid and insured
to the Gates Corporation Service Center.
For quick turn around, “2nd Day Air” or air
shipment is recommended.
5. There will be no charge for repairs within the
warranty period due to defective materials
and/or workmanship after the unit has been
received.
FOR REPAIRS SEND UNITS TO:
GATES CORPORATION
c/o Seiffert Industrial, Inc.
Attn: Service Department
1323 Columbia Drive, Suite 305
Richardson, TX 75081 USA
800-777-6363

22 23
EZ ALIGN™RED PRECISION LASER ALIGNMENT OPERATING INSTRUCTIONS
RECOMMENDED PULLEY
ALIGNMENT VALUES
The standard limit for V-belt drive alignment is 0.5
degrees, and 0.25 degrees for synchronous drives.
Most major belt and pulley manufacturers specify
these values. Pulley alignment can be set closer
than this if the alignment procedure is carefully
followed. The following table converts degrees of
misalignment to mils/inch and mm/100 (of pulley
diameter) of misalignment between the projected
planes of the pulley faces.
ANGLE OF
MISALIGNMENT
(DEGREES) MM / 100MM MM / INCH
0.1 0.18 1.75
0.2 0.35 3.49
0.3 0.52 5.24
0.4 0.70 6.98
0.5 0.87 8.73
0.6 1.05 10.47
0.7 1.22 12.22
0.8 1.40 13.96
0.9 1.57 15.71
1.0 1.74 17.45
Bold = within recommended limits for V-belt drives
Note that the values between 0.1 and 0.5 fall within
recommended misalignment limits for V-belt drives.
STATEMENT OF LIMITED WARRANTY
Gates Corporation warrants the Gates EZ Align™to be free of defects in
material and workmanship for a period of two (2) years. This twenty four (24)
month warranty period begins when the unit is received by the purchaser.
Gates Corporation will repair or replace, at its option, any defective part of
components of which notice has been given during the warranty period. Travel
and per diem expenses, if required, to and from the place where repairs are
made, will be charged to the purchaser at the prevailing rates.
Customers should send units to Gates Corporation (use address on previous
page) for warranty repairs; freight prepaid.
Any evidence of negligent, abnormal use, or accident with exception of the
previously stated warranty or an attempt to repair equipment by other factory
authorized personnel using Gates Corporation certified or recommended
parts, automatically voids the warranty.
Special precautions have been taken to assure proper calibration; however,
calibration is not covered by this warranty. Calibration maintenance is the
responsibility of the user.
The foregoing states the entire liability of Gates Corporation regarding the
purchase and use of its equipment. Gates Corporation will not be held
responsible for any consequential loss or damage of any kind.
This warranty is in lieu of all other warranties, except as set forth above,
including any implied warranty merchantability or fitness for a particular
purpose, are hereby disclaimed. This warranty is in lieu of all other warranties,
expressed or implied.

SEE MORE POWER TRANSMISSION SOLUTIONS AT GATES.COM/PT
EZ ALIGN is a registered trademark of Gates Corporation
Gates EZ Align™7420-1000 TECHNICAL DATA
EZ ALIGN™RED LASER TRANSMITTER
Operating Distance: 8 Ft. or Better
Accuracy: 1/16” At 6 Ft.
Laser Type: 635nm Visible Red Laser Diode
Laser Power: <1 mW, Class 2
Laser Line Length: 28” At 6 Ft. (711mm at 1.9m)
Controls: Laser ON/OFF/ON
Flashlight Rocker Switch
Operating Time: 25 Hours Continuous at 72° F
Battery Type: 2 AAA Alkaline Batteries
Operating Temp: 15° F (9° C) To 110° F (43° C)
Storage Temp: -4° F (-20° C) To 140° F (60° C)
Mounting: Magnetic
Weight: 17.0 Oz. (483 g)
Dimensions: 1.3” (33mm) W x 1.3” (33mm) D
x 8” (203mm) H
Housing: Aluminum, Powder Coat Finish
EZ ALIGN™RED REFLECTOR
Reflector Size: 1” (25mm) W x 1.4” (36mm) H
Mounting: Magnetic
Weight: 9.4 Oz. (266 g)
Dimensions: 1.3” (33mm) W x 0.9” (23mm) D
x 8” (203mm) H
Housing: Aluminum, Powder Coat Finish
CARRYING CASE
Material: Black, High Density Polyethylene
Dimensions: 10.25” (260mm) W x 8” (203mm) D
x 3” (76mm) H
Insert: Die Cut Foam
Total Package Weight: 2.6 Lbs. (1.2 kg)
© 2010 - 2018 Gates Corporation. All rights reserved.
17535-M-G 6/18
Table of contents


