Gavita Euroquatics Angel A1 User manual
Premium Aquarium LED
A1/A1P
User Guide
TM
i
Copyright © 2014-2015 Euroquatics. All rights reserved. No part of this User Guide may be reproduced, distributed, or
transmitted in any form or by any means, including photocopying, recording, or other electronic or mechanical methods,
without the prior written permission from Euroquatics, except in the case of brief quotations embodied in critical reviews and
certain other noncommercial uses permitted by copyright law. Euroquatics hereby grants permission to download a single
copy of this User Guide or any revision onto any form of electronic storage to be viewed for personal use, any unauthorized
commercial distribution of this manual is strictly prohibited.!
!
Information in this document is subject to change without prior notice. Euroquatics reserves the right to change or improve
documents and to make changes to the content without obligation to notify any person or organization of said changes.
DOCUMENT
ANGEL A1/A1P USER GUIDE
PRODUCT
ANGEL A1 & A1P LED FIXTURES
DOC VERSION
1.0
DOC DATE
19, DECEMBER 2014
Document
Welcome to the User Guide for your Angel LED system. While we try to maintain the most complete user guide
possible there are always questions that can come up that we miss or just don’t have the space to cover in this
manual. When that happens we welcome your questions and comments on our company FaceBook page, direct
through our website, or to any of our dedicated outlets around the world!!
!
For a complete listing of our international distributors please visit our site at www.euroquatics.com/where-to-buy
and click on your region!
!
In this User Guide we cover the basic set up, the use of our free mobile app and the fixtures embedded website.
We also have sections for firmware updates, trouble shooting as well as hardware info and a mounting template.
User Guide Introduction
EUROQUATICS
Oosteinderweg 127
1432 AH!Aalsmeer
The Netherlands
!
www.euroquatics.com

Table of Contents
ii
Section Page
Section 1 - Establishing Euronet
Connecting Multiple Lights to Euronet……..…………………….
Section 2 - Euroquatics Remote App Setup
Connecting the Euroquatics Remote App to WiFi.……………..
Overview of the Euroquatics Remote App……………………….
Selecting a Preset Program or Mood…………………………….
Setting the Mood: Quick Change…………………………..…….
Basic Setup Is Complete………………………………………….
Section 3 - Accessing the Web Interface
Accessing the Web Interface……………………………………..
Logging into the Web Interface……………………………….….
Web Interface Overview………………………………..….………
The Web Interface Settings Page…………………………..…….
Selecting a Program……………………………………..………..
Setting The Mood………………………………………………….
Edit or Create a New Program…………………………….….…..
Changing the Program Name……………………………………..
Understanding Demo/Test Mode………………..………………..
Understanding the Program Settings……………..………………
More on Editing a Profile……………………………..……………
More on the Extra Color Option on the A1P………..……………
Edit or Create a New Mood………………………….……….…..
Section 4 - General Setup and Installation Notes
Button Actions……………………….……………….……….…..
Manual Select Levels………………………………………….…..
Preset Moods……………………………………………………...
Preset Programs…………………………………………………..
Recommendations and Warnings……………………………..…
Section 5 - Troubleshooting
Troubleshooting……………………………………….……………
Section 6 - Servicing and Upgrades
Servicing and Upgrades………………………………..…………
Section 7 - Firmware Updates
Firmware Updates Overview…………………………….………..
Section 8 - Overview/Warranty
Dimensions……………….……………………………….……….
Mounting Template………………………………………………..
Product Hardware Overview……………………………………..
Warranty Information…………………………………….………..
!
1
!
2
3
4
5
6
!
7
8
9
10
12
13
14
15
16
17
18
19
20
!
21
21
22
22
23
!
24
!
25
!
26
!
27
27
28
28
Section 1 - Establishing Euronet
Even though all Angel LED fixtures are tested at our factory, we suggest you perform your own initial test and
configuration prior to installing your fixtures over your aquarium. This is a great way get a better understanding of
your new LED fixtures without having to stay perched above your aquarium, and the Angel will save your setting so
anything you configure will be saved.
1. Place each Angel fixture on the floor or a table, face up – but do not plug into power yet.
•This is also a great time mount your fixtures if you’re using our rail system.
•Take care to never look directly into the fixture when powered on.
2. Next, plug in power to the units one at a time.
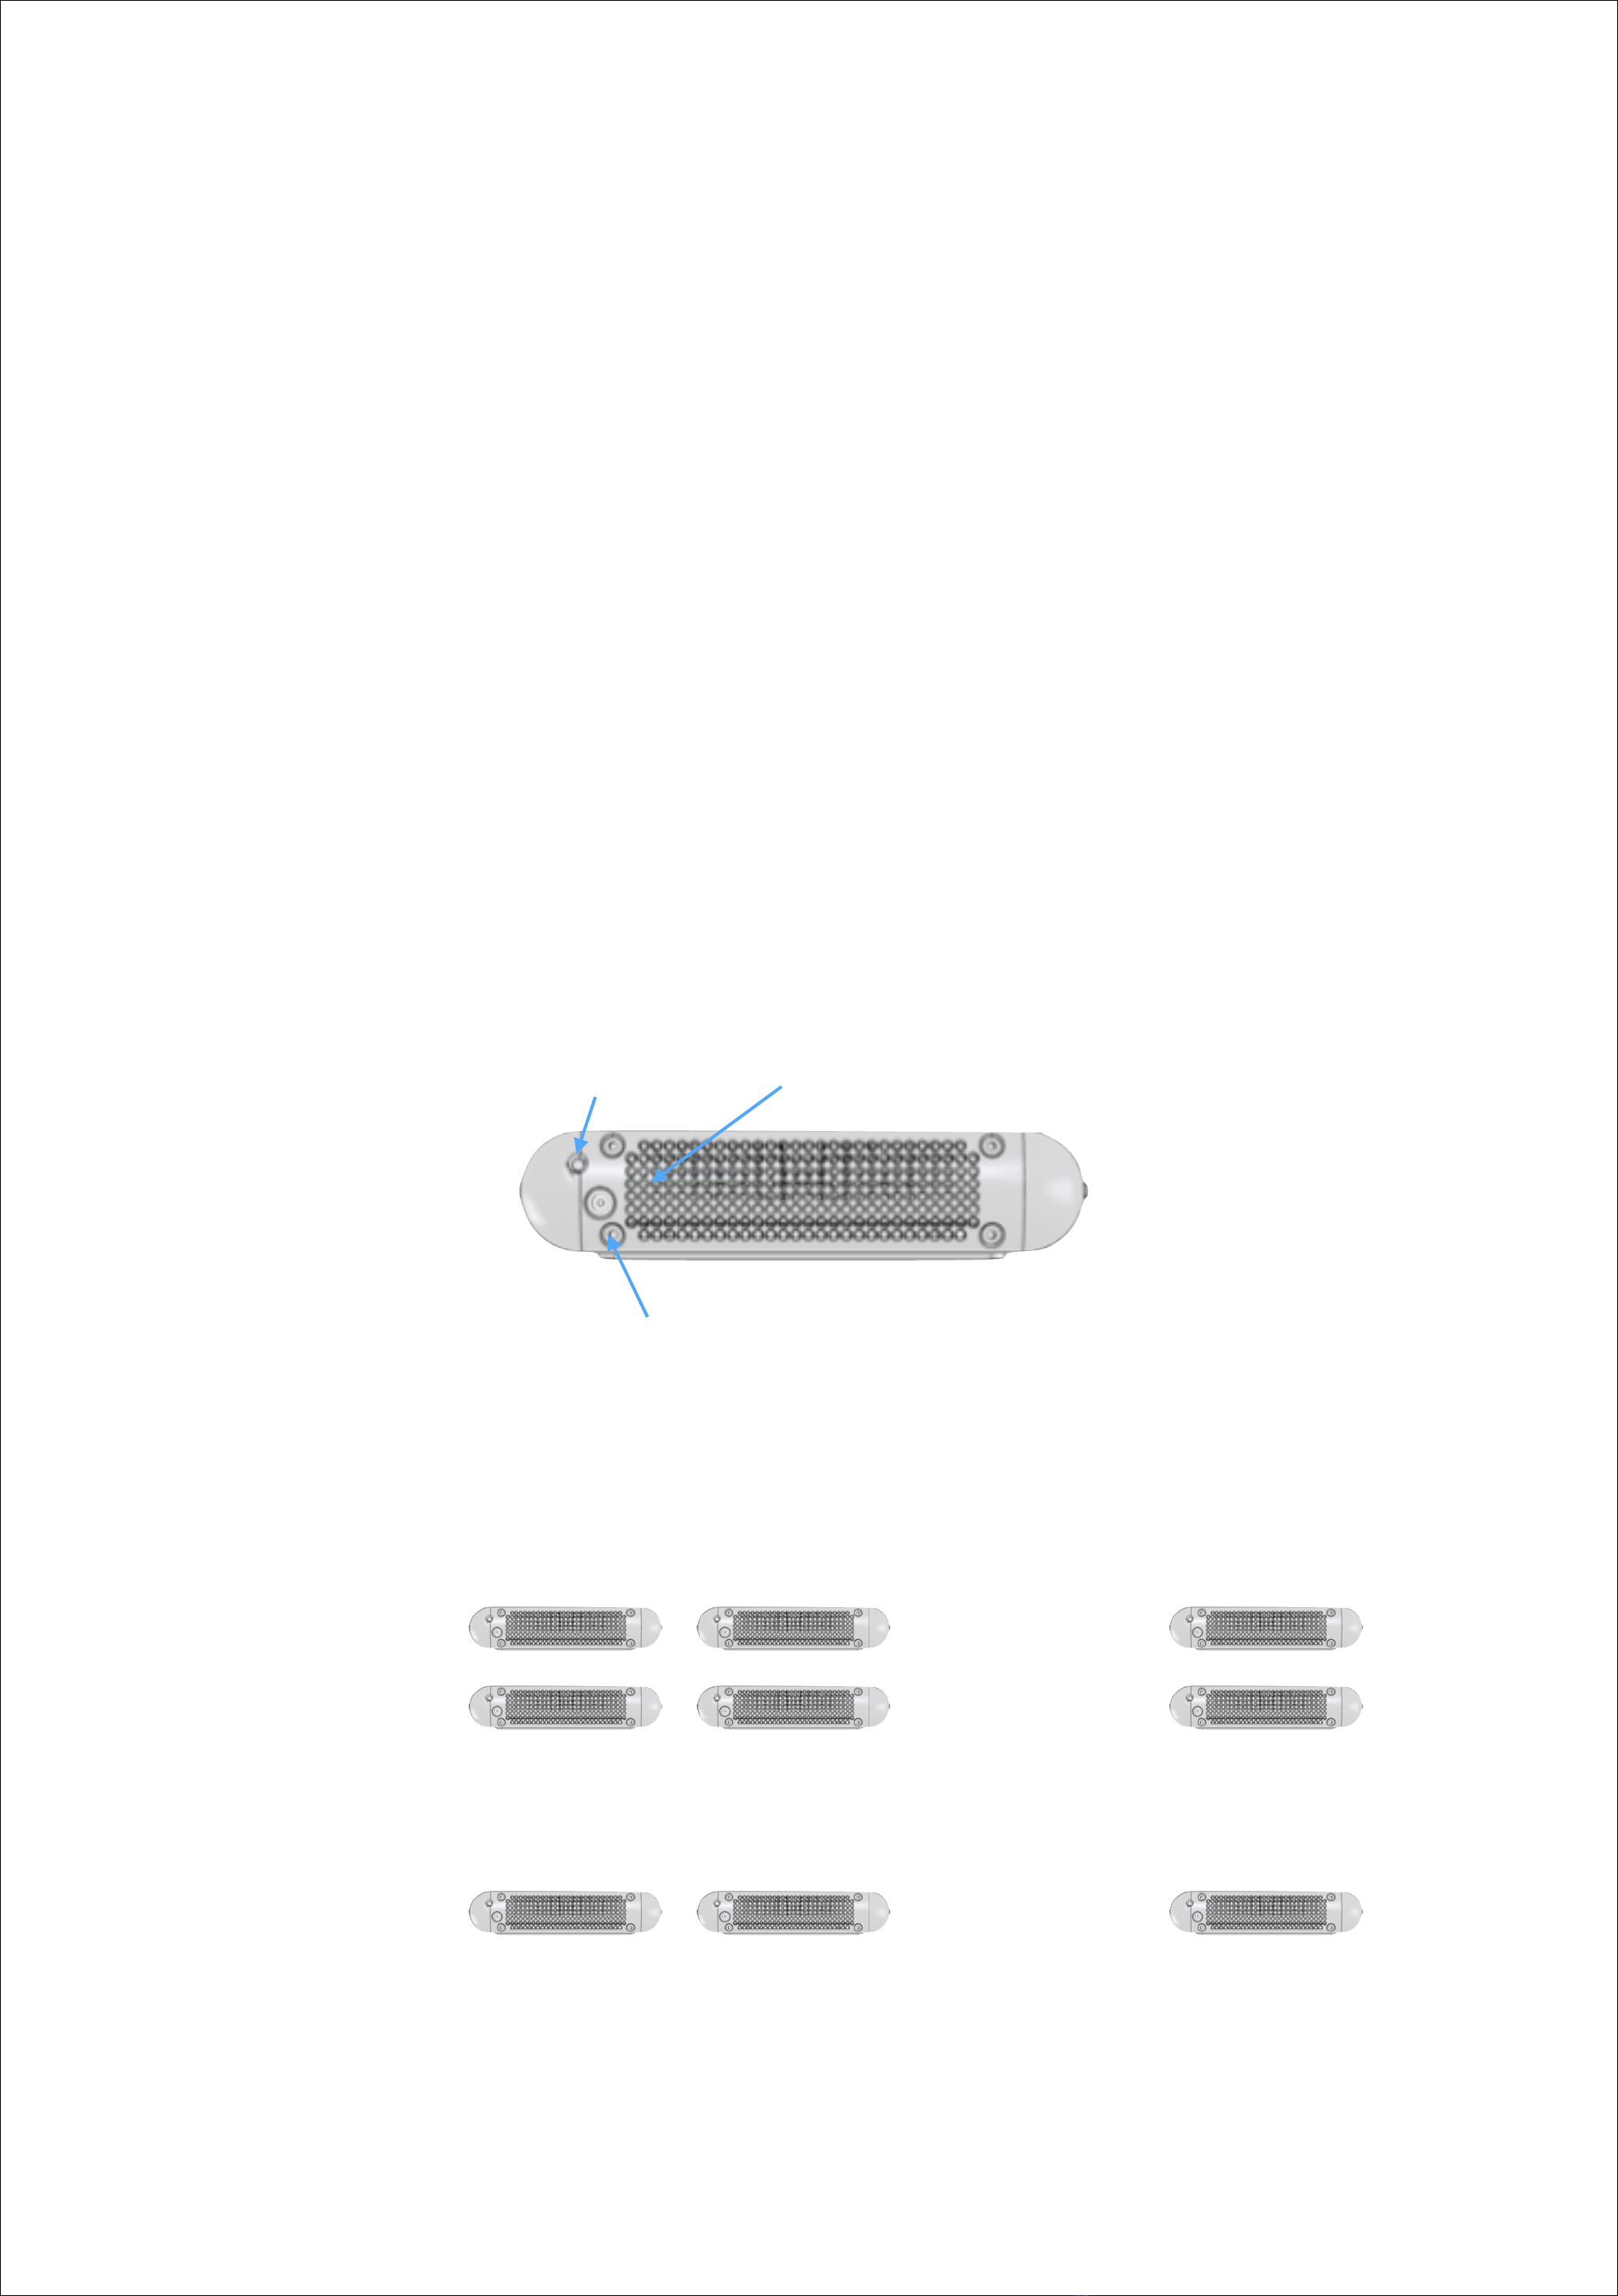
3. As you power additional units, enable the Euronet link. Here's how:
•Press the configuration button on first fixture for 2 seconds, and then immediately press the
configuration button on the second fixture for 2 seconds.
•You will see the indicator LED pulsing rapidly until the two units link. After linking, the indicator lights
will blink slowly to indicate pairing.
•Repeat this step one at a time for each new fixture added to your system until complete.
•We suggest using the button on the first fixture each time you pair a new fixture to the network.
•Wait about 30 seconds between pairings to insure all units are properly synchronized.
Power Plug
Configuration
Button
Indicator LED
(inside the fixture)
Connecting Multiple Lights to Euronet
Up to 100 fixtures!
…
The number of total systems depends on your home networks WiFi limits
Main Display Tank
Office Tank
SPS Frag Tank
…
…
…
…
…
1
Note:
Please refer to Section 4 for a complete list of the Configuration Button functions.
TM

Section 2 - Euroquatics Remote App Setup
All Angel fixtures come with built in WiFi capability. This allows you to quickly configure your LED system from smart
phone (using our Euroquatics Remote app), or on a Windows or Mac computer (using our web-based interface).
Once you have your Euronet network completed, your system is in “Access Point” mode. This allows you to use
your smart phone and our free Remote App to control your lighting. Here's how:
!
•Download our Remote App from the iOS App Store or the Android Play store for free by searching
"Euroquatics."
•Open up your smart phone's WiFi settings and find the network named “Euronet” and select it as shown in
picture #1.
•Open the Euroquatics Remote App on your phone.
•Select the Euronet network as shown in picture #2.
•After selecting the Euronet network, you’ll be taken to the configuration/home screen.
Direct Connect EURONET network
Picture #2Picture #1
Connecting the Euroquatics Remote App to WiFi
2
NOTE: The first time you log in the app will request the password for the system. The default password is
“Admin123” and is case sensitive!
!
If you can see the Angel system but the app wont seem to open close the app and go into network settings and
have your mobile device forget the network. Then reconnect and try again. Make sure you completely close the
app and that it’s not running in the background!
Default Password"
“Admin123”
First time login
This manual suits for next models
1
Table of contents


