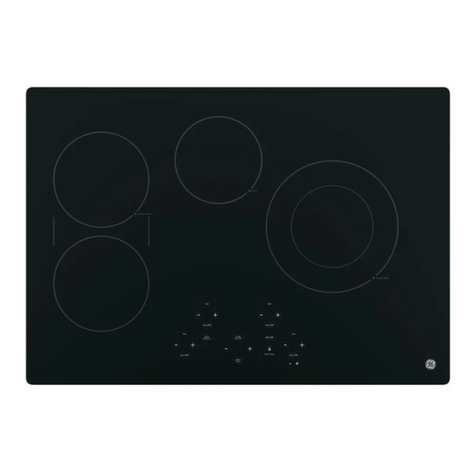
GE JP200 Operating instructions

ge.com
0
Safety Information ........ 2-5
Operating Instru_tions
Cookware Tips ............... 7
Surface Units ................ 6
Care and Cleaning
Control I_obs .............. 8
Porcelain Enamel Cooktop .... 8
Stainless Steel Cooktop ........ 8
Surface Units and Drip Pans .... 9
Installation Instru_tions
Electrical Connections ....... 10
Electrical Requirements ...... 10
Installation of the Cooktop .... 13
Optional Location ........... 12
Tools You Will Need ......... 10
Typical Location ............ 11
Troubleshooting Tips ....... 14
Consumer Support
Consumer Support . . . Back Coxer
'Warranty .................. 15
GEQuality Product
JP200
JP201
JP202
Write the model and serial
numbers here:
Model #
Serial #
You can find them on a label on
the bottom of the cooktop.
49-80385 12-05JR

IMPORTANTSAFETYINFORMATION.
READALLINSTRUCTIONSBEFOREUSING.
AWARNING'!
For your safe_, the information in this manual must be followed to minimize the risk of fire or
explosion, electric shock, or toprevent property damage, personal injury, or loss of fife.
SAFETYPRECAUtiONS
When using electrical appflances, basic safety precautions should be followed, including the following:
• Use this appliance only for its intended • CAUTION:_tems of interest to
use as described in this manual.
•Do not attempt to repair or replace any
part of your cooktop unless it is specifically
recommended in this manual. All other
servicing should be refetTed to a qualified
technician.
•Be sure yonr appliance is properly
installed and grounded by a qualified
technician in accordance with the
provided Installation Instructions.
•Before performing any service,
DISCONNECT THE COOKTOP PO_&:ER
SUPPI,Y AT THE HOUSEHOI,D
DISTRIBUTION PANEL BY REMOVING
THE FUSE OR SWITCHING OFF THE
CIRCUIT BREAKER.
•Do not leme children alone--rhildren
should not be left alone or unattended in
an area where an appliance is in use. They
should nex>r be allowed to sit or stand on
any part of the appliance.
•Do not allow anyone to climb, stand or
hang on the cooktop.
children should not be stored in cabinets
abox> a cooktoi>--children climbing on
the cooktop to reach items could be
seriously injmed.
Never wear loose-fitting or hanging
gm_nents while using the appliance. Be
carefifl when reaching for items stored in
cabinets ox>r tim cooktop. Flammable
material could be ignimd if brought in
contact with hot sur£_ce units and mac
callse severe bnl_/ls,
•Always kee I) dish towels, dish clofl_s, pot
holders and other linens a safe distance
flom your cooktop.
•Always kee I) wooden and plastic utensils
and canned food a safe distance away flom
your cooktop.
2

AWARNING!
For your safe_ the information in this manual must be followed to minimize the risk of fire or
explosion, electric shock, or to prevent property damage, personal injury, or loss of life.
ge.com
SAFETYPRECAUTIONS
When using electrical appliances, basic safety precautions should be followed, including the following:
• Teach children not to play with file
controls or any oilier part of die cooktop.
• Alwws kee I) combustible wall coveling_,
curtains or drapes a safe distance flom
your cooktop.
• Use only di T pot holders--moist or damp
pot holders on hot surfiaces may result ill
btlins from steam. Do not let pot holders
touch hot surfi_ce units. Do not use a towel
or other bulky cloth ill place of a pot
holder Such cloflls can catch fire on a hot
surl_ace unit.
• Do not use wamr on grease fires. Nex>r
pick up a flaming pan. Turn off tile
surl_ace unit then smother flaming pan
by coxering pan completely with well-
fitting lid, cookie sheet or fiat u W o_;
if available, a multi-pm])ose dry chemical
or foam-type extinguisher
Flaming grease inside or outside a pan
call be put out by co\_[Jng with baking
soda o_; if available, a mulfi-puq)ose di T
chemical or foam-type rite exfinguishen
3

IMPORTANTSAFETYINFORMATION.
READALLINSTRUCTIONSBEFOREUSING.
WARNING!
SAFETYPRECAUTIONS
.,..jl_rj_ • Do not store flammable materials near
the cooktop.
• Kee I) hood and grease filtet_ clean to
maintain good x>nfing and to a_oid
grease fires.
• Do not flame foods on the cooktop. If you
do flame foods under the hood, tnn_ the
_tn oil,
• Do ,lot let cooking grease or other
flammable materials accumulam on
fire cooktop.
• Do *lot touch surthce units. These smthces
m W be hot enougtl m 1)urn even thou01
they are dark in color: Dining and after
use, do *lot touch, or let cloflting or other
flammable materials contact sm£tce units
or areas nearl)y sur/_ace units; allow
sufficient time for cooling first.
Potentially hot surfaces include the
cooktop and areas fi_cing rite cooktop.
• To minimize fire possibility of bums,
ignition of flammable mamrials and
spillage, file handle of a container
should be unned toward rite center
of the cooktop without exmnding oxer
at Vnearby sm/_ace units.
•Always turn rite surfi_ce units to OFFbefore
renloving cookware,
• To ax_id rite possibility of a bum or electric
shock, alwws be certain that rite conuols
lbr all suiiZace units ate at the OFFposition
and all surface units are cool before
atmmpfing m lift or temoxe rite unit.
• Do not immerse or soak tim removable
surthce units. Do not put them in a
dishwasher
• Clean tile cookmp with caution. It"a
wet spong> or cloth is used to wipe spills
on a hot surPace, be carefltl to ax_id
smam buI_lS.
• Do not store or use combustible mamtials,
gasoline or other flammable vapors and
liquids in the vicinity of this or any
appliance.
• Clean only parts lismd in dtis Owner's
Manual.
• Do ,lot lem> paper products, cooking
umnsils or food on the cookmp when
*lot in use.
• Kee I) cooktop clean and free of
accumulation of gTease or spillox>rs
which may ignite.
•Nex>r heat unopened food containers.
Pressure buildup may make container
burst and cause injury.
• Ne_>r lea_ejars or cans of tZatdlippings
on or ,lear your cookmp.
• Ne_er use your appliance for wanning
or heating rite room.
COOKMEATANDPOULTRYTHOROUGHLY...
Cookmeat andpoultry thoroughly--meat toat leastan INTERNALtemperatureof 16O°Fandpoultry
toat least an INTERNALtemperatureof 180°ECookingto thesetemperaturesusuallyprotectsagainst
foodbomeillness.
4

ge.com
SURFACECOOKINGUNITS
Use proper pan size--This appfiance is equipped with different size surface units. Select cookware
having flat bottoms large enough to cover the surface unit heating element. The use of undersized
cookware will expose a portion of the surface unit to direct contact and may result in ignition of
clothing. Proper relationship of the cookware to the surface unit will also improve efficiencv.
• Never leax.e tile sui£tce units unattended
at high heat settings. Boilox.ers cause
smoking and gIeasy spillox.ers that may
catch on fire.
• Be S/li,e the drip pans and file duct ai.e not
covered and are in place. Their absence
during cooking could damag.e cookmp
parts and wiring.
• Do not use ahlminum foil m line the drip
pans. Misuse could result in a shock, fii.e
hazard or damag.e m file cookmp.
• Only certain Wpes of glass, glass/ceramic,
earthenware or other glazed containers ai.e
suitable for cookmp seiMce; others may
break because of tile sudden chang.e in
temperature.
• Kee I) an eye on foods being fried at HI
or Modium Nigh heat setdng_s.
• Foods for flTing should be as di T as
possible. Frost on flozen tbods or moisul_.e
on flesh foods can cause hot laat m bubble
up and ox.ei tile sides of file pan.
• Use little fht for effective shallow or deep-
fiat ruing. Filling tile pan mo flfll of fat call
cause spillox.ers when food is added.
• If a combination of oils or fats will be used
in ruing, stir tog.ether befbre headng, or
as fats melt slowly.
• Alwws heat laatslowly, and watch as it heats.
• Use a deep Pat themlomemr whenever
possible to prex.ent ox.erheating t_atbeyond
tile smoking point.
• Nex.er ItT m move a pan of hot fat,
especially a deep fat riTer _'ait until
tile fat is cool.
READANDFOLLOWTHISSAFETYINFORMATIONCAREFULLY.
SAVETHESEINSTRUCTIONS

Usingthecooktop.
Throughout this manual, features and appearance may vary from your model.
Cooktop Controls
Yoursurfaceunits andcontrolsaredesignedto
give youan inhbitechoice ofheat settlbgs for
surface unit cooklbg,
At both OFF "and HI tile control clicks
into position.
XA]/en cooking in a quiet kitchen, you
may hear slight clicking sounds--an
indication that tile heat settings you
selected are being maintained.
Switching heats to higher settings
always results in a quicker change than
switching to lower settings.
I II
How to Set the Controls
[] (;rasp tile control knob and push
down.
[] Turn tile knob to tile desired heat
setfin ,
Tile control must be pushed in to set
only fl'om tile OFFposition. \Allen tile
control is in any position other than OFF,
it may be rotated without pushing in.
Be st/i'e _ot/ttii'n tile control knob
to OFFwhen you finish cooking.
An indicator light will glow when a
suil'ilce unit is on.
Medium Medium
high low
(Onsomemodels)
Medklm tMedklm
high low
Medklm
(Onsomemodels)
Heat Setting Guide
HI Quick start for cooking; bring water to boil.
Medium High, (Setting halfway between HI and IVIED)
7-9 l\/]aint_lins a tilst boil Oil large _lillO/ints ofti)od.
MED, 4-6 Satlt(_ and brown; keeps ti)od at medium boil or simmei:
Medium Low, (Sett/bghalfway between IVIEDand LO)
I-3 Cook alter starting at HI; cooks with little water in a covered pan.
LO Steam rice, cereal; maintains serving temperature (fftoods. Slow
cooking and simmering. At LO settings, melt chocolate and butter
on a small suil'i_ce unit.
NOTE:At HIorMediumHigh(7-9)neverleavefoodunattendedBoiloverscausesmoking,greasy
spi//oversmaycatchfire.

Right
Not over Iinch
Wrong
Over 1inch
Use medium- or heavy-weight cookware. Aluminum
cookware conducts heat faster than other metals. Cast-
iron and coated cast-iron cookware are slow to absorb
heat, but generally cook evenly at low to medium heat
settings. Steel pans may cook unevenly if not combined
with other metals.
Forbest cooking results pans should be flat on the
bottom. Match the size of the saucepan to the size of
the surface unit. Thepan should not extend over the
edge of the trim ring more than 1inch.
Deep FatFrying
Do not ove_Mll cookware with ti_t that
may spill over when adding food. Frosty
foods bubble vigorously. Watch tood
fl'ying at high temperatures. Keep range
and hood clean from grease.
Useonlyflat-bottomedwoks.
Wok Cooking
We recommendthat youuseonlya flat-bottomed
wok. Theyareavailableatyour localretail store.
Do not rise WO]CS that have Stlppor[ IJngs.
Use of these types of wok% with or
without the ring in place, can be
dangerous. Pladng the ring over the
surlilce unit will cause a build-up ot heat
that will damage the cooktop.
Do not t_w to use such wol<s without the
ring. Ybu could be seriously bm'ned if the
wok tipped over
Home Canningtips
Be sure the (miner is centered oxer the
smqfhce tmit.
Make sure the cromer is fiat on the
bottolll.
Use recipes and procedm'es fl'om
reputable sources. These are available
ti'om manufi_cmre_s such as Ball ®and
Kerr: and the Department of Agricultm'e
Extension Service.
To pi'event btli'ns J[i'Olll stealll or heat,
rise Carl[ion when c_lnniilg.

Careand cleaning of thecooktop.
Be sure electrical power is off and aft surfaces are cool before cleaning any part of the cooktop.
Proper care and cleaning are important so your cooktop will give you efficient and satisfactory service. Follow these
directions carefully in caring for your cooktop to assure safe and proper maintenance.
Control Knobs
Thecontrolknobsmayberemovedforeasier
cleaning.
Make sure the knobs are in the OFF
positions and pull them straight off the
stems %r cleaning.
The knobs can be cleaned in a
dishwasher or they may also be washed
with soap and watei; Make sure the inskle
of the knobs are (h_' befi)re replacing.
Replace the knobs in the OFFposition
to ensure proper placement.
Porcelain Enamel Cooktofl fensomemodels)
Theporcelain enamelfieish is sturdybut
breakableif mieused
This finish is acid-resistant. Ho_vve_; any
acid foods spilled (such as fruit juices,
tomato or vinegar) should not be
pemfitted to remain on the finish.
If adds spill on the cooktop while it is
hot, use a (h T paper towel or cloth to
wipe it up right away: _]_en the stmfi_ce
has cooled, wash with soap and water:
Rinse well.
For other spills such as tilt spatterings,
wash with soap and water or cleansing
pow(le_s after the stwfi_ce has cooled.
Rinse well. Polish with a d_w cloth.
Stainless Steel Cooktop (onsomemodels)
Do not use a steel wool pad; #will scratch
the surface.
To clean the stainless steel surfhce,
use wam_ sudsy water or a stainless steel
cleaner or polish. Always wipe the surli_ce
in the direction of the grain. Follow the
cleaner instructions fin" cleaning the
stainless steel stmfhce.
To inquire about i)urchasing stainless
steel appliance cleaner or polish, or to
find the location ot a dealer nearest you,
please call our toll-ti'ee nulnber:
National Parts Center 1.800.626.2002
ge.com
8

ge.com
Toclean the surface units, turn the control to the highest setting for a minute. Thecoils will bum off any soil.
Lift the surface unit about I inch
above the drip pan and pull it out.
Surface Units andDrip Pans
CAUTION
• Be sure all the controls are turned to
OFFand the StIFf;Ice tlni[s aI'e C()O1
betore attempting to remove them.
•Do not imme_e the stm'hce units in
liquids of any kind,
•Do not clean the sm_i_ce units in a
dishwasher:
• Do not bend the sm_hce unit I)lug
temfinals.
• Do not attempt to clean, a(!iust or in
any way repair the l)lug-in receptacle.
Toremove a surface unit:
To remove the drip pans lot cleaning,
the surtilce units nlust be removed first.
Lift the StlI_;Ice unit about 1 inch above
the drip pan and pull it out.
Do not lift the surti_ce unit more than ]
inch. If you do, it may not lie fiat on the
drip pan when you I)lug it back in.
Rel)eated lifting of the sm_i_ce unit more
than 1 inch above the drip pan can
pemmnently damage the receptacle.
Toreplace a surface unit:
•]),el)lace the drip l)an into the recess in
the cooktop. Make sure opening in the
pan lines up with the receptacle.
• Insert the temfinals ot the surlhce unit
through the opening in the drip pan
and into the receptacle.
• Guide the sm_hce unit into place so it
rests evenly.
Drip Pans
Remove the sm_hce units. Then lift out
the drip pans.
For best results, clean the drip pans bv
hand. Place them in a covered container
(or a plastic bag) with 1/4 cup ammonia
to loosen the soil. Then scrub with a soap
flled scouring pad if necessary. Pdnse
with clean water and polish with a clean
soft cloth.
Thedrip pans may alsobecleaned in the
dtshwashe_
Clean the area under the (lri l) pans often.
Built-up soil, esl)eciallv ,grease ma_ catch
on fire.
Do not coxer drip pans with foil. Using
foil so close to the receptacle could cause
shock, fire or damaoe,_ to the cooktop.

Installationofthecooktop.
Read theseinstructionscompletely and carefully.
BeforeYouBegin
Read these instructions completely
and carefully.
IMPORTANT--Save these instructions
for local inspector's use.
IMPORTANT--Observe all governing codes
and ordinances•
NOTE TOINSTALLER--Be sure to leave these
instructions with the Consumer.
NOTE: Thisappliance mustbeproperly
grounded.
ToolsYouWill Need
/f _ • •
• 1/8 [nllblt
•Electric or hand drill
• Flat blade screwdrixer
• Pencil
• Ruler or tape measure and straightedge
• Hand saw or saber saw
Locationof
rating plate
10
Electrical Requirements
CAUTION:for personal safe_ remove house
fuse or circuit breaker before beginning
installation.
This appliance must be supplied with the proper
voltage and fl'equency and connected to an
individual, properly gromMed branch circuit,
protected by a circuit breaker or time delay filse,
as noted on the rating plate.
MI wire connections m ust be made in accordance
with local codes and properly insulated. Check
with vom +local utili_' tor governing electrical
codes and ordinances.
In the absence of local electrical codes, the
National Electrical Code, ANSI/NFPA No.
70-I,atest Edition, governing electric range
installations, must be fi)llowed.
A copy of the National Electrical Code can be
obtained by writing to:
National Fire Protection Association
Batterymarch Park
Quincy, MA 02260
If you fail to wire your counter unit in
accordance with governing codes, you
may create a hazardous condition•
Electrical Connections
ADANGER: The electrical power to the
counter unit supply line must be shut off while
line connections are being made• Failure
to do so could result in serious injury or death•
xa)u must use a two-wire A.C. 208/240 Volt,
60 Hertz electrical system. A white (neutral) wire
is not needed tiw this refit. The white lead fi'om
the household electrical supply can be isolated
and secm'ed in thejm_cfion box. If you connect
toaluminum wiring, properly installed connections
listed for use with aluminum and copper wiring
must be used.
Use a minimum wire size of No. 12 copper Mre
with a 20 Mnp filse or circuit breaker tor both
208/240 Volt electrical systems.
\._]_en making the wire connections, use the
entire length ot conduit provided. The conduit
must not be cut.
Connect the red and black leads fl'om the
cotmter refit conduit to the corresponding leads
in thejtlnction box.
The barn grotmd wire in the conduit is cmmecmd
to the cotmter refit flame. It nlust be com_ected
to the household electrical supply grotmd.
Typicalinstallationlocation.
#f installingthe cooktc_overa GSM2100dishwasher,go tothenextpage) ge.com
Read theseinstructionscompletely and carefully,
Dimensionsand Clearances
i I
I \ I I
Max._ ii i
30"Min.
I1_4"Min.
I
, C'@SrsRce to
15 1_g" E:16 W"
Unit and cutout dimensions
This counter unR must be installed with the
control knobs toward the front edge or the side.
Counterspace mustbe provided for installation of
the counter unit. When choosing a location, consider
the following:
•Tile cooktop should be easy to reach and
lighted with natural light during tile day.
• To eliminate the risk _ff burns or fire by
reaching over heated surfi_ce units, cabinet
storage space located above tile surfi_ce units
should be avoided. If cabinet storage space
is to be provided, tile risk can be reduced by
installing a range hood that projects
horizontally a minim um of 5" beyond tile
bottom of tile cabinets. Cabinets installed
above tile counter unit may be no deeper than
13" and Inust be at least 30" above tile cooktop.
•To insure accuracy, it is best to make a template
when cutting the opening in the counte_: See
the ti)llowing illustration and chart tot all
necessary dinlensions.
Thefollowing minimum clearances must be
maintained:
• 2:_" minimum clearance between the fl'ont
edge of the counter unit and the front edge
of tile COllntei:
•30" minimum vertical clearance fix_m tile
cooktop to tile nearest overhead surti_ce.
• 18" minim um vertical clearance to a(!jacent
cabinets.
•1½" minimum vertical clearance between tile
bottom of tile cooktop and any combustible
material, i.e. sheMng.
11

Optionalinstallationover GEundersinkdishwasher
modelGSM2100.(ifnot_t_ll_th__ookto_over_d_hw_h_r,_ototh__t m_)
Read theseinstructionscompletely and carefully.
Dimensionsand Clearancesfor Optional Installation
1¾" Min.
clearanceto
__"_,_._,_ sidewall
Floor
Unitandcutoutdimensions
C:19WId" D: 15WId" E: 161/a"
H:3" J:2" Min. K:M/l" Min.
This counter unit must be installed with the control
knobs toward the front edge of the countertop.
Counterspace mustbe provided for installation of
the counter unit. When choosing the location of the
cooktop and dishwasher, consider the following:
• _'hen installing over a dishwashei; (ooktop
models ]P2OO,JP20] andJP202 are only
approved fiw installation over GE Undei_ink
Dishwasher model (;SM2100, Install the
dishwasher using the separate ii_stallafion
instructions packed with the dishwashei:
• Tile cooktop should be easy to reach and
lighted with natuI_ll light during tile day.
• To eliminate the risk of burns or fire by
reaching over heated surfl_ce milts, cabinet
storage space located above tile SUlti_ce units
should be avoided. If cabinet storage space
is to be provided, tile risk can be reduced bv
installing a range hood that projects
hoI_izontally a Inilfim mn of 5" beyond tile
bottoln of tile cabinets. Cabinets installed
above tile counter unit inav be no deeper than
l 3" and In ust be at least 30" above tile cooktop.
• Tile cooktop nmst be centered lett to fight
oxer the dishwasher trait.
• To insure accuracy, it is best to make a
template when cutting the opening in the
countei: See the illustration and chart above
ti)r all necessary dimensions.
Thefollowingm&imumclearancesmustbe
maintaine&
• 3:_" inii]ilnuln clearance between tile front
edge of the counter trait and the fl'ont edge
of tile co/intei:
• 30" minim um vertical clearance fl'om tile
cooktop to tile nearest overhead stiFf,ice.
• 18" nfillinlulll vertical clearance to a(!iacent
cabinets.
12

Installationofthecooktop, ge.com
Read theseinstructionscompletely and carefully.
InstallationInstruction
Besurethiscut doesnotinterferewith thecabinetstructureatthefront
,- l
5" Min.*
_[
Holddownretainer
!4 ;7
Selftappingscrew forserviceability
Max. distance of7" when installingover GSM2100dishwasher
Suggested mounting of an approved junction box.
Install an approved junction box where it will be
easil) accessible through the front of the cabinet
where the counter unit will be located.
IMPORTAN# Thejunction box must be located
where it will allow slack in the conduit for
serviceabili_ If installing over a GSM2100
dishwasher, the center of the junction box must
be installed 5" to 7" below the cooktop lip, so it
does not interfere with the dishwasher
installation or operation.
Install the cotmter unit in the cutout opening.
IIIOT£"If theunitisbeinginstalledinablindcounter
(onewithnocabinetopeningbelow)orovera GSM2100
dishwasher,wkeconnectionsmustbemadebeforeputting
theunitintothecutout
Secure the cooktop unit to the counter using the
side retainers and screws shipped with the unit.
• For thicker counte_s (greater than 1" thick),
hold down straps should be used to install
the cooktop. They are included with some
models, or can be ordered, GE model
number WB2K5328.
Beforeinstallingthecounterunitormovingitto
anotherlocationhavetheelectricianverify:
• That your home is provided with adequate
electrical serxice,
• That the addition of the counter unit will not
oxerload the household circuit on which it is
tlsed,
,_ DANGER:Always disconnect the electrical
service to the unit before repairing or
servicing the counter unit. This can be done by
disconnecting the fuse or circuit breaker. Failure
to do this could result in a dangerous or even
fatal shock. Know where your main disconnect
switch is located. If you don't know, have your
electrician show you.
•To attach the cooktop to the counter; insert
the hold-down strap into the slots on each side
of the unit (see diagram).
• Use suitable scre_:s to attach the cooktop to
the counter as shown. The cooktop must rest
on the metal flange around the burner box.
Mountingslot
Strap
Cabine_es
)1
)1
)1
I )j
,j
Burnerboxsides
Usesuitable
fastenersfor
anchoringin
cabinetsides
13

Before YouCallForService...
Troubleshooting -tips
Save time and money! Review the chart on this page
first and you may not need to carl for service.
Problem Possible Causes What ToDo
Surface units not The surface milts are *_._]th the controls off, check to make sure the surti_ce
functioningproperly not plugged in solidly, unit is plugged completely into the receptacle.
The surface unit controls *Check to see the correct control is set for the stu_fi_ce
axe improperly set. trait xou are usino
The drip paa_s are not set *_]th the controls off, check to make sure the drip
securely in the cooktop, pan is in the recess in the cooktop and that the
opening in the pan lines up with the receptacle.
•Replace the fllse or reset the circtfit breaker:A fuse in your home may
be blown or the circuit
breaker tripped.
/4

Built-In CooktopWarranty.
Aft warranty service provided by our Factory Service
Centers, or an authorized Customer Care®technician.
Toschedule service, on-line, 24 hours a day, vis# us
at ge.com, or call 800.GE.CARES(800.432.2737).Please
have serial number and model number available
when cafling for service.
Staple your receipt here.
Proof of the original purchase
date is needed to obtain service
under the warranty.
For ThePeriod Of." We Will Replace:
OneYear
Fromthedate ofthe
originalpurchase
Anypartof the cooktop which tifils due to a defect in materials or workmanship.
During this lim#ed one-year warranty, GE will also provide, free of charge, all labor
and related service to replace the defecti\'e part,
What is Not Covered:
• Service trips to your home to teach you how to
use the product.
• hnproper installation, deli\'e_' or maintenance,
• Failure of the product if it is abused, misused, or
used fi)r other than the intended pui])ose or used
commercially.
• Damage caused after deliver*:
• Replacement of house fllses or resetting of circuit
breake_.
• Damage to the product caused by accident, fire,
floods or acts of God.
•]nddental or consequential damage caused bv possible
defects with this appliance,
• Product not accessible to provide required service,
EXCLUSION OFIMPLIED WARRANTIES--Your sole and exclusive remedy is product repa# as provided
in this Limited Warranty. Any implied warranties, including the implied warranties of merchantability
or fitness for a particular purpose, are limited to one year or the shortest period allowed by law.
This warranty is extended to the original purchaser and any succeeding owner for products purchased for
home use within the USA. In Alaska, the warranty excludes the cost of shipping or service calls to your home.
Some states do not aflow the exclusion or limitation of incidental or consequential damages. This warranty
gives you specific legal rights, and you may also have other rights which vary from state to state. Toknow
what your legal rights are, consult your local or state consumer affairs office or your state's Attorney General
Warrantor: General Electric Company.Louisville, KY 40225
15

ConsumerSupport.
q"J GEAppliancesWebsite ge.com
Hme a question or need assistance with your appliance? Try the GE Al)pliances _ ebsite 24 hom_ a day,
any da)of the _ear'. For greater comenience and taster service, )ou can now download Owner s Manuals,
** order parts, catalogs, or exert schedule serxice on-line. You can also "_sk Our Team of Experts ......
}OILY questions, and so I/lllCh i/loi'e,,,
ScheduleService
Expert GE repair service is onl) one step awa) fl'om your (loo_; Get on-line and schedule your service at
your, comenience 24 hotu_ am dm of the '_ear! Or call 800.GE.(_ARES (800.432.2737) during nomml
business hom_.
ge.com
RealLifeDesignStudio ge.com
GE suI)ports the ILrnive_al Design concei)t--products, services and enviromnents that can be used b)'
people of all ages, sizes and capabilities. We recognize the need to design fi)r a wide range of physical and
ment;d abilities and impaim_ents. For details of GE's ILrnive_al Design applications, including kitchen
design ideas for people with disabilities, check out otlr _.Vebsite today. For the hearing impaired, please call
800.TDD.GEAC (800.833.4322).
ExtendedWarranties ge.com
Pro'chase a GE extended warranty and learn about special discounts that are axailable while your, warranty
00 ....
is still in effect. You can l)urchase it on-line anytime, or call 8 .626.2224 during nomml business hotu_.
(;E Consumer Home Serxices will still be there after )our warrant} expires.
PartsandAccessories ge.com
Individuals qualified to service their own appliances can have parts or accessories sent directly to their
homes (VISA, MasterCard and Discover cards are accepted). Order on-line today, 24 hom_ eve_' day or
by phone at 800.626.2002 dm_ing nomml business hotu_.
Instructions contained in this manual cover procedures to be performed by any user. Other servicing generally
should be referred to qualified service personnel. Cautionmust be exercised, since improper servicing may cause
unsafe operation.
ContactUs ge.com
If you are not satisiied with the service you receive fl'om GE, contact us on our _'ebsite with all the details
including your phone ntllllbeI; oI" wIJte to: General Manager; CtlStOlllei" ]),elations
GE Apl)liances, Appliance Park
I,ouisville, KY 40225
qlRegisterYourAppliance
Register your new applim_ce on-lhle----at your convenience! Timely product registration will allow for
' enhanced communication and prompt service under the temps of)our warrant); should the need arise.
You may also mail in the prep_inted registration card included in the I)ackin°_ material.
ge.com
Printed in flTeUnited States
Other manuals for JP200
5
This manual suits for next models
2
Table of contents
Other GE Cooktop manuals
Popular Cooktop manuals by other brands

Frigidaire
Frigidaire FGFL89CCB Wiring diagram

Frigidaire
Frigidaire FEF366CSA Wiring diagram

Whirlpool
Whirlpool G7CG3064X - DIMENSIONS GUIDE Product dimensions

Panasonic
Panasonic KY-C227D operating instructions

Whirlpool
Whirlpool RCS2002GS1 installation instructions

Salton
Salton ID1445 Instruction booklet