manuals.online logo
Brands
  1. Home
  2. •
  3. Brands
  4. •
  5. GE
  6. •
  7. Dishwasher
  8. •
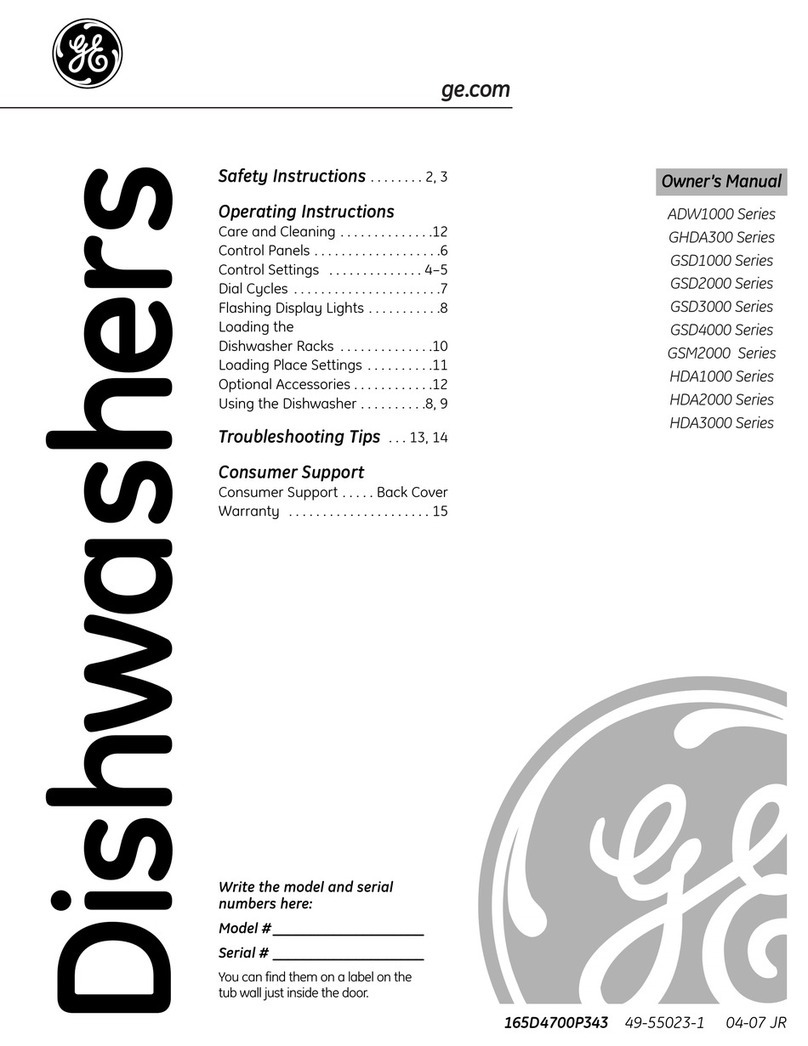
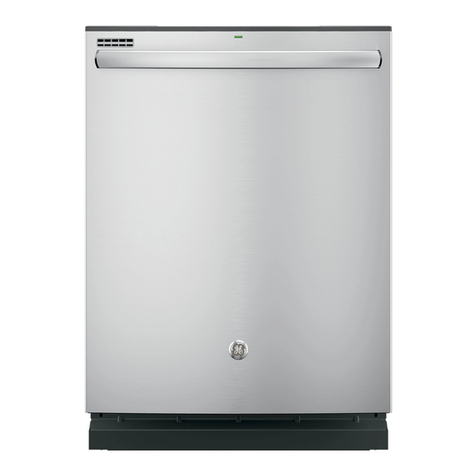
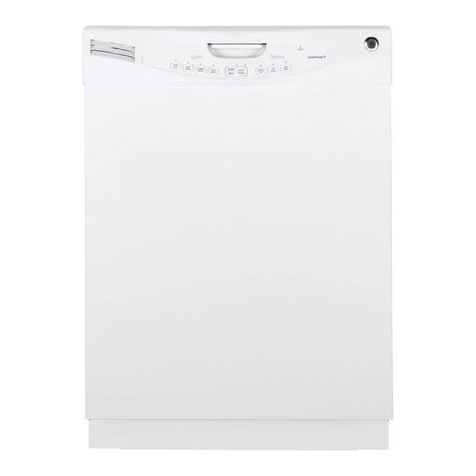
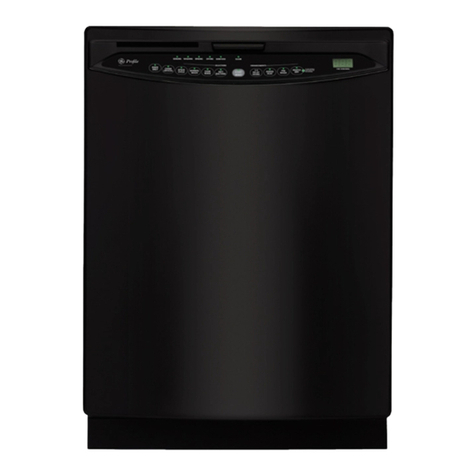
  9. GE GLD8760NSS User manual

GE GLD8760NSS User manual

ge.com
(11
J=
(11
Safety Instructions ........... 2,s
Operating Instructions
Care and Cleaning ................. 15
Control Panel and Settings ........ _J6
Loading Place Settings ............. 14
Loading the Racks ............. 12j 1_
Recommended Dishwasher
Products ............................. 7
Using the Dishwasher ............ 8-11
Troubleshooting Tips ...... 16-18
Consumer Support
Consumer Support ................. 22
Product Registration ............ 19, 20
Warranty .......................... 21
CDW9000 Series
GLD8000 Series
PDWSO00 Series
PDW9000 Series
Write the model and serial
numbers here:
Model #
Serial #
Youcan find them on the tub wall
just insidethe door.
165D4700P369 49-55044 03-08 JR
IMPORTANTSAFETYINFORMATION.
READALL INSTRUCTIONSBEFOREUSING-
SAVETHESEINSTRUCTIONS
WARNING!
For your safety, the information in this manual must be followed to minimize the risk of fire
or explosion, electric shock, and to prevent property damage, personal injury, or death.
-&WARNING! WATER HEATER SAFETY
Under certain conditions, hydrogen gas may beproduced in a water heater that has not been used
for two weeks or more. HYDROGEN GAS IS EXPLOSIVE.
Ifthe hot water has not been used for two weeks or more, prevent the possibility of damage or injury
by turning on all hot water faucets and allow them to run for several minutes. Do this before using any
electrical appliance which is connected to the hot water system. This simple procedure willallow any built-
up hydrogen gas to escape. Since the gas is flammable, do not smoke or use an open flame or appliance
during this process.
%PROPER INSTALLATION AND MAINTENANCE
This dishwasher must be properly installed and located in accordance with the Installation
Instructions before it is used. If you did not receive an Installation Instructions sheet with
your dishwasher, you can receive one by visiting our website at ge.com.
• Connect to a grounded metal, permanent wiring
system; or run an equipment-grounding
conductor with the circuit conductors and
connect to the equipment-grounding terminal
or lead of the appliance.
• Improper connection of the equipment-grounding
conductor can result in a risk of electricshock.
Checkwith a qualified electrician or service
representative if you are in doubt whether the
appliance isproperly grounded.
• Disposeof discarded appliances and shipping
or packing material properly.
• Donot attempt to repair or replace any part
of your dishwasher unlessit isspecifically
recommended inthis manual. Allother servicing
should be referredto a qualified technician.
• Tominimize the possibility of electric shock,
disconnect this appliance from the power supply
beforeattempting any maintenance.
NOTE:Turningthe dishwasher off doesnot
disconnect the appliance from the power supply.
We recommend having a qualified technician
service gout appliance.
CAUTION: Topreventminorinjuryorpropertydamage
• Contents washed in Anti-bacterial mode, if
available,may be hot to the touch. Use care
before handling.
• Using a detergent that is
not specifically designed
for dishwashers will cause
the dishwasher to fillwith
suds.
• If your dishwasher is connected to a
wall switch, ensure that the switch is
on prior to use.
• On dishwasherswith electronic
controls, if you choose to turn the wall
switch off between wash cycles,allow
5-10 secondsafter turning the switch on before
touching START/RESETto allow the control to
reboot.
• Non-Dishware Items:Donot wash itemssuch
aselectronic air cleanerfilters, furnace filters and
paint brushes in your dishwasher.Damage to
dishwasher and discoloration or staining of
dishwasher may result.
• Closesupervisionis necessary ifthis appliance
isused by or near children.
• Load light, plastic items so they will not
become dislodged and drop to the bottom
of the dishwasher-they might come into
contact with the heating element and be
damaged.
ge.com
WARNING! RISK OF CHILD ENTRAPMENT
PROPER DISPOSAL OF THE DISHWASHER
Junked or abandoned dishwashers ore dangerous...
even if they will sit for "just o few dogs." If you ore
getting rid of your old dishwasher,pleasefollow
the instructions to help prevent accidents.
Before You Throw Awag Your Old Dishwasher
Take offthe door of the washing comportment or
remove the door latch (asshown).
NOTE: CDW9000 Series and PDW9200-PDW9900
Series models also have a latch screw which must be
removed (Step 1)as shown.
O Screw
(Of} some
models) 0
AWARNING! When using gour dishwasher, follow basic precautions,
including the following:
• Usethis appliance only for its intended purpose
as described in this Owner's Manual.
• Useonly powder,tabs, liquid detergents or rinse
agents recommended for use in o dishwasher and
keepthem out of the reach of children.Cuscude®,
Cascade ®Complete and Electrusol ®Automatic
Dishwoshing Detergents,and Jet-Dry®and
Cuscude Crystal Cloute rinseagents hove been
approved for usein oil GEdishwashers.
• On models with the SmartDispenseTM system,
do not mix any chlorine bleach-bused eutometic
dishwashing detergent with any dishwashing
detergent containing enzymes us this could
cause the detergents to congeal end lead to
blockage of the SmartDispenseTM system.
• Locatesharp itemsso that they ore not likely
to damage the door seal.
• Loadsharp kniveswith the handles up to reduce
the risk of cut-type injuries.
• Donot wash plastic items unlessmarked
dishwasher safe or the equivalent. Forplastic
items not so marked, checkthe manufacturer's
recommendations.
• Do not touch the heating element during or
immediately offer use.
• Do not operate your dishwasher unlessoil
enclosure panels ore properly in place.
• Do not tamper with controls.
• Do not abuse,sit on or stand on the door or dish
rock of the dishwasher.
• Do notollowchildrentoployorounddishwosher
when openingorclosingdoorduetothepossibility
ofsmollfingersbeingpinchedindoor.
• Do notdiscordo dishwosherwithoutfirstremoving
thedoorofthewoshingcomportmentorthedoor
latch.
• Do not store or usecombustible materials,gasoline
or other flammable vapors and liquidsin the
vicinity of this or any other appliance.
• Do not allow children to play with, on or insidethis
appliance or any discorded appliance.
READ AND FOLLOW THIS SAFETY INFORMATION
CAREFULLY.
SAVE THESEINSTRUCTIONS
3
About the dishwasher control panel.
Youcanlocategourmodelnumberonthetubwalljustinsidethedoor.Throughoutthismanual,featuresandappearancemablvarblfromgourmodel.
B--n m
__ ........................................... SELECTIONS QuietPowerS ENHANCEMENTS ..............................................
le m El
CDW9000Seriesand PDW9000Series
ME REMAINING
n n
ENHANCEMENTS -- _ STATUS
cea_oLs • LOWBETERGENT 0 DRYING
!PRESS ® SENSING 0 SANITIZED
HEATEODRY
mB_S_ O WASHING OCLEAN
El El
ControlSettings
BStatus Indicator Lights (Indicatorsvary by models)
TheStatusdisplagtells gou what ishappeningwhile the dishwasherisinoperation and magflash,
indicating a malfunction.Thelightswill come ONindicatingthe sequenceofthe dishwasheroperation.
LOW DETERGENT
SENSING
ADD-A-DISH
WASHING
RINSING
DRYING
SANITIZED
CLEAN
Displagedwhen the SmartDispenseTM needsto be refilledwith liquid or gelautomatic
dishwasherdetergent.
NOTE:Ifgou are not usingSmartDispenseTM and gou want to turn the LOWDETERGENT
LEDlightoff,presstheADDEDHEATpad 5 timeswithin 3 seconds.Youwill hear3
beeps;then the lightwillgo off.Youcan turn the light backon bg pressingtheADDED
HEATpad5 timeswithin 3 seconds.
Displagedwhilethe CleanSensorTM ismeasuring the amount of soiland temperature
of water.Thedishwasherwilladjust the selectedcgcleto achieveoptimal performance.
Displagedduring prewash, indicating that dishes added now will still be cleaned.
Displagedduring prewash,main wash and rinseperiods.
Displagedduring rinse periods.
Displagedduring HEATEDDRY.
Displayedwhen cycle has met sanitizationconditions.
Displagedwhen a wash cgcleiscomplete.
BTime Remaining Displag (onsome models)
le
Duringoperation,the displagshowsthe minutes remaininguntil thecgcle iscomplete.Thedisplagmag
adjust the remainingtime while the Sensinglightison.Thetime displagedat the start of eachcgcle mag
changefrom the factorg setting asthe unitcustomizes itselfto home use.Duringa delag start, the displag
willshow hoursof time remaining untilthe cgcle starts.
Selections
PDWSO00Series and GLD8000 Series: Press the pad for the desired wash cycle.
CDWgO00Series and PDWgO00Series: Use the Arrow Pads ('_'_[_ to scroll through the wash cgdes.
NOTE:Allcgcle times and water usage information contained in the following section are approximate
values.Actual resultswilldepend on severalfactors,includingbut not limited to inlettemperature,
householdwater pressureand amount ofsoilin the wash water.
Thelightaboveor nextto the selectedpad will beONto indicatewhich WASHCYCLEhasbeen selected.
ge.com
I_ Selections (continued)
ANTI-BACTERIA Heovg 8.8 gal., 105 min.
Medium 7.5 gal., 95 min.
Light 6.3 gal., 85 min.
This cgcle raises the water temperature in the final rinse to sanitize your dishware. The
cgcle length will vary depending on the temperature of your inlet water.
NOTE:The Anti-Bacteria cycle is monitored for sanitization requirements. If the cycle is
interrupted during or after the main wash portion or if the incoming water temperature is
so low that adequate water heating cannot be achieved, the sanitizing conditions mag
not be met. Inthese cases, the sanitized light will not illuminate at the end of the cgcle.
NOTE: NSF-certified residential dishwashers are not intended for licensed food
establishments.
COOKWARE
(POTS & PANS)
NORMAL WASH
SPEEDCYCLE
(onsome models)
CHINA CRYSTAL
GLASSES
(onsome models)
PLASTICSCYCLE
(onsome models)
SINGLERACKWASH
(onsome models)
RINSEONLY
Heovy 10.0gal.,80 min.
Medium 8.8gal.,70 min.
Light 7.5gal.,60 min.
Thiscgcle ismeant for heavilgsoileddishesor cookware with dried-on or baked-on soils.
Thiscgcle mag not remove burned-on foods. Evergdagdishesare safeto be usedin
this cgcle.
Heovg8.8gal.,70 min.
Medium 7.5gal.,60 rain.
Light 5.0gal.,50 min.
Thiscgcle isfor medium/heavily soileddishesand glassware.
7.5gal.,35 min.
Thiscycle isfor everyday dishesand glassware.
7.5gal.,35 min.
Thiscycle isfor lightly soiledchina and crystal.
7.5gal.,30 min.
Thiscycle isspecifically designedfor glasses.
Heovg 8.8gal.,120 min.
Medium 7.5gal.,105 min.
Light 5.0gal.,90 min.
Thelonger time for this cgcle includes a built-in drging portion that is specifically
designedto reducethe risk of melting plastic items and improve plasticdrging.
Forremoving red tomato-based stains,GErecommends the use of Cascade®
PlasticBoosterTM.
Heevg 8.2gal.,70 min.
Medium 7.0gal.,60 min.
Light 4.6gal.,50 min.
Thiscgcle washes lightlg soileddishes on the upper reck onlg.
2.5gal.,10 min.
Forrinsing partial loadsthat will be washed later.Donot usedetergent with this cgcle.
NOTE: On some models, the CHINA CRVSTAL/PLASTICS selector is o toggle pod; push pod to switch
between CHINA CRYSTALand PLASTICS.
NOTE:Thisdishwosherisequipped with CleonSensoffMwith outomotic temperoture control;therefore,
cgde length ond time mog vorg dependingon soil ond woter temperoture conditions.
NOTE:Onlg theAnti-Bocterio cgcle hosbeendesignedto meet therequirementsof Section6,NSF18/4for
soilremovol ond sonitizotion efficocg.
About the dishwasher control panel.
DEnhancements
Thelight above the selected pad will be ON to indicate which ENHANCEMENThasbeen selected.
DELAYHOURS
ADDED HEAT
(EXTRAHOT WASH)
PREWASH
(on some models)
HEATEDDRY
LightOff
HEATEDDRY
LightOn
LOCK
RESET
m
Youcan delay the start of a wash cycle for up to 2/4hours (dependingon model).Press
the DELAYSTARTpad to choose the number of hours you wont to delay the start of
the cycle; then pressSTART/RESET.
PDW8000 Seriesand GLD8000Series:Themachine will count down and start
automatically at the correct time.
CDW9000 Seriesand PDW9000 Series:After closing the door,the machine will count
down and automatically start at the correct time.
NOTE:Tocancel the DELAYSTARTselection beforethe cycle begins,repeatedly press
the DELAYSTARTpad until the display isblank.
When selected,the cycle will run longer with heating element on to improve both wash
and dry performance.
NOTE:Cannot be selectedwith RINSEONLYcycle.
Forusewith heavily soiledand/or dried-on, baked-on soils.Thisoption MUSTbe
selectedPRIORto starting the cycle. Thisoption adds 15 minutes to the cycle time.
NOTE:Cannot be selectedwith RINSEONLYcycle.
Shutsoffthe drying heat option. Disheswill air dry naturally (PDW8000Seriesand
GLD8000Series)orfan dry (PDWg000Seriesand CDWg000Series)to save energy.
Turnsthe heater on for fast drying. Thiswill extend the total cycle time by 15 minutes
for the ANTI-BACTERIALcycle, 38 minutes for the NORMAL,SINGLERACKWASH
and COOKWAREcycles,8 minutesfor the SPEEDcycle, 15 minutes for the
PLASTICScycle and 30 minutes for all other cycles.
NOTE:Cannot be selectedwith RINSEONLYcycle.
Youcan lockthe controls to prevent any selections from being mode. Or you can lock
the controls offer you hove started a cycle.
Children cannotaccidentally start dishwasher by touching pads with this option
selected.
Tounlock the dishwasher controls, pressand hold the HEATEDDRYpad for 3 seconds.
Thelight above the lock pad will turn off.Tolock the dishwasher,pressand hold the
HEATEDDRYpad for 3 seconds.The light abovethe LOCKpad will turn on.
Tochange o cycle offer washing starts...
PDW8000Seriesand GLD8000Series:Touchthe START/RESETpad to cancel the cycle.
TheSTART/RESETlightwillflash while the water ispumped out if needed.Thistakes
approximately 2 minutes.
PDW9000Series:Openthe door slowlyto prevent splash-out. Touchthe START/RESET
pad to cancel the cycle. Ifthe START/RESETlight isflashing,close the door until the
water pumps out (thistakes approximately 2 minutes)and the light stopsflashing.
When the lightstops flashing,the dishwasher can be reprogrammed and restarted.
Start
PDW8000 Seriesand GLD8000Series
Closeand latch the dishwasherdoor and selectthe cycle and desiredenhancements.Touch the
START/RESETpad to begin the cycle. Water fill begins immediately, and approximately 60 secondslater
the wash action begins.
When the dishwasher door isfully closedand latched,the control panel lights will display the lostsettings
you selected.If you don't wont to change any of the settings,simply touch the START/RESETpad to
begin the cycle.
If the door isclosed,the indicator lightswill turn off ifthe START/RESETpad is not selectedwithin 5 minutes.
Toactivate the display,open and closethe door or pressany pad.
ge.com
Ll start (continued)
lrl
PDW9000 Series
After selecting the cycle and desiredenhancements, touch the START/RESETpad to ready the
dishwasher to begin the cycle. Closethe door to start the cycle or begin the DELAVSTARTcountdown.
When the cycle starts,the water fill begins and approximately 60 secondslater the wash action begins.
Thedishwasher will always display your last selection and enhancements. If you don't want to change
the settings,simply touch the START/RESETpad to ready the dishwasher and closethe door to begin
the cycle.
Also,ifa power failure occurs NORMALand HEATEDDRYwill automatically be programmed. Hake any
new selections and touch the START/RESETpad to begin the new cycle.
When the door isopened,the indicator lights will turn off ifthe START/RESETpadisnot selectedwithin
5 minutes. Toactivate the display, open and close the door or touch any pad.
Clean
PDW8000 Seriesand GLD8000Series
TheCLEANlight is illuminated when the selected cycle and enhancements are complete. Thelight will
stay ONuntil a pad ispressedor the door isopened and then closed.
PDW9000 Seriesand CDW9000 Series
TheCLEANlight is illuminated and a double beep will soundwhen the selected cycle and enhancements
are complete. You may remove the dishes at any time.Thehigh-efficiency fan will run quietly for 30
minutes to 4 hours (depending on selectedcycle) after the CLEANlight is illuminated to continue drying
the dishes.Thefan can be turned off by opening the door and pressingany keypad.
ALL MODELS:Toturn off the audible end-of-cycle signal (orre-activate it ifit was previously turned off),
pressthe HEATEDDRYpad 5 times within 3 seconds.A triple beep will soundto indicate the end-of-cycle
beep option has been toggled.
Flashing displag lights.
Status Indicator Lights What It Means
START/RESET Cycle has been interrupted by pressingthe START/RESETpad,or there
has been a power failure. Light will stop flashing after the dishwasher
automatically drainsout the water.Thedishwasher will restart ifthe
interruption was the result of a power failure.
Recommended dishwasher products.
GErecommends the following products for use in its
dishwashers:
Foryour manual detergent dispenser,Cascade®
and ElectrasoF powder,liquid or gel automatic
dishwasher detergents are approved.
Foryour SmartDispenseTM Detergent Dispenser,use
only the recommended detergents listed on page
10of this manual.
Jet Dr&l®or CascadeCrystal Cleare rinseagents
to remove spots and prevent new film buildup on
your dishes,glasses,flatware, cookware and
plastic. Using rinseagent also improves dry
performance.
•Cascade®Plastic BoosterTM to remove red staining
inside your dishwasher that can come from some
tomato-based foods.
•Cerama Br&lte®StainlessSteelApplianceCleaner
to clean the exterior stainlesssteel panel of GEand
ProfileTM dishwashers (forstainlesssteel exterior
models only).
Using the dishwasher.
Check the Water Temperature
The entering water should be at least 120°F and not more than 150°F for effective cleaning and to
prevent dish damage. Check the water temperature with a candy or meat thermometer. Turn on the
hot water faucet nearest the dishwasher, place the thermometer in a glass and let the water run
continuously into the glass until the temperature stops rising.
Use Jet-Dry ®or Cascade Crystal Clear®Rinse Agent
det-Drg ®or Cascade Crgstal Clear _ rinse agent improves drging, removes spots and prevents new
film buildup on your dishes, glosses, flatware, cookwore and plastic.
Filling the Dispenser Rinse Aid Setting
Therinseagent dispenser holds3.5oz.of rinseagent.
Under normal conditions,this will last approximatelg
one month.Try to keep it full,but do not overfill.
m
F2-1
Make surethe dishwasher door isfullg open.
Turnthe dispenser
cap to the left and
lift itout.
I-_1 Add rinseagent until
the indicator window
looks full.
[] Cleanup any spilled
rinseagent with a Indicator
damp cloth, window Dispenser cap
Theamount of rinseagent releasedinto the final
wash can be adjusted.Thefactory setting is at the
midpoint. Ifthere are ringsof calcium (hardwater)
spots on dishes,try a higher setting. If there is
foaming, use a lower setting.
Toadjust the setting:
Removethe dispenser cap_
thenturntheadjuster
counterclockwise to
increase the amount k._ \_ _j-"-'_ Rinse agent
of rinseagent or _ adjuster
clockwiseto reduce
the amount of rinseagent dispensed.
FI Replacethe dispenser cap.
Dish Preparation Prior to Loading
• Noprerinsing of normal food soilisrequired. • Removelarge quantities of any remaining food.
• Scrapeoff hard soils,bones,toothpicks, skinsand • Removeleafy vegetables, meat trimmings and
seeds, excessiveamounts of grease or oil.
Forget to Add a Dish?
A forgotten dish can be added ang time before
the main wash.
I-_1 Squeezethe door latch to release the door.
I-_1 Do not open the door until the water spray
action stops. Steam may rise out of the
dishwasher.
I-_1Add forgotten dishes.
[_-I Close the door.
8
ge.com
Manual Detergent Dispenser
Somemodelscomeequippedwithan automaticliquid
dishwasherdetergentdispenser(SmartDispenseTM) and
a manualdispenser.Youcanuseeitherofthesedispensers
butdon'tusebothatthesametime.
//i ............ill
SmartDispense TM
Manual Detergent
Dispenser
Forheavilysoiledloads,usea bitmoredetergent.Forwater
temperaturesabove140%,usea bitlessdetergent.
Medium Medium Extremely
Soft Soft Hard Hard
li MAINWASH[WASH]
Forheovilblsoiledloads,usethePotsandPansor HeovblWash
cycle,
Thecoverofthemanualdispenserwillopenduringthe
washcycle.IfyouareusingSmartDispenseTM, leavethe
coverofthe manualdispenseropenbeforestartingthe
cycle.
Forthemanualdispenser,Cascade®and Electrosol®
AutomaticDishwashingDetergentshavebeenapproved.
Youmay usepowder,liquid,gelortabletsinthisdispenser.It
isimportanttokeeppowdereddetergentsandtabletsfresh
anddrysothey don'tloseeffectiveness.Therefore,donot
putdetergentintothemanualdispenseruntilyouareready
towashdishes.
DO NOTUSEHAND DISHDETERGENT
m
m
Filfing Manual Detergent Dispenser
Theamountofdetergentto usedependsonwhetheryour
waterishardor soft.Withhardwater,youneedextra
detergent.Withsoftwater,youneedlessdetergent.
Protectyourdishesanddishwasherbycontactingyour
waterdepartmentand askinghowhardyourwateris.
Twelveor moregrainsisextremelyhardwater.Awater
softenerisrecommended.Withoutit, limecanbuildup in
thewatervalve,whichcouldstickwhileopenandcause
flooding.Toomuchdetergentwithsoftwatercancause
a permanentcloudinessofglassware,calledetching.
Usetheinformationinthetablebelowasa guideto
determinetheamountofautomaticdishwasherdetergent
toplaceinthedispenser.Youmay usepowder,liquid,gel
ortabletsinthisdispenser.
Whenusingautomaticdishwashingdetergenttablets,
simplyplaceonetabletinthe mainwashsectionandclose
thecover.
Number
of Grains Detergent Cups to Fill
Lessthan 4 Fillcup to soft line (1/3 full)
4 to 8 Fillcup to medium soft line (2/3 full)
8 to 12 Fillcup to medium hard line
(completely full)
Greater Fillboth main wash cup
than 12 and pre wash cup
NOTE:Usingo detergentthatisnotspecificoll_jdesigned
fordishwasherswillcausethedishwasherto fillwithsuds.
Duringoperation,thesesudswillspilloutofthedishwasher
vents,coveringthekitchenfloorandmakingthefloorwet.
Becausesomanydetergentcontainerslookalike,store
thedishwasherdetergentina separatespacefromall
othercleaners.Showanyonewhomay usethedishwasher
thecorrectdetergentandwhereitisstored.
Whiletherewillbenolastingdamagetothedishwasher,
yourdisheswillnotgetcleanusinga dishwashing
detergentthat isnotformulatedto workwith dishwashers.
Using the dishwasher.
10
SmartOispense Detergent Dispenser (somemodels)
Thisdishwasher may haveSmartDispenseTM,a
feature which automatically dispensesliquid
automatic dishwasher detergent into each cycle
based on soil leveland water hardness.
Toutilizethe SmartDispenseTMDetergent Dispenser,
it must first be filled.Although any liquid or gel
automatic dishwashing detergent can be used in the
SmartDispenseTMsystem, all liquid or gel automatic
dishwashing detergents are not the same, Most
automatic dishwashing detergents are chlorine
bleach-based (suchasCascade®or Electrasol®)
while others contain enzymes (suchas Cascade
Complete®or Electrasol®AdvancedTMGel).
Do not mix ony chlorine bleoch-bosed outomotic
dishwoshing detergent with ony dishwoshing
detergent contoining enzymes os this could couse
the detergents to congeol ond leod to blockoge of
the SmortDispenseTMsgstem.Checkthe detergent
label to determine ifthe detergent ischlorine
bleach-based or one that contains enzymes. It is
recommended that the same type of detergent be
usedwhen refilling your SmartDispenseTMsystem.
CAUTION! Absolutely do not add
powder detergent, tablets or any liquid soap or
detergent normally usedfor washing hands or
dishes in a sink.Only useliquid or gel detergent
specifically designedfor usein an automatic
dishwasher.
Toopen the dispenser for filling, push down and
turn the blue cap counterclockwise until the cap is
loose.Lift cap off.
Aim the detergent bottle at the opening in the door
and begin to fill. ,i
i
[
i
Thedispenserwill hold 45 oz of liquid dishwasher
detergent (standard sizebottle).
Turn clockwise.
i
[i
[
When full, replacethe cap and turn clockwise until
tight to ensure no water enters the SmartDispenseTM
dispenser.If residueisleft on the door,it will be
washed off in the next cycle.
An indicator light will turn on to notify you when the
dispenser needsto befilled again.After filling,the light
will not turn off until the door isclosed.Afull dispenser
will last approximately I month for the average user.
STATUS
Light will SmartDispense
turn on _ O LOWDETERGEflT 9) DRYING
when 0 SENSING • SANITIZED
time to
refill 0 WASHING •CLEAN
Setthe door at a comfortable angle to fill the
dispenser.
(appearance may vary)
NOTE:If you are not usingSmartDispenseTMand you
want to turn the LOWDETERGENTLEDlight off,press
theADDEDHEATpad 5 timeswithin 3 seconds.Youwill
hear 3 beeps;then the lightwillgo off.Youcanturn the
light back on by pressingtheADDEDHEATpad 5 times
within 3 seconds.
SmartDispense Detergent Dispenser
Water Hardness Calibration
ge.com
Priorto the first use,the dishwasher needsto
be calibrated for water hardness.Pleasefollow
directions below to calibrate the dishwasher to
the hardness of gour tap water.
Determine the Hardness of Vour Tap Water
Inthe bag that contained these instructions, Uou
shouldfind a water hardnesstest strip package. Read
the instructions on the package, remove the test strip
and follow the instructions to determine the hardness
levelof gour tap water.Youwill usethis information to
calibrate gour dishwasher to dispensethe optimal
amount of detergent.
Water hardness test strip indication
SOFT
HARD
Velue to Enter
into Dishwesher
OREDIIIIIIIII 1
1RED _ 2
2 RED _ 3
3 RED _ 4
4RED _ 5
Calibration of ]2-Button Front-Control
Models With 3-Digit Displag
Press at the same time. Dispiag
I-/1 Closeand latch the door (lightson, dishwasher
not running).
F_ Pressthe COOKWARE and DELAYHOURSpads
at the same time for 3 seconds.Thedisplay will
show a number from Ito 5.This isthe water
hardnessvalue currently set.
[_ Pressthe COOKWAREpadto raisethe value or
the NORMALpad to lower the value. Setthe
water hardness valueto the number determined
with the test strip and table above.
[4-] Oncethe water hardness isset,press the
START/RESETpad to savethe setting and return
the dishwasher to normal operation.
Calibration of 7-Button Front-Control
Models With 3-Digit Displag
Display Press at the same time.
I-/1 Openthe door and touch a pad (otherthan
START)to turn lights on.
I_1 Pressthe "Up" _ Arrow Padand DELAY
HOURSpad at the same time for 3 seconds.The
displauwill show a number from Ito 5.Thisisthe
water hardness value currently set.
1-31Pressthe "Up" f_ Arrow Padto raisethe value
or the "Down" [3_Arrow Padto lower the value.
Setthe water hardnessvalueto the number
determined with the test strip and table at the left.
1-4-]Oncethe water hardness isset, the
press
START/RESETpad to savethe setting and return
the dishwasher to normal operation.
Calibration of Models Without a 3-Digit Displag
Front controls
I-/1 Closeand latch the door (lightson, dishwasher
not running).
F_ Pressthe COOKWAREand DELAYHOURSpads
together for 3seconds.All lights will light up and
you will hear i to 5 beeps.The number of beeps
indicatesthe current hardnessvalue.
E]To change the setting, pressthe DELAVHOURS
pad the number oftimes that corresponds to the
water hardness value determined at the left. The
control will beep each time Uoupressthe pad.
E] Oncefinished pressingthe pad, Uouwill hear a
confirmation with beepsfor the number of times
Uoupressedthe pad.
rs-i if the number of beeps isnot what you desire,
start pressingthe DELAYHOURSpad again to
reenter a new water hardness level.
I-6-1Oncethe water hardness isset,press the
START/RESETpad to savethe setting and return
the dishwasher to normal operation.
Topcontrols
I-/1 Openthe door and touch a pad to turn lights on.
I_1 Pressthe "Up" _ Arrow Padand DELAY
HOURSpad at the same time for 3 seconds.All
lights will light up and Uouwill hear I to 5 beeps.
The number of beepsindicatesthe current
hardnessvalue.
1-31Tochange the setting, pressthe DELAVHOURS
pad the number oftimes that corresponds to the
water hardness value determined at the left. The
control will beep each time Uoupressthe pad.
E] Oncefinished pressingthe pad, Uouwill hear a
confirmation with beepsfor the number of times
Uoupressedthe pad.
rs-i if the number of beeps isnot what you desire,
start pressingthe DELAYHOURSpad again to
reenter a new water hardness level.
B-I Oncethe water hardness isset, the
press
START/RESETpad to savethe setting and return
the dishwasher to normal operation.
NOTE:Youshould recalibrate the dishwasher control
ifwater conditions change; for example, if a water
softener system isadded or removed from your
home. 11
Loading the dishwasher racks.
For best dishwashing results, follow these loading guidelines. Features and appearance of rocks and silverware
baskets mabl varbl from blour model
Upper Rack
Although the upper rock isprimarily for
glosses,cups and saucers, pots and pans con
be placed in this rack for effective cleaning.
Cupsand glossesfit best along the sides.This
isalso a secure place for dishwasher plastics.
Theutility shelf (somemodels)may be placed
in the up or down position to add flexibility.A
wine gloss holder (somemodels)secureswine
glossesfor best washability.
Somemodels hovecontoured metal cup
shelvesthat con secure up to 12wine glosses
(asshown).
Becausewine glossescome in various sizes,
offer loading,slowly push in the rock to make
surethey will clearthe top of the dishwasher.
Somemodels haveon Angled RackSystem,
which allows you to angle your dishes,such
as coffee mugs,for better cleaning and
quicker drying. To position the tines,pull the
leverforward then drop the tines into
position,then releasethe lever.
Theupper rock isgood for oil kinds of
odd-shaped utensils.Saucepans,mixing
bowls and other items should be placed face
down. Fold-down tines (onsome models)
provide flexibility for extra-large and hard-
to-fit items.
Securelarger dishwasher-safe plastics over
2 tines when possible.
Makesuresmall plastic items are secure so
they can't fall onto the heater.
Besurethat items do not protrude through
the bottom of the rack and block rotation of
the middle spray arm. This could resultin
poor wash performance for items in the
upper rock.
Checkto make surethat no items will block
rotation of the wash arm.
NOTE:TheSingle RockWash selection,on
models with this feature,washes the upper
rock only. If you usethis feature, do not load
items in the lower rock.
\
]qt-b4 l U11f/ f
I II II II II II II II II II II
Adjustable Upper Rack
Thestandard position of your adjustable rack
is"up" which allows for maximum clearance
for your taller items in the lower rack. If you
have taller wine glasses,tumblers or other
items to place inthe upper rack,you may
want to adjust the rack to the lower position.
Tolower the rack support the weight of the
rack with your hands asshown and press
both finger pads about 1/4" toward the inside
of the rack as indicated and guide the rack
down to its lower position.
Toraise the rack to the "up" position,pull up
on the center of the rack sideframe until the
rack locksinto place.
12
Lower Rack
Thelower rack isbest usedfor plates,saucers
and cookware. Large items such as broiler
pans and baking racks shouldgo along the
left-hand side. Load platters, pots and bowls
along the sides,in corners or in the back.The
soiledsideof items shouldface the center of
the rack. If necessary,oversizedglassesand
mugs can be placed in the lower rack to
maximize loading flexibility.
Also,be careful notto let a portion of an item
such as a pot or dish handle extend through
the bottom rack.Thiscould blockthe wash
arm and cause poor washing results.
Fold-down tines (onsome models)provide
flexibility for extra-large and hard-to-fit items.
Thetines may be left inthe up position or
folded down to customize the lower rack.
Shower Nozzle Service
Part Number WD12XlO134
tab out Remove end cap
ge.com
Removing the Upper Rack
Yournew dishwasher hasthe capability to
wash extra large items in the lower rack,This
isaccomplished by removing the upper rack
and installing a nozzleoverthe port that
normally supplieswater to the upper rack,
The nozzleis not includedwith your
dishwasher,but isavailable for purchase from
GE.CallGEat 1.800.626.2002or go to the GE
website ge.com and request NozzleSpray
Asm,part number WD12X10134.
Customers inCanada can order on-line at
geappliances.ca 24 hours every day, or by
phone at 1.800.661.1616during normal
businesshours.
NOTE:Donot usethe SINGLERACKWASH
cycle (some models)with this feature. Single
RackWash cycle isfor upper rack wash only.
The recommended cycle for lower rack only
use isthe COOKWAREcycle.
NOTE:Nozzlemust be in placewith upper
rack removed.If not installed properly, poor
wash performance and noisewill result.
Toremove the upper rack:
ITI Pressthumb tab out and remove the
front end caps on each sideofthe rail.
r_ Pullthe rack straight out and offthe rails.
[] Replacethe end caps.
14-I Pushthe railsall the way back into the
dishwasher.
FI Slidethe shower nozzleattachment over
the spout.
"Shower nozzle
attachment
r_ Thenfillthe lower rack and begin
your cycle.
NOTE:Don'tforget to remove the shower
nozzleattachment before you replace the
upper rack.
One-piece basket (on some modelsl
Three-piece basket (on some modelsl
Don't let any
item extend
through bottom.
Silverware Basket
Toload flatware, simply pushthe adjustable
handle to either side(on some models).Put
flatware in the removable basketwith fork
and knife handles up to protect your hands.
Placespoons in the basketwith handles
down. Mix knives,forks and spoons sothey
don't nesttogether. Distribute evenly.Small
plastic items, such as measuring spoons and
lidsfrom small containers should go in the
bottom ofthe silverware basketwith the
silverware on top.
Theone-piece silverware basket(on some
models)can be placed in the front, right side
or back of the lower rack.
A variety of options isavailable regarding
the three-piece silverware basket(on some
models)in your dishwasher.Thecomplete
basket isdesignedto fit on the right sideof
the lower rack.Additionally, each end of
the basket is removable to add loading
flexibility to accommodate flatware and
lower rack capacity needs.
Thelidsof both end and middle baskets(on
some models)can be closedto contain small
items. Long items can be placed on the utility
shelf in the upper rack.
To remove end baskets, grasp the
basket at opposite corners and
slide apart.
13
Loading the dishwasher racks.
Extra Rack Features (on some models)
Guffery Tray
Thecutlery tray holdsup to 4large knifes
such as a carver,chef's knives,bread knife,
etc.,that are too tall to fit inthe silverware
basket.
Hook the tray onto the rear of the upper rack.
Lay the knives between the guides
(asshown).
_1_1I t Ill I I t
These tines fold down
p
L
Bowl Tines
Thespecial large-bowl tines in the lower rack
add flexibility to your loading pattern.They
are usefulfor serving bowls or other large
bowls.
Tousethe bowl tines,fold down the
2 rows of flex tines infront of the bowl
tines and load bowlsjust as you would
in the upper rack.
Large-bowl tines
Loading place settings...
Follow these guidelines for loading 10 place settings. Features and appearance of racks and silverware baskets mag
vary from your model. NOTE:Silverware should be individually loaded into the slots on the silverware basket lid.
_11/
Upper Rack--lO place settings Lower Rack--lO place settings
Follow these guidelines for loading 12 place settings. Features and appearance of racks and silverware baskets mabl
varblfrom blour model. NOTE:Silverware should be individually loaded into the slots on the silverware basket lid.
14 Upper Rack--12 place settings Lower Rack--12 place settings
Caring for the dishwasher, ge.com
Cleaning the Exterior Door Panel
Beforecleaning the front panel,make
sure you know what type of panel you hove.
Referto the last two lettersof your model
number. Youcan locate your model number
on the left-hand tub walljust insidethe door.
If your model number ends with BB,CC,WW,
SAor BG,then you have a PaintedDoor
panel. If your model number endswith SS,
then you havea StainlessSteelDoor panel.If
your model number ends with CS,then you
have a CleanSteelpanel.
Followthe instructions below for cleaning the
door panel for your specific model.
Painted Door Panel (modelnumbers ending
in BB-black,CC-bisque,WW-White, SA-silver
metallic or BG-grophite black)
Usea clean, soft, lightly dampened cloth,
then dry thoroughly. Youmay also usea
good appliance wax or polish.
Stainless SteelDoor Panel (modelnumbers
ending in SS)
Thestainlesssteel panels can be cleaned
with StainlessSteelMagic or a similar product
using a clean,soft cloth. Donot useappliance
wax, polish,bleach or products containing
chlorine on StainlessSteeldoors.
Youcan order StainlessSteelMagic
#WXlOX15 through GEParts by calling
800.626.2002.
CleanSteel Door Panel (model numbers
ending in CS)
Use a clean, soft, lightly dampened cloth,
then dry thoroughly. Do not use appliance
wax, polish or any chemical agent on
CleanSteel doors.
Do not wipe the dishwasher with a soiled
dish cloth or wet towel. Thesemay leave
a residue. Do not use scouring pads or
powdered cleaners because these products
con scratch the finish.
Stainless Steel Interior--Tub and Inner Door
Thestainlesssteel usedto make the
dishwasher tub and inner door provides
the highest reliability available in a GE
dishwasher.If the dishwasher tub or inner
door should be scratched or dented during
normal use,they will not rust or corrode.
Thesesurface blemisheswill not affect
their function or durability.
Cleaning the Control Panel
Tocleanthe control panel,usea lightly
dampened cloth.Then dry thoroughly.
Protect Against Freezing
If your dishwasher isleft in on unheated
place during the winter,ask a service
technician to:
r_l cut off electrical power to the
dishwasher.Removefusesor trip
circuit breaker.
I-_1Turnoff the water supply and disconnect
the water inlet linefrom the water valve.
r_ Drainwater from the water inlet line
and water valve.(Usea pan to catch
the water.)
[_-] Reconnectthe water inlet lineto the
water valve.
Air gap _._ k('L I':_J_
Checktheairgapanytime
goutdishwasherisn'tdraining
welt.
Does Vour Dishwasher Have an Air Gap?
An air gap protects your dishwasher
against water backing up into it if a drain
clogs.The air gap is not a part of the
dishwasher.It isnot covered by your
warranty. Not all plumbing codes require
air gaps,so you may not have one.
Theair gap is easg to clean.
[] Turnoff the dishwasher and lift off the
cover.
Removethe plasticcap and clean with
[-2]a toothpick.
15
Before you call for service...
Error Messages
START/RESETstatus
indicator light flashing
DishwasherBEEPS
onceevery30seconds
Beepingat theend
of thecycle
Troubleshooting Tips
Save time and moneg! Review the charts on the following
pages, or visit ge.com. You mag not need to call for service.
Possible Causes What To Do
Youhavepressedthe
START/RESETpadwhilethe
dishwasherisrunning.Thiswill
cancelthecycle.Thelightwill
stopflashingafter thedishwasher
drains(about90seconds).
• PresstheSTART/RESETpadonlyonetimeto startthedishwasher.Whenthe
dishwasherisrunning,onlypresstheSTART/RESETpadif youwishto cancel
(reset)thecycle.
Power to the dishwasher was
turned off while acycle was
running and power hasjust been
restored to the dishwasher. The
blinking lights indicate that the
dishwasher isdraining water
inside.
• Thelightwillstopflashingafterthedishwasherdrainsoutthewater.Anew
cyclewillstartautomaticallywhenthedrainends.
Thisisa reminderthat your
dishwasherdoor hasbeenleft
openduring operation.It will
continuebeepinguntil youclose
thedoor.
• Closeandlatchthedoorafteropeningit mid-cycle.Beepingwillstopand
dishwasherwillcompletecycle.
This is normal. The dishwasher
will beep twice at the end of
the cycle.
• Toturnoffthedoublebeepindicator(orre-activateitifitwas previously
turnedoff),presstheHEATEDDRYpad5timeswithin3 seconds.Atriple
beepwillsoundto indicatetheend-of-cyclebeepoptionhasbeenturned
on oroff.
Problem
Dishesand flatware
not clean
Possible Causes What ToDo
Lowinletwatertemperature •
Water pressureistemporarilg low •
Hakesureinletwatertemperatureiscorrect(seepage8).Turnonthehot
waterfaucetnearestthedishwasher;letrununtilthewatertemperature
stopsrising.Thenstartthedishwasherandturn offthefaucet.Thisensures
theenteringwaterishot.
Trynottousethedishwasherwhenhotwaterisbeingusedelsewhere
inthehouse;forexample,whendoinglaundryorwhena familymember
isusingtheshower.
Turnon afaucet.Iswatercomingoutmoreslowlythanusual?Ifso,wait
untilpressureisnormalbeforeusingyourdishwasher.
Trynottousethedishwasherwhenhotwaterisbeingusedelsewhere
inthehouse;forexample,whendoinglaundryorwhena familymember
isusingtheshower.
Air gapor disposerisclogged • Cleantheair gaporflushthedisposer.
Improperrack loading • Hakesurelargedishwaredoesnotblockthedetergentdispenserorthe
washarms.SeetheLoadingthedishwasherrackssection.
Noair gapor highdrain loop • Verifythat youhavean airgapora highdrainloop.Refertothe
InstallationInstructions.
16
ge.com
Problem Possible Causes What ToDo
Spats and filming
on glosses and
flatware
Extremelg hard water
Low inlet water temperature
Overloadingthe dishwasher
Improper loading
Old or damp powder detergent
Rinseagent dispenser emptg
Too little detergent
•UseJet-Dry ®or Cascade Crystal clear* rinseagents to remove spots and
prevent new filmbuildup.
• Hake sure water temperature isat least 120°F.
• Loaddishwasher as shown inthe LoadingPlaceSettingssection.
• Hakesuredetergentisfresh.
• Ifwaterisextremelyhard,asoftenermay berequired.
Cloudinesson Combinationof softwater and • Thisiscalledetchingandispermanent.Topreventthisfromhappening,
glassware too much detergent use lessdetergent ifyou have soft water. Wash glassware inthe shortest
cycle that willget them clean.
Water temperatureentering • Thiscouldbeetching.Lowerthewaterheatertemperature.
thedishwasherexceeds150°F
Sudsin thetub Correctdetergent •Useonlyautomaticdishwasherdetergentstoavoidsudsing.
wasn'tused Cascade®andElectrusol®AutomaticDishwashingDetergents
havebeenapprovedforuseinallGEdishwashers.
• Toremovesudsfromthetub,openthedishwasherandlet
sudsdissipate.Closeandlatchthedishwasherdoor.Pumpoutwater
bytouchingtheSTART/RESETpadonce;then30secondslater,
touchtheSTART/RESETpadagain.Repeatifnecessary.
• Alwayswipeuprinseagentspillsimmediately.
• Repositionthedishes,sothewaterfrom thelowersprayarmcan
flushthedetergentcup.Seepages13and1/4.
• Usea turkeybastertoremoveasmuchwateraspossiblefromthe
SmartDispense"dispenserandrefillitasnormal.Besuretotightenthe
capfullyto preventwaterfrom enteringthedispenser.
• Removemarkswitha mild,abrasivecleaner.
Detergentleft in
dispensercups
Waterin the
SmartDispense'"
dispenser
Blackor gray
markson dishes
Dishes don't dry
Rinseagent was spilled
Dishesare blocking the
detergent cup
Cap not tightened after filling
the dispenser
Aluminumutensilshave
rubbedagainstdishes
Lowinletwater temperature
Rinseagent dispenser isemptg
Controlpunel responded Door latch mag not be properlg
to inputs but dishwasher seated
never filled with water Water valve Tag be turned off
Stained tub interior Some tomato-based foods can
cause reddish stains
Teaor coffeestains
Anoverallgellowor brownfilmcan •
becausedbyirondepositsinwater
White film on insidesurface- •
hardwater minerals
• Makesure inlet water temperature isat least 120°F.
• SelectHEATEDDRY.
• Use PREWASHor ADDEDHEAToptions.
• Selecta higher cycle,such asANTI-BACTERIAor COOKWARE.
• Checkthe rinseagent dispenserand fill as required.
• Hake sure the door isfirmly closed.
• Hakesurewatervalve(usuallylocatedunderthesink)isturnedon.
• Useofthe RINSEONLYcycleafteraddingthedishtothe load
candecreasethelevelofstaining.GErecommendsCascade®
PlasticBoosterto helpremovethesetypesofstains.
• Removethestainby hand,usinga solutionof 1/2cupbleach
andBcupswarmwater.
AWARNING
Beforecleaninginterior,waitatleast20minutesaftera cycleforthe
heatinaelementstocooldown.Failuretodo socanresultin burns.
Aspecialfilterinthewatersupplylineistheonlyway tocorrect
thisproblem.Contacta watersoftenercompany.
GErecommends Jet-Drg ®or Cascade Crystal Clear*to help
prevent hard water mineraldeposits fromforming.
• Rundishwasher withcitricacid to remove mineral deposits. Citric
acid (Partnumber: WDBSX1S1)can beordered through GEParts.
See back cover forordering information.
17
Before gou call for service...
Troubleshooting Tips
\
Problem
Dishwosher won't run
What ToDoPossible Causes
• Replacefuseor resetcircuitbreaker.Removeanyotherappliancesfrom
thecircuit.
• Insomeinstallations,thepowertothedishwasherisprovidedthrougha
wallswitch,oftenlocatednexttothedisposerswitch.Makesureitison.
• Unlockcontrolpanel.Seepage6.
• Turnoff powertothedishwasher(circuitbreakerorwallswitch)for
30seconds;thenturn backon.
Fuseisblownor circuitbreaker
istripped
Poweristurned off
Controlpanelislocked
Controlpanelneedsto be
rebooted
Controlpanellights Timetoo longbetween • Eachpadmustbetouchedwithin5minutesoftheothers.
go offwhen you're touchingof selectedpads Torelight,touchany padagain,or unlockandrelatchdoor.
settingcontrols
Waterstanding in Thisisnormal • Asmallamountofcleanwateraroundtheoutletonthetub
thebottomof thetub bottomatthebackofthetub keepsthepumpseallubricated.
Waterwon't pump Drainisclogged • Ifyouhaveanairgap,cleanit.Seepage15.
outof thetub • Ifthedishwasherdrainsintoa disposer,rundisposerclear.
• Checktoseeifyourkitchensinkisdrainingwell.If not,you
may needaplumber.
Steam Thisisnormal • Warm,moistaircomesthroughtheventbythedoorlatchduringdrying
andwhenwaterisbeingpumpedout.Thisisnecessaryfordrying.
Sanitizedlight does Thedoorwasopenedand the • Donotinterruptthecycleanytimeduringor aftermainwash.
not illuminateat the cgclewasinterrupted during
endofthecycle orafter the mainwashportion
(Anti-Bacteria Theincomingwater • Raisethewaterheatertemperatureto between120°Fand140°F.
cycleonly) temperaturewastoo low
Noise Normaloperatingsounds • Theseareallnormal.Noactionisrequired.
Detergentcupopening
Water enteringdishwasher
Themotor stopsand starts at
varioustimesduringthecgcle
Drainpumpsoundsduring
pumpout
Drgingfan runningfor 2-4 hours
after CLEANlight isilluminated
(TopControlPanelmodelsonlLj)
Rattlingdisheswhenthe sprag
arm rotates • Hakesuredishesare properlyloaded.SeetheLoadingthe
dishwasherrackssection.
18
Notes.
If}
e_M
111
0
"0
(b
a
e_M
If}
e_M
111
0
O
e_M
v
111
(b
"0
0
19 i
ul
_a
ul
ul
.o
_a
2
0
0
ul
F_
v
0
E
ul
0
Notes.
2O

Other manuals for GLD8760NSS

1

This manual suits for next models

4

Other GE Dishwasher manuals

GE GSC720 User manual

GE

GE GSC720 User manual

GE Profile PDW7900N Manual

GE

GE Profile PDW7900N Manual

GE GLD7400R User manual

GE

GE GLD7400R User manual

GE GLD7400R Manual

GE

GE GLD7400R Manual

GE Profile PDW8700N Manual

GE

GE Profile PDW8700N Manual

GE GSC410 User manual

GE

GE GSC410 User manual

GE Profile Series Manual

GE

GE Profile Series Manual

GE GSC580 User manual

GE

GE GSC580 User manual

GE Spacemaker GSM1860NSS Manual

GE

GE Spacemaker GSM1860NSS Manual

GE Monogram ZBD1800GSS User instructions

GE

GE Monogram ZBD1800GSS User instructions

GE Appliances GSD4410 User manual

GE

GE Appliances GSD4410 User manual

GE GSD4010 User manual

GE

GE GSD4010 User manual

GE Profile PDWT502RII Manual

GE

GE Profile PDWT502RII Manual

GE Profile 165D4700P176 User manual

GE

GE Profile 165D4700P176 User manual

GE GSD580 User manual

GE

GE GSD580 User manual

GE Monogram ZBD6800K How to use

GE

GE Monogram ZBD6800K How to use

GE Monogram ZBD6800 User manual

GE

GE Monogram ZBD6800 User manual

GE Monogram ZBD6400 Series How to use

GE

GE Monogram ZBD6400 Series How to use

GE Monogram ZBD6800 User manual

GE

GE Monogram ZBD6800 User manual

GE GDF 610 Series User manual

GE

GE GDF 610 Series User manual

GE Spacemaker GSM2200N User manual

GE

GE Spacemaker GSM2200N User manual

GE GSD7750 User manual

GE

GE GSD7750 User manual

GE Artistry Series User manual

GE

GE Artistry Series User manual

GE Stainless Steel Tub Dishwasher User manual

GE

GE Stainless Steel Tub Dishwasher User manual

Popular Dishwasher manuals by other brands

Kleenmaid DW27I Instructions for use

Kleenmaid

Kleenmaid DW27I Instructions for use

Maytag MDB4949SDE installation instructions

Maytag

Maytag MDB4949SDE installation instructions

Asko D3250 use & care

Asko

Asko D3250 use & care

KitchenAid KDTE234GPS User instructions

KitchenAid

KitchenAid KDTE234GPS User instructions

Fisher & Paykel DishDrawer DD36STI2 installation instructions

Fisher & Paykel

Fisher & Paykel DishDrawer DD36STI2 installation instructions

Concept2 MNV3360 manual

Concept2

Concept2 MNV3360 manual

Magic Chef DU40J Service manual

Magic Chef

Magic Chef DU40J Service manual

Moyerdiebel DFM7.5 Installation, Operation and Service Parts Manual

Moyerdiebel

Moyerdiebel DFM7.5 Installation, Operation and Service Parts Manual

Glastender GT-24 Operations manual & parts list

Glastender

Glastender GT-24 Operations manual & parts list

Porter&Charles DWTPC6FI installation manual

Porter&Charles

Porter&Charles DWTPC6FI installation manual

BLACK DECKER BPD8W instruction manual

BLACK DECKER

BLACK DECKER BPD8W instruction manual

Moyerdiebel 351HT Installation/operation manual with service replacement parts

Moyerdiebel

Moyerdiebel 351HT Installation/operation manual with service replacement parts

Magic Chef MCSCD6W3 user manual

Magic Chef

Magic Chef MCSCD6W3 user manual

O.K. ODW 60032 FS A2 user manual

O.K.

O.K. ODW 60032 FS A2 user manual

Range Master RDW6012FI User guide & installation & service instructions

Range Master

Range Master RDW6012FI User guide & installation & service instructions

Moyerdiebel MD2000-VHR Installation, Operation & Parts Manual

Moyerdiebel

Moyerdiebel MD2000-VHR Installation, Operation & Parts Manual

Concept2 MNV4260 manual

Concept2

Concept2 MNV4260 manual

V-ZUG Adora 55 S operating instructions

V-ZUG

V-ZUG Adora 55 S operating instructions

manuals.online logo
manuals.online logoBrands
  • About & Mission
  • Contact us
  • Privacy Policy
  • Terms and Conditions

Copyright 2025 Manuals.Online. All Rights Reserved.