HOW TO
OPEM~
YO~
DIS~ASHER
Your dishwasher is designed to give maximum
performance on loads with normal and heavy soils.
You may find that many of your dishes have lighter
soils than normal; if this is the case you can save
water and energy by selecting a cycle other than
NORMAL
WASH.
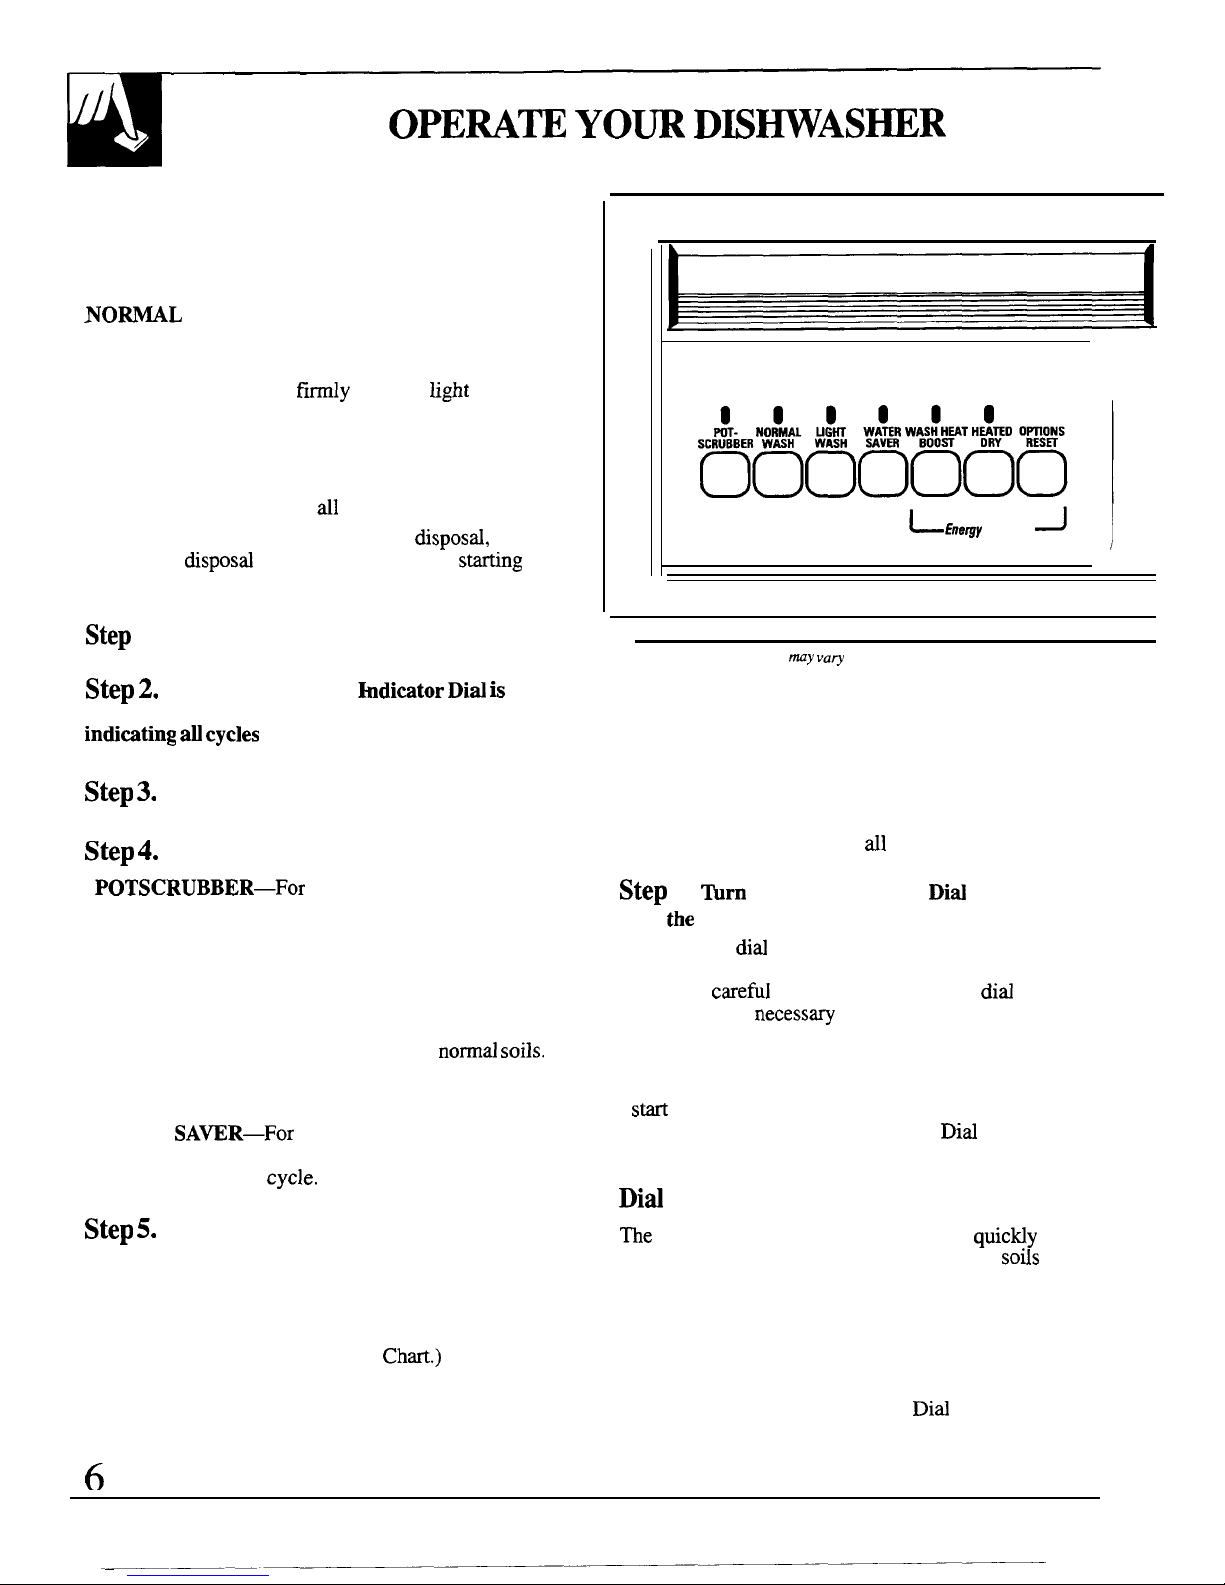
NOTE: The lights over the Cycle and Energy Option
pads come ON to indicate the cycle/option that has
been selected. Press pad
fmly
until the
tight
comes
on. These Cycle and Energy Option Indicator lights
remain on while the door is latched.
The CYCLE ON light will come on when the
dishwasher is in a Start Delay, Wash or Dry cycle.
The light will go out when
dl
cycles are complete.
If dishwasher drains into a food waste
disposd,
operate the disposd until it is empty before
sting
dishwasher.
Step
1.
Load your dishwasher. (See
Loading section.)
step
2.
Make sure the Cycle
hdicator
Did
is
at
the OFF position and the CYCLE ON light is off,
indiwting
au
cycles
are complete.
step
3.
Latch the door.
step
4.
Select desired wash cycle.
. POTSCRUBBER—For
items such as pots, pans
and casseroles with dried-on or baked-on soils.
Everyday dishes may be included. This cycle will
get heavily soiled dishes cleaner than the normal
cycle. It will not remove burned-on foods.
●
NORMAL WASH—For
most loads of everyday
dishes, glasses and cookware with medium soils.
Designed to yield high performance on norrnd
soils.
● LIGHT WASH—For loads that have dishes with
light soils.
●
WATER
SA~R—For
dishes with light soils. This
cycle saves water by using
3070
less water than the
NORMAL WASH
cycle.
step
5.
Select the desired Energy Options.
●
WASH HEAT BOOST—Use
this option for
best performance with heavily-soiled dishes.
When selected, the wash cycle is extended while
the dishwasher heats the water for the best washing
and drying. (See Cycle Selection
Chti.)
● HEATED DRY—Turns the drying heater on for
fast
drying. When selected, the cycle time will be
extended for 32 minutes.
Cycles
L
Ene~y
Options
‘1
Features ad appearance
my
vaq
slightly.
● HEATED DRY off-Shuts off the heating unit,
thus saving energy. Dishes air-dry naturally. It takes
longer but saves energy. You can open the door after
the motor stops to speed drying. Excellent for
overnight drying.
● OPTIONS RESET-Turns
d]
Energy Options off.
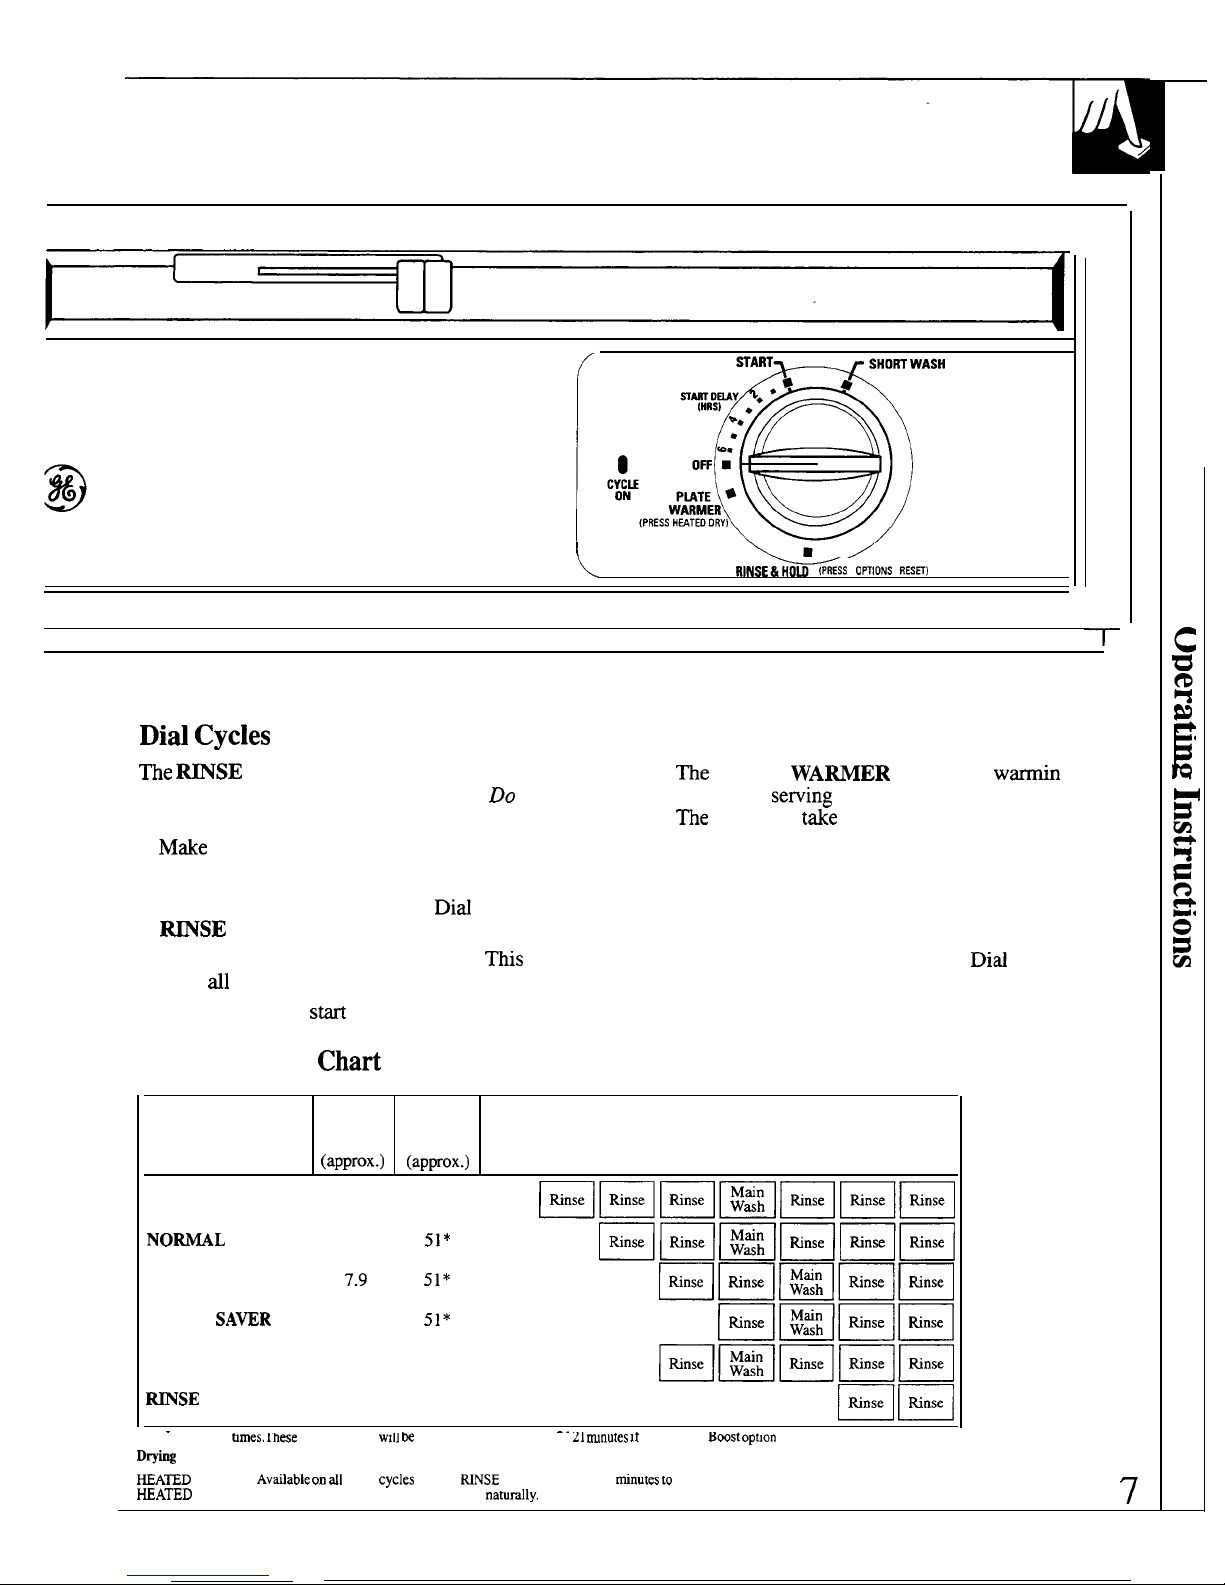
Step
6.
firn
the Cycle Indicator
Did
to START
or to
the
desired START DELAY time.
●
Turning the
did
to START will begin the cycle
immediately. To obtain the benefits of a complete
cycle, be
carefil
that you do not turn the
did
any
farther than is
necess~
to start the dishwasher.
There is a time delay between start-up and water
fill so you will not hear any wash action right away.
●
The
START DELAY
will allow you to delay the
sw
time of your dishwasher automatically for up
to 6 hours. Turn the Cycle Indicator
Did
to the
desired time. The
CYCLE ON light will
come on.
Did
Cycles
The
SHORT WASH
cycle allows you to
quic~y
wash loads of everyday dishes with medium
sods
that have not dried on, such as loads consisting mostly
of glasses.
Start Delay cannot be used with this cycle.
a. Select the NORMAL WASH cycle and any
Energy Option if desired.
b. Be sure the door is unlatched.
c. Slowly turn the Cycle Indicator
Did
to
SHORT WASH.
d. Latch the door to start the cycle.
6