manuals.online logo
Brands
  1. Home
  2. •
  3. Brands
  4. •
  5. GE
  6. •
  7. Dishwasher
  8. •
  9. GE GSD580P User manual

GE GSD580P User manual

D
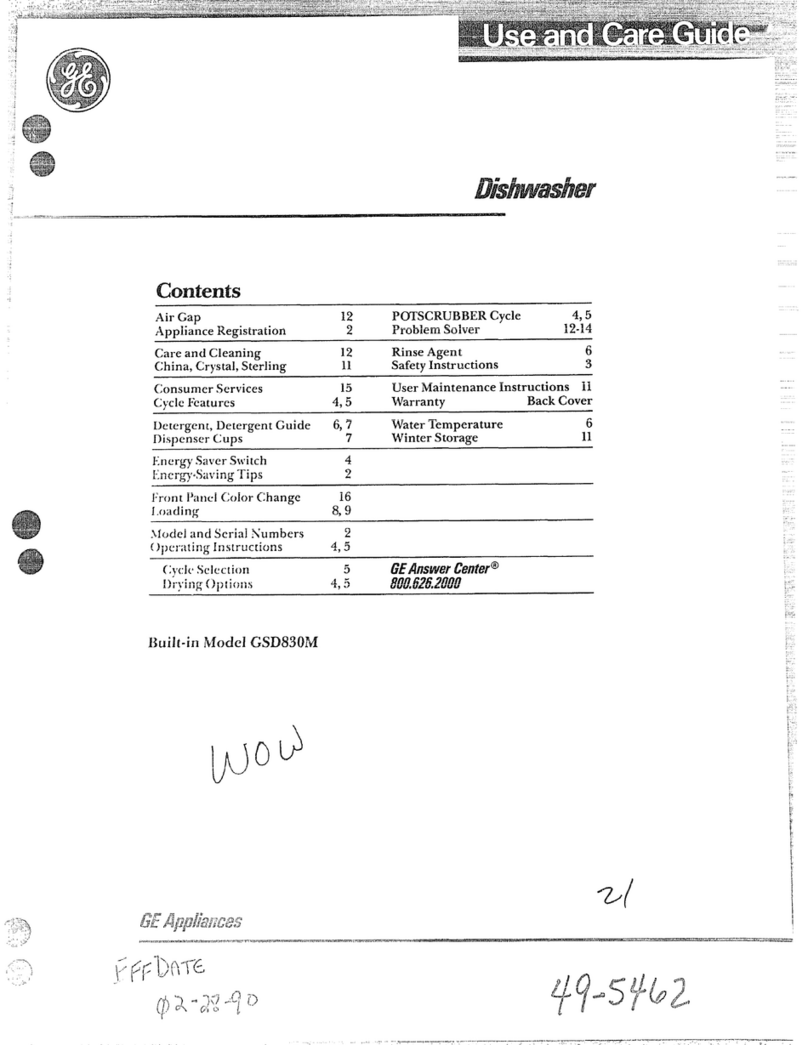
Contents
Air Gap 14 SafetyInstructions 3
ApplianceRegistration 2UserMaintenanceInstructions 14
CareandCleaning 14 warranty BackCover
China,Crystal,Sterling 10 WaterTemperature 6
ConsumerServices 15 WinterStorage 14
CycleFeatures 5
Detergent,DetergentGuide 6,7
llis~enserCum 7
EnergySaverSwitch 4
Energy-SavingTips 2
FrontPanelColorChange .,
.:.“+/M“.
Loading 8;;
ModelandSerialNumbers 2
OperatingInstructions 4,5
CycleSelection 4,5
DryingOptions 4,5
ProblemSolver 11-13 GEAnswt7rCenter@
RinseAgent 6
Built-h Model GSD580 ~
2“7
t
All manuals and user guides at all-guides.com
all-guides.com
Help us help ym.L..
Beforewingyour’
dishwasher,readthis
bookcarefully.
It is intendedto help youoperate
and maintainyour new dishwasher
properly.
Keep it handy for answersto your
questions.
If you don’tunderstandsomething
or need more help, write(include
yourphonenumber):
ConsumerAffairs
GE Appliances
AppliancePark
Louisville,KY 40225
VVritedownthemodeland
serialnumbers.
You’llfind them on alabel
fastened to the tub walljust inside
the dishwasherdoor.
These numbersare also on the
ConsumerProduct Ownership
Registration Card that came with
your dishwasher.Before sending in
this card, please write these
numbers here:
Model Number
Serial Number
Use these numbers in any
correspondence or service calls
concerning your dishwasher.
H’~OU ~e~ei~e~ adamaged
didlWaFJler..m
Immediately contact the dealer (or
builder) that sold you the
dishwasher.
Savetimeandmoney.
Beforeyourequest
service...
Check the ProblemSolver (pages
11through 13).It lists causes of
minor operatingproblemsthat you
can correctyourself.
TOobtainaSpanish language
version of this book, call
GE Answer Center@
800.626.2000
consumerinformation service.
Para obtenerla versi6n en
espaiiolde este manual,
name a
GE Answer Center,@
serviciode inforrnaci6n
para el consumidor,
te16fono800.626.2000
Ener~-sating tips
The power consumption of your
dishwasher can be minimized if
you follow these suggestions:
eOperate dishwasher only when
it’s fuU.Let the dishes accumulate
in dishwasher. When you put in
only apartial load, use the RINSE
&HOLD cycle to rinse off heavy --
soils. Be sure to latch the door
when waiting for afull load. This
helps keep soils moist, easier to
remove.
@Always select the cyck that
uses least amount of water that
will remove the soil from the
bad. See pages 4and 5.
~If you don‘t need your dishes
right away, use your ENERGY
SAVER no-heat feature that turns
the drying heater off automatically.
Dishes dry naturally over alonger
period such as overnight.
If youneed Mrvice
Toobtain service,see the
ConsumerServicespagein the o
back of thisbook.
We’reproud of our serviceand a
wantyou to be pleased. If for some
reason you are not happy with the
serviceyou receive, here are three
stepsto followfor furtherhelp.
FIRST’,contactthe people who
servicedyour appliance.Explain
why you are notpleased. In most
cases, this will solvethe problem.
NEXT, if you are stillnot pleased,
write all the details—including
your phone number—to:
Manager, ConsumerRelations
GE Appliances
Appliance Park
Louisville,Kentucky 40225
FINALLY,if your problem is still
not resolved, write:
Major Appliance Consumer
Action Panel
20 North WackerDrive
Chicago, Illinois60606
XL’
All manuals and user guides at all-guides.com
IMPORTANT SAFETY INSTRUCTIONS
Readauhlstrl.lctimsbeforeusingthisappkime
—
aWARNING-Whenusingthis
appliance,alwaysexercisebasic
safetyprecautions,includingthe
following:
*Usethisappliance only for its
intendedpurpose,asyouwill
fiid describedinthisUseand
CareBook.
*This dishwashermustbe
properlyinstalledandlocated
inaccordancewiththe
InstallationInstructionsbefore
itisused.Ifyoudidnotreceive
anInstallationInstructionssheet
withyourdishwasher,youcan
obtainonebycontactingthe
servicelocationnearestyou.
—Thisappliancemustbe
connectedtoagroundedmetal,
permanentwiringsystem;oran
equipment-groundingconductor
mustberunwiththecircuit
conductorsandconnectedtothe
equipment-groundingterminalor
leadoftheappliance.
—Connecttoaproperlyrated,
protectedandsizedpower-supply
circuittoavoidelectrical
overload.
CI Do not store or ~~e
combustiblematerials,gasoline
orotherfkumnabkvaporsand
liquidsinthevicinityofthisor
my otherappliance.
~Useonlypowderorliquid
detergentsorwettingagents
recommendedforuseina
dishwasher.
oDonotwashplasticitemsunless
marked“dishwashersafe”orthe
equivalent.Forplasticitemsnotso
marked,checkthemanufacturer’s
recommendations.
eLoadlightplasticitemssothey
willnotbecomedislodgedand
droptothebottomofthe
dishwasher—theymightcome
intocontactwiththeheatingunit
andbedamaged.
Tominimize the possibilityof
injury.
oWhenloadingitemstobe
washed:
A.Locatesharpitemssothat
theyarenotlikelytodamage
thedoorseal,and
B,Loadsharpkniveswiththe
handlesuptoreducetherisk
ofcut-typeinjuries.
@Donottouchtheheating
elementduringorimmediately
afteruse.
*Donotoperateyourdishwasher
unlessallenclosurepanelsare
properlyinplace.
oDonottamperwithcontrols.
oDonotabuse,siton,orstandon
thedoorordishrackofthe
dishwasher.
~Closesupervisionisnecessary
ifthisapplianceisusedbyor
nearchildren.Donotallow
childrentoplayinside,onorwith
thisapplianceoranydiscarded
appliance.Disposeofdiscarded
appliancesandshippingor
packingmaterialproperly.Before
discardingadishwasher,remove
thedoorofthewashing
compartment.
~Keepallwashingdetergents
andwettingagentsoutofthe
reachofchildren,preferablyina
lockedcabinet.Observeall
warningsoncontainerlabelsto
avoidpersonalinjury.
o‘TOminimizethe possibilityOf
electricshock,disconnectthis
appliancefromthepowersupply
beforeattemptingany
maintenance.
Note:Turningthecontroldialto
theOFFpositiondoesnot
disconnecttheappliancefromthe
power supply.Werecommend
havingaqualifiedtechnician
serviceyourappliance.
WARNNG-mROGENGAS
isproducedbythechemical
actionwithinyourwaterheater.
It canaccumulateinthewater
heaterand/orwaterpipesifhot
waterhasnotbeenusedfora
periodoftwoweeksorlonger.
HYDROCJENGASIS
EXPLOSIVE.Topreventthe
possibilityofdamageorinjury,
if youhavenotusedhotwater
fortwoweeksormore,or
movedintoaresidencein whichr
thehotwatersystemmaynot
havebeenusedforsometime,
turnon allhot waterfaucetsand
allowthemto runforseveral
minutesbeforeusingany
electricalappliancewhichis
connectedto thehotwater
system.ThiswillaHowany
hydrogengastoescape.Also,
sincethe gasis flammable,do
not smokeoruse anopenflame
or applianceduringthisprocess.
SAVETHESE
INSTRUCTIONS
/=
.4
.
All manuals and user guides at all-guides.com
I1I
sswlsERNwwt’ HE&so E?f# OmwyUGHTWASH
ROwmm
BE, :@
8+
WASHING
DRVNJG 0
Cycles Opsfom INSE&HOI.GKM w#: OP_ ON
b-
—
STEP’LLoad your dishwasher
with dishes, silverware,pots,
pans, bowls, etc. according to
instructionson pages 8and 9.
STEP2.Add detergent to the
detergentdispenser.Make sure the
Cycle IndicatorDial is at OFF
position before adding detergent.
(See pages 6and 7.)
Use rinse aid agent to help prevent
spotting. Occasionally check to
make sure therinse agent container
is at least half full. (See page 6.)
STEP’3.Select HEATED DRY.
~
Im
HEATED DRY.Turns the drying
heater on for fast drying.
ENERGY SAVER (no heat boost).
Turns the drying heater off to save
energy. Dishes will dry naturally
over alonger period such as
overnight.
If you need your dishes sooner,
open the dishwasher door after the
cycle is complete to reduce the
natural drying time.
Use of this option reduces the
electrical energy used by this
model approximately 7% for the
NORMAL WASH cycle.
STEP4.Select thecycle and start
dishwasher.(See CycleSelection
Hints on next page.)
If your dishwasherdrains into a
food waste disposer,operate the
disposeruntil it is empty before
starting the dishwasher.
oFo~POTSCR?.JBBERtNXI
NORMALWASH
cycles:
Im
a. Push selected cycle button.
b. Latch the door.
OJF~N UGHTWASH
@
14
WASHING
ORVN4Gu
❑RINSE&HOLG(W ‘~v# OPIIONI
c. Slowly turn CycleIndicator Dial
to ON position to startthe cycle.
Youwill hear the motor start.
There is atime delaybetween
start-up and water fill so you
will not hear any wash action
right away.
To obtain the benefits of acomplete
cycle, be careful that you do not
tukn the dial any further than
necessary to start the dishwasher.
oFor LIGHTWASHcycle:
a. Be sure door is unlatched,
b. Push NORMAL WASHbutton.
hOFFON
mm UGNTWASH
@
8+
WASHING
ORYING S
I❑RINSE&HGI.GIW %!%~OF’lIONI I
c. Slowly turn Cycle Indicator Dial
to LIGHT WASHposition.
d. Latch door to startthe cycle.
oFor RINSE&HOLDcycle:
a. Besure door is unlatched.
b. Select ENERGY SAVER drying
option.
OFFON
❑6UGHTWASH
@
e
WASHING
OWING S
8
7RINSE&HOLGIUSE ‘?ff$~ OPWW
c. Slowly turn Cycle Indicator Dial
to RINSE &~OLD position.
d. Latch door to start the cycle.
All manuals and user guides at all-guides.com
cycle sek!ctim hints
@Itis importantto fbllowthe loading
instructionson pages 8and 9.
POTSCRUBBER—Foritems such
aspots, pans and casseroleswith
dried-onor baked-on soils.
Everyday dishesmay be included.
NORMAL WASH—Forloadsof
everyday dishes,glasses and
cookware.
LIGHT WASH—Fordishesthat
are lightly soiled with soilsthat
havenot dried on. Also for
everyday dishes that have extra
preparation before loading.
RINSE &HOLD—For rinsing
partial loads which will be washed
later.Do not usedeter-gent.
Whathappensin eachcycle
oYou’11hear occasional clicking
sounds:
—Soft food disposer shredding
action.
—Drain valve opening to pump
water out.
—Timer control as cycle
eDuring the drying period:
—The motor stops.
—Watervapor comes through the
vent by the door latch during
drying and when water is being
pumped out.
progresses.
—Detergent cup opening.
Wash
WaterUse CycleTime
Gallons Minutes
WashCycles (approx.) (approx.) CycleSequence
POTSCRUJ3BER 12.1 74 ❑mmMBmB
i’fJORMALWASH 12.1 “❑BEMBmm
LIGHTWASH 10.3 53 EmE%mEIEm
RINSE&HOLD 4,9 14 FI WFI
Drying options:
HEATEDDRYING.AvailableonallwashcyclesexceptRINSE& HOLD.Acid24minutestowash
cycletime.
ENERGYSAVER.Dryingheateristurnedoff.Dishesdrynaturally.
@
-—33%;
~-.
.:”;Y=YJ.
All manuals and user guides at all-guides.com
Cad dishwashing starts
withHOI’water.
Toget dishescleanand dry,you
needhot water.Tohelpyou get
waterof thepropertemperature,
yourdishwasherautomatically
heatsthe waterin the washcycle.
Forgood washingand drying,the
enteringwatermust beat least
120”F.Topreventdish damage,
inletwater shouldnotexceed 150”F.
How to test water temperature:
Check the water temperature
insideyour dishwasher with a
candy or meat thermometer.
Let the dishwasher run throughone
fill and pump out cycle, then let
the dishwasher fill with water the
second time.
When you hear the water stop
filling, unlatch the door and slowly
Aopen it.
Measure the temperature of the
water in the bottom of the tub this
way:
Remove the silverware basket and
place acandy or meat thermometer
in the water towards the middle of
the tub. If the temperature is less
than 120”F,you will not get good
washing results. Higher water
temperature is needed to dissolve
grease and activate powder
detergents.
Helpful hints: If outside
temperatures are unusuallylow, or if
your water travels along distance
from water heater to dishwasher,
you may need to set your water
heater’s thermostat up. If you have
not used hot water for some time,
the water in the pipes will be cold.
Turn on the hot water faucet at the
sink and allow it to run untilthe
waterishot.Then startthe
dishwasher.If you’verecentlydone
laundryorrun hot waterfor
showers,giveyour waterheater
timeto recoverbeforeoperatingthe
dishwasher.
Toimprove washabilityif the
water is less than 120”Fand you
cannot adjustyour water heater:
Select alongercycle and fill both
detergentcups at leasthalf-full
with detergent.
HOwtOusearinseagent,.
Arinse agent makes water flow off
dishesquicker than usual. This
lessenswater spotting and makes
drying faster,too.
For best dishwashingperformance,
use of arinse agent such as JET-
DRY brand is recommended.
Rinse agents come in either liquid
or solid form. Yourdishwasher
uses the liquid form.
How to fill the rinse agent
dispenser. Unscrew the cap. Add
the liquid rinse agent until itjust
reaches the bottom of the lip inside
the dispenser opening. Replace the
cap. The dispenser automatically
releases the rinse agent into the
final rinse water.
If you accidentxdlyspill: Wipe up
the rinse agent with adamp cloth.
Don’tleave the spill in the
dishwasher. It can keep your
detergent from working.
H’you can’tfind any rinse agent,
write:
BENCKISER CONSUMER
PRODUCTS, INC.
(“JET-DRY”)
411 W. Putnam Ave.
Greenwich, CT 06830
How tochoose and time the o
right detergent.
First, use onlypowder or liquid a
detergentspecificallymade for
use in dishwashers.Other types
will cause oversudsing.
Second,check the phosphate
content. Phosphatehelpsprevent
hard-watermaterialsfromforming
spotsor film on your dishes.If
your water is hard (7 grainsor
more), yourdetergenthas to work
harder.Detergentswith ahigher
phosphatelevelwill probablywork
better.If the phosphatecontentis
low (8.7% or less),you’ll haveto
use extra detergentwith hard water.
Yourwater departmentcan telll
you how hard your wateris. So
can your county extensionagent.
Or your area’swater softener
company.Just call and ask them
how many “grains” of hardnessis
in your water.
How much detergentshouldyou
use? That depends.Is your water
“hard” or “soft”? Withhard water,
you need extra detergentto get
dishesclean. With soft water,you
need less detergent.
Too much detergentwith soft water
not only wastes money,it can be
harmful. It can cause apermanent
cloudinessof glassware, called
“etching.” An outsidelayer of
glass is etched away! But why take
achance when it’seasy to find out
the hardness of your water.
Keep your detergent fresh and
dry. Under the sink isn’tagood
place to store detergent.Too much
moisture. Don’tput powder
detergent into the dispenseruntil
you’re ready to wash dishes, either.
(Rwon’t be fresh OR dry.)
If ym.lrpowder detergent gets Okl.
or 111mPy9
thK’QWit away. Old
detergent often won’t dissolve. If
you use aliquid dishwasher
detergent, these precautions are not
necessary because liquid detergents
don’t “knp” as theyageorcome .;~+
incontactwithwater. Q
‘*F
6
All manuals and user guides at all-guides.com
all-guides.com
YOLI’Ufind two detergent
dispenserson the insidedoor of
yourdishwasher.There are two
becausesomecycles use two
washes.
OPEN
CUP
See “DetergentUsageGuide”
below (Besurethe CycleIndicator
Dial isat OFFposition before
addingdetergent.Otherwise,the
deter~entcu~lid willnot closeand
latchpropefiy.)
GRASPHANDLE, 0’”
ROTATE
AND
/’
CLOSETIGHTLY /f“
L
Close the main cup.
NOTE: Detergent cup may be
opened manually with no‘harm.
Turnhandle counterclockwise
until it releases.Asnapping sound
is normal when it opens.
Howtoprepare the dishes
forwashing
If thisis yourfirstdishwasher,orif
you’rereplacingamucholder
model,youmay wonderhowmuch
preparationyourdishesneed.
Actuallyverylittle.Pre-rinsingof
normalfood soilsis notnecessary.
Withcommonsenseandalittle
practiceyou’llsoonknowwhat
foodsto remove.Here are some
guidelines:
1. Scrape off bones, seeds,skins,
toothpicksand other hard solids.It
is also best to remove hard shelled
vegetables,meat trimmings,leafy
vegetablesand crusts. Remove
excessive quantitiesof oil or
grease.
2. Remove large quantitiesof any
food. Yourdishwasher has abuilt-
in softfood disposer that
pulverizes soft food bits and
flushes them away. It can handle
small amountsofsoftfoods,but
large amounts will be difficultto
handle.
.
DetergentUsage(hide (powderorliquid)
3.Tryto removefoodscrapsand
date dishesin dishwasherbefore
;oil hasachancetodry andbecome
hard.Disheswithdried-onsoilare
moredifficulttowashandmay not
comecleanin theNORMAL
WASHcycle.Rememberto use
yourRINSE&HOLD cyclefor
small“holding” loads.
Note:The foods mentionedabove
are examples only.Other foods not
mentionedmay also need to be
removed from yourdishes. You
may also want to consider
removing foods such as mustard,
mayonnaise, vinegar,lemonjuice
and other foods that can cause
discolorationof stainlesssteelif
allowed to remain on dishesfor a
long period of time.
When using the I?OTSCIUJBBER
cycle,lesspreparationisrequired
beforeloading.ThePOTSCRUBBER
cyclecanwashheavily-soileddishes
andremovedried-onandbaked-on
soilsfrompots,pansandcasseroles.
Itemswithburned-onsoilsmaynot
comecleanandthedishwashercannot
removeburnmarksorrestorefading
causedbyoverheatingduringcooking.
ISOFT WATER MEDIUM WATER HARD WATER
(O-3grains hardness) (3-7 grains) (7-12 grains*)
CYCLES IMainCup$ IOpenCup* IMain Cup$ IOpen Cup* IMain Cup$ IOpen Cup*
11I , ,1ii #
POTSCRUBBERand 1Ta~~espoon I1Tablespoon Half Full 1Half Full Completely ICompletely
PJORMAL WASH minimum +minimum +Full +Full
l.JGHT WASH 1Tablespoon None Half Full None Completely None
minimum Full
RIFISE&HOLll use no detergent Usemdetergent Use Mdetergent
*12grainsandupis extremelyhardwater.Awatersoftenerisrecommended.Withoutit,limecanbuildup inthewatervalve.
Thewatervalvemaystickwhileopenandcauseflooding.
~Fikd Main Cup holds 3tablespoons; Filled Open Cup holds 2tablespoons.
-.
-“ ‘7—
.
.
All manuals and user guides at all-guides.com
....,,1:=.8 ;’,
How to.kMkdyour dishwasher H(W tokmdthe’HIP WCK
Thisis arandom mixed load, the most COnmIOiZtype ~;@7~;f+I
::%4:;-~
;~:i@,.----Thetoprack is best for Elasses,CUPSand saucers. Cum
you willhave. ‘~$%?:!?and glasses fit best alon~the si~es~This is the place for
Make sure dishes are properly loaded to insure that }<$$$~+dishwasher-safeplastics, too.Make sure smallplastic
%
‘~~~$;,:?items are lodged in tightly so they can’t fall onto the
water can reach the soiledsurfaces. The wash arm in ‘---.R~Xt
the botton~sprays water up. The tower that rises in the :.,.fi++$j.~alrod@heating unit. Arrangestemware so that it cannot
center sends water out over the dishes to wash the 7$ ‘“Q;$$; move easily.Don’t let the glasses touch each other.
items in the upper rack. A~J~pray~:~fi$~~:top:.w~s-h~s.$$:;S?
down~Make sure to place tail-itemsto the outside so “q;;
the upper wash arm is not blocked. ,-,
WATCHOUT FOR THIS.
The wash tower rises through the center of the bottom
r[lc]<during the wash and rinse portions of the cyc]e.
Don‘tblock it or load Ml things next to it. Also, be
careful not to let aportion of an item such as apot or
dish handle extend through the bottom rack. This could
block the wash arm and cause poor washing results.
<9
~> —— .—
This rack is ideal for dishwasher-safe plastics. When
loading, place plastic items along the back and be sure
that each plastic tumbler is secured over two fingers.
This will prevent dislodging; tumbler wiH not fail
through rack onto heating unit.
All manuals and user guides at all-guides.com
.-
[’
‘..
Iu
Sauce pans, mixing bowls and other small items may
be placed—face down—in the top rack. The top rack is
handy for all kinds of odd shapes.
How to load the BOTTOM MCK
Fit Dlatesand saucersbetween the pins.Place itemsso
tha~water and detergentfrom wash arm can reach soiled
surfaces.
Put flatware in the removablebasketwith handlesup to
protect your hands. Mix knives,forks and spoonsso they
don’t nest together.Distributeevenly,Small plasticitems,
such as mess-uringspoonsand lidsfrom smallcontainers
are not recommended for automaticdishwashing.If
placed in the dishwasher,they should go in the bottomof
silverware basket with silverwareon top.
Plw%autioln!
f>
SC.
,.... ..
$$$!~ Take out anything that may fall or extend throughthe
~~ bottom of the basket.
f@
,.
Load platters,pots, pans and bowls along the sides, in
corne;s or in the back. All large items, such as pitchers
salad bowls and mixingbowls, shouldbe washed in th
lower rack.
Heavily soiled pots, pans and casseroles MUST be
loaded in the bottom rack, facing down. Prop broiler
pans and racks along the edge.
Don’tlet
extendtl
bottom. !
II
Ii
__J_.
All manuals and user guides at all-guides.com
—
what youam usuaIIy ‘washsafelyinyour dishwasher.
And what youcan’t.
SpecialInstructions “e
.—
Somedarkeningorspottingpossible.Removeby
scouringwithsoap-filledsteelwoolpads.
Usually
Material Safe
Aluminum YES
Exceptions(notsafe)
Somecoloredanodizedaluminumcan
fade.
Antique,metal-trimmed,hand-painted
orover-the-glazepatternsfade.Gold
leafwilldiscolor.
China/Stoneware 1-
YEs
YES
Ifindoubt,checkwiththemanufacturer,ortestwash
onepiecedailyforatleastamonth.Comparewiththe
restoftheset,
Antique,metal-trimmedorhand-
paintedpatternsfade.Goldleafwill
discolor.
Crystal Loadsecurelytopreventmovement.Check
manufacturer’sinstructionsforyourcrystal,
Non-dishware
items--such as
electronic air cleaner
filters, furnacefilters,
paint brushes, etc.
Glass
NO Donotwashindishwasher.Damagetodishwasherand
discolorationorstainingofdishwashermayresult.
YES MilkGlassmayyellow.
Iron NO Ironwillrust.
Pewter NO Pewtertarnishes,
Ifit doesn’tsayDISHWASHERSAFE,testonepiecein
thetoprackbeforedishwashinganentireset.Washin
toprackonly.
Rinseif notwashingimmediately.Saltyoracidfoods
canstainif lefton.
Rinseifnotwashingimmediately.Saltyoracidfoods
canstainif lefton.Drydetergentcancausedifficult-to-
removeblackspots.Placeinbacksectionofsilverware
baskettoavoidexposuretodetergentfromthedetergent
cup.
Plastics YES
Stainless steel YES
Sterling Silver
and Silver plate YES Don’tputinsamesilverwarebasket
withstainlesssteel.Contactbetween
metalscandamagesilver.Don‘twash
:opperutensilsinthesameload.Silver
maygetabrownfilm.Adhesiveused
:0attachsomehollow-handleknives
:anloosen.
Non-stick
coatings YES Afterwashing,wipethenon-stickcoatingareawith
vegetableoiltokeepitfromlosingits non-stickquality.
Tincanrust.
Woodcanwarp,crackorloseits
Finishwithanytypeofwashing.
Tin NO
wood NO
Forgetadish?Here’s
when‘you Giln addit.
Add dishesany timeduringthe
RINSE &HOLD cycle.With
However, opening the door during 2. Wait afew seconds until the
any cycle lessens cleaning power water cahms.Then open the door.
because the temperature inside the
dishwasher is lowered. So try to 3. Add dishes you’ve forgotten.
load everything at the beginning. 4. Close the door and push the
otherwashcycles,you can add
(fishesat any timeBEFOREthe main
detergentwashportionof thecycle.
—
Here’s how to add aforgotten dish: latch to the far right. When the
door is locked, washing wiH
continue.
1.Push the door latch to the left.
VVashinEwill sto~.
10
All manuals and user guides at all-guides.com
gi!!!iqQuestions?
?Use ThisProblem Solver
~
oPROBLEM
DISHWASHER
WON’T RUN
UNUSUAL NOISE
DISHES DON’T DRY
UNCLEAN DISHES
AND FLATWARE
BLACK OR GRAY
MARKS ON DISHES
DETERGENT LEFT IN
DISPENSER CUPS
DETERGENT CUP
LID WON’T LATCH
AFTER ADDING
DETERGENT
YELLOW OR
BROWN FILM
POSSIBLE CAUSEAND REMEDY
Afuse in your home maybe blown, or the circuitbreaker tripped. Replacefuse of
reset circuitbreaker.Remove any other appliancesfrom the circuit.
Utensilsmay not be secure on rack pins, or somethingsmall may havedroppedfrom
therack. Wateris causing utensilsto rattle. Make sure everythingis securelyplaced in ,
dishwasher.
Make sure inlet water temperatureis correct. (See page 6.)
Unload the bottom rack first. Waterfrom dishes in the top rack maybe spillinginto the
bottom rack.
Check for improper loading.Dishes shouldn’tnest together.Avoidoverloading.
Check the rinse agent dispenserto see that it’snot empty.
Check inlet water temperature. It should be at least 120°F.(To test, seepage 6.)
Waterpressure may be temporarily low. Turn on afaucet. Is water coming out slower
than usual? If so, wait until pressure is normal before using your dishwasher.
Plugged air gap. (See page 14.)
Improper rack loading. (See pages 8and 9.)
Aluminum utensils often leave marks when they rub against dishes.Remove marks
with amild abrasive cleanser.
Water may not be reaching the detergent cups. Move dishes that maybe blocking
detergent cup.
The dispenser cover may not be opening or may be blocked by improperly loaded
items. If you used apowder detergent, open the cup and remove any caked-on
detergent. If the cup still doesn’t open automatically, call for service.
Detergent may be old. If the powder detergent is hard or caked in the box, throw it
away. The detergent may not be working well. Try another brand.
Cycle Indicator Dial must be in OFF position for cup lid to close and latch properly.If
you unlatch the door and open it to dry your dishes, the Cycle Indicator Dial does not
advance to OFF by itself.
Tea or coffee can stain cups. Remove the stains by hand, using asolution of 1/2CLIp
bleach and 3cups warm water.
An overall yellow or brown film on dishes or glassware can be caused by iron
deposits in water. Aspecial filter inthewatersupplylineistheonlywaytocorrect
this problem. Your water softener company can tell you about the filter.
Yellow film on sterling silver results when yoLlwash copper utensils in the same
load. Silver polish wi]~usually remove this stain.
(continued next page,)
.
All manuals and user guides at all-guides.com
all-guides.com
PROBLEM POSSIBLE CAUSE AND REMEDY
SPOTS AND Spottingcan be caused by all thesethings: e
FILMING ON
GLASSES AND
FLA~ARE
0Extremely,hard water.‘(Seepage 6.)
*Low inlet water temperature.(Totest, see page 6.)
*Overloadingthe dishwasher.
●Improperloading. (See pages 8and 9.)
oOld or damp powder detergent.
●Phosphatelevel in detergenttoo low.(See page 6.)
●Rinseagent dispenser empty.(Seepage 6.)
oToo littledetergent. (See page 7.)
Due to varyinglocal water conditionsand personal preferences, try several brands of
detergentsto find one that gives the best results for you. Aliquid dishwasherdetergent
may help reduce filming.
Toremove stubborn spots and film from g~assware:
1. Remove all metal utensilsfrom the dishwasher.
2. Do not add detergent.
3. SelectNormal Wash cycle.
4. Start the dishwasher and allow to rur
now be in the main wash.
5. Then open the door and pour 2cups
the dishwasher.
for 15to 20 minutes. The dishwasher will
500 ml) of white vinegar into the bottom of
6. Close the door and allow to complete the cycle.
H’vinegar rinse doesn’t work: Repeat as above, except use 1/4cup (60 ml) of citric
acid crystals instead of vinegar. (Most drugstores carry citric acid crystals. If yours
doesn’t,call GE Factory Service.)
Using avinegar or citric acid crystal rinse more than twice amonth? Consider a
home water softener.
I
CLOUDINESS ON IIf vinegar or citric acid crystal rinse doesn’t work, the cloudiness is “etching.”
GLASSWARE The film cannot be removed.
It can be prevented: Use less detergent if you have soft water. Wash glassware in
the shortest cycle that will get them clean.
IWater temperature entering dishwasher exceeds 150°F.
All manuals and user guides at all-guides.com
—.— —-
PROBLENI
eCHIPPING OF
CHINA
SMALL AMOUNT
OF WA~R
STANDING IN
THE BOTTOM
OF THE TUB
WATERWON’T
PUMP OUT OF
THE TUB
SUDS IN THE TUB
DISHWASHER
LEAKS
POSSIBLE CAUSEAND REMEDY
Roughhandlingcan cause chipping.Load with care. Make sure glasswareand china
are secureand can’tjar loose. (See page 8for correct way to load glassware.)Make
sure tallglasses and stemware willclear the top of the tub when you push the rack
into the dishwasher.
Alwaysuse the top rack for delicate items.
Water around the outleton the tub bottom at the back of the tub is normal.It is clean
water.It’sthere to keep the water seal lubricated.
If the entire bottom of the tub has water, you may have adrain problem. Clean the air
gap, if you have one. (See page 14.)
Check the kitchen sink. Is it draining well? Youmay need aplumber,
If dishwash~rdrains into disposer,run disposer to clear. Be sure disposer is not
clogged. ‘
Sudsing detergentsare not meant for dishwashers. USE ONLY AUTOMATIC
DISHWASHER DETERGENTS TO AVOID SUDSING.
To remove suds from the tub: Open the dishwasher. Let suds evaporate. Add 1
gallon of cold water to the tub. Close and latch the dishwasher.Pump out water by
slowiy turning the control dial until adrain period is reached.
Repeat if necessary.
Sudscan cause unit to overflow. That’s why it’s so important to use adetergent that’s
designed for automatic dishwashers.
Spilling the rinse agent can cause foam during washing. This can lead to overflowing,
Wipe up accidental spill of rinse agent with adamp cloth.
If you need more help...caH, toll free:
GE Answer Center@
$00.626.2000
consumer information service
13
All manuals and user guides at all-guides.com
careand Ckaning
USER MAII+U’ENANCE
mmumml?js
Clean the controlpanelwith a
lightlydampened cloth.Dry
thoroughly.Do not useabrasives
or.sharp objectson thepanel. They
can damageit.
Cleanthe outside withagood
appliancepolish wax. The outside
cabinetfinish is durable,but it can
scratch. So useno scouringpads
or harsh or gritty cleaners.
Appliance Polish Wax&Cleaner
(Cat.No. WR97X0216)is
availablefrom GE Appliance
PartsMart.
The inside usually takes care of
itself. If it should ever need
cleaning, use amild cleansing
powder. Scouringpads and harsh
cleaners can mar the finish.
lluil~-i~ dishwashers
oftenuseanair gap.
Keepit dean.
An air gap is aplumbing device.
It protects your dishwasher against
water backing up into it if adrain
clogs. The air gap is not apart of
the dishwasher.Andyou may not
even haveone. Not allplumbing
codesrequireair gaps.
If you have an air gap,check it at
least once amonth.IT IS NOT
PARTOF’YOURDISHWASHER.
IT IS NOT COVERED IN YOUR
WARRANTY.
The air gap is easy to clean.
With most types, firstturn off the
dishwasher,then lift off the
chrome cover.Then unscrew the
plastic cap and check for any
buildup of grit. Atoothpick makes
cleaning easy.
Check the air gap any time your
dishwasher isn’t draining well.
NMusing yourdishwasher
inwinter?Rotect
againstfreezing. o
If yourdishwasheris left in an
unheatedplace during the winter,
ask aservicetechnicianto:
cCut offelectric power to the
dishwasher.Remove fuses or trip
circuitbreaker.
~Turn off the water supply,
eDisconnectthe water inlet line
from the watervalve.
eDrain waterfrom the inlet line
and water valve. (Use apan to
catch the water.)
eReconnectthe water inlet line to
the water valve.
~Removetheplasticpumpcoverin
the tubbottomand use aspongeto
soakup waterin the rubberboot.
PUMP COVER SCREWS 1
Howtochangecolor
If you are redecorating, you can
change your dishwasher’s door
panel to match or blend with your
new colors.
The panel is held in place by the
door trim. Each side of the panel is
adifferent color. Or you can paint
the panel with the color of your
own choice.
—
panels
How to change the door panek
1. Take out trim screws on either
side of the dishwasher door.
Remove the side trim.
2. Slide the panel out.
(careful—edges may be sharp.)
3. Turn the panel around and put
the color you want in front.
4. Replace the panel, side trim and
screws.
Awood paneltrim kit contains
trim and instructionsfor adding a
decorativewood door panel and
lower accesspanel to match kitchen
cabinets.The kit is availableat no
extra cost. (SpecifyGPF4Q.)
Order from:
GE Appliances
c/o Dri-ViewManufacturing
4706 Alknond Ave.
Louisville,KY 40209
Note:Donotoperate the
dishwasher while ‘changing
panels.
M=
All manuals and user guides at all-guides.com
we’llBemere
With the purchase of your new GEappliance, receive the
assurance that if you everneecl information or assistance
from GE,we’llbe there. All you have to do is call-toll-free!
AGE ConsumerServiceprofessional
a- willprovideexpertrepairservice,
—.——.
‘z scheduledatatimethat’sconvenient
foryou.ManyGEConsumerService
company-operatedlocationsofferyou
servicetodayor tomorrow,or atyour
convenience(700 a.m.to ‘ZOOp.m.
weekdays9:00a.m.to2:00p.m.Satur-
days).Ourfactory-trainedtechnicians
knowyourapplianceinsideandout—
somostrepaimcanbe handledinjust
one visit.
&fi5A!
...
*...
-..
WhateveryourquestionaboutanyGE
majorappliance,GEAnswerCente#
informationserviceisavailableto
help.Yourcall-and yourquestion—
willbeansweredpromptiyand
courteously.Andyoucancallany
time.GEAnswerCente# serviceis
open24hoursaday7daysaweek.
Youcanhavethesecurefeelingthat
GEConsumerServicewillstillbe
thereafteryourwarrantyexpires.l?ur-
chaseaGEcontractwhileyourwar-
rantyisstillin effectandyou’llreceive
asubstantialdiscount.WithamuMple-
yearcontract,you’reassuredof fhture
serviceattoday’sprices.
TelecommunicationDevice for the Deaf
n“— -. . . . ,“, ..- -. -.
m!.. -0 .- mu“m-.*. -... ,-. ,1
Individualsqudifkd to service their
owna~#a.nces can haveneeded
partsor accessoriessentdirectlyto
theirhome,freeof shippingcharge!
The GEpartssystemprovidesaccess
toover47,000parts...andallGE
GenuineRenewalPartsarefilly
warranted.VISA,MasterCardand
Discovercardsareaccepted.
user maintenanceinstructions
containedin.thisbookletcoverproce-
duresintendedto be performedby
anyuser.Othersmvieinggenerally
shouldbe referred.to qualifiedsew
V& personnel.caution mustbe
exel@XXi9sinceimproperservicing
may‘causeunsafeoperation.
LJponrequest,GEwillprovideBraille
controlsfor avarietyof GEappliances,
andabrochuretoassistin planninga
barrier-fi-eekitchenfor personswith
limitedmobility.Toobtaintheseitems,
freeof charge,call800.626.2000.
Consumerswithimpaired hearing
or speechwho haveaccessto aTDD
or aconventionalteletypewritermay
Cd 800-TDD-GEAC(800-833-4322)
to request information or service.
All manuals and user guides at all-guides.com
‘YOURGEAUTOMATICDISHWASHER
WARRANTY
Saveproof of original purchasedate such as yoursalesslip or cancelledcheckto establishwarrantyperiod. 4
WHAT1sCOVEFED FULL ONE-YEAR WARRANTY
For one yearfrom date of original
purchase,we will provide,free of
charge, partsand service labor in
your hometo repairor replaceany
part of the ciishwasherthat fails
becauseof amanufacturingdefect.
FULL TEN-YEAR WARRANTY
Forten years from date of original
purchase,we will provide,free of
charge, parts and servicelabor in
your home to repairor replace the
tub or doorliner if it failsto contain
water because of amanufacturing
defect such as cracking, chipping,
peeling or rusting.
This warrantyis extendedto
the original purchaserand any
succeedingownerfor products
purchasedfor ordinaryhome use
in the 48 mainlandstates, Hawaii
and Washington,D.C.InAlaskathe
warranty isthe same exceptthat it
is LIMITED becauseyou must pay
to shipthe productto the service
shop or for the servicetechnician’s
travel coststo your home.
All warranty servicewill be
provided by our FactoryService
Centers or by our authorized
Customer Care” servicersduring
normal working hours.
Look in the White or Yellow Pages
of your telephone directoryfor
HOTPOINT FACTORYSERVICE,
GENERAL ELECTRIC-HOTPOINT
FACTORYSERVICEor HOTPOINT
CUSTOMER CARE@SERVICE.
WHAT1SNOTCX3VEREED~Service trips to your hometo
teach you how to usethe product.
13eadyour We and Care material.
If you then have any questions
about operatingthe product, please
contact your dealer or our
Consumer Affairs office at the
address below, or call, toll free:
GE Answer Cente@
800.626.2000
consumer information service
~Improper installation.
If you have an installation problem,
contact your dealer or installer.
You are responsible for providing
adequate electrical, plumbing and
other connecting facilities.
@Replacementof housefuses or
resetting of circuit breakers.
@Cleaning or servicing of air gap ,
device in drain line.
@Failure of the product if it is used
for other than its intended purpose {
or used commercially.
~Damage to product caused by
accident,fire, floods or acts of God.
WARRANTOR IS NOT
RESPONSIBLE FOR
CONSEQUENTIAL DAMAGES.
I
Some states do not aHowthe exclusion or limitation of incidental or consequential damages, so the above limitation or exclusion
may not apply to you. This warranty gives you specific legal rights, and you may also have other rights which vary from state to state,
To know what your legal rights are in your state, consult your local or state consumer affairs office or your state’s Attorney General.
Warrantor: General Electric Company
Hfurther help is needed concerning this warranty,write:
Manager—ConsumerAffairs,GEAppliances,Louisvih, KY40225
b
P
rInm6-m r-f-
1
Part No. 165D3080PI 80 I
PubNo,4-9-54$7 I
1-91 CG
All manuals and user guides at all-guides.com
all-guides.com

This manual suits for next models

1

Other GE Dishwasher manuals

GE GLD4100M User manual

GE

GE GLD4100M User manual

GE 49-5215 Installation instructions

GE

GE 49-5215 Installation instructions

GE Profile PDWT480PSS Manual

GE

GE Profile PDWT480PSS Manual

GE GLD4604V Manual

GE

GE GLD4604V Manual

GE Monogram ZBD4800 User manual

GE

GE Monogram ZBD4800 User manual

GE Triton EDW2020 User manual

GE

GE Triton EDW2020 User manual

GE GLD5900N Manual

GE

GE GLD5900N Manual

GE GDWT160RSS Manual

GE

GE GDWT160RSS Manual

GE GSD1140P User manual

GE

GE GSD1140P User manual

GE GLD6966RSS Manual

GE

GE GLD6966RSS Manual

GE Triton GSD5110 User manual

GE

GE Triton GSD5110 User manual

GE L0523252 User manual

GE

GE L0523252 User manual

GE Built-In Dishwasher User manual

GE

GE Built-In Dishwasher User manual

GE GDF630-640 Series User manual

GE

GE GDF630-640 Series User manual

GE Spacemaker User manual

GE

GE Spacemaker User manual

GE Profile PDW9700N User manual

GE

GE Profile PDW9700N User manual

GE GSD1350 User manual

GE

GE GSD1350 User manual

GE GSD2100V Manual

GE

GE GSD2100V Manual

GE GLDT696J-SS User manual

GE

GE GLDT696J-SS User manual

GE Profile GSD4610 User manual

GE

GE Profile GSD4610 User manual

GE GDF610PGJ Manual

GE

GE GDF610PGJ Manual

GE EDW4000 Series User manual

GE

GE EDW4000 Series User manual

GE Spacemaker GSM2200N User manual

GE

GE Spacemaker GSM2200N User manual

GE GSD700D Installation instructions

GE

GE GSD700D Installation instructions

Popular Dishwasher manuals by other brands

Pilot Communications PILD6SEHR user manual

Pilot Communications

Pilot Communications PILD6SEHR user manual

EAS Electric EMD12X3-V1 instruction manual

EAS Electric

EAS Electric EMD12X3-V1 instruction manual

GEAppliances GDF510 owner's manual

GEAppliances

GEAppliances GDF510 owner's manual

homark DW009H operating instructions

homark

homark DW009H operating instructions

Champion D-HB Specifications

Champion

Champion D-HB Specifications

Russell Hobbs RHDW3-M instruction manual

Russell Hobbs

Russell Hobbs RHDW3-M instruction manual

Asko DBI233IB operating instructions

Asko

Asko DBI233IB operating instructions

Electrolux EDW 1001 Service manual

Electrolux

Electrolux EDW 1001 Service manual

Whirlpool ADG 7195 Quick reference guide

Whirlpool

Whirlpool ADG 7195 Quick reference guide

Jet-tech 737E Technical manual

Jet-tech

Jet-tech 737E Technical manual

Kenmore 587.1625 Series Use & care guide

Kenmore

Kenmore 587.1625 Series Use & care guide

Gaggenau 200 Series Quick reference guide

Gaggenau

Gaggenau 200 Series Quick reference guide

nanoosi WQP12-J7205E instruction manual

nanoosi

nanoosi WQP12-J7205E instruction manual

Insinger RL-30 Technical manual

Insinger

Insinger RL-30 Technical manual

Atag VA6311ST user manual

Atag

Atag VA6311ST user manual

KitchenAid KDHE704DSS User instructions

KitchenAid

KitchenAid KDHE704DSS User instructions

Siemens SN65EX56CE INFORMATION FOR USE

Siemens

Siemens SN65EX56CE INFORMATION FOR USE

Electrolux Built-In Dishwasher Use & care manual

Electrolux

Electrolux Built-In Dishwasher Use & care manual

manuals.online logo
manuals.online logoBrands
  • About & Mission
  • Contact us
  • Privacy Policy
  • Terms and Conditions

Copyright 2025 Manuals.Online. All Rights Reserved.