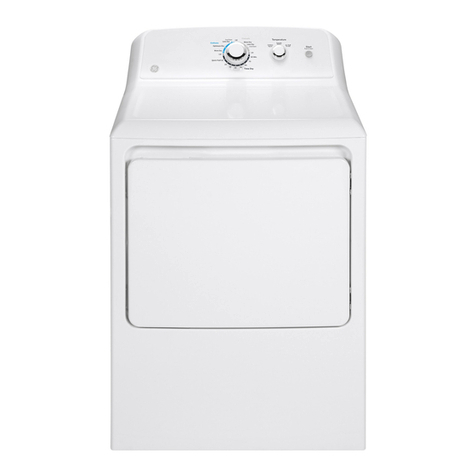
GE DNCD450GG0WC User manual

ge.com
Safety Information ........ 2-5
Operating Instructions
Control Panel .................. 6, 7
Loading and Using
the Dryer ....................... 9
Reversing the Door .............. 8
Venting the Dryer .............. 10
Troubleshooting Tips ... 11,12
Consumer Support
Consumer Support ..... Back Cover
Product Registration ......... 1:3, 14
Warranty ..................... 15
Model: T_tpe 450
Write the model and serial
numbers here:
Model #
Serial #
They ore on the Iobel on the front
of the dryer behind the door.
175D1807P537 49-90269 12-05 JR

iMPORTANTSAFETYiNFORMATiON.
READALLiNSTRUCTiONSBEFOREUSING.
AWARNING'!
For your safety, the information in this manual must be followed to minimize the risk of fire
or explosion, electric shock, or toprevent property damage, personal injury, or death.
Installationand service mustbe performedby a qualified installer,service agency or the gas
supplier.
FORGASDRYERS:YOUMUSTPOSTINA PROMINENTLOCATION
1. Instructionsto follow if theuser smells gas:Contactyourlocal gas
suppfierfor information to be displayed.
z Instructions concerning flammablematerials as follows:
FORYOURSAFETY
Do not store or use gasoline or other flammable vaporsand liquids
in the vicinity of this or any other appliance.
California Safe Drinking Water and Toxic Enforcement Act
This act requires the governor of California to publish a list of substances known to the state to cause cancei;
biIth defects or otheI iepmducOve ham, and iequires businesses to warn customeIs of potential exposme
to such substances.
Gas appliances can cause minor exposure to fore of these substances, namely benzene, carbon monoxide,
fbmlaldehyde and soot, caused primarily by the incomplete cotIlbusfion of natmal gas or LP fimls.
Properly ad]usted dryers will minimize incomplete combustion. Exposure to these substances can be
minimized filrther by properly venting the dryer to the outdoors.
2

PflOPEflINSTALLATION
This dryer must be properly instated and located in accordance with the Instaflation Instructions
before it is used. If you did not receive an Installation Instructions sheet, visit our Website at:
ge.com.
mProperly ground dryer to conform wkb all
governing codes and ordinances. Follow details
in Installation Insmmtions.
m Install or store where it will not be exposed to
temperatures below fleezing or exposed to the
weather:
ImConnect to a properly rated, protected and sized
power supply circuit to avoid electrical overload.
• Remove the colored protective film flom the
control panel.
mlRemove all sharp packing items and dispose of all
shipping materials properly.
Exhaust/Ducting:
[-'_ Gas drye_ MUSTbe exhausted to the outside.
Use only rigid metal 4" diameter ductwork
inside the (hTer cabinet° Use only rigid metal
or flexible metal 4" diamemr ductwork for
exhausting to the outside. USEOFPLAST/COR
OTHERCOMBUSTIBLE OUCTWORK CAN CAUSEA
FIRE.PUNCTURED DUCTWORK CAN CAUSEA FIRE
IF IT COLLAPSESORBECOMES OTHERWISE
RESTRICTEDIN USEORDURING INSTALLATION.
For complete derails, fbllow the Installation
Instructions.
YOUflLAUNDflYAflEA
•Keep the area underneafll and around your
appliances flee of combustible mamfials (lint,
paper; rags, etc.), gasoline, chemicals and other
flammable vapors and liquids.
• Keep all laundI y aids (such as demrgents,
bleaches, etc.) out of the reach of children,
preferably in a locked cabinet. Obse_we all
warnings on container labels m avoid i_jm y.
• Keep the floor around your appliances clean and
d D, to reduce the possit)ilil), of slipping.
• Never climb on or stand on the dD,er top.
• (]lose supe_sqsion is necessary if this appliance is
used by or near chiMren. Do not allow chiMren
to play'on, with or inside this or any'other applimlce.
3

iMPORTANTSAFETYiNFORMATiON.
READALLiNSTRUCTiONSBEFOREUSING.
AWARNING'!
WHENUSINGYOURDRYER
Never reach into the dryer while the drum is
moving. Before loading, unloading or adding
clothes, wait until the drum has completely
smpped.
•The latmd_ T process can reduce die flame
remrdancy of fabrics. To avoid such a result,
careflflly follow the garment manufacturer's
care insu-ucfions.
Glean die lint filter before each load to prevent
lint accumulation inside the dxTer or in the room.
DONOTOPERATETHEDRYERWITHOUTTHELINT
FILTERIN PLACE.
•Do not wash or dITarticles dlat have been
cleaned in, washed in, soaked in or spotted
with combustible or explosive substances (such _ts
wax, oil, paint, gasoline, degreasers, dry-cleaning
soNents, kerosene, etc.). These substances gNe
offvapo_ that m W igmim or explode. Do not add
these substances m the wash wamL Do not use or
place these substances around your washer or
dzTer during opera6on.
Do not place imms exposed to cooking oils in
your dzyer. Imms contaminamd with cooking oils
mW conuibum to a chemical reaction that could
cause a clothes load m catch fire.
•Any article on which you have used a cleaning
soNent or tllat contains flammable mamrials
(such as cleaning cloths, mops, towels used in
beautT salons, restaurants or barber shops, etc.)
must not be placed in or near the dzTer until
soNents or flammable materials have been
removed. There are many highly fl_unmable
imms used in homes such as acetone, denatured
alcohol, gasoline, kerosene, some household
cleanezs, some spot removers, turpentines,
waxes, wax removers and products containing
peuoleum disfillams.
•Do not dUarticles containing rubbet; plastic,
foam or similar mamrials such as padded birds,
mnnis shoes, galoshes, bath mats, rugs, bibs, baby
pants, plastic bags, pillows, etc., that m W melt or
burn. Some rubber mamrials, when heamd, can
under certain circumstances produce fire by
spontaneous combustion.
•Do not store plastic, paper or clodflng fllat may
burn or melt on top of the d_Ter during operation.
•Garments labeled DryAway from Heator Do
Not TumbleDry (such as life jackets containing
l_pok) must not be put in your d_TeL
•Do not dITfiberglass articles in your dITeL
Skin irritation could result flom the remaining
particles that m W be picked up by clothing
during subsequent d_Ter uses.
•To minimize die possibilitT of elecuic shock,
unplug this appliance flom the power supply
or disconnect the &yet at tile building's
disuibufion panel by removing the fllse or
switching off"the circuit breaker before
attempting any maintenance or cleaning
(except the removal and cleaning of tile lint
filter). NOTE:Pressing PAUSEor STOP/CANCEL
does NOTdisconnect tile appliance from tile
power supply:
4

Never attempt to operate this appliance if
it is damaged, malflmcfioning, partially
disassembled, or has missing or broken parts,
including a damaged cord or plug.
The inmrior of file machine and file exhaust duct
connection inside the diyer should be cleaned at
least once a year by a qualified mchnician. See the
LoadingandUsingthe Otyorsecfion.
Ifyoms is a g_ts dryei; it is equipped wifll an
automatic electric igmifion and does not have a
pilot light. DO NOT ATTEMPT TOLIGHT WITH A
MATCH. Bums may result from having your hand
in the vicinity of the burner when the automatic
ignition turns on.
• You may wish m soften your laundered fabYics
or reduce the static elecu-icity in them by using
a d_yer-applied fabric softener or an anti-static
condifioneL We recommend you use either a
fabric softener in the wash cycle, according to
the manufacturer's insmlcfions for those
products, or t_y a dxyer-added product for
which the manufacturer gives written assurance
on the package that their product can be safely
used in your d_yeL Service or performance
problems caused by use of these products are
the responsibility of the manufacmreIs of those
products and are not covered under the wammty
m this appliance.
WHENNOTUSINGYOURDRYER
Grasp file plug firefly when disconnecting dfis
appliance to avoid damage to file cord while
pulling. Place file cord away flom traffic areas
so it will not be stepped on, tripped over or
subjected to damage.
• Before discarding a dIyeI; or removing it
fiom service, remove the d_Ter door to prevent
children fiom hiding inside.
• Do not tamper with controls.
Do not attempt to repair or replace any part of
this appliance or attempt any se_Mcing unless
spedfically recommended in this Owner's Man ual
or in published user-repair insuuctions that you
understand and have the skills to can T out.
READANDFOLLOWTHISSAFETYINFORMATIONCAREFULLY.
SAVETHESEINSTRUCTIONS
5

Aboutthe controlpanel
Your new dryer ofl_rs the convenience of starting your dryer loads by simply choosing a Clothes Gate Selection and the Heat
Setting. Then all you have to do is press START
• Cleanlint filter • Addclothes
Is,,rad[ol0
• Selectdrycycle
• Selectheatsetting
•Closedoor
•PushSTART
Model Type 450
(CLOTHES CARESELECTION
PERM IAIR DRY ®1
AUTOMATICSETTINGS HEAT
SETTINGS
HIGH ®]
I
I,0 ol
[E_,Aol
LOW _J
I "1
START ®
PAUSE
(,,°,1
CANCEL
NOTE:Any time you make a selection that is incompatible with the chosen dry cycle, the dryer will beep twice.
Vision-Impaired Washer/Dryer Kit
For washer model WNRD2050 and dryer model DNGD450, a kit is av®lable for the vision-impaired containing Braille overlays
that fit over the pads on the washer and d_Ter control panels.
Included in the kit are:
• Braille overlws for the washer and d_Ter conuol panels
• Braille Reference Keys that explain the operation of the washer and d_Ter
• Use and Gate Audio Tape
Order publication number 14-D242, available flom your GE supplier.
6

gClothes Care Selection
LOADS
lPERM ÷1
PRESS
n
El
For cottons and most linens.
For loads consisting of cottons and poly-blends.
For wrinkle-free and permanent press items.
For knits and sweaters with fabric care labels that say "Machine Dry."
For lingerie and special care fabrics.
For tumbling items without heat.
Heat Settings
LOW @1
EXTRA @1
LOW
For regular to hea_ T cottons.
For synthetics, blends and items labeled permanent press.
For delicates, synthetics and items labeled Tumble Dry I,ow.
For lingerie and special-care fabrics.
START/PAUSE
PressSTARTtobeginthecycle.
START ®}
PAUSE • Press twice to select the last cycle you used and start the dryer.
• If you have selected a new cycle, press once to start the cycle.
• If the dryer is running, press once to interrupt the cycle; press again to continue the cycle.
STOP
CANCEL
EST TIME
REMAINING
EST TIME
REMAINING
--1 STOP/CANCEL
• This pad should notbe used to interrupt or pause a cycle.
• Pressing this pad will cancel the current settings and the settings will be lost.
Estimated Time Remaining
As the cycle begins, you will see the approximate total cycle time in the display. Then "racetrack lights" will
flash in the display, in a clockwise direcOon. This means the dryer is continuously monitoring the amount of
moisture in the load. The racetrack lights will continue until the dryer senses a low level of moisulre in the
load. At that point, the dryer will calculate and display the approximate dine remaining.
"Racetrack lights" 7

Aboutreversingthedoor.
Reversing the Door
Toolsneeded.
•Standard//2 • Tape-tipped • Needle-nosed
Phillipsscrewdriver puttyknife pliers
V-_ Open the door and remove the filler plugs opposite the hinges. _(_qth the door
completely open, remove the bottom screw flom each hinge on the dD,er face. Insert
these screws about halfway into the TOPholes, for each hinge, on the opposite side
(where you removed the filler plugs). Apply tim1 pressure to get the screw started in
untapped holes.
[_-] I,oosen top screw flom each hinge on the dryer face halfway: With one hand holding
the top of the door and the other hand holding the bottom, remove the door flom
the dryer by lifting it UP and OUT
[7_ Rotate the door 180 °. Insert it on the opposite side of the opening by moving the door
uv__aI/I/and DOWN until the top hinge and the bottom hinge are resting on the top screws
inserted in step 1.
iii¸(
i l i ILV_ Remove the remaining screws flom the side of the opening flom which the door was
removed. _(_qth these screws secure each hinge at the bottom. Tighten the two top
screws of each hinge. Reinsert the plastic plugs on the side flom which the door w_ts
removed.
8

Loadingand usingthe dryer.
Always follow the fabric manufacturer's care label when laundering.
FabricCareLabels
Below are fabric care label "symbols" that affbct the clothing you will be laundering.
WASH LABELS
wash __ __
cycle Normal PermanentPress/ Gentle--/ an was Donotwash Donotwring
wd,_k_eresistant delicate h
Water • • • • •
temperature Hot Warm
(50°0/120 _F) (40°0/105°F)
BLEACHLABELS
Bleach A A ._
symbols _,_,;_?,_e_,_O,,,y,,o,,oh_o,,,ob_ooohDo,,o,_o_oh
(whe_ _eeded}
Cold/cool
(30°C/85°F)
DRY LABELS
dr, Do,,o,_,y
Dry Normal Pem_a_ent Press/ 6e_tle/ Do not tl_mb_edry (used with
wri_k_e resistant de_ieate do not wash}
.eat _ ® ® •
setting
High Medil_m Low No heat/air
S,ec,a,I=1 I--q y-1
instructions Li_e dry/ Drip dry Dry flat In the shade
ha_g to dry
SortingandLoadingHints
As a general rule, if clothes are sorted properly for the washei, they are sorted properly for the di),eL
Try also to sort items according to size. For example, do not dry a sheet with socks or other sm_fllitems.
Donotaddfabricsoftenersheetsoncetheloadhasbecomewarm.Theymaycausefabricsoftenerstains.
Bounce®FabricConditionerDryerSheetshavebeenapprovedforuseinall GEDryerswhenusedinaccordancewith the
manufacturer'sinstructions.
Donotoverload.Thiswastesenergyandcauseswrinkling.
Donotdrythefollowingitems:fiberglassitems,woolens,rubber-coateditems,plastics,itemswithplastictrimand
foam-filleditems.
CareandCleaningof theDryer
TheExterior:Wipe or dust any spills or washing
compounds wit1 a damp cloth. Dryer conuol
panel and finishes may be damaged by some
laundI T pretreatment soil and stain remover
products. Apply these products away flom the
dryer The f_d)ricm W then be washed and dried
norma/l> Damage to your &Ter caused I)y these
products is not covered by your warranty:
TheLintFilter:Clean the lint filter befbre each
use. Moismn your finge_ and reach into the filmr
opening. Run your fingers across the filmr Have a
quNified mchnician vacuuln the lint fiom the dryer
once a yeai:
TheExhaustDuct:Inspect and clean die exhaust
ducdng at least once a year to prevent clogging.
A partially clogged exhaust can lengthen the
drying dine.
Follow these steps:
[_] Turn off electrical supply by disconnecting the
plug flom the wall socket.
[_ Disconnect the duct flom the d_Ter
[-_-]\4muum the duct with the hose attachment and
reconnect the duct.
The ExhaustHood'. Check fiom tile outside dmt the
flaps of the hood move fleely' when operating. Make
sure that there is no wildlife (bhds, insects, etc.)
nesfin g in side the duct or hood.
9

Ventingthedryer.
For the best &Ting performance the d_Ter needs to be properly vented. The dryer will use more
energyandrunlongerif it is notventedtothebelow specifications.Carefullyfollow thedetails on
Exhaustingin theInstallationInstructions.
• Use only rigid metal 4" diameter ductwork inside
the dryer cabinet. Use only rigid metal or flexible
metal 4" diameter ductwork for exhausting
to the outside.
• Do not use plastic or other combustible ductwork.
• Use the shortest length possible.
• Do not crush, kink or collapse the duct.
• Avoid resting the duct on sharp objects.
•Ventingmustconformtolocal buildingcodes.
Correct
Venting
i!ii_i_i_i_illii _ii_i_ii_ii_iill iiiI _ii
1¸(¸¸¸¸¸¸¸
g
Incorrect
Venting !
10

Beforeyou call forservice...
Troubleshooting -tips
Save time and money! Review the charts on the following
pages first and you may not need to call for service.
Possible Causes
Controls accidentally put in
service mode
Control panel is "asleep"
Dryer is unplugged
Fuse is blown/circuit breaker
is tripped
What ToDo
•Press STOP/CANCEL
Controlpads not
responding
Dryer doesn'tstart •This is hernial. Press STARTrwice to choose the last cycle
you used and to start the dryeL
• Make sure the dryer plug is pushed completely into
the outer.
• Check the building's fl_se/circuit breaker box and
replace fl_se or reset breakeL NOTE: Most electric
dryers use two fl_ses/breakers.
Dryerdoesn'theat Fuse is blown/circuit breaker is • Check the buiMing's fl_se/circuit breaker box and
tripped; the dryer may tumble replace both fl_ses or reset both breake]_. Your (hTer may
but not heat ramble if only one fl_se is blown or one breaker tripped.
Gas service is off • Make sure gas shutoff at dryer and main shutoff are
fully open.
Dryer shakes or makes Some shaking/noise is normal. • Move dryer to an even floor space, or adjust
noise Dryer may be sitting unevenly leveling legs as necessary until even.
Inconsistentdryingtimes Type of heat • Drying time will vary according to the type of heat used
(electric, natural or 1,P gas), size of load, types of fabrics,
wetness of clothes and condition of exhaust ducts.
No numbersdisplayed Dryer is continuously monitoring • This is hernial. When the (hTer senses a low level of
duringcycle,only the amount of moisture in moisture in the load, the dryer will display the dry
"racetrack"lights the clothes time remaining.
Clothes are still wet The door was opened mid-cycle. • A dry cycle must be reselected each time a new load
and dryer shutoff after The load was then removed from is put in.
ashort time the dryer and a new load put in
without selecting a new cycle
Dryer is not level. • Move (hTer to an even floor space or adjust leveling legs
as necessary until even.
Cannotmake a The HEAT SETTINGthat you are • Tiffs is nomlal.
selection and the trying to select is incompatible
dryerbeeps twice with the chosen dry cycle
Possible Causes
Clothesare wrinkled Overdrying
.......... Overloading
What ToDo
• Remove items while they still heM a slight amount
of moisture.
• Separam large loads into smaller ones.
Clothes shrink Some fabrics will naturally shrink
when washed. Others can be
safely washed, but will shrink
in the dryer.
• To avoid shrinkage, follow gamlent care labels exactly.
• Some imms may be pressed back into shape after d_Ting.
• ffyou are concerned about shrinkage in a particular item,
do not machine wash or tumble d_T it.
//

Beforeyoucall forservice...
Troubleshooting -tips
Greasy spots on clothes
Possible Causes
Improper use of fabric softener
Drying dirty items with clean ones
What ToDo
•Follow directions on fabric softener package.
•Use your dryer to dD, only clean items. Dirl 0, items can
stain clean items and the d_TeL
Clothes were not completely clean • Sometimes stains which cannot be seen when the
cloflles are wet appearafter dlying. Use proper
washing procedures before d_ying.
Linton clothes Lint filter is full • Clean lint screen before each load.
Improper sorting • Sort lint produce_ (like chenille) from lint collectors
(like corduroy).
Static electricity can attract lint •See suggestions in this section under STATIC.
Overloading • Sepmate large loads into smaller ones.
Paper, tissue, etc., left in pockets • Empty all pockets before lmmdering clothes.
Static occurs No fabric softener was used • T_y afabric softeneL
•Bounce ®Fabric Conditioner D_yer Sheets have
been approved for use in all GE Dryers when used in
accordance Mill file manufacturer's instructions.
Overdrying • TD' a fabric soffeneL
• Adjust conuols for less drying.
Synthetics, permanent press • T_T a fabric softener.
and blends can cause static
Clothes take too long Improper sorting • Separate hem T items flom lightweight items (generally,
to dry a well-sorted w_Mler load is a well-sorted &Ter load).
Large loads of heavy fabrics • 1,a_ge, heaxy fabrics contain more moisture and rake
(like beach towels) longer m d_y. Separate large, hemy fabrics into smaller
loads m speed drying time.
Controls improperly set • Match control settings to the load you are drying.
Lint filter is full • Clean lint filter before evel y load.
Improper or obstructed ducting • Check installation instructions for proper
ducfing/venfing.
• Make sure ducfing is clean, flee of kinks and
unobstructed.
• Check m see if outside wall damper operams easily.
• Check the Installation Insn-ucfions m make sure the d_yer
venting is correct.
Blown fuses or tripped circuit •Replace fllses or reset circuit breakexs. Since most
breaker d_Teis use 2 filses/breake_s, make sure both are
operating.
Overloading/combining loads • Do not put more than one washer load in the dryer at
a time.
Underloading • If you are (hTing on b, one or two items, add a few items
m ensure proper rambling.
12

GE Service Protection Plus TM
GE, a name recognized worldwide for quality and dependability, offers you
Service Protection Plus"_'-comprehensive protection on all your appliances-
No Matter What Brand!
Benefits Include:
+ Backed by GE
+All brands covered
+ Unlimited service calls
+ All parts and labor costs included
+ No out-of-pocket expenses
+ No hidden deductibles
+ One 800 number to call
We71 CoverAny Appliance.
Anywhere. Anytime.*
You will be completely satisfied with our service protection or you may request your money back
on the remaining value of your contract. No questions asked. It's that simple.
Protect your refligerato_, dishwasher, washer and d_Ter, range, TV, VCR and much more-any brand!
Plus there's no extra charge for emergency service and low monthly financing is available. Even icemaker
coverage and food spoilage protection is offered. You can rest easy; knowing that all your valuable
household products are protected against expensive repairs.
e_.ceyo_._o.fide.ce i. CE..d _.Uusi. the U.S.ton-f,ee.t 800.626.2224
ff_r more information.
+b\ll brands c(+vcred, up 1(+ 20 years old, in 111(+c(mlinenlal U.N.
.......................................... _= =Cut here
Please place in envelope and mail to:
General Electric Company
Warranty Registration Department
P.O. Box 32150
Louis_e, KY 40232-2150
/3

Consumer Product Ownership Registration
Dear Customer:
Thank you for purchasing our product and thank you for placing your confidence in us.
We are proud to have you as a customer!
Follow these three steps to protect your new appliance investment:
Complete and mail
your Consumer
Product Ownership
Registration today.
Have tlte peace of
mind of knowing we
can contact you in
the unlikely event of
a salctv modification.
Alter mailing tlte
registration below,
store this document
in a sate place. It
contains inlormation
yon will need sltonld
yon require service.
Our service number is
800.GE.CARES
(800.432.2737).
Read your Owner's
Manual carefitlly.
It will ltelp you
operate your new
appliance properl>
Model Number Serial Number
Important: If you did not get a registration card with your
product, detach and return the form below to
ensure that your product is registered, or register
online at ge.com. .............................. _._ c._here
Consumer Product Ownership Registration
Model Number
,,,,,,,,,,I I
Serial Number
I I I I I I
Mr. J Ms.::i! Mrs.::i! Miss ]
Fh:st ] ] I,ast ]
Nalne I IIIIIII I Nalne I I I I I I I I I I I
Street I
Address I I I I I I I I I I I I I I I I I I I I I I I
Ap_.#l I I I I I I I I>mailAddress
I)at< Pla_¢d
'"_'1, IDa,I, I _arl, IPhone
N.mberl I. I-I.. I-I . .
Mon th
GE Consumer &IndustrMl
Appliances
General Electric Company
Louisville, KV40225
ge.com
* Please provide }our e-mail address to receive, via e-mail, discounts, special otters aim other
important comnatmicatiolls fi'om GE Appliances (GEA).
Check here if )ou do not _lllt to receive comlnunicatiolls fi'om GEA's carefldl? selected
partners.
FAII,URE TO COMPI,ETE AND RETURN THIS CARD DOES NOT DIMINISH YOUR
WARRANTY RIGHTS.
For intormation about C,EA's privac) aim clam usage policy, go to ge.com aim click on
"Privac) Polic)" or call 800.626.2224.
14

GECommercialDryer Warranty
Parts and service are available from your General Electric
Commercial Laundry distributor.
Please have serial number and model number available
when calling for service.
For The Period Of:
OneYear
Fromthedateof the
originalpurchase
We Will Replace:
Anypartof file dxTer which fails due m a defect in mamIials or workmanship. During fllis
limitedone-yearwarranty,we will also provide, free ofcharge, all labor and relamd sex_'icecosts m
replace the defective part.
Second through Fifth Year Any extra large orsuper capacity dryer drumwhich fails due m a defect in mamxials or workmanship.
From the date of the During this additional four-year limited warranty, you will be responsible for any labor and related
original purchase se_'ice costs.
What Is Not Covered'.
• Service trips to your place of business to teach you how
to use the product.
•Improper installation, delivery or maintenance.
•Failure of the product if it is abused, misused, or used
for other than the intended purpose.
•Any and all implied warranties of merchantability and
fitness for aparticular purpose.
• Replacement of fuses or resetting of circuit breakers
at place of business.
• Damage to the product caused by accident, fire, floods
or acts of God.
• Incidental or consequential damage caused by possible
defects with this appliance.
•Damage caused after delivery.
•Product not accessible to provide required service.
EXCLUSION OFIMPLIED WARRANTIES--Your sole and exclusive remedy isproduct repair as provided in this
Limited Warranty. Any implied warranties, including the implied warranties of merchantability or fitness for a
particular purpose, are limited to one year or the shortest period allowed by law.
This warranty is extended to the original purchaser and any succeeding owner for products purchased for
commercial use within the USA. If the product is located in an area where service by a GEAuthorized Servicer
is not available, you may be responsible for a trip charge or you may be required to bring the product to an
Authorized GE Service location for service. In Alaska, the warranty excludes the cost of shipping to your
place of business.
Some states do not allow the exclusion or limitation of incidental or consequential damages. This warranty gives
you specific legal rights, and you may also have other rights which vary from state to state. Toknow what your
legal rights are, consult your local or state consumer affairs office or your state's Attorney General
Warrantor: General Electric Company.Louisville, KY 40225
15

ConsumerSupport.
GEAppliancesWebsite ge.com
Have a ques0on or need assistance widl your appliance? T1T the GE Appliances Website 24 hours a day,
any day of file year! For greater convenience and lc,tsteI service, you can now download Ownei-'s Manuals,
order parts, catalogs, or even schedule se_Mce ondine. You can also "Ask Our Team of Experts"*"
your ques0ons, and so much moIe...
ScheduleService
Expert GE repair seivice is only one step away flom your doo_. Get ondine and schedule your service at
your convenience 24 hours any day of the year! Or ctfll 800.GE.GARES 800.432.2737) during nomml
business hours.
ge.com
RealLifeDesignStudio ge.com
GE supports the Universal Design concept--products, services and envuonments that can be used by
people of aUages, sizes and capabiliOes. We recognize the need m design for a wide range of physical and
mental abili0es and impaixments. For details of GE's Univeisal Desigm applica0ons, including kitchen
design ideas for people with disabili0es, check out our Website today. For the hearing impaired, please call
800.TDD.GEAG (800.833.4322).
ExtendedWarranties ge.com
Purchase a GE extended warranty and learn about special discounts that are available while your w;u_vmty
is still in eff)ct. You can purchase it ondine anytime, or call 800.626.2224 during nomml business hours.
GE Gonsumer Home Se_qces will still be there _ffteryour warranty expires.
PartsandAccessories ge.com
Individuals qualified to service their own appliances can have parts or accesso_-iessent directly to their homes
(VISA, MasterGard and Discover cards are accepted). Order on-line today, 24 hours every day or by phone
at 800.626.2002 during nomml business hours.
Instructionscontainedinthismanualcoverprocedurestobeperformedbyanyuser.Otherservicing generally
shouldbereferredtoqualifiedservicepersonnelCautionmustbeexercised,sinceimproperservicingmaycause
unsafeoperation.
ContactUs ge.com
If you are not satisfied wifll die se_Mce you receive flom GE, contact us on our Website wifll all die details
including your phone numbe_, or w_-imm: General Manage_, Gusmmer Relations
GE Appliances, Appliance Park
I.ouisville, KY40225
RegisterYourAppliance
Register your new appliance on-line--at your convenience! Timely product regism_fion will allow for
enhanced communica0on and prompt se_a_iceunder the temls of your warranty, should the need arise.
You may also mail in the pre-printed regism_0on card included in the packing material.
ge.com
Printed in Canada
Other manuals for DNCD450GG0WC
1
This manual suits for next models
19
Table of contents
Other GE Dryer manuals
Popular Dryer manuals by other brands

Whirlpool
Whirlpool 3396311 Use and care

Bosch
Bosch WTYH6791GB/07 Installation and operating instructions

Kenmore
Kenmore 29-Inch Wide GAS DRYERS owner's manual

Frigidaire
Frigidaire Affinity FAQG7072LA Product specifications

KitchenAid
KitchenAid KEYE860W Use and care guide

Maytag
Maytag MDE9651 operating instructions