GE GTDP520EDWW User manual

GEAppliances.com
Dryers
234D2241P003 49-90508 10-13 GE
Safety Instructions........ 2–4
Operating Instructions
ControlPanels .................5-7
DryerFeatures...................8
Loading and Using the Dryer.....10
Reversing the Door...............9
VentingtheDryer...............11
Troubleshooting Tips . . . 12, 13
Consumer Support
Consumer Support ..............16
Warranty .......................15
Write the model and serial
number here:
Model # __________________
Serial # ___________________
You can find them on a label
on the front of the dryer
behind the door.
Owner’s Manual

IMPORTANT SAFETY INFORMATION.
READ ALL INSTRUCTIONS BEFORE USING.
California Safe Drinking Water and Toxic Enforcement Act
This act requires the governor of California to publish a list of substances known to the state to cause cancer,
birth defects or other reproductive harm and requires businesses to warn customers of potential exposure to
such substances.
Gas appliances can cause minor exposure to four of these substances, namely benzene, carbon monoxide,
formaldehyde and soot, caused primarily by the incomplete combustion of natural gas or LP fuels.
Properly adjusted dryers will minimize incomplete combustion. Exposure to these substances can be minimized
further by properly venting the dryer to the outdoors.
WARNING!
For your safety, the information in this manual must be followed to minimize the
risk of fire or explosion, electric shock, or to prevent property damage, personal
injury, or death.
WHAT TO DO IF YOU SMELL GAS:
1Do not try to light a match, or cigarette,
or turn on any gas or electrical
appliance.
2Do not touch any electrical switch; do
not use any phone in your building.
3Clear the room, building or area of
all occupants.
4Immediately call your gas supplier from
a neighbor’s phone. Follow the gas
supplier’s instructions carefully.
5If you cannot reach your gas supplier,
call the fire department.
Do not store or use gasoline or other
flammable vapors and liquids in the
vicinity of this or any other appliance.
Installation and service must be
performed by a qualified installer,
service agency or the gas supplier.
Properly ground dryer to conform with all
governing codes and ordinances. Follow details
in Installation Instructions.
Install or store where it will not be exposed to
temperatures below freezing or exposed to
the weather.
Connect to a properly rated, protected and sized
power supply circuit to avoid electrical overload.
Remove all sharp packing items and dispose of
all shipping materials properly.
Remove the colored protective tape from the
control panel.
Exhaust/Ducting:
1All dryers MUST be exhausted to the outside to
prevent large amounts of moisture and lint from
being blown into the room.
2Use only rigid metal 4ļdiameter ductwork inside
the dryer cabinet and use only rigid metal 4ļ
diameter or UL approved transition ducting
between the dryer and the home duct. USE OF
PLASTIC OR OTHER COMBUSTIBLE DUCTWORK
CAN CAUSE A FIRE. PUNCTURED DUCTWORK
CAN CAUSE A FIRE IF IT COLLAPSES OR
BECOMES OTHERWISE RESTRICTED IN USE OR
DURING INSTALLATION.
For complete details, follow the Installation
Instructions.
PROPER INSTALLATION
This dryer must be properly installed and located in accordance with the Installation Instructions
before it is used. If you did not receive an Installation Instructions sheet, you can receive one by
visiting GEAppliances.com or by calling 800.GE.CARES (800.432.2737).
2

3
IMPORTANT SAFETY INFORMATION.
READ ALL INSTRUCTIONS BEFORE USING. GEAppliances.com
YOUR LAUNDRY AREA
Keep the area underneath and around your
appliances free of combustible materials (lint,
paper, rags, etc.), gasoline, chemicals and other
flammable vapors and liquids.
Keep the floor around your appliances clean and
dry to reduce the possibility of slipping.
Close supervision is necessary if this appliance is
used near children. Do not allow children to
play
on, with or inside this or any other appliance.
Keep all laundry aids (such as detergents, bleaches,
etc.) out of the reach of children, preferably in a
locked cabinet. Observe all warnings on container
labels to avoid injury.
Never climb on or stand on the dryer top.
Keep the area around the exhaust opening
and adjacent surrounding areas free from the
accumulation of lint, dust, and dirt.
Do not obstruct the flow of ventilating air. Do not
stack or place laundry or throw rugs against the
front or back of the dryer.
WHEN USING YOUR DRYER
Never reach into the dryer while the drum is
moving. Before loading, unloading or adding
clothes, wait until the drum has completely
stopped.
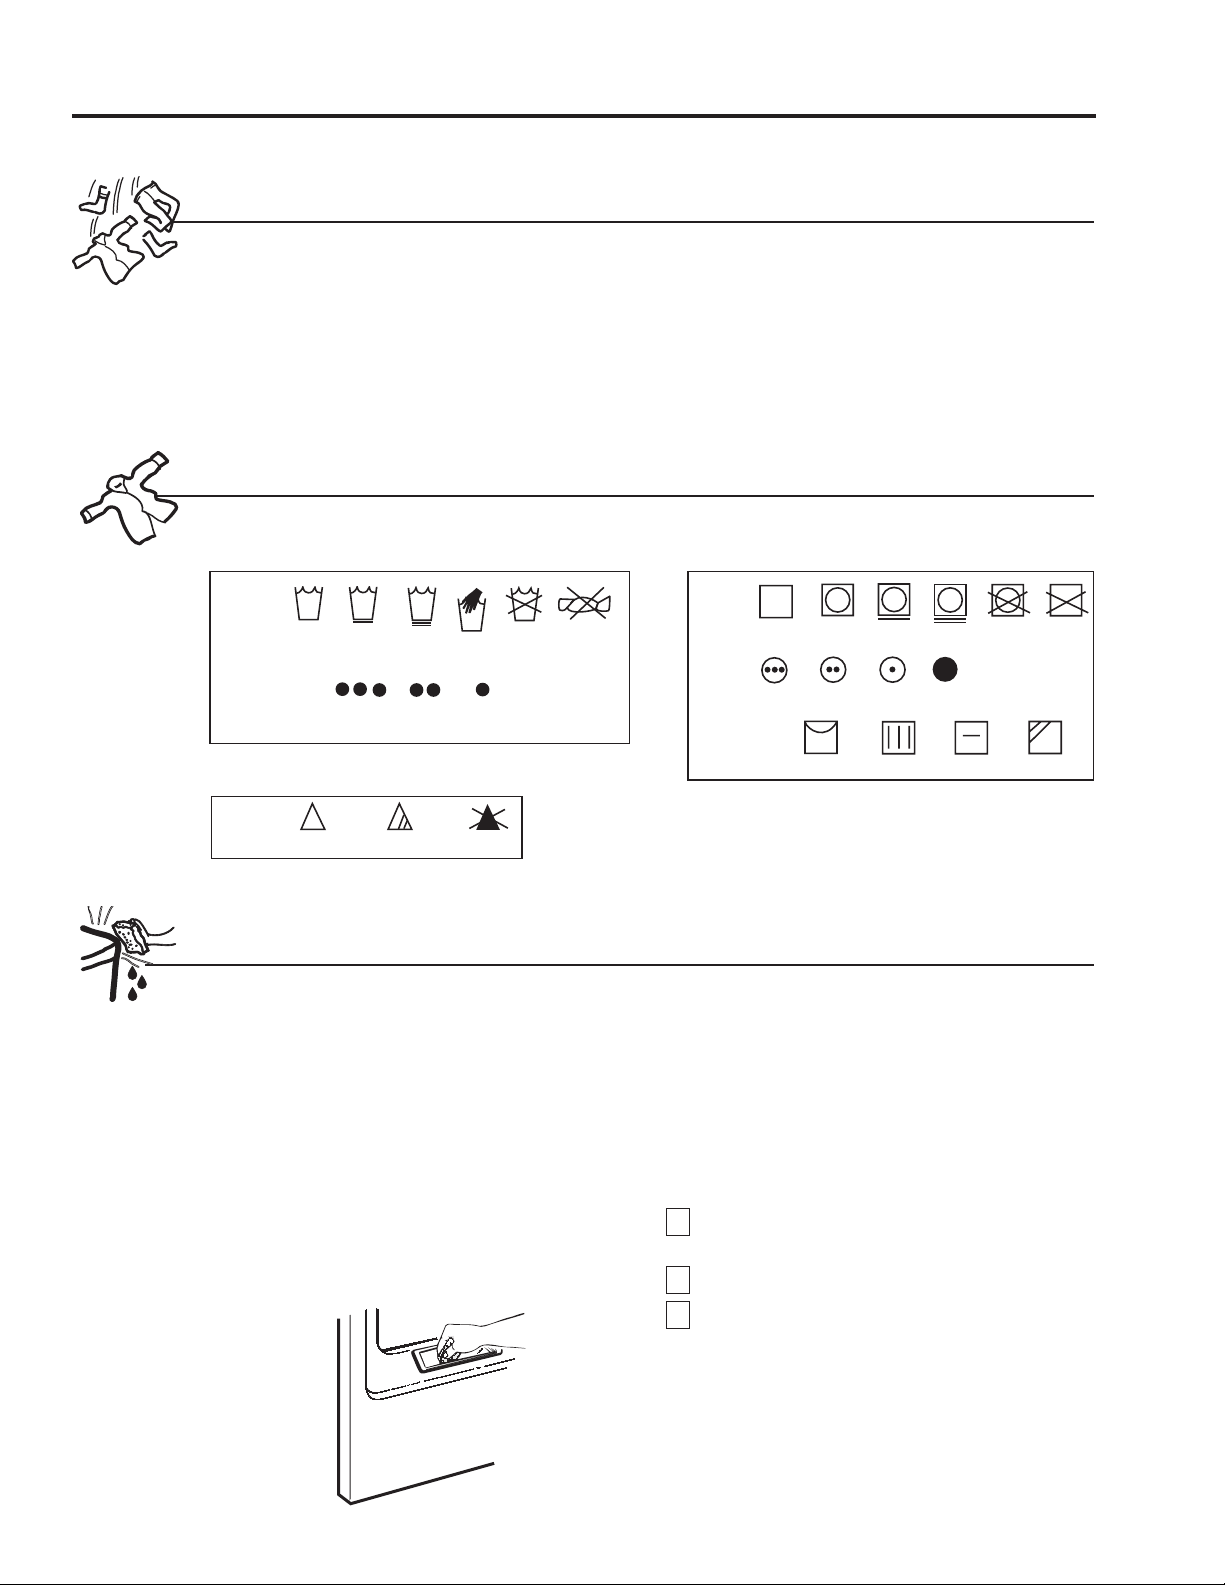
Clean the lint filter before each load to prevent
lint accumulation inside the dryer or in the room.
DO NOT OPERATE THE DRYER WITHOUT
THE LINT FILTER IN PLACE.
Do not wash or dry articles that have been
cleaned in, washed in, soaked in or spotted
with combustible or explosive substances (such as
wax, oil, paint, gasoline, degreasers, dry-cleaning
solvents, kerosene, etc.). These substances give
off vapors that may ignite or explode. Do not add
these substances to the wash water. Do not use
or place these substances around your washer or
dryer during operation.
Do not place items exposed to cooking oils in your
dryer. Items contaminated with cooking oils may
contribute to a chemical reaction that could cause
a clothes load to catch fire
.
Any article on which you have used a cleaning
solvent or that contains flammable materials (such
as cleaning cloths, mops, towels used in beauty
salons, restaurants or barber shops, etc.) must not
be placed in or near the dryer. There are many
highly flammable items used in homes such as
acetone, denatured alcohol, gasoline, kerosene,
some household cleaners, some spot removers,
turpentines, waxes, wax removers and products
containing petroleum distillates.
The laundry process can reduce the flame
retardancy of fabrics. To avoid such a result,
carefully follow the garment manufacturer’s
care instructions.
Do not dry articles containing rubber, plastic,
foam or similar materials such as padded bras,
tennis shoes, galoshes, bath mats, rugs, bibs, baby
pants, plastic bags, pillows, etc., that may melt
or burn. Some rubber materials, when heated,
can under certain circumstances produce fire by
spontaneous combustion.
Do not store plastic, paper or clothing that may
burn or melt on top of the dryer during operation.
Garments labeled Dry Away from Heat or Do Not
Tumble Dry (such as life jackets containing Kapok)
must not be put in your dryer.
Do not dry fiberglass articles in your dryer.
Skin irritation could result from the remaining
particles that may be picked up by clothing during
subsequent dryer uses.
To minimize the possibility of electric shock, unplug
this appliance from the power supply or disconnect
the dryer at the household distribution panel by
removing the fuse or switching off the circuit
breaker before attempting any maintenance or
cleaning (except the removal and cleaning of the
lint filter). NOTE: Turning the Cycle Selector knob
to an off position, or pressing PAUSE does NOT
disconnect the appliance from the power supply.
WARNING!

4
WARNING!
WHEN USING YOUR DRYER (cont.)
Never attempt to operate this appliance
if it is damaged, malfunctioning, partially
disassembled, or has missing or broken parts,
including a damaged cord or plug.
The interior of the machine and the exhaust duct
connection inside the dryer should be cleaned at
least once a year by a qualified technician. See the
Loading and Using the Dryer section.
If yours is a gas dryer, it is equipped with an
automatic electric ignition and does not have a
pilot light. DO NOT ATTEMPT TO LIGHT WITH A
MATCH. Burns may result from having your hand
in the vicinity of the burner when the automatic
ignition turns on.
You may wish to soften your laundered fabrics
or reduce the static electricity in them by using
a dryer-applied fabric softener or an anti-static
conditioner. We recommend you use either a
fabric softener in the wash cycle, according to the
manufacturer’s instructions for those products,
or try a dryer-added product for which the
manufacturer gives written assurance on the
package that their product can be safely used
in your dryer. Service or performance problems
caused by use of these products are the
responsibility of the manufacturers of those
products and are not covered under the warranty
to this appliance.
If you see water on the floor around the dryer, call
for service.
Do not spray any type of aerosol into, on, or near
dryer at any time. Do not use any type of spray
cleaner when cleaning dryer interior. Hazardous
fumes or electrical shock could occur.
Never attempt to use the Steam Dewrinkle or
Steam Refresh cycles without clothes in the drum.
It is highly recommended to select the appropriate
load size for best results. Selecting large load cycles
for small loads may result in clothes being wet,
and selecting small load cycles for large loads may
result in poor dewrinkling performance.
IMPORTANT SAFETY INFORMATION.
READ ALL INSTRUCTIONS BEFORE USING.
WHEN NOT USING YOUR DRYER
Grasp the plug firmly when disconnecting this
appliance to avoid damage to the cord while
pulling. Place the cord away from traffic areas
so it will not be stepped on, tripped over or
subjected to damage.
Do not attempt to repair or replace any part of
this appliance or attempt any servicing unless
specifically recommended in this Owner’s Manual
or in published user-repair instructions that you
understand and have the skills to carry out.
Before discarding a dryer, or removing it from
service, remove the dryer door to prevent children
from hiding inside.
Do not tamper with controls.
READ AND FOLLOW THIS SAFETY INFORMATION CAREFULLY.
SAVE THESE INSTRUCTIONS

5
Drying Cycles-Sensor cycles automatically determine fabric dryness.
Timed cycles run for the selected time.
Cottons For cottons and most linens.
Perm. Press For wrinkle-free, permanent press, delicate items and knits.
Delicates For delicate items, special-care fabrics and knits.
Mixed Loads
For loads consisting of cottons and poly-blends.
Timed Dry
Set the Cycle Selector at the desired drying time.
Dewrinkle For removing wrinkles from items that are clean and dry or that are very lightly damp.
Quick Fluff For freshening or fluffing up already dry clothing, fabric, linens and pillows. Use with No Heat.
Provides 10 minutes of no-heat tumbling.
Anti-Bacterial This option reduces certain types of bacteria by 99.9%, including: Staphylococcus aureus, Pseudomonas
aeruginosa and Klebsiella pneumoniae*. The anti-bacterial process occurs when high heat is used
during a portion of the drying cycle.
NOTE: Do not use this cycle on delicate fabrics.
*The Anti-Bacterial Cycle is Certified by NSF International (formerly National Sanitation
Foundation) to NSF Protocol P154 Sanitization Performance of Residential Clothes Dryers.
• Clean lint filter • Select drying cycle • Push Start
Quick Start Guide
About the control panel GEAppliances.com
Step 1 Step 2 Step 3 Step 4
To reduce the risk of fire, electric shock, or injury to persons, read the IMPORTANT SAFETY INSTRUCTIONS before operating
this appliance.
Throughout this manual, features and appearance may vary from your model.
WARNING!
G
T
W
N
5
9
5
0
D
W
W
-
1
7
5
D
6
8
0
5
G
0
0
1
-
1
7
5
D
6
8
0
4
G
0
0
1
-
1
7
5
D
6
9
5
7
P
0
0
1
-
R
e
v
.
4
S
e
nsing
Dryi
ng
Damp
Mixed Loads
Perm. Press
Antibacterial
Speed Dry
Steam Refresh
Steam Dewrinkle
Delicates Cottons
Towels/Sheets
Timed Dry
Dewrinkle
Quick Fluff
Extended
Tumble
80
60
50
40
30
Extra Dry
More Dry
Dry
Less Dry
Damp
Signal
Delay Dry
Start
Pause
Power
Level TimeTemp
Hold 3 secs
To Save Current Cycle
Dewrinkle
Tumble
My
Settings
Hold 3 secs
to Cancel Delay
Good Better
e
Dry
Damp
Alert
On
e
monitor
High
Medium
Low
Extra Low
No Heat
Cool Down
Dela
y
AB C DEF
GHI
Controls
A
• Add clothes
• Shut door
NSF Protocol P154
Sanitization Performance of
Residential Clothes Dryers

About the control panel
6
Towels/Sheets For most towels and linens.
Speed Dry For small loads that are needed in a hurry, such as sport or school uniforms. Can also be used if the previous
cycle left some items damp, such as collars or waistbands. NOTE: On some models, the time remaining in
the cycle will show counting down in the display.
Energy Saver For cottons and most linens. The cycle offers a reduction in energy use when compared to the Cottons
cycle. The dryer automatically sets the most energy efficient settings and only changes to the Dryness Level
are allowed by the user.
Steam Refresh For slightly wrinkled dry garments. Significantly reduces wrinkles. After the Steam Refresh cycle,
(on some models) the unit will beep (if Signal is selected) and display “00.”
Steam Refresh is recommended for 1-2 garments
NOTE: Steam cycles are not intended for use with towels.
NOTE: A single extremely light fabric item may need to have an additional item included in
the Steam Refresh cycle to achieve optimum results.
Important - the temperature setting must be set to HIGH and water must be turned on
before running the Steam Refresh cycle.
Steam Dewrinkle For use with larger loads than Steam Refresh. Ideal for loads left in the dryer for an extended time.
(on some models) Steam Dewrinkle is recommended for 8-13 garments
NOTE: Steam cycles are not intended for use with towels.
Important - the temperature setting must be set to HIGH and water must be turned on
before running the Steam Refresh cycle.
Options
Dewrinkle Tumble
Use this option to minimize the wrinkles in clothes. It provides 30 minutes of no-heat tumbling after the clothes are dry. If you
are using the cycle Signal and you select the Dewrinkle Tumble option, a signal will sound at the end of the drying time and
several times during the Dewrinkle Tumble cycle. This will remind you that it is time to remove the clothes.
Extended Tumble
Use this option to minimize the wrinkles in clothes. It provides 1 hour of no-heat tumbling after the clothes are dry. If you
are using the cycle Signal and you select the Extended Tumble option, a signal will sound at the end of the drying time and
several times during the Extended Tumble cycle. This will remind you that it is time to remove the clothes.
Damp Alert
This option causes the dryer to beep when clothes have dried to a damp level. Remove items that you wish to hang dry. The
Damp Alert will only beep when this option is selected (but the dry cycle will keep running). Removing clothes and hanging
them when they are damp, can reduce the need to iron some items. The light beside the pad will be lit when Damp Alert is
on.
Delay Dry
On models with a Time Remaining display, as the Delay Dry pad is repeatedly pressed, the delay time sets to 30 minutes, 1
hour, 2 hours, 4 hours, 8 hours, and back to clear (0 minutes). After selecting the delay time, press Start and the delay time will
count down the time remaining until the cycle starts.
On models without a Time Remaining display, as the Delay Dry pad is repeatedly pressed, the delay time sets to 2 hours, 4
hours, 8 hours, and back to clear (0 hours).
For all models, if the Delay Dry pad is pressed for 3 seconds, it clears (regardless of the delay time).
Signal
Use the Signal pad to change the volume of the end of cycle signal. Press the pad until you reach the desired volume or off.
The clothes should be removed when the beeper goes off so wrinkles do not set in.
NOTE:
• Remove garments promptly at the sound of signal. Place clothes on hangers so wrinkles will not set in.
• Use the Signal especially when drying fabrics like polyester, knits and permanent press. These fabrics should be removed so
wrinkles will not set in.
A
B

About the control panel GEAppliances.com
7
Settings
Individual settings for dryness level (Level), temperature (Temp), and Timed Dry cycle minutes (Time) can be set from
the minimum (lowest in column) to maximum (highest in column). In general, the higher up the column, the more
energy will be used.
Dryness Level-Selection only used for Sensor cycles. Timed cycles run for the selected time.
Extra Dry Use for heavy-duty fabrics or items that should be very dry, such as towels.
More Dry Use for heavy-duty or mixed type fabrics.
Dry Use for a normal dryness level suitable for most loads. This is the preferred cycle for energy savings.
Less Dry Use for lighter fabrics.
Damp
For leaving items partially damp.
Temperature
High For regular to heavy cottons.
NOTE: Steam Dewrinkle and Steam Refresh require the High temperature setting.
Medium For synthetics, blends, delicates and items labeled permanent press.
Low For delicates, synthetics and items labeled tumble dry low.
Extra Low
For delicates, synthetics and items labeled tumble dry low.
No Heat For fluffing items without heat. For use only with the Timed Dry cycles.
My Settings (on some models)
As the cycle selector knob is turned, the Level (Dryness Level), Temp (Temperature) and Time (Timed Dry) settings change to
automatic pre-set default settings. If you desire a different setting, press the appropriate pad(s). Then press and hold the My
Settings pad for 3 seconds and the dryer will “remember” these settings for that Knob Selection. In the future, when you turn
the selector knob to that cycle, your settings will be automatically recalled. NOTE: Signal volume cannot be set for My Settings.
Power
Press to “wake up” the display. If the display is active, press to put the dryer into idle mode.
NOTE: Pressing Power does not disconnect the appliance from the power supply.
Start
Press Start to begin the cycle. NOTE: The door must be closed for the dryer to start the cycle. Pressing Start again will Pause
the cycle and the cycle Indicator Light will blink.
To continue the cycle, press Start again. To stop the cycle, hold the pad for 3 seconds.
eDry (on some models)
When the eDry pad is pressed, cycle settings change to reduce the total energy consumption of the selected sensor cycle.
NOTE: Cycle times will change when eDry is selected.
Display (on some models)
The display shows the approximate time remaining until the end of the cycle.
In addition, this display will, “scroll” the dryer status:
• PAUSE The message “PAUSE” will scroll across the display when the dryer’s cycle is paused. The cycle may be
re-started by pressing the Start pad.
• door The message “door” will be displayed when the door is opened during the dryer’s cycle.
The eMonitor lights display the relative energy use of your selected cycle and options. They are provided as an energy guide
and range from Good (1 light) to Better (5 lights). Cycle (time), dryness level, temperature, and additional tumble options can
increase or decrease your energy efficiency. Some special cycles will not provide a display.
Indicator lights
Five LED lights indicate the current dryer status moving from left to right as the cycle progresses.
Demand Side Management (on some models) - When connected to your power company’s rate monitoring system, the
dryer will automatically delay starting if the rates are high/critical. An “ES” will be displayed and the selected cycle will
start after 4 hours or when the rates drop to low/medium, whichever comes first. If the rates are not high/critical, the
selected cycle will start immediately.
D
E
F
G
H
I
DSM
C

Sensor Dry
Drum Lamp
Before replacing the light bulb, be sure to
unplug the dryer power cord or disconnect
the dryer at the household distribution panel
by removing the fuse or switching off the
circuit breaker. Reach above dryer
opening
from inside the drum. Remove the
bulb and
replace with the same size bulb.
Sensor Dry (on some models)
This feature is only activated in the Cottons,
Easy Care and Delicates cycles.
The Sensor Dry provides greater
drying accuracy than standard machines,
resulting in shorter dry times and better
clothes care. As the clothes tumble, they
touch a moisture sensor. The sensor will
stop the heating cycle as soon as the
clothes have reached the selected dryness.
This dryer will adjust the initial estimated
drying time of the sensor dry cycles as it
“learns” its installation and usage profile.
Please allow several weeks for the dryer to
customize itself to “you”.
Drying Rack (on some models)
A handy drying rack may be used for drying
delicate items such as washable sweaters.
Hook the rack over the lint filter so
the rack extends into the dryer drum.
NOTE:
The drying rack must be used with the
Timed Cycle.
Do not use this drying rack when there
are other clothes in the dryer.
Stainless Steel Drum (on some models)
The stainless steel used to make the
dryer drum provides the highest reliability
available in a GE dryer. If the dryer drum
should be scratched or dented during normal
use, the drum will not rust or corrode. These
surface blemishes will not affect the function
or durability of the drum.
8
About the dryer features.

9
About reversing the door. GEAppliances.com
Reversing the Door
Tools needed:
Standard #2 Tape-tipped
Phillips screwdriver putty knife
1Open the door and remove the filler plugs opposite the
hinges. With the door completely open, remove the bottom
screw from each hinge on the dryer face. Insert these
screws about half way into the TOP holes, for each hinge,
on the opposite side (where you removed the filler plugs).
Apply firm pressure to get the screw started in new holes.
2Loosen top screw from each hinge on the dryer face half
way. With one hand holding the top of the door and the
other hand holding the bottom, remove the door from the
dryer by lifting it UP and OUT.
3Remove the blind plate from the hinge side of the dryer by
removing its two screws. Remove the strike plate from the
opposite side of the dryer by removing its two screws.
Reinstall the plates, on the opposite sides, using two screws
in each plate.
4Rotate the door 180°. Insert it on the opposite side of the
opening by moving the door IN and DOWN until the top
hinge and the bottom hinge are resting on the top screws
inserted in step 1.
5Remove the remaining screws from the side of the opening
from which the door was removed. With these screws,
secure each hinge at the bottom. Tighten the two top screws
of each hinge. Reinsert the plastic plugs on the side from
which the door was removed.
INSTALL AND TIGHTEN BOTTOM
SCREWS AND TIGHTEN TOP
SCREWS
INSERT PLUGS
INTO HOLES ON
OPPOSITE SIDE
REMOVE BOTTOM SCREW FROM EACH HINGE
AND INSTALL HALF WAY INTO EACH TOP OF
OPPOSITE HINGE HOLES
REMOVE 4 PLUGS AND KEEP
FOR INSERTION INTO
THE OPPOSITE SIDE
LOOSEN EACH TOP HINGE
SCREW HALF WAY AND LIFT
THE DOOR UP AND OFF
FRONT PANEL
SWITCH
STRIKE
PLATE
BLIND
PLATE
ROTATE DOOR 180º AND HANG
IT ON TOP HINGE SCREWS

Machine
wash
cycle Normal Permanent Press/
wrinkle resistant
Gentle/
delicate Hand wash Do not wash Do not wring
Water
temperature Hot
(50C/120F)
Warm
(40C/105F)
Cold/cool
(30C/85F)
WASH LABELS
Tumble
dry
Dry Normal Permanent Press/
wrinkle resistant
Gentle/
delicate Do not tumble dry
Do not dry
(used with
do not wash)
Heat
setting
High Medium Low No heat/air
Special
instructions Line dry/
hang to dry Drip dry Dry flat In the shade
DRY LABELS
Bleach
symbols Any bleach
(when needed) Only non-chlorine bleach
(when needed)
Do not bleach
BLEACH LABELS
About loading and using the dryer.
Always follow the fabric manufacturer’s care label when laundering.
Sorting and Loading Hints
As a general rule, if clothes are sorted properly for
the washer, they are sorted properly for the dryer.
Do not add fabric softener sheets once the load
has become warm. They may cause fabric
softener stains. Bounce®Fabric Conditioner
Dryer Sheets have been approved for use in all
GE Dryers when used in accordance with the
manufacturer’s instructions.
Do not overload. This wastes energy and causes
wrinkling.
Do not dry the following items: fiberglass items,
woolens, rubber-coated items, plastics, items with
plastic trim and foam-filled items.
Care and Cleaning of the Dryer
The Exterior: Wipe or dust any spills or washing
compounds with a damp cloth. Dryer control
panel and finishes may be damaged by some
laundry pretreatment soil and stain remover
products. Apply these products away from the
dryer. The fabric may then be washed and dried
normally. Damage to your dryer caused by these
products is not covered by your warranty.
The Lint Filter: Clean the lint filter before each
use. Moisten your fingers and reach into the filter
opening. Run your fingers
across the filter. Have a
qualified
technician vacuum the lint from the dryer
once a year.
Stainless Steel: To clean stainless steel surfaces,
use a damp cloth with a mild, non-abrasive cleaner
suitable for stainless steel surfaces. Remove the
cleaner residue, and then dry with a clean cloth.
The Exhaust Duct: Inspect and clean the exhaust
ducting at least once a year to prevent clogging.
A partially clogged exhaust can lengthen the
drying time.
Follow these steps:
1Turn off electrical supply by disconnecting
the plug from the wall socket.
2Disconnect the duct from the dryer.
3Vacuum the duct with the hose attachment
and reconnect the duct.
The Exhaust Hood: Check from the outside that
the flaps of the hood move freely when operating.
Make sure that there is not wildlife (birds, insects,
etc.) nesting inside the duct or hood.
Fabric Care Labels
Below are fabric care label “symbols” that affect the clothing you will be laundering.
10

11
Correct
Venting
Incorrect
Venting
For the best drying performance, the dryer needs to be properly vented. The dryer
will use more energy and run longer if it is not vented to the below specifications.
Carefully follow the details on Exhausting in the Installation Instructions.
Use only rigid metal 4” diameter ductwork inside the dryer cabinet. Use only rigid metal or
UL listed flexible metal 4” diameter ductwork for exhausting to the outside.
Do not use plastic or other combustible ductwork.
Use the shortest length possible.
Do not crush or collapse.
Avoid resting the duct on sharp objects.
Venting must conform to local building codes.
About venting the dryer. GEAppliances.com

Troubleshooting Tips
Save time and money! Review the charts on the following pages,
or visit GEAppliances.com. You may not need to call for service.
Before you call for service…
Problem Possible Causes What To Do
Dryer doesn’t start Dryer is unplugged • Make sure the dryer plug is pushed completely into
the outlet.
Fuse is blown/circuit breaker • Check the house fuse/circuit breaker box and replace
is tripped fuse or reset breaker. NOTE: Most electric dryers use
two fuses/breakers.
Dryer doesn’t heat Fuse is blown/circuit breaker is • Check the house fuse/circuit breaker box and replace
tripped; the dryer may tumble both fuses or reset both breakers. Your dryer may tumble
but not heat if only one fuse is blown or one breaker is tripped.
Gas service is off • Make sure gas shutoff at dryer and main shutoff are
fully open.
No heat temperature • Select another heat setting.
selected
Dryer shakes or Some shaking/noise is normal. • Move dryer to an even floor space, or adjust leveling legs
makes noise Dryer may be sitting unevenly as necessary until even.
Greasy spots on clothes Improper use of fabric softener • Follow directions on fabric softener package.
Drying dirty items • Use your dryer to dry only clean items. Dirty items can
with clean ones stain clean items and the dryer.
Clothes were not • Sometimes stains which cannot be seen when the clothes
completely clean are wet appear after drying. Use proper washing procedures
before drying.
Lint on clothes Lint filter is full • Clean lint screen before each load.
Improper sorting • Sort lint producers (like chenille) from lint collectors
(like corduroy).
Static electricity can attract lint • See suggestions in this section under Static.
Overloading • Separate large loads into smaller ones.
Paper, tissue, etc., left in pockets • Empty all pockets before laundering clothes.
Static occurs No fabric softener was used • Try a fabric softener.
• Bounce®Fabric Conditioner Dryer Sheets have been
approved for use in all GE Dryers when used in accordance
with the manufacturer’s instructions.
Over-drying • Try a fabric softener.
• Adjust setting to Less Dry or Damp Dry.
Synthetics, permanent press • Try a fabric softener.
and blends can cause static
Inconsistent Type of heat • Automatic drying times will vary according to the type
drying times of heat used (electric, natural or LP gas), size of load,
types of fabrics, wetness of clothes and condition of
exhaust ducts.
The Dry dryness level Load consists of a mixture • When combining heavy and light fabrics in a load,
was chosen but load is of heavy and light fabrics choose More Dry if you are using a sensor cycle.
still damp
Exhaust system is blocked • Inspect and clean exhaust system.
12

13
Before you call for service… GEAppliances.com
Problem Possible Causes What To Do
Clothes take too long Improper sorting • Separate heavy items from lightweight items (generally,
to dry a well-sorted washer load is a well-sorted dryer load).
Large loads of heavy fabrics • Large, heavy fabrics contain more moisture and take
(like beach towels) longer to dry. Separate large, heavy fabrics into smaller
loads to speed drying time.
Controls improperly set • Match control settings to the load you are drying.
Lint filter is full • Clean lint filter before every load.
Improper or obstructed • Check installation instructions for proper
ducting ducting/venting.
• Make sure ducting is clean, free of kinks and
unobstructed.
• Check to see if outside wall damper operates easily.
• Check the Installation Instructions to make sure the
dryer venting is correct.
Blown fuses or tripped • Replace fuses or reset circuit breakers. Since most dryers
circuit breaker use 2 fuses/breakers, make sure both are operating.
Overloading/combining loads • Do not put more than one washer load in the dryer at
a time.
Under-loading • If you are drying only one or two items, add a few items
to ensure proper tumbling.
Clothes are wrinkled Over-drying • Select a shorter drying time.
• Remove items while they still hold a slight amount of
moisture. Select a Less Dry or Damp Dry setting.
Letting items sit in dryer • Remove items when cycle ends and fold or hang
after cycle ends immediately.
Overloading • Separate large loads into smaller ones.
Clothes shrink Some fabrics will naturally shrink • To avoid shrinkage, follow garment care labels exactly.
when washed. Others can be
safely washed, but will shrink • Some items may be pressed back into shape after drying.
in the dryer • If you are concerned about shrinkage in a particular
item, do not machine wash or tumble dry it
Water seen on inside of Steam condenses on these • This is normal.
door and top of lint filter surfaces
when opening door after
steam cycle
Small areas on clothes are Steam condenses on inner drum • If using the Steam Dewrinkle cycle, manually reduce
damp after steam cycle the cycle time. If using the Steam Refresh cycle, add
more garments to the load.
Collars and waistbands The dryness monitor senses • Choose Speed Dry or Timed Dry to dry damp collars
still wet at end of cycle that the body of the clothes and waistbands. In the future, when drying a load with
is dry collars and waistbands, choose More Dry.
Slight variation This is normal • Due to the metallic properties of paint used for this unique
in metallic color product, slight variations of color may occur due to
viewing angles and lighting conditions.

14
Before you call for service…
Problem Possible Causes What To Do
Small amount of water Inadequate load size for steam • If using the Steam Dewrinkle cycle, manually reduce
on floor in front of dryer cycle selected, excess steam time. If using the Steam Refresh cycle, add more
condenses inside cabinet and garments to the load.
leaks out
Water on floor in back Loose water hose connection to • Tighten connection.
of dryer valve
Hose missing rubber washer at • Install rubber washer provided with hose.
connection with valve
Water drips from door Steam condenses on inner door • This is normal.
when opened after
a Steam Cycle
Cannot see steam at Steam released at different • This is normal.
beginning of cycle time in cycle
Cannot see steam at any The steam nozzle might be • Call 800.GE.CARES to order nozzle replacement kit
time during the cycle clogged with debris from your WE25M71 or to request a service technician to replace this
water supply for you.
Garments still wrinkled Too many garments • Load fewer garments; manually increase time.
after steam cycle
Dryer continues to Extended/Dewrinkle Tumble • Ensure Extended/Dewrinkle Tumble option is not selected.
tumble after display was selected For the Steam Refresh cycle, Extended/Dewrinkle Tumble
says complete will automatically be turned on and cannot be turned off.
Garments are wet after Lint filter not clean • Clean lint filter
Steam cycle
Load is children/infant garments • Use the Steam Refresh cycle.
No numbers displayed Dryer is continuously • This is normal. When the dryer senses a low level of
during cycle, only lights monitoring the amount of moisture in the load, the dryer will display the dry time
moisture in the clothes remaining.
Time Remaining The estimated time may change • This is normal.
jumped to a when a smaller load than usual
lower number is drying
Dryer is running but The Extended/Dewrinkle • This is normal. During Extended/Dewrinkle Tumble, the
00 is displayed in Tumble option was chosen time remaining is not displayed. The extended tumbling
Time Remaining option lasts approximately 60 minutes; dewrinkle 30 minutes.
Clothes are still wet The door was opened mid-cycle. • A dry cycle must be re-selected each time a new load
and dryer shuts off The load was then removed from is put in.
after a short time the dryer and a new load put in
without selecting a new cycle
Small load • When drying 3 items or less, choose Speed Dry or
Timed Dry.
Load was already dry except • Choose Speed Dry or Timed Dry to dry damp collars
for collars and waistbands and waistbands. In the future, when drying a load with
collars and waistbands, choose More Dry.
Dryer is not level • Move dryer to an even floor space or adjust leveling legs
as necessary until even.

GE Dryer Warranty.
15
What GE Will Not Cover:
Service trips to your home to teach you how
to use the product.
Improper installation, delivery or maintenance.
Failure of the product if it is abused, misused, or
used for other than the intended purpose or used
commercially.
Replacement of the light bulb.
Replacement of house fuses or resetting
of circuit breakers.
Damage to the product caused by accident, fire, floods
or acts of God.
Incidental or consequential damage caused by possible
defects with this appliance.
Damage caused after delivery.
Product not accessible to provide required service.
Defects or damage due to operation in freezing
temperatures.
Products which are not defective or broken, or which are
working as described in the Owner’s Manual.
This warranty is extended to the original purchaser and any succeeding owner for products purchased for home use within the
USA. If the product is located in an area where service by a GE Authorized Servicer is not available, you may be responsible for a
trip charge or you may be required to bring the product to an Authorized GE Service location for service. In Alaska, the warranty
excludes the cost of shipping or service calls to your home.
Some states do not allow the exclusion or limitation of incidental or consequential damages. This warranty gives you specific legal
rights, and you may also have other rights which vary from state to state. To know what your legal rights are, consult your local
or state consumer affairs office or your state’s Attorney General.
Warrantor: General Electric Company. Louisville, KY 40225
All warranty support provided by our Factory Service Centers,
or an authorized Customer Care®technician. To schedule service,
on-line, 24 hours a day, visit us at GEAppliances.com or call 800.
GE.CARES (800.432.2737). Please have serial number and model
number available when calling for service.
Staple your receipt here.
Proof of the original purchase
date is needed to obtain
support under the warranty.
(;&/86,212),03/,(':$55$17,(6³<RXUVROHDQGH[FOXVLYHUHPHG\LVSURGXFWUHSDLUDVSURYLGHGLQWKLV/LPLWHG
Warranty. Any implied warranties, including the implied warranties of merchantability or fitness for a particular
purpose, are limited to one year or the shortest period allowed by law.
For The Period Of: GE Will Replace:
One Year Any part of the dryer which fails due to a defect in materials or workmanship. During this
From the date of the limited one-year warranty, GE will also provide, free of charge, all labor and related service costs
original purchase to replace the defective part.
Second Year Any part of the dryer which fails due to a defect in materials or workmanship. During this
From the date of the additional one-year limited warranty, you will be responsible for any labor or related service costs.
original purchase
Second through The extra large or super capacity dryer drum and main electronic control board, if any of these
Fifth Year parts should fail due to a defect in materials or workmanship. During this additional four-year
From the date of the limited warranty, you will be responsible for any labor or related service costs.
original purchase

16
Consumer Support.
GE Appliances Website GEAppliances.com
Have a question or need assistance with your appliance? Try the GE Appliances Website 24 hours a day,
any day of the year! For greater convenience and faster service, you can now download Owner’s Manuals,
order parts or even schedule service on-line.
Schedule Service GEAppliances.com
Expert GE repair service is only one step away from your door. Get on-line and schedule your service at your
convenience 24 hours any day of the year! Or call 800.GE.CARES (800.432.2737) during normal business hours.
Real Life Design Studio GEAppliances.com
*(VXSSRUWVWKH8QLYHUVDO'HVLJQFRQFHSW³SURGXFWVVHUYLFHVDQGHQYLURQPHQWVWKDWFDQEHXVHGE\
people of all ages, sizes and capabilities. We recognize the need to design for a wide range of physical and
mental abilities and impairments. For details of GE’s Universal Design applications, including kitchen design
ideas for people with disabilities, check out our Website today. For the hearing impaired, please call 800.TDD.
GEAC (800.833.4322).
Extended Warranties GEAppliances.com
Purchase a GE extended warranty and learn about special discounts that are available while your warranty
is still in effect. You can purchase it on-line anytime, or call 800.626.2224 during normal business hours.
GE Consumer Home Services will still be there after your warranty expires.
Parts and Accessories GEAppliances.com
Individuals qualified to service their own appliances can have parts or accessories sent directly to their homes
(VISA, MasterCard and Discover cards are accepted). Order on-line today, 24 hours every day or by phone
at 800.626.2002 during normal business hours.
Instructions contained in this manual cover procedures to be performed by any user. Other servicing generally
should be referred to qualified service personnel. Caution must be exercised, since improper servicing may
cause unsafe operation.
Contact Us GEAppliances.com
If you are not satisfied with the service you receive from GE, contact us on our Website with all the details
including your phone number, or write to: General Manager, Customer Relations
GE Appliances, Appliance Park
Louisville, KY 40225
Register Your Appliance GEAppliances.com
5HJLVWHU\RXUQHZDSSOLDQFHRQOLQH³DW\RXUFRQYHQLHQFH Timely product registration will allow for enhanced
communication and prompt service under the terms of your warranty, should the need arise.
You may also mail in the pre-printed registration card included in the packing material.

GEAppliances.com
Manual del
propietario
Secadoras
Instrucciones
de seguridad............... 2–4
Instrucciones de operación
Cómo cambiar el sentido
deaperturadelapuerta .........9
Cómo cargar y usar la secadora . 10
Funciones de la secadora ........8
Panelesdecontrol.............5-7
Ventilación de la secadora.......11
Consejos para la solución
de problemas ............ 13,14
Soporte al consumidor
Garantía ..................... 15
Soportealconsumidor..........16
Escriba el número de modelo
y de serie aquí:
No. de modelo _____________
No. de serie _______________
Estos números se encuentran
en una etiqueta en la parte
delantera de la secadora, detrás
de la puerta.
234D2241P003 49-90508 10-13 GE

INFORMACIÓN DE SEGURIDAD IMPORTANTE.
LEA TODAS LAS INSTRUCCIONES ANTES DE USAR.
Decreto para hacer cumplir las leyes sobre tóxicos y agua potable de California
Este decreto requiere que el Gobernador de California publique una lista de las sustancias que el estado sabe que
causan cáncer, defectos de nacimiento y otros daños reproductivos y requiere que los comerciantes le adviertan
a sus consumidores sobre el potencial de exposición a tales sustancias.
Los electrodomésticos de gas pueden causar la exposición a cuatro de estas sustancias, concretamente
benceno, monóxido de carbono, formaldehído y hollín, principalmente causados por la combustión incompleta
del gas natural o de combustibles LP.
Cuando las secadoras están ajustadas apropiadamente, se minimiza la combustión incompleta. La exposición a
estas sustancias puede minimizarse aún más ventilando apropiadamente la secadora hacia el exterior.
¡ADVERTENCIA!
Por su seguridad, debe seguir las indicaciones de este manual para minimizar el
riesgo de incendio o explosión, descarga eléctrica, o para evitar daños a la propiedad,
lesiones personales, o muerte.
QUÉ HACER SI USTED HUELE GAS:
1No intente encender un fósforo,
o un cigarrillo, o encender cualquier
electrodoméstico eléctrico o de gas.
2No toque ningún interruptor eléctrico;
no use ningún teléfono en el edificio.
3Desocupe el habitación, edificio o área
afectada.
4Llame inmediatamente a su proveedor
de gas usando el teléfono de algún
vecino. Siga las instrucciones del
proveedor de gas cuidadosamente.
5Si usted no puede ponerse en contacto
con su proveedor de gas, llame al
departamento de bomberos.
No almacene ni use gasolina u otros
vapores y líquidos inflamables en las
proximidades de este o cualquier otro
electrodoméstico.
La instalación y el servicio lo deben
llevar a cabo un instalador calificado,
la agencia de servicio o el proveedor
de gas.
Conecte la secadora a tierra de manera apropiada
que cumpla con todos los códigos y ordenanzas
reguladoras. Siga con cuidado las Instrucciones
de instalación.
Instálela o almacénela donde no esté expuesta
a temperaturas por debajo del punto de
congelación o expuesta a la intemperie.
Conecte a un tomacorriente del tamaño y del calibre
apropiados para evitar una sobrecarga eléctrica.
Remueva todos los objetos de empaquetado
y deshágase apropiadamente de todos los
materiales de envío.
Quite la cinta colorada de protección del panel de
control.
Escape/Ductos:
1Las secadoras DEBEN contar con escape al
exterior para impedir que grandes volúmenes de
humedad y pelusa ingresen a la habitación.
2
Utilice únicamente ducto de metal rígido de 4ļde
diámetro en el interior del gabinete de la secadora y
utilice únicamente ducto de metal rígido de 4ļde
diámetro, o con aprobación de UL en el ducto de
transición entre la secadora y el ducto del hogar. EL
USO DE DUCTOS PLÁSTICOS U OTROS DUCTOS DE
MATERIALES COMBUSTIBLES PODRÍA CAUSAR UN
INCENDIO. LOS DUCTOS PERFORADOS PODRÍAN
CAUSAR UN INCENDIO SI COLAPSAN O SI OCURRE
ALGUNA OBSTRUCCIÓN DURANTE EL USO O
DURANTE LA INSTALACIÓN.
Para los detalles completos, siga las Instrucciones de
instalación.
INSTALACIÓN APROPIADA
Antes de usarse, la secadora se debe instalar apropiadamente de acuerdo con las Instrucciones
de instalación. Si no recibió una Hoja de instrucciones de instalación, puede obtener una
visitando GEAppliances.com o llamando al 800.GE.CARES (800.432.2737).
2

INFORMACIÓN DE SEGURIDAD IMPORTANTE.
LEA TODAS LAS INSTRUCCIONES ANTES DE USAR. GEAppliances.com
SU ÁREA DE SECADO
Mantenga el área debajo y alrededor de sus
electrodomésticos libre de materiales combustibles
(pelusas, papel, trapos, etc.), gasolina, productos
químicos y otros líquidos y vapores inflamables.
Mantenga el piso alrededor de sus
electrodomésticos limpios y secos para reducir la
posibilidad de
un accidente.
Supervise a los niños en caso de que ellos usen
la secadora o jueguen cerca de ella durante su
operación. No permita que los niños jueguen con
la secadora, en su interior, sobre ella o ningún
otro electrodoméstico.
Mantenga todos los artículos de limpieza (tales
como detergentes y blanqueadores) fuera del
alcance de los niños, preferiblemente encerrados
en un gabinete. Ponga atención a las advertencias
en las etiquetas de los envases para evitar
accidentes.
Nunca trepe ni se ponga de pie sobre la parte
superior de la secadora.
Mantenga el área alrededor de la salida y las áreas
cercanas libres de acumulación de pelusas, polvillo
y suciedad.
No obstruya el flujo del aire ventilado. No apile,
no coloque ropa, no eche alfombras al frente o al
respaldo de la secadora.
CUANDO USE SU SECADORA
Nunca introduzca sus manos en el interior de
la secadora mientras el tambor giratorio esté
moviéndose. Antes de agregar y sacar ropa,
espere hasta que el tambor giratorio se haya
detenido.
Limpie el filtro de pelusa antes de cada carga
para evitar la acumulación de pelusa en el interior
de la secadora o en la habitación. NO OPERE LA
SECADORA SIN EL FILTRO DE PELUSA EN SU LUGAR.
No lave ni seque artículos que se hayan limpiado,
lavado, remojado o salpicado con sustancias
combustibles o explosivas (tales como cera, aceite,
pintura, gasolina, desengrasadores, solventes de
tintorería, kerosene). Estas sustancias producen
vapores que podrían incendiarse o explotar. No
agregue estas sustancias al agua de lavado. No
use ni coloque estas sustancias alrededor de la
lavadora o secadora durante su uso.
No coloque artículos expuestos a aceite de cocinar
en la secadora. Los artículos contaminados con
aceites de cocinar podrían contribuir a formar una
reacción química que podría causar que una carga
de ropas se incendie.
Cualquier artículo sobre el cual usted usó un
solvente de limpieza o que contenga materiales
inflamables (tales como paños de limpieza,
trapeadores, toallas usadas en salones de belleza,
restaurantes o barberías) no se deben colocar en
el interior o en las proximidades de la secadora.
Existen muchos artículos inflamables en el hogar
tales como la acetona, el alcohol, la gasolina,
el kerosene, algunos limpiadores, algunos
quitamanchas, aguarrás, trementina, ceras,
removedores de cera y productos que contengan
derivados del petróleo.
El proceso de lavado puede reducir la habilidad
de retardar la flamabilidad de algunas telas.
Para evitar tal resultado, siga las instrucciones
del fabricante de las telas con mucho cuidado.
No seque artículos que contengan goma,
plástico, espuma o materiales similares tales
como sostenes (brasieres) con relleno, zapatos
deportivos, ganchos de goma, alfombras de
baño, baberos de niño, pantalones de niño, bolsas
plásticas y almohadas que se puedan derretir o
quemar. Algunos materiales gomosos, cuando
se calientan, bajo ciertas circunstancias podrían
incendiarse por combustión espontánea.
Durante su operación, no almacene encima
de la secadora plásticos, papel o ropa que se
puedan quemar o derretir.
Las prendas de vestir etiquetadas “Dry away from
heat” (Secar alejadas del calor) o “Do not tumble
GU\µ1RVHFDUSRUJLUR³WDOHVFRPRFKDTXHWDV
VDOYDYLGDVTXHFRQWLHQHQFDSRF³QRVHGHEHQ
colocar en su secadora.
No seque artículos de fibra de vidrio en su secadora.
Esto podría ocasionar irritación en la piel debido a
las partículas restantes que se podrían adherir a la
ropa durante usos subsecuentes de la secadora.
Para minimizar la posibilidad de una descarga
eléctrica, desconecte éste electrodoméstico de su
tomacorriente o desconecte la secadora del panel
de distribución eléctrica del edificio removiendo el
fusible o desconectando el circuito antes de dar
cualquier tipo de mantenimiento o limpieza (con
la excepción de remover y limpiar el filtro de la
pelusa). NOTA: Girar la perilla selectora de ciclos
a la posición OFF (apagado) o presionar PAUSE NO
desconecta el electrodoméstico del tomacorriente.
¡ADVERTENCIA!
3

¡ADVERTENCIA!
CUANDO USE SU SECADORA (cont.)
Nunca intente operar éste electrodoméstico
si está dañado, si no funciona bien, si está
parcialmente desarmado, o si le faltan partes o éstas
están rotas, incluyendo daños al cable eléctrico.
El interior de la máquina y la conexión del tubo
de escape en el interior de la secadora se deben
limpiar por lo menos una vez al año por parte de un
técnico calificado. Ver la sección Cómo cargar
y usar la secadora.
Si su secadora es de gas, ésta está equipada con un
encendido eléctrico automático y no necesita una luz
piloto. NO INTENTE ENCENDERLA CON UN FÓSFORO.
Podrían resultar quemaduras por tener su mano en
las cercanías del quemador cuando el encendido
eléctrico automático comience.
Es posible que usted desee suavizar su ropa
o reducir la electricidad estática en ella usando
una toalla suavizante para secadora o un
acondicionador antiestático. Recomendamos
que usted use un suavizante de telas en el ciclo
de lavado, de acuerdo con las instrucciones
del fabricante para estos productos, o trate un
producto en el que el fabricante le proporcione
una garantía escrita en el paquete especificando que
es seguro para usar en las secadoras. Los problemas
de servicio o de rendimiento causados por estos
productos son responsabilidad de
los fabricantes de estos productos y no están
cubiertos por la garantía de éste electrodoméstico.
Si ve agua sobre el piso alrededor de la secadora,
llame al servicio técnico.
Nunca pulverice cualquier tipo de aerosol en, sobre o
cerca de la secadora. No use ningun tipo de limpiador
aerosol al limpiar el interior de la secadora. Humos
peligrosos o choque eléctrico pueden ocurrir.
Nunca trate de utilizar los ciclos de estirar por vapor
o renovación por vapor sin prendas en el tambor.
Además, se recomienda enfáticamente seleccionar el
tamaño de carga apropiado para mejores resultados.
Seleccionar ciclos de cargas grandes para cargas
pequeñas puede mojar las ropas y seleccionar ciclos
de cargas pequeñas para cargas grandes puede
generar un desempeño pobre de estiramiento.
INFORMACIÓN DE SEGURIDAD IMPORTANTE.
LEA TODAS LAS INSTRUCCIONES ANTES DE USAR.
CUANDO NO SE ENCUENTRE USANDO SU SECADORA
Cuando desconecte éste electrodoméstico, agarre
el enchufe firmemente para evitar daños al
cable eléctrico mientras lo hale. Coloque el cable
eléctrico en un lugar alejado de las áreas de tráfico
para que nadie lo pise, tropiece o lo pueda dañar.
No intente hacer reparaciones o reemplazar
ninguna parte de éste electrodoméstico ni intente
llevar a cabo ningún tipo de servicio a no ser que
lo recomiende el Manual del propietario o
instrucciones publicadas que usted entienda
y tenga la habilidad de llevar a cabo.
Antes de desechar una secadora o de removerla
para darle servicio, remueva la puerta de la
secadora para evitar que algún niño se esconda
en su interior.
No intente alterar los controles.
LEA Y SIGA ESTA INFORMACIÓN
DE SEGURIDAD CUIDADOSAMENTE.
CONSERVE ESTAS INSTRUCCIONES
4
This manual suits for next models
3
Table of contents
Languages:
Other GE Dryer manuals