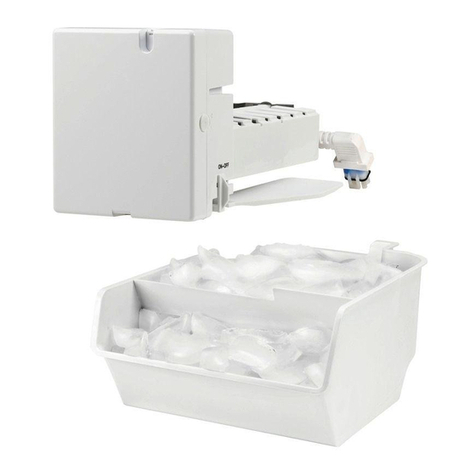
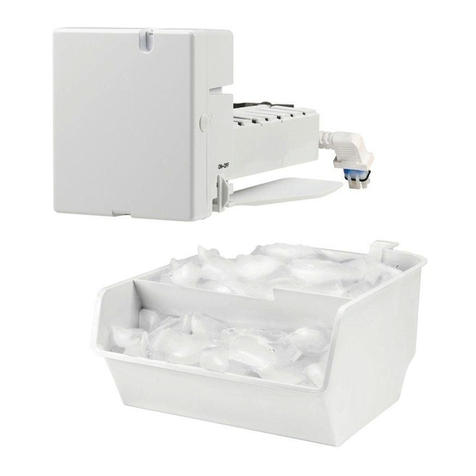
GE IM-4B Operating instructions

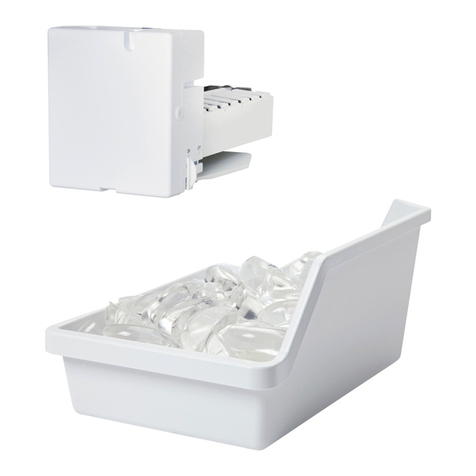
Icemaker Accessory Kit
GEAppliances.com
IM-4B
162D4614P015 49-60684 05-13 GE
Safety Information......... 1
Operating Instructions .....2
Before You Call For Service ....3-5
Normal Sounds You May Hear....2
Preparing for Vacation ..........2
When You Should Set the
FeelerArmtoOFF...............2
Installation Instructions
. .6-10
Icemaker .....................8,9
WaterLine.....................10
PartsList........................7
Consumer Support
Consumer Support .....Back Page
Warranty ..................... 11
Owner’s Manual and
Installation Instructions
Machine à glaçons
Trousse
Manuel d’utilisation
et d’installation
La section française commence à la page 19
Máquina de Hielos
Equipo de Accesorios
Manual del propietario
e instalación
La sección en español empieza en la página 37
SAFETY PRECAUTIONS
FOR YOUR SAFETY:
Do not place fingers or hands in the automatic
icemaking mechanism while the refrigerator
is plugged in. This will help protect you from
possible injury.
It will also prevent interference with moving
partsoftheejectormechanismandtheheating
elementthat releasesthe cubes,located onthe
bottom of the icemaker.
READ AND FOLLOW THIS SAFETY INFORMATION CAREFULLY.
READ AND SAVE THESE INSTRUCTIONS

About the automatic icemaker.
A newly-installed refrigerator may take 12 to 24 hours to begin making ice.
Automatic Icemaker (on some models)
The icemaker will produce approximately 3 to
3½ lbs. of ice in a 24-hour period, depending on
the freezer compartment temperature, room
temperature, number of door openings and
otheruse conditions.
If the refrigerator is operated before the water
connection is made to the icemaker, move the
feelerarm to the STOP (up)position.
When the refrigerator has been connected to
the water supply, move the feeler arm to the ON
(down) position.
The icemaker will fill with water when it cools to
15°F. A newly-installed refrigerator may take 12
to24 hours to begin makingice cubes.
Once the icemaker starts to make ice, it may
take up to 48 hours to fill the bin, depending on
the temperature settings and number of door
openings.
You will hear a buzzing sound each time the
icemaker fills with water. Throw away the first
fewbatchesoficetoallowthewaterlinetoclear.
Be sure nothing interferes with the sweep of the
feelerarm.
When the bin fills to the level of the feeler arm,
the icemaker will stop producing ice. It is normal
for several cubes to be joined together. If ice is
not used frequently, old ice cubes will become
cloudy,taste stale, shrink or fusetogether.
NOTE: In homes with lower-than-average water
pressure, you may hear the icemaker cycle
multipletimes when making one batch ofice.
Preparing for Vacation
Move the feeler arm to the STOP (up) position
andshutoffthewatersupplytotherefrigerator. If the temperature can drop below freezing,
haveaqualifiedservicerdrainthewatersupply
system (on some models) to prevent serious
property damage due to flooding.
When you should set the icemaker feeler arm to the STOP (up) position
Whentheicestoragebinisremovedformore
than a minute or two.
When the water supply will be shut off for
several hours.
When the refrigerator will not be used for
several days.
The icemaker water valve will buzz when the
icemaker fills with water. If the feeler arm is
in the ON (down) position, it will buzz even
if it has not yet been hooked up to water.
Keeping the feeler arm in the ON position
before it is hooked up to water can damage
the icemaker.To preventthis, movethe feeler
arm to the STOP (up) position. This will stop
the buzzing.
The soundof cubesdropping intothe binand
water running in the pipes as the icemaker
refills.
Normal sounds you may hear
Icemaker
ON
OFF
2
3
Problem Possible Causes What To Do
Automatic icemaker Freezer compartment • After installing the kit, allow the refrigerator to completely
does not work too warm. cool down for 24 hours. Once the compartment is cool,
the icemaker will begin ice production.
Icemaker is not turned on. • Move the icemaker
feeler arm to the
ON (down) position.
Icemaker is not plugged • If using a power cord adapter, make sure that it is fully
in correctly. connected. Also, check that the icemaker cord plug is fully
inserted into the socket. See Plug in the icemaker.
Water line kinked. • Check that the plastic water
line running from the valve
to the water tube inlet is not
kinked. See Connect the
water line. A kink in the
water line will restrict flow
to the water line.
Water supply turned off or • After installing the kit, make sure the house water supply
not connected. to the refrigerator has been turned on.
Piled up cubes in the storage bin • Level cubes by hand.
cause the icemaker to shut off.
Water valve is not plugged in • Check that the valve wire
correctly. adapter is completely
plugged onto the male
connector plug and the
terminals on the water valve.
See Attach the water valve.
Before you call for service… GEAppliances.com
Troubleshooting Tips
Save time and money! Review the following chart first
and you may not need to call for service.
Clip Restraints
onto Locking
Tabs
Locking
Tabs
Hook
Adhesive-backed
Fasteners for
Water Tube
Male Connector
Plug
Valve
Terminals
Feeler Arm
Model
Feeler Arm in the ON
(down) position
Feeler Arm in the
STOP (up) position

Problem Possible Causes What To Do
Leaking water around Foam in the fill cup from • If the fill tube was installed by sliding it through the back
the fill cup installing the fill tube. of the refrigerator, it may have picked up pieces of foam
as it was pushed through. This foam can interfere with
the water flow in the fill cup. Check the cup and make
sure there are no foam pieces.
Fill tube not correctly seated • Check that the fill tube is
in the fill cup. correctly inserted in the
fill cup opening. See Mount
the icemaker.
Leaking water behind House supply not properly • Check that the house supply is firmly attached to
the refrigerator connected to the water valve. the water valve. See Water line installation instructions.
Water line not connected • Check that the plastic
to the water tube inlet. water line running from
the valve to the water tube
inlet is firmly attached with
the hose clamp. See Connect
the water line.
Slow ice/freezer not Door left open. • Check to see if package is holding door open.
cold enough Temperature control not • See About the Temperature Control.
set cold enough.
Ice cubes too small/ Water shutoff valve connecting • We recommend drilling a 1/4” hole
slow ice refrigerator to house water line in the water pipe to connect the water
may be clogged. shut-off valve. Failure to drill a 1/4”
hole may result in reduced ice
production or smaller cubes.
See Installing the water line.
Water line kinked. • Check that the plastic water
line running from the valve
to the water tube inlet is not
kinked. See Connect the
water line. A kink in the
water line will restrict flow
to the icemaker.
4
Troubleshooting Tips
Save time and money! Review the following chart first
and you may not need to call for service.
Before you call for service… GEAppliances.com
FillTube
Fill
Tube
FillCup
Water
Tube Inlet
Hose
Clamp
Water Line
Adhesive-backed
Fasteners for
Water Tube
Drill 1/4” hole
in water pipe

Problem Possible Causes What To Do
Ice cubes have Ice storage bin needs cleaning. • Empty and wash bin. Discard old cubes.
odor/taste Food transmitting odor/taste • Wrap foods well.
to ice cubes.
Interior of refrigerator • See Care and cleaning.
needs cleaning.
Frequent “buzzing” Normal operation. • During normal operation, the water valve will “buzz”
sound when the icemaker fills with water.
Before you call for service…
Troubleshooting Tips
Save time and money! Review the following chart first
and you may not need to call for service.
5

6
BEFORE YOU BEGIN
Installation IM-4B
Instructions Icemaker Kit
Read these instructions completely and carefully.
•IMPORTANT –Save these instructions
for local inspector’s use.
•IMPORTANT –Observe all governing
codes and ordinances.
• Note to Installer –Be sure to leave these
instructions with the Consumer.
• Note to Consumer –Keep these instructions
for future reference.
• Skill level – Installation of this appliance requires
basic mechanical and electrical skills.
• Completion time – 20–60 minutes
• Proper installation is the responsibility of the
installer.
• Product failure due to improper installation is not
covered under the Warranty.
It’s important that you use the water valve and fill tube
extension that come with this kit, even though your
refrigerator may already have them installed.
The old valve will not allow enough water through to fill the
icemaker properly and will cause damage.
The fill tube extension needs to be a different length than
the original tube for proper water flow. Cut the tube to the
length indicated for your model of refrigerator.
ARE YOU REPLACING AN ICEMAKER
WITH THIS KIT?
Questions? Call 800.GE.CARES (800.432.2737) or visit our Website at: geappliances.com.
In Canada, call 1.800.561.3344 or visit our Website at: geappliances.ca.
• If the unit is damaged in shipment, return the unit to the
store in which it was bought for repair or replacement.
• If the unit is damaged by the customer, repair or
replacement is the responsibility of the customer.
• If the unit is damaged by the installer (if other than
the customer), repair or replacement must be made by
arrangement between customer and installer.
DAMAGE – SHIPMENT/INSTALLATION

7
Installation Instructions
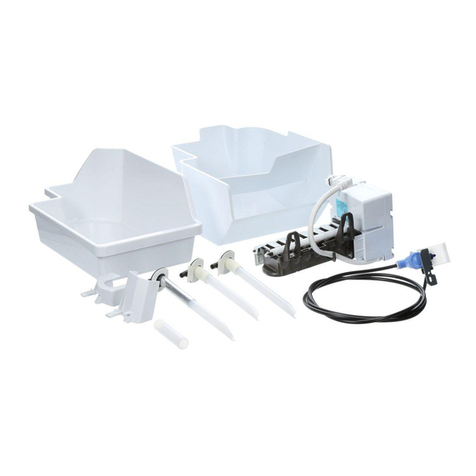
CONTENTS OF KIT IM-4B
Owner’s Manual &
Installation Instructions
2
Water Inlet Gasket
5
Water Valve and Tube Assembly
3
Adhesive-Backed Water Tube
Fasteners, to secure plastic water
tube (4)
4Phillips Head Screw, for
attaching water valve (2)
9
Ice Bucket
8
Water Line Clamp (strain relief),
6
11 Water Tube Inlet
10 Hex Head Screws, for
mounting ice maker (2)
Warranty Label
7
ICEMAKER
WARRANTY VERIFICATION
Date Installed
Dealer
12 Icemaker Fill Cup
ST OP
Icemaker (Appearance may vary)
1
Installation
Instructions
13 Hose Clamp
Water Tube Inlet
Cover
14
Phillips Head Screws, for
attaching water tube
inlet cover and water line
clamp (3)
15

8
Installation Instructions
ICEMAKER INSTALLATION INSTRUCTIONS
BEFORE YOU BEGIN
Read each step thoroughly before proceeding.
•CAUTION – Unplug the
refrigerator. To eliminate the danger of
electric shock during installation, you
must unplug the refrigerator from its
electrical outlet.
INSTALL THE ICEMAKER FILL CUP
Install the icemaker fill cup (side-mounted) into the
icemaker as shown.
3
PLUG IN THE ICEMAKER
Holdingtheicemakerinplace,inserttheicemaker power
cord plug into the socket, making sure that the prongs
and holes are matched. Press the plug firmly into the
socket. Lock the plug in place by clipping the restraints
onto each side of the plug. Make sure the restraints click
into place.Make sure thepower cord isstill in the hookon
the back of the icemaker.
MOUNT THE ICE MAKER
Inside the freezer, loosen the 2 mounting screws but
do not screw them all the way out. If your model does
not have the screws already in the freezer wall, look for
two plug buttons. Remove the plug buttons and insert
the 2 philips head screws.The screws should extend
approximately 1/2” (13mm) out from the freezer wall.
4
5
Phillips screwdriver Pliers
TOOLS YOU WILL NEED
Sharp knife
1/4” Nutdriver or adjustable wrench
Remove
plug
PREPARE FOR INSTALLATION
• Remove and discard the large white plug from the
rear freezer wall.
MOVE FEELER ARM TO THE STOP
POSITION
Move the feeler arm to the STOP (up) position. Leave the
feeler arm in the STOP position until the refrigerator is
connected to the water supply to prevent premature
operation.
2
ST OP
Feeler
Arm
Mounting Screws
Hook
Ice Maker
(Appearance may vary)
1
Fill Cup
12
1
10

INSTALL THE ICE BUCKET
Put the ice bucket (8) in
place under the icemaker.
Make sure the icemaker
power switch is set to OFF.
Installation Instructions
ICEMAKER INSTALLATION INSTRUCTIONS (cont.)
ATTACH WARRANTY LABEL
Alabel (7) is provided with this kit to record the date of
installation for warranty purposes. Apply it to the back of
the refrigerator.
8
7
9
8
REMOVE THE COVER
At the bottom rear of the refrigerator, remove the
screw(s) holding the access cover.
Bend the cover back for access to the compartment.
Be sure to save the screws as the access cover must be
reinstalled later to ensure your refrigerator will function
properly.
9
ATTACH THE WATER VALVE
• Locate the female connector plug. Plug the female
connector onto the male terminals on the water
valve. Either wire can go on either terminal.
Female
connector
Male
terminals
FASTEN THE WATER VALVE
• Fasten the water valve (3) to the cabinet by driving
the Phillips-head screw (9) from the kit into the hole
in the cabinet leg.
MOUNT THE ICEMAKER
• Hang the icemaker on the two mounting screws (10).
Make sure:
• The power cord is still firmly in the socket.
• The icemaker mounting screws are located in the
uppermost position of the mounting slots.
• The icemaker is level.
TIGHTEN THE ICEMAKER MOUNTING SCREWS
SECURELY.
6
11
10
9
3
Mounting Screws
INSTALL INLET TUBE SEAL
Peel one side of the paper away from the water fill tube
seal, slide the seal along the tube and affix to the back
side of the water tube inlet flange.
12
Gasket
Water Inlet
Tube 11
10
5

10
Installation Instructions
ICEMAKER INSTALLATION INSTRUCTIONS (cont.)
INSTALL WATER LINE
Make sure there is enough plastic water line to
extend from the water valve to well into the water
tube inlet. Cut off any excess tubing.
Squeeze the ends of the hose clamp from the kit with
pliers and slide the clamp over the water tube inlet.
Whilestillsqueezingtheclamp,inserttheplasticwater
line into the inlet as far as it will go (approximately 1”
(25 mm). Then slide the clamp downward to capture
the plastic water line in place. Make sure the fill tube
is aimed down.
Remove the adhesive backing on the opposite side of
the water fill tube seal and slide the tube into the hole
near the top at the back of the refrigerator. Firmly
press on the inlet to secure it to the refrigerator.
Note: Prior to use, verify water tube inlet is fully
seated in the fill cup.
ROUTE AND ATTACH THE WATER
TUBE
Fasten the plastic water tube to the back of the
refrigerator with adhesive-backed fasteners, spacing
the fasteners as shown to take up slack in the tube.
INSTALL WATER LINE CLAMP
Attach the water tube inlet cover and water line
clamp to the refrigerator. Drive the screw from the
kit through the fixtures at the indent into the back of
the cabinet.
WATER VALVE INSTALLED
Once the home water line is connected to the water
valve and turned on, set the feeler arm to the ON
position.
The icemaking cycle will not begin until the
icemaker and freezer compartment reach
operating temperature, then icemaking will begin
automatically.
Water Tube Fastener
KEEP THIS MANUAL
The warranty for the icemaker is printed in this
manual. Keep this manual with your Refrigerator
Owner’s Manual.
The icemaker installation inside the freezer is now
complete.ContinuetotheWaterValveAssemblysection.
13
15
14
16
17
Water Tube
Inlet Cover
13
Hose Clamp
Water Line Clamp
Phillips Head
Screws
14
6
15
4
Fill Tube
Fill Cup 12
11

11
Icemaker Warranty.
All warranty service provided by our Factory Service Centers, or an
authorized Customer Care®technician. To schedule service, on-line,
visit us at ge.com, or call 800.GE.CARES (800.432.2737). In Canada,
call 1.800.561.3344. Please have serial number and model number
available when calling for service.
For The Period Of: We Will Replace:
One Year Any part of the icemaker which fails due to a defect in materials or workmanship.
From the date of the During this limited one-year warranty, GE will provide, free of charge, replacement parts
original purchase for any defective part in your icemaker kit.
Service trips to your home to teach you how to use the
product.
Improper installation. You are responsible for providing
adequate electrical, plumbing, and other connecting facilities,
including the water line to the icemaker and the water line
installation.
Failure of the product if it is abused, misused, or used for
other than the intended purpose or used commercially.
Replacement of house fuses or resetting of circuit breakers.
Damage to the product caused by accident, fire, floods or
acts of God.
Incidental or consequential damage caused by possible
defects with this appliance.
Product not accessible to provide required service.
What Is Not Covered (for customers in the United States):
This warranty is extended to the original purchaser and any succeeding owner for products purchased for home use
withintheUSA. If theproductis located in anarea where service byaGE Authorized Servicerisnot available, youmay
be responsible for a trip charge or you may be required to bring the product to an Authorized GE Service location for
service. In Alaska, the warranty excludes the cost of shipping or service calls to your home.
Some states do not allow the exclusion or limitation of incidental or consequential damages. This warranty gives
you specific legal rights, and you may also have other rights which vary from state to state. To know what your legal
rights are, consult your local or state consumer affairs office or your state’s Attorney General.
Warrantor: General Electric Company. Louisville, KY 40225
Staple your receipt here.
Proof of the original purchase
date is needed to obtain
service under the warranty.
What Is Not Covered (for customers in Canada):
Service trips to your home to teach you how to use the
product.
Read your Owner’s Manual. If you then have any questions
about
operating the product, please contact
your dealer or
our Consumer Relations office at:
Manager, Consumer Relations
Mabe Canada Inc.
1 Factory Lane, Suite 310
Moncton, N.B.
E1C 9M3
Improper installation. If you have an installation problem,
contact your dealer or installer. You
are responsible for
providing adequate
electrical, exhausting and other
connecting facilities.
Replacementofhousefusesorresetting
ofcircuitbreakers.
Failure of the product if it is misused, or used for other
than the intended purpose or used commercially.
Damage to product caused by accident,
fire, floods or acts
of God.
WARRANTOR IS NOT RESPONSIBLE FOR CONSEQUENTIAL DAMAGES.
(;&/86,212),03/,(':$55$17,(6³<RXUVROHDQGH[FOXVLYHUHPHG\LVSURGXFWUHSDLUDVSURYLGHGLQWKLV
Limited Warranty. Any implied warranties, including the implied warranties of merchantability or fitness for
a particular purpose, are limited to one year or the shortest period allowed by law.

Mesures de sécurité........... 12
Instructions de
fonctionnement. . . . . . . . . . . . . . . . .13
Avant d’appeler
unréparateur..................14–15
Bruits normaux que vous
pouvezentendre...................13
Préparation à un départ
de longue durée ...................13
Vous devez mettre le commutateur
de marche de la machine à glaçons
en position OFF (arrêt)..............13
Instructions d’installation ...19-21
Machine à glaçons .............19,20
Conduite d’eau froide ..............21
Listedepièces.....................18
Services aux consommateurs
Garantie ...........................22
Soutien au consommateur .........23
Trousse d’accessoires pour machine
à glaçons
electromenagersge.ca
IM-4B
162D4614P015 49-60684 05-13 GE
Machine à glaçons
Trousse
Manuel d’utilisation
et d’installation
LISEZ ET CONSERVEZ CES INSTRUCTIONS.
LISEZ ET SUIVEZ SOIGNEUSEMENT CES MESURES DE
SÉCURITÉ.
MESURES DE PRÉCAUTION
POUR VOTRE SÉCURITÉ:
Nemettezjamaisvosdoigtsouvosmainsdans
la machine à glaçons automatique quand le
réfrigérateur est branché. Vous éviterez ainsi
de vous blesser.
Vous éviterez également de gêner le
fonctionnement du mécanisme d’éjection
et de l’élément de chauffage qui libère les
glaçons qui sont situés en bas de la machine
à glaçons.

13
Le robinet d’eau de la machine à glaçons
émet un bourdonnement lorsque la
machine à glaçons se remplit d’eau. Si le
commutateur de marche est à la position
ON (vers le bas - en marche), le robinet
émettra un bourdonnement même s’il n’est
pas encore raccordé à la conduite d’eau.
Un commutateur de marche qui demeure
à la position ON (en marche) avant le
raccordement à la conduite d’eau risque
d’endommager la machine à glaçons.
Les glaçons qui tombent dans le bac et l’eau
qui coule dans les tuyaux quand la machine
à glaçons se remplit font un bruit normal.
Déplacez le commutateur de marche à la
position STOP (vers le haut - arrêt) pour
prévenir les dommages. Ceci arrêtera
également le bourdonnement.
Bruits normaux que vous pouvez entendre
La machine à glaçons automatique. electromenagersge.ca
Un réfrigérateur nouvellement installé peut prendre de 12 à 24 heures pour commencer à produire des glaçons.
Machine à glaçons automatique
La machine à glaçons produit sept glaçons
par cycle, soit environ 100 à 130 glaçons
par 24 heures, selon la température du
compartiment congélation, la température
de la pièce, le nombre de fois que la porte est
ouverte et les autres conditions d’utilisation.
Si le réfrigérateur est mis en marche avant
le raccordement de l’alimentation d’eau à la
machine à glaçons, placez le bras tâteur à la
positionSTOP (Arrêt)(haut).
Déplacez le commutateur de marche vers
à la position ON (vers le bas - en marche) si le
raccordementd’eau dela machineà glaçonsse
faitalorsqueleréfrigérateurestdéjàenmarche.
La machine à glaçons se remplit d’eau
quand elle atteint le point de congélation. Un
réfrigérateur nouvellement installé prend de
12 à 24 heures pour commencer à produire
des glaçons.
Une fois que la machine à glaçons commence
à produire de la glace, il peut s’écouler jusqu’à
48 heuresavantque lebac nese remplisse,tout
dépendant du réglage de température et de la
fréquenced’ouverture de la porte.
Vousentendrez unbourdonnement chaquefois
quelamachineàglaçonsseremplitd’eau.Jetez
les premiers lots de glaçons pour permettre à
la conduite d’eau de se purger. Assurez-vous
que rien ne gène la course du bras palpeur.
Quand le bac se remplit jusqu’au niveau du
braspalpeur,lamachineàglaçonss’arrêtede
produire des glaçons. Il est normal de trouver
des glaçons qui soient soudés ensemble. Si
vous n’utilisez pas souvent vos glaçons, les
vieux glaçons deviennent opaques, prennent
un mauvais goût et rétrécissent.
NOTE: Dans les maisons qui ont une pression
d’eau plus faible que la moyenne, vous pouvez
entendre la machine à glaçons recommencer
plusieurs fois son cycle pour produire un lot de
glaçons.
Préparation à un départ de longue durée
Déplacez le commutateur de marche à la
position STOP (vers le haut - arrêt) pour fermer
de la conduite d’eau vers le réfrigérateur.
Si la températeur risque de s’abaisser en
dessous de la température de congélation,
demandez à un technicien qualifié de
purger votre système d’alimentation d’eau
(sur certains modèles) pour empêcher toute
inondation pouvant occasionner des dégâts
sérieux.
Moment où vous devez régler le commutateur de marche à la position
STOP (vers le haut - arrêt)
Quand le bac à glaçons est enlevé pendant
plus d’une minute ou deux.
Quand l’alimentation d’eau est coupée
pendant plusieurs heures.
Quand vous n’utilisez pas votre réfrigérateur
pendant plusieurs jours.
Machine à glaçons
SUR
OFF

Votre problème Causes possibles Solutions
La machine à glaçons Le compartiment congélation • Après avoir installé l’ensemble, attendez 24 heures
automatique est trop chaud. que le réfrigérateur soit complètement refroidi. Quand
ne fonctionne pas/ le compartiment est froid, la machine à glaçons
produit pas de glaçons se met à produire des glaçons.
La machine à glaçons n’est •
pas en marche.
La machine à glaçons n’est • Si vous utilisez un adaptateur de cordon d’alimentation,
pas bien branchée. assurez-vous qu’il est bien branché. Veillez aussi à ce que
la fiche du cordon d’alimentation de la machine à glaçons
est bien insérée dans la prise. Consultez Branchement
de la machine à glaçons.
La conduite d’eau est coudée. • Assurez-vous que la conduite
d’eau en matière plastique
qui va du robinet à l’entrée
de conduite d’eau de la
machine ne soit pas coudée.
Consultez Branchement de
la conduite d’eau. Un coude
dans la conduite d’eau réduit
la circulation dans la conduite
d’eau.
L’alimentation d’eau est fermée • Après avoir installé l’ensemble, assurez-vous que
ou non branchée. l’alimentation d’eau de la maison au réfrigérateur
soit bien ouverte.
L’entassement des glaçons • Égalisez les glaçons à la main.
dans le bac à glaçons occasionne
un arrêt de la machine à glaçons.
Le robinet d’eau • Assurez-vous que l’adaptateur
n’est pas bien branché. du fil du robinet soit
complètement branché
dans le connecteur mâle et
les contacts sur le robinet d’eau.
Consultez Attachement
du robinet d’eau.
Liste de vérifications préventives
Économisez votre temps et votre argent! Consultez le
tableau suivante; vous éviterez peut-être d’appeler un
réparateur.
Machine
à glaçons
Agrafes dans
les taquets de
verrouillage
Taquets
de
verrouillage
Crochet
Dispositifs de fixation
avec envers adhésif
pour la conduite
d’eau
Bouchon
connecteur
mâle
Contacts
du robinet
Avant d’appeler un réparateur…
Commutateur
de marche à la
position STOP
(vers le haut -
arrêt)
Commutateur
de marche à
la position ON
(vers le bas - en
marche)
Déplacez le
commutateur
de marche à la
position STOP (vers
le haut - arrêt).
14

15
Votre problème Causes possibles Solutions
L’eau fuit autour de Il y a de la mousse dans la tasse • Si vous avez installé la conduite de remplissage en
la tasse de remplissage de remplissage resultant de la faisant glisser par l’arrière du réfrigérateur, vous pouvez
l’installation de la conduite avoir entraîné des morceaux de mousse en le poussant.
de remplissage. Cette mousse gênera la circulation de l’eau dans la tasse de
remplissage. Vérifiez la tasse et assurez-vous qu’il n’y ait pas
de morceaux de mousse.
La conduite de remplissage • Vérifiez que la conduite
ne repose pas bien dans la tasse de remplissage soit bien
de remplissage. finsérée dans l’ouverture
de la tasse de remplissage.
Consultez Montez la machine
à glaçons.
L’eau fuit derrière L’alimentation d’eau • Vérifiez que l’alimentation d’eau soit bien branchée
le réfrigérateur de la maison n’est pas bien au robinet d’eau. Consultez Instructions pour l’installation
branchée au robinet d’eau. de la conduite d’eau.
La conduite d’eau n’est pas bien • Vérifiez que la conduite
branchée à l’entrée de conduite d’eau en matière plastique
d’eau. qui va du robinet à l’entrée
de conduite d’eau soit bien
fixée par le collier de serrage.
Consultez Branchement
de la conduite d’eau.
La formation La porte est restée ouverte. • Vérifiez qu’un paquet de nourriture n’empêche pas
de glaçons est lente/ une bonne fermeture de la porte.
Le compartiment Le bouton de réglage • Consultez Bouton de réglage de température.
congélateur n’est pas de température est mis
suffisamment froid à une réglage trop basse.
Les glaçons sont trop Le robinet d’arrêt de l’eau • Nous recommandons de percer
petits/ La formation qui relie le réfrigérateur un trou de 1/4 po dans la conduite d’eau
de glaçons est lente à la canalisation d’alimentation pour brancher le robinet d’arrêt d’eau.
d’eau peut être bouché. Si vous ne percez pas un trou de 1/4 po,
vous pouvez occasionner une réduction
dans la production de glaçons ou dans
la taille des glaçons produits. Voir Installation
de la conduite d’eau.
La conduite d’eau est coudée. • Vérifiez que la conduite
d’eau en matière plastique
qui va du robinet à l’entrée
de conduite d’eau ne soit
pas coudée. Consultez
Branchement de la conduite
d’eau. Un coude réduira
la circulation à la machine
à glaçons.
Conduite de remplissage
Tasse de
remplissage
Entrée de
conduite d’eau
Collier de
serrage
Conduite d’eau
Dispositifs
de fixation avec
envers adhésif pour
la conduite d’eau
Percez un trou
de 1/4 po dans
la conduite d’eau
Liste de vérifications préventives
Économisez votre temps et votre argent! Consultez le tableau suivante;
vous éviterez peut-être d’appeler un réparateur.
Avant d’appeler un réparateur… electromenagersge.ca

Liste de vérifications préventives
Économisez votre temps et votre argent! Consultez le
tableau suivante; vous éviterez peut-être d’appeler un
réparateur.
Avant d’appeler un réparateur…
Votre problème Causes possibles Solutions
Les glaçons ont Le bac à glaçons doit être nettoyé. • Videz et lavez le bac à glaçons. Jetez les vieux glaçons.
une odeur ou un goût Les aliments donnent de l’odeur • Emballez bien les aliments.
ou du goût aux glaçons.
L’intérieur du réfrigérateur • Consultez Soins et nettoyage de votre réfrigérateur.
a besoin d’être nettoyé.
Il y a un bourdonnement C’est normal. • Pendant le fonctionnement normal du réfrigérateur,
fréquent le robinet d’eau bourdonne quand la machine à glaçons
se remplit d’eau.
16

17
AVANT DE COMMENCER
Instructions IM-4B Trousse de
d’installation machine à glaçons
Lisez ces instructions complètement et attentivement.
•IMPORTANT –Conservez ces instructions
pour votre inspecteur local.
•IMPORTANT –Observez tous les codes et
les ordonnances en vigueur.
• Note à l’installateur –Assurez-vous de laisser
ces instructions au consommateur.
• Note au consommateur –Conservez ces
instructions pour références futures.
• Niveau de compétence – L’installation de cet
appareil électroménager nécessite des compétences
mécaniques et électriques de base.
• Durée requise pour l’installation – 20–60 minutes
• L’installateur est responsable d’une bonne installation.
• Toute panne de l’appareil due à une mauvaise
installation est exclue de la garantie.
Il est important que vous utilisiez le robinet d’eau et la
rallonge de conduite qui sont contenus dans cette trousse,
même si votre réfrigérateur a déjà un robinet d’eau et une
rallonge déjà installés.
Le vieux robinet peut occasionner une alimentation d’eau
insuffisante pour un bon remplissage de la machine à
glaçons et cela risque de provoquer des dommages.
La rallonge de conduite d’eau doit être d’une longueur
différente que celle qui existe, pour permettre une bonne
alimentation d’eau. Coupez la conduite à la longueur
indiquée pour votre modèle de réfrigérateur.
REMPLACEZ-VOUS UNE MACHINE
À GLAÇONS EXISTANTE PAR CETTE
TROUSSE?
•Si votre appareil a été endommagé pendant son
expédition,renvoyez-leaumagasinoùvousl’avezacheté.
Il le réparera ou le remplacera.
• Si c’est le client qui a endommagé votre appareil, il est
responsable de sa réparation ou de son remplacement.
• Si c’est l’installateur (autre que le client) qui a
endommagé l’appareil, c’est l’accord qui lie l’installateur
au client qui détermine celui qui est responsable de la
réparation ou du remplacement.
DOMMAGES – EXPÉDITION/INSTALLATION
Vous avez des questions? Au Canada, appelez au numéro 1.800.561.3344 ou
visitez notre site Web à l’adresse electromenagersge.ca

18
Instructions d’installation
CONTENU DE LA TROUSSE IM-4B
Manuel du propriétaire et
instructions d’installation
2
Collier de serrage de
conduite d’eau (collier de
serrage)
6
Joint d’étanchéité de l’entrée
d’eau
5
Ensemble de robinet
et de conduite d’eau
3
Dispositifs de fixation de
conduite d’eau avec envers
adhésif, pour attacher la
conduite d’eau en matière
plastique (4)
4Vis à tête Phillips pour
fixer le robinet (2)
9
Bac de glaçons
8
10
11
Vis à tête hexagonale,
pour monter la machine à
glaçons (2)
Étiquette de garantie
7
ICEMAKER
WARRANTY VERIFICATION
Date Installed
Dealer
12 Récipientderemplissage
de la machine à glaçons
Machine à glaçons
(L’aspect peut varier)
1
Installation
Instructions
13 Collier de serrage
Couvercle d’entrée de
conduite d’eau
17
Vis à tête Phillips, pour fixer
le couvercle d’entrée de
conduite d’eau et le collier de
serrage de conduite d’eau (3)
18
Inlet Tube d’eau
ST OP

INSTALLEZ LE RÉCIPIENT DE
REMPLISSAGE
Installez le récipient de remplissage de la machine à
glaçons (montage de côté) dans la machine à glaçons
comme l’indique la figure.
3
BRANCHEZ LA MACHINE À GLAÇONS
Insérez la fiche
de cordon
d’alimentation
électrique de
la machine à
glaçons dans
la prise située
sur la paroi
arrière, en vous
assurant de mettre les bonnes broches dans les bons
trous. Pressez fort la fiche dans la prise. Fixez la fiche
en place en agrafant les dispositifs de retenue des deux
côtés de la fiche. Assurez-vous que les dispositifs de
retenue soient fixés en place. Assurez-vous que le cordon
d’alimentation soit toujours sur le crochet de la machine
à glaçons.
4
19
Instructions d’installation
INSTRUCTIONS D’INSTALLATION DE LA MACHINE À GLAÇONS
AVANT DE COMMENCER
Lisez soigneusement chaque étape avant de
commencer.
•MISE EN GARDE –
Débranchez le réfrigérateur. Pour
éliminer tout danger de secousse
électrique pendant l’installation, vous
devez débrancher la fiche de votre
réfrigérateur de sa prise électrique
murale.
Tournevis de Phillips Pinces
OUTILS NÉCESSAIRES
Couteau aiguisé
Tourne-écrous de 1/4 po ou clé anglaise
1
PRÉPAREZ VOTRE INSTALLATION
• Enlevez le grand capuchon blanc de la paroi arrière
du compartiment congélation et jetez-le.
• Enlevez le couvercle de la prise avec un tournevis à
lame plate.
Enlevez le
capuchon
DÉPLACEZ LE COMMUTATEUR DE
MARCHE À LA POSITION STOP (ARRÊT).
Déplacez lecommutateur demarche àla positionSTOP
(vers lehaut -arrêt). Laissezle commutateurde marche
à la position STOP (arrêt) jusqu’à ce que la conduite
d’eausoitraccordéeauréfrigérateurafindeprévenirun
démarrage prématuré.
2
Commutateur
de marche
(L’aspect peut varier)
Récipient De
Remplissage
12
Crochet
Machine À
Glaçons
1
MONTEZ LA MACHINE À GLAÇONS
À l’intérieur du congélateur, desserrer les 2 vis de
montagesanslesdévissertotalement.Sivotremodèlene
comporte pas déjà de vis dans les parois du congélateur,
recherchez les deux capuchons de boutons. Enlevez les
capuchons debouchons etinsérez les 2vis à tête Phillips.
Laissez une longueur d’environ 13 mm (1/2 po) ressortir
de la paroi du congélateur.
Vis de montage 10
5
ST OP

Instructions d’installation
20
COLLEZ L’ÉTIQUETTE DE GARANTIE
Vous trouverez dans cette trousse une étiquette (7), sur
laquelle vous devez noter la date de l’installation, à des
fins de garantie. Collez-la à l’arrière du réfrigérateur.
8
INSTALLEZ LE BAC À GLAÇONS
Mettezle bac à glaçons (9)
en place sous la machine
à glaçons.
Assurez-vous que le
commutateur de marche
de la machine à glaçons
soit en position OFF (arrêt).
7
8
INSTRUCTIONS D’INSTALLATION DE LA MACHINE À GLAÇONS (suite)
MONTEZ LA MACHINE À GLAÇONS
• Accrochez la machine à glaçons aux deux vis de
montage (10).
Assurez-vous bien que:
• Le cordon d’alimentation électrique soit toujours
bien fixé à la prise.
• Les vis de montage se trouvent dans la position
supérieure des fentes de montage.
• La machine à glaçons est bien horizontale.
SERREZ ALORS FORT LES VIS DE MONTAGE DE LA
MACHINE À GLAÇONS.
6
Vis de montage
ENLEVEZ LE COUVERCLE
Enlevez la/les vis qui tient/tiennent le couvercle de
compartiment du compresseur en bas de l’arrière du
réfrigérateur.
Pliez le couvercle vers l’arrière pour avoir accès au
compartiment.
Assurez-vous de conserver les vis, car vous devrez
remettre en place le couvercle pour assurer le bon
fonctionnement de votre réfrigérateur.
9
BRANCHEZ LE ROBINET
• Repérez le connecteur femelle. Branchez le
connecteur femelle sur les bornes mâles du robinet.
Chaque fil peut s’apparier indifféremment avec l’une
ou l’autre borne.
Connecteur
femelle
Bornes
mâles
FIXEZ LE ROBINET
• Fixez le robinet (3) à la carrosserie en vissant la vis
à tête Phillips (9) de la trousse dans le trou du pied
de carrosserie.
11
10
9
POSEZ LE JOINT D’ÉTANCHÉITÉ DU
TUBE D’ENTRÉE D’EAU
•Pelez un côté du papier pour le dégager du joint
d’étanchéité du tube de remplissage, glissez le joint le long
du tube et apposez-le sur la face arrière de la collerette de
l’entrée de conduite d’eau.
Joint d’étanchéité
Tube d’entrée
d’eau 11
12
10
3
5
Table of contents
Languages:
Other GE Ice Maker manuals

GE
GE OPAL01GEPSS User manual

GE
GE monogram ZDIC150 User manual

GE
GE UCC15NPRII Operating instructions

GE
GE Monogram ZDI15 User manual

GE
GE IM4D Operating instructions

GE
GE Monogram ZDI15 User manual

GE
GE XPIO43SCSS User manual

GE
GE Profile OPAL User manual

GE
GE OPAL01GEPKT User manual

GE
GE Monogram ZDIS150WSS How to use

GE
GE Profile XPIOX3SCSS User manual

GE
GE WR30X10093 User manual

GE
GE monogram ZDIC150 User manual

GE
GE MONOGRAM ZDIS15CSS User guide

GE
GE OPAL XPIO13BCBT User manual

GE
GE OPAL 2.0 User manual

GE
GE IM6 Operating instructions

GE
GE IM-4A Operating instructions

GE
GE UNC15NJ-II Operating instructions

GE
GE monogram ZDIC150 User manual