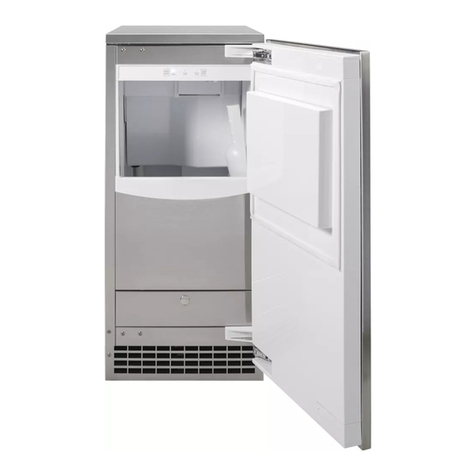
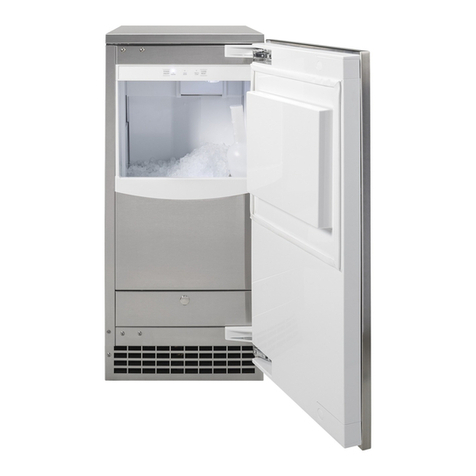
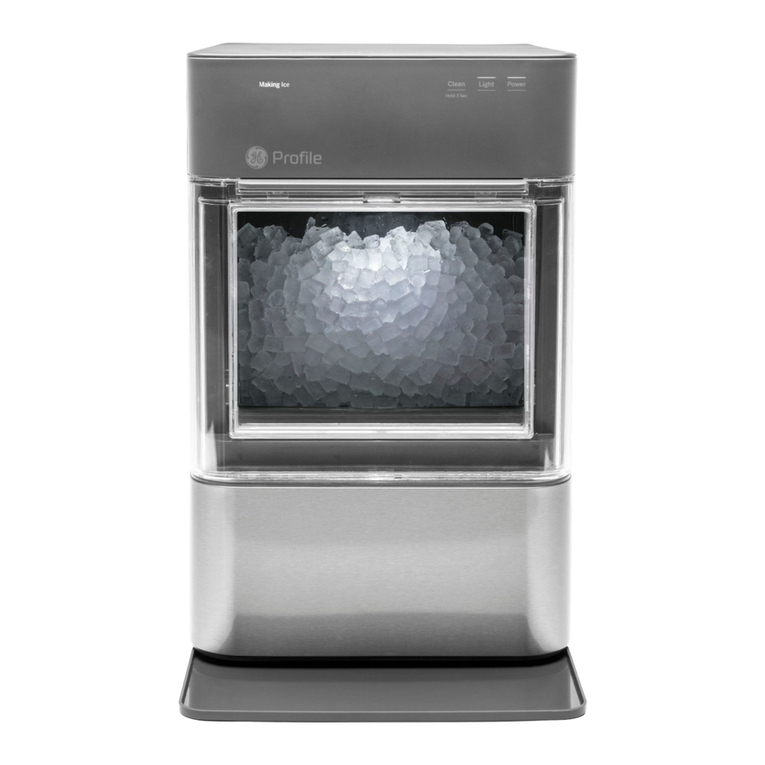
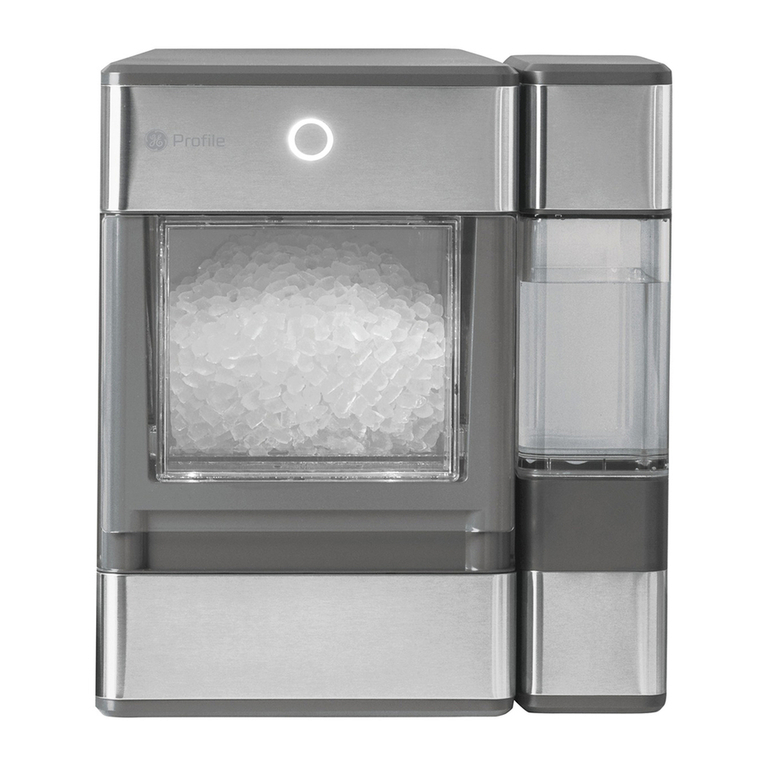
GE OPAL XPIO13BCBT User manual

Write the model and serial numbers here:
Model #_________________
Serial # _________________
Find these numbers on a label
on the back of the unit.
GE is a trademark of the General Electric Company. Manufactured under trademark license.
OWNER’S MANUAL
OPAL ICE MAKER
49-1000464 Rev. 0 03-20 GEA
XPIO13BCBT
XPIO13SCSS
XPIO23BCBT
XPIO23SCSS
ENGLISH/FRANÇAIS
SAFETY INFORMATION .........3
PARTS INCLUDED ................5
GETTING STARTED ..............6
CARE AND CLEANING ...........7
DISPLAY SETTINGS .............10
MAKING ICE......................10
DRAINING ........................10
WATER FILTER ..................10
SIDE TANK ACCESSORY ....... 11
TROUBLESHOOTING............14
ICE MAKER PRODUCT
SPECIFICATIONS ................15
LIMITED WARRANTY ...........19
CONSUMER SUPPORT ......... 20

249-1000464 Rev. 0
THANK YOU FOR MAKING GE APPLIANCES A PART OF YOUR HOME.
Whether you grew up with GE Appliances, or this is your first, we’re happy to have you in the family.
We take pride in the craftsmanship, innovation and design that goes into every GE Appliances
product, and we think you will too. Among other things, registration of your appliance ensures that we
can deliver important product information and warranty details when you need them.

49-1000464 Rev. 0 3
CAUTION To reduce the risk of injury when using your Opal, follow these basic safety
precautions.
■ Donotremoveanysafety,warning,orproductinformation
labels from your ice maker.
■ LiftingHazard:Itisrecommendedtohavetwopeople
move and install the ice maker in order to prevent injury.
Refrigerant and Foam Disposal
DisposeofapplianceinaccordancewithFederalandLocalRegulations.Flammablerefrigerantandinsulationmaterialused
require special disposal procedures. Contact your local authorities for the environmentally safe disposal of your appliance.
SAFETY INFORMATION
READ AND SAVE THESE INSTRUCTIONS
WARNING Toreducetheriskofre,explosion,electricshock,exposuretoUVradiation,orinjury
when using your Opal, follow these basic safety precautions.
■ Donot,underanycircumstances,alterorremovethethird
(ground)prongfromthepowercord.Forpersonalsafety,
this product must be properly grounded.
■ Donotexceedpoweroutletratings.Itisrecommended
thattheicemakerisconnectedtoitsowncircuit.Useonly
a115V,60Hzstandardelectricalsupplythatisproperly
grounded in accordance with the National Electric Code
and local codes and ordinances.
■ Duetopotentialsafetyhazardsundercertainconditions,
westronglyadviseagainsttheuseofanextension
cord.However,ifyoumustuseanextensioncord,itis
absolutelynecessarythatitisaUL-listed,3-wireground
typeapplianceextensioncordhavingagroundingtype
plug and that the electrical rating of the cord be 15
Amperes(minimum)and120Volts.
■ Thisproductmustbeproperlyinstalledandlocatedin
accordance with the installation instructions before it is
used.Productisforindoorhouseholduseonly.Donotuse
outdoors.
■ Donotstoreoruseflammablevaporsorliquidsnearthis
product.
■ Donotallowchildrentoclimb,stand,orhangontheice
maker. They could seriously injure themselves.
■ DonotlookdirectlyatUVlampwhenitisoperating.The
light emitted by the lamp will cause serious eye damage
and burn unprotected skin.
■ InordertoavoidexposuretoUVradiation,disconnect
powertotheicemakerbeforeremovingtheexternal
covers.
■ Donotusewithwaterthatismicro-biologicallyunsafeor
of unknown quality.
■ Placepowercordinsuchawayitcannotbepulledonby
childrenorcauseatrippinghazard.
■ Placepowercordinsuchawaythatitisnotincontact
with hot surfaces.
■ Donotoperateifanycomponent,includingthecordor
plug, is damaged.
■ Unplugtheproductbeforecleaningbyhandandwhennot
in use.
■ Donotimmerseanypartoftheproductinwater.
■ Donotplugorunplugproductwithwethands.
■ Donotattempttodisassemble,repair,modify,orreplace
any part of your product.
■ Usethisproductonlyforitsintendedpurposeasdescribed
in this user manual.
■ Donotuseanyaccessoriesnotrecommendedbythe
manufacturer.
■ Whenhandling,installing,andoperatingtheappliance,
care should be taken to avoid damage to the refrigerant
tubing.
■ Servicingshallbeperformedbyfactoryauthorizedservice
personnel and component parts shall be replaced with
manufacturerauthorizedreplacementcomponents.
IMPORTANT SAFETY INFORMATION
READ ALL INSTRUCTIONS BEFORE USING THE APPLIANCE
WARNING FIRE OR EXPLOSION HAZARD Flammable Refrigerant
This appliance contains isobutane refrigerant, also known as R600a, a natural gas with high
environmental compatibility. Howber, it is also combustible. Adhere to the warnings below to reduce the
risk of injury or property damage.
1. When handling, installing, and operating the appliance,
care should be taken to avoid damage to the refrigerant
tubing.
2.Serviceshallonlybeperformedbyauthorizedservice
personnel.Useonlymanufacturer-authorizedserviceparts.
3.DisposeofrefrigeratorinaccordancewithFederal
andLocalRegulations.Theflammablerefrigerantand
insulation material used in this product require special
disposal procedures. Contact your local authorities for the
environmentally safe disposal of your refrigerator.
4. Keep ventilation openings in the appliance enclosures or in
thebuilt-instructureclearofobstruction.
5. To remove frost, scrape with a plastic or wood spatula or
scraper.Donotuseanicepickorametalorsharp-edged
instrumentasitmaypunturethefreezerlinerandthenthe
flammable refrigerant tubing behind it.
6.Donotuseelectricalappliancesinsidethefoodstorage
compartment of the appliance.
7.Donotuseanyelectricaldevicetodefrostyourappliance

449-1000464 Rev. 0
ATTENTION Pour réduire le risque de blessure lors de l’utilisation de votre Opal, observez
les consignes de sécurité élémentaires suivantes
■ Neretirezaucuneétiquetteapposéesurlamachineàglaçonsqui
présentedesrenseignementssurlasécurité,lesavertissements
ou le produit.
■ Risqueassociéàunechargelourde:Nousrecommandonsque
deuxpersonnesdéplacentetinstallentlamachineàglaçonsafin
deprévenirlesblessures.
LISEZ, SUIVRE, ET CONSERVER CES INSTRUCTIONS
AVERTISSEMENT Pour réduire le risque d'incendie, d'explosion, de choc électrique,
d’exposition aux rayons UV ou de blessure lors de l’utilisation de votre
Opal, observez les consignes de sécurité élémentaires suivantes.
■ Encas,vousnedevezmodifierniretirerlatroisièmebroche
(terre)ducordonélectrique.Pourvotresécurité,ceproduitdoit
êtrecorrectementmisàlaterre.
■ N'excédezpaslesvaleursnominalesdelapriseélectrique.
Nousrecommandonsquelamachineàglaçonssoitbranchée
àsonproprecircuit.Utilisezuniquementunealimentation
électriquestandardde115V,60Hz,correctementmiseàlaterre
conformémentaucodenationaldel'électricitéetauxcodeset
règlementslocauxenvigueur.
■ Enraisonderisquespotentielspourlasécuritédanscertaines
conditions, nous vous mettons fortement en garde contre
l'utilisationd'uncordonprolongateur.Sitoutefoisvousdevez
utilizeruncordonprolongateur,celui-cidoitprésenterles
caractéristiquessuivantes:typepourélectroménagersà
troisbrochesavecmiseàlaterre,ficheavecmiseàlaterre,
homologationUL,valeursnominalesde15ampères(minimum)et
120volts.
■ Ceproduitdoitêtreinstallécorrectementetplacéconformément
auxinstructionsd'installationavantsonutilisation.Ceproduit
estdestinéàunusagedomestiqueàl'intérieurseulement.Ne
l'utilisezpasàl'extérieur.
■ Nerangeznin'utilisezdesvapeursoudesliquidesinflammables
àproximitédeceproduit.
■ Nepermettezpasauxenfantsdegrimpersurlamachineà
glaçons,nides'ytenirous'yagripper.Ilspourraientseblesser
gravement.
■ NeregardezpaslalampeUVdirectementlorsqu'elleestallumée.
Lalumièreémiseparlalampepeutcauserdeslésionssévères
auxyeuxoubrûlerlapeaunonprotégée.
■ Afindeprévenirl'expositionauxradiationsUV,débranchez
l'alimentationélectriqueàlamachineàglaçonsavantderetirer
lescouverclesextérieurs.
■ N'utilisezpasd'eauimpropreàlaconsommationoudequalité
douteuse sur le plan microbiologique.
■ Placezlecordonélectriquedefaçonqu'ilnesoitpastiréparles
enfantsetqu'ilneposepasunrisquedetrébuchement.
■ Placezlecordonélectriquedefaçonqu'ilnetouchepasaux
surfaces chaudes.
■ Nefaitespasfonctionnerl'appareilsiundesescomposants,
cordonetficheinclus,estendommagé.
■ Débranchezleproduitavantdelenettoyeràlamainoulorsqu'il
n'estpasutilisé.
■ N'immergezaucunepiècedeceproduitdansl'eau.
■ Nebranchezninedébranchezleproduitaveclesmains
mouillées.
■ Netentezpasdedémonter,réparer,modifierouremplacerune
piècequelconquedeceproduit.
■ Utilisezceproduituniquementauxfinsauxquellesilestdestiné
quisontdécritesdanscemanueld'utilisation.
■ N'utilisezaucunaccessoirequin'estpasrecommandéparle
fabricant.
■ Lorsdelamanipulation,del'installationetdel'utilisationde
l'appareil,veillezànepasendommagerletubederéfrigérant.
■ L'entretiendoitêtreeffectuépardupersonneldeserviceautorisé
parl'usineetlescomposantsdoiventêtreremplacéspardes
piècesderechangeautoriséesparlefabricant.
CONSIGNES DE SÉCURITÉ IMPORTANTES
LISEZ, SUIVRE, ET CONSERVER CES INSTRUCTIONS
CONSIGNES DE SÉCURITÉ IMPORTANTES
AVERTISSEMENT RISQUE D’INCENDIE OU D’EXPLOSION Fluide frigorigène inflammable
Cet électroménager contient le réfrigérant isobutane, aussi connu comme R600a, un gaz naturel à compatibilité élevée
avec l’environnement. Il s’agit cependant d’un combustible. Observez les consignes de sécurité ci-dessous afin de
réduire le risque de blessure ou de dommage à la propriété.
1.Lorsdelamanipulation,del’installationetdel’utilisationde
cetappareil,prenezsoindenepasendommagerlestubesde
circulationdufluidefrigorigène.
2.L’entretienoularéparationdoiventêtreeffectuésparunpersonnel
deserviceautorisé.Utilisezseulementdespiècesderechange
autoriséesparlefabricant.
3.Mettezleréfrigérateuraurebutconformémentauxréglementations
fédéralesetlocales.Lefluidefrigorigèneinflammableetlematériel
isolantutilisésnécessitentdesprocéduresdemiseaurebut
spéciales.Communiquezaveclesautoritéslocalescompétentes
pourlamiseaurebutdevotreréfrigérateursansdangerpour
l’environnement.
4.N’obstruezpasleséventsdansl’enceinteprévuepourl’appareil.
5.Pourretirerlegivre,grattezàl’aided’ungrattoiroud’unespatule
enplastiqueouenbois.N’utilisezpasunpicàglaceniun
instrumentmétalliqueouauxarêtescoupantescarilyarisque
depercerladoublureducongélateuretlatubulureduréfrigérant
inflammablederrièreelle.
6.N’utilisezpasd’appareilsélectriquesdanslecompartiment
réfrigérateurdecetappareil.
7.N’utilisezaucunappareilélectriquepourdégivrervotre
congélateur.
Élimination du réfrigérant et de la mousse
Jeterl'appareilconformémentauxréglementationsfédéralesetlocales.Leréfrigérantinflammableetlesmatériauxd'isolationutilisés
nécessitentdesprocéduresd'éliminationspéciales.Contactezvosautoritéslocalespourl'éliminationécologiquedevotreappareil.
49-1000464 Rev. 0 5
PARTS INCLUDED
Parts Included
OpalIceMaker
QuickStartGuide
49-1000499 Rev. 0 03-20 GEA
OPAL Ice Maker Quickstart Guide
IMPORTANT: Read and understand all safety instructions detailed in Owner's Manual before
using the Opal.
Cleaning the Ice Bin and Water Reservoir
Remove the ice bin and wash with warm soapy water, then rinse thoroughly. Use a damp sponge to
wipe down the water reservoir under the ice bin. Never use soap inside your Opal icemaker.
Rinsing Opal's Internal Components
1. Fill the water reservoir to the upper fill line.
See Figure 1.
2. Plug in Opal, Press Power Button to turn on
and then hold the 'Clean' button for 3 seconds
to initiate the cleaning process.
See Figure 2.
3. Water will begin circulating and the 'Cleaning'
indicator will light up on the left-hand side of
the unit to confirm the unit is now in cleaning
process. See Figure 3. After a few minutes the
water will stop and the 'Cleaning' indicator light
will turn off.
4. When the 'Cleaning' indicator light turns off,
drain the Opal. Unhook the top of the drain
hoses at the back of the unit. See Figure 4.
Figure 4
Figure 3
Figure 1
Figure 2
Water
Reservoir
Fill Line
Making Ice
Defrosting Cleaning
Hold 3 Sec
Add Water
Clean Light Power
Making Ice
Defrosting Cleaning
Add Water
Making Ice
DefrostingCleaning
Hold 3 Sec
Add Water
Clean Light Power
IceBin
IceScoopSideTankClip
DripTray
SideTankAccessory
(Specicmodels
only)
Base

649-1000464 Rev. 0
Installation Requirements
CAUTION Lifting Hazard: It is recommended to have two people move and install the ice maker in
order to prevent injury.
■Productisdesignedtobeinstalledindoors.Donot
use your ice maker outdoors.
■Productmustbeinstalleduprightonaflat,level
surface that is able to support the total weight when
full of water.
■Ensureaminimumofthreeinches(3")clearance
around the side and back walls of the ice maker for
proper air circulation.
■Installtheproductinawell-ventilatedareawithan
ambienttemperaturebetween55°Fand90°F.
■Donotplacetheproductnearheatsourcessuchas
ovens or cooktops.
■Donotplacetheproductindirectsunlight.
Prepare Opal For Use
1.Carefullyremovepackingmaterial.Donotusesharp
toolsthatcandamagetheboxcontents.
2.Ensureallcomponentsarepresent.Ifanyitemis
missing, please contact1.866.907.6718.
3. Place the ice maker upright on a flat, level surface
and plug it in.
4.Installdriptraybyslidingitunderthefrontedgeof
Opal. The tray slots should align with the front feet of
Opal.
5.Sanitizeandrinsetheicemakerwithcleanwaterfor
five minutes before first use.
NOTICE Sometypesofunder-cabinetlampscanbehotenough
tocausedamagetoyourOpaltop'sappearance.
Getting Started
GETTING STARTED
Making Ice
Defrosting Cleaning
Hold 3 Sec
Add Water
Clean Light Power

49-1000464 Rev. 0 7
CARE AND CLEANING
To keep your nugget ice tasting fresh and your Opal
lookinggreat,werecommendcleaning/sanitizingyour
Opal once per week.
Tocleantheexterioroftheicemaker,unplugthe
product, then use a soft cloth dampened with soapy
watertogentlycleantheexteriorsurfaces.Drywitha
soft cloth.
Theexteriorstainlesssteelsurfacescanbecleaned
withcommerciallyavailablestainlesssteelcleaner.Use
only a liquid cleaner free of grit and rub in the direction
ofthebrushlineswithadamp,softsponge.Donotuse
appliancewax,polish,solvents,orchemicalsonthe
stainlesssteel.Donotusesoaptocleanthereservoir.
Useasoftclothmoistenedwithwater.
WARNING ChemicalExposureHazard,when
cleaning with bleach, use bleach in a well ventilated area
andavoidmixingbleachwithotherhouseholdcleaners.
WARNING Unplugtheproductbeforecleaningby
hand, and when not in use.
System Cleaning / Sanitizing Procedure
TocleanOpal'sinternalcomponents,completethe
followingsteps:
1.UnplugOpal.
2.Removewaterfilter(ifpresent),andreplacewiththe
reservoir'sscreenedintakecap.
SeeFigure1.
3.DrainOpal(seepage8fordetailedinstructions).
4. Create a solution of five cups of water and one
teaspoonhouseholdbleach.Skiptopage9for
further instructions on how to remove hard mineral
deposits.
5. Pour solution into water reservoir, up to the fill line
shown.
Seefigure2.
6.PluginOpalandholdthe'Clean'buttonfor3
secondstoinitiatethecleaningprocess.Seefigure3.
7.Waterwillbegincirculatingandthe'Cleaning'
indicatorwilllightupontheleft-handsideoftheunit
toconfirmtheunitisnowincleaningprocess.See
figure 4. After three minutes the water will stop and
the'Cleaning'indicatorlightwillturnoff.
NOTE: Donotusesoaptocleanthewaterreservoir.
Care and Cleaning
Figure4
Figure3
Figure1
Figure2
Water
Reservoir
FillLine
Making Ice
Defrosting Cleaning
Hold 3 Sec
Add Water
Clean Light Power
Making Ice
Defrosting Cleaning
Hold 3 Sec
Add Water
Clean Light Power
Making Ice
Defrosting Cleaning
Hold 3 Sec
Add Water
Clean Light Power

849-1000464 Rev. 0
vCARE AND CLEANING
System Cleaning / Sanitizing Procedure
(continued)
8.Whenthe'Cleaning'indicatorlightturnsoff,drainthe
Opal.
9.Unhookthetopofthedrainhosesatthebackoftheunit.
Seefigure5.
10.Thenlaythemdowntodrainintoasinkorbucketthatis
belowtheleveloftheicemaker.Seefigure6and7.
11.Removetheplugsandallowthewatertocompletely
drain.Seefigure7.
12.Oncewaterstopsflowing,re-insertthedrainplugs.
13.Torinse:addfivecupsoffreshwatertothewater
reservoir,andpressthe'Clean'buttontoinitiatea
secondcleaningcycle.Toexitthecleaningcycle
atanytime,pressandholdthe'Clean'buttonfor3
seconds.
14.Repeatsteps8through13twomoretimes,adding
fresh water to the reservoir each time (you may
continue to repeat the rinse cycle, for as many times
as you like).
15.Replacedraintubesonback.Seefigure8.
16.Whencomplete,fillunitwithfreshwaterandpressthe
'Power'buttontostartmakingice.Seefigure9.
Care and Cleaning
Figure5
Pull to the left to unhook
Figure8
Replacedraintubes
Figure7
Figure9
Figure6
Making Ice
Defrosting Cleaning
Hold 3 Sec
Add Water
Clean Light Power

49-1000464 Rev. 0 9
Care and Cleaning
UNDERSTANDING THE DISPLAY
Understanding the display
Removal of Mineral Deposits
1.Fillthereservoirwithwhitevinegartothemaxfilllineandrunuptothreecleaningcycles.Or
purchase an Opal Cleaning Kit and follow instructions inside.
2.Ifusingvinegar,leavethevinegarintheunitfor18hoursandsetavinegar-soakedtowelon
theicechuteovernighttofurtherdissolveanymineralbuildup.Seefigure10.
3. Clean the sensors with vinegar and wipe clean with water. After draining the vinegar, run
threerinsecycles,usingfreshwaterforeachrinse.Seefigures11,12,and13toreference
location of the sensors.
Cleaning the Bin and Tray
To clean the ice bin, remove the ice bin from the ice maker and clean with a soft cloth dampened with soapy water.
Rinsethoroughly.Drywithasoftcloth.Do not use solvents or chemicals.
The drip tray should be wiped dry. Water left in this area may leave deposits. To clean the drip tray, remove the tray
fromOpalanduseasoftclothdampenedwithmildsoapywatertogentlycleanthesurface.Drywithasoftcloth.Do
not use solvents or chemicals.
Power
The Power button, when pressed, will begin the ice
making process. When pressed, while ON, will turn the
icemakero.
Light
Thelightfeaturehasthreedierentmodes:ON/DIM/OFF.
Toggle between the three modes by pressing the light
button until you reach your desired lighting mode.
Clean
The cleaning cycle is initiated by pressing and holding
the'Clean'buttonforthreeseconds.
Indicator Lights
Thefourindicatorlightsontheleft-handsideoftheunit
displaythecurrentstatusoftheOpal.If'AddWater'is
highlighted, your unit needs more water before it can
cycle to make ice or clean.
WiFi
UsingthecomplimentaryOpalmobileapp,customers
can connect to their Opal and control it from their Android
oriPhone.Theindicatorlightontheleft-handsidewill
conrmasuccessfulconnection.Seepage14forhowto
connectOpalIceMakertoWiFiApplication.
Making Ice
Defrosting Cleaning Hold 3 Sec
Add Water Clean Light Power
Figure10
Figure11 Figure12 Figure13

10 49-1000464 Rev. 0
CARE AND CLEANING
Making Ice with Opal
Draining Opal
Water Filter
OnceOpalhasbeencleaned/sanitized,movetheicemakertoitsdesiredlocationandcompletethefollowingsteps.
1.Removeicebin.
2.Fillreservoirwithpotable(safetodrink)waterupto
the"MaxFill"line.Waterhardnessmustbelessthan
12grainspergallon.Donotfillreservoirwithany
liquidexceptwater.Usinganyliquidexceptpotable
water is misuse and will void your warranty.
3. Plug the ice maker into a grounded outlet.
4. Touch the Power button to start the ice maker. The
indicatorontheleft-handsidewilllightup'MakingIce'
to confirm that unit has begun to make ice.
5.Opalwillbegintoproduceicein15-30minutes.Itwill
continue to make ice until the bin is full, or it runs out
of water. To continue making ice, just add more water.
WerecommenddrainingyourOpalwhen:
1.Youputitawayoranytimeit'sbeingrelocated
2. You turn it off for more than a few days. (i.e. vacation)
3. You are not using much ice. Continous recirculation
ofmeltwatermayaffecttaste.Forbestresults,drain
your Opal.
TheOpalWaterFilter,isavailableatGEAppliances
and is the only water filter compatible with Opal. Please
follow the installation instructions included with your filter.
NOTE: Removeyourwaterfilter(ifinstalled)and
reinstall the screened intake cap prior to cleaning your
Opal.
WaterReservoir
Maxllline
Waterltersnapsintoplace
Making Ice
Defrosting Cleaning Hold 3 Sec
Add Water Clean Light Power
SideView FrontView
WaterFilter

49-1000464 Rev. 0 11
SIDE TANK ACCESSORY
Side Tank Accessory
NOTE:TherearetwodraintubeslocatedonthebackofyourOpalNuggetIceMakerindicatedasdraintubeAandB
in the illustration on page 12.
1.HandWashOnly:RinseandhandwashOpalSide
Tankwithwarmwaterandamilddishsoap.Remove
OpalSideTank’scapandwashthecapandrubber
valvewithwaterandamilddishsoap.TheSideTank
base can be washed by disconnecting the hose and
addingasmallamountofsoapywatertoit.Scrubas
needed and rinse thoroughly. The rinse water should
drain out the port in the back.
Rinsethecap,rubbervalve,tankandthebasewellto
remove any residual soap (see illustration).
DO NOT WASH THE SIDE TANK IN THE
DISHWASHER.
2.UnplugOpalNuggetIceMaker.UnhookOpal’sdrain
tubes and drain the water from the reservoir.
3.Connectdraintube,labeledB,tothebackofOpalSide
Tank’s base.
4. Make sure drain tube (A) is connected to the black
hanger and installed on the back of Opal.
5.Makesuredraintube(B)connectingtotheSideTank
isrestingflatonthecountertop.
SideTank
Cap and
Valve
Unplugthis
draintube(B)
from the black
hanger and
connect this
tube to the
SideTank.
PlugdraintubeB
into the side tank
here.
BA
TubeB
attached to
the side tank
TubeB
attached to
the side tank
6.PlaceOpalSideTankontherightorleft-handsideofthetheOpalNuggetIceMaker.Usingthesidetankattachment,
slide the shorter side of the attachment under the unit, near the front of the unit. The attachment will slide into a slot on
thebottomoftheunit.Oncethisisplaced,thesidetankcanslideontotheoppositeattachment.Seeguresbelowand
onnextpage.
NOTE: Care should be taken to connect the correct tube to the Opal Side Tank. Tube (B) should always be
connected to the Side Tank whether it is installed on the left or right side of the Opal Nugget Ice Maker. It is
important to make sure the tube is lying at, otherwise water may not ow from the side tank into the ice maker.

12 49-1000464 Rev. 0
SIDE TANK ACCESSORY
Side Tank Accessory
6.Continued.
7.RemoveOpalSideTank’sreservoirfromitsbase.
8.UnscrewOpalSideTank’scapfromthereservoir.Filltheclearreservoirwithwater.
9.ReplaceOpalSideTank’scap.Ensurethecapiscleanwheninstalling.
10.CarefullyflipoverOpalSideTank’sreservoirandplaceinthebase.WatershouldstartflowingintotheOpal
NuggetIceMakerandbubblesintheOpalSideTankwillappearperiodicallyduringthetimewaterisflowingtothe
ice maker.
NOTE: Ifwaterdoesnotappeartoflowintotheicemaker,pleasecheckforthefollowing:
-Theremaybebubblesintube(B)connectingtheSideTanktotheOpal.
-Tube(B)isnotlyingflat.
Ifeitheroftheaboveissuesarepresent,adjusttube(B)toallowthewatertoflow.
11.FillOpalNuggetIceMaker’sreservoir(ifdesired).
12.PluginOpalNuggetIceMaker,andbeginmakingice.
Sidetankclip
Bottomview Bottomview
Sidetank
clip area
Sidetankclip
Sidetankclip Sidetank

49-1000464 Rev. 0 13
SIDE TANK ACCESSORY
Side Tank Accessory
WARNING To reduce the risk of electrical shock or injury when using your Opal, follow these basic
safety precautions:
■Unplugtheproductbeforecleaningbyhandandwhen
not in use.
■Donotusewithwaterthatismicrobiologicallyunsafeor
of unknown quality.
■UsecautionwhenllingandinstallingOpalSideTank,
aslledunitmaybeheavy.
■Donotusethissidetankforanyliquidotherthanwater.
■ChildrenshouldnotllorinstallOpalSideTank,as
lledunitmaybeheavy.
■Sidetankshouldbeassembledtoicemakerper
installationinstructions.Installingsidetankinadifferent
manner may result in overturning risk.
■MakesurethatOpalNuggetIceMakerisunplugged
whendrainingreservoirandinstallingOpalSideTank.
■EnsurethatOpalSideTankisinstalledonalevel
surfacethatwillbestableevenwhenOpalSideTankis
full.
■MakesurethecapoftheSideTankremainsclean
duringllingandoperation.Handsshouldbewashed
and clean prior to opening and closing the cap.
Use and Care
Cleaning the Side Tank
■RemoveanddraintheSideTank.
■IfthereisresidualwaterinOpalSideTankbaseunit,
flipOpalSideTank’sbasetodrain.
■RemoveandwashOpalSideTank’scapandvalvewith
dish soap and warm water as needed. Ensure the cap
iscleanafterremovingandre-installingbyhand.
■Only remove drain tubes while near a sink or bucket, as
removingdraintubesfromOpalorOpalSideTankwill
drain any water in either unit.
Proper Installation and Location
Thesidetankshouldbeinstalledflushtothefrontof
theOpalNuggetIcemaker.OpalSideTankneedsto
sitonthesamelevelsurfaceasyourOpalNuggetIce
Maker.DonotelevateOpalSideTank,oryourOpalmay
overflow.
To Remove Mineral Deposits:
Mixtwoquartsofwaterwithtwoquartsofwhitevinegar,
ORusetheOpalCleaningKit.
Clean any visible mineral buildup or deposits with this
solution.Ifdepositsarepresentinthetank,llthetank
withthissolutionandletsoak.Besuretodrainandrinse
thetankthoroughlyaftercleaning.Stubborndeposits
may require more than one treatment.
Side Tank Troubleshooting
IfwaterdoesnotflowfromtheSideTanktotheOpalIce
Maker:
There may be bubbles in the tube connecting the side
tanktotheOpalifthetubeisnotlyingflat.Tryadjusting
thetubetoallowthewatertoflow.Oncewaterstarts
flowingittypicallywillnotneedfurtheradjusting.

14 49-1000464 Rev. 0
TROUBLESHOOTING
Normal Operating Sounds
Radio Frequency Interference
WiFi Connect
Yournewicemakermaymakesoundsthatarenotfamiliar.Mostofthesesoundsarenormal.Hardsurfaceslikethe
floor,walls,andcountertopscanamplifythesesounds.Thefollowingdescribesthesoundsthatmaybenewtoyou
and what may be creating them.
■WHIR-WhenOpalisrstturnedon,youmaynotice
the condenser fan spinning.
■BUZZ-Whenthewaterpumprstturnson,itmaybe
dryandslightlynoisy.Onceitislledwithwater,the
noisereducessignicantly.
■RATTLE-Rattlingnoisesmaybeproducedfromthe
flowoftherefrigerant.Thesenoisesshouldreduce
signicantlyoncetherefrigerantsystemhasstabilized.
■GURGLE-Whentherefrigerantsystemshutso,there
maybeabriefgurgleastherefrigerantstopsflowing.
■HUM-Thecompressorisamotor.Itproducesalow
toned humming sound while it is running.
■CLICK-Asnuggeticeisproduced,itdropsintotheice
drawer.Therstnuggetsproducedaretheloudest,as
theyimpactthebottomoftheicebin.Asthebinlls,
thisnoisereducessignicantly.
■SQUEAK–WhenOpalisinneedofdefrosting,it
may start to squeak as ice starts to build up around
the mechanisms. The defost cycle is automatic, and
maytake30-45minutes.Duringthistime,thefront
button won’t respond. More frequent squeaking usually
requires white vinegar cleaning to remove internal
mineral scale buildup.
This product has been tested and found to comply
withthelimitssetforthinTitle47CFRPart15-Radio
FrequencyDevices.Operationissubjecttothefollowing
conditions:(1)Thisdevicemaynotcauseharmful
interference, and (2) this device must accept any
interference received, including interference that may
cause undesired operation. This product generates, uses,
and can radiate radio frequency energy, and if not used
in accordance with the instructions, may cause harmful
interferencetoradiocommunications.Ifthisproduct
does cause harmful interference to radio or television
reception, which can be determined by unplugging Opal,
the user is encouraged to try to correct the interference
byoneormoreofthefollowingmeasures:
■ReorientorrelocatetheTVorradioantennas.
■IncreasethedistancebetweentheproductandTVor
radio.
■PlugOpalintoaseparateoutletfromaradioorTV.
Thetransmittermustnotbeco-locatedoroperatingin
conjunction with other antennas or transmitters.
YourOPALicemakerisWiFiConnectEnabled.AWiFi
communication card is built into the product allowing
ittocommunicatewithyourSmartPhoneforremote
monitoring,control,andnotications.
Please visit geappliances.com/ge/
connected-appliances/ to learn more about connected
appliance features and to learn what connected
applianceApp'swillworkwithyourSmartPhone.

49-1000464 Rev. 0 15
ICE MAKER PRODUCT SPECIFICATIONS
Ice Maker Product Specifications
Descriptionofproduct Portable nugget ice maker
Model XPIO13BCBT/XPIO13SCSS/XPIO23BCBT/XPIO23SCSS
Voltage/Frequency 120VAC/60Hz
Current 3.0A
Icestoragecapacity 3.0lbs
Icemakingrate 24 lbs per day / 1 lb per hour*
Dimensions(widthxdepthxheight) 13.43x17.5x16.5
Installationclearance(sidesandback) 3 in
Operating environment 55°F-90°F
Weight (when empty) 38.6lbs
NOTE:Technical data and performance information provided for reference only.
Specicationsaresubjecttochange.Checktheratinglabelonyouricemakerforthemostaccurateinformation.
*The actual quantity of ice produced will vary with environmental conditions.
Do not Attempt to repair or replace the UV lamp
Note: Products containing refrigerants
Thisproductcontainsarefrigerant,whichunderFederalLawmustberemovedpriortoproductdisposal.Ifyouare
disposing this, or any refrigeration product, check with your local waste company for guidance.
WARNING In order to avoid exposure to UV radiation, disconnect power to the ice maker before
removing the external covers.

16 49-1000464 Rev. 0
NOTES
Notes

49-1000464 Rev. 0 17
NOTES
Notes

18 49-1000464 Rev. 0
NOTES
Notes

49-1000464 Rev. 0 19
■Servicetripstoyourhome.
■Improperinstallation,deliveryormaintenance.
■Failureoftheproductifitisabused,misused,or
used for other than the intended purpose or used
commercially.
■Replacementofhousefusesorresettingofcircuit
breakers.
■Damagecausedafterdelivery.
■Replacementofthelightbulbs,ifincluded.
■Damagetotheproductcausedbyaccident,fire,floods
or acts of God.
■Incidentalorconsequentialdamagecausedby
possible defects with this appliance.
■Softwarebugsthatcanbecorrectedwithanupdate
via the Opal App
■Laborandotherchargestoinstalland/orremovethe
product
What GE Appliances Will Not Cover:
For the Period of: GE Appliances Covers
One Year
Fromthedateofthe
original purchase
Iftheicemachinefailsduetoadefectinmaterialsorworkmanship,duringthe limited one-year
warranty, GE Appliances will either replace your product with a new or remanufactured product,
or refund the purchase price of the product at GE Appliances sole discretion.
Stapleyourreceipthere.Proofoftheoriginalpurchase
date is needed to obtain service under the warranty.
GEAppliances.com
Pleasehaveyourserialnumberandyourmodelnumberavailablewhencallingforservice.Call1.866.907.6718for
service questions.
LIMITED WARRANTY
GE Appliances Ice Maker Limited Warranty
EXCLUSION OF IMPLIED WARRANTIES
YoursoleandexclusiveremediesareproductexchangeorrefundasprovidedinthisLimitedWarranty.Any
implied warranties, including the implied warranties of merchantability or fitness for a particular purpose, are
limited to one year or the shortest period allowed by law.
For sale in the 50 United States and the District of Columbia only: ForUSCustomers:Thislimitedwarrantyis
extendedtotheoriginalpurchaserforproductspurchasedforhomeusewithintheUSA.InAlaskaandHawaii,thelimited
warranty does not include the costs of shipping units.
Somestatesdonotallowtheexclusionorlimitationofincidentalorconsequentialdamages.Thiswarrantygivesyou
specific legal rights, and you may also have other rights which vary from state to state. To know what your legal rights
are, consult your local or state consumer affairs office or your state’s Attorney General.
Warrantor: GE Appliances, aHaier company
Louisville, KY 40225

20 49-1000464 Rev. 0
Consumer Support
CONSUMER SUPPORT
Service and Registration
Registeryournewapplianceon-lineatyourconvenience!Timelyproductregistrationwillallowforenhanced
communication and prompt service under the terms of your warranty, should the need arise.
RegisteryourapplianceatGEAppliances.com/register or visit myopalservice.com to submit a service request.
Contact Us
IfyouarenotsatisfiedwiththeserviceyoureceivefromGEAppliances,contactusonourWebsitewithallthe
detailsincludingyourphonenumber,orwriteto:
IntheUS:GeneralManager,CustomerRelations|GEAppliances,AppliancePark|Louisville,KY40225
GEAppliances.com/contact
InCanada:Director,ConsumerRelations,MabeCanadaInc.|Suite310,1FactoryLane|Moncton,N.B.E1C9M3
GEAppliances.ca/en/contact-us
Other manuals for OPAL XPIO13BCBT
1
This manual suits for next models
3
Table of contents
Other GE Ice Maker manuals

GE
GE WR30X10093 User manual

GE
GE Monogram ZDI15 User manual

GE
GE OPAL01GEPSS User manual

GE
GE monogram ZDIC150 User manual

GE
GE Monogram ZDI15 User manual

GE
GE Monogram ZDI15CBB User guide

GE
GE monogram ZDIC150 User manual

GE
GE MONOGRAM ZDIS15CSS User guide

GE
GE OPAL01GENKT User manual

GE
GE OPAL NUGGET User manual