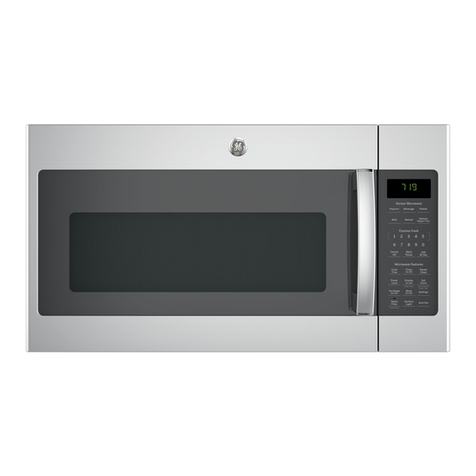
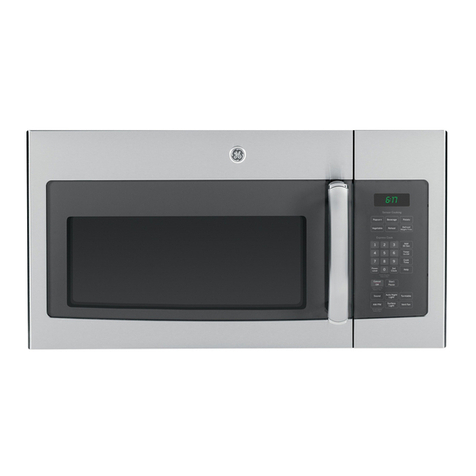
GE JESO734PMRR User manual

microwave
oven
700 watts
model JESO734PMRR
ge.com
Safety Instructions . . . . . . . . . . . . . . 2-5
Operating Instructions
Feat res . . . . . . . . . . . . . . . . . . . . . . . . . . . . . . 6
Q ick Start . . . . . . . . . . . . . . . . . . . . . . . . . . . . 6
Changing Power Levels . . . . . . . . . . . . . . . . 7
Time Feat res . . . . . . . . . . . . . . . . . . . . . . 7-10
Convenience Feat res . . . . . . . . . . . . . 10-11
Other Feat res . . . . . . . . . . . . . . . . . . . . . . . 11
Helpful Information
Microwave Terms . . . . . . . . . . . . . . . . . . . . . 12
Care and Cleaning . . . . . . . . . . . . . . . . . 12-13
If Something Goes Wrong . . . . . . . . . . . . . 13
Things That Are Normal . . . . . . . . . . . . . . . 13
Microwave Oven Warranty . . . . . 15
Consumer Support . . . . . . . back cover
3513913 00 49-40546 02-07 JR

2
OPERATING INSTRUCTIONSSAFETY INSTRUCTIONS
IMPORTANT SAFETY INFORMATION.
READ ALL SAFETY INFORMATION BEFORE USING.
wPRECAUTIONS TO AVOID
POSSIBLE EXPOSURE TO
EXCESSIVE MICROWAVE
ENERGY
For your saf ty, th information in this manual must b follow d
to minimiz th risk of fir or xplosion, or to pr v nt prop rty
damag , p rsonal injury or loss of lif .
Do Not Att mpt to operate this oven with the door open since
open-door operation can res lt in harmf l expos re to
microwave energy. It is important not to defeat or tamper with
the safety interlocks.
Do Not Plac any object between the oven front face and the door
or allow soil or cleaner resid e to acc m late on sealing s rfaces.
Do Not Op rat the oven if it is damaged. It is partic larly important
that the oven door close properly and that there is no damage to the:
1door (bent),
2hinges and latches (broken or loosened),
3door seals and sealing s rfaces.
Th Ov n Should Not be adj sted or repaired by anyone except
properly q alified service personnel.
wWARNING!
Wh n using l ctrical applianc s, basic saf ty pr cautions
should b follow d, including th following:
SAFETY PRECAUTIONS
This microwav ov n is not approv d or t st d for marin us .
• Read and follow the specific “Preca tions to Avoid Possible
Expos re to Excessive Microwave Energy” above.
• This appliance m st be gro nded. Connect only to properly
gro nded o tlet. See Gro nding Instr ctions section on page 4.
• Do not mo nt this appliance over a sink.
• Install or locate this appliance only in accordance with the
provided Installation Instr ctions.
• Be certain to place the front s rface of the door three inches or
more back from the co ntertop edge to avoid accidental tipping
of the appliance in normal sage.
• Do not mo nt the microwave oven over or near any portion of
a heating or cooking appliance.
• Do not store anything directly on top of the microwave oven
s rface when the oven is in operation.
• Do not operate any heating or cooking appliance beneath
this microwave.
• Use this appliance only for its intended se as described in this
man al. Do not se corrosive chemicals or vapors in this appliance.
This microwave oven is specifically designed to heat, dry or cook
food, and is not intended for laboratory or ind strial se.
• Do not operate this appliance if it has a damaged power cord or
pl g, if it is not working properly or if it has been damaged or
dropped.
• Do not cover or block any openings on the appliance.
• Do not store this appliance o tdoors. Do not se this prod ct near
water—for example, in a wet basement, near a swimming pool,
near a sink or in similar locations.
• Keep power cord away from heated s rfaces.
• Do not immerse power cord or pl g in water.
• Do not let power cord hang over edge of table or co nter.
• To red ce the risk of fire in the oven cavity:
— Do not overcook food. Caref lly attend appliance when paper,
plastic or other comb stible materials are placed inside the oven
while cooking.
— Remove wire twist-ties and metal handles from paper or plastic
containers before placing them in the oven.
— Do not se the oven for storage p rposes. Do not leave paper
prod cts, cooking tensils or food in the oven when not in se.
— If materials inside oven ignite, keep the oven door closed, t rn the
oven off and disconnect the power cord, or sh t off power at the
f se or circ it breaker panel. If the door is opened, the fire may
spread.
• See door s rface cleaning instr ctions in the Care and Cleaning
section(s) of this man al.
• GE does not s pport any servicing of the microwave. We strongly
recommend that yo do not attempt to service the microwave
yo rself.
• As with any appliance, close s pervision is necessary when sed
by children.
SAVE THESE INSTRUCTIONS

3
SAFETY INSTRUCTIONS
SPECIAL NOTES ABOUT
MICROWAVING
ARCING
If you s arcing, pr ss th CLEAR/OFF pad and corr ct th probl m.
Arcing is the microwave term for sparks in the oven. Arcing is
ca sed by:
• Metal or foil to ching the side of the oven.
• Foil not molded to food ( pt rned edges act like antennas).
• Metal, s ch as twist-ties, po ltry pins or gold-rimmed dishes,
in the microwave.
• Recycled paper towels containing small metal pieces being sed
in the microwave.
FOODS
• Do not pop popcorn in yo r microwave oven nless in a special
microwave popcorn accessory or nless yo se popcorn labeled
for se in microwave ovens.
• Some prod cts s ch as whole eggs and sealed containers—for
example, closed jars—are able to explode and sho ld not be heated
in this microwave oven. S ch se of the microwave oven co ld res lt
in inj ry.
• Do not boil eggs in a microwave oven. Press re will b ild p inside
egg yolk and will ca se it to b rst, possibly res lting in inj ry.
• Operating the microwave with no food inside for more than a
min te or two may ca se damage to the oven and co ld start
a fire. It increases the heat aro nd the magnetron and can
shorten the life of the oven.
• Foods with nbroken o ter “skin” s ch as potatoes, hot dogs,
sa sages, tomatoes, apples, chicken livers and other giblets,
and egg yolks sho ld be pierced to allow steam to escape
d ring cooking.
SAFETY FACT
SUPERHEATED WATER
Liquids, such as wat r, coff or t a ar abl to b ov rh at d
b yond th boiling point without app aring to b boiling. Visibl
bubbling or boiling wh n th contain r is r mov d from th
microwav ov n is not always pr s nt. THIS COULD RESULT
IN VERY HOT LIQUIDS SUDDENLY BOILING OVER WHEN THE
CONTAINER IS DISTURBED OR A SPOON OR OTHER UTENSIL
IS INSERTED INTO THE LIQUID.
To red ce the risk of inj ry to persons:
— Do not overheat the liq id.
— Stir the liq id both before and halfway thro gh heating it.
— Do not se straight-sided containers with narrow necks.
— After heating, allow the container to stand in the microwave oven
for a short time before removing the container.
— Use extreme care when inserting a spoon or other tensil into the
container.
• Avoid heating baby food in glass jars, even with the lid off. Make
s re all infant food is thoro ghly cooked. Stir food to distrib te the
heat evenly. Be caref l to prevent scalding when warming form la.
The container may feel cooler than the form la really is. Always test
the form la before feeding the baby.
• Don’t defrost frozen beverages in narrow-necked bottles (especially
carbonated beverages). Even if the container is opened, press re
can b ild p. This can ca se the container to b rst, possibly
res lting in inj ry.
• Hot foods and steam can ca se b rns. Be caref l when opening
any containers of hot food, incl ding popcorn bags, cooking
po ches and boxes. To prevent possible inj ry, direct steam away
from hands and face.
• Do not overcook potatoes. They co ld dehydrate and catch
fire, ca sing damage to yo r oven.
• Cook meat and po ltry thoro ghly—meat to at least an INTERNAL
temperat re of 160°F and po ltry to at least an INTERNAL temperat re
of 180°F. Cooking to these temperat res s ally protects against
foodborne illness.
MICROWAVE-SAFE COOKWARE
Make s re all cookware sed in yo r microwave oven is s itable for
microwaving. Most glass casseroles, cooking dishes, meas ring c ps,
c stard c ps, pottery or china dinnerware which does not have
metallic trim or glaze with a metallic sheen can be sed. Some
cookware is labeled “s itable for microwaving.”
• If yo are not s re if a dish is
microwave-safe, se this test: Place in
the oven both the dish yo are testing
and a glass meas ring c p filled with
1 c p of water—set the meas ring c p
either in or next to the dish. Microwave 1 min te at high. If the dish
heats, it sho ld not be sed for microwaving. If the dish remains
cool and only the water in the c p heats, then the dish is
microwave-safe.
• If yo se a meat thermometer while cooking, make s re it is safe
for se in microwave ovens.
IMPORTANT SAFETY INFORMATION.
READ ALL INSTRUCTIONS BEFORE USING.
4
SAFETY INSTRUCTIONS
SPECIAL NOTES ABOUT
MICROWAVING (CONT.)
• Do not se recycled paper prod cts. Recycled paper towels,
napkins and waxed paper can contain metal flecks which may
ca se arcing or ignite. Paper prod cts containing nylon or nylon
filaments sho ld be avoided, as they may also ignite.
• Some styrofoam trays (like those that meat is packaged on) have a
thin strip of metal embedded in the bottom. When microwaved, the
metal can b rn the floor of the oven or ignite a paper towel.
• Do not se the microwave to dry newspapers.
• Not all plastic wrap is s itable for se in microwave ovens. Check
the package for proper se.
• Paper towels, waxed paper and plastic wrap can be sed to cover
dishes in order to retain moist re and prevent spattering. Be s re
to vent plastic wrap so steam can escape.
• Cookware may become hot beca se of heat transferred from the
heated food. Pot holders may be needed to handle the cookware.
• “Boilable” cooking po ches and tightly closed plastic bags sho ld
be slit, pierced or vented as directed by package. If they are not,
plastic co ld b rst d ring or immediately after cooking, possibly
res lting in inj ry. Also, plastic storage containers sho ld be at
least partially ncovered beca se they form a tight seal. When
cooking with containers tightly covered with plastic wrap, remove
covering caref lly and direct steam away from hands and face.
• Use foil only as directed in this man al. TV dinners may be
microwaved in foil trays less than 3/4" high; remove the top foil
cover and ret rn the tray to the box. When sing foil in the
microwave oven, keep the foil at least 1" away from
the sides of the oven.
• Plastic cookware—Plastic cookware designed for microwave cooking
is very sef l, b t sho ld be sed caref lly. Even microwave-safe
plastic may not be as tolerant of overcooking conditions as are glass
or ceramic materials, and may soften or char if s bjected to short
periods of overcooking. In longer expos res to overcooking, the food
and cookware co ld ignite.
Follow th s guid lin s:
1Use microwave-safe plastics only and se them in strict
compliance with the cookware man fact rer’s recommendations.
2Do not microwave empty containers.
3Do not permit children to se plastic cookware witho t
complete s pervision.
GROUNDING INSTRUCTIONS
wWARNING!
Improp r us of th grounding plug
can r sult in a risk of l ctric shock.
This appliance m st be gro nded. In the
event of an electrical short circ it,
gro nding red ces the risk of electric
shock by providing an escape wire for the electric c rrent. This
appliance is eq ipped with a power cord having a gro nding wire
with a gro nding pl g. The pl g m st be pl gged into an o tlet that
is properly installed and gro nded.
Cons lt a q alified electrician or service technician if the gro nding
instr ctions are not completely nderstood, or if do bt exists as to
whether the appliance is properly gro nded.
If the o tlet is a standard 2-prong wall o tlet, it is yo r personal
responsibility and obligation to have it replaced with a properly
gro nded 3-prong wall o tlet.
Do not nder any circ mstances c t or remove the third (gro nd)
prong from the power cord.
For best operation, pl g this appliance into its own electrical o tlet
to prevent flickering of lights, blowing of f se or tripping of circ it
breaker.
IMPORTANT SAFETY INFORMATION.
READ ALL INSTRUCTIONS BEFORE USING.
Ens re proper gro nd
exists before se.
PREFERRED
METHOD

5
SAFETY INSTRUCTIONS
ADAPTER PLUGS
Usag situations wh r applianc ’s
pow r cord will b disconn ct d
infr qu ntly.
Beca se of potential safety hazards
nder certain conditions, we strongly
recommend against the use of an
adapter plug. However, if yo still
elect to se an adapter, where local
codes permit, a TEMPORARY
CONNECTION may be made to a properly gro nded two-prong wall
receptacle by the se of a UL listed adapter which is available at most
local hardware stores.
The larger slot in the adapter m st be aligned with the larger slot
in the wall receptacle to provide proper polarity in the connection
of the power cord.
CAUTION: Attaching the adapter gro nd terminal to the wall receptacle
cover screw does not gro nd the appliance nless the cover screw is
metal, and not ins lated, and the wall receptacle is gro nded thro gh
the ho se wiring.
Yo sho ld have the circ it checked by a q alified electrician to make
s re the receptacle is properly gro nded.
When disconnecting the power cord from the adapter, always hold the
adapter with one hand. If this is not done, the adapter gro nd terminal
is very likely to break with repeated se. Sho ld this happen, DO NOT
USE the appliance ntil a proper gro nd has again been established.
Usag situations wh r applianc ’s pow r cord will b disconn ct d
fr qu ntly.
Do not use an adapter plug in these sit ations beca se freq ent
disconnection of the power cord places nd e strain on the adapter
and leads to event al fail re of the adapter gro nd terminal. Yo
sho ld have the two-prong wall receptacle replaced with a
three-prong (gro nding) receptacle by a q alified electrician
before sing the appliance.
EXTENSION CORDS
A short power s pply cord is provided to red ce the risks res lting from
becoming entangled in or tripping over a longer cord.
Extension cords may be sed if yo are caref l in sing them.
If an extension cord is sed—
1The marked electrical rating of the extension cord sho ld be at least
as great as the electrical rating of the appliance;
2The extension cord m st be a gro nding-type 3-wire cord and it
m st be pl gged into a 3-slot o tlet;
3The extension cord sho ld be arranged so that it will not drape over
the co ntertop or tabletop where it can be p lled on by children or
tripped over nintentionally.
If yo se an extension cord, the interior light may flicker and the blower
so nd may vary when the microwave oven is on. Cooking times may be
longer, too.
READ AND FOLLOW THIS SAFETY
INFORMATION CAREFULLY.
SAVE THESE INSTRUCTIONS
Ensure proper ground
and firm connection
before use.
TEMPORARY
METHOD
Align large
prongs/slots
(Adapter plugs not
permitted in anada)
IMPORTANT SAFETY INFORMATION.
READ ALL INSTRUCTIONS BEFORE USING.
6
OPERATING INSTRUCTIONS
Features
(Thro gho t this man al, feat res and
appearance may vary from yo r model.)
1. Door Latches.
2. Window with Metal Shield. Screen
allows cooking to be viewed while
keeping microwaves confined
in the oven.
3. Convenience Guide.
NOTE: Rating plate, oven vent(s) and
oven light are located on the inside walls
of the microwave oven.
4. Touch Control Panel Display.
5. Door Latch Release. Press latch
release to open the door.
6. Removable Turntable. T rntable and
s pport must be in place when sing
the oven. The t rntable may be
removed for cleaning.
1
3
Press Enter
Time Cook Amo nt of cooking time.
Time Defrost (Amount of defrosting time) Amo nt of defrosting time.
Add 30 Starts a tomatically!
Power Level Power level 1–9
(a tomatically set at Hi).
Tim F atur s
Quick Start (Thro gho t this man al, feat res and appearance may vary from yo r model.)
Th Controls on Your Microwav Ov n
Yo can microwave by time or with
the convenience feat res.
Conv ni nc F atur s
5
2
4
Press Enter
Popcorn 3.5 oz. or 3.0 oz. package
Beverage 1–4 servings
Pizza 1–4 slices
Dinner plate 1 or 2 servings
Cook Food type 1–6
6
700 Watts

Tim Cook
The power level may be changed if yo
do not want f ll power.
1.Press Time Cook.
2.Enter cooking time.
3.Change power level if yo don’t want
f ll power. (Press Power Level.
Select a desired power level 1–9.)
4. Press Start.
Time Cook
Allows yo to microwave for any time p
to 99 min tes and 99 seconds.
Power level Hi is a tomatically set, b t
yo may change it for more flexibility.
Yo may open the door d ring Time Cook
to check the food. Close the door and press
Start to res me cooking.
7
OPERATING INSTRUCTIONS
Changing Power Levels
Variable power levels add flexibility to
microwave cooking. The power levels on
the microwave oven can be compared to
the s rface nits on a range. Power level Hi
or f ll power is the fastest way to cook and
gives yo 100% power. Each power level
gives yo microwave energy a certain
percent of the time. Power level 7 is
microwave energy 70% of the time. Power
level 3 is energy 30% of the time.
A high setting will cook faster b t food
may need more freq ent stirring, rotating
or t rning over. Most cooking will be done
on power level Hi. A lower setting will cook
more evenly and need less stirring or
rotating of the food.
Some foods may have better flavor, text re
or appearance if one of the lower settings
is sed. Use a lower power level when
cooking foods that have a tendency to boil
over, s ch as scalloped potatoes.
Rest periods (when the microwave energy
cycles off) give time for the food to
“eq alize” or transfer heat to the inside of
the food. An example of this is shown with
power level 3—the defrost cycle. If
microwave energy did not cycle off, the
o tside of the food wo ld cook before the
inside was defrosted.
Here are some examples of uses for
various power levels:
Pow r L v l B st Us s
Hi Fish, bacon, vegetables,
boiling liq ids.
Med-High Gentle cooking of meat and
po ltry; baking casseroles
and reheating.
Medium 5 Slow cooking and
tenderizing s ch as
stews and less tender
c ts of meat.
Low 2 or 3 Defrosting witho t cooking;
simmering; delicate sa ces.
Warm 1 Keeping food warm witho t
overcooking; softening
b tter.
How to Chang th Pow r L v l
The power level may be entered or
changed immediately after entering
the feat re time for Time Cook.
1. Press Time Cook.
2. Enter cooking time.
3. Press Power Level.
4. Select desired power level 1–9.
5. Press Start.
OPERATING INSTRUCTIONS
Time Features

Vegetable Amount Time Comments
Asparagus
(fresh spears) 1 lb. 7 to 10 min., Med-High (7) In 1
1
⁄
2
-qt. casserole, place 1/4 c p water.
(frozen spears) 10-oz. package 5 to 8 min. In 1-qt. casserole.
Beans
(fresh green) 1 lb. c t in half 12 to 17 min. In 1
1
⁄
2
-qt. casserole, place 1/2 c p water.
(frozen green) 10-oz. package 6 to 9 min. In 1-qt. casserole, place 2 tablespoons water.
(frozen lima) 10-oz. package 6 to 9 min. In 1-qt. casserole, place 1/4 c p water.
Beets
(fresh, whole) 1 b nch 18 to 25 min. In 2-qt. casserole, place 1/2 c p water.
Broccoli
(fresh c t) 1 b nch (1
1
⁄
4
to 1
1
⁄
2
lbs.) 7 to 10 min. In 2-qt. casserole, place 1/2 c p water.
(fresh spears) 1 b nch (1
1
⁄
4
to 1
1
⁄
2
lbs.) 9 to 13 min. In 2-qt. casserole, place 1/4 c p water.
(frozen, chopped) 10-oz. package 5 to 8 min. In 1-qt. casserole.
(frozen spears) 10-oz. package 5 to 8 min. In 1-qt. casserole, place 3 tablespoons water.
Cabbage
(fresh) 1 medi m head (abo t 2 lbs.) 8 to 13 min. In 1
1
⁄
2
- or 2-qt. casserole, place 1/4 c p water.
(wedges) 7 to 14 min. In 2- or 3-qt. casserole, place 1/4 c p water.
Carrots
(fresh, sliced) 1 lb. 6 to 9 min. In 1
1
⁄
2
-qt. casserole, place 1/4 c p water.
(frozen) 10-oz. package 5 to 8 min. In 1-qt. casserole, place 2 tablespoons water.
Cauliflower
(flowerets) 1 medi m head 9 to 14 min. In 2-qt. casserole, place 1/2 c p water.
(fresh, whole) 1 medi m head 9 to 17 min. In 2-qt. casserole, place 1/2 c p water.
(frozen) 10-oz. package 5 to 8 min. In 1-qt. casserole, place 2 tablespoons water.
Corn
(frozen kernel) 10-oz. package 4 to 8 min. In 1-qt. casserole, place 2 tablespoons water.
Corn on the cob
(fresh) 1 to 5 ears 3 to 5 min. per ear In 2-qt. glass baking dish, place corn. If corn is in h sk, se no
water; if corn has been h sked, add 1/4 c p water. Rearrange
after half of time.
(frozen) 1 ear 5 to 7 min. Place in 2-qt. glass baking dish. Cover with vented plastic wrap.
2 to 6 ears 2 to 4 min. per ear Rearrange after half of time.
Mixed vegetables
(frozen) 10-oz. package 4 to 8 min. In 1-qt. casserole, place 3 tablespoons water.
Peas
(fresh, shelled) 2 lbs. nshelled 9
to 12 min.
In 1-qt. casserole, place 1/4 c p water.
(frozen) 10-oz. package 4 to 8 min. In 1-qt. casserole, place 2 tablespoons water.
Potatoes
(fresh, c bed, 4 potatoes
11 to 14 min.
Peel and c t into 1 inch c bes. Place in 2-qt. casserole with 1/2 c p
white) (6 to 8 oz. each) water. Stir after half of time.
(fresh, whole, 1 (6 to 8 oz.) 2 to 5 min. Pierce with cooking fork. Place in center of the oven. Let stand
sweet or white) 5 min tes.
Spinach
(fresh) 10 to 16 oz. 5 to 8 min. In 2-qt. casserole, place washed spinach.
(frozen, chopped 10-oz. package 5 to 8 min. In 1-qt. casserole, place 3 tablespoons water.
and leaf)
Squash
(fresh, s mmer 1 lb. sliced 4 to 7 min. In 11⁄2-qt. casserole, place 1/4 c p water.
and yellow)
(winter, acorn 1 to 2 sq ash 7 to 11 min. C t in half and remove fibro s membranes. In 2-qt. glass baking
or b ttern t)
(abo t 1 lb. each)
dish, place sq ash c t-side-down. T rn c t-side- p after 4 min tes.
8
OPERATING INSTRUCTIONS
Tim Cook Guid – NOTE: Use power level Hi nless otherwise noted.
Time Features (cont)

9
OPERATING INSTRUCTIONS
Food Time Comments
Breads, Cakes
Bread, b ns or rolls (1 piece) 1/2 min.
Sweet rolls (approx. 12 oz.) 3 to 5 min. Rearrange after half the time.
Fish and Seafood
Fillets, frozen (1 lb.) 6 to 9 min.
Shellfish, small pieces
(1 lb.)
6 to 9 min. Place block in casserole. T rn over and break p after half the time.
Fruit
Plastic po ch—1 or 2 2 to 6 min.
(10-oz. package)
Meat
Bacon (1 lb.) 4 to 7 min. Place nopened package in oven. Let stand 5 min tes after defrosting.
Franks (1 lb.) 4 to 7 min. Place nopened package in oven. Microwave j st ntil franks can be separated. Let stand
5 min tes, if necessary, to complete defrosting.
Gro nd meat (1 lb.) 10 to 12 min. T rn meat over after first half of time.
Roast: beef, lamb, veal, pork
9 to 13 min.
per lb. Use power level 1.
Steaks, chops and c tlets 9 to 13 min. per lb. Place nwrapped meat in cooking dish. T rn over after first half of time and shield warm areas with
foil. After second half of time, separate pieces with table knife. Let stand to complete defrosting.
Poultry
Chicken, broiler-fryer, c t p
26 to 32 min.
Place wrapped chicken in dish. Unwrap and t rn over after first half of time. After second half of
(21⁄2to 3 lbs.)
time, separate pieces and place in cooking dish. Microwave 2 to 4 min tes more, if necessary. Let
stand a few min tes to finish defrosting.
Chicken, whole (21⁄2to 3 lbs.)
26 to 32 min.
Place wrapped chicken in dish. After half the time, nwrap and t rn chicken over. Shield warm
areas with foil. To complete defrosting, r n cold water in the cavity ntil giblets can be removed.
Cornish hen 7 to 13 min. per lb. Place nwrapped hen in the oven breast-side- p. T rn over after first half of time.
R n cool water in the cavity ntil giblets can be removed.
T rkey breast (4 to 6 lbs.) 9 to 14 min. per lb. Place nwrapped breast in microwave-safe dish breast-side-down. After first half
of time, t rn breast-side- p and shield warm areas with foil. Defrost for second
half of time. Let stand 1 to 2 ho rs in refrigerator to complete defrosting.
Tim D frost
Allows yo to defrost for a selected length
of time. See the Defrosting G ide for
s ggested times.
1. Press Time Defrost.
2. Enter defrosting time.
3. Press Start.
4. T rn the food over after half the time.
5. Press Start.
At one half of selected defrosting time, t rn
food over and break apart or rearrange
pieces for more even defrosting. Shield any
warm areas with small pieces of foil. The
oven will contin e to defrost if yo don’t
open the door and t rn the food.
A d ll th mping noise may be heard
d ring defrosting. This is normal when
oven is not operating at Hi power.
Defrosting Tips
•
Foods frozen in paper or plastic can be
defrosted in the package. Closed packages
sho ld be slit, pierced or vented AFTER
food has partially defrosted. Plastic storage
containers sho ld be partially ncovered.
• Family-size, prepackaged frozen dinners
can be defrosted and microwaved. If the
food is in a foil container, transfer it to a
microwave-safe dish.
• Foods that spoil easily sho ld not be
allowed to sit o t for more than one ho r
after defrosting. Room temperat re
promotes the growth of harmf l bacteria.
• When defrosted, food sho ld be cool
b t softened in all areas. If still slightly icy,
ret rn to the microwave very briefly, or
let it stand a few min tes.
Time Features (cont)
D frosting Guid

10
OPERATING INSTRUCTIONSOPERATING INSTRUCTIONS
Add 30
It will add 30 seconds to the time
co nting down each time the pad is
pressed.
Each to ch will add 30 seconds, p to
99 min tes and 99 seconds.
The oven will start immediately when
pressed.
Time Features (cont)
Popcorn
How to Use the Popcorn Feature
1. Follow package instr ctions. Place
the package of popcorn in the center
of the microwave.
2. Press Popcorn once for a 3.5 o nce
package of popcorn and twice for a
3.0 o nce package. The oven will
start immediately after Popcorn
is to ched.
Use only with prepackaged microwave
popcorn weighing 3.0 to 3.5 ounces.
B v rag
The Beverage feat re works best for
heating a beverage that is at room
temperat re.
Press Beverage once for 8 oz., twice
for 12 oz., three times for 16 oz. and fo r
times for 4 oz. The oven will start
immediately when Beverage is to ched.
Beverages heated with the Beverage
feature may be very hot. Remove the
container with care.
Cook
The Cook feat re a tomatically sets the
cooking times and power levels for a
variety of foods.
1. Press Cook. Code will be displayed.
2. Select food type 1-6. Serving
Sizes 1-4 will be displayed.
3. Enter Serving Size 1-4.
4. The oven starts a tomatically.
Food S rving
Cod Food Siz
1Baked potato 1-4
2Canned veg. 1-4
3Fresh veg. 1-4
4Frozen veg. 1-4
5Chicken 1-4
6Fish 1-4
Dinn r Plat
The Dinner Plate feat re reheats
previo sly cooked foods.
Press Dinner Plate once to reheat.
A cooking time of 6:00 starts
co nting down.
The oven starts immediately after
Dinner Plate is to ched.
Be s re to cover the plate with
plastic wrap.
Convenience Features

11
OPERATING INSTRUCTIONS OPERATING INSTRUCTIONS
Pizza
The Pizza feat re is for reheating
1 to 4 slices of pizza.
Press Pizza once for one slice of pizza,
twice for two slices, three times for three
slices and fo r times for fo r slices. The
oven will start immediately after Pizza is
to ched.
Clock
Press Clock to enter the time of day.
1. Press Clock.
2. Enter time of day.
3. Press Start or Clock.
Tim r
The Timer operates as a min te timer.
1. Press Timer.
2. Enter amo nt of time yo want to
co nt down.
3. Press Timer. When the time is p,
the timer will signal.
The Timer feat re operates witho t
microwave energy.
To stop the timer, press and hold
Timer for 3 seconds.
Cl ar/Off
To pa se cooking, press Start. To
contin e cooking, press Start again.
Clear/Off will not stop the Timer.
Press once to stop and erase yo r
cooking settings.
Child Lock-Out
Yo may lock the control panel
to prevent the microwave from
being accidentally started or sed
by children.
To lock or nlock the controls, press and
hold Clear/Off for abo t three seconds.
When the control panel is locked, Loc or
UnLo appears in the display.
Convenience Features (cont)
Other Features

12
OPERATING INSTRUCTIONSHELPFUL INFORMATION
Term Definition
Arcing Arcing is the microwave term for sparks in the oven. Arcing is ca sed by:
• metal or foil to ching the side of the oven.
• foil that is not molded to food ( pt rned edges act like antennas).
• metal s ch as twist-ties, po ltry pins, gold-rimmed dishes.
• recycled paper towels containing small metal pieces.
Covering Covers hold in moist re, allow for more even heating and red ce cooking time. Venting plastic wrap
or covering with wax paper allows excess steam to escape.
Shielding In a reg lar oven, yo shield chicken breasts or baked foods to prevent over-browning. When
microwaving, yo se small strips of foil to shield thin parts, s ch as the tips of wings and legs on
po ltry, which wo ld cook before larger parts.
Standing Time When yo cook with reg lar ovens, foods s ch as roasts or cakes are allowed to stand to finish
cooking or to set. Standing time is especially important in microwave cooking. Note that a
microwaved cake is not placed on a cooling rack.
Venting After covering a dish with plastic wrap, yo vent the plastic wrap by t rning back one corner so
excess steam can escape.
Microwave Terms
How to Cl an th Insid
Walls, Floor, Insid Window, M tal and
Plastic Parts on th Door
Some spatters can be removed with a
paper towel; others may req ire a damp
cloth. Remove greasy spatters with a
s dsy cloth, then rinse with a damp
cloth. Do not se abrasive cleaners or
sharp tensils on oven walls. To clean
the s rface of the door and the s rface
of the oven that come together pon
closing, se only mild, nonabrasive soaps
or detergents sing a sponge or soft
cloth. Rinse with a damp cloth and dry.
Never use a commercial oven cleaner
on any part of your microwave.
R movabl Turntabl and
Turntabl Support
To prevent breakage, do not place the
t rntable into water j st after cooking.
Wash it caref lly in warm, s dsy water
or in the dishwasher. The t rntable and
s pport can be broken if dropped.
Remember, do not operate the oven
witho t the t rntable and s pport
in place.
H lpful Hints
An occasional thoro gh wiping with
a sol tion of baking soda and water
keeps the inside fresh.
UNPLUG THE CORD BEFORE CLEANING
ANY PART OF THIS OVEN.
Care and Cleaning

OPERATING INSTRUCTIONS HELPFUL INFORMATION
13
How to Cl an th Outsid
Cas
Clean the o tside of the microwave
with a s dsy cloth. Rinse and then
dry. Wipe the window clean with a
damp cloth.
Control Pan l and Door
Wipe with a damp cloth. Dry thoro ghly.
Do not se cleaning sprays, large
amo nts of soap and water, abrasives
or sharp objects on the panel—they
can damage it. Some paper towels can
also scratch the control panel.
Door Surfac
It’s important to keep the area clean
where the door seals against the
microwave. Use only mild, non-abrasive
detergents applied with a clean sponge
or soft cloth. Rinse well.
Pow r Cord
If the cord becomes soiled, npl g
and wash with a damp cloth. For
st bborn spots, s dsy water may be
sed, b t be certain to rinse with a
damp cloth and dry thoro ghly before
pl gging cord into o tlet.
Do not us cl an rs containing
ammonia or alcohol on th
microwav ov n. Ammonia or
alcohol can damag th
app aranc of th microwav .
If Something Goes Wrong
Problem Possible Causes What To Do
Oven will not start
A f se in yo r home may be
• Replace f se or reset circ it breaker.
blown or the circ it breaker tripped.
Power s rge. • Unpl g the microwave oven, then pl g it back in.
Pl g not f lly inserted into wall o tlet. • Make s re the 3-prong pl g on oven is f lly inserted into wall o tlet.
Control panel lighted, yet
Door not sec rely closed. • Open the door and close sec rely.
oven will not start.
Start not pressed after • Press Start.
entering cooking selection.
Another selection entered • Press Clear/Off.
already in oven and Clear/Off
not pressed to cancel it.
Cooking time not entered • Make s re yo have entered cooking time after pressing Time Cook.
after pressing Time Cook.
Start was pressed • Reset cooking program and press Start.
accidentally.
Things That Ar Normal
• Steam or vapor escaping from
aro nd the door.
• Light reflection aro nd door or
o ter case.
• Dimming oven light and change in
the blower so nd at power levels other
than high.
• D ll th mping so nd while oven is
operating.
• TV-radio interference might be noticed
while sing the microwave. Similar to
the interference ca sed by other small
appliances, it does not indicate a
problem with the microwave. Pl g the
microwave into a different electrical
circ it, move the radio or TV as far
away from the microwave as possible,
or check the position and signal of
the TV/radio antenna.

14
NOTES

15
WARRANTY
EXCLUSION OF IMPLIED WARRANTIES—Your sol and xclusiv r m dy is product
xchang as provid d in this Limit d Warranty. Any impli d warranti s, including
th impli d warranti s of m rchantability or fitn ss for a particular purpos , ar
limit d to on y ar or th short st p riod allow d by law.
GE Microwave Oven Warranty Staple your receipt here.
Proof of the original purchase
date is needed to make a
warranty claim.
For The Period Of: What GE Will Provide:
On Y ar R plac m nt unit for any prod ct which fails d e to a defect in materials or
From the date of the original purchase workmanship. The exchange nit is warranted for the remainder of yo r
prod ct’s original one-year warranty period.
What GE Will Not Cover:
• Customer instructions. This owner’s manual provides
information regarding operating instructions
and user controls.
• Improper installation, delivery or maintenance.
• Failure of the product or damage to the product if it is
abused, misused (for example, cavity arcing from wire
rack or metal/foil), or used for other than the intended
purpose or used commercially.
• Replacement of house fuses or resetting of circuit
breakers.
• Damage to the product caused by accident, fire, floods
or acts of God.
• Incidental or consequential damage caused by possible
defects with this appliance.
• Damage caused after delivery.
This warranty is extended to the original purchaser and any succeeding owner for
products purchased for home use within the USA.
Some states do not allow the exclusion or limitation of incidental or consequential
damages. This warranty gives you specific legal rights and you may also have other
rights which vary from state to state. To know what your legal rights are consult your
local or state consumer affairs office or your state’s Attorney General.
Exclusion of implied warranties: Except where prohibited or restricted by law there are
no warranties whether express oral or statutory which extend beyond the description
on the face hereof including specifically the implied warranties of merchantability or
fitness for a particular purpose.
Warrantor: G n ral El ctric Company. Louisvill , KY 40225
In Order to Make a Warranty Claim:
• Properly pack your unit. We recommend using the
original carton and packing materials.
• Return the product to the retail location where it was
purchased.
• Include in the package a copy of the sales receipt or other
evidence of date of original purchase. Also print your
name and address and a description of the defect.

Printed in China
GE Applianc s W bsit
g .com
Have a q estion or need assistance with yo r appliance?
Try the GE Appliances Website 24 ho rs a day, any day of the
year! For greater convenience and faster service, yo can now
download Owner’s Man als, or even order parts on-line.
R al Lif D sign Studio
g .com
GE s pports the Universal Design concept—prod cts, services
and environments that can be sed by people of all ages, sizes
and capabilities. We recognize the need to design for a wide
range of physical and mental abilities and impairments. For
details of GE’s Universal Design applications, incl ding kitchen
design ideas for people with disabilities, check o t o r Website
today. For the hearing impaired, please call 800.TDD.GEAC
(800.833.4322).
Consumer Support
Parts and Acc ssori s
g .com
A replacement t rntable (WB49X688) or t rntable s pport ring
(WB06X10696) is available at extra cost from o r Parts Center
and can be sent directly to yo r home (VISA, MasterCard and
Discover cards are accepted). Order on-line today, 24 ho rs
every day or by phone at 800.626.2002 d ring normal b siness
ho rs.
Instructions contained in this manual cover procedures to
be performed by any user. GE does not support any servicing of
the microwave oven. We strongly recommend that you do not
attempt to service the microwave oven yourself.
Contact Us
g .com
If yo are not satisfied with the service yo receive from GE,
contact s on o r Website with all the details incl ding yo r
phone n mber, or write to:
General Manager, C stomer Relations
GE Appliances, Appliance Park
Lo isville, KY 40225
GE Consumer & Industrial
Appliances
General Electric Company
Lo isville, KY 40225
ge.com

Horno
microondas
700 vatios
modelo JESO734PMRR
ge.com
Información de seguridad . . . . . . 2-5
Instrucciones de operación
Cam io los niveles de potencia . . . . . . . . . . . 7
Funciones . . . . . . . . . . . . . . . . . . . . . . . . . . . . . 6
Funciones de tiempo . . . . . . . . . . . . . . . . 7-10
Funciones de conveniencia . . . . . . . . . . 10-11
Inicio rápido . . . . . . . . . . . . . . . . . . . . . . . . . . . 6
Otras funciones . . . . . . . . . . . . . . . . . . . . . . . 11
Información útil
Cosas que son normales . . . . . . . . . . . . . . 13
Cuidado y limpieza . . . . . . . . . . . . . . . . . 12–13
Si algo sale mal . . . . . . . . . . . . . . . . . . . . . . 13
Términos del microondas . . . . . . . . . . . . . . . 12
Garantía del horno
microondas . . . . . . . . . . . . . . . . . . . . . . . . 15
Soporte
al consumidor . . . . . . . cu ierta posterior
3513913700 49-40546 02-07 JR

2
OPERATING INSTRUCTIONS
INSTRUCCIONES DE SEGURIDAD
INFORMACIÓN IMPORTANTE DE SEGURIDAD.
LEA TODA LA INFORMACIÓN DE SEGURIDAD ANTES DE USAR.
w
PRECAUCIONES PARA EVITAR
EXPOSICIÓN POSIBLE A LA ENERGÍA
EXCESIVA DE MICROONDAS
Por su seguri a , la información conteni a en este manual ebe
seguirse para minimizar el riesgo e incen io, explosión, escarga
eléctrica, o para evitar años a la propie a , lesiones personales o
pér i a e vi a.
No intente operar este horno microondas con la puerta a ierta
ya que la operación con la puerta a ierta puede resultar en una
exposición a la peligrosa energía de microondas. Es importante no
tratar de manipular o usar mal los cierres de seguridad.
No coloque ningún o jeto entre la parte frontal del horno y
la puerta, ni permita que tierra o residuo de limpieza se acumulen
en las superficies sellantes.
No opere el horno si está dañado. Es particularmente importante que la
puerta del horno cierre apropiadamente y que no exista daño a:
1la puerta (do lada),
isagras y pasadores (rotos o sueltos),
3los sellos de la puerta y las superficies sellantes.
El horno no ebería ajustarse ni repararse por nadie que no sea personal
de servicio adecuadamente calificado.
w¡ADVERTENCIA!
Cuan o se encuentre usan o electro omésticos eléctricos, algunas
reglas básicas e seguri a eben seguirse, incluyen o las
siguientes:
PRECAUCIONES DE SEGURIDAD
Este horno microon as no es aproba o o proba o para uso marino.
• Lea y o edezca todas las “Precauciones para evitar exposición posi le
a la energía excesiva de
microondas”
de arri a.
• Este electrodoméstico de e conectarse a tierra. Solamente conéctelo
en un tomacorriente apropiadamente conectado a tierra. Ver la sección
de Instrucciones para la conexión a tierra en la página 4.
• No monte este electrodoméstico so re un fregadero.
• Instale o coloque este electrodoméstico siguiendo sólo las Instrucciones
de Instalación provistas.
• Asegúrese de colocar la superficie frontal de la puerta a más de tres
pulgadas del orde del mostrador, a fin de evitar que el aparato se
voltee accidentalmente durante el uso normal.
• No monte el horno microondas so re ni cerca de ninguna parte de un
aparato calentador o de cocción.
• No almacene nada directamente en la parte superior del horno
microondas cuando el horno microondas esté en operación.
• No opere ningún aparato calentador ni de cocción de ajo de este
horno microondas.
• Use este electrodoméstico sólo para los fines que se descri en en este
manual. No use productos químicos ni vapores corrosivos en este
electrodoméstico. Este horno microondas está específicamente
diseñado para calentar, secar o cocinar comida y no para su uso
industrial o en la oratorio.
• No utilice este electrodoméstico si el ca le eléctrico o el enchufe han
sufrido algún daño, si no funciona correctamente o si ha resultado
dañado o se ha caído.
• No cu ra ni loquee ninguna apertura de este electrodoméstico.
• No almacene este electrodoméstico al aire li re. No use este producto
cerca del agua—por ejemplo, en un sótano mojado, cerca de una
al erca, de un fregadero o de lugares similares.
• Mantenga el ca le eléctrico alejado de superficies calientes.
• No sumerja el ca le eléctrico ni el enchufe en agua.
• No permita que el ca le eléctrico cuelgue so re el orde de la mesa o
el mostrador.
• Para reducir el riesgo de incendio en la apertura del horno:
— No cocine demasiado la comida. Preste atención cuidadosa al
electrodoméstico cuando se coloca papel, plástico u otro material
com usti le en el horno mientras se cocina.
— Quite las cintas de cierre con metal y las asas metálicas de los
recipientes de papel o plástico antes de introducirlos en el horno.
— No almacene cosas en el horno. No deje productos de papel, utensilios
de cocinar ni comida en el horno mientras no lo esté usando.
— Si se incendia algún material dentro del horno, mantenga la puerta del
horno cerrada, apague el horno y desconecte el ca le eléctrico, o
apague la corriente en el fusi le o panel del diferencial. Si se a re la
puerta, el fuego podría expandirse.
• Ver las instrucciones de limpieza de la superficie de la puerta en la
sección de Limpieza y cuidado en este manual.
• GE no está no apoya que se le proporcione ningún servicio al horno
microondas. Vehementemente recomendamos que usted no intente
proporcionar servicio al horno microondas usted mismo.
• El uso de cualquier electrodoméstico por parte de niños de ería ser
supervisado de cerca por un adulto.
GUARDE ESTAS INSTRUCCIONES

3
INSTRUCCIONES DE SEGURIDAD
NOTAS ESPECIALES SOBRE EL
USO DEL MICROONDAS
ARCO ELÉCTRICO
Si observa un arco eléctrico, presione el botón CLEAR/OFF
(borrar/apaga o) y corrija el problema.
El arco eléctrico es el término de microondas para definir las chispas
dentro del horno. El arco eléctrico es causado por:
• Metal o papel aluminio que está en contacto con el lado del horno.
• El papel aluminio no está amoldado a los alimentos (los ordes
colocados hacia arri a actúan como antenas).
• Metal, como tirillas para torcer, alfileres para aves o platos con adornos
dorados en el microondas.
• Se están utilizando toallas de papel reciclado en el horno microondas
que contienen pequeñas piezas metálicas.
ALIMENTOS
• No reviente palomitas de maíz en su horno microondas a no ser que lo
haga usando un accesorio especial para tales propósitos o si usa
palomitas de maíz cuyas etiquetas especifiquen que es seguro hacerlo.
• Algunos productos tales como los “huevos enteros” u otros que vienen
en envases sellados—por ejemplo, latas o otes cerrados—podrían
explotar y no se de en calentar en este horno microondas. Tal uso del
horno microondas podría resultar en lesiones.
• No hierva huevos en el horno microondas. La presión se acumulará en
el interior de la yema del huevo y causará que explote, posi lemente
causando una lesión.
• Operar el horno microondas sin ningún alimento en su interior por más
de uno o dos minutos, podría causar daño al horno microondas y
podría comenzar un incendio. Hacerlo aumenta el calor alrededor del
magnetrón y reduce la vida del horno microondas.
• Los alimentos con “piel” externa no rota, como las patatas, los hot dogs,
las salchichas, los tomates, las manzanas, los hígados de pollo y otras
menudencias, además de las yemas de huevos, de erían perforarse
para permitir que el vapor se escape de su interior durante la cocción.
HECHOS SOBRE LA SEGURIDAD
AGUA SUPERCALENTADA
Los líqui os, tales como el agua, el café o el té, se po rían calentar
excesivamente más allá el punto e ebullición sin ar las apariencias
e estar hirvien o. Uste no siempre po rá notar las burbujas visibles
o la evi encia e que el líqui o está hirvien o cuan o el recipiente se
remueve el horno microon as. ESTO PODRÍA RESULTAR EN QUE LOS
LÍQUIDOS MUY CALIENTES SE DERRAMEN CUANDO SE MUEVA EL
RECIPIENTE O SI SE LE INTRODUCE UNA CUCHARA O ALGÚN OTRO
UTENSILIO.
Para reducir el riesgo de lesiones personales:
— No caliente excesivamente los líquidos.
— Mueva los líquidos antes y a mitad del proceso de calentamiento.
— No use envases de cuellos largos o estrechos.
— Después del calentamiento, permita que los recipientes permanezcan
en el horno microondas por un tiempo corto antes de removerlo.
— Use cuidado extremo cuando inserte una cuchara u otro utensilio
en el envase.
•
Evite calentar alimentos para niños en latas de vidrio, aunque haya
retirado la tapa. Asegúrese de que todos los alimentos de niños sean
cocinados completamente. Mueva los alimentos para distri uir el calor
de manera uniforme. Tenga cuidado de evitar que los alimentos hiervan
cuando caliente leche para niños. El envase podría sentirse más frío que
la leche en su interior. Siempre prue e la leche antes de dársela al niño.
• No descongele e idas congeladas en otellas de cuello estrecho
(especialmente e idas car onatadas); aún si el envase está a ierto, ya
que la presión podría acumularse. Esto podría causar que el envase
explote y existe la posi ilidad de lesiones personales.
• Los alimentos calientes y el vapor pueden causar quemaduras. Tenga
cuidado cuando a ra envases de alimentos calientes, incluyendo
palomitas de maíz, olsas de cocinar o cajas. Para evitar posi les
lesiones, dirija el vapor en dirección contraria a sus manos y cara.
• No cocine las patatas excesivamente. Podrían deshidratarse y
encenderse, causando daños a su horno microondas.
• Cocine las carnes y las carnes de ave completamente—las carnes a
una temperatura INTERNA mínima de 160 ºF y las carnes de ave a una
temperatura INTERNA de por lo menos 180 ºF. Cocinarlas a estas
temperaturas generalmente le protegerá contra las enfermedades
contenidas en los alimentos.
UTENSILIOS DE COCINA PARA MICROONDAS
Asegúrese de que todos los utensilios de
cocina utilizados en su horno microondas
sean adecuados para cocinar con
microondas. Pueden utilizarse la mayoría
de cacerolas de vidrio, platos para cocinar,
tazones de medición, tazones para cremas,
cerámica o vajilla de porcelana que no tenga adornos metálicos o esté
arnizada con un lustre metálico. Algunos utensilios de cocina están
etiquetados como “aptos para cocinar con microondas.”
• Si no está seguro de que un plato pueda usarse en el microondas, haga
esta prue a: Coloque el plato que esté pro ando y un vaso de medir
con 1 taza de agua en el horno—ponga la taza de medir dentro o al
lado del plato. Ponga el microondas en marcha, a máxima potencia,
durante uno minuto. Si el plato se calienta, no de ería usarse en el
microondas. Si el plato se mantiene frío y sólo se calienta la taza,
entonces el plato puede usarse de forma segura en el microondas.
• Si usa un termómetro de carne al cocinar, asegúrese que sea uno
seguro para usarse en hornos microondas.
INFORMACIÓN IMPORTANTE DE SEGURIDAD.
LEA TODAS LAS INSTRUCCIONES ANTES DE USAR.

4
INSTRUCCIONES DE SEGURIDAD
NOTAS ESPECIALES SOBRE EL
USO DEL MICROONDAS (CONT.)
• No use productos de papel reciclado. El papel toalla, las servilletas y el
papel de cera reciclados pueden contener motas metálicas que podrían
causar la formación de arcos eléctricos o incendiarse. Los productos de
papel que contengan nilón o filamentos de nilón tampoco de erían
usarse ya que se podrían incendiar de igual modo.
• Algunas andejas de espuma de poliestireno (como en las que se
empaqueta la carne) tienen una cinta fina de metal incrustada en el
plato. Al ponerse en el microondas, el metal puede quemar el suelo del
horno o incendiar un papel toalla.
• No use su horno microondas para secar periódicos.
• No todo film plástico puede usarse en hornos microondas. Revise el uso
adecuado del paquete.
• Pueden usarse papel toalla, papel encerado y film plástico para los
recipientes de forma que retengan la humedad y para prevenir
salpicaduras. Asegúrese de proveer una forma de ventilación para que
el vapor pueda escapar del film plástico.
• Podrían calentarse los utensilios por el calor transferido por los
alimentos calientes. Puede necesitar usar manoplas de cocina para
manejar los utensilios.
• Las olsas de cocinar que puedan hervir y cualquier olsa de plástico
firmemente cerrada, de erían cortarse, pincharse o proveer cualquier
tipo de ventilación que indique el paquete. En caso contrario, el plástico
podría explotar mientras se cocina o después, pudiendo causar daños
físicos. Además, los recipientes de plástico de erían permanecer, al
menos, parcialmente destapados ya que pueden sellarse fuertemente.
Cuando cocine con recipientes firmemente cu iertos con film plástico,
retire la cu ierta con cuidado y mantenga el vapor alejado de sus
manos y rostro.
• Use papel de aluminio sólo de la forma detallada en este manual. Los
alimentos preparados en porciones listas para calentar y servir (TV
Dinners) pueden cocinarse con microondas en andejas de papel
aluminio de una altura menor a 3/4"; remueva la cu ierta superior de
aluminio y vuelva a colocar la andeja en la caja. Cuando use aluminio
dentro de un horno microondas, mantenga el aluminio, al menos, a una
pulgada de distancia de los lados del horno.
• Utensilios de plástico – Los utensilios de plástico diseñados para su uso
en microondas son muy prácticos, pero de en usarse con cuidado.
Incluso aquellos utensilios autorizados para su uso en microondas
podrían no ser tan tolerantes como el cristal o los materiales de
cerámica en condiciones de so recalentamiento y podrían a landarse
o car onizarse al someterlos a períodos cortos de so recalentamiento.
En exposiciones más largas a so recalentamiento, la comida y los
utensilios podrían incendiarse.
Siga estas normas:
1Use solamente plásticos aptos para microondas y úselos siguiendo
estrictamente las recomendaciones del fa ricante de los utensilios.
2No introduzca en el microondas recipientes vacíos.
3No permita que los niños usen utensilios de plástico sin completa
supervisión.
INSTRUCCIONES PARA LA
CONEXIÓN A TIERRA
INSTRUCCIONES PARA LA CONEXIÓN
A TIERRA
w¡ADVERTENCIA!
El uso inapropia o el enchufe sin
conexión a tierra po ría resultar en
una escarga eléctrica.
Este electrodoméstico se de e conectar a
tierra. En el caso de un corto circuito, la
conexión a tierra reduce el riesgo de descargas eléctricas proporcionando un
ca le de escape para la corriente eléctrica.
Este electrodoméstico
está
equipado con un ca le eléctrico que tiene un ca le con conexión a tierra
con un enchufe con conexión a tierra. El enchufe se de e enchufar a un
tomacorriente que tenga conexión a tierra.
Consulte a un electricista calificado o un técnico de servicio si usted no
entiende completamente las instrucciones so re la conexión a tierra, o si
existe alguna duda so re si el electrodoméstico está conectado a tierra
apropiadamente.
Si el tomacorriente es uno estándar de dos púas, es su responsa ilidad
personal y o ligación hacer los arreglos para que se cam ie por uno de
tres púas con conexión a tierra.
Bajo ninguna circunstancia corte o remueva la tercera púa (conexión a
tierra).
Para una mejor operación, conecte este electrodoméstico en su
tomacorriente propio para evitar que las luces parpadeen, que los
fusi les se aterricen o que el circuito se caiga.
INFORMACIÓN IMPORTANTE DE SEGURIDAD.
LEA TODAS LAS INSTRUCCIONES ANTES DE USAR.
Asegúrese de que existe
una conexión apropiada
a tierra antes del uso.
MÉTODO
PREFERIDO
Table of contents
Languages:
Other GE Microwave Oven manuals

GE
GE JTP95 User manual

GE
GE PSA9120SF1SS User manual

GE
GE JET86 Installation instructions

GE
GE Spacemaker III JEM6G Installation instructions

GE
GE Spacemaker JVM1540 User manual

GE
GE Spacemaker 164D2966P143 User manual

GE
GE Profile Advantium SCA2000F User manual

GE
GE UVM9125 User manual

GE
GE Appliances CEB1590 User manual

GE
GE Spacemaker II JEM824G User manual