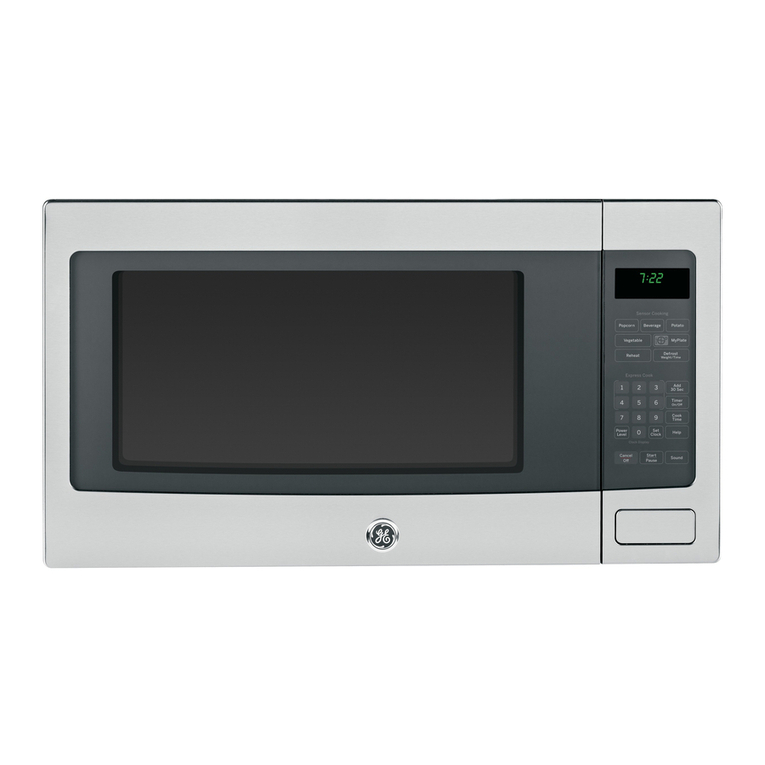
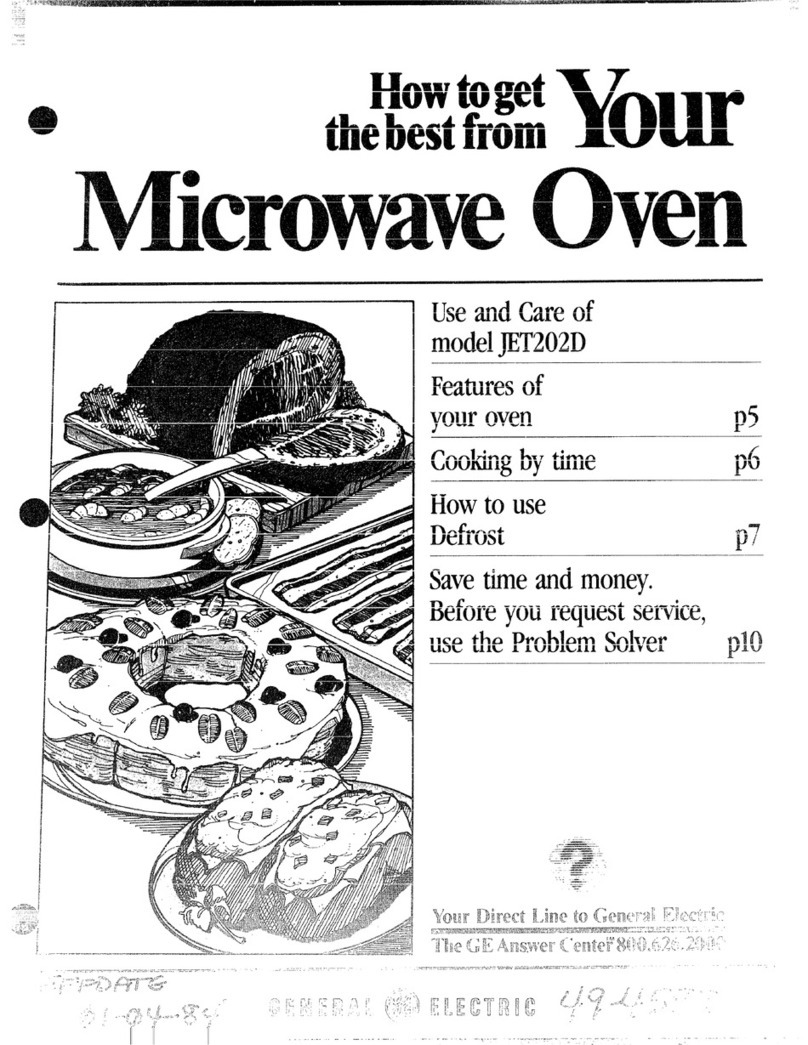
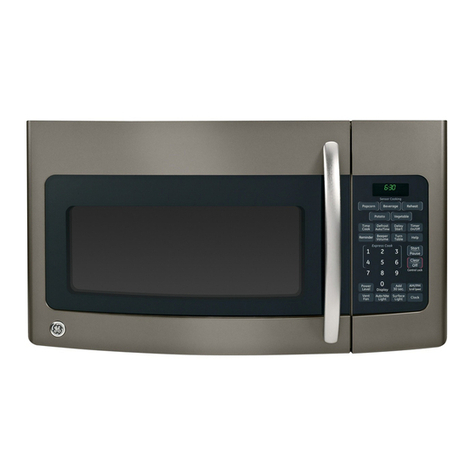
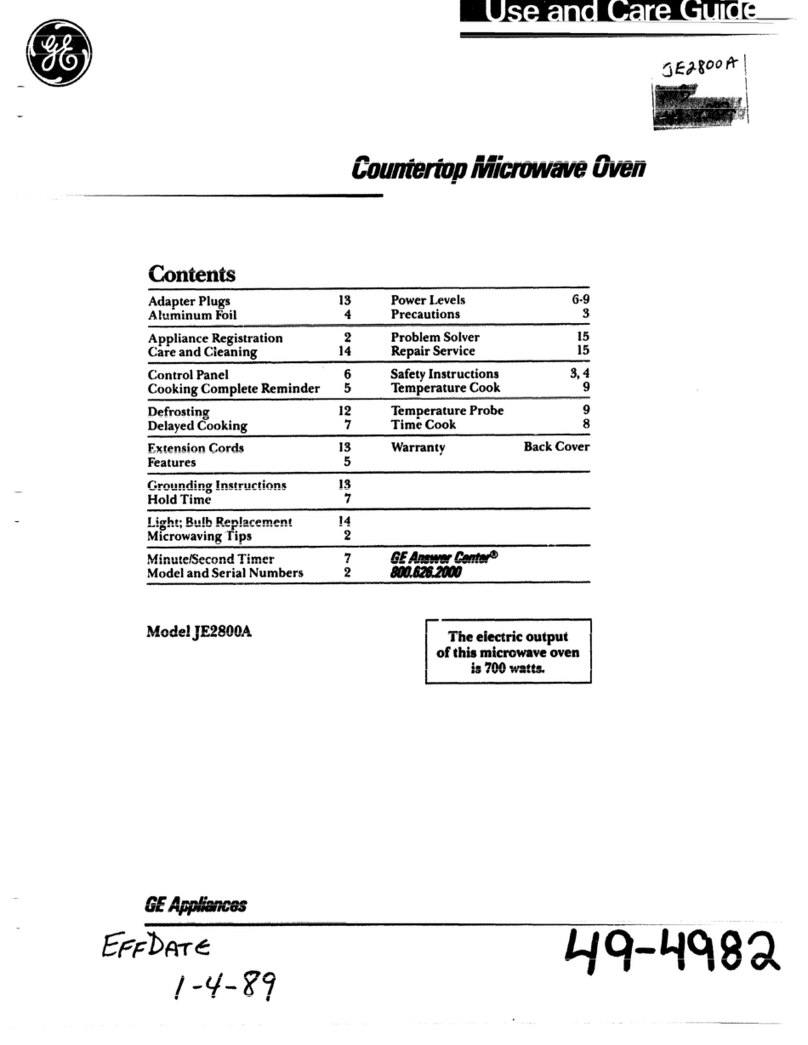
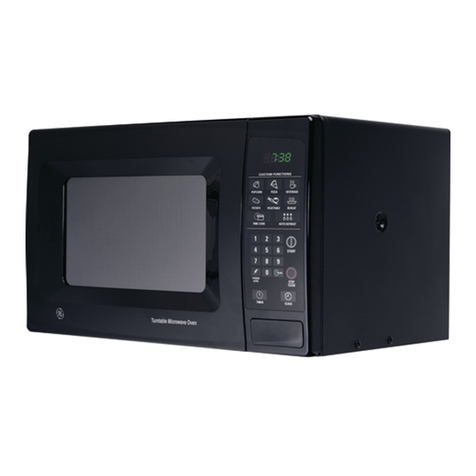
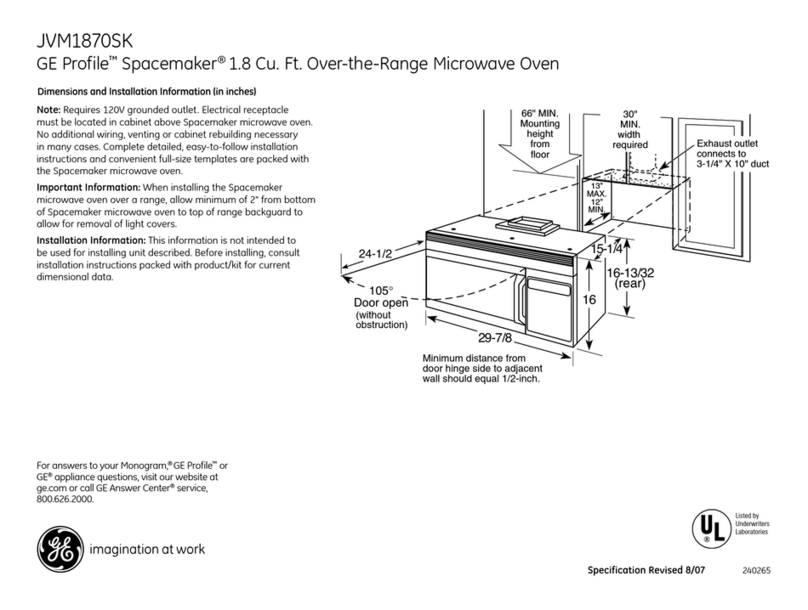
GE JET220 Installation instructions

UseandCareof
Featuresof
your -p5
Cookingbytime
cooking
by t
HOWtousethe
..——
-—”-
.—.—. .-.--e.
.--~——.
—--
~-—- -————-
—.—.— ——
——.
.—--- --..m----
-- —----- -
——~
- - ... —--

m
this book Carefully.
HISdesignedto help you operate
and maintain your new Microwave
Ovenproperly.
Keep it handy for answersto your
questions.
If you don’t understandsomething
or needmore help. . .
Gall,toll free:
The GEAnswer Center’”
800.626.2000
consumer information service
or write: (include your phone
number);
Consumer Affairs
General Electric Company
Appliance Park
Louisville, W40225
the model and
serial
You’llfind them on a label inside the
oven on the upper left side.
These numbers are also on the
Consumer Product Ownership
Registration Card that came with
your Microwave Oven. Before
sending in this card, pleasewrite
these numbers here:
ModelNo
Be sure your Nlkxntvave
Oven is registered.
It is important that we,the manu-
facturer, know the location of your
Microwaveoven should a need
occur for adjustments.
Your supplier is responsiblefor
registering you asthe owner.
Pleasecheck with your supplier to
besure he hasdone so; alsosend
in your Consumer Product Clwner-
ship Registration Card. If you move,
or if you are not the original pur-
chaserpleasewrite to us,stating
modei and serial numbers.This
appliancemustbe registered.
Pleasebecertainthatitis.
Write to:
General Electric Company
RangeProduct Service
Appliance Park
Louisville, KY 40225
If you received adamaged
oven. ●*
immediately contact the dealer (or
builder) that sold you the Micro-
waveOven.
Save ti~~ Wld ~OR’’i42)lm
Before yourequestservice,check
theProblemSohwron page 18. It
lists minor causesof operating
problems that you can correct
yourself.
TO
(a) Do NotAttempttooperatethis
ovenwith the door open since open
door operation can result in harmful
exposureto microwaveenergy. It is
important not to defeat or tamper
with the safety interlocks.
(b) Do Not.PIacx?any object
betweenthe oven front face and the
door or allow soil or cleaner residue
to accumulate on sealing surfaces.
(c) DONotOperatethe oven if it is
damaged. It is particularly important
that the oven door close properly
and that there is no damageto the:
(1)
door (bent)
(2) hinges and latches (broken or
loosened)
(3)door sealsand sealing surfaces
(d) The OvenShouldnotbe
adjusted or repaired by anyone
except properly qualified service
personnel.
,. .\
,’

r‘~oduction to Yol.jrOven, . . .. . . 5
~~~~j~hControl Panel . . . . . .. . . . . 6
C-,gtting the clock ......“s‘“‘o““6
“TimeCook ., ., ................ 7
Defrost ... , . . . . . . . . . . . . . . . . .. . 8
Temp Cook .....,............. 9
Automatic Roasting
&Chart ................a.10-~1
COOK GODE’MControl . . . . . . . . 12
C(X3K CODE7MControl Chart . . 13
t-io[d/Timer. .................. 15
Careof YourOven ............ 16
Grounding instructions ........ 17
Useof Extension Cords. . . . . . . . 17
T’i-wProblem Solver ........... 18
Consumer Services. ........... 19
Warranty . . . . . . . . . . . . . Back Cover
—
—
@Makesure all utensils used in
your microwave oven are labeled
“suitable for microwaving”. Check
your Cookbook tor specific test
to determine “microwave-safe”
utensiIs.
-- Papertowels, wax paper, and
..
plastic wrap can be used to cover
dishes in order to retain moisture
find prevent spattering.
ISome microwaved foods require
stirring, rotating, or rearranging.
Check your Cookbook for specific
I[lstructions.
Some foods sL~chas unshelled
~’ggs2175’hot’dogs must be pierced
~L~~[ltlt~ steam to escape during
~’~joking.
Whenusing electrical appliances
basicsafetyprecautions should
be foiiowed, including the
following:
WARNING-–TOreducethe risk
of burns,electric shock, fire,
injury to personsor exposureto
excessivemicrowaveenergy:
@Usethis appliance only for its
intended useasdescribed in this
manual.
@Readand foilow the specific
“PRECAUTIONS TO AVOID
POSSIBLEEXPOSURETO
EXCESSIVEMICROWAVE
ENERGY”found on page2
aThis appliance must be
grounded. Connect only to
properly grounded outlet. See
“GROUNDING INSTRUCTIONS”
found on page 17.
@For bestoperation, plug this
appliance into it own electrical
outlet, to preventflickering of
lights, blowing of fuse or trip-
ping of circuit breaker.
ainstall or locate this appliance
only in accordance with the pro-
vided installation instructions.
eBe certain toIplace the front
surface of the door three inches
or more back from the counter-
top edge to avoid accidentaltip-
pingdthe applianceh
usage.
~Do not cover or block any
openings on the appliance.
%Do not use outdoors.
s) Do not immerse cord or plug
in water.
EKeep cord away from heated
surfaces.
Do not let cord hang over
edge of table or counter.
Do not operate this appliance
if it has acord or plug,
;f ~~is ~-;~-~VJOE-kiHgpropffly, or if
i: has IXX!n damaged or
,-;.’-/-)@l\g&-:j,
... . ,-,
“. J\:$!:~“:;+i;l”~:“’“~-
..., !J ,...~,
-,<, . ~.1.... .iearlino
d
.- ~< .:“.-
‘.- -; ,,$-~-l---,-.
;?~;
‘::-,:‘ii -.).L?~-<z:.10
J
QThis appliance should beser-
viced only by qualified service
personnel.Contact nearest
authorized service for
examination, repair or
adjustment.
eAs with any appliance,dose
supervision is necessarywhen
used by children.
*To reduce the risk of fire in
the oven cavity:
—-Donot overcook food, Care-
fully attend appliance if paper,
plastic, or other combustible
materials are placed inside the
oven to facilitate cooking.
—Removewire twist-ties from
paper or plastic bags before
placing bag in oven.
—Do not useyour microwave
oven to dry newspapers.
—Do not pop popcornin your
microwaveoven unless in aspe-
cial microwave popcorn acces-
sory or unless you usepopcorn
labeled for use in microwave
ovens.
—Do not the
to avoid to the
ovenand the dfire. If by
accident the oven should run
empty aminute or two, no harm
is done. However, try to avoid
operating the oven empty at all
times—it savesenergy and prO-
Iongs life of the oven.
—H materials inside the oven
should ignite, keep oven door
closed, turn oven off, and dis-
connect the power cord, or shut
off power at the fuse or circuit
breaker panel.
QSome products such as
whole.eggs and ccm-
tainers—for example,
glass jars-may and
should not be heated in this
oven.
“fox%?lin
glass jars, even ‘:i”iei:’
,.
i~d~; re~e~tarl~ieg;;
iniML,!1“62s.
(.:(,:;(/)],1~.‘2’,/(7‘,L,>..,.

@IN3n’t frozen lxwer-
ages in narrow necked bottles;
especially carbonated ones.
Even if the container is opened,
pressure can build up. This can
cause the container to burst,
resulting in injury.
*Use metal only as directed in
Metalstrips as used
on meat roasts are helpful when
useci as shown in Cookbook.
TV dinners may be cooked in
metal trays but when using shelf
they must be replaced in their
box. However, when using metal
in n7icrowave oven, keep metal
(except for DOUBLE ICNJTYTM
shelf) at least l-inch away from
sides doven.
sutensils may
hot because of heat
transferred from the heated
food. This is especially true if
plastic wrap has been covering
the top and handles of the
utensil. I%thoiders may be
needed to handle the utensil.
ethe floor
can too to touch.
Be careful touching the floor
during and after cooking.
*DO not use any
in food you are microwaving
unless that thermometer is
design[?d or recommended for
use inthe microwave oven.
Q3 the
the not
it to cook with. If you leave
~l-jc:~jrobe ~nsidethe oven witho~lt
Insert inq it in food or Iiqu id, and
f!~rr] OCIHIi(.;rovvaveenergy. it can
tjr[}:ito clnctrica IarcInq inthe
~j!jf>~],;~r][j {ji~~r”]~z{~e
oVe17 VVai/S,
*Plastic U%ensils—Plastic
utensilsdesigned for microwave
cooking are very useful, but
should be used carefully. Even
microwave plastic may not be as
tolerant of overcooking condi-
tions as are glass or ceramic
materials and may soften or
char if subjected to short periods
of overcooking. In longer expo-
sures to overcooking, the food
and utensils could ignite. For
thesereasons:1)Use micro-
wave plastics only “and use
them” in strict compliance with
the utensil manufacturer’s
recommendations. 2) Do not
subject empty utensils to micro-
waving. 3) Do not permit children
to use plastic utensils without
complete supervision.
eWhen cooking porkfollow
our directions exactly and
always cook the meat to at least
170°. This assures that, in the
remote possibility that trichina
may be present in the meat, it
will be killed and meat will be
safeto eat.
eBoilingi2ggs(in and out of
shall) is not recommended for
microwave cooking. Pressure
can build up inside egg yolk and
may cause it to burst, resulting
in injury.
49 Foods with outer
“skin”such as potatoes, hot
dogs or sausages, tomatoes,
apples, chicken livers and other
gibiets, and eggs (see above)
should be pierced to allow
steam to escape during cooking.
e“Boilable”cooking pouches
and tightly closed plasticbags
should be slit, pierced or vented
as directed in Cookbook. If they
are not, plastic could burst dur-
ing or immediately after cooking,
possibly resulting in injury. Also,
plastic storage containers should
be at least partially uncovered
because they form atight seal.
When cooking with containers
tightly covered with plastic wrap,
remove covering carefully and
direct steam away from hands
and face.
eUse of the DOUBLE D!JTYTM
shelf accessory. (See your Cook-
book for proper use.)
—Remove the shelf from oven
when not in use.
—Do not store or cook with
shelf on flcor of oven. Product
damage may result.
—Use potholders when handling
the shelf and utensils. They may
be hot.
—Do not use microwave brown-
ing dish on shelf. The shelf could
overheat.
—

—
——-~..
..-——— —----
F$
$’
4
In
iIlt II ~/‘/ A-———---------~%L —... —J)
IJse with TEMP COOK and AUTO ROAST func-
tions only. for Temperature
Probe must be securely inserted into receptacle
when using TEMP GOOK or AUTO ROAST.
Lets you microwave sev-
eral foods at once. DO not use shelf without
plastic spacers in place as shown. (See Safe%y
Tips for special instructions.) When this shf?lfis
not inuse, please remove from the oven.
D,Seenext page
!c)I-instructions,
arid $%3%3!

Displays time of day,
time or temperature during cooking
functions (or power level when
Power Level Pad is touched).
TIME COOK. lvlicrowave for a
preset amount of time using auto-
matic Power Level 10 (or change
power level after entering cooking
time. See page 7.)
T’EMP COOK. Use the tempera-
ture probe to cook by using a
preset temperature. (lven shows
temperature until preset tempera-
ture is reached and then turns off.
(See page 9.)
PADS. Touch these pads
to enter ccokin g/defrosting time,
time of day, temperature, Power
Level, Auto Roast Code, or Cook
Code digits.
LEVEL. Touch this pad
before entering another power
level number if you want to change
from automatic Power Level 10
(HIGH) for cooking or Power Level
3(LOW) for cfefr-osting.
After all selections are
ITlade, toluch this pad to start oven.
DEFFN2ST.Gentle, generally uni-
form thawing at automatic Power
/Level 3(or change power level
after entering defrosting time. See
page 8,)
HOLK)/T!MER. This feature uses
no microwave energy while it func-
tions as both akitchen timer or as
aholding period between defrost
and time or temperature cooking.
(See page 15.)
CLOCK. Touch this pad to enter
time of day or check time of day
\
while microwaving. To set clock,
first touch CLC?CKpad and then
enter time of day. For example, if
time is 1:30, touch number pads 1,
3, and Oand 1:30 will appear in
display. Re-touch CLOCK pad. To
reset or change time, simply repeat
above process.
CLEAR/OFF. When touched, it
shuts off the oven and erases all
settings (except time of day).
COOK CODETMcontrol. Use this
pad as ashort-cut method for
entering cooking time, and power
level. (See page 12.)

—The TIMECOOK feature allows
~Ic~uto preset the cooking time.
‘Theoven shuts off automatically.
power ~evei 1() is i3_d0f-natifal~
set for time cooking, but you may
change this for more flexibility.
SeeyourCookbook.
To become better acquainted with
TIME COOK function, make acup
of coffee by following the steps
below.
step ~: Fill acup 2/3 full of water
and Iteaspoon of freeze dried
coffee. Use acup that has no metal
decoration. Place cup in oven and
~Iosedoor.
S~eP~: TOUCh TIME COOK. The
display shows :0. Signal light
nbove TIMECOOK flashes. Power
Lt~vel 10 is automatical Iy set in
t~\en, butdoes not appear in
!.1!Spla y
Step 3: Select your time. Touch
1,2 and Ofor aminute and 20 sec-
onds. 1:20 and signal light above
TIME COOK appear on display. If
another Power Level is desired
touch POWER LEVEL and the
number, aitnough Power Level 10
(HIGH) is preferred for this cup of
coffee.
Step 4: Touch START. Time
counting down shows on display,
Step 5: When time is up, oven
sounds and oven, light, and fan
shut off.
Q. Itouched the numher pads and
selected my power level. WIIen 1
touched START, however, my oven
didn’t come om Why not?
A. The TIME COOK pad must be
touched before setting ‘the number’
pads or else your oven will not be-
gin cooking.
Q. Iti-lpd to change F;CIWer1.PVP!
I; \~~ ~\]~~(-jIspIa‘f (Il”}::!i(.j:d :-;::,: /(-)
(-()(~~\Ir-lu 1Im!2 vuhtl~>
L
——

“-, ,> “.f*& -‘-—–-—-- ‘---- .. . . ---
o
The Defrost setting is designed
for even thawing necessaryfor
large amounts of food and is one
of the most important advantages
of ami~rowave oven,
@Power Level 3is automatically
set for defrosting, but you may
change this for more flexibility.
@See your Cookbook for the
complete defrosting chart.
To become better acquainted with
the defrost functions, defrost fro-
zen pork chops by following the
steps below.
Step 1: Place package of frozen
chops in the oven and close door.
Step 2: Touch DEFROST. Display
reads :0. Power Level 3ISautomat-
ica1Iyset Inoven butdoes not
appear on readout. Signal Light
ahove DEF.flashes.
Step 3:Touch 8, 0, and Ofor 8min-
utes. 8:00 and signal light above
DEF. are displayed. If you wish to
change Power Level, touch Power
Level pad and then new number.
Step 4:Touch START. Time counts
down on display. When cycle is
completed, the oven signals and
automatical Iy shuts off.
Step 5: TLJrn package over, close
door and repeat Steps 2, 3 and 4.
Step 6: When oven signals and
shuts off, remove package and sep-
arate chops to finish defrosting.
Defrosting Tips
@Foods frozen in paper or
plastic can be defrosted in the
package.
eFor even defrosting, many
foods neec~to be broken up or
separated part of the way through
the defrosting time. ,, . -
@Homemade dinners can be
frozen in shallow foil trays and
heated for later use. (Do not heat
on metal shelf). Select foods
which microwave well.
@Pre-packaged frozen dinners
can be defrosted and microwave
cooked, but foil tray must be
returned to box before cooking
on metal shelf.
@Check your Cookbook for
defrosting tips. other
Q. Can Iopen the door during DE-
FROST tO check on the progress
of my food~
A.Yes You may ope[7 the d~or at
any tIme during m!crowaving. To
resume defrosting, close the door
.~ndpress STAR-T,
Q. Can Iselect aPower Level other’
than automatic Power Level 3for
defrosting?
A. Yes. Some smaller foods may be
defrosted quicker on higher Power ..
Levels but for even, carefree de-
frosting, Power Level 3is sug-
gested. Check the chart In the i..
Cookbook for specltic times ~i~d
Powef-Leve!s,
...

by
For marry foods, internal temperature is the best -meT“rnm?ratllr’eIw3be
test of doneness. The temper~ture probe is afood thermometer that
Roasts or poultry are cooked to perfection when
temperature cooking. Heating or reheating foods gauges the internal temperature of your food; it
must be used when using TEMP COOK or AUTO
accurately to aserving temperature you desire is ROAST. Follow the directions for use and insertion
simple and easy. on page 10.
TEtvlP COOK takes the guesswork out of cooking tiANIJL t
because the oven shuts off automatically when the (Afjl [
food is done. \
5ENSC)R CLIP
Step 1: Insert temperature probe
as directed in Cookbook and at-
tach probe securely in oven wall.
Close the door.
—Step 2: Touch TEMP COOK. The
readout display shows Oand signal
—Iight above TEMP COOK flashes.
Step 3: Touch 1, 3, 0or 130°. 130
shows on display. Power Level 10
Is automatically set inoven but
ijoes not appear on readout.
Step 4: Touch POWER LEVEL pad.
Touch 5for MEDIUM power. P-5
shows on display and then display
reverts back to set fi nished
temperature.
Step 5: Touch START. Display
shows temperature of food count-
ing up.
Step6:When 130° is reached, the
oven wil Isound and automatically
shut off. Remove probe and food
from the oven.
Cmking Tips
@Usealower power level setting;
it will heat more evenly even
though requiring more time.
@Be sure frozen food has been
completely defrosted before insert-
ing probe. Probe may break off if
used in frozen foods,
@Always insert probe into the
center of meaty areas; take care
not to touch the fat or the bone.
@Insert probe as horizontally as
possible into foods as directed in
the recipes. Make sure the handle
does not touch the food.
@Use the clip to keep the probe
in place while heating.
@Cover foods as directed in
Cookbook for moisture control and
quick, even heating.
Q. After Ifollowed the steps and
touched START, asignal sounded
and oven dId not start. What is
wrong ?
-...
..
than set temperature, oven will
sound and not start.
Q. Can Ileave my probe in the
oven if it’s not inserted in the food?
-—
—

—
Cookbook
for
1
.---1
—....
Placefender beef roasts on trivet in
microwave safe dish. Insert probe
horizontally into center meaty area
not touching bone or fat. Cover
with wax paper.
Poultry, pork or ham roasts need
no trivet, Add YZcup water to roast
dish, cover with plastic wrap. (For
cooking bag method, see cook-
book.) Insert probe into center
meaty area
How
3. Touch AUTO ROAST Pad. Cooking signal light
‘1
Place meat in oven with probe to
the right. Insert cable end of probe
firmly into receptacle on oven wall.
2. Light over Code shows on display. Readout dis-
plays internal food temperature.

Beef
Tender Roast
Flare 2,p5,) ‘12-14 5-1o
Medium 3 140° 14-16 10-15
Well 4170’ 17-18 30
Meatloaf 4170” ‘15-20 5-10
(loaf or round)
—.——— ————.. —-.— ————..——..—
Pork .. . .
i-oin Roast 4 170° 18-20 20
~re~ooke~ ~a~ 1 1-15° 11-14 5-1o
Whole Chicken 5190° 13-1El 20
(3 lb.)
Whoie Turkey 5 190° 13-15 20
(Ll~ to 12 Ib.s.)
—(!nsert probe into meatiest area of inner thigh from below end and parallel to leg.)
Turkey Breast 4 170° 13-15 20
—IInsert probe horizontally into meatiest area.)..
“Recommended standing time before serving.
and L3. Why was my roast not fully
cooked even thou gh the ternpe.ra-
t~Ire on the readout was correct
~~-l(j~! Jto l+oast com pIetecf~
A. When cooking with Auto Roast,
the temperature probe must be
inserted properly as fu!Iydescribed
inthe Cookbook. Check to make
sur’e the probe hasn’t SIipped or
changed posit io!1.
Q. Is it necessary to always cover
foods dur!ng i4uto Roast?
A. No, but aloose coverl ng helps
prevet7t spattering and hold mois-
ture in food.

HowtoUse
Cook CodeTMControl is ashort-cut method for en-
tering time and the Power Level on your microwave
oven. Cooking Codes are only used for recipes
which need iittle or no attention, and which require
no change of power level during cooking. Recipes
which !equire additional ingredients, attention or
change ot power level during microwaving should
be rooked in the usual manner. Also, recipes with
cooking time of less than one minute or more than
99 minutes can not use Cooking Codes.
Tu understand the Cook Code control, it is import-
ant to know what the numbers mean and what the
sequence is. The first and second numbers, if set-
ting a 3 digit Cooking Code, indicate the amount of
time you desire; the last control entry number is
always the Power Level. For example, 125 means
12minutes at Power Level 5. INOTE:Your oven can
only be programmed to 99 minutes when using the
Cook Code control and the highest Power Level is
10 which is represented by “O”. When setting a
2digit Cook Code control entry, the first is time, the
second is power level For example, 50 means
5minutes at Power Level 10.
2-Digit
a 3
Time-in Power
Minutes High
Oil the following”pa(je IS showrt n]arly frot~uf}~ltly
prep;~red foods and their codes It’s easy, ~lt(jufjh,
to make CookIIIg COdes for many i)ttior rncipos.
Just select one rtwo digits repres~~ntl[tgthe l{+rl{~th
of cooking time dt?sired, and a final digit for the
[newerLevel required. The (3. mkinqCocf8sgiven or)
the chart are for the minimum time needed, to avoid
overcook ing which carr dry out food and make it
tasteless and tough. If you feel that more cooking is
needed, add additional time by changing Ihe first
digit of the Code. You cannot add seconds to the
cycle time--Cooking Codes are for whole minutes
only. If your recipe calls for Power Level changes or
different amounts of time needed between addition
of ingredients, you may set one Cooking Code for
the first part of the recipe, then after completion, set
another Cooking Code for that period of time and
Power Level.
Remember that Cooking Codes are for micro--
waving by time only. If you are microwaving by
temperature, you must use the Temp Cook or Auto
Roast function
COOKING CODE
3-Digit
1 2 5
Level Time in Power Level
(lo) Minutes Med (5)
Programming your oven for Cook Code’” Control operation is easy. Follow the simple steps below.

.
,.-:-.-2:+.s+. —.—--
CookCode’M
+
$and Tape bInside Cabinet KkMX mOther
$fhe Cook GodeT”Controt featuro gives you an easy
iautornatic way to accurately sot ml<jrovvavctime for
,foods requlrlng only one power level at]d Ilttl[+
!
Iattention durinCJcouking. The CI\itrt km!ow shows
I
Ifrequently prepared foods and the sllggested
1Cooking Codes to use with each For’ specific
/information on stirring, turning or rotating, check
ithe Microwave Guide and Cookl:ook which comes
;
iwith your microwave oven. AlwaYsuse microwave-
I
i
(Warming)
C)ip{Cream Cheese)
‘,: ~iJp 25
1CLJp 45
Dips (Sour Cream)
1/:~LJp 13
1cup 23
Pastry Bites (Reheating)
2Servings 17
4Servinas 10
and Dfxwerts
(5-6) 37
Brownies (Mix) 60
Cakes (Mix)
(16 cup fiuted moid) 110
Cheese Bread, Yeast
(1 ioaf) 105
Chocolate Chip Bars 50
Nut Bread (Mix)
(1 ioaf) 97
Pu’dding’Mix (3oz. pkg.)60
.
Coffee, Soup
(1 cup) 10
Milk Bases
Note: Times biven beiovv are for entire defrost
cycie. LJsuaiiy food must be rotated, broken up or
turned over whiie defrosting. Check Cookbook for
specific information. 23
143
13
-13
...-,
Meat$/lMainDishes
Bacon
2Slices 28
4Slices 30
Chicken
8-10 pieces 200
2pieces 40
4pieces 70
Chuck Roast
(3 ibs.) 665
Eggs, Baked
2Eggs 25
Eggs, Scrarnbiecf
2Eggs 20
Entrees, Frozen
8OZ. 50
16OZ. 110
2ibs. zoo
Fish Fiiiets
(1 ib.) 60
Franks (in bun)
210
430
Meat Loaf
(1‘h ibs.) 170
Sausage (Raw)
4Patties ~-)
4Links 20
Swiss Steak
(2 ibs.) 706
Frozen TV Dinner
(10 oz.) 107’
Beans, Green
(1 ib.)
Broccoii
(1IA-I ‘h ibs.)
Spears
cut
Cauiifiower, Head
Corn on Cob
(4)
Potatoes
(4)
Squash
(1 ib.)
Zucch ini
,, (1~~‘]
.—-——.—.-.-——.——— .-.—.“....“... ...
..3,
..,-a1..
.,:“+‘,’:):,! ,i?,=,.2:\~:“:’::’‘.2[~‘:
-;,‘,, },;-~
L, ..FL!J..- ..

——. .-
to Usethe
frosting Hold Timer can-be set up Step 4: When time is up, a.stgnal up t(.) 99 rnl f-lutes follow Sk)ps 1
to Wminutes souf~ds and the timer turns off, and 2 to enter hold time, then set
Sfep 1: Tuuch HOLD/TllVIER pad. Time Cook and time, or Ternp
The display shows :0. Signal light Cook and temperature desired
above HOLD/TIMER flashes. before pressing START, When
hoIding before temperature
Step 2: Select the amount of time The HOLDTIMER can also be cooking, be sure probe is in food
you desire. T-ouchthe appropriate used to program ‘‘standing time’ before pressing START.
number pads. If, for example, you between microwave cooking $unc-
Defrost–Hold/Time–Time
To heip you become acquainted with the t+C)LD/TIMER feature as used with Time Cook or Temp Cook follow
steps below to defrost afrozen casserole for 15 minutes, then hold 10minutes and then cook 25 minutes, If using
Temp Cook after Hold/Timer, be sure to insert probe correctly as shown on page 10.
Step 1: Remove casserole from the
freezer and place in oven. Touch
the DEFROST pad. The readout
panei shows :0 and signal light
above DEF. flashes.
Step 3: Set standing or hold time
by touching HOLD/TINIER. :0 ap-
pears on display. Signal light above
l-fOLD/TIMER flashes.
Step 2: Touch 1, 5, 0 and Ofor
defrosting time. 15:00 appears on
display panel. (Defrosting is auto-
matically set on Power Level 3but
can be changed by touching
FQWER LEVEL pad and the new
Power Level.)
4: Touch 1, 0, 0 and OtO hold
for ten minutes. 10:00 appears on
display.
Step 5: Touch the TIME COOK
pad. This display shows :0 and
signal light above TIME COQK
flashes.
Step 6: Touch 2, 5, 0 and Ofor
twenty-five minutes of cooking
time. 25:00 appears on display.
7: Touch START. 15:00count-
ing down shows on display. As
each function is autornatical Iyper-
formed oven display shows entered
information and light above that
function comes on. While cooking,
you may touch appropriate pad to
recall times you set.
Q. Can iDefrost-Hold only on my
Oven‘?
A. Yes, for foods you don’t wan?
to cook, like frozen fruit, frozen
whipped topping, etc.—refer to
Cookbook.
NOTE: Allow foods to remain at
room ternperatu re onIy as 10ng as
safe. Tlrnes will vary
m
--
..—
-..
—
.

Oven
~~~~f$@w ~igy~wave~v~~is ~
Appliance,ProtectIt From
By$%dtowing TheseRUhS:
@Keepyourovencleanand
sweet-smelling.Opening the oven
door afew minutes after cooking
helps “air-out” the interior, An
occasional thorough wiping with a
soJuticmof baking soda and water
keepsthe interior fresh.
eusesharp-edgedutensils
oven.The interior and ex-
terior ovenwalls can be scratched.
The control panel can bedamaged.
*removethe antennacover
atthe topof the oven (microwave
feature 4 on page 5). YOUwill
damage the oven.
Speck3inotewhenusingBrown‘N
SearDish:High heat generatedon
bottom of Brown ‘N!%ar Dish can
causescorched appearingstainsto
bakeonto the ovenfloor if greaseis
present.These may be removed
with Bar KeepersFriend@~Cleanser
by SerVaasLaboratories,Inc.
After using Bar KeepersFriend@~
Cleanser,rinseand dry thOrC?UQhly,
following instructions on can. Do
not useBar KeepersFriend@
Cleanseron the painted surfaces
such asthe walls, It mayscratch the
paint.
Bar KeepersFriend@Cleanseris
sold in many grocery, hardware,
and department stores.
DOUBLE DUTY’” shelf. Your shelf
accessoryis designed for use in a
microwaveoven only; do not use in
aconventional oven. Do not usea
browning dish with the shelf. Arcing
could occur.
Clean shelf with mild soap and
water or in the dishwasher.Do not
removeplastic spacersfrom the
sheif when cleaning. DOnot clean
in oven.
Probe.
Probe is sturdy, but careshould be
taken in handling. Do not twist or
bend; avoid dropping temperature
probe.
Ciean assoon after usirrgas pos-
sible. To c~ean,wipe with sudsy
cloth, then rub lightly with plastic
scouring ball if necessary.Rinse
and dry. (Clrwash in dishwasher.)
l-low toClean the
Case.Cleanthe outsideof your
ovenwith soapand dampcloth,
then rinse and dry. The outer’pane
of the window wglass.Just wipe
cleanwith adamp cloth, Ghrorrw
trim is bestwiped with adamp cloth
and then with adry towel.
C@ntro[PaneLWipewith adamp
cloth. Dry thoroughly. Do not use
abrasivesor sharpobjects on the
panel.They can damageit.
DoorSurface.Whencleaning sur-
facesof door and oventhat come
together on closing the door, use
only mild, non--abrasivesoapsor
detergents applied with asponge
or soft cloth.
Cord. Ifthe cord becomessoiled,
unplug and washwith damp cloth.
Forstubborn spots,sudsy water
may be used, but becertain to rinse
and dry thoroughly before plugging
cord into outlet.
Oven Lamp F@placxxnent.First
unplug the oven.Them remove
lamp compartment cover by re-
moving screw which holds cover in
place.Cover is located at the rear
of outer case.
Replacewith 40 watt appliance
bulb. (It is available in drug and
hardware stores.) Replacecom-
partment cover. Plug in the oven.

~. .-
,i:g)pit~r]~~mLJ~tbe grounded.
~t1P,?even?of an eiectrlcai short
.JWLJN,grounding reducesthe rrsk
vf @lectricshock by providing an
escapewir~)for the electric Curr’ent,
This appliance is equipped with a
<~~>rd
havingagrounding wire with
agrounding plug. The plug must be
plugged into an ol~tletthat is prop-
edy installed and grounded. (Fig. 1)
WARNING--lrnproper useof the
qroundinCJ p[ug can result in arisk
of electric shock.
~....-............
L.- —
consult aqualified electrician or
serviceman if the grounding instruc-
tions are not completely under-
stood, or if doubt exists asto
whether the appiiarrce is properly
grounded.
—Whereastandard two-prong wall
—receptacle is encountered, it isthe
personal responsibility and obliga-
tion of the customer to have it
replaced with ,aproperly grounded
three-prong wail receptacle.
‘or
whet%
Power Cord
Wiiim?
13ecauseof poterltia! safety hazards
under certain conditions, we
strongly recommend againstthe
useof an adapter plug. However,
if you still elect to usean adapter,
where local codes permit, aTEfvl-
PORAF?YCONNECTION may be
madeto aproperly grounded two-
prong wall receptacle by the useof
atJL listed adapter (Fig.2) which is
availableat most local hardware
stores.
TEMPORARYMETHOD I \
(A[)AP1ERPI[1(;!;NOI
PFRMITT[[1INCANA1)AI d’ll!d! tl
w“/“
iNSURE[WIPERGROIJND
~- AND
[-IRMCONNEC[ION
Fig. 2BEFOREUSF
The larger slot in the adapter must
be aligned with the larger slot in the
wall receptacle to provide proper
polarity in the connection of the
power cord.
Attaching the adapter
ground terminal to the wall recep-
tacle cover screw does not ground
the appliance unless the cover
screw is metal, and not insulated,
and the wall receptacle is grounded
through the house wiring. The
customer should havethe circuit
checked by aqualified electrician to
make sure the receptacle is prop-
erly grounded.
When disconnecting the power
cord from the adapter, always hold
the adapter with one hand. Hthis is
not done, the adapter ground ter-
minal is very likely to break with
repeated use. Should this happen,
DO NOT USE the appliance until
aproper ground has again been
e.sl”?.bIish6C).
Appliance’s Power COd
WiliEM
[%tlot (Isti an adap
‘1-clsave -rimeandMorqP——
you request serwhx,
the Problem Solver
1~
you have aproblem, it maybe
minor. Youmay beable to correct
it yourself.Just use this Problem
Solver to locate your problem and
then follow the suggested
recoin mendat ions.
.——
-——... .———
——————— .——.—
OVEN WILL NOT COME ON
CONTROL PANEL LIGHTED,
YET OVEN WILL NOT START
FOODS ARE EITHER C3VEF?-
COOKED OR IJNDERCOOKE~
.———
——
[—.
. ... These Things Are Normal
cmYour Microwave Oven:
@Steamor vaporescapingfrom
around the door.
aLight reflection around door or
outer case.
e~immingownlight and change
in blower sound mayoccur while
operating at power levelsother than
high.
——._.—.————-——————-.-- –—.—.--—----
eDull thumping soundwhile Oper-
ating at power levelsother than
high.
.SomeTV-Radio interference
might benoticed while using your
microwaveoven.[t’s similar to the
interferencecausedby other small
appliancesand does nat indicate a
problem with your oven.
.. -.. —-
Poss1f3i”E CAUSE AND REMEDY
.——.—.————-——-——
.——..__—.——--—--—
—-.—.-—..——.....-—
Afuse in your home may be blown or the circuit breaker tripped.
Replace fuse or reset circuit breaker.
Make sure 3-prong plug an oven is fully inserted into wall receptacle.
—.—......-——-—— ——-..”...... —.—..-——”—.—
——
Door not securely closed.
START must be touched after entering cooking selection.
Another selection entered already in oven and CLEAFUOFF not
touched to cancel it.
Makesure you haveentered cooking time after touching TIME COOK.
CLEAR/OFF was touched accidentally. Reset cooking program and
touch START.
Temperature probe not inserted properly or not being used during
TEMP COOK or AUTO ROAST functions.
Make sure you have entered desired cooking temperature after
touching TEMP COOK.
After touching COOK CODETMor AUTO ROAST pads, no code
number was entered. —.——-
Cooking times may vary because of starting food temperature, food
density or amount of foods in oven. Touch TIME CO~~ and ~ddi-
tional cooking time for completion.
Incorrect Power Level entered. Check Cookbook for recomrn@nded
Power Level or changing levels during cooking if necessary.
Dish was not rotated, turned or stirred. Some dishes require specific
instructions. Check Cookbook or recipe for these instructions.
Too many dishes in oven at same time. C~okin9 time ~~ust be
increased when cooking more than one food item. Check Cookbook
for recommendation on increasing time.
Probe not inserted properly into meat or dish. Check CookboOk for
probe placement.
I~lcorrect COOK C.ODET”numbers entered.
\A/12er1using DOUBL.E DUTYTMshelf, check Cookbook for food
p!a.fxjrnentand ir7strL!CtiOnS. —.—.—--- —-————-—-.-—-——
.- ...... .------- -.———————
~pp<;zj~~ ;plj\-]e!’lC.)i’enis first plugged in. This is normal.
,Q-.;.:*[}[2;1[’s. [!lj’;“]~.r-; p~’f!~ ~to oven has been interru ptec!, aild ihen
r: s!-: 75(:1. ‘:’(:~!C;~(:~~’/3;jq/’~~~~ ~Q~~~~~ “pF”. ~~~~1( ~“,iJ&- ;:l~ f+-::(;’~.,
—.——...—- ——.—

OurConsumer&?rvicesare designed with your needs and wants in mind.
WarrantyProtection
Your newapplianceisawelldesignedandengineered Seethewarrantyonthebackpageof this bookfor
product.Beforeit left thefactory,it wentthrough details.
rigorousteststo detectmanufacturingdefects.Arid
you haveawrittenwarrantyto protectyou.
——
PromptService at your Convenience
Whetheryourapplianceis in oroutof warranty, FIRST,contactthe peoplewhoservicedyour
you’rejust a phonecall awayfromour nationwide appliance. Explain why you are not pleased. In most
network of Factory TrainedService professionals. cases, this will solve the problem.
Simply call our GE service organization. You’ll find NEXT,if you are still not pleased write all the details
them in the White Pagesunder “General Electric —including your phone number to:
Company” or “General Electric Factory Service;’
and in the Yellow Pages under “General Electric Manager,Consumer Relations
CustomerCare”Service.” GeneralElectricCompany
AppliancePark
Service is scheduled at your convenience and the Louisville, Kentucky 40225
technician drives afully-stocked parts service truck
so that, in most cases, the repair can be completed FINALLY,if your problem is still not resolved, write:
in one visit. Major Appliance Consumer Action Panel
We’re proud of our service and want you to be 20 North Wacker Drive
pleased, but if for some reason you are not happy Chicago, Illinois 60606
with the service you receive, here are three steps to
follow for further help. f.
Service Contracts
P
keep your appliance in good operating
For trouble-freeservicebeyond ~6&@% condition during the contract period at
the written warrantyperiod. -.
\
no additional charge. Service contracts
El let you pay today’s prices for service
If YOUorefer to budqet yourrepairexpenditures amonth, ayear,or several years from
instead of being su;prised by them, GE offers ~L J
@, now. And, ‘you’ll receive service from
service contracts for varying lengths of time on GE trained service technicians using
all GE major appliances. With acontract, we’ll <.e“only Genuine GE parts.
For do-it-yourselfers who would
prefer ?0fix GE major appliances
themselves ...GE offers an industry
first, the Quick Fix~~~System.
Aprogram for do-it-yourself appllance repair,
the system includes step-by-step repair
manuals for refrigerators. most non-rnicrowaw
electric ranges, dishwashers, and standard
and large capacity washers and dryers, plus
specially packaged replacement parfs, and
technical help with atol~tree 800 r)umbt’?i:
_T”heGE Answer CenterTf~ 8130.&% XKX3
r

r
,- ,’ ~‘; YCxm ELECTRIC
.- - - -
L,’ ~
)
Save proof of original purchasedate suchas yoursales slip or cancel led check to establish warranty period
1s LIMITEDFIVE-YEAR
For five yearsfrom date of original
purchase,we will provide,freeof
charge,parts and servicelaborto
repairor replaceanypartof the
microwaveoventhat fails because
‘<j of amanufacturing defect.TC.I
avoid anycharges,you must take
‘> the microwaveovento aGeneral
Electric FactoryServiceCenteror
‘:1 aGeneralElectric CustomerCare@
iXi VIW ~1 Id pick it up following
service.In-homeserviceis also
available,but you must payfor the
servicetechnician’s travelcosts to
your home.
E. .rE 1P- . . . ,: AA” c. .-
——————.. .
This warrantyis extendedto the
originalpurchaserandanysucceed-
ing owner for products purchased
for ordinary home use in the 48
mainland states, Alaska, Hawaii
and Washington, D.C.
All warranty service will be provided
by our Factory ServiceCentersor
by our authorizedCustomerCare@
servicersduring normalworking
hours.
Look in the White orYellow Pages
of your telephonedirectory for
GENERALELECTRICCOMPANY,
GENERALELECTRICFACTORY
SERVICE,GENERALELECTRIC-
HOTPOINTFACTORYSERVICEor
GENERALELECTRICCUSTOMER
CARE@SERVICE.
@Improper installation.
If you havean installation problem,
contact your dealeror installer.
Youare responsible for providing
adequate electrical, exhausting
and other connecting facilities.
*Replacement of housefuses
or resetting of circuit breakers.
eFailure of the product if it is
used for other than its intended
purposeor used commercially.
@Damageto product caused
by accident, fire, floods or acts
of God.
WARRANTORIS/VO”~RESPON-
SIBLE FORCONSEQUENTIAL
DAMAGES.
I.- ,“ ‘
. .
Table of contents
Other GE Microwave Oven manuals

GE
GE EM720DG User manual

GE
GE SPACEMAKER JVM48 User manual

GE
GE JES1022TW User manual

GE
GE Monogram ZMC1095 Series User manual

GE
GE JET86 Installation instructions

GE
GE Spacemaker JVM1650BH User instructions

GE
GE Monogram ZMW2000 Series User manual

GE
GE SES0732 User manual

GE
GE JKP61G User manual

GE
GE Profile PVM1790 User manual

GE
GE JE48A Use and care manual

GE
GE JVM3150 User manual

GE
GE JET211 Specification sheet

GE
GE CEB1590SSSS User manual

GE
GE SpacemakerXL JVM1631 User manual

GE
GE Spacemaker JVM1740DM User manual

GE
GE Spacemaker III JEM4KWA Use and care manual

GE
GE PVM9215SFSS Manual

GE
GE Spacemaker JVM1740SPSS Manual

GE
GE Spacemaker JVM60 Installation instructions