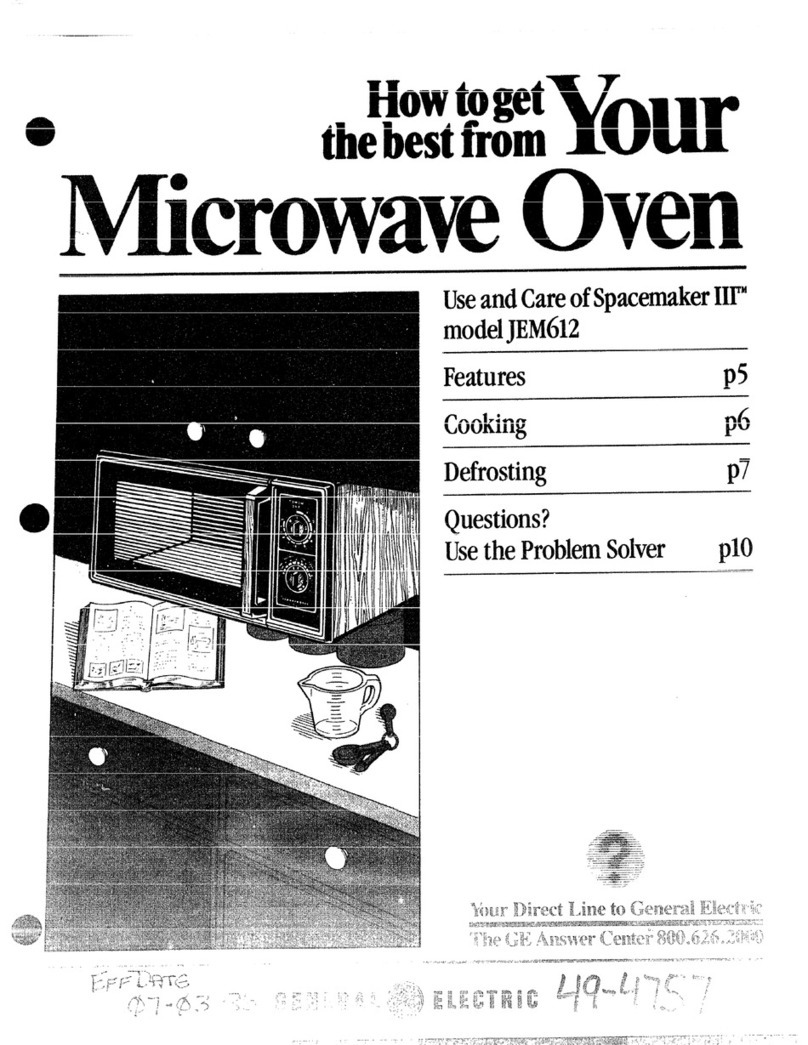
GE Spacemaker II JEM31G Installation instructions

.....J
,“
-.
contents
AdapterPlugs 19 Precautions 3
ApplianceRegistration 2Problem Solver 20
AutoDefrost 12, 13 Program Cooking 6
AutoRoast 10,11 RepairService 21
IAutoSimmer 11 SafetyInstructions 3,4
Care &Cleaning 18 TemperatureCook 9
Control Panel 6TemperatureProbe 5,6,9-11, 18
ConversionGuide 12 TimeCook 8
ICook ‘NWatch 8Time Defrost 14
CookingComplete Reminder 5ToRemovefromCabinetMount 15
DelayedCooking 7Warranty Back Cover
Double Duty Shelf 4,5, 16-18
IExtensionCords 19
Features 5
IGrounding Instructions 19
‘Hold Tim; 7
Light BulbRcplacemcnt 18
MicrowavingTips 2
Minute/Second Timer 7
Model and Serial Numbers 2
useandcareof
I_I’M
The electric output
oftbis microwave oven
is600Watts.
-=====--
—-..-==
—.-....—
,—.:-_-=_
.-=—-—
-J.—.
...— s=====
—-.—
..... .
.———
.——
.— —.
——
WUI-Directme ‘mchimera!Ekctric
/

.............,.,..=.=.
.......
usingyour ovens
readthi$book Camfuuy
It isintendedtohelpyouoperate
andmaintainyournewmicrowave
ovenproperly.
Keepithandyfor answerstoyour
questions.
If youdon’tunderstandsomething
or needmore help, write (include
yourphonenumber):
ConsumerAffairs
GeneralElectric Company
AppliancePark
Louisville,KY40225
down the model
and said
You’llfindthem on alabel inside
the oven.
These numbersare also on the
Consumer Product Ownership
RegistrationCard thatcame with
yourmicrowaveoven.Before
sendingin thiscard, please write
thesenumbers here:
ModelNumber
Serial Number
Use these numbers in any
correspondence or service calls
concerningyour microwaveoven.
It is importantthat wc knowthe
location ofyour microwaveovcil
shouldaneed occur foradjustinerits.
%missupplier is responsible for
i“egistcringyou as the owner.
Pleasecheckwithyoursupplierto
be surehe hasdoneso; alsosendin
yourConsumerProductOwnership
RegistrationCard. If youmove,or
ifyouarenottheoriginalpurchaser
pleasewritetous, statingmodel
andserialnumbers.This appliance
mustberegistered.Pleasebecertain
that it is.
Writeto:
GeneralElectric Company
RangeProductService
AppliancePark
Louisville,KY40225
If you.1received a
oven. ee
Immediatelycontactthedealer (or
builder)that soldyouthe oven.
save the and money.
Before you request service...
checktheProblemSolveronpage20.
It listscauses ofminor operating
problemsthatyoucancorrectyourself.
Accessories
Availableat extracost fromyour
General Electric supplier.
JX8G Installation Kit converts
thisovento abuilt-inwalloven.
WM8G Installation Kit allows
this ovento be mountedon awall.
when your
microwave oven.. you shouldfind
an installationpackagethatcontains
installationiilstructions,atemplate,
and installationhardware for
under-the-cabinet mounting.If
missing, con~actyoui-supplier.
9
,-
eMakesureallcookwareusedin
yourmicrowaveovenissuitablefor
microwaving.Mostglasscasseroles,
cookingdishes, measuringcups,
custardcups, potteryor china
dinnerwarewhichdoesnot have
metallictrimor glazewithametallic
sheencan be used. Somecookware
islabeled“suitableformicrowaving’
If youareunsure, usethisdishtest:
Measure 1cup waterin aglasscup.
Place inovenon or besidedish.
Micmve 1-1%minutesatHIGH. If
waterbecomeshot,dishismicrowave
safe.If dishheats, itshouldnotbe
used formicrowaving.
~Papertowels,waxpaper, and
plasticwrap can be used to cover
dishesin order to retainmoisture
and preventspattering.
@Somemicrowavedfoodsrequire
stirring, rotating,or rearranging.
Check yourcookbook.
@Steambuildsup pressure in foods
which are tightlycoveredby askin
or membrane. Piercepotatoes, egg
yolksand chicken liversto prevent
bursting.
.
...—..———
0

m
(a)Do NW tooperatethis
ovenwiththe door open since
opendoor operationcan resultin
harmfulexposurefomicrowave
energy.It is importantnotto
defeatortarnper with the safety
interlocks.
[t))Do Not ~hcc?1311yobject
betweenthe ovenfront faceand
thedoor or allowsoilor cleaner
residue@accumulateon seaiing
~urfa~e~+
(c)Do PM the oven
if itis damaged. Risparticularly
importantthattheovendoor close
properly and thatthere is no
damageto the:
(1)door (bent)
(2)hingesaridbitches(brokenor
loosened)
..
Whenusingelectricalappliances
basicsai%typrecautionsshouldbe
followed,includingthefollowing:
reduce
theriskofbums,electricshock,
fire,injurytopersonsorexposure
toexcessivemicrowaveenergy:
*~~e this ~pplianee Onlyfor its
intended use as described in this
manual.
e~~d and followthe specific
“FRECAUTKN’4S‘IOAVOID
PCN!MBLEEXPOSURE30
EXCESSIVE
MK3WWAVE
ENERGY”atleft.
*Thisappliancenmstbegm~ded.
C.onnectonlytoproperlygrounded
outlet.See“CRCNJMXNG
HWTIWC130NS”onpage19.
~Forbestoperation,plugthis
applianceintoitsownelectrical
outlet,topreventflickeringof
lights,blowingoffineortripping
ofcircuitbreaker.
@~nstallor locate this appliance
only in accordance with the
provided installation instructions.
@Donot.imnersepowercordor
plugillwater.
eD()flc)tQpwitethis!appliirw
ifithasadamagedpowercordor
plug,ifit isnotworkingproperly,
orifit hasbeendamagedor
dropped.
%Seedoorsurfacecleaning
instructionsortpage184
~Thisappliance ShOUldk
servicedonlybyqualifiedservice
personnel.Contactnearest
authorizedservicefiicilityfor
examination,repairoradjustment.
~Awithanyappliance,CIOSe
supervisionisnecessarywhen
usedbychildren.
@~~Nduct!tlwriskoffirein
theovenCm’ity:
–Do notovercookfood.GrdbUy
attendapplianceifpaper.’,plastic,
orothercombustiblematerialsare
placedinsidetheoventofacilitate
cooking.
–Removewiretwist4iesfrom
paperorplasticbagsbefore
placingbaginoven.
–Do notuseyourmicrowave
oventodrynewspapers.
–Pq.MX and
wax Recycledpaper
productscancontainmetalflecks
whichmaycausearcingorignite.
Paperproducts nylon
ornylon.filamentsshouldbe
avoided,astheymayalsoignite.
–-KMnotoperatethe ‘Wonwhile
toavoid ‘b$1162
4YWK!4$mdthe W&%H
byaccidenttheovenshouldrun
emptya.minuteortwo,noharm
isdone.However,trytoavoid
operatingtheovenemptyatail
times—-itsavesenergyand
proh’lgsthelifeof~~~~~~~.
—J’’..%
,
I
.... . ...-—.--.—.“ . ---- ————— -- .- . . . — . . .
,!
o

.:..J,~.,, +-.L,,3:,..,.z ,~->-.,k%-<.m- ..+-. -...—.——-———-— ——— —.., . .
(~~ntin~ed)
—mnotpop lpqx!om hyour
microwaveown unlessinaspecial
microwavepopcorn accessory or
unlessyou usepopcorn labeledfor
use in microwaveovens.
–DomOWm)dkpotatoes.
Theycoulddehydrateandcatch
fire,causing
damage toyouroven.
–If materials inside oven should
ignite,keep ovendoor closed,
turn oven off, and disconnect
power cord, or shutoff power at
fuse or circuit breaker panel.
@f$~lnf? suchas Whoie
eggsandsealedcontainers-for
example,closedglassjars—may
explodeandshould not be heated
in this oven.
s~vf-j~~ baby foodin
glassjars,evenwithout their lids;
especially meat and egg mixtures.
@~Qn$~ fiwzwi
in
narrowneckedbottles(especially
carbonated beverages). Even if’the
container is opened, pressure
can build up. This can cause the
container to burst, resulting in
injury.
@FOO(jf$cookedinky.ids(such
aspasta)maytendtoboilover
morerapidlythanfoodscontaining
lessmoisture.Shouldthisoccur,
refixtopage18forinstructionson
howtocleantheinsideoftheoven.
*~~e~~~~~~~—~onot .
useathermometerinfoodyou
aremicrowavingunlessthe
thermometerisdesignedor
recommendedforuseinthe
microwaveoven.
IBRemovethetemperaturep~
Ii-mthemm whennotinuse.If
youleavetheprobeinsidetheoven
withoutinsertingitinf~ orliquid,
andturnonmicrowaveenergy,it
cancreateelectricalarcinginthe
ovenanddamageovenwalls.
~Plasticutend.s-i%sticutensils
designedformicrowavecooking
areveryusefid,butshouldbe
usedcarefully.Evenmicrowave
plasticmaynotbeastolerantof
overcookingconditionsasareglass
orceramicmaterialsandmay
softenorcharifsubjectedtoshort
periodsofovercooking.Inlonger
exposurestoovercooking,thefood
andutensilscouldignite.For
thesereasons:1)Usemicrowave
plasticsonlyandusetheminstrict
compliancewiththeutensil
manufacturer’srecommendations.
2)DOnotsubjectemptyutensilsto
microwaving.3)Donotpermit
childrentouseplasticutensils
wi(houtwmpletesupervision.
$2~(p~fj~~~~~ @~f*~
%kin99suchaspotatoes,sausages,
tomatoes,apples,chickenlivers
andothergiblets,a~deggyolks
(seepreviouscaution)shouldbe
piercedtoallowsteamtoescape
duringcooking.
@~~~~~~~~&cookingpouches
andtight!ycihxxlpkastkbags
shouldbeslit,piercedorvented
asdirectedincookbook.Ifthey
arenot,plasticcouldburstduring
orimmediatelyaftercooking,
possiblyresultingininjury.Also,
plasticstoragecontainersshouldbe
atleastpartiallyuncoveredbecause
theyformatightseaLWhen
cookingwithcontainerstightly
coveredwithplasticwrap,remove
coveringcarefullyanddirectsteam
awayfromhandsandface.
*b@ing—Under
certain special circumstances,
liquids may start to boil during or
shortly afier removal from the
rnicmwaveoven. Toprevent burns
from splashi~g liquid, siir the
liquid briefly before removing the
containerfromthemicrowaveovem
@EJseofthe DKJ~~Thl
–Removetheshelffromoven
whennotinuse.
–Ilo notstoreorcookwithshelf
onfloc~ofoven.Productdamage
mayresult.
–Use potho~derswhenhandling
theshelfandutensds.Theymay
behot.
–Do notusemicrowavebrowning
dishonshelf.Thsshelfcould
overheat.
–Be surethattheshelfis
positionedpropmlyinsidethe
oventopreventproductdamage
(seepage16).
--- ...——. —.—.. ., -.. _—..—... ..-——.
-.’ . .— .————.— . . . . . . .-— —. —
.

.ai%?a?.
~cooking complete Reminder
~(E-orallAUm~~~~cQdesexCe~tc0de6°MJm
I.)EFROST,COOK ‘NWATCH,TIME COOK
andTIME DEFROST cycles)
Tbremindyouthatyouhavefoodinthe
oven,theovenwillbeeponceaminuteuntil
~’oueitheropentheovendoorortouchthe
CLEARIOFFpad.
Y
5–“=m
:-,---
---...
“--.-> Ils
*>l!
~
:-------
S“-:::.-<
:.-.-....5
*... .-,..
:..
.. . ..:..:+
::.. I
!!5EE4-B
I
.....
I
5. Oven Interior Light turns on
when the door isopened or when
(heoven is operating.
6. IwIcRorrHE~~~~~~~~~~T3’
Tempe@u~”e Probe. Usc with
AUTO ROAST01-TEMP
COOK/~-~O~Df’unctiOnonly.
I
b
..
8. Touch cmtro~Paneland
Display. See nextpagefor
instructions.
9. Door Latch Rekase. Press latch
1“
E?” “
:
release bar at indentto open door. -=\&-
Door must be securelYlatched fo~” -’!?!”--
~
ovento operate. l.~
:,- 5+ ,;
10. Auto Roast and Auto
1:
‘,
->S: ,
Defrost (hides. Contain cooking Lg:(
;={
information for the Automatic
Roastingfunction (see page 10) I
and
defrosting information for the ~‘
Automatic Defrosting function (see \
page 12). I~o
I
——...
!
..——-—---..,—..-.
-r .- —— —-- -. .-—
——. - .}

The Touch Control Panel
allowsyou to set the ovencontrols
ekctronically with the touch of
afinger. It’sdesignedtobeeasy
touseand understand.
LTIME COOK 1&11.
Microwaveforapresetamountof
timeusingautomaticPowerLevel
10(HIGH), (or changepowerlevel
afterenteringcookingtime. See
page8.)
2. TIME DEFROST. Gentle
thawingat automaticPowerLevel
3(LOW). (Ifdesired, youmay
changepowerlevelafter entering
defrostingtime. Seepage 14.)
3. IXN’VERLEVEL. Touchthis
pad beforeenteringanotherpower
levelnumberif youwantto change
fromautomaticPowerLevel 10
(HIGH) forcookingor Power
Level3(LOW)for defrosting.
4. PADS.Touchthese
padstoentercooking/defrostingtime,
powerlevel,time ofday,finished
foodtemperature, AutoRoast
codes and AutoDefrost weights.
5. MIN. Use with numberpads to
enter whoje minutes.For example,
for4m:nutes touch4and MIN.
6.START. After all selectionsare
made, touchthis pad to startoven.
7.AU”I’0ROAST. insert probe,
touch thispad, and desired number
pad for C(MJC to slow-cookor
[cmj~craturccook meat with
;m[omtiticpreset program. (See
pii~<CS 10 iiIld 11.)
3. J!)ISPLAY’.Dispkiystimeofday,
[in]ccounting down during cooki12g
fu[[ctions,power Icvcl, internal
fix}dtcmpcraturc, Auto ~oast codes
;~ndAuto ikfrost foodweights,
~xltlkiIIgnltxlcnnd instructions.
“PROBE” ~~~C?~13
On Display:
~Probe has been forgottenwhen
AU’10ROASTor TEMP CClOK/
HOLD function isbeing used.
~Probe is not securely seated
in ovenwallreceptacle.
9.TEMP ICOOWHOLD. Use
thetemperatureprobeto cookby
usingapresettemperature.Once
ovenreachespresettemperature,
itswitchestoHOLD settingand
maintainsthattemperatureuntil
youtouchtheCLEAIUOFF pad.
(Seepage9.)
10.MIN/SEC TIMER This
featureusesno microwaveenergy.
It functionsasakitchentimer, as a
holdingperiod afterTimeDefrost
or as adelaytimer beforeTime
Cook I&11,TempCook/Hold or
AutoRoast. (Seepage7.)
IL COOK ‘INWATCH. Use this
pad forshort-termcooking.The
ovenautomaticallyturnsoff after
3minutes. (Seepage8.)
K2.CLOCK. Touchthispad to
enter timeofdayor check time of
daywhilemicrowaving.
Tosetclock, firsttouchCLOCK
pad and then enter time ofday.For
example,if time is 1:30,touch
number pads 1,3, and Oand 1:30
will appear in display.Touch
STARTpad. Toresetor change
time, simplyrepeat aboveprocess.
13.CLIQ?J1/OFF.When touched,
it shutsoffthe ovenand erases all
settings(excepttime ofday).
14.AUTO DIU?ROST.Touchthis
pad and then the number pads for
the desired foodweight. The oven
automatically setspower levels
and defrostingtime. (See pages 12
and 13.)
Pmgmm
Use yoLlrTouch Control Panelto
ALltoRoastor Auto Defrost with the
ovenautomatically settingthe times
and power levels for you, Time
Defrost, Time Cook and Cook ‘N
Watchwith choice of Power Levels
from 1(Iowcst)to 10(highest),
tii~wkitchen taskswith the Min/Sec
Timer. Gndset the clock.
6
Create your own programs to suit
your individualcooking style. For
example: use the Min/Sec Timer to
delay the start ofAuto Roast, Temp
Cook/Hold orTime Cook I&Hor
program ahold time between Time
Defrost and Time Cook IIk 11.(See
page 7.) Set ‘TimeCook I&11 for a;Z”’”
two-stageprogram using different ~-...-
timesandPowerLevels.(Seepage8.)
..——.- . . ---—---- .-———-——-...—---- ,..———-..... .,...-———.—.-. 0
HOWtOthe the
“NwNIM’WSECTIMER has three
timing functions:
@Noperates as aminute timer.
~It can be set to delaycooking.
@Mcan be used as ahold setting
after defrosting.
The MIN/SEC TIMER operates
withoutmicrowaveenergy.
Howtom-ma3-Minute
Phonecdl
LTouchMIN/SEC TIMER pad.
The displayshows:Oand
“ENTER TIME” flashes.
2. Touchnumberpad3and MIN (for
3minutesand no seconds). Display
shows3:00 and “TIME” flashes.
3. TouchSTART.Displayshows
“TIME” andtime countingdown.
4. When timeis up, ovensignals,
flashes “EndJ’and displayshows
timeof day.
‘---
‘- TJHWIE
The h4inute/SecondTimer can also
bc used toprogram “hold time”
between microwavecooking
functions.The time can rangefrom
oncscconcito 99 minutesand 99
seconds. AHOLD, or “standing”
time may bc foundin someof your
ownrecipes or ccmkbook.
Step LTakecasserolefromfreezer
andplacein oven.
Step2: TouchTIMEDEFROSTpad.
The displayshows:Oand
“POWER3:’ “ENTER DEF
TIME” flashes.
Step 3: Touchpads 1,5 andMIN
for 15minutesdefrostingtime. 15:00
appearson display.(Defrostingis
automaticallysetonpowerlevel3
butcan be changedby touchingthe
POWERLEVEL pad andthe
desiredpowerlevel.)
Step 4: Set standingor hold time
bytouchingNHN/SECTIMER.
The displayshows :Oand
“ENTER TIME” flashes.
Step 5: Tbuch 1,0 and MIN to hold
forten minutes. 10:00appears on
displayand “TIME” flashes.
Step 7:Touch2,5 andMIN for
twenty-fiveminutesofcookingtime.
“COOKTIME” flashesand25:00
and“POWER10”appearondisplay.
Step$: TouchST~. “DEFTIME”
and 15:00countingdownshow
on display.Aseach fi.mctionis
automaticallyperformedoven
displayshowsinstructionsentered
andthe fimction.
Step 9: When time isup, the oven
signalsand flashes “EndV
and
Q. What will happen Ml
accidentally reverse my defrost9
McI and cook instructions’?
A. The ovenwill automatically
rearrangeyour program. Defrosting
willalwayscome first, then hold,
and then the cookingfunction.
Q. Can 1defrost and hold.only’?
A. Yes.Sometimesyou mayonly
wantto defrostafood, hold it, and
cook it later. Allyouneed to do is
program in Defrost and amountof
time. Then program Hold and the
amountof time. Be sure to put the
thaweddish in the refrigerator
promptly.
NOTE: Let foodsremain at room
temperature only aslong as safe.
Times will vary.
‘Q.1my oven for a
specific defIwsting time but it
defrosted. klnger than necessary.
what
A. When instructions conflict,
the ovencarries outthe last
instruction. Youmay have setthe
ovento Defrost for 4minutes,
I-Iold/Timefor 2minutes, and then
Defrost for 6minutes. In this case,
the own wouldDefrostfor6minutes
and Hold/Time for 2minutes.
... .-—
_–
---
-
il?2%5—
—.
_–
-
i
[
7
-. —-.—..—. .........——.—----..-...,,,——
-- ---
———-.~,-
——-—-
.

TIME COOK I&II allowsyou
to microwavefor apreset amount
of time using automatic power
level10(1-HG~9or c~wx Power
levelau~omatically.
Powerlevel10(HIGH) k
recommendedfor mostcooking,
butyoumaychangethisformore
flexibility.Seeyourcookbook.
Tobecomebetteracquaintedwith
timucoofir~g,make aCUPOfCOffee
byfollowingthe stepsbelow.
Step 1:Fill acup 2/3 fullof
waterand add 1teaspoonof instant
coffeeand stir to dissolve. Use a
cup that has no metal decoration
and ismicrowavesafe (referto
MicrowavingTipson page2).
Place cup inovenand closedoor.
Step 2: TouchTIME COOK I&H
p~~(],I>isiiayShOWS:Oand “POWER
lo:” “ENTER (XXX TIME” fladles.
Step 4: TouchSTART.“COOK
TIME;’ “POWER 10~’andtime
countingdownshowon display.
Step 5: When timeisup,the oven
signalsand flashes “End~’Oven,
lightand fan shutoff.
Step 6: Openthedoor.
using the me cook n
Feature
Withthe Time CookII feature,you
can settwotime cookingfunctions
withinoneprogram. This would
be idealifyoudesiredto change
powerlevelsduringyour cooking
operations.
The followingisan exampleofhow
to changepowerlevelsusingTime
Cook II.
Step 1:Repeat Steps 1,2 and 3.
Step2: TouchTIME COOK I&H.
Step 3: Setyour time.
Step 4: Tochangethe powerlevel,
touchPOWER LEVEL pad and
desirednumberfornewpowerlevel.
Step 5: TouchSTART.
Step6:“POWER 10”isdisplayed
and “COOK TIME I“ countsdown.
Step 7:At the end of “COOK
TIME 1“the nextselectedpower
levelis displayedand “COOK
TIME II” is showncountingdown.
Step 8: When time is up, the oven
signalsand flashes “End~’The
oven, lightand fan shutoff.
Step 9: Open the door.
To Use Cook ‘NWatch
Step 1:TouchCOOK ‘NWA~H.
“COOK ‘NWATCH”and
“POWER 10”aredisplayedand
“START”flashes.
Step 2: TouchSTART.“COOK ‘N
WA~H” andtimecountingupto
3minutesaredisplayed.Power
level10is automaticallysetin
ovenbut anotherpowerlevelcan
be selected.
Step 3: Openthedoor or touchthe
CLEAR/OFF padto stopcooking.
The ovenwillautomaticallysignal,
flash “End” and shutoffattheend
of3minutes.
‘QI.lestiom andAIB$we~~
Q. 1set my ovenfor the time
called for in the recip% but at the
end ofthe time allowed, my food
wasn’tdone. What happened?
A. Sincehousepowervariesdue
totime or locationmanyTime
Cook recipesgiveyouatime range
to preventovercooking.Setthe
ovenforminimumtime, testthe
foodfor doneness,and cook your
foodalittlelonger,if necessary.
---
Q. Itouched the number pads
and selectedmypower level.When
Itouched START,lwveve~, my
oven didn’t come on. Why not’?
A. The TIME COOK I&11pad
mustbe touchedbefore settingthe
number pads or elseyour ovenwiH
notbegin cooking.
Q. Iwant to cook on apower
levelotherthanHIGH. Vvhatdo
Ixleditodo?
A. Tochange the powerlevel,
touch the POWER LEVEL pad.
“ENTER POWER” flashes on the
displaypanel. Enter new number.
Q, Can 1interrupt my Time
Ckmkfunction tocheckthefood?
A. Yes.Toresume cooking,
simply close the door and press
the STARTpad. The timer must be
reset for cookingto resume unless
time is remaining on timer.
.=.-.
....-—

Internal temperature isthe best
testof doneness for many foods.
Use TEMP C.00K/HOLD to
cook avariety of foods to the
desiredfinishedfoodten-qxmture.
The TIME COOK I&11 setting
isrecommended for batters,
doughs, frozen foods and foods
which are difficult to cook
precisely with the probe.
“TEMP COOK/HOLD” takesthe
guessworkoutofcookingbecause
theovenautomaticallysignalswith
fourbeepswhenthe foodreaches
(hepreset temperature. The Hold
featurewilfmaintainthistemperature
forup to twelvehours or untilyou
touchthe CLEAR/OFF pad.
~otc: Ovenautomaticallyswitches
to “Hold” when preset food
temperatureis reached.
The Probe
HANDLE CABLE
SENSOR
The temperature probe is a
foodthermometer that gaugesthe
internalteinperatureof the food; it
mustbc used when using “TEMP
COOK/HOL13°or “AU’II)ROAST:’
‘[i)Lfscthe probe pl”oper]y,fol]ow
dirwtions on page 10.
BeefRib Roast toMedium
Step 1:Insert temperatureprobe
intoroastand attachprobesecurely
inovenwall. Closethedoor.
Step2: TouchTEMPCOOK/HOLD.
“F” and “POWER10”aredisplayed
and “ENTER TEMP” flashes.
Step 3: Touch 1,2,5 for 125”F.
“TEMP~’“POWER 10”and
“125F”are displayed.
Step 4: TouchPOWER LEVEL
pad. “ENTER POWER” flashes.
Touch5for mediumpower.
“TEMP,” “POWER 5“ and
“125F”showon display.
Step 5: TouchSTART.If internal
temperatureofthe roast islessthan
80°F., displaywill show “COOL”
and “FOOD TEMP.”If temperature
is 80°F.or above,displayshows
temperaturecountingup.
Step 6: When 125”F.is reached,
the ovenwill soundand display
“HOLD:’ The ovenwillthen hold
the temperature.
Step 7:Touchthe CLEAR/OFF
pad to stopthe cycle.
Step8: Removeprobe and food
from the oven.
cooking ‘llps
QUse alowerpower level; itwill
heat more evenlyeven though
requiring more time.
@Be sure frozen food has been
completelydefrostedbeforeinserting
probe. Probe may break off ifused
in frozen ioods.
~COVCrfoodsloosely for moistul”e
control and quick, evenheating.
Questionsand Answers
Q. Iinserted the temperature
probe, closedthe door,touched
TEIW?COOIUHOD and entered
my desired food temperature but
the temperature didn’tappear on
the display.
A. Youmayhaveenteredan
incorrecttemperature.Anyfood
temperaturefrom 80°to 199°F.
maybe enteredforTEMP COOK/
HOLD. TouchCLEAR/QFF and
beginagain.
Q. Are there any foodsIcan’t
Ternp Cook?
A. Yes.Delicatebuttericings,ice
cream, frozenwhippedtoppings,
etc. softenrapidlyatwarm
temperatures.Batters,doughsand
frozenfoodsare alsodifficultto
cookpreciselywith theprobe. It’s
bestto TimeCookthese foods.
Q. Why did 6TROBE” flash on
the display after Itouched the
START pad?
A. “PROBE” will flashif you
don’tseatthecable endoftheprobe
securelyintothe receptaclein the
ovenwallor if youtouchtheTEMP
COOK/HOLD pad and forgetto
usethe probe.
Q. Can Ileavemy probe in the
oven if it%not inserted in food?
A. No, ifit touchesthe ovenwall,
youmaydamagethe oven.
Q. can ITemp cook different
portions of food at different
temperatures?
A. Yes.The temperature probe
givesyou the freedom to cook
different portions offood at
different temperatures to suit
individualeating styles. Simply
place probe in food and change
temperature setting as needed.
RE%%!--
%3&am.—
-p%awl—
.

...”--”””
-
‘-
AU~ ROAST usesthe
ternperatu~~probe to cooktothe
desired serving temperature.
iJnlikeTE~~~~~/~~~D,
whichusesasinglepower level,
AUNI ROASTusesup to3power
settings which automatically
switchduring roasting, thus
providing even,tender cooking
results without overcooking.
Justasinconventionalroasting,
onlytenderroastsshouldbeAuto
Roasteduntilspecifiedinternal
temperaturesarereached. Less
tenderroastsshouldbemicrowaved
bytime, accordingtothecookbook
whichcomeswithyouroven.
Roas@ for
Auto
Placetender beefroastontrivetin
microwave-s~~fedish. Insert probe
horizontallyintothecenter meaty
W-cilnottouchingboneor fat. Make
surethe handledoes nottouchthe
foodor topor sidesofthc oven.
Coverwith waxpaper.
Porkorhamroastsneednotrivet.
Add1/2cupwatertoroastdishand
coverwithplasticwrap.
Placemeat inovenwithprobeto
theright. Insert cableendofprobe
firmlyintoreceptacleonovenwall.
How to Auto Roast
Beef to
1. TouchAU~ ROASTpad.
“AUIU” and “TElVIP”aredisplayed
and“ENTER CODE” flashes.Touch
number pad2. “TEMP;’ “CODE”
and “2” appeflrOndisPlaYand
“START” flashes. TouchSTART.
Displayshows,,c~~L,, and “2,,
untilfoodtemperaturereaches80°E
2. At80°F.,displayswitchesto
showmeat’sinternaltempera~re.
3. WhenyouselectAutoRoast
Codes1,2,3 or4, theovensignals
with4beepsand “Turn” flashing
onthedisplaywhenit’stimetoturn
theroastover.Afteryouturnthe
roast, closethedoorandtouch
START.The remainingcooking
timecountsdownonthedisplay.
(Note:Oven continuestocookafter
thesignalwhether ornotroastis
turned over.)
4. After aprepl”ogrammedfood
temperature isreached, ovenbeeps
4timesand “End” appearsonthe
display.

.g!sss$
.......... AutoRoast Guide
~Usecontainersandcoveringsas directedat left. Placeprobecorrectlyin
roastbeforecooking.
@Recommendedcodesare alsoshowninsideovenon AutoRoastguide.
Final ApproximateTime Hold”
Food CodeTemperature(minutesperpound)Minutes
Beef
TenderRoast
Rare 1115° 12-14 5-1o
Medium 2125° 14-16 10
Well 3150° 16-18 10
Pork
LoinRoast 4175° 17-19 10
PrecookedHam 1115° 13-15 5-1o
Poultry
WholeChicken(3lbs.) 5180° 12-14 5-1o
TurkeyBreast 5180° 15-18 20
(Insc;probe horizontally
into meatiest area. )
. . .. .- . . 1--r--- -,..-.,:=”
*Rcc~mmended stanUlng time CX51UIcWIvIIIg-
-.
w- Ch.lide (AutoRoast~Q~4
=7-
Approx.
Bed’
Pot
Rwst 5-7 Addenoughliquidtojustcovermeat.
Ifaddingvegetablesmakesuretheyare
completely covered by liquid.
Chili 5-8 Precookmeatanddrainwell.Placeprobe
1inchfromtopsurface.Stirafter3hours,
if possible.
4-6 Add4cupsliquid.Insertprobeinto
meatiestareaofinnerthighfrombelow
endml paralleltoleg.Turnoverafter
1/2oftime.
ElrtJilci/Fry~r 3-4 Sameprocedureasabove.
——.-.—.—---’-
iiaul(11-Pork
Roast 4-6 Add4cupsliquid.
—_,-—
Sl)liiI’C:l 5-7 A(k!enoughliquidtocoverpeasatleast
‘7inchc~.stir-;lftCI-1]1OUI’S.
———.. -. ——.-——-———————
simmer
(AutoRoast ~Od~ 6)
SetAutoSimmerlikeAuto
Roastas explainedon page 10.
Displayshows“COOL” untilfood
is 80”F., then switchesto show
foodtemperatureuntil 180”F.
Oven will hold at 180°F.,untilyou
turn offthe ovenand removethe
food. If stirring is recommended,
youcan resetovenby retouching
START.TouchCLEAR/OFF after
cooking.
Totaltime includestime tobring
foodto 180”F.and hold atthat
temperature untildone.

With the AutoDefrost feature,
the ovenautomatically setsthe
defrosting times and power IeveBs
for ycm.
Usethe AutoDefrostguideon
page 13.Enterthe FoodWeightin
poundsandtenthsofapound(see
ConversionGuideat right). Then
touchSTARTpad.
Theovencalculatesdefrostingtime
andchangespowerlevelsduring
defrostingtogiveevendefrosting
results.
How’tosetAuto Defrost
Before you begin, check the guide
locatedat bottom ofovenwhen you
open the door. It showsminimum
andmaximumFoodWeightsfor a
varietyof foods.Youwillneedto
knowyour FoodWeightbefore
settingAuto Defrost.
LRemovefoodfrom package,
place in ovenon microwave-safe
dish and closedoor.
2. TbUCh AUTODEFROST pad.
3. Enterweight.Forexample,touch
NumberPads 1and2forweightof
1.2pounds(1pound, 3ounces.See
ConversionGuideatright.)
Displayshows“1.2;’“WEIGHT:’
“LBS” and “DEF~’After4seconds,
“DEF” isdisplayedand “1.2” is
replacedby “START” flashing.
4. TouchSTARTpad. Display
showsDefrostTimecountingdown.
Twiceduringdefrosting the oven
beeps4timesand “mod’fhs~=
“Turn” flashes untilyouopen the
door. attendyour food (see guide
on nextpage), close the door and
StandTime --
Whenusingthe AutoDefrost
feature,itis necessaryto allow
meattostandin ordertofinish
defrostingthe interior.Youmaytake
themeatoutoftheovenifyouwish.
Stand’timerecommendationsare
giveninthe guideonthe nextpage.
GN’mrskmGuide
If weightof foodisstatedin
poundsand ounces,the ounces
mustbe convertedtotenths(.1)
ofapound.
Ounces IPounds
1-2 .1
3.2
4-5 .3
6-7 .4
8.5
9-10 .6
11 .7
12-13 .8
14-!5 .9

.-.,
L
*
,
‘RECOMIWEmE~ MIN.-MAX.
FOODS WEIGHT xF~~STSI~NA~ SECOND SIGNAL STANDTIME
Meat
Chops 0.1-2.0 ‘llrn over,separate, Separateandturn over. 5to 10minutes
shieldwherenecessary. Shieldwherenecessary.
Frankfurters, 0.1-2.0 Turnover.Separate. Separateand remove 5to 10minutes
Sausage defrostedpieces.
GroundMeat 0.1-3.0 Removedefrosted Removedefrosted 5to 10minutes --
areas. areasandbreak apart. .—————
BeefPatties 0.1-3.0 Separate.Turnover. Separateand remove 5to 10minutes
defrostedpatties.
Roast 0.1-5.0 Turnoverand shieldif Turn overand shieldif 60 to 90 minutes
necessary. necessary.
Lamb Roast 0.1-5.0 Turn overand shieldif Turnover.Shield 60 to 90 minutes
necessary. wherenecessary. —
.— -. —
Ribs 0.1-3.0 Turn overand Turnoverandremove 5to 10minutes .-
defrostedpieces. -—
-.
separate. ..—-
.———
-&:+::---
Turn overand Turn over.Shield. 5to 10minutes ~. ~–--
Steak 0.1-2.0 =—= -.
*“-–-.:
separate. --L””
T
Turnoverand Separateand remove 5to 10minutes -–
stew 0.1-3.0 _.z ~
defrostedpieces. x
separate. -—w:-
-— .- –
=——:----
Poultry -~.-. –- --
WG;.-
WholeChicken 0.1-5.0 Turn overand shieldif Turn overand shield. 10to 15minutes; ~+:—1:- -
necessary. run cold waterin !s%%?kz:-
R“w–<?..
cavity,if necessary. WA-en—.
ti~?–—–=
...”-...L..%
0.1-5.0 Turn overand shieldif Turn overand shield. 60 to 90 minutes E.T+:—
TurkeyBreast 4---,=--=--:.:
b;+>w~––
necessary. $-?–.-
&*#@=-- --
—
Turn overand shieldif Separateand remove 5to 15minutes —
b;c=y.–-
Chicken Pieces 0.1-5.0 ‘-<:—KZ.-“
defrostedpieces. k%-.-4n-
necessary. ..
8.—*.l-
~q~--?._--
Turn overand shieldif Turn overand shield. ~~~k::
lo to 15minutes; ,: :.-.-- - ‘-
Cornish Hens 0.1-3.0
(Wllolc) run cold water in .
necessary. ‘cavity,if necessary. :‘:” -
0.1-3.0 Turn overand shieldif Turn overand shield. 5to 10minutes i-;;:;:--;-a.-
(DornishHcr\s
(split) necessary. .,.=-..!V~.,:L=..-
-
SQ:!f’ood
Fish Fillets (il-2.o Turn
over. Separate and remove 5to 10minutes
defrosted pieces. -“-3‘.=:,>-:..,
.
Separate and remove 5t. 10mi*utes
Shrimp, scallops 0.1-2.0 separate. defrosted pieces.
,.——-—
Whole Fish 0,1-2.0 Turn over. Turn overand shield 5to 10minutes;hold
tail. under co]d rurming ““,,-,:’:”:.’
water, if necessary.
-......—----------
vilucs or thin m-cmof nut will defrost more rapidly than other areas. After first or second s@aL shield warm areas
I

..-
.
by
The Time Defrost setting is
designed for speedy thawing of
frozen food and isone ofthe great
advantages of amicrowaveoven.
Use the Time Defrost setting to
quickly thaw foodssuch as bread,
rolls, vegetables,fruits and frozen
dinners. The Auto Defrost setting
ispreferred for meat and poultry
becausetheovensetsthe defrosting
time and power levelsfor you.
~Powerlevel3is automaticallyset
fordefrosting,but youmay change
thisfor more flexibility.
~Seeyour cookbookfor
defrostinghelp.
Tobecome better acquaintedwith
thedefrostfimction,defrosta1O-OZ.
packageof frozenstrawberriesby
followingthe stepsbelow.
Step 1:Place packageof frozen
strawberries inthe ovenand close
door. Be surepackagecontains
no metal.
Step 2: TOUChTIME mimosrr.
Displayshows :Oand “POWER 3:’
“ENTER DEF TIME” flashes.
f%ep4: TouchST~. “DEFTIME”
showsand timecountsdownon
display.When cycleis completed,
the ovensignalsandflashes “End~’
thenautomaticallyshutsoff.
Step 5: Turn packageover,close
door and repeat Steps2and 3to set
remaininghalf ofdefrostingtime
and touchSTART.
Step 6: When ovensignalsand
flashesEnd, open door, remove
packageand separatestrawberries
to finishdefrosting.
Tips
<*p
-.
“i,~~>
././
,
./ .
eFoodsfrozen in paper or plastic
can be defrosted in thepackage.
~Family-size,pre-packaged
frozendinners can be defrosted
and microwaved.If the foodis in a
foilcontainer, transfer it to a-
microwave-safedish.
oFor mm defrosting, some foods
nwd to bc broken up or separated
part of the waythrougb the
(idi’r(v+tins ti[llc.
.. ...... ... —.. . —
IQ.When Ipress START,1hear a
dull, thumping noise. What isit?
A. Thissoundis normal. Itis
lettingyouknowtheovenis usinga
powerlevellowerthan 10(HIGH).
Q. Can Idefrost small items in
ahurry?
A. Yes,butthey willneed more
frequentattentionthanusual. Raise
thepowerlevelafterenteringthe
timebytouchingthedesired power
levelpad. Powerlevel7cutsthe
totaldefrostingtimeaboutin 1/2;
Powerlevel10cutsthetotal
defrostingtime to approximately
1/3.During either,rotateor stir
foodfrequently.
Q. Why don’tthe defrosting
times in the cookbook seem right
for my food?
A. Cookbooktimesare averages.
Defrostingtime can vary according
tothetemperaturein yourfreezer.
Setyour ovenforthe time indicated
inyour cookbook.If your foodis
stillnotcompletelythawedatthe
end ofthattime, reset youroven
and adjustthe time accordingly.
Q. Should aUlfoods be completely
thawed before cooking?
A. Somefoodsshouldnotbe
completelythawedbeforecooking.
For example,fish cooks so quickly
it isbetter to begin cooking while it
isstill slightlyfrozen.
Q. Can 1open the door during
defrosting to cheek on the
progress of my food?
A. Yes.Youmayopen the door at
any time during microwaving.To
resume defrosting, close the door
and press START.The ovenbegins
operating if time isleft cmtimer.
If not, reset timer.
--——...

A#%?al
...-
m
-*
..>
i(
To the
Step 1:Replacethe rubberfeet.
Step 2: Fullysupportthe
microwavewith somethingsturdy.
Forexampleusetelephonebooks
orencyclopedias,stackedevenly
andcloseenoughto balancethe
weightofthe oven.
Step 3: Open yourcabinetand with
yourscrewdriver,begin to remove
thescrewsholdingthe microwave
ovenin place byturning them
countercloc~wise-
(Alternatebetween screwsso that
ovenis loosenedas evenlyas
possible.)
~Ot~s Beforefinal removal of the
screws. check to be sure that the
microwave oven is being suitably
supported to prevent it from falling
ors] iding.
,>,
—.- .——.---- ..-
—
-......
-
——..-.
—
--—- .-–
-—
.—
-– .
_–..
E?as.
II
0“

eDO~0~storeor cookWith
shelfon floor ofovem Product
damage may result.
euse potholders when handling
metal shelf and cookware.
They may be hot.
~Donot store microwave
browning dish on metal shelf.
Thewireshelfisspecifically
designedforaddedcapacityheating
andreheatinginyourmicrowave
oven.Nowmorethanonefoodmay
beheatedorreheatedandreadyto
serveatthesametime.
Whenmicrowavingwiththeoven
shelf, sometechniqueswilldiffer
fromthecookbookwhichcame
withyouroven.Itisimportantto
arrangefoodsproperly (shownon
thenextpage).Cookwaresizeis
important;selectfromamongthe
suggestionsbelow.Also, foodsize
shouldbeconsidered;foodsover
3~incheshigh, or 3pounds areriOt
recommendedforshelfcooking.
Battersanddoughfoodsandalso
uncookedfoodswhich needtobe
prepared fromscratchshouldbe
cookedwithouttheovenshelf,
fcdlowingcookbookdirections.
p’-- $
cookware forshelf
Heating andReheating
A4?if&-
.—.—.—.
the shelf ‘-
Cookwareforheatingorreheating
include1cupmeasuringcup,
8x4x3-inchloafdishes,9x5x3-inch
loafdishesor9-inchpieplates.
-
Leftoversmaybe placedinsmall
individualceramic orplasticbowls
ordividedplates.
I1
Beforeplacingfoodinthedishes,
checktoseethattheywillfittogether
onorundertheshelf.Also,besure
cookwareismicrowavesafe.
TopositiontheDOUBLE DUTY’M
shelf,tipthebackslightlyandfitthe
shelfsupportguidesontothe
supportguideslocatedoneach side
oftheovenintherear. I
n
LJSCwaxppcr or pkistic wrap
ins!ewt of lids on casscrcics. Lids
Next, lowerthe frontuntilthe shelf
supportguidesfitonto thesupport
guideslocatedateach sideofthe
oveninthefront.
Whenthe shelfisproperly
positioned,YOUshouldbeableto
readtheplastictabthatsaysFRONT
THIS SIDEUP.The shelfshouldfit
snuglyinplace, be levelandnot
touchtheback walloftheoven.
Ifareing occurs when using the
shelf to cook more ‘thanone food
at the same time9turn the oven
off. Make sure the shelf is
positioned right-side-uponall
four shelf supports and not
touching ovenwalk
!()
.- -—...—
1
I
—.——.—
..———-—..
o

.. .- HowtoHeatorReheatSimibrl’jqxs W?ood
II
TWOplates of’leftoversmaybe
reheatedtogether.Arrangethick
ordensefoodstooutsideedgesof
plateandcoverwithplasticwrap.
MicrowaveatHIGH (10)for2 to3
minutes.Reversepositionofplates
(toptobottom)androtate 1/2turn.
ContinuemicrowavingatHIGH
(10)for2 to3minutes.Continue
heating,ifnecessary,untilhot.
Reheating twocasseroles(height
shouldbelessthan3%inches)is
possible.Coverwithplasticwrap.
Usestaggeredarrangementsof
food,placingfoodonrightsideof
shelfandleftsideoffloor.Referto
HeatingorReheatingGuidein
cookbookforsuggestedmicrowave
timeper casseroleandaddthetimes
together.MicrowaveatHIGH (10)
reversingpositionoffoods(topto
bottom)afierhalfoftime.Several
smaHbowlsofkfloversmaybe
heatedinthesameway,stirring
andreversingpositionsafterhalf
oftime.
Howto several Types OfFoodsTogether
Heator reheatdifferenttypesof
foodatHIGH (10).Todetermine
heating[imes,addtimes forall
foocistogether.(Seeheatingguide
incookbook.) After halfoftime,
S(ir(wrearrange foods(donot
reversepositions). C%cckfoods
(cspcciiillythoseon ,>vcniloor)
after 3/4oflot:iltimeandrcmove
a]lywhich arc done. Continue
cookin: others.
Twofrozen individual entrees
(5to 702. each) or twoTV dinners
(Into 120z. each) arebothreadyto
serveatthesametime.Removetrays
offbodfromtheirboxesandturnback
onecomeroftheplasticcovertovent.
Iftherearefoilcovers,removethem
andreturnthetraysoffoodtotheir
boxes.(Batterfoodsshouldbe
removedfromthetraysandcooked
conventionally.)Placeinovenwith
oneTV dinneronrightshelfand the
seconddinneronleftfloor.
MicrowaveatHIGH (10)for8
minutes.Reversepositions(topto
bottom)androtatefoods1/2turn.
ContinuemicrowavingatHIGH
(10)for8minutes.Checkdinners
forheating.Ifonedinnerseemsless
donethandesired, return ittothe
boxandcontinueheatingonfloor
1to2more minutes.
miceon floor, kwgeor(klmse
foods which needthemostheating,
suchasleftoverfried chicken,
casserolesofcanned or leftover
vegetables,rice or pasta. Place on
ovenshelfthosefoodswhich need
onlybcwarmed, suchasbakery
pies, rolls, muffinsor breads.
!
....— .——-—..... ,- 0“

Yournew Mkr-owaveoven is
avaluable appliance. Protect
it from misuse by following
these rules:
@Keep your ovenclean and
sweet-smelling.Openingtheoven
doorafewminutesafter cooking
helpsair-outthe interior.An
occasionalthoroughwipingwith a
solutionofbakingsoda andwater
keepsthe interiorfresh.
@Don’t use sharp-edged utensils
on your oven. The insideand
outsideovenwallscan bescratched.
The controlpanel can bedamaged.
BE CERTAII$4IWWER IS OFF
BEFOJRECLEAIWNG ANY
PAJK!i7OI?THIS OVEN.
B
“
3Howto(%3mthe Imide
Wallsand floor. Some spatterscan
be removedwith apaper towel,
others may require adamp cloth.
Removegreasy spatters with a
sudsycloth, then rinse with adamp
cloth. Do notuse abrasive chxmers
on ovenwails. NEVER USE
ACOMMERCIAL OVEN
(’1.KiAN~~IlON ANY PARTOF
YOURMICROWAVEOVEN.
Door (inside). Window:Wipeup
spattersdailyandwashwhen soiled
withadampcloth.Rinsethoroughly
anddry.
Metalandplasticpartsondoor:
Wipefrequentlywithadamp
clothtoremovealIsoil. DO NOT
USE ABRASIVES,SUCHAS
CLEANINGPOWDERSORSTEEL
AND PLASTIC PADS.THEY
WILL MAR THE SURFACE.
Special note when using
Brown ‘NSear Dish: Ifgrease
ispresent, highheatgeneratedon
bottomof aBrown‘NSeardish
maycausethegrease tobum onto
the ovenfloor.This maybe
removedwithacleansersuch as
BonAmi@brand cleanser.
After usingBon Ami” brand
cleanser,rinse and dry thoroughly,
followinginstructionsoncan. Do
notuse BonAmi@brand cleanser
on the paintedsurfacessuchas the
walls.It mayscratch thepaint.
Automatic Temperature Probe.
Probe is sturdy,but care shouldbe
taken in handling.Do nottwist or
bend; avoiddroppingtemperature
probe.
Cleanassoonafterusingaspossible.
Toclean, wipe with sudsycloth,
thenrub 1ightlywithplasticscouring
ballif necessary.Rinseanddry. (Or
wash in dishwasher.)
DOUBLE DIY1’YT”shelf. Your
shelf accessory isdesigned foruse
in amicrowaveovenonly; do not
use inaconventionaloven. Do not
use abrowningdish with the shelf.
Arcing could occur.
CIcan shelf’with mild soap and
water or in the dishwasher.Do not
clean shelf in aoven.
~;.:
—
HowtoChm the
Case, Cleantheoutsideofyour
ovenwithsoapanddamp cloth,
rinse withdampclothandthendry.
Wipethe windowcleanwith a
dampcloth. Chrometrim isbest
wipedwith adampcloth andthen
with adry towel.
Control Pad. Wipewith adamp
cloth. Dry thoroughly.Do notuse
cleaningsprays,largeamountsof
soapand water,abrasives,or sharp
objectson thepanel—theycan
damageit.
Door Surface. Whencleaning
surfacesofdoor andoventhat
cometogetheron closingthe door,
use onlymild, nonabrasivesoaps
or detergentsappliedwith asponge
or softcloth.
Power Cord. If thecord becomes
soiled, unplugand washwith damp
cloth. For stubbornspots, sudsy
watermaybe used, but be certain
to rinse with damp cloth anddry
thorough~ybeforepluggingcord
intooutlet.
‘oven Lamp
First unplugthe oven.Then remove
lampcompartmentcoverbyremoving
screwwhich holdscover in place.
Coveris locatedon the back ofthe
outer case.
Replacewith20-wattappliancebulb.
(It isavailablein drug and hardware
stores.)Replace compartment
cover. Plug in the oven.
—. .—...-—..——.—.
.--.
.. —. ..
.

.—=~-=’=”-
~-=---w J&-. -.-i —3, rv-- ...,,-.-..-,,----- .. .1---- ..L-. ----—..!- ..—— . . . .. . . . . . . . . . . . . . . .
-=3: .>%.5. .- .-.+. -=.=. -.
j ,-..,...-,-.=-..—
Thisappliancemustbe grounded.
Intheeventofan electricalshort
circuit,groundingreducestherisk
ofelectric shockbyprovidingan
escapewire forthe electriccurrent.
Thisapplianceisequippedwith a
powercordhavingagrounding
wire withagroundingplug.The
plugmustbepluggedintoan outlet
thatisproperly installedand
grounded. (Fig. 1)
useofthegroundingplugian result
inarisk ofelectric shock.
r(
-. Consultaqualifiedelectrician or
w’ service technicianif the grounding
instructionsare not completely
understood, or ifdoubt existsas to
whether the applianceis properly
grounded.
Where astandardtwo-prongwall
nxcptaclc isencountered, it is
>WJI-personal responsibilityand
obligation(Ohaveit replaced with
itproperly groundul three-prong
W’:IIJI“cceptxk.
~){)~~[)g#Jg~gj~~”any
L’HiOrViYnovethe third
p“oilg fi-onl ihc power ‘fxMdo
use Plugs
usage whel’%’
apphmds powermrd VW
be
Becauseofpotentialsafetyhazards
undercertainconditions,we
strongly recommend against the
use of an adapter plug. However,
if youstillelect to usean adapter,
wherelocalcodespermit, a
TEMIWRARYCONNE~ION
maybemadeto aproperlygrounded
two-prongwallreceptaclebytheuse
ofa~L l~stedadapter(Fig.‘2)
whichisavailableatmostlocal
hardwarestores.
TEMPORARYMETHOD
{ADAPTERPLUGSNOT -—
1
R
101
The largerslot in theadaptermust
bealignedwith the largerslotinthe
wallreceptacle to provideproper
polarity in the connectionofthe
powercord.
CmJtion: Attachingtheadapter
ground terminal to the wall
receptaclecover screw does not
ground the appliance unlessthe
coverscrew is metal, and not
insulated, and the wall receptacle
isgrounded through the house
wiring. YOLJshould havethe circuit
checked byaqualified electrician
to malwsure the receptacle is
properly grounded.
When disconnecting the power
cord [mm the adapter+alwayshold
lhc adaptcF. with orwhm)d.If this
is n(xdone, the adapter ground
[crminai is wry liktiy to break with
K’pcwcd use .~hou]d this happen,
]>() ~.:();’ ~]~~~
,the appliance until
~~~.tltl~c][l:l:;a:a in bcei~
:Lpr(lpcr~
~~j:~[:[i~[~~d.
usage ‘where
pm’ver ‘cm’dwill
be
Donotuse an adapter pluginthese
situationsbecausedisconnectingof
thepowercord placesunduestrain
on theadapterandleadsto eventual
fiiilureoftheadaptergroundterminal.
Youshouldhavethetwo-prongwall
receptaclereplacedwith athree-
prong(grounding)receptaclebya
qualifiedelectricianbeforeusing
theappliance.
use c@r&
Becauseofpotentialsafetyhazards
undercertainconditions,westrongly
recommendagainstthe use ofan
extensioncord. However,if itis
necessaryto use an extensioncord,
useonly a3-wireextensioncord
thathas a3-bladegroundingplug,
and a3-slotreceptaclethat will
acceptthe plugon the appliance.
The marked ratingof the extension
cord shallbe equalto or greater
thanthe electrical rating ofthe
appliance(15amperes).
Suchextensioncords are obtainable
throughGeneral Electric service.
If you do use an extension ‘cord
with your mkn-owaveoven$the
interior lightmayfliclcerand the
blowersound mayvary when oven
E%m=.
— --
-.
~.
_–
,—.
m?mr
—.
is inuse. Cook times may be longer ~
as well.
.-...,. ...—-—.--.. .- ------..——.-—-—-

P’ROBLEM
0V13NlVILLN~
COMBO??
CONTROLP~~
LIGHTED, YET OVEN
WILL NOTSTART
Fcmx AREmmm
ovw?coo~~~~
wwmlumo~~
‘WKMMi”APPEARS
ONDEM’’LAY
POSSIBLE CAUSEAN~~~~~
@Afise inyourhomemaybeblownorthecircuitbreakertripped.‘R@ace‘fiM@orre@
circuitbreaker.
~Unplugyourmicrowaveoven,thenplugitbackin. I
*~&e ~ure3-prongplugonovenisfullyinsertedintoW* laeP@cIe~
eDoornot securelyclosed.
*START
mustbe touchedafterenteringcookingselection. I
eAnotherselectionenteredalreadyinovenandCL134-R/OFF
nottouchedtOcan~e~~t~
%MakesureyouhaveenteredcookingtimeaftertouchingTME CO~K~~~.
~cLEAR/OFF wastouchedaccidentally.Resetcookingprogr~andt~uch STA~.
sMakesureyouhaveenteredadesiredfinishedtemperamreaftertouchingT~M~
CoOK/HOLD.
~MakesureyouhaveenteredacodenumberaftertouctingALT~ROAST.
~cookingtimesmayvarybecauseofstartingfoodtemperamre,fooddensityoramount
offoodsinoven.TouchTIMECOOKI&IIandadditionalcookingtimeforcompletion.
~kcorrect powerlevelentered. Checkcookbookforreco~endedpower kvel~or
changinglevelsduringcookingifnecessw.
sDishwasnotrobted, turned or stirred. Somedishesrequire specificinstructions”
Checkcookbookor recipefor instructions.
~TOO manydishesinovenatsametime.Cookingtimemustbeincreasedwhencooki*g
morethanonefooditem.Checkcookbooktimerecommendations.
*ProbenotinsertedproperlyintomeatordishwhenusingTempCoWHo~dOrAuto
Roastfunctions.Check cookbookforspecificinstructions.
eProbehasbeen forgottenor notseatedproperly inovenwallwhen usingAutoRoastor
TernpCook/Hold Ii.mctions.
AAThese Things Are Norma! 0Dimmingovenlightandchange ~SomeTV-Radiointerference
with yourMicrowave Oven: inblowersoundmayoccurwhile mightbenoticedwhileusingyour
Q,Stcamor vaporescupingfrom operatingatpowerlevelsother microwaveoven.It’ssimilartothe
thanhigh. interferencecausedbyother small
aroundthedoor. QDullthumpingsoundwhileoven appliancesanddoesnotindicatea
QLightrcllcction arounddooror isol]eratin~. problemwith youroven.
(w{crcase. 1“
i
.------,
(
~\.)
+.,.-J
‘1’
I
I
,
Other GE Microwave Oven manuals