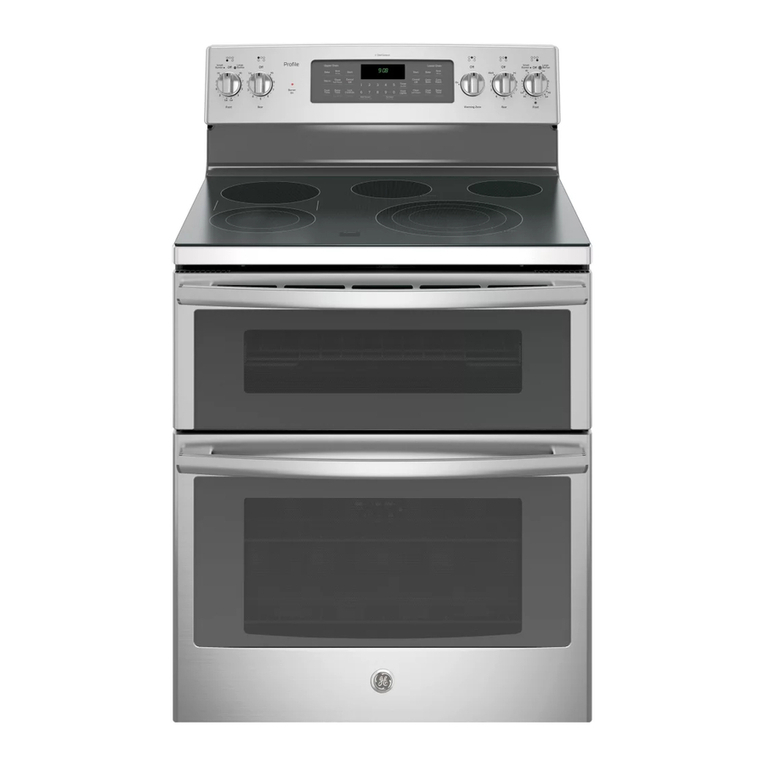
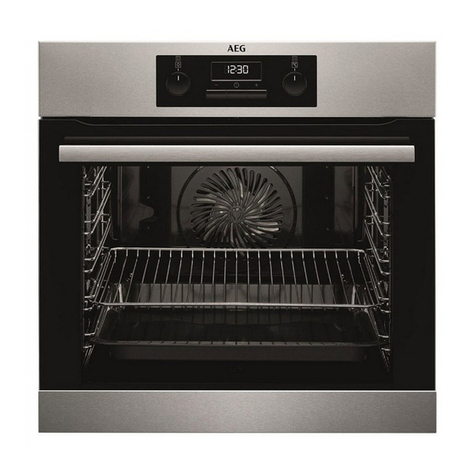
GE JGRP20 User manual

ge.com
Safety Instructions ..... 2-5
Operating Instructions, Tips
Aluminum foil ......... 14, 19
Baking feature ......... 14, 15
Broiling feature ........ 21, 22
Clock and timer ............ 8
Control features and settings , ,7
Door latch ............... 23
Ignition .................. 12
Light ........................ 12
Preheating ............... 14
Roasting feature .......... 19, 20
Self-cleaning
instructions ................ 23, 24
Shelves .................... 13
Special features of your
oven control .............. 10, !I
Timed baking ........... 16, 17
Type of margarine .......... !8
Vent ....................... 12
Care and Cleaning
Broiler pan and grid ....... 25
Burner air adjustment
shutters ................. 28
Control panel .............. 27
Door removal ............... 27
Light replacement ............ 26
Orifice hood adjustment .... 28
Oven bottom ............... 26
Oven vents ................ 25
Self-cleaning
instructions .............. 23, 24
Shelves ........................ 26
Storage drawer .............. 25
Before You Call For
Service
Thermostat adjustment--
do it yourself .............. t8
Troubleshooting tips ..... 29-31
Consumer Support
Consumer Support, .Back Cover
Product registration ...... 33, 34
Warranty ................ 35
Write themodelandserial
numbershere:
Model #,
Serial #
You can find them on a label on the
front of the oven behind the door.
JGRP20
49-80343 11-05JR

2
IMPORTANTSAFETYINFORMATION.
READALLINSTRUCTIONSBEFOREUSING.
WARNING:uthemform_on
in this manual is not followed exactly,
a fire or explosion may result causing
property damage, personal injury
or death.
m Do not store or use gasoline or other
flammable vapors and liquids in the
vicinity of this or any other appliance.
WHATTODOIF YOU
SMELLGAS
ti__Do not try to fight any appliance.
E_Do not touch any electrical switch;
do not use any phone in your building.
_ Immediately call your gas supplier
from aneighbor's phone. Follow the
gas supplier's instructions.
Fi!_If you cannot reach your gas supplier,
call the fire department.
Installation and service must be
performed by aqualified installer,
service agency or the gas supplier.

_&COm
,R,WARNING!
Foryour safeb/, the information in this manual must be followed to minimize the risk of fire or explosion,
electric shock, or to prevent property damage, personal injury or loss of life.
IMPORTANTSAFETYNOtiCE
The California Safe Drinking Water and ToxicEnforcement Act requires the Governor of California to
publish a list of substances known to the state to cause birth defects or other reproductive harm, and
requires businesses to warn customers ofpotential exposure to such substances,
Gasappfiances can cause minor exposure to four of these substances, namely benzene, carbon
monoxide, formaldehyde and soo_ caused primarily by the incomplete combustion of natural gas or
LP fuels, Properly adjusted burners, indicated by a bluish rather than a yellow flame, wilt minimize
incomplete combustion, Exposure to these substances can be minimized by venting with an open
window or using a ventilation fan or hood,
SAFETYPRECAUtiONS
Have the installer show you the location of the oven gas shut-off valve and how to shut it off if necessan/
72Have your oven installed and properly _ Be sure your oven is correctly adjusted by a
grounded by a qualified installer, in
accordance,a_th the InsinUation Insmactions,
Any adjustment and service should be
performed only by qualified gas oven
insta!lers or service technicians°
qualified service technidan or installer for
the type of gas (natural or LP) that is to be
used. Your oven can be converted for use
with either type of gas. See the Installation
Insn'uctions,
L7Do not attempt to repair or replace any
part of your oven unless it is specifically
recommended in this manual. All other
sen, ice should be referred to a qualified
technidan,.
;2 Be suure all packaging materials are removed
from the oven before operating it to prevent
fire or smoke damage should the packaging
material ignite.
K Do not touch the interior surface of the
oven. These surfaces may be hot enough
to burn even though they are dark in color°
During and after use, do not touch, or let
dothing or other flammable materials
contact any interior area of the oven;
allow sufficient time for cooling first_
Potentially hot surfaces include the oven
vent openings, surfaces near the opening
and crevices around the door.
Remember:.The inside surfaces of an oven
may be hot when the door is opened.
WARNING:Theseadjustments must
be made by a qualified service technician in
accordance with the manufacturer's
instructions and all codes and requirements
of the authority having jurisdiction. Failure
to follow these instructions could result in
serious injury or property damage. The
qualified agency performing this work
assumes responsibifity for the conversion.
Be sure the oven is securely installed in a
cabinet that is firmly attached to the house
structure. Never allow anyone to climb, sit,
stand or hang on the oven door.
Do not leave children alone or unattended
where an oven is hot or in operation. They
could be seriously burned.
Do not allow anyone to climb, stand or
hang on the oven door or storage drawer.
They could damage the oven.
3

IMPORTANTSAFETYINFORMATION.
READALLINSTRUCTIONSBEFOREUSING.
SAFETYPRECAUTIONS
CAUTION:i_msofinterestto
children should not be stored in cabinets
above an oven--children climbing on the
oven to reach items could be seriously
injured.
._,WARNING:NEVERuse
appliance as a space heater to heat or
warm the room. Doing so may result
in carbon monoxide poisoning and
overheating of the oven.
For ),our safety, never use your appliance
for warming or heating the room.
E Never wear loose fitting or hanging
garments while using the appliance. Be
carebal when reaching for items stored in
cabinets over the oven. Flammable material
could be ignited if brought in contact with
flame or hot oven surfaces mad may cause
severe burns.
Do not store flarmnable materials in the
oven or storage drawee
Do not store or use combustible materials,
gasoline or other flammable vapors and
fiquids in the vicinity of this or any other
appliance.
K Do not let cooking grease or other flammable
materials accumulate in or near the oven.
Do not use water on grease fires, Smother
fire or flame or use a multi-purpose dry
chemical or foam-type fire extinguisher.
Flame in the oven can be smothered
completely by closing the oven door and
turning the oven offor by using a multi-
pro'pose dry chemical or foam-type fire
extinguisher,
12Use only dry pot holders--moist or damp
pot holders on hot surfaces may result in
bums from steam. Do not let pot holders
come near open flames when lifting
cookware_ Do not use a towel or other
bulky cloth. Such cloths can catch fire on
a hot burner.
[_Always keep dish towels, dish cloths, pot
holders and other linens a safe distance
from ),our oven.
Always keep wooden and plastic utensils
and canned food a safe distance away from
your oven°
Do not leave paper products, cooking
utensils or food in the oven when not in use.
COOKMEATANDPOULTRYTHOROUGHLY...
Cookmeat andpoultry thoroughly--meat toat least an INTERNALtemperatureof 160°Fandpoultry toat least an
INTERNALtemperatureof 180°ECookingto thesetemperaturesusuallyprotects against foodbomeillness
4

ge,com
OVEN
Stand away from the oven when opening the door of a hot oven. Thehot air and steam that escape can
cause bums to hands, face and eyes.
[.7_Do not use the oven for a storage arem
Items stored in the oven can ignite.
_5Keep the oven vent ducts unobstructed,
[2 Keep the oven free from grease buildup..
_'.Place the oven shelves in the desired
position while the oven is cool.
[Z Pulling out the shelf to the stop-lock is a
convenience in lifting heavy foods. It is also
a precaution against burns from touching
hot surfaces of the door or oven _Is.
,_YYDo not heat unopened food containers
Pressure could build up and the container
could burst, causing an injury.
[2 Never use alunainum foil to line the oven
bottom. Improper use of foil could start
afire.
AWARNING:Na'ERcover
any slots, holes or passages in the oven
bottom or cover an entire rack with
materials such as aluminum foil. Doing
so blocks air flow through the oven and
may cause carbon monox4de poisoning.
Aluminum foil linings may also trap
heat, causing a fire hazard°
12_Do not use aluminum foil anywhere in the
oven except as described in this manual.
Misuse could result in a fire hazard or
damage to the oven.
When using cooking or roasting bags in the
oven, follow the manufacturer's directions,
I:ZDo not use your oven to dry neuspapers.
If overheated, they can catch fire°
Use only glass cookware that is
recommended for use in gas ovens.
OVEN
Always remove the broiler pan from oven as
soon asyou finish broiling° Grease left in the
pan can catch fire if oven is used without
removing the grease from the broiler pan°
F2When broiling, if meat is too close to the
flame, the fat may ignite_ Trim excess fat
to prevent excessive flare-ups_
_2_Make sure the broiler pan is in place
correctly to reduce the possibility of
grease fires.
[z If you should have a grease fire in the broiler
pan, turn the oven off, and keep the oven
door dosed to contain fire until it burns out.
i_i_Never leave jars or cans of fat drippings in or
near your oven.
5

IMPORTANTSAFETYINFORMATION.
READALLINSTRUCTIONSBEFOREUSING.
SELF-CLEANINGOVEN
E Be sure to wipe up excess spillage before
self-cleaning operation,,
Before self-cleaning the oven, remove the
shelves, broiler pan, grid and other
cookavareo
[2 Do not dean the door gaskeL The door
gasket is essential for a good seal. Care
should be taken not to rob, damage or
move the gasket..
Clean only parts listed in fllis Owner's
Manual.
If the self-cleaning mode malfunctions,
turn the oven offand disconnect the power
supply. Have it serviced by a qualified
technician.
E_Do not use oven cleaners° No commercial
oven cleaner or oven liner of any kind
should be used in or around any part of
the oven,, Residue from oven cleaners _
damage the inside of the oven when the
seK-clean cycle is used.
READANDFOLLOWTHISSAFETYINFORMATIONCAREFULLY,
SAVETHESEINSTRUCTIONS

Usingthe ovencontrols.
OV IN CONTR _LS
geocom
OvenControl,Clockand TimerFeaturesandSettings
BAKEPOd
Touda this pad to select the bake function,
BAKE Light
Flashes while in edit mode--you can change
the oven temperature at this point, Glows
when the oven is in bake mode°
BROIL HI/LO Pad
Touch this pad to select the broil fimction,,
BROIL Light
Flashes while in edit mode--you can switch
from Hi to tO BROILat this point. Glo_ when
the oven isin broil mode.
Oisptav
Shou_ the operations you have selected,
the time of day and the cookdng status°
OCOOKINGTIME Pad
Touch this pad and then touch the +or -
pad to set the amount of time you want
your food to cook. The oven M!I shut off
when the cooldng time has run out,
ODELAYSTARTPad
Use along with the COOKINGTIMEor
SELFCLEANpad to set the oven to start and
stop automatically at a dine you set,
OOVENLIGHTON/OFFPad
Touch this pad to mrn the oven light on
or off_
OTIMER/CLOCKPad
Touch this pad to select the timer feature.
Then touch +and -pads to adjust fime_
To set the dock, touch this pad twice and
hold 3 seconds and then touch the ÷ and -
pads, The time of dayMll flash in the
display when the oven is first mined on,
STARTPOd
Must be touched to start any cooking
function.
-Pad
Short taps to this pad will decrease the dme
or temperature by small amounts Touch
and hold the pad to decrease the dme or
temperature by larger amounts,
+ Pad
Short taps to this pad will increase the time
or temperature by small amounts, Touch
and hold the pad to increase the time or
temperature by larger amounts.
CLEAR/OFFPad
Touch this pad to cancel All oven
operations except the clock and dmer.
SELFCLEANPOd
Touch this pad to select the self_eaning
function, Seethe Usingtheself-cleaning
ovensection.
CLEANLight
Hashes while in edit mode--you can change
the length of time for the serf-clean cycle at
tl_spoint Glows when the oven is in the self-
clean cycle°After the self-clean cycle, the light
will turn off. Unlatch the door.
If "f- enda numberorletter"flashin thedisplayandthe
avoncontrolsignals,thisindicatesa functionerrorcode
TouchtheCLEA_OFFpad Allow theoventocoolforone
hour.Puttheovenbackintooperation.
If functionerrorcodarepeats,discannectpowertotheoven
andcalfforservice

.==
Usingthe clock and timer.
Not all features are on all models°
:ii iI
Make sure the clack is set to the
correct time of day.
To Set the Clock
The dock must be set to the correct time
of clayfor the automatic oven timing
functions to work properly The time of
day cannot be changed during a delayed
cooking or a delayed seN-cleaning cycle,
[] Touch the TIMER/CLOCKpad twice,
[] Touch the +or-pad,
If the +or - pad is not touched
Mthin one minute after you touch the
TIMER/CLOCKpad, the display reverts to
the original setting, If this happens, touch
the TIMER/CLOCKpad twice and reentel
the time of day,
[] Touch the STARTpad until the time
of day sho_ in the display This
enters the time and starts the dock,
Tocheckthetimeofdaywhenthedisplayis
showingotherinformation,simplytouchthe
CLOCKpad Thetimeofdayshowsuntifanother
padistouched
To Turn Off the Clock Display
Kyou have several docks in your kitchen,
you may _sh to mrn off the time of day
clock display on your oven.
[] Touch the TIMER/CLOCKpadonce
to turn off the time of day display.
Although you will not be able to see
it, the clock maintains the correct
time of day
[] Touch the TIMER/CLOCKpadtwice to
recall the dock display,
tr_L_T01
The timer is aminute timer only,
The CLEAR/BFFpad does notaffect
the timer,
To Set the timer
Thetimerdoesnotcontrolovenoperations
Themaximumsettingonthetimeris9 hours
and59minutes
[] Touch the TIMER/CLOCKpad.
[] Touch the +or - pad until the
amount of time you u_nt shows in
the display The maximum time that
can be entered in minutes is 59,
Times more than 59 minutes should
be changed to hours and minutes.
tfyeumakeamistake,touchtheTIMER/CLOCK
padandbeginagain
[] Touch the STARTpad, The time
MII start counting down, although
the display does not change until
one minute has passed,
[] V_en the timer reaches :00, the
control _ll beep 3 times followed by
one beep every 6 seconds until the
TIMER/CLOCKpad is touched
To Reset the timer
If the display is still sho_ng the time
remaining, you may change it by touching
the TIMER/CLOCKpad, then touching the
+or -pad unt!l the time you _mat
appears in the display,,
If the iemaining time isnot in the display
(clock, start time or cooking time are in
the display), recall the remaining time by
touching the TIMER/CLOCKpadand then
touching the +or - pad to enter the new
time you want,
ToCancel the Timer
Touch the TIMER/CLOCK
pad twice,

Power Failure
Ifa flashing time of day is in the d_lay,
you have experienced a power failure, Reset
the clock.
To reset the dock, touch the TIMER/CLOCK
pad and hold S seconds, Enter the correct
time of day by touching the ÷or - pad,
Touch the STARTpad,
ge,gom
Thecontrolhas aseries oftones that wilt soundatdifferenttimes,Thesetones maysoundwhile
youset thecontrolfor anovenfunction or atthe endof theovenfunction, Theywill alsoalert you
whenan incorrect time or temperaturehasbeen enteredor if thereis aproblemwith theoven,
TonesWhile Setting the Control
V_q_enyou touch atouch pad you will hear
abeep, This beep will let you know you
have placed enough pressure on the pad
to activate it_
Attention Tone
Preheat Notification Tone
When you set an oven temperature the
oven automatically starts to heat _rhen the
temperature inside the oven reaches your
set temperature a tone _h_llsound to let you
know to place the food in the oven,
This tone _11 sound ffyou set an inwAid
fi.mction or try to set an additional figtction,,
The tone can be quickly identified by
watching the display messages_
9

Special featuresofyourovencontrol
Yournew touch pad control has additional features that you may choose to use, Thefollowing are the features and
how you may activate them.
The special feature modes can only be activated while the display is showing the time of day clock. They remain in
the control's memory until the steps are repeated,
When the display shows your choice, touch the STARTpad. Thespecial features will remain in memory after
a power failure,
Tonesat the End of a Timed Cycle
At theendof a timed cycle,3 short beeps
willsoundfollowed byone beepevery
6 seconds,until theCLEAR/OFFpadis touched.
Thiscontinuous6-secondbeep maybe
canceled.
To cancel the _second beep:
[] Touch the BAKEand BROIL,H!/LOpads
at the same time for 2 seconds until
the display shows $F,
[] Touch the BBOILHI/LOpad The
display show_ CONBEEP(continuous
beep)_ Touch the BROILH//LOpad
again, The display shox_ BEEP,(This
cancels the one beep every 6 seconds )
[] Touch the STARTpad,
12-HourShut-Off
Withthisfeature,shouldyouforgetandleavethe
ovenon,thecontrolwillautomaticallyturnoffthe
ovenafter 12hoursduringbakingfunctionsorafter
3hoursduringa broilfunction
Kyou wish to mm OFFthis feature, follow
the steps belo_;
[] Touch the BAKE and BROILH!/LO pads
at the same time for 2 seconds until
the display shows SE
[]
[]
Touch the DELAYSTABTpad,The
display ,_lI show 12shdn(12 hour
shut-off)o Touch the DELAYSTARTpad
again and the display will show no
shdn (no shut-off),
Touch the STARTpad to activate the
no shut-off and leave the control set in
this special features mode_
Cook and Hold
Yournewcontrolhasa cookandholdfeaturethat
keepscookedfoodswarmforupto3hoursafter
thecookingfunctionisfinished
To activate this feature, follow the steps
belo_
[] Touch the BAKE and BROILHIV!.Opads
at the same time for 2 seconds until
the display sho_ SE
[] Touch the COOKINGT/MEpad. The
display will show Hid OFF.
[]
Touch the COOKINGtiME pad again
to activate the feature. The display _A1
show HidON.
Touch the STARTpad to activate the
cook and hold feature and leave the
control set in this special feaULres
rlelod e,
10

ge,com
@
12-Hour, 24-Hour or Clock Black-Out
Yourcontrolis.settousea 12-hourctock_
If you would prefer to have a 24-hour
military time clock or black-out flue dock
display, follow the steps below.
[] Touch the BAKEand BROILHI/LO
pads at the same time for 2seconds
until the display shou_ SE
[] Touch the tiMER/CLOCKpad once
The display will show 12hr.
Touch the TIMER/CLOCKpad again to
change to the 24-hour military time
clock. The display x_lI show 24 hr_
Touch the TIMER/CLOCKpad again to
black-out the clock display. The display
x_l show OFF,
[] Touch the STARTpad to activate your
choice and leave the control set in this
special features mode
NOTE."Iftheclockisin theblack-outmodeyouwill
notbeabletousetheDelayStartfunction
_i i_i _ • •
:i
Control Lockout
Yourcontrolwillallowyoutolockoutthetouch
padssotheycannotbeactivatedwhentouched
To lock the controls:
[] Touch the BAKEand BROILHI/LOpads
at the same time for 2 seconds until
the display shows SF.
[] Touch the SELFCLEANpad. The
display will show LOCOFF.
Touch the SELFCLEANpad again.
The display will show LOC
[] Touch the STARTpad to activate the
control lockout feature and leave
the control set in this special
features mode.
When this feature is on and the touch
pads are touched the control will beep
and the display will show LOC,
NOTE:Thecontrollockoutmodewillnotaffectthe
clock,timerandovenlighttouchpads
Fahrenheit or Centigrade Temperature Selection
YourovencontrolissettousetheFahrenheit
temperatureselectionsbutyoumaychangethis
tousetheCentigradeselections
[] Touch the BAKEand BROILHI/LOpads
at the same time for 2 seconds until
the display shows SF,
[] Touch the BROILHI/LOand COOKING
TIMEpads at the same time for 2
[]
seconds, The display _afillshow F
(Fahrenheit),
Touch the BROILH_LOand COOKING
TIMEpads again at the same time for
2 seconds. The display will show C
(Centigrade).
[] Touch the STARTpad
Changing the Speed of the ÷/- Pads
Asyouusethe+/- padswhensettinga timeor
temperature,youmaynoticethedisplaychanges
slowlyThisspecialfeatureallowsyoutochange
thespeed
To set the speed you prefer, follow the
steps below.
[] Touch the BAKEand BROILHI/LOpads
at the same time for 2 seconds until
the display shows SF,
[] Touch the +pad. The display _l
show you a set speed between I and 5.
[] Touch the +pad to increase the speed
up to the number 5.r
[]
Touch the -pad to decrease the
speed dough to the number l
Touch the STARTpad to actuate the
setting and leave the control set in this
special features mode
II

m
€}
Usingtheoven.
Before you begin.°.
[]
[]
Look, at the controls, Be sure you
understand how to set them properly.
Check the oven interior° Look at
the shelves, Take a practice nm at
removing and replacing them
properly to give sure, sturdy support-
[] Read over the information and tips
that follow,
[] Keep this guide handy so you can
refer to it, especially during the first
weeks of using your new oven
NOTES;
F£Youmay notice a "burning" or "oily"smell
the first few timesyouturnyour ovenon,
Thisis normalin a newovenand will
disappearin a shortb'me.Tospeedthe
process,set a Self-Cleancycle for4 hours.
Seethe UsingtheSelf-CleaningOven
section,
A coolingfan mayautomaticallyturnon
and off tocool intemalparts,,Thisisnormal,
and thefanmay continueto run evenafter
theovenis turnedoff.
Automatic Ignition
Theovenbumerislit byelectricignition,
To light the burner, do the following:
[] Touch the pad for the desired
fimction, Then touch the +or-
pad until the desired temperature is
displayed,, The burner should ignite
_dthin 60 seconds,
After the oven reaches the selected
temperature, the oven burner cycles off
completely; then on _,th a full flame to
keep die oven temperature controlled.
_/ii+_¸:: __/i_i<_i _i!i:_i_!_!IQII¸¸
::_!i!_i_:i_!i_:_ii_i_:i:,_ii_i__:_i:iii_!!ii;i__ :i_ii:_!_!iii
Oven Vent
_rhen the oven is on, heated air moves
through a vent behind the griIte,
The vent area could get hot during
oven llse ,,
The vent is needed for proper air flow in
the oven and good baking results. Do not
block this vent Doing so may cause oven
failure or fire.
Power Outage
The oven burner _ll not light in the event
of an elecu'icaJ power outage,
CAUTION:Donot attemptto lightit manually
with a match
! i:i!•:: ¸¸ /•: • : -!i:: ::
(-_E_iOvenLight
LIGHT Touch the OVENLIGHTpadto turn the Light
:on or off.
12

g_com
Oven Shelves
Theshelvesare designedwith stop-locks
sothat,whenplacedcorrectly on thesheff
supports,they willstop before coming
completelyout ofthe ovenand will nottilt
whenyouare removingfoodfrom them or
placingfoodonthem,
V_nnenplacing cook_'are on a shelf, pull the
sheK out to the bump on the sheK support
Place the cookx_nareon the shelf, then slide
the shelf back into the oven. This will
eliminate reaching into the hot oven.
Toremove a shelf from the oven, pull the
shelf tox_.rd you, flit the front end upward
and pull the shelf out
Toreplace,place the sbeK on the shelf
support with the stop-locks (curved
extension of the shelf) facing up and
to_<ard the rear of the oven. Tilt up the
front and push the shelf tox<ard the back
of the oven until it goes past the bump on
the shelf support. Then lower the front of
the shelf and push it all the _y back.
let
Sheff Positions
The oven has 4 shelf supports, identified
in this illustration as A (bottom), B, C and
D (top),
Shelf positions for cookhag m"esuggested in
the Baking, Roasting and Broiling sections.
Oven Moisture
As your oven heats up, the changing
temperature of the air in the oven may
cause water droplets to fbrm on the door
glass. Thencedroplets are harmless and _I1
evaporate as the oven continues to heat upo
13

Usingthebaking feature.
Youroven temperature is controlled very accurately using anoven contro! system, It is recommended that you
operate the oven for a number of weeks using the time given on recipes as a guide to become familiar with your
new oven's performance.
If you think an adjustment is necessary, see the Adjust the Oven Thermostat secdon, It lists easy Do It Yourseff
instructions on how to adjust the thermostat
@
How to Set Your Oven for Baking
Toavoidpossibleburns,place theshelvesin the
correctpositionbeforeyoutum theovenon.
[] Touch the BAKEpad,
[] Touch the +or -pad to set the oven
temperature°
[] Touch the SYARTpad,
When the oven starts to heat, the
changing temperature Mll be in the
display,. (The display starts changing
once the temperature reaches 100°E)
Tochangetheoventemperatureduring the
Bakecycle, touchthe BAKEpad andset the
new temperature,
[] Touch the CLBIR/OH:pad when the
b_ing is finished,
NOTE."A coolingfan mayautomaticallyturnon
andoff tocoolintematparte Thieisnormal,
andthe fanmay continuetorun evenafter the
ovenisturnedoff_
[]
[]
Oven Shelves
Arrange the oven shelf or shelves in the
desired locations while the oven is cool,
The correct shelf position depends on the
"kind of food and the browning desired,
As a general nile, place most foods in the
middle of the oven, on either sheKposidon
Bor CSee the chart for suggested shag
positions,
Typeof Food Shelf Position
Angelfoodcake A
Frozenpies(oncookiesheet) A
Bundterpoundcakes AorB
Roasting AorB
Biscuits.muffins,brownies, BorC
cookies,cupcakes,
layercakes,pies,pieshells
Casseroles 8orC
Preheating
Preheat the oven if the redpe calls for it.
Preheat means bringing the oven up to the
specified temperature before putting the
food in the oven. To preheat, set the oven
at the correct temperature--selecting a
higher temperature does not shorten
preheat time.
Preheating is necessary for good rest_ts
when baking cakes, cookies, pastry and
breads. For most casseroles and roasts,
preheating is not necessary. For ovens
without a preheat indicator light or tone,
preheat 10 minutes. After the oven is
preheated, place the food in the oven
as quickly as possible to prevent heat
from escaping.
14
Aluminum Foil
Never entirely cover a shelf with aluminum
foil This MI1disturb the heat circulation
and result in poor baking A smaller sheet
: of foil may be used to catch a spitlover by
placing it on a lower shelf several inches
::: below the food,

g_¢OM
Baking Pans
Use the proper baking pan_ The type of
finish on the pan determines the amount
of browning that will occur.
Dark, rough or dull pans absorb heat
resulting in a browner, crisper crust
Use this type for pies,
_ Shiny bright and smooth pans reflect
heat, resulting in a fighter, more delicate
browning. Cakes and cookies require this
tj[pe of pan,
[i_;Glass b"akingdishes also absorb heat.
_A_en baking in glass baking dishes, the
temperature may need to be reduced
by25°
i;_If you axe using dark non-stick pans,
you may find that you need to reduce
the oven temperatore 25_F to prevent
over-bro_qling
Pan Placement
For even cooking and proper brov,_ng,
there must be enough room for air
circulation in the oven. Baking results will
be better if baking pans are centered as
much as possible rather than being placed
to the front or to the back of the oven.
Pans should not touch each other or the
w_lis of the oven. Allow 1- to 1_inch space
between pans as well as from the back of
the oven, the door and the sides If you
need to use two shelves, stagger the pans so
one is not directly above the other.
)i ¸¸¸¸i i TII211
Cookies
When baking cookies, flat cookie sheets
(without sides) produce better-looking
cookies. Cookies balCed in ajelly roll pan
(short sides all around) may have darker
edges and pale or light brox_naing
may occur.
Do not use a cookie sheet so large that it
touches the walls or the door of the oven
Never entirely cover a shelf with a large
cookie sheet
For best results during baking, use only
one cookie sheet in the oven at a time.
Pies
For best results, bake pies in daxk., rough
or dull pans to produce a browner, crisper
crust Frozen pies in foil pans should be
placed on an aluminum cookie sheet for
baking since the shiny foil pan reflects
heat away from the pie crust; the cookie
sheet helps retain it.
Cakes
When baking cakes, _ped or bent pans
x_411cause uneven baking results and poorly
shaped products. A cake baked in a pan
larger than the recipe recommends _11
usually be crisper, thinner and drier than it
should be. If baked in a pan smaller than
recommended, it may be undercooked
and batter may overflow Check the recipe
to make sure the pan size used is the one
recommended.
Peeking
Set the timer for the estimated cooking
time and do not open the door to look at
your food., Most recipes provide minimum
and maximum baking times such as "bake
3040 minutes."
DONOTopen the door to check until the
minimum time. Opening the oven door
frequently during cooking allows heat to
escape and makes baking times longer.
Your baldng results may also be affected.
75

Usingthetimedbaking feature.
,................ ii i i ii :::::::::::::::::::::::::::::::
i i ::: i :: :: i•i 7:_; •
How to Set YourOven for Time Bake
Theovencontrolallows youtoturntheovenon
or off automaticallyatspecific timesthatyou
set Examplesof ImmediateStart(oventurns on
now andyouset it to tom offautomadcallyat
theendof cookingtime)andOelayStart and
Stop(setlingthe ovento turnonautomatically
ata later timeand turnoff aftera preset
cookingtime)will be described.
NOTE:Before beginning,makesurethe clock
shows thecorrect timeof day.
To set the dock, do the following:
[] Touch the TIMER/CLOCKpad.
[] Touch the +or-pad
to set the time of day,
NOTE:An attentiontonewill soundif you
are using 77reedBakingand do nottouch
theSTARTpad after enteringthe baking
temperature
[] Touch the STAIITpad
G
@
How to Set Immediate Start and Automatic Stop
CAUTION:Toavoidpessiblebums,placethe
shelvesinthe correctpositionbeforeyouturn
theovenon.
The oven MI1 mrn on immediately and
cook for a selected length of time At the
end of cooklng time, the oven _411turn off
automatically.
[] Touch the BAKEpad.
[] Touch the +or - pad to set the oven
temperature°
[] Touch the COOKINGT/MEpad.
NOTE:Ifyourrecipe requirespreheating,you
mayneed toadd additionaltimeto thelength
of thecooking time.
[] Touch the +or -pad to set the baking
time,
NOTES:
ETheIowtomperature zoneof this oven
(between 170°Fand200°F)is availableto
keephotcooked foodswarm.Foodkept in
theovenlonger thantwo hours atthese low
temperaturesmayspoil.
Foodsthatspoileasily,such asmilk,eggs,
fish,stuffings,poultryandpork, shouldnot
be allowedtosit for morethanonehour
beforeor after cooking.Roomtemperature
promotesthegrowth ofharmful bacteria.Be
suretheovenlightisoff becauseheatfrom
the bulbwill speedharmful bacteriagrowth
%
The oven temperature and the
cooking time that you entered will
be displayed.
Touch the STARTpad The display
shows the oven temperature that you
set and the cooking time countdo_s_a,
(The display starts changing once the
the temperature reaches 100°E)
The oven u_,iIcontinue to cook for the
prograrrmaed mount oftime, then
shut off automatically
[_ Touch the C!.E4B/OFfpad to clear the
end of cycle tone if necessary,.
16

@
ge,Bom
How to Set Delay Start and Automatic Stop
CAUTION:Toavoidpossibleburns,placethe
shelvesin thecorrectpositionbeforeyouturn
theovenon
You can set the control to delay the start of
coo "tdng, cook for a specific length of _ne
and then turn off automatically.
[] Touch the BAKEpad,
[] Touch the +or - pad to set the oven
temperature,
[] Touch the COOKINGTIMEpad
NOTE.:If yourrecipe requirespreheating,you
mayneedto addadditionaltimeto thelength
ofthe cookingtime
NOTES:
'E,Thelow temperaturezoneof this oven
(between 170°Fand 2OO°F)is availableto
keephot cookedfoodswarm,.Foodkept in
theovenlongerthantwo hoursattheselow
temperaturesmayspoil
Foodsthat spoil easily,such asmilk,eggs,
fish,stuffings,poultryandpork, shouldnot
beallowedto sit for morethanone hour
beforeor after cooking Roomtemperature
promotesthegrowth ofharmfulbacteria,Be
suretheovenlightis off becauseheatfrom
thebulb willspeedharmful bacteriagrowth,
[] Touch. the +or -pad to set the baking
lame,
[]
[]
Touch the DELAYSTARTpad,
Touch the +or -pad to set the time of
day you _nant the oven to turn on and
start cooldng
[_ Touch the STARTpad
If you would like to check the times
you have set, touch the DELAYSTART
pad to check the start time you have
set or touch the COOKINGTiMEpad to
check the length of cooking time you
have set,
When the oven ttzms on at the time
of dayyou have set, the display will
show the changing temperature
(starting at 100°F) and the cooking
drne countdown,
At the end of cooking time the oven
tam offand the end of cycle tone
_ sound.
[] Touch the CLEAtVOFFpadto clear the
end of cycle tone if necessm3_
17

Adjustthe oventhermostat--Do it yourself!
i i i i i i
Youmay find that your new oven cooks differently than the one it replaced° Use your new oven for a few weeks to
become more familiar with iL If you still think your new oven is too hot or too cold, you can adjust the thermostat yourself.
Do not use thermometers, such as those found in grocery stores, to check the temperature setting of your oven°
These thermometers may vary 20-40 degrees,
NOTE: This adjustment will not affect the broiling or self-cleaning temperatures Theadjustment will be retained in
memory after a power failure.
@
ToAdjust the Thermostat
[] Touch the BAKEand BROILH_rLOpads
at the same time for 2 seconds until
the display sho_ SF.
[] Touch the BAKEpad, A two-di_t
number sho_ in the display,
[] The oven temperature can be adjusted
up as much as 35°F or down as much
as 35°E Touch the +pad to increase
the temperature in 1-degree
increments, Touch the -pad to
decrease the temperature in
t-degree increments,
[] When you have made the adjustment,
touch the STARTpadto go ba& to the
time of day display. Use your oven as
you would normally_
Thetypeof margarine will affect bakingperformance! i i iiiiiiiiiiiiiiii uii i
Most recipes for baking have been developed using high4at products such as butter or margarine (80% fat)_If you
decrease the fa_ the recipe may not give the same results as with a higher fat product
Recipe failure can result ff cakes, pies, pastries; cookies or candies are made with low-fat spreads, Thelower the fat
content of a spread produc_ the more noticeable these differences become_
Federal standards require products labeled "margarine" to contain at least 80% fat by weight, Low fat spreads, on the
other hand, contain less fat and more water. The high moisture content of these spreads affects the texture and flavor
of baked goods For best results with your old favorite recipes, use margarine, butter or stick spreads containing at least
70% vegetable oil.
18

Usingthemastingfeature, genera
i
Roasting is cooking by dry heal Tender meat or poultry can be roasted uncovered in your oven. Roasting temperatures,
which should be low and steady, keep spattering to a minimum,
Before You Begin Roasting°,°
Roasdng is really a baldng procedure used
for meats. Therefore, the oven controls are
set for Baking or Timed Baldng, (You may
hear a slight clicking sound, indicating the
oven is working properly) Timed Baking
_ turn the oven on and off automatically.
Most meats continue to cook slightly after
being removed from the oven The internal
temperature ,_I1 rise about 5° to t0°F
during the recommended standing 0xne of
10 to 20 minutes. This allows roasts to firm
up and makes them easier to carve,
To compensate for this rise in temperature,
you may _ant to remove the roast sooner
(at 5° to 10°F less than the temperature in
the Roasting Glfide).
REMEMBER:Foodwilt continueto cook in
thehot ovenand therefore shouldbe removed
whenthe desiredinternal temperaturehas
beenreached
G
@
How to Set Your Oven for Roasting
[] Place the shelf in Aor Bposition..
No preheating is necessm_.
[] Check the weight of the meat, Place
the meat fat side up, or poultry breast
side up, on roasting grid in a shallow
pan The melting fat _a_llbaste the
meat.. Select a pan as dose to the size
of the meat as possible, (The broiler
pan with grid is a good pan for this )
[] Touch the BAKEpad,
Tochangetheoventemperatureduring the
masting cycle,touch theBAKEpad and set
thenew temperature
[] Touch the +or -pad toset the
oven temperature.
[] Touch the STARTpad.
[] Touch the CLEAR/OFFpadwhen
roasting is finished.
,il ¸¸¸:!: Aluminum Foil
You can use aluminum foil to line the
broiler pan. This makes clean-up easier
when using the pan for marinating,
cooking with fiafits, cooking heavily cured
meats or basting food during cooldng
Press the foil tightly around the inside of
the pan.
19

Usingthemastingfeature.
2O
Questions and Answers
Q. Is it necessary to check for doneness
with a meat thermometer?
A, Checking the finished internal
temperature at the completion of
cooking time is recommended,
Temperatures are shown in the
Roasting Guide, For roasts over 8 lbs,,
check vrith thermometer at half-hour
intervals after half the cooking time
has passed,
Q. Why is my roast crumbling when I try
to carve iL_
A. Roasts are easier to slice if allowed to
cool 10 to 20 minutes after removing
them from the oven. Be sure to cut
across the grain of the meat.
Q. Do I need to preheat my oven each
time I cook a roast or poultry,?
A, It is not necessary to preheat ),our
oven,
Q. When buying a roast, are there any
special tips that would help me cook
it more evenly?
A. Yes Buy aroast as even in thickness as
possible, or buy rolled rnasts_
Q. can I seal the sides of my foil "tent"
when roasting a turkey?
A, Sealing the foil will steam the meal
Leaving it unsealed allows the air to
circulate and brown the meat
Other manuals for JGRP20
7
Table of contents
Other GE Oven manuals
Popular Oven manuals by other brands

Hotpoint Ariston
Hotpoint Ariston FZ 101 P.1/HA operating instructions

Svan
Svan SKMW4600X user manual

Optimum
Optimum PK-2222 operating instructions

Hotpoint Ariston
Hotpoint Ariston FK 89 EL P.20 X operating instructions

Infiniton
Infiniton HORNO 40ACW0 manual

NEFF
NEFF B1GCC0AN.B User manual and installation instructions