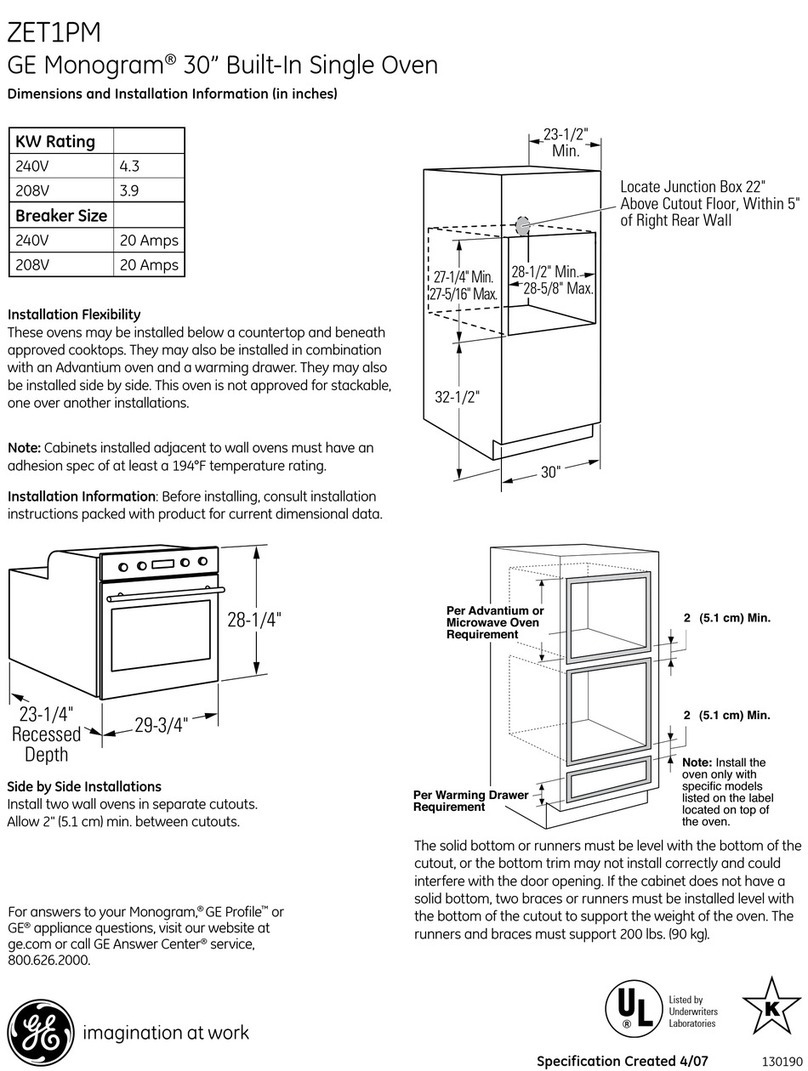
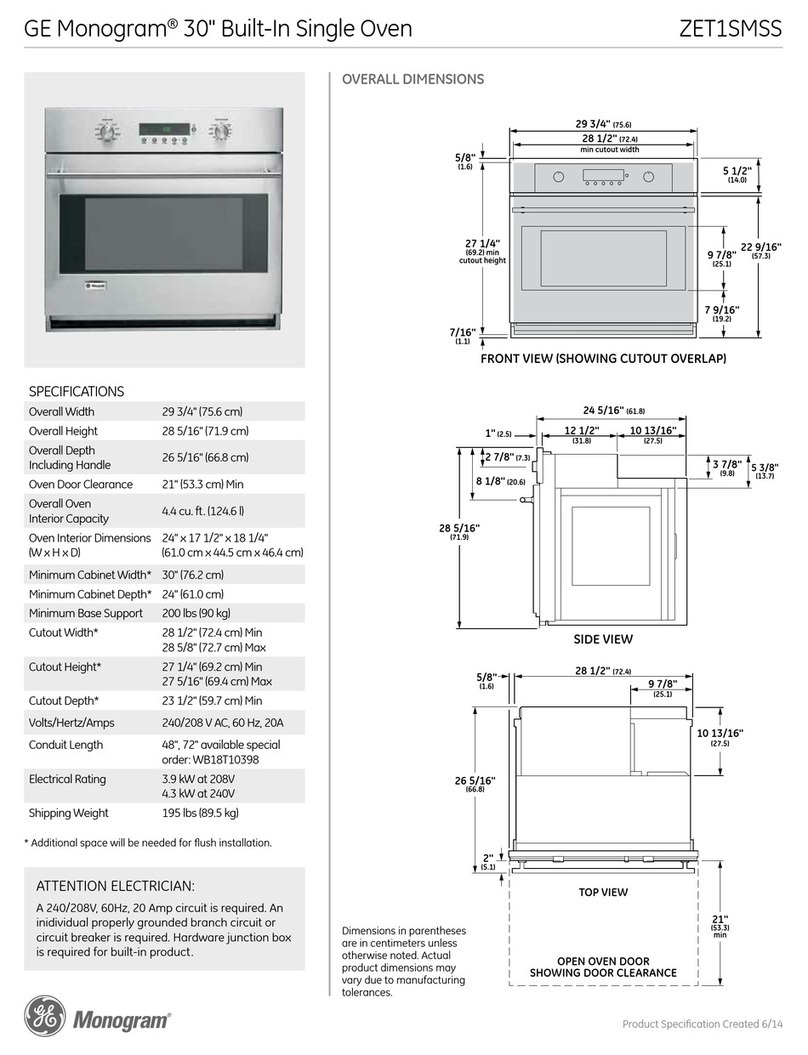
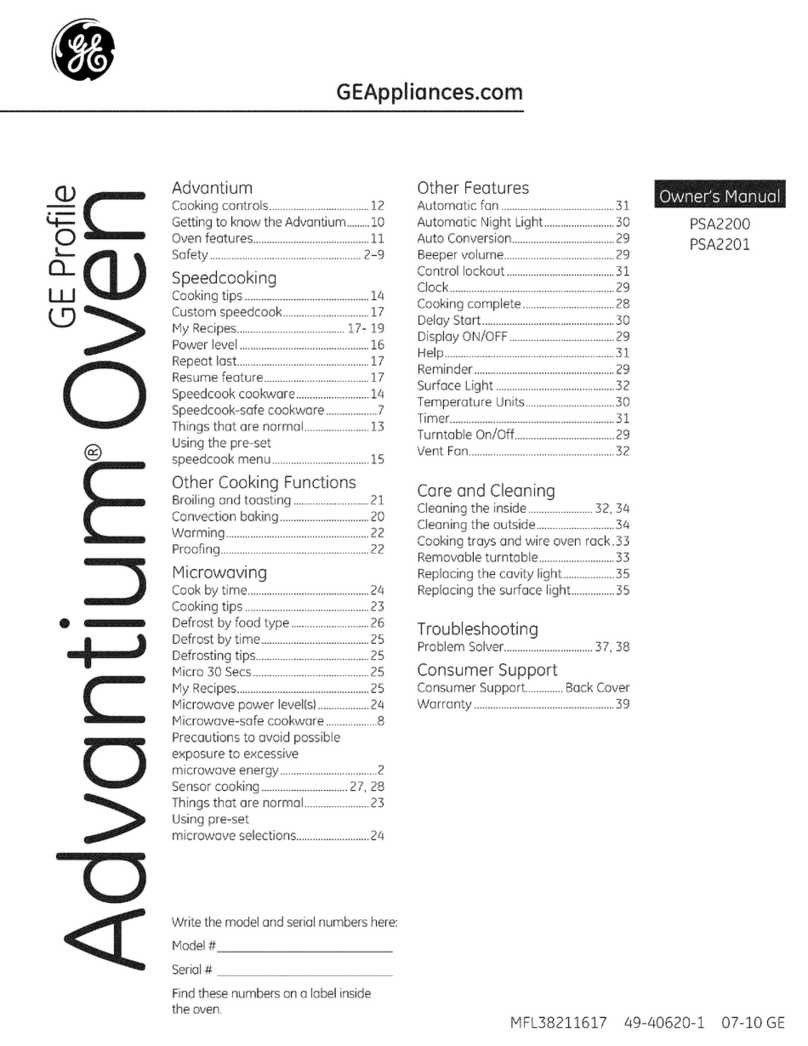
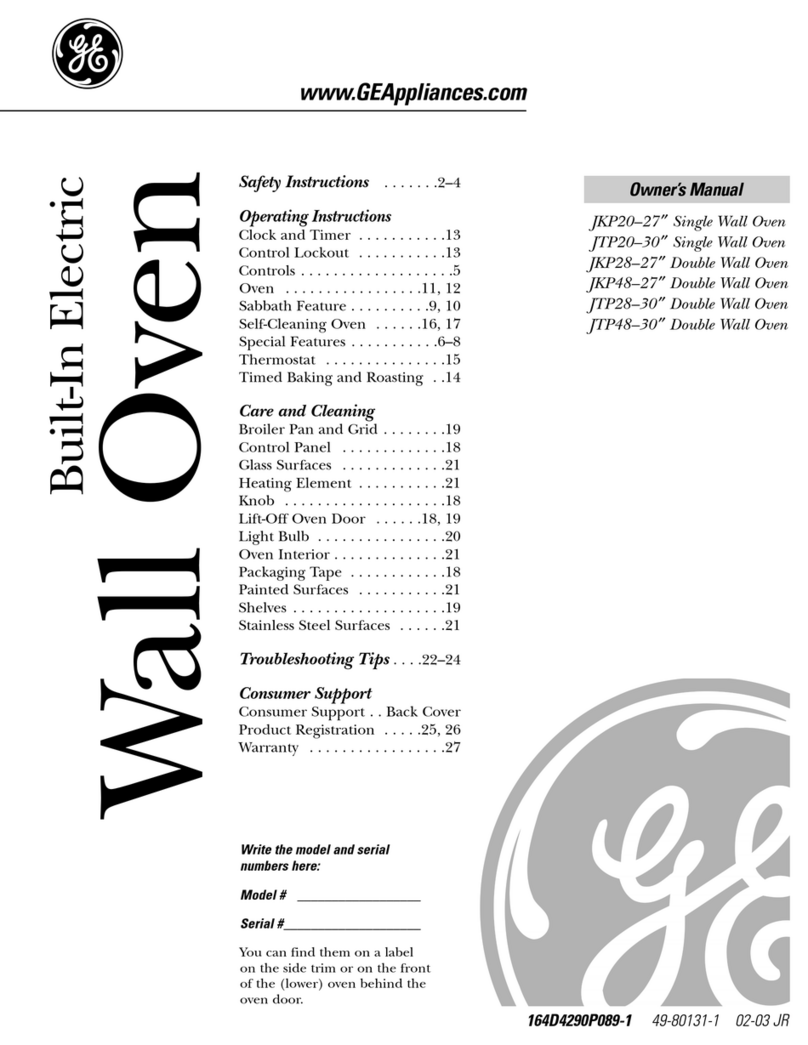
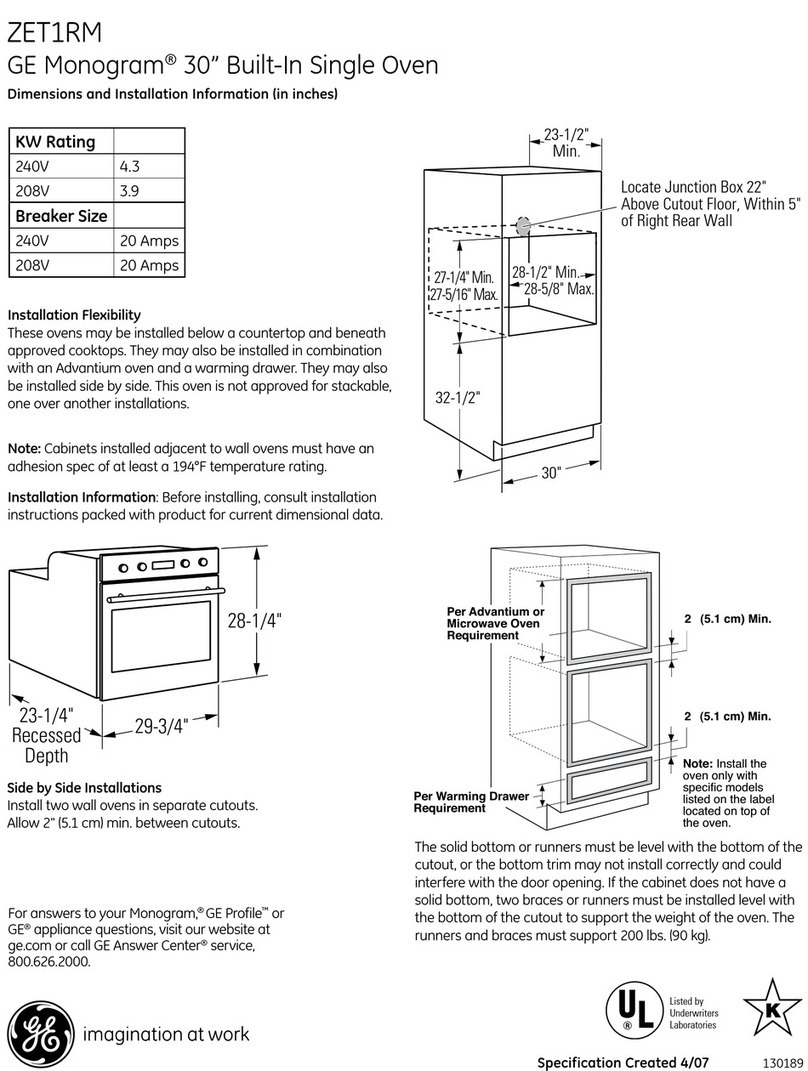
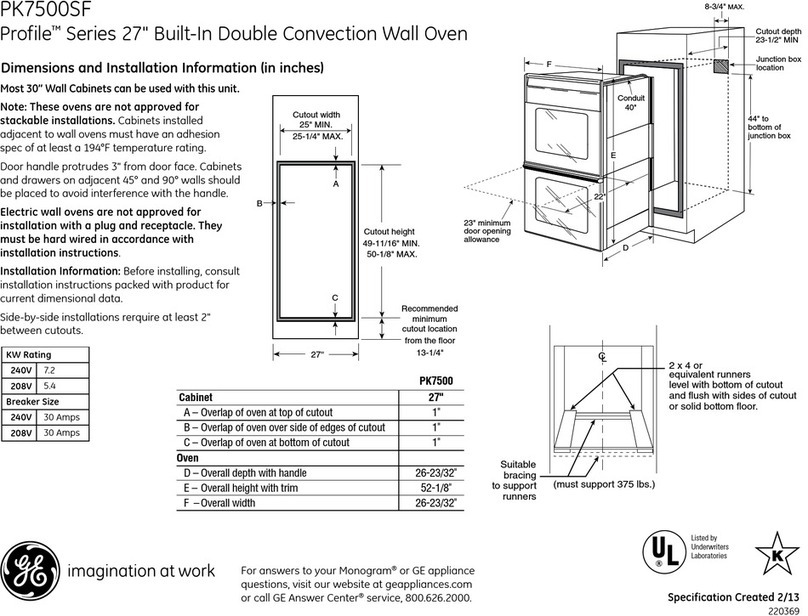
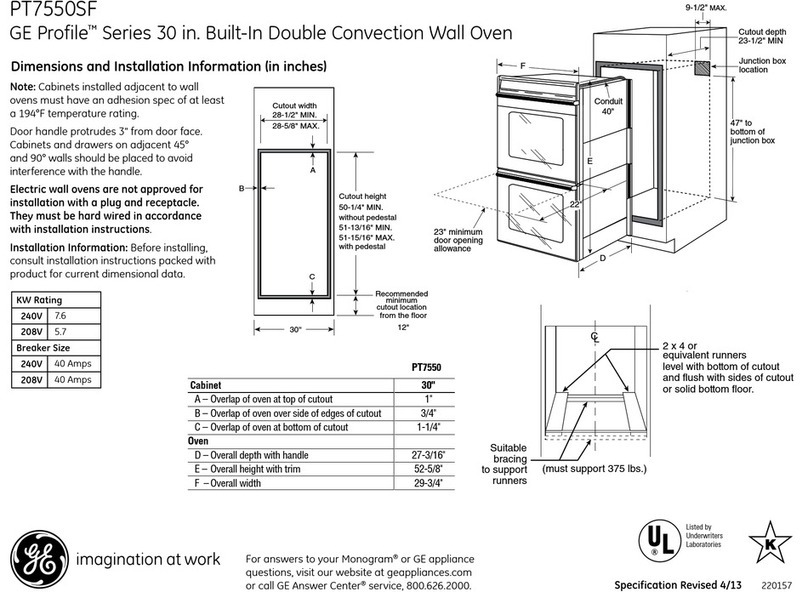
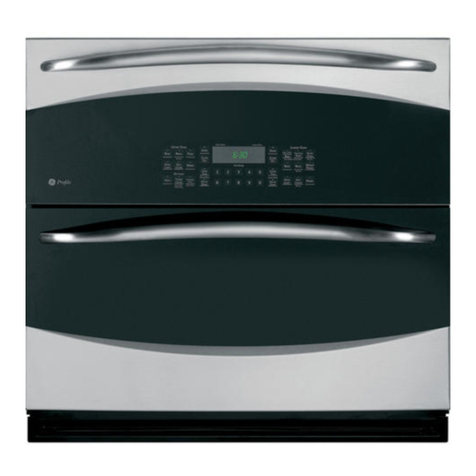
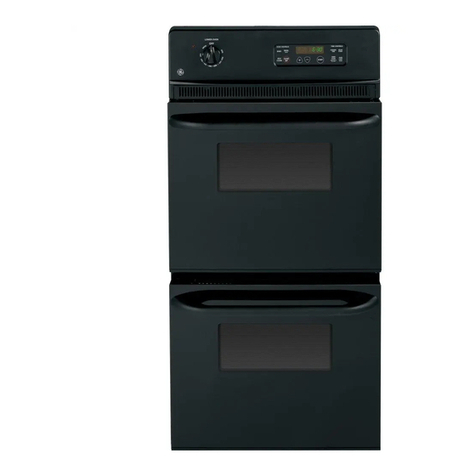
GE JRP24BD1BB User manual

www.GEAppliances.com
Safety Instructions ........ 2-4
Operating lnstructions
Clock and Timer ............ 13
Oven .................... 5-17
Sabbath Feature .......... 9, 10
Serf-Cleaning ............ 16, 17
Thermostat ................. 15
Timed Baking and
Roasting ................... 14
Care and Cleaning
Broiler Pan and Grid ......... 19
Control Panel ............... 21
Door ...................... 18
Glass Surfaces ............... 21
Heating Element ............ 20
Knob ...................... 21
Lift-Off Oven Door .......... 18
Light ...................... 20
Oven Interior ............... 20
Painted Surfaces ............ 21
Shelves ..................... 19
Stainless Steel Surfaces ....... 21
Troubleshooting Tips ...22-24
Consumer Support
Consumer Support... Back Cover
Product Registration ....... 25, 26
Warranty ................... 27
Write _e modelandsedal
numberehere:
Model#
Serial#
You can find them on a label
on the front of file lower oven
behind the oven door.
164D4290P063 49-80105 06-01 JR

IMPORTANTSAFETYINFORMATION.
READALLINSTRUCTIONSBEFOREUSING.
WARNING!
Foryour safeW,the information in this manualmustbe followed tominimizetherisk of fireor
explosion, electric shock, or toprevent property damage,personal injury, or loss of life.
IMPORTANTSAFETYNOTICE
The£alifemiaSafe DrinkingWater and ToxicEnforcementAct requires the GovernorofCaliforniato
publish a list ofsubstances known to thestate to cause cancer,birthdefects or otherreproductive
harm, andrequires businessesto warncustomers of potential exposure to such substances.
Thefiberglass insulation in self-cleanovens gives off a verysmaflamountof carbon monoxideduring
the cleaning cycle. Exposurecan be minimized by venting with an openwindow or using a ventilation
fanor hood.
SAFETYPRECAUTIONS
Whenusing electricalappliances,basic safetyprecautionsshouldbe followed,including thefollowing:
al Use this appliance only for its intended
purpose as described in this Owner's
Manual.
Be sure your appliance is propedy installed
and grounded by a qualified technician in
accordance with the provided installation
instructions.
Do not attempt to repair or replace any
part of your oven unless it is specifically
recommended in this manual. All other
sezvidng should be referred to a qualified
technician.
Have the installer show you the location
of the circuit breaker or fuse. Mark it for
easy reference.
Before performing any service, disconnect
the oven power supply at the household
distribution panel by removing the iirse or
switching off the circuit breaker.
al Do not leave children alone--chilch'en
should not be left alone or unattended in
an area where an appliance is in use. They
should never be _alowed to sit or stand on
any pact of the appliance.
Do not allow anyone to climb, stand or
hang on the door. They could damage the
oven, or cause severe personal injury.
}_Be sure the oven is securely installed in a
cabinet that is finally attached to the house
structure. Never "allowanyone to climb, sit,
stand or hang on the oven door.
:4_Never leave the oven door open when you
are not watching the oven.
Always keep combustible wall covering,
curtains or drapes a safe distance from
your oven.
Always keep dish towels, dish cloths, pot
holders and other linens a safe distance
from your oven.
@ Aalrays keep wooden and plastic utensils
and canned food a safe distance away from
your oven.
al Teach dfildren not to play with the
controls or any other part of the oven.
N Large scratches or impacts to glass doors
can lead to broken or shattered glass,
2

vvw_.GEAppliances.com
,RWARNING!
SAFETYPRECAUTIONS
0D.oono::orea ,ablomate,in
fr CAUTION:Items of interest to
children should not be stored in cabinets
above an oven; children climbing on the
oven to reach items could be seriously
injured.
_._Never wear loose-fitting or hanging
garments while using the appliance. Be
carefid when reaching tbr items stored in
cabinets over the oven. Flammable
material could be ignited if brought in
con tact with hot surfaces or heating
elements and may cause severe burns.
fr Use only dry pot holders-moist or "damp
pot holders on hot surfaces may result in
burns from steam. Do not let pot holders
touch hot heating elements. Do not use a
towel or other bulky cloth.
fr For your s_ety, never use your appliance
for warming or heating the room.
fr Do not let cooking grease or other
flammable materials accumulate in
or near the oven.
te Do not use water on grease rims. Never pick
up a flaming pan. Turn the controls off.
Flame in the Oven can be smothered
completely by dosing the oven door and
turning the oven offor by using a multi-
purpose dry chemical or foanl-type fire
extinguisher.
fr Stand away from the oven when opening
the oven door. Hot air or steam which
escapes can cause burns to hands, face
and/or eyes.
fr Do not heat unopened food containers.
Pressure could build up mad the container
could burst, causing an injury.
fr Keep the oven vent unobstructed.
fr Keep the oven free from grease buildup.
@ Place the oven shelf in the desired position
while the oven is cool. If shelves must be
handled when hot, do not let pot holder
contact the heating elements.
al When using cooking or roasting bags in the
oven, follow the manufacturer's directions.
fr Do not touch the heating elements or the
interior surface of the oven. These surfaces
may be hot enough to burn even though
they are dark in cnlor. During and after
use, do not touch, or let clothing or other
riammable materials contact any interior
area of the oven; allow sufficient rime for
cooling first.
Potentially hot surfaces include oven vent
opetemgs, surfaces near the openings,
crevices around the oven door, the edges
nfthe window and metal trim parts above
the door.
REMEMBER:The inside surface of the oven
may be hot when the door is opened.
fr Never leave jars or cans of fat drippings in
or near your oven.
fr Do not store or use combustible materials,
gasofine or other flammable vapors and
liquids in the vicinity of this or any other
appliance.
3

IMPORTANTSAFETYINFORMATION.
READALLINSTRUCTIONSBEFOREUSING.
A, WARNING!
SAFETYPRECAUTIONS
fr Pulling out the shelf to the stop-lock is a
convenience in lifting heavy foods. It is also
a precaution against burns from touching
hot surfaces of the door or oven walls.
If Do not use the oven to dry newspapers.
ff overheated, they can catch on fire.
If Do not use the oven for a storage area.
Items stored in an oven can ignite.
fr Do not leave paper products, cooking
utensils or food in the oven when not
in use.
If After broiling, always take the broiler pan
out of the oven and clean it. Leftover
grease in the broiler pan can catch fire
next time you use the pan.
C ean only parts listed m this Owner s
Manual.
_::_Do not use aluminum foil to line oven
bottoms, except as suggested in this
manual. Improper installation of
aluminum foil may result in a risk
of electric shock or fire.
COOKMEATANDPOULTRYTHOROUGHLY...
Cookmeatandpedtlf thoroughiy_eat toatleastanINTERNALtemperatureof 160°Fandpoultry
toatleastanINTERNALtemperatureof 180°ECookingtothesetemperaturesusuallyprotectsagainst
foodbomeillness.
SELF-CLEANINGOVEN
fr Do not clean the door gasket. The door
gasket is essential for a good seal. Care
should be taken not to rub, damage or
move the gasket.
fr Do not use oven cleaners. No commercial
oven cleaner or oven liner protective
coating of any kind should be used in or
around any part of the oven. Residue from
oven cleaners will damage the inside of the
oven when the sfrf_lean cycle is used.
If Before self-cleaning the oven, remove the
broiler pan, grid and other cookware.
fr Be sure to wipe up excess spillage before
starting the self-cleaning operation.
@If the self-cleaning mode malfunctions,
turn the oven offand disconnect the power
supply. Have it serviced by a qualified
technician.
READANDFOLLOWTHISSAFETYINFORMATIONCAREFULLY.
SAVETHESEINSTRUCTIONS
4

Usingthe ovencontrols ,, .G piioen,, .oom
Throughout this manual, features and appearance may vary from your model
UpperOvenControlClockandtimer
oBAKEPad
Press this pad to select the bake function. 0
QBRO/LHI/LOPad
Press this pad mselect the broil function.
OOisplay
Shows the time of day, oven teinperamre,
whether the oven is in the bake, broil or
serf-cleaning mode and the dines set for the
timer or automatic oven operations.
ff "F--and anumberor letter" flashin the display
and Me ovencen_ol signals,thisindicatesa
fBnctienerrorcode.PresstheCLEAR_FFpad.Allow
theoventocoolfor onehour.Puttheevenbeckinto
operation.If thefunctionerrorcoderepeats,disconnectthe
powerto theovenandcall forservice.
ff youroven was set for atimed ovenoperationand a
power outageencorrad theclockandaftprogrammed
functionsmustbereset
FeaturesandSettings
OELAYSTART Pad
Use ahmg with COOKINGlIME or SELF
CLEANpads to set the oven to start and
stop automatically at a time you set.
oCLOCKPad
Press this pad before setting the dock.
oKITCHENTIMERON/OFFPad
Press this pad to select the timer feature.
oCLEAR/OFFPad
Press this pad to cancel ALL cwen
operathms except the clock and timer.
@HOUR and MIN + and -Pads
Press these pads to set times up to 9 hours
and 59 Ininutes--for example, the dine of
day on the clock, the timer, the starting and
length of cooking time for timed bake and
the starring and length ofdeaning time for
self-clean.
Thetimeofdaywillflashinthedisplaywhenthere
hasbeenapoweroutage.
oSTARTPad
Must be pressed to start any cooking or
cleaning function.
0COOKING TIME Pad
Press this pad and then press the number
pads to set the anmunt of time you want
your food to cook. The oven will shut off
when the c_klng time has lain out.
TEMP+ and-Pads
Press these pads to setthe cooking
temperature you want touse.
OVEN UGHT ON/OFF Pad
Press this pad to turn the oven fight
Oil or off.
@SELF CLEANPad
Press this pad to select the self, cleaning
fimcfion. See the Using the self-cleaning
ovsn section.
LowerOvenControl
OVENTEMP Knob m_,_, ow, or* m,_v_
Turnthisknobm _-_:,.a""'"*'_""••
the teinperamre /i '_._.
setfingyouwant. _\ ]_).,
file OVENCYCLElightglowsuntiltheovoo ranchesyour
selectedtemperature,thengoesoff andon with theoven
element(s)duringcooking.
5

Specialfeaturesofyourovencontrol
Yournew touch pad control has additionalfeatures that youmay choose to use. Thefeflowing are the features
and how youmay activate them.
Thespecial feature modes can only be activatedwhilethe displayis showing the time of day. Theyremain
in the contrors memory until the stepsare repeated.
When the disp/ayshows your choice,presstheSTARTpad.Thespecialfeatureswillremaininmemory after
a powerfai/ure, exceptferthe Sabbathfeature,whichwil/have to bereset
12 Hour Shut-Off
Withthisfeature,shouldyouforgetandleavethe
ovenon, thecontrolwill automaticallyturnoff the
ovenafter 12hoursduringbakingfunctionsor
after3hoursduringabroil function.
If you wish to turn OFF this feature,
follow the steps below.
[] Press the RAKE'and BROILHI/LO pads
at the same time for 3 seconds urlfil
the display shows SE
[] Press the BELAYSTART pad until
no shdn (no shut-olD appears in the
display.
[] Press the START pad u_ lock in the
noshdn (no shut_>ff) feature mad
leave the conta-ol set in this special
features mode.
NOTE."Thisfeatureisnotavailablefor the
loweroven.
iiiiiii(iiiiiii
Fahrenheit or Celsius Temperature Selection
Yourovencontrolisset tousetheFahrenheit [] Pressthe STARTpad.
temperatureselectionsbut youmaychangethis
tousetheCelsiusselections.
[] Press the RAKE'madBROILH!/LOpads
at tile same dxne fi_r 3 seconds until
the display shows SE
[] Press the BROILH//LB pad. The
display will show F (Fahrenheit).
[] Press the BROILH//[O pad affain. The
display will show C(Celsius).
NOTE:Thisfeatureisnotavailableforthe
lowerovan.
Control Lockout
Yoercontrolwill allow youtoleakdown thetueah
[] Press the BAKEand BROILHI/LO pads
at the same time for 3 seconds tmfil
the display shows SE
When this feature is on and the touch
pacts are pressed, the control will beep
and the display will show LOB.
[] Press the SELFCLEANpad. The
display will show LOCOBE. NOTE.."
Press the SELFCLEANpad again. The
display will show LOCON.
Press the ST-,4RTpad to activate the
control lockout feature and leave the
c(_nm ,l set in thLs special fi_atures mode.
To unlock the control, repeat steps I and
2. Press the iflAIV/"pad when the display
shows fOC OFF..
Thecontrollockoutmodewill notaffectthe
CLOCK,KITCHEN17MERON/OFFandOVEN
LIGHTON/OFFtouchpads.
Thisfeatureiseat availablefortheloweroven.
6

ww_.GEAppliances.com
Tones at the End of a Timed Cycle
At theendof a timedcycle,3shortbeepswill
soundfollowedbyonebeepevery6secondsuntil
the CLEAR/OFFpadispressed.Thiscontinuous6
secondbeapmaybecanceled
To cancel the 6 second beep:
[] Press the BAKE and BROILHIIl,O pads
at the same time for 3 seconds until
the display shows SE
[] Press the KITCHEN17MERON/OFF
pad. The display shows CONBEEP
(continuous beep). Press the
KITCHENTIMERON/OFFpad again.
The display shows BEEP. (This
cancels the one beep every 6
seconds.)
[_] Press the START pad.
NOTE."Thisfeatureisnot availablefor the
lowereven.
iiiiiiiiiiii _i:i!i_i_i_iii_121tOUr,24 Houror Clock Black-Out
Yourcontrolisset tousea 12hourclon£
ffyou would prefer to have a 24 hour
display,followthes psbolow.
[] Press the BAKE'andBROILH_O pads
at the same dine for 3 seconds tmti]
the splays o ,
[] Press the CLOCKpad once. The
display will show/2 hr. ff this is the
choice you want press the START pad.
Press the CLOCKpad again u_change
u_the 24 hour military time clock.
The display will show 2.4hr.ffthis
Lsthe choice you want press the
STARTpad.
Press the CLOCKpad again u)
black-out the clock display. The
display will show 0/:_. ffthis is the
choice you want press the STARTpad.
NOTE.."If theclockis in theblackoutmodeyou
will not beabletousetheDelayStartfunction.

Specialfeaturesofyourovencontrol
ii i iiii:iii,li i ii;iiiioook..d.n,,
Yournew controlhase ceakandheldfeaturethat
keepscookedfoodswarmforup to3 hoursafter
below.
[_] Press the BAKEand BROILHL/LOpads
at the same time for 3 seconds until
the display shows SE
[_ Press the COOKINGT/MEpad. The
display will show Hid OFF.
Press the COOKINGlIME pad again t_)
activate the feature. The display win
show Hid ON.
[] Press the $TAffF pad to acfiwate the
c¢_okmid hold feature and leave the
conux)l set in this special features
mode.
NOff: Thisfeatureisnat availablefor the
1owsrovan.
Changing the Speed of the + or- Pads
Asyouusethe+or -padswhensettinga time
or temperature,youmaynoticethedisplay
changesslowly.Thisspecialfeatureallows youto
changethespeed Toset thespeadyouprefer,
followthestepshelow
[_ Press the BAKEand BROILBll_O pads
at the s`anle time for 3 seconds until
the display shrews $E
Press the +pad. The display will show
you a set speed between 1 `and 5.
Press the +pad tu increase the speed
up to the mtmber 5.
Press the - pad to decrease the speed
down tx_the tmmber 1.
[_ Press STIIRTto acd,rate the setting
and leave the control set in this
special features mode.
8

Usingthe SabbathFeature.(Thisfeature is not available for the lower oven.)
(Designedfor use on the Jewish Sabbath and Holidays.) www.GEAppliance_com
TheSabbath feature canbe used for baking/roasting only, Itcannotbe used for broiling,self-cleaning,
or DelayStart cooking.
NOTE:Theoven light comeson automatically (on some models)when the dooris opened andgoes offwhen the
door is closed. Thebulb may be removeff See the OvenLightReplacementsection. Onmodels wfh a light switch on
the control panel, the ovenlight may be turned on and left on.
IBAKE #
_DEL AY-
/ START
When the display shews _the
oven ts set in Sabbath. When the
display shows_ Cthe even is
baMng/roasdng.
How to Set for RegularBaking/Roasting
NOTE:Tounderstandhowtheovencontrolworks,
oracttnousingregularbaking(non-Sabbath!before
en_nngSabbathmode
Makesuretheclockshowsthecorrectttme
ofdav
[L] Pl_e_sand hold boththe OAl_ and aROII
e_&o pads, atthe same#me, undl the
display shows SF.
[] Tap the aELAY STARTpad lmdl
SAb bAtH appears in the display.
]Pres,s the START pad and _ will appear
in the display.
[_ Pre_ the BAKE pad. No signal wi/l
be given.
[] The preset starting temperature will
automadcally be set to 350 ° .Tap
the INCREASEor DECREASEpads to
incre&se or decrease the temperature in
5°incremenL_. The temperature can be
set between 170 °and 550 °. No signal or
temperature wi!! be given.
[] Press the STARTpad.
[_ After a random delay period of
appro_dmately 30 seconds to I minute,
c will appear in the display indicating
that the oven is baking/ro_dng. If_ c
does not appear in the display, start ag_m
at step 4.
To adjust the oven temperatme, pres_s
the BAffEpad and tap the INCREASEor
DECBEASEpads m increase or decrease the
temperature in .5° iucxements. Press the
STARTpad.
NOTE:The CLEARAOFFandCOOKINGT/ME'pads
are active during the Sabbath feature.
When the disp/ay shows_ the
even is set in Sabbath. When the
display shows _cthe even is
baking/roasting.
How toSet for TimedBaking/Roasting-lmmediato Startand Automatic Stop
NOTE:Tounderstandhow theovencontrolm_rks,
practiceusingregular[non Sabbath)ImmediateStart
andAutomaticStopbeforeenteringtheSabbathrnod_
Make suretheclockshowsthecorrecttime
of day
[] Pre_,s and hold both the BAKE and BROIL
al_o pads, at _same time, tmtil the
display shows SE
[] Tap the DEIAYSTARTpad until SAb bAtH
appears in the display.
[] Press the STARTpad and _ will appear in
die display.
[] Press the COOKINGTIMEpad.
[]
[]
[]
Pre_s the INCREASEor OECREASEpads to
set the desired length of cooking time
between I minute and 9 ho/ws and 59
minutes. The cChoking dine that you
entered will be displayed.
Press the STARTpad.
Prem the BAKEpad. No signal will
be given.
[] The preset stamng temperature will
automatically be set to .9,50°. Tap the
INCREASEor OECREASEpads mincrease
or decrease the temperature in 5 °
increments. The temperature can be set
between 170 °and 550 °. No signal or
temperature will be given.
[] Pressthe STARTpad.
_Afier a random delay period of
approJdmately 30 seconds to I minute,
c: will appearin the display indicating
that the oven is baking/roasting.
am c doesnotappearinthedisplay,
start again at step 7.
To adjtt_t the oven temperature, press the
BAKEpad and tap the INCREASEor DECREASE
pads tuincrease or decrease the temperature
in 5° increments. Pressthe STARTpad.
When cooking is finished, the display will
change from _ c to _ and 0;0Owill appear,
indicating that the oven has turned 0kTbu tis
still set ha SabbadL Remove the c¢loked food.
9
Usingthe Sabbathfeature.
How to Exit the Sabbath Feature
[] Pressthe CLEAR/OFFpad.
[] ffthe oven is cooking, wait
for a random delay period of
approximately 30 seconds u) 1
minute, until only m is in the display.
[] Press and hold boththe OA/_and
BROILH!/LOpads, at thesametime,
until the display shows SF..
[4T Tap the DELAYS]'ARTpad until
'_ 12shdnor noshdnappears in the
display. 12shdnindicates that the
oven will automatically turn oifafter
12 h()_trs, no shdnindicates that the
oven will not automatically turn off.
[] Press the STARTpad.
NOTE-"ffa power ou_tge occurred while
the (wen was in Sabbath mode, the cwen
will automatically mm offand the oven
conm)l must be reset.
10

Usingthe oven. www.GEAppliances.com
Toavoidpossibleburns,place the shelves in thedesired positionbeforeyouturn the oven on.
The oven has 4 sheff positions.
Before you begin,..
The shelves have stop-locks, so that when
placed conecdy on the supports, they will
stt)p before coming completely out, and
will not tilt.
When placing and removing cookware,
pull the shelf out to the bump on the
shelf support.
Toremovea shelf,p_tll it toward you, tilt
the front end up mad pull it out.
Toreplace, place the end of the shelf
(stop-loclcs) on the support, flit up the
front mad push the shelf in.
i iii ::__ --_-e_¢-,2" i_;_i _i :i_i_i_i_¸
iiiii
How to Set the Oven for Baking or Roasting
[] Press the BAKEpad. Type of Food Shelf Position
[] Press the TEMP+ or- pads to set the Frozenpies(offcookiesheet) Born
desired temperature. Angelfoodcake, A
[] Press the STABT pad. bundtorpoundcakes
Biscuits,muffins,brownies, BorC
] Check food for deepness at minimum c00kies,cupcakes,
time on recipe. C(x)klonger ffn_. layercakes,pies
[] PresstheCLEA_OFFpadwhen Casseroles BorC
cooking Lscomplete.
NOTE"Thelowerovenis controlledwith aknob.
Toset theovenforbakingtom theknobtothe
desiredsettingor temperature.Turntheknobto
OFFwhenbakingiscomplete.
NOTE."A coolingfanmayautomaticallytomon
andoff toeenlinternalparts.Thisisnormal,and
thefanmaycontinuetorunevenaftertheovenis
turnedoff
Preheating and Pan Placement
Preheat the oven if the recipe calls for it.
To preheat, set the oven at the correct
temperature. Preheating is necessary tbr
gond resulLs when baking c_kes, cookies,
pastry and breads.
Forovenswithoutapreheatindicatorlightor
tone,preheat lOminutes.
'Baking results will be better if baking p arts
are centered in the oven a.smuch _-s
possible. Pans should not touch each
other or the walls of the oven. If you need
to use two shelves, stagger the pans sn one
is not directly above the other, and leave
approximately 1_" between pans, from
the front, back and sides of the wall.
nutslits in the fofljust likethegrid
Aluminum Foil
You can use aluminum foil to line the
broiler pan and broiler grid. However,
you must mold the fnll dghfly to the grid
mad cut slits in it just like the grid.
Ahrmthumfell mayalsoheusedtocatcha
spillover
Never entirely cover a shelf with
aluminum fifil. This will disturb the heat
circulatinn and result in poor baking.
A smaller sheet of foil may be used u_
(:etch a spillover by placing it on a lower
shelt'several inches below the tbod.
11

Usingtheoven.
Leave the door open to the bmtl
stop position, The door stays open
by #serf, yet the proper temperabJre
is maintained in the oven.
12
How to Set the Oven for Broiling
[_ Place the meat (,rfish on the broiler
grid in the broiler pan.
[_ Follow suggested sheff positions in
the Broiling Guide.
if yourovenis connectedto208volts,raresteaks
maybebroiledbypreheatingthebroilerand
positioningtheovenshelfonepositionhighe_
[] Press the BROILHl_O pad once for
HI Broil.
[] Press the START pad.
[_] When broiling is finished, press the
CL£AR/OFFpad.
NOTE:Theloweroveniscontrolledwith a knob.
Tosettheovenforbroilingt_mtheknobtoBROIL.
Turntheknobto OFFwhenbroilingis complete.
To change to LOBroil,prer_s the
BROILHI/[O pad again.
Broiling Guide
Food
Ground Beef
Wel[Oone
Beef Steaks
Rare
Medium
Wed Done
Ba_e
Medium
Well Done
:hicken
Lobster Tails
:kshFillets
Ham Slices
(precooked)
Pork Chops
WerlDone
Lamb Chops
Medium
Wel! Done
Medium
Well Dane
Quantity and/
or Thickness
qIh (4patties)
1/2to 3/4"thick
1" thick
1to 1½1be
1½"thick
2 tc2½1bs.
1whole
2to2V_Ihs,
spl_tlengthwise
2-4
6to 8oz each
1/4 to 1/2"thick
1" thick
2 (1/2"thick)
2(1"thick}aboof1IP
2 {1" thick) about 10
to 12 oz.
2(1½"thick) about1 Ib
Shelf
Position
C
c
C
c
0
C
A
C
c
c
B
FirstSide
_me (rain.)
6
8
!2
lO
15
25
35
13-16
lO
13
lO
12
14
17
Second Side
_me{min.)
5
6
11
7-8
14-16
20-25
10-15
DO rlut
turn OVeE
lO
13
9
10
12
12-14
Commen_
Spaceevenly. Up
to 8 patties take
aleut the same
time.
Steakslessthan
1"thickcook
throughbefore
brown[ug
Panfryingis
recommended.
Sqashfat.
Reducetimeabout
5to 10minutes
persideforcut-up
chickenBrush
eachsidewith
meltedbutte,
Broilshin-side-
downfirst
Cutthroughba_of
shell.Spreadopen.
Brushw_hmelted
butterbefore
broilingandafter
halfaf broi[fng
time.
Handleandturn
verycarefully.
Brushwith lemon
befte_beforeand
duringcooking,if
desired.Preheat
breirertoincrease
browning.
Increasetime5to
10minutesper
sidefor1_" thick
orbom_cumdham.
Slashfat
Slash fat

Usingtheclockandtimer. _=._v_p,,.==.o.=
iiii ,;i,iiii!iii!,:i,iiii,!i,,i!iiii H ii!iii ii;i!!iii !;!i!!!i!i;,, Thed,,c m, .tbethe,,fd "0SetR,eCloc,,theautom.tiooveo
functions to work properly. The tinm of
Make sure the cloc k is set to the day cannot be changed during a timed
correcttimeofda7 baking or self-cleaning cycle.
[] Press the CLOCKpad.
[] Pr_-ssthc HOURand MIH + or
-pads Ix)set the time of day.
[] Press the STARTpad.
Thetimeris eminutetimeronly.
Thetimer doesnet centre/oven
operations. The maximum serdng on
the timerisghoersand 59minutes.
To Set the _mer
[]
[]
Press the KITCHENTIMER
OI_!OFFpad.
Press the HOUR"and MIN +or
-pads until the amount ofthne
you _rant shows in the display.
The n'laxlnlunl rime you can enter in
nlinutes is 59. Cooking times more
than 59 minutes should be changed
to hours and ndnutes. For example,
enter 90 minutes ms1 hour, 30
minutes.
ffyou make a mistake, press
KITCHENTIMERONADFFand be_n
ag',£m.
[] Press the STARTpad.
AfterpressingtheSTARTpad,SETdisappears,"
thistollsyouthetimeiscountingdomT,although
thedisplaydoesnotchangeunti!oneminute
haspassed.
[] When the diner reaches ._0, the
contlx)l will beep 3 times h)llowed
by one beep every 6 seconds until
the KITCHENTIMERON/OFFpad
is pres_d.
The6secondtonecanbecx_celedbyfollowing
thestepsin theSpecialfeaturesofyouroven
controlsectionunderTonesat the Endof a
7J_ C_/e.
To Reset the 7_mer
ffthe display is still showing the time
remaining, you may change it by pressing
the KITCHENTIMERON/OFFpad, then
pre_s the HOURand MIN +or - pads until
the time you wmlt appears in the display.
ffthe remaining time is not in the display
(clock, delay start or cooking dine are in
the display), recall the remaining time by
pressing the KITCHENTIMEROI_VOFFpad
and then pressing the HOURand MIN +
or - pads to enter the new time you want_
To Cancel the 77mer
Press the KITCHENTIM_ OJWO_:
pad twice.
13

Usingthetimed baking androastingfeatures.
(Thesefeaturesare not availablefor the lower oven,)
NOTE:Foodsthat spoil easily-suchasmilk,eggs,hsh,stuffings, poultry andpork-shouldnot be allowedto sit for
more than I hour before or after cooking. Roomtemperature promotes thegrowth of harmful bacteria.Be sure that
the ovenlight is off because heat from the bulb will speedharmful bacteria growth,
How to Set an Immediate Start and Automatic Stop
Theovenwill turnonimmediatelyandcookfor a
selectedlengthoftime.At theendof thecooking
timetheovenwill turnoff automatically
Make sure the clock shows the correct
time of day.
[] Press the BAffE pad.
[] Using the TEMP+ or- pads, enter
the desired temperature.
[] PresstheCOOKlNGTIMEpad.
NOTE"If yourreciperequirespreheating,you
mayneedtoaddadditionaltimeto thelengthof
thecookingtime.
[] Using the HOUR and tiffin + or -
pads, enter the desired baking time.
The maximum time you can enter in
minutes is 59. Cooking times more
than 59 minutes sho/fld be changed
to hottrs and minutes. For example,
enter 90 minutes _.s1 hour, 30
minutes.
The oven temperature and the cooking
time that you entered will be displayed.
[] Press the STARTpad.
The display shows the cwen temperature
that you set and the cooking time
countdown. The display starts changing
once the tetnperature reaches IO0°F.
The oven will continue to cook for the
programmed amount of time, then shut
off automatically.
Press the I_-_!,'I[_F pad tx)dear the display.
How to Set a Delayed Start and Automatic Stop
Youcanset theovencontroltodelay-startthe
oven,cookfor aspecificlengthof time andthen
turnoffautomaticall_
Make sure the clock shows the con-ect
time of day.
[] Press the BAffEpad.
[] Using the TEMP +or - pads, enter
the desired temperature.
[] Press the COOKINGlIME pad.
NOTE:If yourreciperequirespreheating,you
reef needtoaddadditionaltime tothe lengthof
thecookingtime.
[] Using the HOUR and MIN +or -
_p._ds,en_r the desired baking time.
I lie maximum tame you call enter _1
minutes is 59. Cooking times more
than 59 minutes should be changed
to hours and minutes. For example,
enter 90 minutes _s 1 hour, 30
minutes.
[] Using the HOURmid MIN +or -
pads, enter the time of day you "_rant
the oven to turn on mid start cooking.
[] Press the STi_/'pad.
NOTE"Anattentiontonewill soundif youare
usingtimedbakinganddonotpresstheSTAHI-
padafter enteringthebakingtemperature.
ffyou would like to check the times you
have set, press the DB.AYSTPdCTpad to
check the start time you have set or press
the COOKINGlIME pad to check the
length of cooking urne you have set.
When the oven turns on at the time of day
you have set, the display wiUshow the
changing temperature (starring at
1O0°F.) and the cooking time co"mntdown.
At the end €ff timed baking, the oven will
Ran off. The end of cycle tone will sound.
Press the _ pad to dear the disp "lay.
iiilI!i Theoventemper,ture ndthe
firne that you entered will be displayed.
...................................................[] the
14

Adjustthe oven thermostat--Do it yourself! w . EA tia.o=.
Youmay find thatyour new oven cooks differentlythan the oneit replaceff Useyournew ovenfor a few weeksto
become morefamiliar with it. ff youslill think yournew ovenis toohotor too cold,youcanadjust thethermostatyourself
Donotuse thermometers,such asthose foundin grocerystores, to checkthe temperature set_n9ofyouroven.
Thesethermometers may vary20-40 degrees.
NOTE: This adjustment willnot affect the broiling or the seff-cleaning temperatures. Theadjustmentwill be
retained in memoryafter a power failure.
_BAKE
@
ToAdjust the Oven Thermostat (onme.pperoven)
[] Press the BAKE mld BROILHt/LOpads
at the same time for 3 seconds 1mall
the display shows SE
[] Press the BAKE pad. A two digit
number shows in the display.
[] When you have made the adjustlnent,
press the STARTpad to go back to the
time of day display. U_ your oven as
you would normally.
[] The oven temperature can be
adjusted up to (+) 35°F. hotter or (0
35°F. cooler. Press the 7EMP+ pad tu
increase the temperature in I degree
increments. Press the IEMP- pad tu
decrease the temperature in l
degree increments.
iiiii!iiiiiiiiii!' Jiiiiiiiiiiiliiiiiii
iiiiii !!i!
Turn the disk counterclockwise to
increase the oven temperature.
iiiiiiiiiiiii_i!i_iiiiii_iiii
To
Pull the OVEN knob offthe shaft, l,u)k at
the back of the ktuth and note the current
setting before ma_ng any adjustment.
The knob is factory set with the top screw
directly under the pointer.
_] Pull offthe OVENknob.
] Lc_sen tx_th screws on back of
the knob.
Adjust the Oven Thermostat tontheloweroven)
You will hear and feel the notches as you
turn the knob. Each notch changes
temperature about 10° Fahrenheit.
[] Tighten thes=e_.
[] Return the OVENknob tu the oven.
Re-checkovenpedormancebeforemakingany
additionaladjustments.
[] Hold both parts of the knob as
shown in the iUuso-ation of the back
of the OVEN knob and turn so the
lower screw moves in the desired
direction.
Turnthediskclockwise to decrease
the oventemperature.
Thetypeof margarine will affect baking performance!
Most recipesfor bakinghavebeen developedusinghighfat productssuchasbutter or margarine(80%fat).ff you
decrease the fa_ the recipe may notgive the same results as with a higher fat product
Recipefailure can result if cakes,pies, pastries, cookiesor candies are madewithlow fat spreads. Thelower the fat
content ofa spread produc_ the more noticeable these differences become.
Federal standards require product.s labeled "margarine" to contain at least 80% tht by weight. Low fat spreads, on the
other hand, contain less tat and more water. The high moisulre content of these spreads affect the texture and flavor of
baked goods. For best results with your old _avorite recipes, use margarine, butter or stick spreads containing at least
70% vegetable oil. 15

Usingtheself-cleaning even.
(Thisfeature is not available for the lower oven,)
The oven doormust be closed and all controlsmustbe set correctlyfor the cycle to work properly.
Wipeup heaw soil on the oven
bosom.(appearancemay vary)
Before a Clean Cycle
Theove_mustbecoolin ordertosettheself-
cleancycle.
We reconlmend venting your kitchen
with an open window or using a
ventilation Jan or hood during the
first self.lean cycle.
Remove the broiler pan, broiler grid, all
cookware _md any alunlinum foil from
the oven.
The _wen shelves can be seff_cleaned, b_it
they will darken, lose their luster and
become hard tn slide.
Do not use abrasives or oven cleaners.
Clean the top, sides and nuLside of the
oven door with soap and water.
Make sure the _ven Lighthulb cover
(on some models) is in place mid the
oven light is off.
IMPOlffrAIgTl':The fie',xith tffs_me herds
is extremely sensitive to the fumes given
off during the seif_teanlng cycle of any
(wen. M(we birds to another well
ventilated room.
i!_iiiiiiiiiiii!!i_
iiiiiili!i!i_!iii_iiiiiiii_
How to Set the Oven for Cleaning
[] Press the SELFCLEANpad.
[] Using the HOUR"and MIN+ or-
pads, enter the desired clean time, if
a time other than 4 hours is needed.
Clean cycle dme is normally 4 hours.
You _ change the clean time to any
time between _ hours mad 5 hours,
depending on how dirty your oven is.
[] Press the STARTpad.
The door locks automatl 'cally. The dLsplay
will .show the clean time remaining. It will
n(_t he pc)s41bie ts_(_pen the oven door
until the temperature drops below the
lock temperature and the LOCKEDlight
goes off.
When the LOCffEOlightis oil, open
die door.
The ,ac_rd L0CKwill fl_sh and the oven
conm)l will sign-.d if you ,set the dean
cycle and forget tx)dose the oven door.
_Tt) stt)p a clemx cycle, press the
CLEAR/OFFpad.When the LOCREOlight
goes nffindicating the oven has cooled
bekrc¢ the locking temperature, open
the door.
16

www. GEAppliances.com
The ovendoor mustbe closed and all controlsmust be set correctly for the cycle to work properly.
How to Delay the Start of Cleaning
[] PresstheSELFCL_Npad.
[] Using the HOURand MIN+ or-
pads, enter the desired clean time.
[] PresstheOELAYSTAlO'pad.
Using the HOURand MIN +or-
pads, enter the time of dayyou want
the clean cycle to start.
The door locks automaficaUy. The display
will show the start time. It will not be
possible m open the oven door undl
the temperature drops below the lock
temperature and file LOCKEDfight
goes o02
When the LOCKEDlight isel:t; open
the door.
[] Press the STP_T pad.
Alter a Clean Cycle
You may nodce rome white ash in the
oven. Wipe it up with a damp doth "after
the oven cools.
if white spotsremain,removethemwith asoap.
filledsteelwool padandrinse thoroughlywith a
vinegarandwatermixture.
The_ deposits are usually a salt
residue that cannot be rem_wed by
the dean cycle.
If the oven is not dean "afterone clean
cyde, repeat the cycle.
You _trmot set the oven for cooking
until the oven is cc_fi enough for die
door to unlnck.
.*}_tithe shelves become hard to
slide, wipe the shelf supports with
cooking oil.
17

Careand cleaning of theoven.
Be sure electrical power is offand all surfaces are cool before cleaning anypart of the oven.
Lift the doorstraightupandoff
bSehinges.
How toRemove Packaging Tape
To assure no damage is done to the finish
of the product, the safest way Ix)remove
the adhesive left from packaging tape on
new appfiances is an applicatkm of a
household liquid dishwa.shing detergent,
mineral oil or cooking oil.
Applywith a soft ck)th and anow to soak.
Wipe dry and then apply an appliance
polish to thoroughly clean and protect
the surface.
NOTE:1heplastictapemustberemovedfrom
all chrometrim.It cannotberemovedif it is
bakedon.
Lift-Off Oven Door
The (wen door is removable for eafier
access to the lightbulb.
Do notlift thedoorbythehandle.
Toremovethedoor,()pen it to the broil
stop position. Grasp firmly on each side
and lift the door straight up and off
the hinges.
Donotplaoohandsbetweenthehingeandthe
ovendoorframe.
Toreplace the deer,make sure the hinges
are in the broil su)p position. Posidon the
slots in the bottom of the door squarely
over the hinges and slowly lower it over
both hinges.
Thegasket is designedwith agap at the
bottomto allow let properair circulation.
Donot rub or cleanthe doorgasket--
dhas an extremelylow resistance to
abrasion.
if younotice the gasketbecomingworn,
frayed or damagedinany way or if it has
become displacedon the door,you should
have it replaced.
Door (on the upper oven)
TocleanMeinsideofthedoor.
_ Because the area inside the gasket is
cleaned during the serf-dean cycle, you
do not need Ix)clean this by hand.
The area outside the gasket and
the d(g)r liner can be cleaned with a
soap-filled steel w(xfl or plastic pad, hot
water and detergent. Rinse well with a
vinegar and water solution.
Toclean the outsideofthe door.
_ Use soap and water to thoroughly
clean the u)p, sides and fi'ont of the
oven door. Rinse well. You may also
use a gl_ss cleaner to dean the glass on
the outside cffthe door. Do not let
water drip into the vent openings.
If any stain on the door vent trim is
persistent, use a soft abrasive cleaner
and a sponge-scrubber fi)r best results.
Spillage of marinades, fruit juices,
U)mato sauces and b_sfing materials
conmlning acids may cause
discoloration and should be wiped up
immediately. When surface is cool,
clean and rln_.
Do not use (wen cleaners, cleaning
powders or harsh abrasives on the
outside of the door.
Be not allow food spills with a high
sugar or acid content (such as
tomatoes, sauerkraut, fruit juices or
pie filling) to remain on the surface.
They may cause a dull spot even
after cleaning.
18
Door (on the lower oven)
Toclean the inside ofMe door.
L¢Soap and water will normally do the
job. Heavy spattering or spillovers may
require cleaning with a mild abrasive
cleaner. Soap-£flled steel wool pads may
"al_)be used.
Ifnecessaq,youmayuseanovencleaner.Follow
thepackagedirections.
+_"Clean the inside of the oven window
with a mild non-scratching cleaner and
a clamp cloth.
Toclean the outsideof the door,
Use soap and _ater t_)thoroughly dean
the top, sides and front of the oven
door. Rinse well. You may also use a
glass cleaner to clean the glitss on the
outside (ffthe door. Do not let water
drip into the vent openings.
Spillage of marinades, fiafit
juices, u)rnau) sauces and basting
materials containing adds may cau_
discoloration and should be wiped
up immediately. When sm_b.ce is
cool, clean a!ld rinse.
_Do not use oven cleallers, cleaning
powders or harsh abrasives on the
outside of the door.

www.GEAppliances.com
Oven Shelves
Clean the oven shelves with an abrasive
cleaalser or steel wool. Atl_r cleaning,
rinse the shelves with clean water and dry
with a clean cloth.
NOTE:Theovenshelvesmaybecleanedin the
self-cleaningoven.However,theshelveswill
darkenin color,losetheirlusterandbecomehard
toslideif cleaeadduringtheself.cleaningcycle.
Youcanwipe theshelfsupportswith cooking
oilafterself-cleaningtomaketheshelvesslide
moreeasily
)
After broiling,remove the broiler
panfromtheoven.
Donotstoreasoiledbroilerpanand
gridanywhereintheoven.
Broiler Pan & Grid
Do notcleanthebroilerpanor gridin aself-
cleaningoven.
After broiling, remove the broiler pan
froIIl file oven. Remove the grid from the
pan. Carefully pour out the grease from
the pan intx) a proper container.
Wash and rinse the broiler pan and grid
in hot water with a soapJilled or plastic
scouring pad.
fffi)od has burned on, sprinkle the grid
with detergent while hot and c{wer with
wet paper t{r_zelsor a dishcloth. Soaking
the pan will remtwe burned-on foods.
Bc)th the broiler pan and grid may be
cleaned with a commercial oven cleaner.
B_)th the broiler pan and grid can also be
cleaned in a dishwasher.
19

Careand cleaning of theoven.
Oven Heating Elements
Oonotcleanthehakeelementor thebroil
elementAnysoil will burnoff whenthe
elementsareheato_
To clean the oven floor, gently lift
the bake element. Clean with waxen
soapy water.
Non-Self-Clean Oven Interior (ontheloweroven)
With proper care, the porcelain enamel
finish on the ilxside (tithe oven--top,
bottt)m, sides, back and inside of the
door--will stay new-looking fi_r years.
Let the oven cool before deaning. We
recommend that you wear rubber gloves
when cleaning the oven.
Soap and water will nomvaUy do the job.
Heavy spattering or spillovers may require
clemfing with a mild abrasive cleaner.
Soap-fiUed steel wool pads may _sc) be reed.
Oonetallow foodspillswith a high sugaror acid
content(suchas tomatoes,sauerkraut,fruitjuices
orpie filling)toremainonthe surface.Theymay
causea dul!spotevenaftercleaning.
Household ammonia may make the
cleaning job easier. Place 1/2 cup in a
shallow glass or pottery container in a
cold oven overnight.
The ammonia fumes will help loosen the
burned-on grease and ff_od.
Ifnecessaxy, you may use an oven cleaner.
Follow the package directions.
Donot sprayovencleanerontheelectrical
centralsandswitchesbecauseit couldcausea
shortcircuitandresultin sparkingor fire.
Donatallow a film fromthecleanertobuildup
onthe temperaturesensor--it couldcausethe
oventoheatimproperly(Thesensorislocated
at thetopof theoven.)Carefullywipethe
sensorcleanafter eachovencleaning,being
carefulnot tomevethesensorasa changein
itspositioncouldaffecthew theovenbakes.
Donot sprayanyovencleanerontheoven
doer,handlesor anyexteriorsurfaceof the
oven,cabinetsor paintedsurfaces.Thecleaner
candamagethesesurfaces.
Oven Light Bulb
CAfft'lON:Beforereplacingyoorovenlightbuth,
disconnecttheelectricalpowerto theovenat the
Be sure to let the light cover and bulb
cool completely.
Wire cover holder _] Hold a hand under the cover so it
doesn't Pall when released. With
fingers of the same hand, firmly
pnsh back the wire cover bolder.
Lift off the cover.
Donot removeanyscrewstoremovethecovet:
[] Replace bulb with a 4Owatt
appliance bulb.
Toreplace the cover,
[_] Place it into gr_x_ves of the light
receptacle. Pull wire forward to
the center of the cover undl it
snaps into place.
] Cozmect electrical power to
the oven.
20
Table of contents
Other GE Oven manuals

GE
GE Appliances PT925 User manual

GE
GE CT9070 User manual

GE
GE JRS06 User manual

GE
GE Profile PT920DR Manual

GE
GE Profile PLD617 Operating instructions

GE
GE Advantium PSB9120EFES User manual

GE
GE Profile PT956SRSS Manual

GE
GE JGRP20 User instructions

GE
GE Profile Spacemaker JVM1490 User manual

GE
GE JKP90SPSS User manual