10
Using the timed baking and roasting features. (on some models)
On double oven models, you can use timed baking in one oven while using self-clean in the other; you can also use timed
baking in both ovens at the same time.
NOTE: )RRGVWKDWVSRLOHDVLO\³VXFKDVPLONHJJVILVKVWXIILQJVSRXOWU\DQGSRUN³VKRXOGQRWEHDOORZHGWRVLWIRUPRUH
than 1 hour before or after cooking. Room temperature promotes the growth of harmful bacteria. Be sure that the oven
light is off because heat from the bulb will speed harmful bacteria growth.
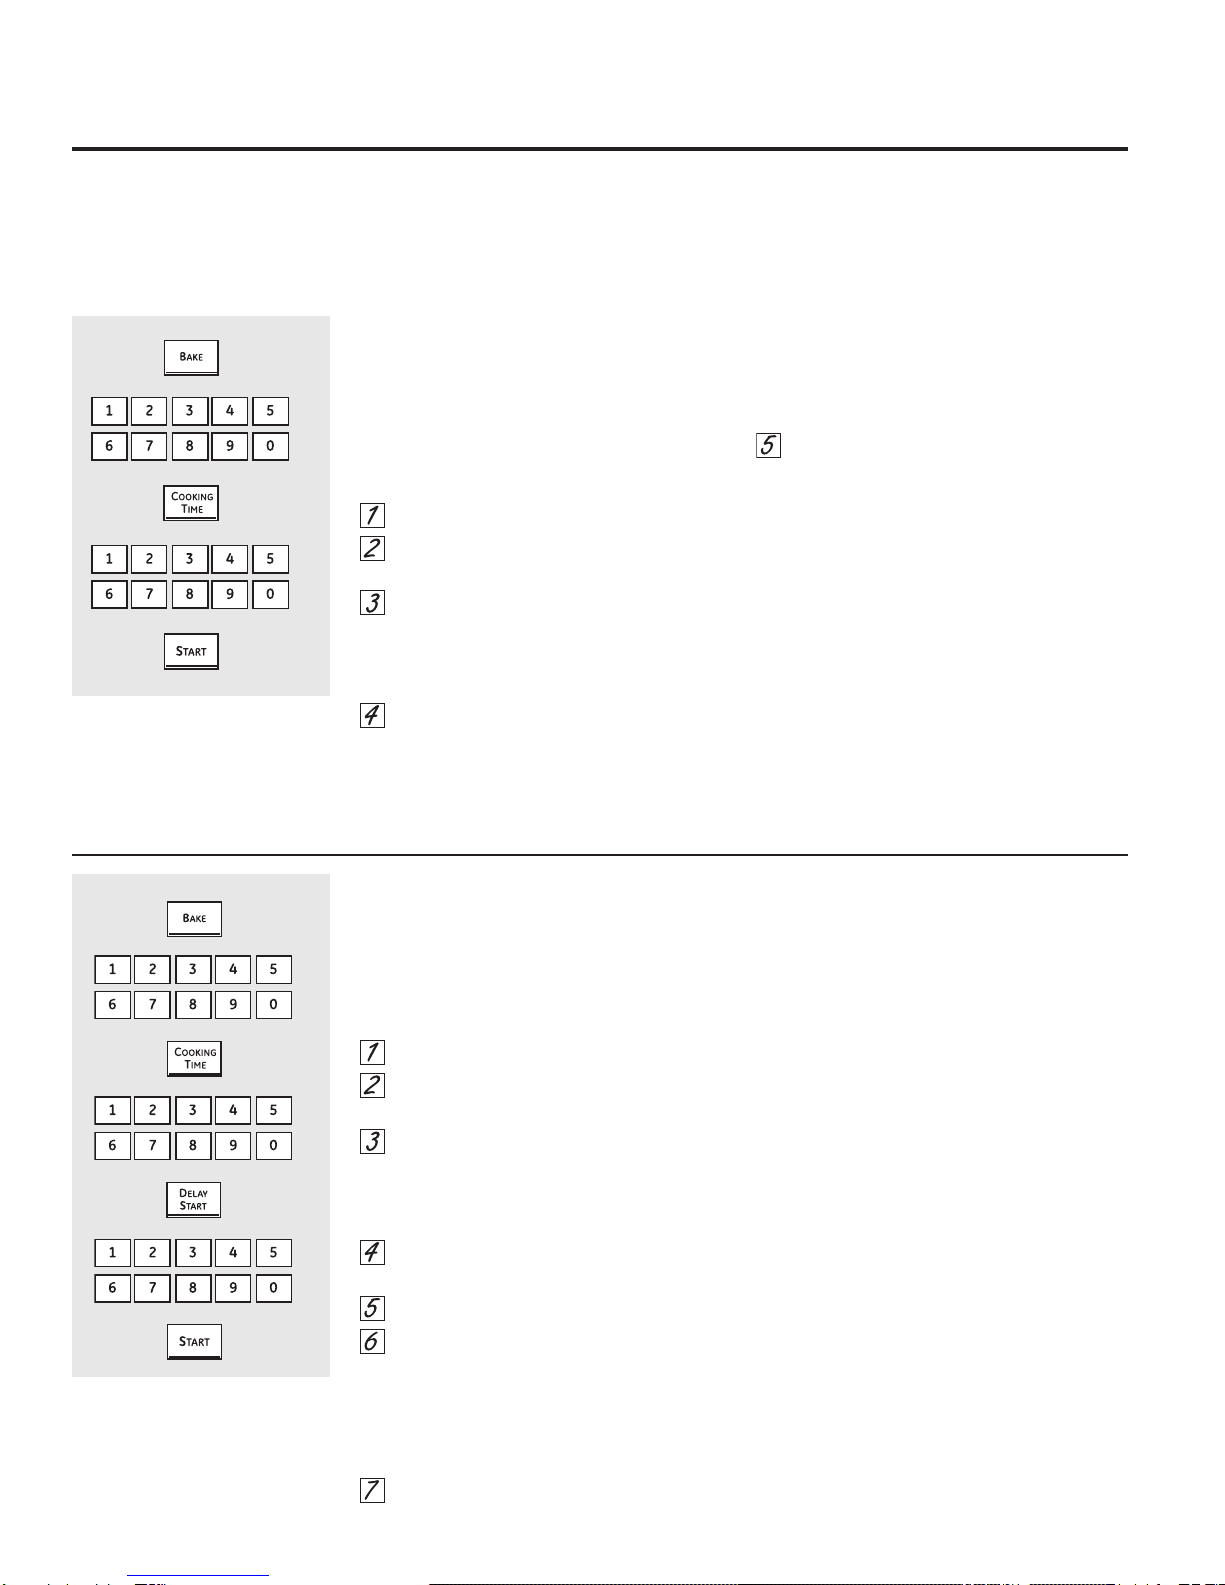
How to Set an Immediate Start and Automatic Stop
The oven will turn on immediately and cook
for a selected length of time. At the end
of the cooking time, the oven will turn off
automatically.
Make sure the clock shows the correct time
of day.
Press the Bake pad.
Using the number pads, enter the desired
temperature.
Press the Cooking Time pad.
NOTE: If your recipe requires preheating, you
may need to add additional time to the length
of the cooking time.
Using the number pads, enter
the desired baking time. The oven
temperature and the cooking time
that you entered will be displayed.
NOTE: If you want your food to be kept warm
for up to 3 hours after the cooking function is
finished, press the Warm pad once.
Press the Start pad.
The display will show the changing
temperature (starting at 100°F) and the
cooking time. The display starts changing
once the temperature reaches 100°F.
NOTE: On double oven models, when using
both ovens at the same time, the times
showing in the display will be for the last oven
set. To display the time set for the first oven set,
press the Cooking Time pad for that oven.
The oven will continue to cook for the
programmed amount of time, then shut off
automatically unless the warmer feature was
set.
Press the Clear/Off pad to clear the display.
How to Set a Delayed Start and Automatic Stop
You can set the oven control to delay-start the
oven, cook for a specific length of time and
then turn off automatically.
Make sure the clock shows the correct time
of day.
Press the Bake pad.
Using the number pads, enter the desired
temperature.
Press the Cooking Time pad.
NOTE: If your recipe requires preheating, you
may need to add additional time to the length
of the cooking time.
Using the number pads, enter the desired
baking time.
Press the Delay Start pad.
Using the number pads, enter the time
of day you want the oven to turn on and
start cooking.
NOTE: If you want your food to be kept warm
for up to 3 hours after the cooking function is
finished, press the Warm pad once.
Press the Start pad.
NOTE: An attention tone will sound if you are
using timed baking and do not press the Start
pad after entering the baking temperature.
If you would like to check the times you have
set, press the Delay Start pad to check the
start time you have set or press the Cooking
Time pad to check the length of cooking time
you have set.
When the oven turns on at the time of
day you have set, the display will show the
changing temperature (starting at 100°F) and
the cooking time. The display starts changing
once the temperature reaches 100°F.
NOTE: On double oven models, when using
both ovens at the same time, the times
showing in the display will be for the last oven
set. To display the time set for the first oven set,
press the Delay Start or the Cooking Time pad
for that oven.
The oven will continue to cook for the
programmed amount of time, then shut off
automatically unless the warmer feature was
set.
Press the Clear/Off pad to clear the display.