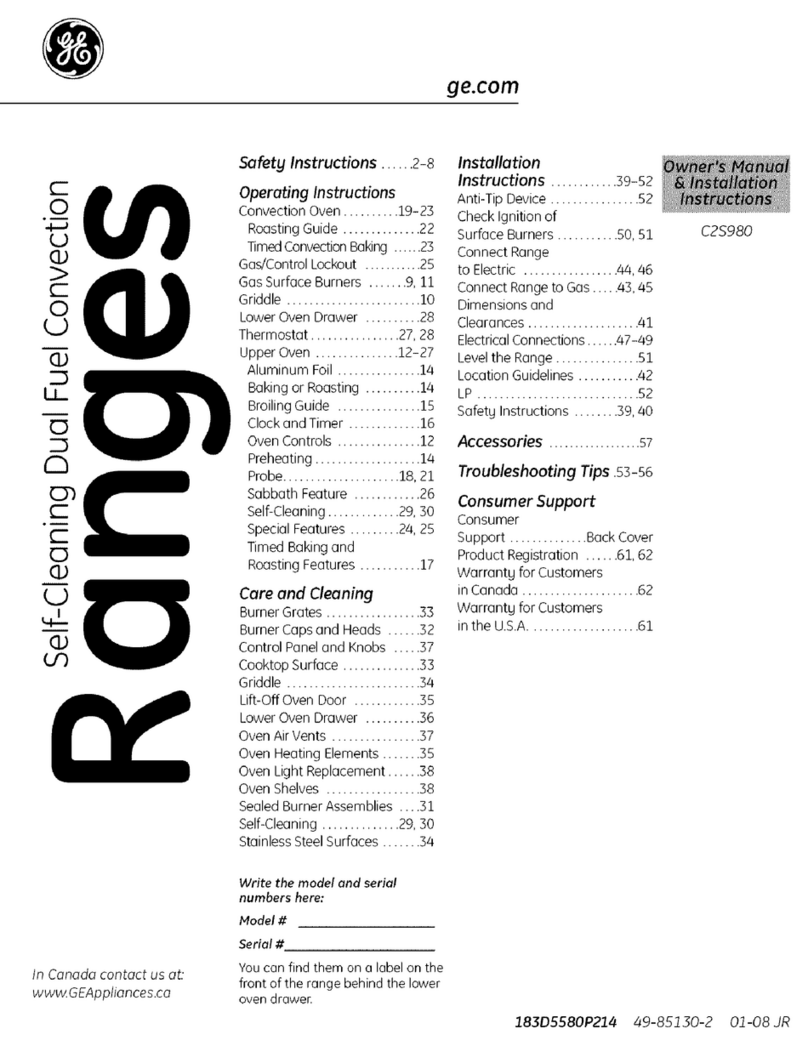
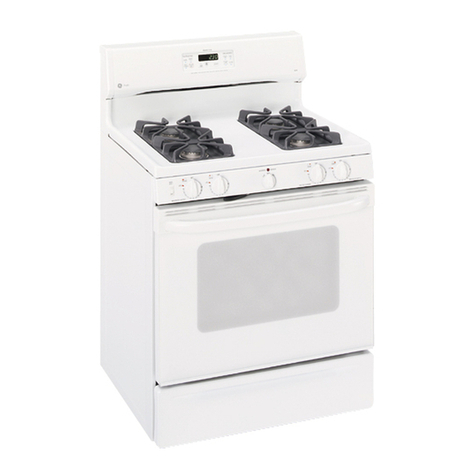
GE JGBS14 Operating instructions

GEAppliances.corn
0
am
|
0
0
Safety Instructions ..... 2-s
Operating Instructions
Oven ....................... 8-13
Broiling Compartment ....... 10
Lighting Burners with a Hatch. 7
Lighting Oven with a Match... 9
Preheating ................... 9
Shelves....................... 8
Thermostat Adjustment ..... 12
Surface Cooking ............. 6, 7
Care and Cleaning
Aluminum Foil.............. 10, 11
Burner Assembly .............. 13
Burner Grates ................. 13
Control Panel and Knobs ...... 14
Cooktop ...................... 15
Door Removal ................. 15
Oven Bottom .................. 15
Oven Vents ................... 14
Racks......................... 15
Replacing 9V Battery ........... 7
Surface ....................... 14
Installation
Instructions ............ 17-28
Air Adjustment ............. 23, 2/4
Anti-Tip Device ................ 2/4
Buttery ....................... 23
Checking Burner
Ignition ....................... 23
Connecting the Range
to Gas ..................... 21, 22
Dimensions and
Clearances.................... 21
Leveling the Range............ 24
LP............................ 20
Troubleshooting
Tips ......................... 2s
Accessories ............... 27
Consumer Support
Consumer Support ... Back Cover
Warranty for Customers
in the U.S.A................... 30
Standard Clean
Cordless
JGBS14
RGB518
For aSpanish version
of this manual, visit
our Web site at
GEAppliances.com.
Para consulter una
version en espafiol
de este manual de
instrucciones, visite
nuestro sitio de internet
GEAppliances.com.
Write the model end serial
numbers here:
Model #
Serial #
You can find them on a label on
the front of the range behind the
warming drawer or lower oven
drawer. 49-85207-i 08-12 GE

IMPORTANT SAFETY INFORMATION.
READ ALL INSTRUCTIONS BEFORE USING.
IA WARNING I If the information in this manual is not followed exactly, cl fire or explosion may
result, causing property damage, personal injury or death.
- Do not store or use gasoline or other flammable vapors and liquids in the vicinity of this or any other appliance.
- WHAT TO DO IFYOU SMELL GAS
_:_ Do not try to light any appliance.
':, Do not touch any electrical switch; do not use any phone inyour building.
':, Immediately call your gas supplier from a neighbor's phone. Follow the gas supplier's instructions.
':, If you cannot reach your gas supplier, call the fire department.
- Installation and service must be performed by a qualified installer, service agency or the gas supplier.
[A WARNING j
All ranges can tip.
BURNS or other SERIOUSINJURIEScan result.
INSTALLand CHECKthe anti-tip bracket following the instructions supplied with the bracket.
To reduce the risk of tipping the range, the range must be secured by a properly installed
anti-tip bracket. See installation instructions shipped with the bracket for complete details before
attempting to install.
To check if the bracket is installed and engaged properly, look underneath the range to see
that the anti-tip arm attached to the side panel isengaged in the bracket. On some models, the
storage drawer or kick panel can be removed for easier inspection. If visual inspection is not
possible, slide the range forward, confirm the anti-tip bracket is securely attached to the floor or wall, and slide the
range back so the anti-tip arm slides just under the anti-tip bracket.
If the range is pulled from the wall for any reason, always repeat this procedure to verify the range is properly
secured by the anti-tip bracket.
Never completely remove the leveling legs or the range will not be secured to the anti-tip device properly.
If you did not receive an anti-tip bracket with your purchase, call 1.800.626.8774 to receive one at no cost. For
installation instructions of the bracket, visit GEAppliances.com (in Canada, GEAppliances.ca).
[AWARNING ]IMPORTANT SAFETYNOTICE
The California Safe Drinking Water and Toxic Enforcement Act requires the Governor of California to publish a list of
substances known to the state to cause cancer, birth defects or other reproductive harm, and requires businesses to
warn customers of potential exposure to such substances.
The fiberglass insulation in self-clean ovens gives off a very small amount of carbon monoxide during the cleaning cycle.
Exposure can be minimized by venting with an open window or using a ventilation fan or hood.
SAVE THESE INSTRUCTIONS

[A, WARNING ] GENERAL SAFETYINSTRUCTIONS
GEAppliances.com
WARNING j
NEVER use this appliance as aspace heater to heat
or warm the room. Doing so may result in carbon
monoxide poisoning and overheating of the oven.
Use this appliance for its intended purpose as described
in this owner's manual.
Have your range installed and properly grounded by
a qualified installer in accordance with the provided
installation instructions. Any adjustment and service
should be performed only by a qualified gas range
installers or service technicians. Do not attempt to repair
or replace any part of your range unless it is specifically
recommended in this manual.
_:_Your range is shipped from the factory set for use with
natural gas. It can be converted for use with LP gas.
If required, these adjustments must be made by a
qualified technician in accordance with the installation
instructions and local codes. The agency performing this
work assumes responsibility for the conversion.
i Have the installer show you the location of the range
gas shut-off valve and how to turn it off if necessary.
Before performing any service, remove the 9V battery
from the range to disable the spark ingition system.
Be sure all packing materials are removed from the
range before operating to prevent ignition of these
materials.
Do not leave children alone or unattended in an
area where an appliance is in use. They should never
be allowed to climb, sit or stand on any part of the
appliance.
iiiiiil
iiiiiiili_
iiiiiiili_
iiiiiiili_
iiiiiiili_
iiiiiiili_
iiiiiiili_
Do not store items of interest to children above a range
or on the backguard of a range-children climbing on
the range to reach items could be seriously injured.
Do not allow anyone to climb, stand or hang on the
oven door, drawer or cooktop. They could damage the
range or tip it over causing severe injury or death.
Never block the vents (air openings) of the range. They
provide the air inlets and outlets that are necessary for
the range to operate properly with correct combustion.
Air openings are located at the rear of the cooktop, at
the top and bottom of the oven door, and at the bottom
of the range under the warming drawer, lower oven
drawer or kick panel.
Use only dry pot holders-moist or damp pot holders on
hot surfaces may result in burns from steam. Do not let
pot holders touch surface burners, burner grate, or oven
heating element. Do not use a towel or other bulky cloth
in place of pot holders.
Be careful not to touch hot surfaces of the range.
Potentially hot surfaces include burners, grates, cooktop,
backguard, oven and door interior and crevices around
the oven door.
Do not heat unopened food containers. Pressure could
build up and the container could burst, causing an
injury.
Cook meat and poultry thoroughly-meat to at least an
internal temperature of 160°F and poultry to at least
an internal temperature of 180°F. Cooking to these
temperatures usually protects against foodborne illness.
SAVE THESE INSTRUCTIONS 3

IMPORTANT SAFETY INFORMATION.
READ ALL INSTRUCTIONS BEFORE USING.
iA WARNING iKEEP FLAMMABLE MATERIALS AWAY FROM THE RANGE
Do not store or use flammable materials in an oven or
near the cooktop, including paper, plastic, pot holders,
linens, wall coverings, curtains, drapes and gasoline or
other flammable vapors and liquids.
Never wear loose-fitting or hanging garments while
using the appliance. Avoid storing commonly used
items in cabinets above the range and be careful when
reaching over the range. Clothing in close proximity to
burners or hot surfaces may ignite causing severe burns.
Do not let cooking grease or other flammable materials
accumulate in or near the range. Grease in the oven or
on the cooktop may ignite.
Clean ventilating hoods frequently. Grease should not
be allowed to accumulate on the hood or filter.
IAWARNINGI INTHE EVENT OF A FIRE,TAKE THE FOLLOWING STEPS
TO PREVENT INJURYAND FIRESPREADING:
Do not use water on grease fires. Never pick up
a flaming pan. Turn the controls off. Smother a
flaming pan on a surface burner by covering the pan
completely with a well-fitting lid, cookie sheet or flat
tray. If necessary, use a multi-purpose dry chemical or
foam-type fire extinguisher.
If there is afire in the oven during baking, turn the oven
off and keep the door closed until the fire goes out. If
iiiiiil
necessary, use a multi-purpose dry chemical or foam
type fire extinguisher.
If there is afire in the oven during self-clean, turn the
oven off and wait for the fire to go out. Do not force
the door open. Introduction of fresh air at self-clean
temperatures may lead to a burst of flame from the
oven. Failure to follow this instruction may result in
severe burns.
IA WARNING iCOOKTOP SAFETY INSTRUCTIONS
Never leave the surface burners unattended at medium
or high heat settings. Foods, especially oily foods, may
ignite resulting in fire that could spread to surrounding
cabinets.
To minimize the possibility of burns, ignition of
flammable materials and spillage, the handle of a
container should be turned toward the center of the
range without extending over nearby burners.
Never leave oil unattended while frying. If allowed to
heat beyond its smoking point, oil may ignite resulting
in fire that may spread to surrounding cabinets. Use a
deep fat thermometer whenever possible to monitor oil
temperature.
To avoid oil spillover and fire, use a minimum amount of
oil when shallow pan-frying and avoid cooking frozen
foods with excessive amounts of ice.
_:, Use proper pan size and avoid pans that are unstable
or easily tipped. Select cookware that is matched to the
size of the burner. Burner flames should be adjusted so
that they do not extend beyond the bottom of the pan.
Excessive flame may be hazardous.
Always use the LITE position when igniting the top
burners and make sure the burners have ignited.
When usingglass/ceramic cookware, makesure it is
suitable for cooktop service;others may breakbecause
of sudden change intemperature.
When preparing flaming foods under a hood, turn the
fan on.
Do not use a wok with a round metal support ring. The
ring may trap heat and block air to the burner resulting
in a carbon monoxide hazard.
iiiiiil
Do not attempt to lift the cooktop if your range has
sealed surface burners. Doing so may damage the gas
tubing to the surface burners resulting in a gas leak and
risk of fire.
iiiiiil
Do not use aluminum foil to cover the grates or line
any part of the cooktop. Doing so may result in carbon
monoxide poisoning, overheating of the cooktop
surfaces, or a potential fire hazard.
4 SAVE THESE INSTRUCTIONS
GEAppliances.com
iA WARNING jOVEN SAFETYINSTRUCTIONS
[AL_WARN ING jlNEVER coverony slots,holes,or
passages in the oven bottom or cover on entire rock with
materials such as aluminum foil. Doing so blocks air flow
through the oven and may cause carbon monoxide
poisoning. Aluminum foil linings may also trap heat, causing
o fire hazard.
Stand away from the range when opening the oven
door. Hot air or steam which escapes can cause burns
to hands, face and/or eyes.
Keep the oven free from grease buildup. Grease in the
oven may ignite.
Place oven racks in desired location while oven is cool.
If rack must be moved while oven is hot, be careful to
avoid touching hot surfaces.
iiiil}i
iiiiiiili_
iiiiiiili_
iiiiiiili_
iiiiiiili_
Pull the oven rack to the stop-lock position when
loading and unloading food from the oven. This helps
prevent burns from touching hot surfaces of the door
and oven walls.
Do not leave items such as paper, cooking utensils or
food in the oven when not in use. Items stored in an
oven can ignite.
Do not leave items on the cooktop near the oven vent
which is at the rear edge of the cooktop. Items may
overheat resulting in a risk of fire or burns.
When using cooking or roasting bags in the oven, follow
the manufacturer's directions.
Never broil with door open. Open-door broiling is not
permitted due to overheating of control knobs.
SAVE THESE INSTRUCTIONS s
Using the gas surface burners.
Throughout this manual, features and appearance may vary from your model.
Before Lighting a Gas Burner
Hake sureall burners are in place.
Hake sureall grates on the range are
properly placed before using any burner.
After Lighting a Gas Burner
Donot operate the burner for an extended
period of time without cookware on the
grate.Thefinish on the grate may chip
without cookware to absorb the heat.
Besure the burners and grates are cool
beforeyou placeyour hand, a pot holder,
cleaning cloths or other materials on them.
Push the control knob in and turn
it to the LITEposition.
How to Light a Gas Surface Burner
Make sure all the surface burners are placed in
their respective positions.
Pushthe control knob in and turn itto the LITE
position.
Youwill hear a little clicking noise-the sound
of the electric spark igniting the burner.
Turnthe knob to adjust the flame size.Ifthe
knob stays at LITE,it will continue to click.
When one burner isturned to LifE, all the
burners spark. Donot attempt to disassemble
or clean around any burner while another
burner ison.An electric shockmay result,which
could cause you to knock over hot cookware.
How to Select Flame Size
AWA RNING i Flamesthat are
not covered bWcookware may present a risk
of burns or clothing ignition. Never let flames
extend beyond the sides of the cookware.
Watch the flame, not the knob, asyou adjust
heat. When fast heating is desired,the flame
sizeon a gas burner should match the
cookware you are using.
Flameslarger than the bottom ofthe cookware
will not result in faster heating and may be
hazardous.
Top-of-Range Cool<ware
Aluminum: Medium-weight cookware is
recommended because it heats quickly
and evenly. Most foods brown evenly in an
aluminum skillet. Use saucepans with tight-
fitting lids when cooking with minimum
amounts of water.
Cast-Iron: Ifheated slowly, most skillets will
give satisfactory results.
Enamelware: Under some conditions, the
enamel of some cookware may melt. Follow
cookware manufacturer's recommendations
for cooking methods.
Glass: There are two types of glass
cookware-those for oven use only and
those for top-of-range cooking (saucepans,
coffee and teapots). Glass conducts heat
very slowly.
Heatproof Glass Ceramic: Can be used for
either surface or oven cooking. It conducts
heat very slowly and cools very slowly. Check
cookware manufacturer's directions to be
sure it can be used on gas ranges.
Stainless Steel: This metal alone has poor
heating properties and is usually combined
with copper, aluminum or other metals for
improved heat distribution. Combination
metal skillets usually work satisfactorily
if they are used with medium heat as the
manufacturer recommends.

GEAppliances.com
Use a tic]t-bottomed wok.
Wok This Way
We recommend that you usea 14-inch or
smaller flat-bottomed wok. Hake surethe wok
bottom sits flat on the grate. They are available
at your local retailstore.
Onlya flat-bottomed wok should be used.
Donot usea wok support ring. Placingthe
ring over the burner or grate may causethe
burner to work improperly, resulting in carbon
monoxide levelsabove allowable standards.
Thiscould be dangerous to your health.
Battery Comportment Location
LO OFF
UTE
Replacing the 9V Battery
CAUTION ]Battery may explode
or leak and cause burn inJury,if recharged,
disposed of in fire, inserted backwards, or
missassembled.
When a knob isturned to the LifE position,
sparking will occur at the burners. Aweak
battery will cause the amount of time between
sparksto increase.Ifthe time between sparks
exceedsone second, replacethe battery. If a
surface burner doesn't light within five seconds
turn gas off and wait one minute for gasto
dissipate before attempting to light again.
On some models, a Buttery Level indicator light
islocated to the left of the burner knobs.This
light will glow asthe burners are being lit ifthe
battery has enough power. Ifthis indicator light
fails to glow during sparking,the battery power
levelis low and the battery should be replaced
soon.
IMPORTANT'.Replacewith standard 9V alkaline
battery. Followall state and local requirements
for disposing of the old battery.
Lighting Burners with a Match
If the battery istoo weak to light the burners
you can light the gas surface burners on your
range with a wooden kitchen match. Hold a
lit match to the burner, then push in and turn
the control knob to the LITEposition. Use
extreme caution when lighting burners this
way. Surface burners in usewhen an electrical
power failure occurs will continue to operate
normally.

Usingthe oven.
To operate the oven:
%
[]
F31
[]
Ensuregas isavailable at the range by
lighting any surface burner and turning it
off again.
Pushand turn knob to the PILOTposition.
Push in completely and hold for i0
seconds, then release (Holding in on the
oven control knob for less than 10
seconds at the PILOT position may cause
the oven burner not to light.)
Push and turn to the temperature you
want.
rs] Checkfor oven burner flame by opening
the oven door and looking through the
hole at the front of the oven bottom.
If no sparkingnoise isheard when the oven
temperature knob ispushed in at the PILOT
position,replace the battery with a fresh
9V alkalinebattery. Battery compartment is
located behind the broil door.
[] Turnthe control knob to OFFwhen
finished baking.
To avoid possible burns, place
The oven has 5 shelf positions.
It also has a special low shelf
position(R)forextralargeitems,
suchasa large turkey.
the shelves in the desired position before you turn the oven on.
Before you begin...
Theshelveshave stop-locks, sothat when
placed correctly on the shelf supports (A
through E),they will stop before coming
completely out, and will not tilt.
When placing and removing cookware, pull the
shelf out to the bump on the shelf support.
[ ACAUTION lWhenyouare
using a rack in the lowest position (R),you
will need to use caution when pulling the
rack out. We recommend that you pull the
rack out several inches and then, using two
pot holders, pull the rack out by holding the
sides of it. The rack is low and you can be
burned if you put your hand in the middle of
the rack and pull all the way out.
Toremove a shelf, pull ittoward you, tilt the
front end up and pull it out.
Toreplace, place the end of the shelf (stop-
locks)on the support, tilt up the front and push
the shelf in.
NOTE:Theshelf isnot designedto slideout at
thespecial low shelf (R)position.
Plastic items on the cooktop may
melt if left too close to the vent.
Vent appearance and location vary.
Upper Oven Vent
Your oven isvented through ducts at the rear
of the range. Donot block these ducts when
cooking inthe oven-it isimportant that the
flow of hot air from the oven and fresh air
to the oven burner be uninterrupted. Avoid
touching the vent openings or nearby surfaces
during oven or broiler operation-they may
become hot.
Handlesof pots and pans on the cooktop
may become hot if lefttoo closeto the vent.
Donot leaveplastic or flammable items on
the cooktop-they may melt or ignite if left
too closeto the vent.
Do not leave closed containers on the
cooktop. The pressure in closed containers
may increase, which may cause them
to burst.
Metal items will become very hot ifthey are
left on the cooktop,and could cause burns.

GEAppliances.com
Lighting the Oven with a Match
Theoven of u buttery-powered cordless range
may be litwith u match and operated normally,
even ifthe buttery istoo weak to activate the
spark system. Follow these stepsto match-light
the oven burner:
1. Removethe oven door, oven racks,and oven
bottom. To remove oven bottom, remove two
1/4" hex headscrews at the rear of the oven.
2. Locatethe oven burner pilot at the left rear of
the oven burner.
3. Holdu lit match to the oven burner pilot. Turn
the oven control knobto the PILOTposition
and push in completely.
4.After pilot lights,continue to hold in firmly on
the knobfor ZOseconds before releasing.
5. Pilotshould remain lit. If not, repeat steps 3
and 4.
6. Replaceoven bottom, rocks,and oven door.
7.Turn knobto the desired temperature setting.
Ovenwill operate normally.
Turnoven control knob to OFFwhen finished
baking.
Ifyour model has a door latch, do not lock the oven door with the latch during baking or roasting.
The latch is used for self-cleaning only.
ii
The oven has o special low shelf
(R)position just above the oven
bottom. Use it when extra cooking
space is needed, for example,
when cooking o large turkey. The
shelf is not designed to slide out
at this position.
Preheating and Pan Placement
Toavoid possiblebums,place the racksin the
desiredposition beforeyou turn on the oven.
Preheatthe oven if the recipe calls for it. To
preheat, set the oven at the correct temperature.
Preheatingis necessaryfor good resultswhen
baking cakes,cookies,pastry and breads.
Forovenswithout a preheat indicator light or
tone, preheat 10 minutes.
Bakingresultswill be better ifbaking pans
are centered in the oven as much aspossible.
Pansshould not touch each other or the walls of
the oven. Ifyou need to usetwo shelves,stagger
the pansso one isnot directly above the other,
and leaveapproximately IVY' between pans,
from the front, back and sides ofthe wall.
When baking on o single rack, use
rack position C.Baking results
will be better if baking pans ore
centered in the oven as much as
possible.

Usingthe oven.
Aluminum Foil
Do not use aluminum foil to line oven bottoms.
Thefoilwill trap heat below and upset the
performance of the oven. Foilcan melt and
permanently damage the oven bottom.
Damage from improper useof aluminum foil is
not covered by the product warranty.
Foilmay be used to catch spillsby placing a
sheet on a lower rack,several inches below
the food .Donot usemore foil than necessary
and never entirely cover an oven rack with
aluminum foil. Keepfoil at least 1-1/2" from
oven walls to prevent poor heat circulation.
Oven Moisture
Asyour oven heats up,the temperature change
of the air in the oven may cause water droplets
to form on the door glass.These droplets
are harmlessand will evaporate as the oven
continues to heat up.
How to Set the Broiler Comportment (on some models)
Broiling iscooking food by direct heatfrom
above the food. Mostfish and tender cuts of
meat can be broiled. Followthese directions to
keep spattering and smoking to a minimum.
@
Your range hasa compartment below the oven r_
for broiling.
Both the oven and broiler compartment doors
must be closed during broiling.
Turn most foods once during cooking (the
exception isthin fillets offish; oil one side,place
that side down on broiler grid and cook without
turning until done).Time foods for about
one-half the total cooking time,turn food, then
continue to cook to preferred doneness.
r_ Youcan change the distance of the food
from the heat source by positioning the
broiler pan and grid on one of three rack
positions in the broiler compartment--A
(bottom of broiler compartment), B(middle)
and C(top).
@
@
D
If meat hasfat or gristle around the edge,
cut vertical slashesthrough both about 2"
apart. If desired,the fat may be trimmed,
leaving a layerabout 1/8" thick.
Arrange the food on the grid and position
the broiler pan on the appropriate rack in
the oven or broiling compartment. Placing
food closer to the flame increasesexterior
browning of the food, but also increases
spattering and the possibility of fats and
meat juices igniting.
Closethe oven and broiler compartment
door.
Follow oven lighting instructions (seeUsing
the Oven)and then turn the knob to BROIL.
When broilinq isfinished,turn the OVEN
CONTROLknob to OFF.Removethe broiler
pan from the broiler compartment and
serve the food immediately. Leavethe pan
outside the range to cool.
[] Preheatingthe broiler or oven isnot
necessary and can produce poor results.
10

Aluminum Foil
Youcan usealuminum foil to lineyour broiler
pan and broiler grid. However,you must mold
the foil tightly to the grid and cut slits initjust
likethe grid.
Cut slits in the foil just like the grid.
GEAppliances.com
Broiling Compartment Guide Suggestions
Both the oven and broiler compartment doors
must be closed during broiling.
Always usethe broiler pan and grid that
comeswith your range. It isdesignedto
minimize smoking and spattering by trapping
juices inthe shielded lower part ofthe pan.
When arranging the food on the pan, do not
letfatty edges hang overthe sides because
dripping fat could soilthe oven.
The broiler compartment doesnot need to be
preheated. However, for very thin foods,or to
increase browning, preheat ifdesired.
B Forsteaks and chops,slashfat evenly around
the outside edges of the meat. Toslash,cut
crosswisethrough the outer fat surfacejust
to the edge ofthe meat. Usetongs to turn
the meat over to prevent piercingthe meat
and losingjuices.
B Frozensteakscan be broiled by positioning
the rack at the next lowest rack position and
increasingthe cooking time givenin this guide
1_ times per side.
B If desired,marinate meats or chicken before
broiling.Or brush with barbecue sauce lust
5-10 minutes only.
11

Adjust the oven thermostat--Do it yourselfl
You may find that your new oven cooks differently than the one it replaced. Useyour new oven for afew weeks to
become more familiar with it. Ifyou still think your new oven is too hot or too cold, you can adjust the thermostat knob
yourself.
Do not use thermometers, such as those found in grocery stores, to check the temperature setting of your oven.
These thermometers may vary 20-40 degrees.
NOTE: This adjustment will not affect the broiling temperature.
OVE_ TEMP
Front of OVENTEMP knob
(knob appearance may vary)
Back of OVEN TEIVlp knob
(knob appearance may vary)
To Adjust the Thermostat (on models with an OVEN TEIVtpKnob)
%
r21
Pullthe OVENTEMPknob off the range
and look at the back side.To make an
adjustment, loosen(approximately one
turn), but do not completely remove,the
two screws on the back ofthe knob.
With the back of the knob facing you, hold
the outer edge ofthe knob with one hand
and turn the front of the knob with the
other hand.
Toincrease the oventemperature, move
the top screw toward the right.You'll hear
a clickfor each notch you move the knob.
Todecrease the oven temperature, move
the top screw toward the left.
%
%
Eachclickwill change the oven
temperature approximately lO°F.(Range
is plusor minus 60°Ffrom the arrow.) We
suggest that you make the adjustment
one click from the original setting and
check oven performance before making
any additional adjustments.
After the adjustment ismade, retighten
screws so they are snug, but be careful
not to overtighten.
Replacethe knob, matching the flat area
of the knobto the shaft, and check
performance.
The type of margarine will affect baking performance!
Most recipes for baking have been developed using high-fat products such as butter or margarine (80% fat). Ifyou
decrease the fat, the recipe may not give the same results as with a higher-fat product.
Recipe failure can result if cakes, pies, pastries, cookies or candies are made with low-fat spreads. The lower the fat
content of a spread product, the more noticeable these differences become.
Federal standards require products labeled "margarine" to contain at least 80% fat by weight. Low-fat spreads, on the
other hand, contain less fat and more water. The high moisture content of these spreads affects the texture and flavor
of baked goods. For best results with your old favorite recipes, use margarine, butter or stick spreads containing at least
70% vegetable oil.
12

Care and cleaning of the range. GEAppliances.com
Be sure electrical power is off and all surfaces are cool before cleaning any part of the range.
I^ I
i WARNINGI ;uourrange is removed Forcleaning, servicing or any reason, be
sure the anti-tip device is reengaged properly when the range is replaced. Failure to take
this precaution could result in tipping of the range and cause injury.
Tocheck if the bracket is installed and engaged properly, look underneath the range to see
that the anti-tip arm attached to the side panel is engaged in the bracket. Onsome models, the
storage drawer or kick panel can be removed for easier inspection. If visual inspection is not
possible,slide the range forward, confirm the anti-tip bracket is securely attached to the floor or
wall, and slide the range backso the anti-tip arm slidesjust under the anti-tip bracket.
If the range ispulled Fromthe wall Forany reason, always repeat this procedure to verify the
range is properly secured by the anti-tip bracket.
Ifyour range has no anti-tip bracket, call !.800.626.877/4 to receive one at no cost.
Grote
=,,
Drippan (ifso equipped)
Surface burner
ACAUTiON:
Donot operatethe cooktop without all
burner parts, drip pans(if so equipped)
and grates in place.
Standard Twin Burner Assemblies
On models with standard twin burners,the
cooktop lifts up for easy access.
Turn all controls OFFbefore removing burner
parts and drip pans (ifsoequipped).
The burner grates and drip pans (if so
equipped) can be lifted off, making them easy
to clean.
Theholesin the surface burners of your range
must be kept clean at all times for proper
ignition and an even, unhampered flame.
Youshould clean the surface burners routinely,
especiallyafter bad spillovers,which could clog
these holes.
Wipe off surface burners. If heavy spillover
occurs, remove the surface burners from the
range. Burnerslift out for cleaning. Lift up the
cooktop and then lift out the surface burners.
To remove burned-on food, soak the surface
burner in a solution of mild liquid detergent
and hot water. Soakthe surface burner for 20
to 30 minutes.
Formore stubborn stains, usea cleanser like
Soft Scrub®brand or BanAmi®brand. Rinse
well to remove any traces of the cleanser that
might clogthe surface burner openings.
Do not usesteel wool because it will clog the
surface burner openings and scratch the
surface burners. If the holesbecome clogged,
clean them with a sewing needle or twist-tie.
Beforeputting the surface burner back,shake
out excesswater and then dry itthoroughly by
setting it in a warm oven for 30 minutes.Then
place it back inthe range, making sure it is
properly seated and level.
Checkthe flame pattern of each burner. Ifthe
flames are "jumpy" (not steady),cleanthe holes
again with a sewing needle or twist-tie.
Cleaning Burner Grates
Lift out when cool. Grates should be washed
regularly and, of course,after spillovers.Wash
them in hot, soupy water and rinsewith clean
water. When replacing the grates,be sure
they are positioned securelyover the burners.
Replacethe grates sothat continuous arcs are
formed with the center ribsof all three grates.
Do not operate a burner for an extended
period of time without cookwure on the grate.
Thefinish on the grate may chip without
cookware to absorb the heat.
To get rid of burned-on food, placethe grates
in a covered container. Add 1/4 cup ammonia
and letthem soak several hours or overnight.
Wash, rinsewell and dry.
Although they are durable, the grates will
gradually losetheir shine,regardless of the
best care you can givethem. This isdue to
their continual exposure to high temperatures.
You will notice this sooner with lighter color
grates.
Cleanthese holesthoroughly on each
burner.
13

Care and cleaning of the range. GEAppliances.com
Cooktop Surface
Toavoid damaging the porcelain-enamel
surface of the cooktop and to prevent it
from becoming dull,clean up spillsright away.
Foodswith a lot of acid (tomatoes,sauerkraut,
fruit juices, etc.)or foods with high sugar
content could cause a dull spot if allowed to set.
When the surface hascooled, wash and rinse.
Forother spillssuch as fat spatterings, wash
with soap and water once the surface has
cooled.Then rinseand polish with a dry cloth.
Oven Air Vents
Never block the vents (air openings)of the
range.They provide the air inlet and outlet that
are necessaryfor the range to operate properly
with correct combustion.
Air openings are located at the rear of the
cooktop, at the top and bottom of the oven
door,and at the bottom ofthe range.
Vent appearance and location vary.
Surface burner knob
Front Control Panel and Knobs
It's a good idea to wipe the control panel after
each use of the oven. Use a damp cloth to
clean or rinse. For cleaning, use mild soap and
water or a 50/50 solution of vinegar and water.
For rinsing, use clean water. Polish dry with a
soft cloth.
Do not useabrasive cleansers,strong liquid
cleaners,plasticscouring pads or oven cleaners
on the control panel-they will damage the
finish.
Do nottry to bend knobs by pulling them up
or down or by hanging a towel or other such
loads.Thiscan damage the gasvalve shaft.
Thecontrol knobs may be removed for easier
cleaning.
Make surethe knobs are in the OFFpositions
and pull them straight off the stems for
cleaning.
Theknobs can be cleaned in a dishwasher or
they may also bewashed with soapand water.
Makesurethe insidesof the knobs are dry
before replacing.
Replacethe knobs in the OFFposition to ensure
proper placement.
Metal parts can be cleaned with soap and
water. Donot use steelwool, abrasives,
ammonia, acids or commercial oven cleaners.
Dry with a soft cloth.
NOTE:Knobs are not interchangeable. Be sure to
reinstall the knobs to the original location.
14

,GEAppliances.com
Some models have dual support
rods that will hold the cooktop up
while you clean underneath it.
Lift-Up Cooktop (on models with standard twin burners)
Cleanthe area under the cooktop often.
Built-upsoil,especiallygrease, may catch on
fire.
Tomake cleaning easier,the cooktop may be
lifted up.
NOTE:Do not lift the cooktop on sealed burner
models. Lifting the cooktop can lead to damage
and improper operation of the range.
To raise the cooktop:
[-71 Besure the burners are turned off.
[] Removethe grates.
r_ Grasp the two front burner wells and
lift up.
Cleanunder the cooktop with hot, soapy water
and a clean cloth. Ifyou removed your surface
burners while cleaning, make surethey ore
properly seated when replacing them.
After cleaning, lower the cooktop (becareful
not to pinchyour fingers).
Oven Bottom
The oven bottom has a porcelain-enamel
finish. To make cleaning easier, protect the
oven bottom from excessive spillovers by
placing a cookie sheet on the rack below the
rack you are cooking on.This isparticularly
important when baking a fruit pie or other
foods with a high acid content. Hot fruit
fillings or other foods that are highly acidic
(such as tomatoes, sauerkraut and sauces
with vinegar or lemon juice) may cause
pitting and damage to the porcelain-enamel
surface and should be wiped up immediately.
To clean up spillovers, use soap and water,
an abrasive cleaner or soap-filled scouring
pad. Rinsewell to remove any soap before
self-cleaning.
J
Liftthe door straightup and
off the hinges.
Lift-Off Oven Door Ionsome models)
The oven door is removable, but it is
heavy. You may need help removing and
replacing the door.
To remove the door:
r_ open it a few inches to the special stop
position that will hold the door open.
Grasp firmly on each side and lift the
door straight up and off the hinges.
NOTE:Be careful not to place hands between
the hinge and the oven door frame since the
hinge could snap back and pinch fingers.
To replace the door:
[] Hake sure the hinges are in the special
stop position. Position the slots in the
bottom of the door squarely over the
hinges.
Lower the door slowly and evenly over
both hinges at the same time. If the
hinges snap back against the oven
frame, pull them back out.
Oven Racks
All oven racks may be cleaned by hand with an
abrasive cleaner or steel wool. After cleaning,
rinsethe rackswith clean water and dry with
a clean cloth. Itwill be necessary to grease all
oven rack sideedges with a light coating of
vegetable oil after cleaning them by hand or
in the oven. Thiswill help maintain the ease of
slidingthe racksin and out of the oven.
15

GEAppliances.cam
Thegasketisdesignedwith agapatthe
bottom toallowfor properaircirculation.
Donotrubor cleanthedoorgasket-it has
anextremelylow resistancetoabrasion.
if younoticethe gasketbecomingworn,
frayedor damagedinanyway or if it has
becomedisplacedonthedoor,you should
haveit replaced.
Cleaning the Door
Toclean the inside of the door'.
Do not allow excesswater to run into any
holesor slotsin the door.
Thearea outside the gasket can be cleaned
with a soap-filled plastic scouring pad.
Toclean the outside of the door'.
Usesoap and water to thoroughly cleanthe
top, sidesand front of the oven door. Rinse
well.
Spillageof marinades, fruit juices,tomato
saucesand basting materials containing
acids may cause discoloration and should be
wiped up immediately. When the surface is
cool,clean and rinse.
Do not useoven cleaners,cleansing powders
or harsh abrasives on the outside of the door.
Gric
!
|"/. IS
| |
Pan
Broiler Pun end Grid
After broiling,remove the broiler pan from the
broiler compartment. Removethe grid from
the pan. Carefullypour out grease from the
pan into a proper container. Wash and rinse
the broiler pan and grid in hot water with a
soap-filled or plastic scouring pad.
If food has burned on,sprinklethe grid with
detergent while hot and cover with wet paper
towels or a dishcloth. Soakingthe pan will
remove burned-on foods.
Thebroiler pan and grid may be cleaned with a
commercial oven cleaner.
Both the broiler pan and grid can also be
cleaned in a dishwasher.
Do not store a soiledbroiler pan and grid
anywhere in the range.
ACAUTION: oo not cleanthe broiler
pan or grid in a self-cleaningoven.
16

I
Istall ti
structi Ra e
If you have questions, call 1.800.GE.CARES or visit our Web site at: GEAppliances.com
In the Commonwealth of Massachusetts
. This product must be installed by a licensed plumber or
gas fitter.
. When using ball type gas shut-off valves, they shall be
the T-handle type.
A flexiblegasconnector,when used,must not exceed3 feet.
BEFORE YOU BEGIN
Read these instructions completely and carefully.
Installation of this range must conform with local
codes, or in the absence of local codes, with the
National Fuel Gas Code, ANSI Z223.1/NFPA.54, latest
edition. In Canada, installation must conform with
the current Natural Gas Installation Code, CAN/
CGA-B149.1 or the current Propane Installation
Code, CAN/CGA-B149.2, and with local codes where
applicable. This range has been design-certified by
CSAInternational according to ANSI Z21.::[,latest
edition and Canadian Gas Association according to
CAN/CGA-I.1 latest edition.
Aswith any appliance using gas and generating heat,
there are certain safety precautions you should follow.
You will find these precautions in the Important Safety
Information section in the front of this manual. Read
them carefully.
.IMPORTANT -Savetheseinstructionsfor
local electrical inspector's use.
.IMPORTANT - Observeallgoverning
codes and ordinances.
, Note to Installer - Leave these instructions with
the appliance after installation is completed.
, Note to Consumer - Keepthis Owner's Manual
and Installation Instructions for future reference.
.Note - Thisappliance must be properly grounded.
,Servicer - The electricaldiagram isin an envelope
attached to the buck of the range.
Proper installation isthe responsibility of the installer.
Product failure due to improper installation is not
covered under the Warranty.
Mobile Home - Additional Installation Requirements
The installation of this range must conform to the
Manufactured Home Construction and Safety Standard,
Title 2/4CFR,Part 3280 (formerly the Federal Standard
for Mobile Home Construction, use the Standard for
Manufactured Home Installations, ANSIA225, 1/NFPA
501A or with local codes.
Mobile home installations require:
" When this range isinstalled in a mobile home, it must
be secured to the floor during transit. Any method of
securing the range isadequate as long as it conforms to
the standards listed above.
FOR YOUR SAFETY
Do not store or use combustible materials, gasoline
or other flammable vapors and liquids in the vicinity
of this or any other appliance.
If you smell gas:
O Open windows.
O Don't touch electrical switches.
Extinguish any open flame.
O Immediately call your gas supplier.
TOOLS YOU WILL NEED
Phillips screwdriver
Flat-blade screwdriver
Penciland ruler
Pipewrenches(2)
(onefor backup)
Open-end or
adJustablewrench
Level
Drill,awlor nail
MATERIALS YOU MAY NEED
. Gasline shut-off valve
. Pipejoint sealant or UL-approved pipe thread tape with
Teflon* that resistsaction of natural and LPgases
Flexiblemetal appliance connector (1/2" I.D.)
A 5-foot length is recommended for ease of installation
but other lengths are acceptable. Never usean old
connector when installing a new range.
Flareunion adapter for connection to gassupply line
(3/4" or 1/2" NPTx 1/2" I.D.)
. Flareunion adapterfor connection to pressure regulator
on range (1/2" NPTx 1/2" I.D.)
Liquidleak detector or soapy water.
Lag bolt or 1/2" O.D.sleeve anchor (for concrete
floors only).
*Teflon: Registeredtrademark of DuPont
17

Installation Instructions
I,d WAR ING i
iNSTALLATiON
iNSTRUCTiONS SAFETY
Read these instructions completely and carefully.
Failure to follow these instructions can result in
electrical shock, fire, serious injury, or death.
[] Improper installation, adjustment, alteration, service
or maintenance can cause injury or property
damage. Refer to this manual. For assistance or
additional information, consult a qualified installer,
service agency, manufacturer (dealer) or the gas
supplier.
[] Never reuse old flexible connectors. The use of old
flexible connectors can cause gas leaks and personal
injury. Always use NEW flexible connectors when
installing a gas appliance.
[] Leak testing of the appliance shall be conducted
according to the manufacturer instructions.
[] Remove all packing material and literature from oven
before connecting gas and electrical supply to range.
[] Do not attempt to operate the oven of this range
during a power failure (Electric Ignition models only).
[] Have your range installed by a qualified installer.
[] Your range must be electrically grounded in
accordance with local codes or, in the absence of
local codes, in accordance with the National Electrical
Code (ANSI/NFPA70, latest edition). In Canada,
electrical grounding must be in accordance with the
current CSAC22.! Canadian Electrical Code Part !
and/or local codes. See Electrical Connections in this
section.
[] Before installing your range on linoleum or any other
synthetic floor covering, make sure the floor covering
can withstand 180°Fwithout shrinking, warping or
discoloring. Do not install the range over carpeting
unless a sheet of !/4" thick plywood or similar
insulator is placed between the range and carpeting.
[] Hake sure the cabinets and wall coverings around
the range can withstand heat generated by the range
up to 200°F.
Avoid placing cabinets above the range. To reduce
the hazard caused by reaching over the open flames
of operating burners, install a ventilation hood over
the range that projects forward at least 5" beyond
the front of the cabinets.
The ventilating hood must be constructed
of sheet metal not less than 0.0122" thick.
Install above the cooktop with a clearance of not
less than 1/4" between the hood and the underside
of the combustible material or metal cabinet. The
hood must be at least as wide as the appliance and
centered over the appliance. Clearance between the
cooking surface and the ventilation hood surface
MUSTNEVERBE LESSTHAN 24".
EXCEPTION:Installation of a listed microwave oven or
cooking appliance over the cooktop shall conform to
the installation instructions packed with that appliance.
If cabinets are placed above the range,
allow a minimum clearance of 30" between the
cooking surface and the bottom of unprotected
cabinets.
If a 30" clearance between cooking surface and
overhead combustible material or metal cabinets
cannot be maintained, protect the underside of the
cabinets above the cooktop with not less than 1/4"
insulating millboard covered with sheet metal not less
than 0.0122"thick. Clearance between the cooking
surface and protected cabinets MUSTNEVERBE LESS
THAN 24".
The vertical distance from the plane of the cooking
surface to the bottom of adjacent overhead cabinets
extending closer than 1" to the plane of the range
sides must not be less than 18". (Seethe Dimensions
and Clearances illustration in this section.)
Do not install this product with an air curtain hood
or other range hood that operates by blowing air
down on the cooktop. This airflow may interfere
with operation of the gas burners resulting in fire or
explosion hazard.
-- CAUTION - Only the GECaf6 branded series
of Advantium ®or microwave over-the-range ovens are
designed to be installed above the GECaf6 range. Surfaces
above a gas range can become hot. Installationof any other
over-the-range oven above a GECaf6 range may result in
surface temperatures that can cause burns.
18

Installation Instructions
DIMENSIONS AND CLEARANCES
Provide adequate clearances between the range and adjacent combustible surfaces. These dimensions must be
met for safe use of your range. The location of the electrical outlet and pipe opening (see Gas Pipe and Electric
Outlet Locations) may be adjusted to meet specific requirements.
The range may be placed with 0" clearance (flushl at the back wall.
18n_
Minimum to
cabinets on
either side
of the range
i30"
_1 l_ ¸
30"
Minimum "-_"_1" to wall on either side,
standard burner mad,
m
To cabinets
below
cooktop and-._' _-- 0"
at the range
back
36" 1/4"----_
Maximum
depth for
cabinets above
countertops
Frontedge of
the rangeside
panelforward
from cabinet
0"
Tocabinets below
cooktop and at
the range back
(Somemodelswill NOT
have 0" clearance.)
Height Model
46-7/8" JGBS14
39-718" RGB518
Depthwith door closed(includesdoor handle)
Depthvariesdepending on model.
Seespecificationssheet for your model.
----q---
Depthwith door open:
Porcelaindoor 46-2/4" \ \
19

Installation Instructions
LOCATION
Do not locate the range where it may be subject to
strong drafts. Any openings in the floor or wall behind
the range should be sealed. Make sure the openings
around the base of the range that supply fresh air
for combustion and ventilation are not obstructed
by carpeting or woodwork.
Your range, like many other household items, is
heavy and can settle into soft floor coverings such as
cushioned vinyl or carpeting. Use care when moving
the range on this type of flooring. It is recommended
that the following simple and inexpensive instructions
be followed to protect your floor.
The range should be installed on a sheet of plywood
(or similar material). When the floor covering ends at
the front of the range, the area that the range will rest
on should be built up with plywood to the same level or
higher than the floor covering.
This will allow the range to be moved for cleaning
or servicing. Also, make sure your floor covering will
withstand !80°F. (Seethe Installation Safety Instructions
section.)
Make sure the wall coverings around your range can
withstand the heat generated (up to 200°F) by the
range. (Seethe Installation Safety Instructions section.)
IMPORTANT!
Remove all tape and packaging. Make sure the burners
are properly seated and level.
Take the accessory pack out of the oven and/or drawer.
Check to be sure that no range parts have come loose
during shipping.
CONVERTING TO LP GAS (or converting
back to natural gas from LP)
This range leaves the factory set for use with natural
gas. If you want to convert to LP gas, the conversion
must be performed by a qualified LP gas installer.
The conversion instructions and LPorifices can be found
attached to the range next to the pressure regulator.
Keep these instructions and the orifices in case you want
to convert back to natural gas.
PROVIDE ADEQUATE GAS SUPPLY
Your range is designed to operate at a manifold pressure
of 4" of water column on natural gas or, if designed for LP
gas (propane or butane), !0" of water column.
Make sure you are supplying your range with the type of
gas for which it is designed.
This range isconvertible for use on natural or propane
gas. If you decide to usethis range on LPgas, conversion
must be made by a qualified LPinstaller before
attempting to operate the range on that gas.
For proper operation, the pressure of natural gas supplied
to the regulator must be between 5" and 13" of water
column.
For LPgas, the pressure supplied must be between !!"
and 13" of water column.
When checking for proper operation of the regulator,
the inlet pressure must be at least !" greater than the
operating (manifold) pressure as given above.
The pressure regulator located at the inlet of the range
manifold must remain in the supply line regardless of
whether natural or LPgas is being used.
A flexible metal appliance connector used to connect the
range to the gas supply line should have an I.D.of !/2"
and be 5 feet in length for ease of installation. In Canada,
flexible connectors must be single wall metal connectors
no longer than 6 feet in length.
20
This manual suits for next models
1
Table of contents
Languages:
Other GE Range manuals
Popular Range manuals by other brands

Frigidaire
Frigidaire FEF354CGSA owner's guide

Whirlpool
Whirlpool WFG510S0AW Use & care guide

Frigidaire
Frigidaire FGEF3041KF - Electric Range 5.4 Cu.ft Specifications

Maytag
Maytag W10234649A User instructions

Thermador
Thermador Professional PRO-HARMONY PRD30 installation manual

Frigidaire
Frigidaire FEF380MXD Factory parts catalog

KitchenAid
KitchenAid DUALFUEL RANGES installation instructions

Electrolux
Electrolux EW30DS75KS2 Use & care guide

KitchenAid
KitchenAid KGRS807SBL installation instructions

Electrolux
Electrolux EW30GS65G S Instalation instructions

Maytag
Maytag CAE1700 user guide

GEAppliances
GEAppliances JBP64 owner's manual