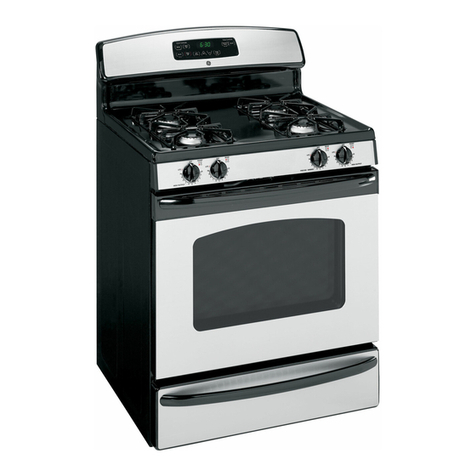
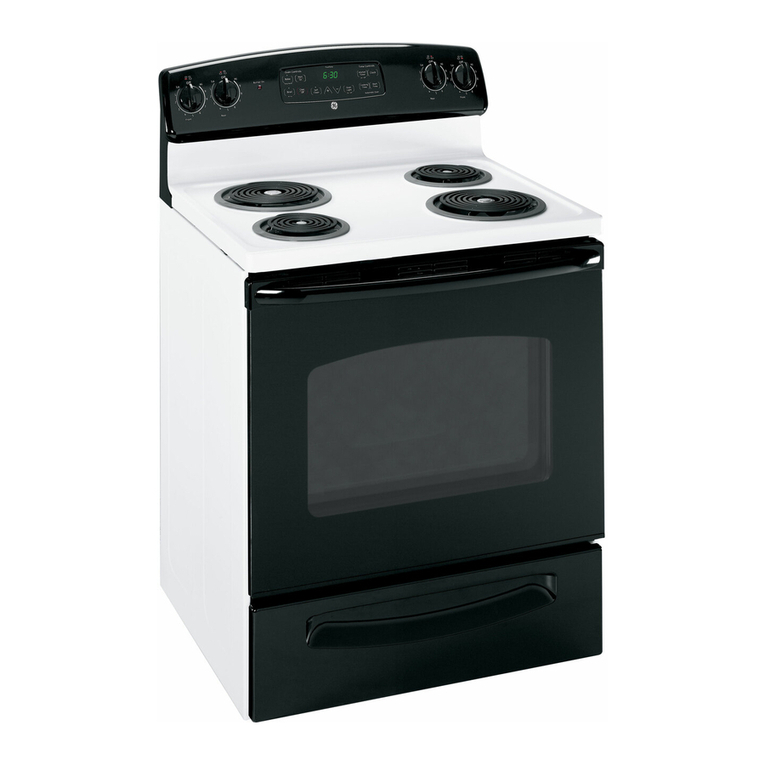
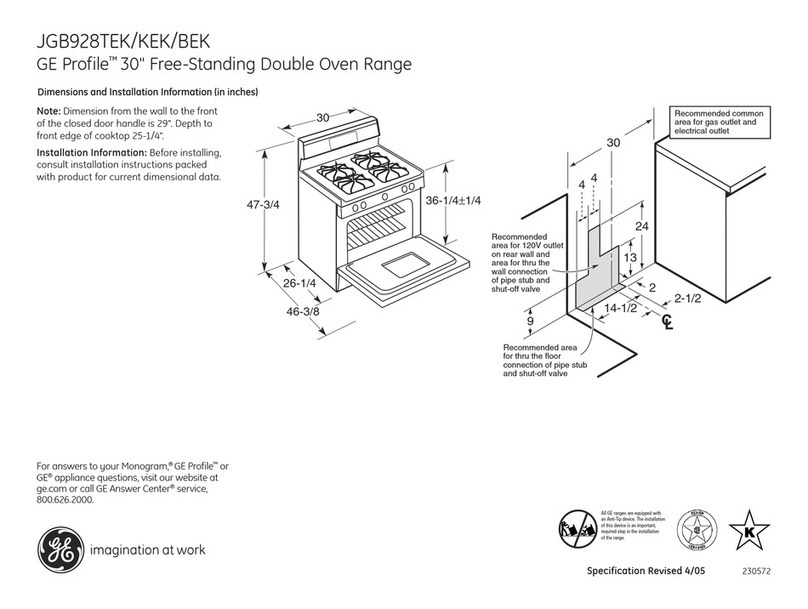
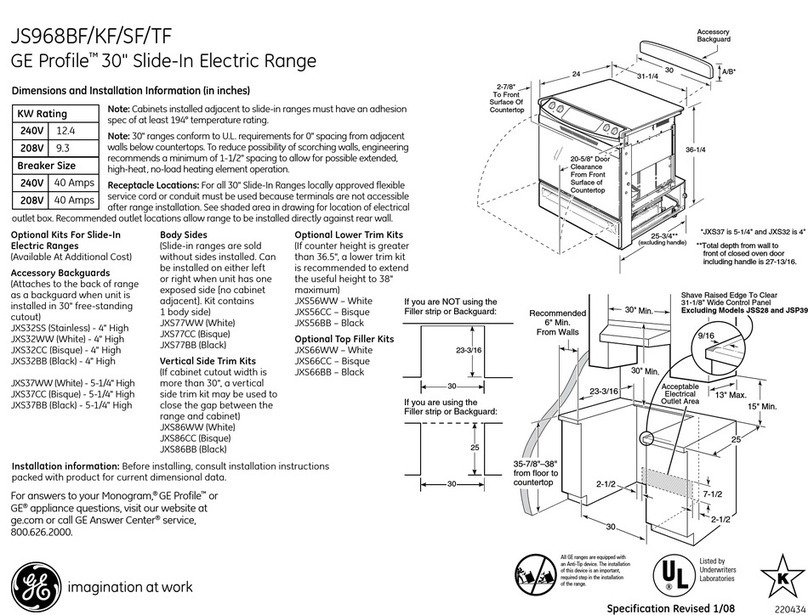
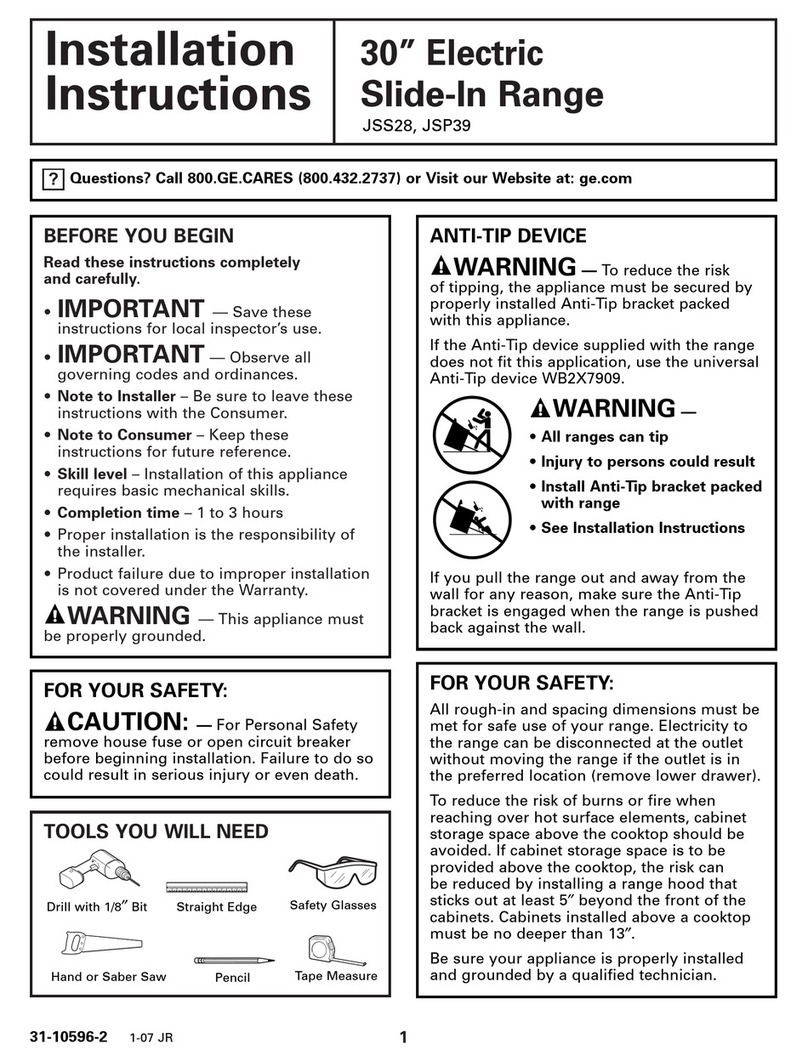
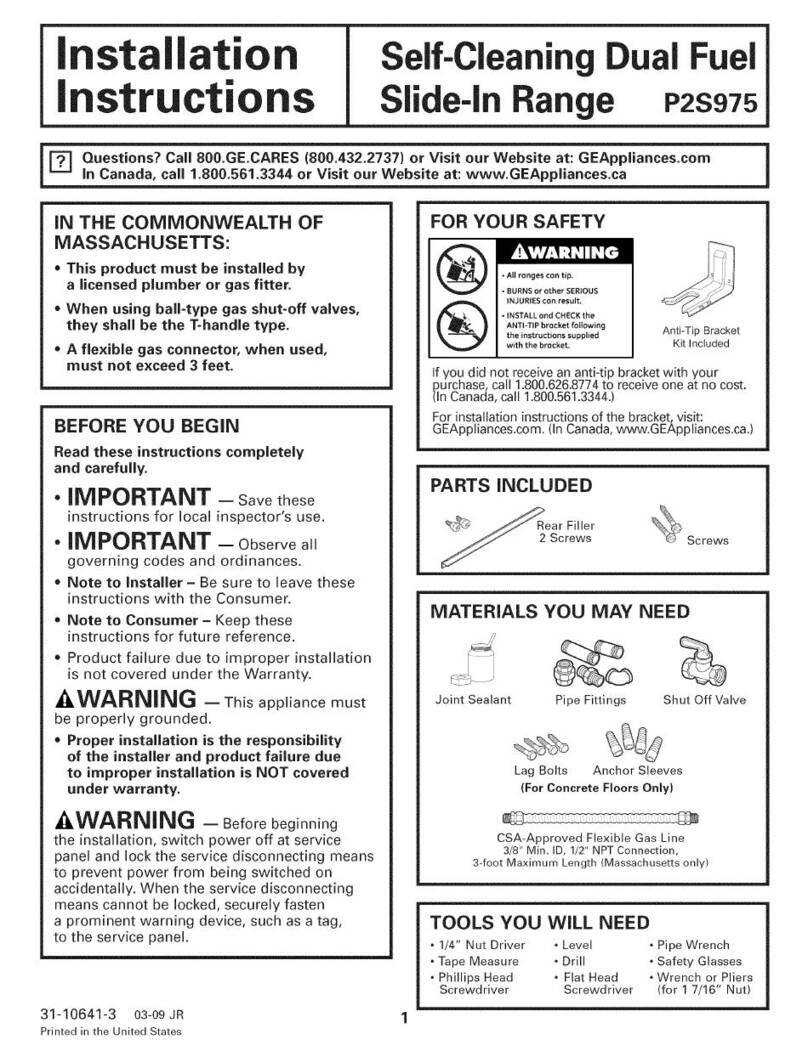
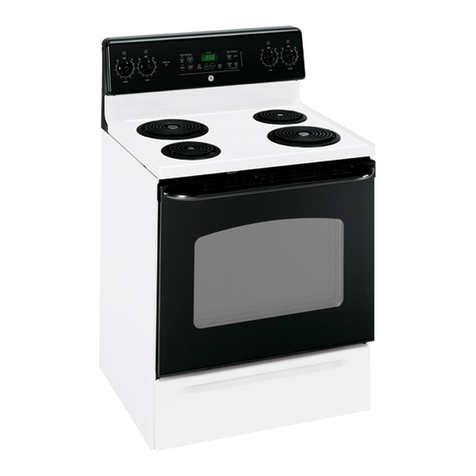
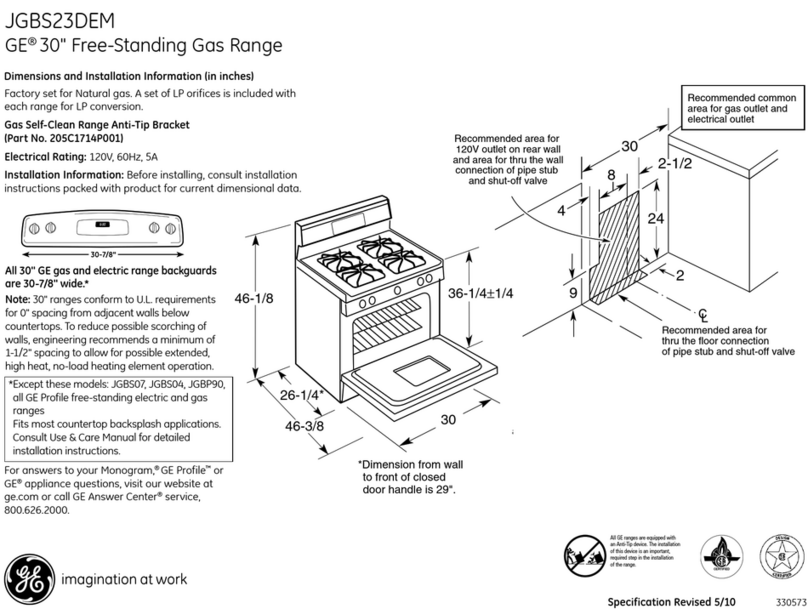
GE JSS26 User manual

GEAppliances
JSS16
_;$26
Part No. 164D3333P106 Pub.IVo.49-8870 3-98 CG

Safety Information
Anti-TipDevice ........... 3
SafetyPrecautions ....... 3,4
Oven.................. 4
SurfaceCookingUnits ...... 5
Operating instructions
UsingtheSurfaceUnits .... 6
UsingtheClockand Timer ... 7
UsingtheOven .......... 8,9
OvenThermostat.......... 10
Congratulations!
YouAm Now PartoftheGEFamily.
Welcome to tt_e GE fhmily. We're proud of our qualib7 products and we are
committed to prox4ding dependable sei_4ce. You'll see it in this easy-to-use Owner's
Manual and you'll hear it in the fliendly voices of our customer sel_4ce department.
Best of all, you'll experience these values each time you use your range. That's
important, because your new range will be part of your fmnily fbr many years.
And we hope you will be part of ours for a long time to come.
We thank you fbr buying GE. We appreciate your purchase, and hope you will
continue to rely on us whenever you need quality appliances for your home.
GE&You,A ServicePartnership.
IMPORTANT!
Fill out and remm the Consumer Product Registration Cm'd that is
packed wid_ this product. If you cannot find it, please send in the
duplicam card pfinmd in the back of this manual.
Camand Cleaning
Anti-TipDevice ........ 1I, I4
Lift-Off OvenDoor ......... I2
OvenLight .............. 12
BroilerPan& Grid ....... 13
SurfaceUnits ............ 15
Lift-UpCooktop........... I5
Troubleshooting77ps
BeforeYouCall
ForService........... 16
Customer Service
ProductRegistration ...... 17
Warranty ............... 19
ServiceTelephone
Numbers ........ BackCover
FORYOURRECORDS
Write themodel and serial numbershere:
#
#
You canfind them on a label on the front of the range behind t|_e
storage (km_,er.
Staple sales slip or cancelled check here.
Proof of tt_eoriginal purchase date is needed to obtain sewice under
the warranb_.
READTHISMANUAL
Inside you will find many helpflfl hints on how to use and maintain
your range properly.Just a little preventive care on your part can save
you a great deal of time and money over the life of your range.
You'll find many answers to common problems in the Before YouCall
ForService section. If you review our chart of TroubleshootingTips
first, you may not need to call fin"sel_ice at all.
IFYOUNEEDSERVICE
If you do need serx4ce, you can relax knowing help is only a phone
call re,ray.A list of toll-flee customer se_4ce nmnbers is included in
the back section of dfis manual. Or you can always call the (;E Answer
Center ®at 800.626.2000, 24 hours a day, 7 days a week.
2

IMPORTANTSAFETYINFORMATION.
READALLINSTRUCTIONSBEFOREUSING.
WARNING!
For your safety, the information in this manual must be followed to minimize the risk of fire or
explosion, electric shock, or to prevent property damage, personal injury, or loss of life.
WARNINGANti-TIPDEVICE
All ranges can tip and injury could result.
Toprevent accidental tipping of the range, attach it to the wall and floor by installing the Anti--tip
device supplied.
Check if the device is installed and engaged properly. Make sure the chain fits securely into the slot
in the bracket.
ffyou pull the range out from the wall for any reason, make sure the device is properly
engaged when you push the range back against the wall. ff it is not, there is a possible risk of
the range tipping over and causing injuiy ityou or a child stand, sit or lean on an open door.
Please refer to the Anti-Tip device itfformation in this manual. Failure to take this precaution
could result in tipping of the range and injui T.
SAFETYPRECAUtiONS
When using electrical appliances, basic safety precautions should be followed, including the following:
Use this appliance only for its intended
puFpose as described in this Owner's Manual.
Be sure your appliance is properly installed
and grounded by a qualitied technician in
accordance with the provided installation
instructions.
Do not attempt to repah or replace any
part ofyour range unless it is specitically
recommended in this manual. All other
sei_,icing should be referred to a qualitied
technician.
Have the installer show you the location of
the circuit breaker or fuse. Mark it for easy
reference.
Before performing any sei_,ice, disconnect
the range power supply at the household
distribution panel by removing the fuse or
switching off the circuit breaker.
Do not leave children alone-children
should not be left alone or unattended in
an area where an appliance isin use. They
should never be allowed to sit or stand on
any part of the appliance.
Do not allow anyone m climb, stand or hang
on the door, storage drawer or cooktop.
They could damage the range and even tip
it over, causing severe personal inju U.
CAUTION:Items of interest to children
should not be stored in cabinets above a
range or on the backsplash (on some models)
of a range-children climbing on the range
to reach items could be seriously injured.
Do not touch the surthce units, the heating
elements or the interior surthce of the
oven. These surfaces may be hot enough to
burn even though they are dark in color.
During and after use, do not touch, or let
clothing or other flammable materials
contact, the surface units, areas nearby the
surface units or any interior area of the
oven; allow sufficient time for cooling first.
Potentially hot surfaces include the
cooktop, areas facing the cooktop, oven
vent opening, surfaces near the opening,
crevices around the oven door and metal
trim parts above the door.
REMEMBER: The inside surface of the oven
may be hot when the door is opened.
Do not store or use combustible materials,
gasoline or other flammable vapors and
liquids in the vicinity of this or any other
appliance.
3

IMPORTANTSAFETYiNFORMATiON.
READALLINSTRUCTIONSBEFOREUSING
WARNING!
SAFETYPRECAUTIONS
.... Do not use water on _ease fires. Never
pick up a flaming pan. Turn the controls
off. Smother a flaming pan on a surface
unit by covering the pan completely with a
well-fitting lid, cookie sheet or fiat tray. Use
a multi-purpose dt T chemical or tbam-type
fire exting_lisher.
Flaming grease outside a pan can be put
out by covering it with baking soda or, it
available, by using a multi-purpose dt T
chemical or foam-type fire extinguisher.
Flame in the oven can be smothered
completely by closing the oven door and
turning the oven offor by using a multi-
purpose dUchemical or foam-type the
extinguisher.
Never leave jars or cans of tat dripping in or
neat your range.
Do not let cooking _ease or other flammable
materials accumulate in or neat the range.
Keep the hood and grease filters clean
to maintain good venting and to avoid
grease fires.
Do not store flammable materials in an
oven or neat the cooktop.
.....Never wear loose-fitting or han_ng
garments while using the appliance. Be
careful when reaching for items stored over
the range. Flammable material could be
ignited it brought in contact with hot
surface units or heating elements and may
cause severe burns.
iiiiiiiiiiii_iii
Use only dt T pot holders-moist or damp
pot holders on hot surthces may result in
burns fiom steam. Do not let pot holders
touch hot surface units or heating elements.
Do not use a towel or other bulky cloth.
iiiiiiiii_Foryour safety, never useyour appliance
forwarmingor heatingthe room.
iiiiiiiii_Teach children not to playwith the
conuolsor anyother partoftherange.
Ahvays keep dish towels, dish cloths, pot
holders and other linens a safe distance
fiom your range.
Ahvays keepwooden and plastic utensils
andcannedfooda sate distancefiom
your range.
iiiiiiiii_Ahvays keep combustiblewall coverings,
curtains or drapes asafe distancefiom
your range.
4
escapes can cause burns to hands, face
and/or eyes.
Do not heat unopened food containers.
Pressure could build up and the container
could burst, causing an in,juU.
Keep the oven vent unobstructed.
Keep the oven flee from grease buildup.
Place the oven shell in the desired position
while the oven is cool. If shelves must be
handled when hot, do not let pot holder
contact the heating elements.
Pulling out the shell to the stop-lock isa
convenience in lifting heaxT foods. It is also
a precaution against burns fiom touching
hot surfaces of the door or oven walls.
iiiiiiiiiiii_iii
directions.
Do not use the oven to dtT newspapers.
It overheated, they can catch on fire.
Do not use the oven for a storage area.
Items stored in an oven can ignite.
Do not leave paper products, cooking
utensils or food in the oven when not in use.
After broiling, ahvays take the broiler pan
out of the range and clean it. Leftover
grease in the broiler pan can catch on fire
the next time you use the pan.
Do not use aluminum foil to line oven
bottoms, except assuggested in this manual.
Improper installation of aluminum foil
may result in a risk of electric shock or fire.

WHENCOOKINGPORK...
Whencookingpork, follow the directionsexactlyand alwayscookthemeat toan btemal temperatureof at
least 170°£Thbassuresthat, b theremotepossibility that trichba maybe presentb the meat,it will be killed
and themeat will be safe toeaL
SURFACECOOKINGUNITS
Use proper pan size--select cookware having flat bottoms large enough to cover the surface unit
heating element. The use of undersized cookware will expose a portion of the surface unit to direct
contact and may result in ignition of clothing. Proper relationship of cookware to surface unit will
also improve efficiency.
Never leave the surface units unattended at
high heat settings. Boilovers cause smoking
and greasy spillovers that may catch on fire.
Do not use aluminum foil to line the drip
pans or anywhere in the oven except as
described in this manual. Misuse could
result in a shock, fhe hazard or damage
to the range.
Be sure the drip pans and the vent duct are
not covered and are in place. Their
absence during cooking could damage
range parts and wiring.
Only certain types of glass, glass/ceramic,
earthenware or other glazed containers are
suitable for cooktop sei_4ce; others may
break because of the sudden change in
temperature.
.....To minimize the possibility of burns,
ignition of flammable materials and
spillage, the handle of a container should
be turned toward the center of the range
without extending over nearby surface
units.
Ahvays turn the surface units off before
removing cookware.
Do not immerse or soak the removable
surface units. Do not put them in a
dishwasher.
When flaming foods are under the hood,
turn the fan off. The fan, il operating, may
spread the flame.
.....To avoid the possibility of a burn or electric
shock, ahvays be certain that the controls
for all surfhce units are at the OFF position
and all coils are cool before attempting to
lilt or remove a unit.
Clean the cooktop with caution. If a wet
sponge is used to wipe spills on a hot
cooktop, be careful to avoid steam burns.
Keep an eye on foods being flied at high or
medium high heat settings.
Foods for fiTing should be as d_T as
possible. Frost on fiozen foods or moisture
on flesh foods can cause hot fat to bubble
up and over the sides of the pan.
Use little fat for eftective shallow or deep
fat flying. Filling the pan too full of fat can
cause spillovers when food isadded.
If a combination of oils or fats will be used
in flying, sth together before heating, or as
fats melt slowly.
Ahvays heat fat slowly, and watch as it heats.
Use a deep fat thermometer whenever
possible to prevent overheating fat beyond
the smoking point.
ReadandfollowthisSafetyInformationcarefully.
SAVETHESEINSTRUCTIONS
5

Usingthesurfaceunits.
Throughout this manual, features and appearance may vary from your model
I
i HowtoSet
ii i Push the knob in and mm in either
direction to the setting you want.
Be sure you turn the control knob
to OFFwhen you finish cooking.
At both OFFand HI the control clicks
into position. You may hear slight clicking
sounds during cooking, indicating the
control is keeping the power level you set.
A suKhce unit ONindicator light will glow
when anysurf_meunit is on.
Not over I inch.
Surface Cookware Tips
Use lnedimn- or hea_,)_weight cookware.
Aluminum cookware conduct_s heat faster
than other metals. Cast-iron and coated
cast-iron cookware are slow m absorb
heat, but generally cook evenly at low to
medium heat settings. Steel pans m W
cook unevenly if not combined _dth
other metals.
For best cooking resuks, pans shouM be
fiat on the bottom. Match the size of the
saucepan to the size of the surface unit.
The pan shouM not extend over the edge
of the suKhce unit more than 1inch.
Use only flat-bottomed woks.
Wok Cooking
Werecommendthatyouuseonlya flat-bottomed
wok.Theyareavailableatyourlocalretailstore.
Do not use woks that hm_esupport rings.
Use of these bqoes ofwoks, wifl_or
without the ring in place, can be
dangerous.
Placing fl_ering over the surface unit will
cruise a buiM-up of heat that will damage
the porcelain cooktop. Do not tUto use
such woks xdthout the ring. You couM be
seriously burned if the wok tipped over.
Deep Fat Frying
Do not overfill cookware _dth fat that lllay
spill over when adding fbod. Frosty fbods
bubble xdgorously.
Watch fbod fiTing at high temperatures.
Keep range and hood clean fl'om grease.
6

Usingtheclock andtimer.
SETTIME
ToSet the Clock:
[y] Press the CLOCKpad.
[] Press the SETTIME÷1-pads.
Make sure the clock is setto the
correct time of day.
Thetimer is a minute timer only.
Thetimer does not control oven
operations. Youcan set the timer
for up to 9 hours and 45seconds.
ToSet the timer:
_] Press die TIMERON/OFFpad.
Press the SETTIME÷1-pads until
the amount of time you want shows
in the displ W. The timer _4ll start
automatically _4thin a few seconds
of releasing the pad.
The end of (?_cletone _ill sound when the
timer countdown is complete. To stop the
tone, press any pad.
ToReset the Timer:
If din display is still showing dm time
remaining, you may change it by pressing
the SETTIME÷1-pads until the time you
want appears in the displ W.
If the remaining time is not in the display,
recall the remaining time by pressing the
TIMERON/OFFpad and then pressing the
SETTIME+/- pads until the new time you
want shows in the displ W.
To Cancel the Timer:
Pressthe TIMERON/OFFpad. The display
_4ll return to the time of day _dter 5
seconds.

Usingtheoven.
Toavoid possible bums, place the shelves in the desired position before you turn the oven on.
I..,N
Before you begin...
The shelves have stop-locks, so fllat when
placed con'ecdy on the supports, they will
stop be%re coming completely out, and
_dll not tilt.
When placing and removing cookware,
pull the shelf out to file bump on the
shelf support.
Toremovea sheff, pull it towardyou, tilt
file front end tip and pull it out.
Toreplace, place tile end of the shelf
(stop-locks) on tile support, tilt tip the
front and push the shelf in.
Theoven has 4 sheff positions.
Oven Control Knobs
Yourrangehastwoovencontrolknobs.
Tile OVENSETknob has settings f_)r BAKE,
BROILand OFF.
Tile OVENTEMPknob maintains tile
temperature ?ou set, from WM (150°E)m
BROIL(550°E).
Tile oven (?_clinglight glows until tile
oven reaches your selected temperature,
then goes offand on with the oven
element(s) during cooking.
How to Set the Oven for Baking or Roasting
[Z] Turn tile OVENSETknob to BAKE
and file OVENTEMPknob to tile
temperature you desire.
Check food for doneness at
minimum time on recipe. Cook
longer if necessa,y.
[_] Turn tile OVENSETknob to OFF
when cooking is complete.
Type of Food Shelf Position
Frozenpies(oncookiesheet) BorC
Angelfoodcake, A
bundtorpoundcakes
Biscuits,muffins,brownies, BorC
cookies,cupcakes,
layercakes,pies
Casseroles BorC
Preheating and Pan Placement
Preheat tile oven if tile recipe calls for it.
To preheat, set the oven at the con'ect
temperature. Preheating is necessa Ufor
good results when baking cakes, cookies,
pasuy and breads.
Forovenswithoutapreheatindicatorlightor
tone,preheat10minutes.
Baking remits will be better if baking pans
are centered in the oven as much as
possible. Pans should not much each
other or tile walls of the oven. If you need
m use two shelves, stagger the pans so one
is not directly above tile other, and leave
approximately 1Y,_,"between pans, fi'om
tile fi'ont, back and sides of the wall.
Cut silts in the foiljust fike the grid.
8
Aluminum Foil
You can use ahmfinum foil to line tile
broiler pan and broiler grid. However,
you must mold the foil tightly to the grid
and cut sli_sin itjust like the grid.
Aluminumfoilmayalsobeusedtocatcha
spillover
Never entirely cover a shelf with
aluminum foil. This _411disturb tile heat
circulation and result in poor baking.
A smaller sheet of foil lllay be used to
catch a spillover by placing it on a lower
shelf several inches below the food.

Leave the door open to the broil
stop position. Thedoor stays open
by itself, yet the proper temperature
is maintained in the oven.
How to Set the Oven for Broiling
[Z] Place the meat or fish on the broiler
grid in dm broiler pan.
[] Follow suggested shelfposidons in
the Broiling Guide.
If yourovenisconnectedto208volts,raresteaks
maybebroiledbypreheatingthebroilerand
positioningtheovenshelfonepositionhigher
[-_ Turn bodl the OVENSETand OVEN
TEMPknobs to BROIL.
_-] When broiling is finished, mm the
OVEN SET knob to OFF.
Broiling Guide
Food
Bacon
GroundBeef
Well Done
Beef Steaks
Rare
Medium
Well Done
Rare
Medium
Well Done
Chicken
LobsterTails
FishFillets
Ham Slices
(precooked)
Pork Chops
Well Done
LambChops
Medium
Well Done
Medium
Well Done
Quantityand/
orThickness
1/2 lb.
(about8thin slices)
1lb. (4patties)
1/2to 3/4" thick
1" thick
1to 1_ Ibs.
1_" thick
2 to 2½Ibs.
1whole
2 to 2_ Ibs.,
split lengthwise
2-4
6 to 8oz.each
1/4to 1/2" thick
1" thick
2 (1/2"thick)
2 (1" thick) about 1lb.
2 (1"thick)about 10
to 12oz.
2 (1½"thick)about 1lb.
Shelf
Position
C
C
C
C
C
C
A
C
B
C
C
C
B
FirstSide
Time(rain.)
41/2
10
6
8
12
10
15
25
35
13-16
10
13
10
12
14
17
SecondSide
Time(min.)
41/2
5
6
11
7-8
14-16
20-25
10-15
Do not
turn
oveE
10
13
9
10
12
12-14
Comments
Arrangeill single laye
Spaceevenly.Upto 8
pattiestake aboutthe
sametime.
Steakslessthan 1"
thickcookthrough
beforebrowning.Pan
frying isrecommendec
Slashfat.
Reducetimeabout 5
to 10minutes persid_
for cut-up chicken.
Brusheachsidewith
meltedbutter.Broil
skin-side-downfirst.
Cutthroughbackof
shell.Spreadopen.
Brushwith melted
butterbeforebroiling
andafter half of
broilingtime.
Handleandturn very
carefully.Brushwith
lemonbutter before
andduringcooking,if
desired.Preheat
broilerto increase
browning.
Increasetime 5to 10
minutespersidefor
11/2"thick or home-
curedham.
Slashfat.
Slashfat.
9

Adjustthe oventhermostat--Bo it yourself!
Youmay find that your new oven cooks differently than the one it replaced. Use your new oven for a few
weeks to become more familiar with it. If you stiff think your new oven is too hot or too cold, you can adjust the
thermostat yourself.
Do not use thermometers, such as those found in grocery stores, to check the temperature setting of your oven.
These thermometers may vary 20-40 degrees.
Back of the OVENTEMP knob.
Lower screw moves toward hotter
or cooler.
Thelower screw moves toward
HOTTERto increase the temperature,
To Adjust the Thermostat
Pull tile OVENTEMP knob offdle shaft,
look at tile back of die knob and note file
current setting befbre making any
a({jusmlent. Tile knob is facto Uset xdth
tile mp screw direcdy under file pointer.
[7] Pull offthe OVENTEMPknob.
[] Loosen both screws on back of
tile knob.
%Hold bodl parts of tile knob as
shown in the illustrauon of the back
of die OVENTEMPknob and turn so
tile lower screw moves in tile desired
direction. You will hear and feel tile
notches as you turn tile knob. Each
notch changes temperature about
10 °Fahrenheit.
_-] Tighten tile screws.
Return tile OVEN TEMP knob to
tile oven.
Re-checkovenperformancebeforemakingany
additionaladjustments.
Thelower screw moves toward
COOLERto decrease the temperature.
10

Careand cleaningofthe range.
Be sure electrical power is off and all surfaces are cool before cleaning any part of the range.
If your range is removed for cleaning, servicing or any reason, be sure the anti-tip
device is re-engaged properly when the range is replaced. Failure to take this
precaution could result in tipping of the range and cause injury.
How to Remove Packaging Tape
To assure no damage is (tone to file finish
of tile pro(hlct, die sa_est way to remove
the adhesive left from packaging tape on
new appliances is an application of a
household liquid dishwashing detergent,
mineral oil or cooking oil.
Apply widl a soft clodl 7mdallow to soak.
Wipe dpyand then apply an appliance
polish m thoroughly clean and protect
tile stu_tce.
NOTE:Theplastictapemustberemovedfromaft
chrometrim.Itcannotberemovedifit isbakedon.
Control Panel
It's a good idea to wipe tile control panel
after each use. Clean with mild soap and
water or vinegar and water, ,inse with
clean water and polish (h)_witll a sof_ cloth.
Do not use abrasive cleansers, strong
liquid cleansers, plastic scounng pads or
oven cleansers on the control panel-they
will damage the fnish. A 50/50 solution
ofvinegar and hot water works well.
Control Knobs
Moldedrib Thecontrolknobsmayberemovedforeasier
cleaning.
Befbre removing file knobs fbr cleaning,
please note fllat file knobs are in file OFF
position. When replacing tile knobs,
check file OFFposition to insure proper
placement.
Tile knob Stelll has a groove in each side.
Tile _'oove on one side has a spring clip.
Tile other _'oove is clear (see illustration).
Check the inside of tile knob and find tile
molded rib.
Washtheknobsinsoapandwaterora vinegar
andhotwatersolutionbutdonotsoak.
Replace the knob by ftting tile molded
rib inside file knob into file clear groove
on tile Steli1.
Brushed Chrome Cooktop (onsomemodels)
(;lean tile brushed chrome top with
win'm, soapy water or Bon Ami ®brand
cleanser. Rinse and immediately (ltT it
widl a clean, soft clodl. Take care m (hT
the surt_tce f_Alowing the "grain."
To help prevent finger marks after
cleaning, spread a thin film of baby oil
on the surf_tce or a chrome protecmnt
may be used to help reduce spotting or
fingerprinting. Wipe away excess oil with
a clean, soft cloth.
Porcelain Enamel Cooktop (onsomemodels)
Tile porcelain enmnel finish is sturdy but
breakable ifmisused. This finish is acid-
resistant. However, _myacidic f_oods
spilled (such as fialitjuices, tomato or
vinegar) should not be permitted to
remain on the finish.If acids spill on tlle
cooktop while it is hot, use a (hT paper
towel or cloth to wipe it up right away.
When tile smMtce has cooled, wash with
soap and water. Rinse well.
Forotherspillssuchasfat spattering&wash
withsoapandwaterorcleansingpowdersafter
thesurfacehascooledRinsewell.Polishwitha
drycloth.
11

Careandc/ean&goftherange.
Oven Shelves
Clean tl_e oven shelves with an abrasive
cleanser or steel wool. After cleaning, rinse the shelves with
clean water and dUwith a clean clofl_.
Lift the door straight up and off the
hinges.
Lift-Off Oven Door
The oven door isremovable for cleaning.
Donotlift thedoorbythehandle,
Toremovethedoor,open it to the broil
stop posiuon. Grasp firm]}," on each side
and lift the door straight up and offthe
hinges.
Donotplacehandsbetweenthehingeandthe
ovendoorframe.
Toreplace the door, make sure tim hinges
are in the broil stop position. Position the
slots in the bottom of the door squarely
over the hinges and slowly lower it over
both hinges.
Tocleantheinsideof thedoor:
Soap and water xdll normally do the
job. Heaxy spattering or spillovers may
require (:leaning v_dtha mild abrasive
(:leaner. Soapy, wet metal pads may
also be used.
Donotaflowfoodspillswithahighsugaroracid
content(suchastomatoes,sauerkraut,fruitjuices
orpiefilling)toremainonthesurface.Theymay
causea duffspotevenaftercleaning.
If necessaIy, you may use an oven
cleaner. Follow file package directions.
Clean file inside of the oven _dndow
_dfl_a miM non-scratdfing cleaner and
a damp cloth.
Tocleantheoutsideofthedoor:
Use soap and water to fl_oroughly clean
the top, sides and front of the oven
door. Rinse well. You may also use a
glass cleaner m clean the glass on the
outside of the door. Do not let water
drip into the vent openings.
Spillage of marinades, fruit juices,
tomato smlces and basting materials
containing acids may cause
discoloration and shouM be wiped up
immediately. When smfhce is cool,
clean and rinse.
Do not use oven cleaners, cleaning
powders or harsh abrasives on file
outside of the door.
Oven Light
Before replacing the bulb, disconnect
electrical power to tim range at the main
filse or circuit breaker panel.
Let the bulb cool completely before
remoxdng it. Replace the bulb with a 40-
watt appliance bulb only. Do not touch a
hot btflb with a damp cloth because the
bulb will break.
Painted Surfaces
Painted surfimes include the sides and the
drawer front.
(;lean these with soap and wamr or a
xdnegar and water solution.
Do not use connnercial oven cleaners,
cleaning powders, smel wool or harsh
abrasives on aW painmd surface.
12

Oven Heating Elements
Donotcleanthebakeelementorthebroil
element.Any.soilwiflbumoff whentheelements
areheated.
To clean the oven floor, gently lift the
bake element. Clean _idl warm soTq)y
water.
[ll/fl/I/fllITTiTIIl'_ll\X\l\\_)
After broiling, remove the broiler
pan from the oven.
Broiler Pan & Grid
After broiling, remove the broiler pan
fi'om the oven. Remove the _'id fi'om the
pan. Carefidly pour out the _'ease fi'om
the pan into a proper container.
Wash and rinse the broiler pan and grid
in hot water _4th a soap-filled or plastic
scouring pad.
Donotstorea soiledbreilerpanandgrid
any.wherein therange.
Iffbod has burned on, sprinkle file grid
wifl_ detergent while hot and cover with
wet paper towels or a dishclofll. Soaking
the pan will remove burned-on fbods.
Boil1 the broiler pan and grid may be
cleaned wit1 a commercial oven cleaner.
Both the broiler pan and grid can also be
cleaned in a dishwasher.
Porcelain Oven Interior
With proper care, the porcelain enamel
finish on the inside of the oven-top,
bottom, sides, back and inside of the
door--will stay new-looking for years.
Let the range cool before cleaning. We
recommend that you wear rubber gloves
when cleaning tim range.
Soap and water will nommlly do the job.
HeaxT spattering or spillovers may require
cleaning _4th a mild abrasive cleaner.
So_q)y,wet metal pads may also be used.
Donotallowfoodspillswithahighsugaroracid
content(suchastomatoes,sauerkraut,fruitjuices
orpiefilling)toremainonthesurface.They.may.
causea duffspotevenaftercleaning.
Household ammonia may make tim
cleaning job easier. Place 1/2 cup in a
shallow glass or pottery container in a
cold oven overnight. The mnmonia
fimms will help loosen the burned-on
grease and food.
Ifnecessmy, you may use an oven cleaner.
Follow the package directions.
Donotspray,ovencleanerontheelectrical
controlsandswitchesbecauseit couldcausea
shortcircuitandresultinsparkingorfire.
Donotallowa filmfromthecleanertobuildup
onthetemperaturesensor--itcouldcausethe
oventoheatimproperly.(Thesensorislocated
at thetopoftheoven.)Carefully.wipethe
sensorcleanaftereachovencleaning,being
carefulnottomovethesensorasachangein
itspositioncouldaffecthowtheovenbakes.
Donotspray,any.ovencleanerontheoven
door,handlesorany.exteriorsurfaceofthe
oven,cabinetsorpaintedsurfaces.Thecleaner
candamagethesesurfaces.
Oven Vent
The oven is vented through an opening
under the right rear sut_hce unit. Nevercovertheopeningwithaluminumfoilor
any.othermaterial
13

Careandcleaningoftherange.
If the range is removed for cleaning or any reason, make sure the chain is reattached.
J
Factorybra_
Backsehsh
ion some models)
Backof
range
Anti-Tip Device
%Befbre placing range in the counter,
notice tt_e location of din stability
bracket which is already attached to
tt_eback of din range. This location
should work fbr most installations.
However, it may be more convenient
to hook tt_e stability chain to the unit
when tt_e stability bracket is attached
to tt_e upper set of holes in tt_e back
of range.
Theupperlevelsetofholesisintendedforuse
witha backsplashkit.If thebacksplashisnot
beingused,makesurethattherearenostructural
supportsforthecountertopwhichwill interfere
with thestabilitybracketwhenlocatedin the
uppersetofholes.
"_0 long screw
Washerand
[] Fasten one end of the smbilib_chain
to the floor or wall with the long
screw and washer supplied.
/VOTE'.If attachingtomasonrg,youcanbuy
suitablescrewsandanchorsat hardwarestores.
Usea masonrydrill todrill therequiredholes.
Chain
Washer'_i/!_
\\ \\\
Wallplate
Makecertainthescrewisgoingintothewall
plateat thebaseof thewallor oneof thestudsin
thebaseofthewall.
Whedmr you attach tt_echain to tt_ewall
or floor, be certain flint the screw is in at
least 3/4 inch tt_ickness of wood odmr
than baseboard and that there are no
elecu'ical wires or plumbing in the area
which the screw could penetrate. Attach
tl_e smbiliVchain in a location which will
allow tl_e chain m be in line with the
bracket side to aide as much as possible
when attached to tt_e unit. Test to see if
tl_e chain is securely f:astened by ragging
on tt_e chain.
%
@
Temporarily attach
the loose end of the
chain to the rear of
the countertop with
the tape fi'om the
packaging.
Place tt_erange in tl_e counter cutout
lemmingjust enough room between
the back of tt_erange and tt_e wall to
reach the stabilib_ bracket.
Hook the loose end of the chain
onto the bracket by slipping the
nearest link of tt_e chain into tt_e slot
in tt_ebracket. Make sure the chain is
pulled as tight as possible and that
dmre is no excess slack in the chain
_dter the chain is attached to tl_e
bracket.
%Slide the range all the way back into
the cotmter. Once the range is
pushed back in place, there will be a
small amount of slack in the chain.
This is nomml.
CAUTION:Excessiveslackin thechaincould
allowtherangetotipover
Thestorage drawer may be
removed for cleaning under the
range.
14
Removable Storage Drawer
Thestoragedrawerisagoodplacetostore
cookwareandbakeware.Donotstoreplastics
andflammablematerialin thedrawer.
Do not overload the storage drawer. If din
drawer is too hem.y, it may slip offthe
track when opened.
To open dm drawer, _'asp the center of
the handle and pull straight out.
Toremove:
Pull the drawer straight out and lift over
the guide stops.
Toreplace:
Lift over the guide stops and slide the
(kawer into place.
To clean both the inside and the out.side:
Wipe _4th soap and water. Rinse well.
Donotusecleansingpowdersorharsh
abrasiveswhichmayscratchthesurface.

Be sure the controls are turned to OFFand the surface units are cool before attempting to remove them.
Surface Units
Receotacle Drionan
To clean the surface units, tuna the
control to dm highest setting for a
minute. The coils ,_411bum offany soil.
Toremovea surfaceunit:
To remove the drip pans fbr cleaning, the
sin:face unit_smust be removed first.
Lift tim surface unit about 1inch above
the drip pan and pull it out.
Donotlift thesurfaceunitmorethanI inch.If
youdo,it maynotfieflat onthedrippanwhen
youplugit backin.
Repeated lifting of the suKhce unit more
than 1 inch above the chip pan can
permanently damage the receptacle.
Toreplacea surfaceunit'.
Replace the (kip pan into the recess in
the cooktop. Make sure the opening in
the pan lines up with the receptacle.
Insert the terminals of tim surface unit
through the opening in the drip pan and
into the receptacle.
Guide dm surface unit into place so it
rests evenly.
Donotimmersethesurfaceunitsin liquidsof
anykind.
Donotcleanthesurfaceunitsina dishwasher.
Donotbendthesurfaceunitplugterminals.
Donotattempttoclean,adjustorinanyway
repairtheplug-inreceptacle.
Drip Pans
Remove flae suKhce unit_s.Then lift out
the chip pans.
For best results, clean the (kip pans by
hand. Place fl_em in a covered container
(or a plastic bag) wkh 1/4 cup awanonia
to loosen the soil. Then scrub with a soaI>
filled scouring pad ifnecessa U. Rinse
with clean water and polish wkh a clean
soft cloth.
The drip pans may also be cleaned in a
dishwasher.
(;lean fl_e area under fl_e drip pans
often. Built-up soil, especially grease,
may catch fire.
Donotcoverthedrippanswithfoil Usingfoilso
closetothereceptaclecouldcauseshock,fireor
damagetotherange.
Supportrod
Be sure all surface units are turned
off before raising the cooktop.
Lift-Up Cooktop
Cleantheareaunderthecooktopoften.Built-up
soil,especiallygrease,maycatchfire.
To make cleaning easier, the entire
cooktop may be lifted up and supported
in the up position.
Be sure all dm surface units are mined off
befbre raising the cooktop. The surface
unit_sand (kip pans do not need to be
removed, however, you may relnove one
to make raising tim cooktop easier. A
support rod will hold the cooktop up
while you clean undemeafll it.
After cleaning under fl_e cooktop wifll
hot, so_q3ywater and a clean cloth, lower
the cooktop. Be carefifl not to pinch your
fingers.
15

Before YouCall ForService...
Troubleshooting lips
Save time and money! Review the chart on this page first
and you may not need to carl for service.
Possible Causes What ToDo
Surface units not The surface units are not *With tile controls ore check to make sure tile surfilce
functioningproperly plugged in sofidly, unit is plugged completely into tile receptacle.
The surface unit controls *Cimck to see tile correct control is set fbr file surfilce
improperly set. unit you are using.
The drip pans are not set *Witil tile controls off, cileck to make sure tile drip
securely in the cooktop, pan is in tile recess in tile cooktop and timt tile
opening in tile pan lines tip witil tile receptacle.
Clock and timer do A fuse in your home may *Replace fllse or reset circuit breaker.
not work be blown or the circuit
breaker tripped.
Ovenlightdoes Light bulb is loose or defective. * Tighten or replace tile bulb.
not work Switch operating light *Call for sm_qce.
is broken.
Ovenwillnot work Plug on range is not completely *Make sure electrical plug is plugged into a live, properly
inserted in the electrical outlet, grounded outlet.
Afuse in your home may be * Replace fllse or reset circuit breaker.
blown or the circuit breaker
tripped.
Oven controls improperly set. * See tile Using the oven section.
Fooddoesnotbake Oven controls improperly set. * See tile Using the oven section.
orroastproperly Sheff position is incorrect * See tile Using the oven section.
or the shelf is not level.
Incorrect cookware or cookware * See tile Using the oven section.
of improper size being used.
Oven thermostat needs *See tile Adjust the oven thermostat--Do it yourselfi
adjustment, section.
Fooddoes not Oven controls improperly set. * See tile Using the oven section.
broilproporly Door not open to the broil stop *See tile Using the oven section.
position as recommended.
Improper shelf position. * See tile BroilingGuide.
Food being cooked *Use the broiling pan and ,gridtllat came with your range.
in a hot pan. Make sure it is (:eel.
Cookware not suited for broiling. * Use tile broiling pan and ,gridtilat crone with your range.
Aluminum foil used on the *See tile Usingtheovensection.
broiling pan and grid has not
been fitted properly and slit as
recommended.
In some areas the power * Prelleat tile broil element fbr 10 nfintltes. Broil for
(voltage) may be low. tile longest period of time recommended in tile
• Broiling Guide.
Oven temperature too Oven thermostat
hot or too cold needs adjustment. * See tile Adjust the oven thermostat--Do it yourselfl
section.
16

GE Service Protection Plus TM
GE, a name recognized worldwide for quality and dependability, offers you Service
Protection Plus TM--comprehensive protection on all your appliances-No Matter
What Brand!
Benefits Include:
Backed by GE
All brands covered
Unlimited service calls
All parts and labor costs included
No out-of-pocket expenses
No hidden deductibles
One 800 number to call
We'll CoverAnyAppliance.
Anywhere. Anytime.*
You will be completely satisfied with our service protection or you may request your money back
on the remaining value of your contract. No questions asked. It's that simple.
Protect your refi'igerator, dishwasher, washer and (hyer, range, TV, VCR and much more-any brand!
Plus there's no extra charge fbr emergency sex_ice and low monthly financing is available. Even icemaker
coverage and fbod spoilage protection is of*ered. You can rest easy knowing that all your valuable
household products are protected against expensive repairs.
Place your confidence in GE and call us in the U.S. toll4i'ee at 800-626-2224
for more information.
*All brands cox ered, up to 20 )ears old, in the continental U .S.
_¢P_(iul here
Please place in envelope and mail to:
General Electric Company
Warranty Registration Department
P.O. Box 34070
Louis_le, KY 402324070
17

Consumer Product Ownership Registration
Dear Customer:
Thank you for purchasing our product and thank you for placing your
confidence in us. We are proud to have you as a customer!
Follow these three steps to protect your new appliance investment:
Complete and
mail your Consumer
Product Ownership
Registration today.
Have the peace of
mind of knowing we
can contact you in
the unlikely event of
a saiety modification.
After mailing
the registration
below, store this
doommnt in a safe
place. It contains
information you
will need should
you require service.
Our service number
is 800-GE-CARES
(800-452-2737).
Read your Owner's
Manual careflflly.
It will help you
operate your new
appliance properly.
If you have questions,
or need more infi)r-
marion call tlle
GE Answer (;enter:
800.626.2000.
Model Number Serial Number
Important: If you did not get a re _'stration card with your product,
detach and return the form below to ensure that your
product is registered.
..... _.,o Clu here
Consumer Product Ownership Registration
Model Number Serial Number
Nit. 1112 Ms. IMrs. 1112 Miss 1112
First ! ]
Name IIIIIIIIIIIII
Last [
Name !!!!!!!!!!!! ! ! ! ! ! ! I
Street ]
Address IIIIIIIIIIIIIIIIIIIIII
Apt#! I I I I I I I I
City!IIIIIIII
State ] I ] ZipCode[ ! ! ! ! ]
[)ale l)la(cd
lnLsc] I ] ] I ]
Month Day
Phone
Number! ! ! [-! ! !
III
Year[!]
I-I , , , !
IIIIIIIIIIII
GeneralElectric Company
Louisville,Kentucky 40225
18
GEApp/iances HOTPOIHT hi,ill

GEElectric Range Warranty
Aft warranty service provided by our Factory Service Centers
or an authorized Customer Care_technician. For service,
carl 800-GE-CARES.
i
Fromthedateofthe:i
originalpurchaseii
GE Will Replace, At No Charge ToYou:
Any part of the range which f_lils(hie to a defect in materials or worklnanship.
During this full one-year warranty,GE _,_411also provide, free of charge, all labor
and in-holne set_ice m replace the defective part.
Service trips to your home to teach you how to use
the product.
Improper installation.
Failure of the product if it is abused, misused, or used
for other than the intended purpose or used
commercially.
Replacement of house fuses or resetting of circuit
breakers.
Damage to the product caused by accident, fire, floods
or acts of God.
Incidental or consequential damage to personal
property caused by possible defects with this appliance.
This warranty is extended to the original purchaser and any succeeding owner for products purchased for
home use within the USA. In Alaska, the warranty excludes the cost of shipping or service calls to your home.
Some states do not allow the exclusion or limitation of incidental or consequential damages. This warranty
gives you specific legal rights, and you may also have other rights which vary from state to state. Toknow
what your legal rights are, consult your local or state consumer affairs office or your state's Attorney General
Warrantor: GeneralElectric Company.Louisville, KY40225
19

ServiceTelephoneNumbers.
GEAnswerCenter®800.626.2000
The GE Answer Center ®is open 24 hours a day, 7days a week.
In-Homeflepak Service800-CE-CARES(800-432-2737)
Expert GE repair sel_dce is only a phone call away.
SpecblNeedsService800.626.2000
800-TDD-GEAC(800-833-432.2)
GE offers, fl'ee of charge, a brochm'e to assist in planning a barfier-fl'ee kitchen for persons
xdth limited rnobilibT.
ServiceContracts8_-_2_-z_4
Purchase a GE seisdce contract while your wan'anty is still in effect and you'll receive a
substan0al discount. GE Consumer Sel_dcewill still be there _6_eryour warranty expires.
PartsandAccessories800-626-2002
Indixdduals qualified to sel_dce their ox,_lappliances can have par_s or accessories sent directly
to their homes (VISA, MasterCard and Discover cards are accepted).
Instructions containedinthismanualcoverprocedurestobeperformedbyanyuser.Otherservicing
genera/IFshouldbereferredtoqualifiedservice personnel.Cautionmustbeexercised, since
improperservicing maycause unsafeoperation.
ServiceSatisfaction
Ifyou are not saOsfled with the sel_dce you receive fl'om GE:
First,contact the people who se_dced your appliance.
Next, ifyou are soil not pleased, x_aiteall the derails-including your phone number-m:
Manager, Consumer Relauons
GE Appliances
Appliance Park
Louisxdlle, KY 40225
Hnallg ifyour problem is soil not resolved, x,_Tim:
M_0orAppliance Consumer Acuon Program
20North Wacker Drive
Chicago, IL 60606
20 Printed in LaFayette, GA
Other manuals for JSS26
1
This manual suits for next models
1
Table of contents
Other GE Range manuals

GE
GE JBS02R Training manual

GE
GE PGS908SEPSS - Profile 30" Slide-In Gas Range Manual

GE
GE JGBP33BEH User manual

GE
GE JBS05 User manual

GE
GE JGB870SETSS Manual

GE
GE Monogram ZDP486NRP6SS User manual

GE
GE Artistry ABS45DFBS Manual

GE
GE Monogram ZDP48N6DHSS User manual

GE
GE Profile JD968KFCC User manual

GE
GE Profile JS905TKWW Manual