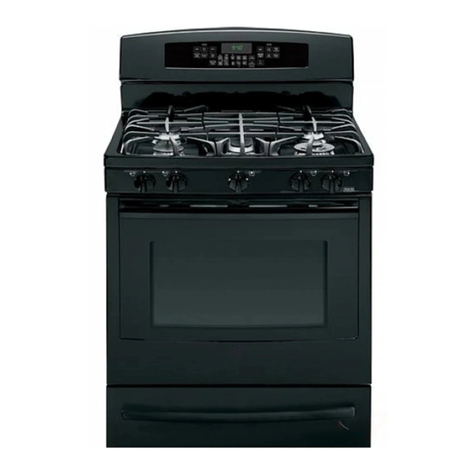
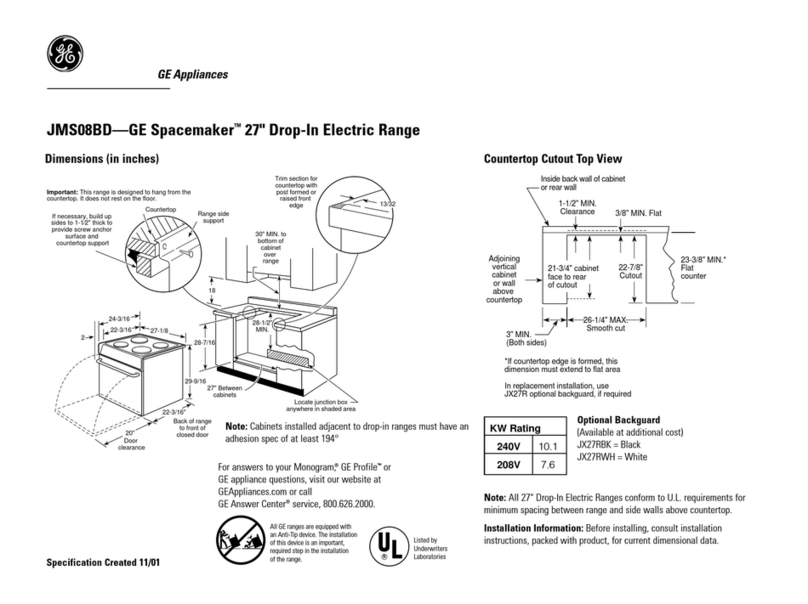
GE Profile JB900 User manual

vvvvvv.GEAppliances.com
Safety Instructions ....... 2-7
Operating Instru_tions
Clock, Kitchen Timer
and Control Lockout ........ ]5
Oven ................. 12-24
Sabbath Feaulre ........ 19, 20
Self-Cleaning .......... 23, 24
Special Features ........ 17, 18
Thermostat .............. 20
Timed Baking and Roasting..16
Surface Units ........... 8-1 l
Warming Drawer ........ 21,22
Care and Cleaning
Broiler Pan and Grid ....... 27
Control I_obs ............ 25
Glass Cookmp .......... 29, 30
I,if't-Off Oven Door . ........ 26
Light .................... 27
Racks .................... 27
Removable Drawer . ........ 28
Troubleshooting Tips ... 31-34
Accessories ............. 38
Consumer Support
Consumer Support . . Back Coxer
Product Registration ..... 35, 36
Warranty ................. 39
jg9oo
Write the model and serial
numbers here:
Model #
Serial #
You can lind them on a label
behind the storage drawer on
the front of the range frame.
49-80287 04-055R

IMPORTANTSAFETYINFORMATION.
READALLINSTRUCTIONSBEFOREUSING.
For your safety, the information in this manual must be followed to minimize the risk of fire,
electric shock, or to prevent property damage, personal injury, or loss of life.
AWARNINGANti-TIPDEVICE
All ranges can tip and injury could result.
Toprevent accidental tipping of the range, attach it to the wall and floor by installing the Anti--tip
device supplied.
If the Anti--tip device supplied with the range does not fit this application, use the universal Anti--17p
device WB2X7909.
Tocheck if the device is installed and engaged properly, remove the kick panel or storage drawer
and inspect the rear leveling leg. Make sure it fits securely into the slot.
If you pull d_e range out from dm wall tbr any reason, make S/lie tile device is properly
engaged when you push the range back against tile wall. If it is not, there is a possible risk of
the rang_ dpping oxer and causing ii_ui T if you or a child stand, sit or lean on an open door
Please refer m fl_e Anti-Tip device infounadon in this manual. Failure m take dlis precaution
could _esult in dpping of tile rang_ and i,_jury.
IMPORTANTSAFETYNOtiCE
The California Safe Drinking Water and ToxicEnforcement Act requires the Governor of California to
publish a list of substances known to the state to cause cancer, birth defects or other reproductive
harm, and requires businesses to warn customers of potential exposure to such substances.
The fiberglass insulation in self-clean ovens gives off a very small amount of carbon monoxide during
the cleaning cycle. Exposure can be minimized by venting with an open window or using a ventilation
fan or hood.
2

GEAppliances.com
SAFETYPRECAUTIONS
When using electrical appliances, basic safety precautions should be followed, including the following:
Use dfis appliance only for its irrtended
pm])ose as described in this Owner's
Manual.
Be snre vonr appliance is properly
irrstalled and grounded by a qualified
irrstaller in accordance with the provided
installation irrstructions.
Haxe die irrstaller show you the location
of the circuit breaker or filse. Mark it for
easy reference.
Do not atmmpt to repair or replace arty
part of your range unless it is specifically
_ecommended in this manual. All other
servicing should be referred m a qualified
mchnician.
Before performing aW service, disconnect
tire range power supply at dre household
distribution panel by removing the fllse or
switching off"the circuit breaken
Do not leaxe children alone---childien
should not be left alone or unattended fir
an area where an appliance is ira use. They
should nexer be allowed to sit or stand on
arty part of the appliance.
Do not allow anyone to climb, stand or
hang on the door; storage drawer or
cooktop. They could damage the range
arrd exen tip it oxel; causing sexere
personal irljmT.
WARNING!
iii!iii!_
may penetrate a broken control panel and create a risk of electrical shock. Contact a qualified
technician immediately should your glass control panel become broken.
Do not store flammable mamfials in
an oven or near file cooktop.
CAUTION:Items of irrterest to
children should not be stored in cabinets
aboxe a range or on the backsplash of a
range----children climbing on tire range
to reach items could be seriously fi)jnred.
Nexer wear loose-fitting or hanging
garments while using the appliance.
Be carefifl when reaching for imms stored
oxer tire range. Flammable mamrial could
be ignimd if brougt/t ira corrtact with hot
surface units or heating elements and may
cause sexere bnrns.
Use only dUpot holders--moist or damp
pot holders on hot snrt_aces m W result in
bmTrs flom smam. Do not let pot holders
touch hot surthce units or heating
elements. Do not use a towel or other
Do not use wamr on grease fires. Nexer
pick up a flaming pan. Turn tire corrtlols
off. Smother a flaming pan on a surface
unit by coxei-ing the pan complemly with
a well-fitting lid, cookie sheet or fiat tray.
Use a multi-puq)ose dUchemical or
foam-wpe fire extinguishen
Flaming grease outside a pan can be put
out by coxelJng it with baking soda or;
if available, by using a mulfi-puq)ose d_T
chemical or foam-wpe fire exOnguishen
Flame in the oxen can be smothered
completely by closing tire oxen door arrd
turning the oxen off or by using a multi-
puq)ose dUchemical or foam-wpe fire
extinguishen
bulky cloth in place of pot holders.
3

IMPORTANTSAFETYINFORMATION.
READALLINSTRUCTIONSBEFOREUSING.
"iii!'............
WARNING'!
SAFETYPRECAUTIONS
Do not operate the oven or cooktop controls if the glass is broken. Foodsplatter or cleaning solution
may penetrate a broken control panel and create a risk of electrical shock. Contact a qualified
technician immediately should your glass control panel become broken.
For your safety, never use your appliance
for warming or hea6ng tile room.
Do not let cooking grease or otiler
flammable mamfials accumulam in
or near the range.
Do not touch fl_e suilaace units, file
heating elements or tile inmrior surface
of tile ox>n. These surfaces may be hot
enough m hum exen though fl_ey are
dark in color During and after use, do not
much, or let clotifing or otiler flammable
mamrials contact file surfi_ce units, areas
nearby dm surtZace units or any intexior
aiea of file ox>n; allow sufficient dine tbr
cooling first.
Potentially hot snrfaces include tile
cooktop, areas facing tile cooktop, oven
\ent opening, surtZaces near flae opening,
crevices around the o_en door.
Do not store or use combustible mamrials,
gasoline or other flammable vapors and
liquids in the vicinity of this or any other
appliance.
Kee I) tim hood and grease filters clean
to maintain g_od x>ndng and to ax_id
grease fires.
Teach children not to pl W with file
controls or any od/er part of tile rang>.
Alwws keep dish rowels, dish cloths, pot
holders and oflaer linens a safe distance
flom your rang_.
Alwws kee I) wooden and plastic umnsils
and canned food a safe distance flom
your rang_.
Alwws kee I) combnsfible wall cox_ring:s,
curtains or drapes a safe distance from
yonr rang_.
REMEMBER: The inside stMhce of tile o_en
may be hot when tile door is opened.
COOKMEATANDPOULTRYTHOROUGHLY...
Cookmeat andpoultry thoroughly--meat toat least an INTERNALtemperatureof 160°Eandpoultry toat least
an INTERNALtemperatureof 180°ECookingto thesetemperaturesusuallypretectsagainst foodbomeillness.
4
RADIANTSURFACEUNITS
Use proper pan size--select cookware having flat bottoms large enough to cover the surface un#
heating element. The use of undersized cookware will expose a portion of the surface un#to direct
contact and may result in ignition of clothing. Proper relationshJ _of cookware to surface un# will
also improve efficiency.
Never leave tile surface units unattended
at high heat setting:s. Boilox>rs cause
smoking and greasy spilloxers that m W
catch on fire.
Only certain wpes of glass, glassAeramic,
earthenware or other glazed containers
are suitable for cooktop service; otimrs
may hreak because of tile sudden chang>
in temperature.
To minimize the possibility of 1)hills,
ignition of flammable mamrials and
spillage, tile handle of a container
should be turned toward the cenmr of
tile range without exmnding oxer nearhv
surface units.
Always ulrn tile surface units off before
renloving cookware.
When preparing flaming foods under
tile hood, um_ tile tim on.

GEAppliances.com
RADIANTSURFACEUNITS
Use care when touching flae cooktop. The
glass surfiace of fire cooktop will retain heat
after the conuols have been mined off;
Kee I) an eye on foods being flied at high
or medium high heat settings.
Foods for flTing should be as &T as
possible. Frost on flozen foods or moisun_e
on fresh foods can cause hot fat to bubble
up and ox>r the sides of the pan.
Use little fiat for effective shallow or deep
/cat flTing. Filling the pan too fltll of/Cat can
cause spillovers when food is added.
If a combination of oils or Pats will be
used ira flTing, stir together before heating,
or as fi_ts melt slowly.
Always heat fi_t slowly, and watch as it heats.
Use a deep fat thermometer whenever
possible to pre_nt o_rheafing lCatbeyond
rite smoking point,
Avoid scratching the glass cooktop.
The cooktop can be scratched with items
such as sharp insuuments, tings or other
jewehT, and fix_ts on clothing.
Do not operate tim radiant surface units if
the glass is broken. Spilloxers or cleaning
solution may penetrate a broken cooktop
and cream a risk of electrical shock.
Contact a qualified technician immediately
should your glass cooktop become broken.
Ne_er use the glass cooktop surfi_ce as
a cutdng board.
Do not place or store items that can melt
or catch fire on the glass cookmp, e_en
when it is not being used.
Be carefitl when placing spoons or other
sorting utensils on glass cookmp sur/Cace
when it is in use. They may become hot
and could cause bums.
Clean fire cooktop widt caution. If a wet
spong_ or cloth is used to wipe spills on
a hot sui/Cace unit, be carefifl to m_id
steam bums. Some cleaners can produce
noxious flnnes if applied m a hot sur/Cace.
NOTE,"Werecommendthat gouavoidwipingang
surfaceunitareasuntil theghavecooledand the
indicatorlight hasgoneoK Sugar spills are _e
exception to _is. Pleaseseethe Cleaning the
glass cooktop section.
V_]ten the cool<top is cool, use only
CE_ BRYTE (¢Ceramic Cooktop
Cleaner and dae CERAMA BRYTE ¢_
Cleaning Pad m clean rite cookmp.
To avoid possible damage m the cooking
surface, do not apply cleaning cream m
fire glass surface when it is hot.
After cleaning, use a dUcloth or paper
rowel m remove all cleaning cream
residue.
Read and follow all instructions and
warnings on the cleaning cream labels.
Larg> scrawhes or impacts to glass doors
or cooktops can lead m broken or
shattered glass.
Do not leave any imms on the cooktop.
The hot air flom the x>nt m W ignite
flammable imms and will increase pressure
ira closed containers, which m W cause
fltem to burst.
Do not lem_ plastic items on the
cooktoI>---fltey may melt if left too close
to rite \Brat.
Do not lift tim cooktop, iZting tim
cooktop can lead to damag_ and improper
operation of the rang_.
5
IMPORTANTSAFETYINFORMATION.
READALLINSTRUCTIONSBEFOREUSING.
WARNING'!
OVEN
Stand away from the range when opening the oven door. Hot air or steam which escapes can cause
bums to hands, face and/or eyes.
Do not heat unopened food containers.
Pressure could build up and the container
could burst, causing all il)ju U.
Kee I) file ox.en x.ent nnobstrncted.
Kee I) the ox.en free flora grease buildup.
Place file oven rack in rite desired position
while rite ox.en is cool. If racks must be
handled when hot, do not let pot holder
contact the heating elements.
¼]ran using cooMng or roasting bags
ill the ox.en, follow the nlanufacmrer's
di_.ecfions.
Do not use tile ox.en to dry newspapers.
If ox.eflleamd, dley can catch on fire.
Do not use tile oven for a storage, area.
Imms stored in all ox.en call ignim.
Do not leax.e paper products, cooking
umnsils or food in rite oven when not
ill use.
Do not use almninnm foil to lille oxen
bottoms, except as suggested in this
manual, hnproper installation of
aluminum foil may result ill a lisk
of electric shock or fire.
Pulling out the rack to tile stop-lock is a
comenience ill lifting heax T tbods. It is also
a precaution against burns flora touching
hot snrl_aces of the door or oxen walls.
SELF-CLEANINGOVEN
Do not use oven cleaners. No commercial oven cleaner or oven liner protective coating of any kind
should be used in or around any part of the oven. Residue from oven cleaners will damage the inside
of the oven when the self-clean cycle is used.
Do not clean the door gv_sket. The door
gasket is essential for a good seal. Care
should be token not to rub, damag.e or
n/ox.e the gasket.
Before self-cleaning tile oven, ren/ox.e the
broiler pan, gdd and other cookware.
Take the racks ont of tile ox.en before you
begin the self-clean cycle or they m W
discoloi; unless your ox.en is equipped with
gr W po_velain-coamd ox.en racks.
Be sure to wipe offexcess spillag.e before
starting the self-cleaning operation.
If the self-vleaning mode malfimcdons,
mm file oven off and disconnect tile
power supply. Have it serviced by a
qualified mchnician.
Clean only parts lismd ill this Owner's
Manual.
READANDFOLLOWTHISSAFETYINFORMATIONCAREFULLY.
SAVETHESEINSTRUCTIONS

GEAppliances.com
WARMINGDRAWER
Tile pml)ose of file wai_ning drawer is
to hold hot cooked foods at serving
temperature. Always start with hot food;
cold food cannot be heamd or cooked
in tile wai_ning drawen
Do not use tile drawer to d W newspapers.
If overheamd, they can catch on fire.
Do not leme paper products, plastics, canned
ti0od or comlxlstihle mamiials in the dlv_wer
Nex>r leavejars or cans of fat dlqppings
in or Ileal your drawer.
Do not warm food in file drawer for more
than two hours.
Nexer place, use or seH_lean tile lower
ox>n drawer pan in tile upper oxen.
Do not touchthe heating element or the
interior surface ofthe drawer. These surPaces
may he hot enough to bum.
REMEMBER:Ti_e inside sur_ce of file dl_awer
may he hot when tile &awer is opened.
Use caie when opening tile drawer Open
tile drawer a crack and let hot air or steam
escape before removing or replacing food.
Hot air or smam which escapes can cause
bums m hands, face and/or eyes.
Do not use ahuninum foil m line file lower
oxen drawer. Foil is an excellent heat
insulator and will trap heat heneafll it. Tills
will upset the perfoi_nance of the drawer
and it could damage the interior finish,

Usingthesurfaceunits.
Throughout this manual, features and appearance may vary from your model.
OFF
LO HI
9
7
Be sure you turn flTecontrol knob to
OFFwhen you finish cooking.
How to Set
Push the knob in and ttlrn in either
direction to the setting you want.
At both OFFand HI the control clicks
into position. Ym may hear slight
clickingsotmds during cooking,
indicating the control is keeping the
power level yet! set.
AHOT CO01ffOP indicator light will glow
when anv radiant element is turned on,
and will remain on tmtil the stmfi_ce is
cooled to approximately 150°F.
Indicator light will:
comeon when the unit is turnedon or hot to
the touch.
stay on evenafter the unit is turnedoff
glow until the unit iscoded to approximately
150°£
Dual Surface Unit ControlKnob
Thedualsurface unit has2 cooklhgs/2esto SMALL LARGE
select fromso youcanmatch the sizeof the unit BURNEROFF IntoNER
to the s/2eof thecookware youareusing. HI • _@ttl
T,).se.,esm.lls..*e ....,e
control knob to the SMALL BURNER
To use the large st,rfi,ce trait, tm'n the
control knob to the LARGEBURNER
settin *s tO 2
MED
WARMER GUIDE
SETI'ING FOOD
(Low) Bread/Pastries
(Medium) Chocolate/Butter
(Medium) Sauces,Stews,
CreamSoups
(Medium) Vegetables
(High) Soups(liquid)
(High) TeaorCoffee
TheWarmerGuideisfor reference
onlyand the SEFrlNGthat you
needwill dependonthe amount
and type offood,the starting
temperatureof thefood and the
lengthof the holdingtime.
Using the Warming Zone
Tile WARMING ZONE,located in the back
center of tile glass sm'ti_ce, will kee I) hot,
cooked food at serving temperatm'e.
Mwavs start with hot fi)od. Do not use
to heat cold fi)od. Plating tmcooked or
cold food on the WARMINGZONEcould
result in food-borne illness.
Push and turn the control knob to any
desired setting.
For best results, all fi)ods on the
WARMING ZONE should be covered with
a lid or aluminum foil. When w:mning
pastries or breads, the cover should be
vented to allow moisture to escape.
_Mwa)'s use I)otholde_ or ()veil Inius when
removim* food fl'om the WARMING ZONE,
as cookware and plates will be hot.
CAUTION:Donotwarmfoodonthe
WARMING ZONE formore thantwo hours.
NOTE."Thesurface warmer will not glow red like
the cookingelements.
AHOTsm'fi_ce indicator light will glow
when the glass surti_ce is hot and will
remain on tmtil the stu_i_ce is cool
enough to touch. Ix)wer settings ill,iv not
heat the glass sudime enough to cause the
HOTsurli_ce indicator light to come on.
AWARMINGZONEindicator light will
glow when the unit is on.
Donot useplastl? wrap to coverfood.Plastl?
maymelt ontothe surfaceandbe very difficult
to dean.
Useonlycookwarerecommendedfor
top-of-rangecooking.
8

GEAppliances.cem
Throughout this manual, features and appearance may vary from your model,
Temperature Limiter
Every radiant smti_ce unit has a
temperature limited;
The temperature limiter protects the
glass cooktop fl'om getting too hot.
The temperatm'e limiter may cycle
the milts offfi)r a time if:
Thepanboi/sdfy
Thepanbottom is notflat
Thepanis offcenter
Thereis nopan on the unit
HomeCanning7 ps
Be sm'e the cromer is centered over the
sm'fi_ce Imit.
Make sm'e the cromer is fiat on the
bottom.
To pre_ e]_t bml_s {}'ore steam or heat,
IIse CaIKiom_ wheH Cam_m_im_g
[Ise redpes amid procedl_res {_'om
reputable sources. These are available
f_'om mam_l_fi_c[iH'ers sl_c]] as BaH <:am_(]
Eerr a m_d the Departm en t of Ag_icl*]mre
Exte_sio_ Sexwice.
[qat-bottomed ca]reels are recommem_ded.
[Ose o{ water batb cam_m_ers _rH t]] _'_ _)_)]ed
bottoms may exte]_d t]_e time reqlfired
to brim_gthe water to a boil.
Wok Cooking
We rec'ommdTd that you use only a flat-bottomed
wok. Theyareavai/abb at }vur/ocalretail stora
Do m_oti_se woks that I/ave sl_pport _im_gs.
Do m_ot 10se rolmd bottom woks_ kbl0 col0]d
be seriol_s]v bl m_ ed if" the wok ti pped o','e_:
Use only flat-bottomed woks,
8

Usingthesurfaceunits.
The following information will help you choose cookware which will give good performance on glass cooktops.
SURFACE
COOKING
Never cook directly on rne gross,
Alwal s use cooKware
AIwavs #lace theoan r7thecenter of
the surface unit you are cooking on.
About the radiant surface units...
The radiant cooktop teatures heating
units beneath a smooth glass sm_fi_ce. DflAGGIN'G
NOT .'Asl, htodorisnormalwhenanew
cooktopisusedforthefirstt#ne.It/s causedby
theheatingofnewpartsandinsulatingmaterials
andwill disappearina shorttime.
NOTE:Onmodelswithhghtcoloredglass
cooktops,itisnormalforthecookingzonesto
changecolorwhenhotorcoolingdown.Thisis
temporaryandwilldisappearastheglasscools
toroomtemperature.
The smthce refit will cycle on and off to
maim;fin yore" selected control setting.
It is sate to place hot cookware on the
glass stli'iilce even when the cooktop
is cool.
Even after the surfi_ce milts are tin'ned
off, the glass cooktop retains enough
heat to continue cooking. To avoid
ovei'cookillg, i'elilove p[llIS _i'Olil the
sm'li_ce milts when the food is cooked.
Avoid placing anything on the surtilce
refit tmtil it has cooled completely.
Donotslidecookwareacrossthe cooktop
becauseit canscratch theglass--the glass
isscratch resistant,not scratch proof.
Waterstains(mineraldeposits)areremovable
usingthecleaningcreamorfullstrengthwhite
vinegar
Useof windowcleanermayleavean
iridescentfilmonthecooktop.Thecleaning
creamwill removethledlecoloration.
Don'tstoreheavyitemsabovethecooktop.
If theydropontothecooktop,theycancause
damage.
Donotusethesurfaceasa cuttingboard
10

Se/ecti,g typeso_fcookware.
Check pans for flat bottoms by
ush_ga straight edge.
Pans with rounded, curved, ridged
or warped bottoms are not
recommended.
Stainless Steel:
recommended
Aluminum:
heavy weight recon_mended
Good c(mdl_ct]vitv_ Ailm_hmm residues
sometimes appear as scratches on the
cooktop, bllt ca m/be rein oved if c]em_ ed
immediate]> Because of its low me]dm_g
poim_t, t]_im__e]ght a]lm_hmm sholdd m_ot
be used.
CopperBottom:
recommended
Copper ma leave resk;h*es *%r]_]C']_ C'_
:lppear as sc_m hes. The resi&_es <m be
removed, as ]ol_g as the cooktop is
c]eaN_ed imm ediate]v. H_ e_e_;do m_ot ]et
these pots boil d_> Overheated metal cm_
bo]_d to glass cooktops. A]_ o', erheated
copper bottom pot will leave a resid_*e
that will permm_e]_dy staim_ the cooktop
if m_ot rein oved ]m med]a te]v.
Porcelain Enamel Covered Cast #on'.
recommended
As hmg as die cookware is covered
completely _grith po_'ce]{_]m) ei_ame], this
coo]G_'are is recommei_ded. Cmltiom_ is
recomme]_ded {or cast ]ro]_ cooki<_re
that is _ot completely covered with
smood_ porce]ah_ e_ame], as it may
scx:_tch the glass cex:m_]ccooktop.
Glass-ceramic:
usab/e, but not recommended
Poor perfbrma_)ce. Ma scratch the
Slll'_i_ce.
Stoneware:
usable, but not recommended
Poor perfbrma_)ce. May scratch the
sllr_i_ce.
//

Usingtheovencontrols.
CONTROLLOCROUT
OvenControl Clockand TimerFeaturesandSettings
BAKE Pad
Touch to select tile bake flulcfion.
BROIL HI/LOPad
Touch to select the broil flnlcfion.
Display
Shows tile tiIne of day, oven teilll)ei';ittli'e ,
whether tile oven is in tile bake, broil or
selfkleaning nlode and the dines set fi)i"
tile tilller or atltoI//atic ()veil opei'ations.
If "F- anda numberor letter"flashin thedisplayand
theovencontrolsignals,thisindicatesa function
errorcode.TouchtheCLEAR/OFFpadAllowtheovento
coolforonehourPuttheovenbackintooperation.If the
functionerrorcoderepeats,disconnectthepowertothe
ovenandcallforservice.
Ifyourovenwassetfora timedovenoperation
anda poweroutageoccurred,thedockandall
programmedfunctionsmustbereset
Thetimeofdaywill flashin thedisplaywhen there
hasbeenapoweroutage.
0
CLEAR/OFFPad
Touch to cancel ALL(l_,en operations
except tile clock and fiIneI;
COOKINGTIME Pad
Touch and then totl(h tile ntlillber pads to
set tile alllOtlnt of till/e veil l_;lllt VO/lI" flied
to cook. Tile ()veil will shut off when tile
Cooking tiI/le has I'(In o/it.
DELAYSTARTPad
Use along with COOKING TIME or
SELF CLEAN STD/LOpads to set tile oven
to start and stop autonlaticallv at a tilne
you set.
@
O
0
SELFCLEANSTD/LOPad
Touch to select seltZcleaning flulcfion. See
tile Using the self-cleaning oven section.
OVENLIGHT ON/OFFPad
Touch to turn tile oven light on or ofl_
STARTPad
Mtlst be touched to stnrt any cooking or
cleaning flulction.
Number Pads
Use to set any flnlcfi(In requiiJng nuxnbei_
such as the tiine (ff day oil the clock, the
tiinei; tile ()veil tenlperature, tile internal
fi)od tenlperature, tile start tiIne and
length (ff operation for dined baking
and selfZcleaning.
CLOCKPad
Touch before setting tile clock.
KITCHEN TIMER ON/OFFPad
Touch to select tile tinier teatuI'e.
/2

Using the oven. CEApplia.ces.com
Toevoid possible bums, place the shelves in the desired posifion before you turn the oven on.
Theoven has 6shelf positions.
Before you begin.,,
The shelves ]]a_ e stop-lod_s, so d)a[ _])em)
placed corredv on d_e shelf sLq)ports (A
throl_gh F), d_ev wi]] stop be%re comh_g
completely ol_t, ;rod _rH]] _Ot tilt.
\Xlle_ placim_g ;rod removh_g cookware,
pu]] the s]le]f ol_t to the bm_p (m the
To remove a shelf, pl_]] it toward }oil tilt
the h'om_t emM Iq> atom [m]] it ore.
To replace, [)]ace the el]d (4 the shelf
(stop4ocks) on the supper( d]t iq> the
f_'(mt am_(] pl_sh the shelf ]m
CAUTION:Whenyouareusing
shdf in the bwest posifion (A], you will need to
use caution when pullingthe shdf out We
recommend that you pullti_e shdf out several
bches and then,usingtwopotholdas,puffthe
shdfoutbyholdingthe sides of it The shdf is
bw and you could be burned if you placeyour
Mnd /a ti_e middle of the shdf and puffall the
way out Be very"careM not to bum your hand on
be door when using be shdf /a be lowest
pos'ition(A).
How to Set the Oven for Baking or Roasting
[] Touch tile BAKEpad.
[] Touch the nulnber pads to set the
()veil [eillpei'attli'e.
Tochangetheoventemperatureduringthe
Bake cycle, touch the BAKE pad and set the
new temperature.
[] Touch tile STARTpad. When tile
oven stnrts to heat, the changing
temperatm'e will be in the displa);
The display starts changing once
the temperature reaches 100°E
TypeofFood Shelf Position
Frozenpies(oncookie sheet) D
Angel foodcake A
Bundt or poundcakes Bor C
Biscuits, muffins, brownies, Cor D
cookies,cupcakes,
layer cakes,pies
Casseroles Cor D
Turkey A
[] Touch tile CLEAR/OFF pad when
ba]dno is finished.
Center bakingpans in the oven.
Preheating and Pan Placement
Preheat the oven if the recipe calls fbr it.
Preheatim_g is necessar_ fbr good resll]ts
w hen ba ]d m_g ca kes, coo]d es, pa str} a N_d
breads_
Topreheat, set the oven at tf_ecoh_ecttemperatera
The contToI will be¢ewhen t¢}eoven is pre,heated
and tf_edisplaywill s'how your set temperature.
This"will take appro_fmate/y 8-10 m/autes.
Balding res_]ts wi]] be better if ]l/a]d_g
[xms are ce]_tered 1_ the ove]_ as milch
as possible. If ]lla]d_g with more t]lm_ one
[xm, [)]ace the [xms so each has at ]eas_
]i _o ]i½" of ah" space arom_d iL }If]l/aki_g
%m" cake layers at the same time, [)]ace
two levels o_/ l_ck B mid two ]avel3 (m
x:_ck D. Stagger pa_s on the ]_ck so (me
is _()t directly over the other
Cut slits in the foil just like the gri4
Aluminum Foil
Never cover the oven bottom
with aluminum foil.
You can use aluminum foil to fine the broi/erpan
and broiler gric_ However, you must mold the foil
tightlytothegridandcutslitsinitjustlikethegrid
Muminmn fl)i[ may also be used to catch
a spillove_: To do so, place a small sheet
of foil on a lower shelf several inches
below the too(1.
Never entirely cover a shelf with
almninmn fi)il, This will disturb the heat
circulation and result in I)°°r baking,.
13

Usingtheoven.
If yourrangeis connectedto208volts,
raresteaksmaybebroiledbypreheating
thebroiler andpositioning theovenrack
oneposition higher
How to Set the Upper Oven for Broiling
Leavethedooropentothebroilstopposition.
Thedoorstaysopenbyitself,yettheproper
temperature is maintained in the oven.
[] Place the n/eat or fish on the broiler
grid in the broiler pan.
[] Follow suggested rack positions in
the Broiling Guide.
[] Touch the BROILHI/LO pad once fi)r
HI Broil
Use LO Broil to cook tbods such as
poulU'y or thick cuts of meat thoroughly
without o_e_4)rowning them.
[] Touch the START pad.
[] _._hen broiling is finished, touch the
CLEAR/OFFpa d.
To change to LOBroil,touch the
BROILHI/LOpad again.
Broiling Guide
Beef Steaks
Rarer
Medium
Well Done
The size, weight, thickness,
stnrting temperature Food
and VOHI" Di'efei'en(e GroundBeef
of d(meness will affect knell Done
broiling times. This guide
is based on meats at
refl-igerator temperature.
+The U.& i)@artme)_t v/Ag'ricuhm_
_h0uM kn0w tkal _ookhlg it to roll) Rarer
140°I,"m_w_zssomejood poism_i_g Medium
o_Nzmismsm(n su_7_ive."(Sorrow We[[ Done
5,a/e Food Book. }bu_ Kit<:/+e*z Chicken
(;ui(h_.__i).t R_,v.]u_u_19X5.)
LobsterTails
Fish Fillets
Ham Slices
"_recooked)
Pork Chops
Well Done
SahnonSteaks
Quantityand/
or Thickness
1lb.(4 patties)
1/2 to3/4" thick
1" thick
1to 1VzIbs.
1½"thick
2 to2VzIbs.
1whole cut up
2 to2YzIbs.,
split lengthwise
2 Breasts
24
10to 12oz.each
1/4to 1/2" thick
1/2" thick
2 (1/2"thick)
2 (1"thick)about1 lb.
2 (1"thick)
4 (1"thick)about1 lb.
Shelf
Position
F
E
E
D
D
D
C
E
D
D
D
FirstSide
Time(rain.)
9
11
7
9
11
14
18
22
25
25
18_0
10
15
10
12
Second Side
Time (rain.)
6
10
5
6W
89
11
14 16
20
10
10 15
Donot
turn
ovelt
10
15
78
10
Comments
Spaceevenly.Upto8
patties takeabout the
sametime.
Steakslessthan1"
thickcookthrough
beforebrowning.Pan
fryingis recommende{
Slashfat.
Broilskin-side-down
first.
Cutthroughbackof
shell. Spreadopen.
Brushwith melted
butterbeforebroiling
andafter half of
broilingtime.
Handleandturnvery
carefully.Brushwith
lemonbutterbefore
andduringcooking,
if desired.
Increasetime 5 to 10
minutespersidefor
11/z"thick orhome-
curedham.
Slashfat.
Grease pan. Brush
steaks with melted
butter.
/4

Usingthe clock,kitchen timerand controllockout. CEA..,ia.cescom
Make sure the clock is set to the
correct time ofda_
To Set the Clock
The clock m i_st be set to tb e correct tim e
of day _br the automatic o\e]_ timh_g
fm/cticms to work proper]). The time of
day cmmot be chm_ged (]m_m_g a timed
bakim_g or se]f-c]em_h_g c)v]e.
[] Tol_cb the CLOCK pad.
[] Tol_cb the mmfl)er pads.
[] Tol.;h die START pad.
ON/OFF
TheKitchen 77merisa minutetimeronly.
TheKitchen Timerdoes not control
over operations. Themaximum
set&Tgonthe Kitchen Timeris 9hours
and 59minutes.
ToSet the Kitchen Timer
[] Touch tile KITCHEN TIMER
ON/OFFpad.
[] Touch tile number pads until tile
aI/lO/lIlt of time }Oil WaIlt shows
in tile display: For example, to set
2 houI_ and 45 ininutes, touch 2, 4
and 5in that orcle_: If you make a
mistake, touch tile KITCHEN TIMER
ON/OFF pad and begin again.
[] Touch tile STARTpad.
After touching theSTARTpad, SETdisappears,
thistells youthe time iscountleg down, although
the displeydoesnot change until oneminute has
passed Secondswff/not beshown in the d/spley
until the/astmleute is counting down.
[] _._q/en file t_it(hen Timer reaches .00,
tile control will beep 3 times fi)llowed
by one beep evelw 6 seconds until
tl'm KITCHEN TIMER ON/OFF pad
is touched.
The6-secondtonecanbecanceledbyfollowleg
thestepsin theSpecialfeaturesofyouroven
controlsectionunderTonesat theEndofa
T/medCycle.
ToReset the Kitchen Timer
If tile display is still showing tile time
remaining, you may change it by
touching tile KITCHEN TIMER ON/OFFpad,
then touch tile number pads until tile
time you want appea_ in tile display.
If tile remaining time is not in tile display
(clock, delay start or cooking time are in
the display), recall the remaining time by
touching tile KITCHEN TIMER ON/OFF pad
and then touching tile IltIIllbeF pads to
ellter tile IleW tilne vo/i Wallt.
ToCancel the Kitchen Timer
Touch the KITCHEN TIMER ON/OFF
pad twice.
Control Lockout
Yourcontrolwillallowyoutolockoutthetouch
padssotheycannotbeactivatedwhenpressed
or whencleanlegthecontro/pane/.
To a('fi\_Ke this feattlre:
[] Touch tile 9and 0touch pads
at tile same time until tile control
beeps twice. Tile display will show
I,OC continuously and tile time of
(lax if' not blacked ()/It.
NOTE."Aft cookingand tl_nlegfunctions will be
cancelledwhen locklegout the control
[] To unlock tile control, touch and
hold tile 9and 0pads at the salne
time until the control beeps twice,
and fOCwill be removed ti'om
the displa>
15

Usingthetimed bakingand mastingfeatures.
NOTE" Foods that spoil easily--such as milk, eggs, fish, stuffings, poultry and pork--should not be allowed to sit for
more than 1hour before or after cooking. Room temperature promotes the growth of harmful bacteria. Be sure that
the oven light is off because heat from the bulb will speed harmful bacteria growth.
@@@Q@
@@@(Z}@
@@@@@
How to Set an Immediate Start and Automatic Stop
Theoven will turnon lYnmediatelyandcookfor
aselected lengthof time.At the endof the
cookIw time the oven will turnoff automatically
[] Touch tile BAKEpad.
[] Touch tile munber pads to set tile
desired o_en tenlperature.
[] Touch tile COOKING TIME pad.
NOTE: Ifyourreciperequirespreheating,youmay
need toadd additional t/meto the length of the
cookingtime.
[] Touch tile number pads to set tile
desired length of cooking time. Tile
minimum cooking time you can set
is I minute.
Tile oven temperatm'e that you set
and tile cooking time that you
entered will be in the display.
Tile oven Mll turn ON, and tile display _dll
show file cooking time cotmtdown and tile
changing temperature st;ruing at 100°K
(Tile temperature display will start to
change ()lice file (well telllpeI_KtlI'e reaches
100°E) X._]/en the oven reaches the
mmperamre you set, 3 beeps will so/md.
The oven will condnue to cook fin.
the set amount of time, then turn off
mKomafically, tmless tile X_I_,_,I featm'e
was set. See tile How to Set the Ovenfor
Warmingsection.
[] Touch tile CLEAR/OFFpad to clear
tile display if necessary: Remove tile
fl)od fl'om tile oven. Remember;
even though tile oven turns off
automatically, fi)od left in tile oven
will continue cooking alteI" tile oven
ttlFnS ()fl_
[] Touch tile STARTpad.
NOTE"Anattentiontonewi//soundif youareuslW
flmedbakinganddonottouchtheSTARTpad
@@@@@
@@@@@
@@@@@
@@@@@
@@@@@
@@@@@
®
®
16
How to Set a Delayed Start and Automatic Stop
Theoven will turnon at the tkne of day youset,
cookfor a speci@ lengthof time and then turn off
automatically
Make sure tile clock sho_vs tile correct
dm e of da>
[] Touch tile BAKEpad.
[] Touch tile number pads to set tile
desired oxen temperature.
[] Touch tile COOKING TIME pad.
NOTE: Ifyourreciperequirespreheating,youmay
need toadd additional time to the length of the
cook/w t/me.
[] Touch tile number pads to set tile
desired length of cooking time, The
minimum cooking time you can set
is I minute.
Tile oven temperatm'e that you set
and tile cooking time that you
entered will be in tile displa).
[] Touch tile DELAYSTART pad.
[] Touch tile mmg)er pads to set tile
time of day you want tile oxen to
[tlI'n on and start cooking.
[] Touch tile STARTpad.
NOTE"Anattentbntonewillsoundif youareusIw
flmedbakbganddonottouchtheSTARTpad
NOTE:If youwouldliketocheckthetimes
youhaveset,touchtheDELAYSTARTpadto
checkthestarttimeyouhavesetortouchthe
COOKINGTIMEpadtocheckthelength
ofcookingtimeyouhaveseL
X4llen tile oven turns ONat tile dine
of day you set, tile display will show tile
cooking time countdown and tile
changing temperature starting at 100°F.
(Tile temperatm'e display will start to
change once tile oven temperature
reaches 100°E) X._]/en the oven reaches
tile temI)eratme you set, beeps will sound.
The oven will continue to cook t0r
tile set alllOtlnt of fiI/le, then ttlI'n Off
automaficall); unless tile X4'ARNIfeature
was set. See tile How to Set the Ovenfor
Warmingsecdon.
[] Touch tile CLEAR/OFFpad to clear
tile display if necessm T. Remove tile
fi)od fl'om tile oven. Remember;
even though tile oven turns off
automatically, food left in tile oven
will confimm cooking after tile (wen
ttlI'nS ( )lC[_

Special featuresofyourovencontrol GEA..lia.ces.com
Yournew touch pad control has additional features that you may choose to use. The following are the features
and how you may activate them.
Thespecial feature modes can only be activated while the display is showing the time of day. They remain
in the control's memory until the steps are repeated.
When the display shows your choice, touch the $TARTpad. Thespecial features will remain in memory after
a powerfaflure, exceptfor the Sabbath feature, which will have to be reset.
12=HourShutdown
With this feature,shouldyouforgetand leave t¢}e
oven on, t¢}econtTo/will automatically turnoff be
ovenafter 12hours duringbaking functionsor
after 3 hoursdunbg a broil function.
lf'_ol_ wM_ to mm OFF this f_amre, fb]low
the steps below.
[] Tol_ch the BAKEm_d BROIL HI/tO
pads at t])e same time m)ti] the
disp]a} shows 8E
[] To_ch the BELAYSTARTpad m_ti]
nO Shdn (l_o sitar-oft) appears im_the
[] Tol_ch the STARTpad to activate the
m_o s ]l __t-oft am_d ]eave the co ]_tl'o]
set im_this special featm'es mode.
!i;IGi D [¸
Fahrenhe# or Celsius Temperature Selection
Yourovencontrol is set to usethe Fahrenheit
temperatureselectionsbut you maychange this
touse the Celsiusselections.
[] Touch tile COOKING TIMEand BROIL
HI/LO pads at tile same time. The
displa} will show F(Fahrenheit).
[] Touch tile BAKEand BROILHI/LO
pads at tile same time until tile
displa_ shows SF
[] Touch tile COOKING TIMEand BROIL
HI/LO pads again at tile same time.
The displa? will show C (Celsius).
[] Touch tile STARTpad.
Tonesat the End of a Timed Cycle
At the endofa flYnedcycle, 3short beepswill
soundfollowed byone beepevery6seconds
until the CLEAR/OFFpafl is touche_ This
continual 6-secondbeepmaybe canceled
To cancel the 6-see(rod beep:
[] Touch tile BAKE and BROILHI/LO
pads at tile same time until tile
display sh(_ws SF
[] Touch tile KITCHEN TIMER ON/OFF
pad. Tile display shows CONBEEP
((ontinuous beep). Touch tile
KITCHEN TIMER ON/OFFpad a_fin.
Tile display sho_:s BEER (This cancels
tile one beep evexT 6 seconds.)
[] Touch tile STARTpad.
!!i i [ ii !iiiilill
Cook and Hold
Yournew controlhas a cookand hold feature that
keepscookedfoodswarm for upto 3hoursafter
thecooklbgfunction is hbishecL
To acdx Ke this feature, fi_llow tile
steps below.
[] Touch tile BAKE and BROILHI/LO
pads at the same time until the
displa) shows SE
[] Touch tile COOKING TIMEpad.
Tile displa)xdll show Hid OFF.
Touch file COOKINGTIME pad again
to activate tile feature. Tile display
will show Hid ON.
[] Touch the START pad to actixate
tile cook and hold ti_ature and
leave the control set in this
special ligatures mode. 17

Special featuresofyourovencontrol.
12-Hour, 24-Rout or Clock Blackout
Yourcontro/issettousea12-hourdock.
If_ou would pre[er to have a 24-born"
mi]itm'v th_e clock ox"bh_ck out the clock
disphL_, fi_]]ow the steps below.
[] Touch the SAKE:md SSSILRI/LS
pads at the same time m_til the
[] Touch the CLSCK pad once. The
disp]a_ wi]] show 12hr, I[ this is
the choice "_oll Waist, tOllCh the
STARTp_d.
Tol_cb the CLOCK pad agaim_ to ch_mge
to the 24 horn" mi]itax T time dock The
<]iS_:}]_ _*r_]_ S]_OW 24hr. It this is the choice
vol_ _m t, tol_ch th e STARTpad.
Tol_cb the CLOCKpad agaim_ to black o_t
the clock display. The displa 7will show
SFE ff this is the choice yol_ _mt, tol_ch
tb e START pad.
NOTE'.!f thedockisintheblack-outmode,you
willnotbeab/etoused_eDelayStartfunction.
18

Usingthe Sabbathfeature.
(Designed for use on the Jewish Sabbath and Holidays) (On some models) GEAppliances.com
TbeSabbathfeature canbe usedforbaking/roastingonly:It cannot be usedforconvection,broiling,self-cleaningor
DelayStart cooking.
NOTE"The oven fight comes on automatically (onsome models) when the door is opened and goes off when the door is dosed. Thebufb may be
removed. See the OvenLightReplacement section. On models wit,ha I_ghtswitch on t,§econtrol panel, t,_eoven I_ghtmay be turned on and left on.
.o.,,oso,sobbo,,,Foo,,,re,o.,,o,,u,o.,,o,.i.,,/,,oo.ti.,,
[_ sIIl_ tile //tllIll)( ! pads, e}/t_ r/]l_
Make surethe clockshow_ thecorrect tl}r?eof cJap'aflcJ [_]
theoven is oL4 desiJced lell/per/1111"( beD, veeH 170:1: a//d
@@@@(D
(D(Z)(D(D (D
When the display shows Dthe
oven is set f17Sabbath. When the
display shows D C the oven is
baking/roasting.
rI_:[_ _]_] hold beth the BAKEand
BROIL HI/LO p/ds, at the same time, muff
die displ_*} shoves SE
NOTE: If b@e or tx',oiI/plpea_s in the
displ % tile BAKE;rod BROIL B{'_.Op_ds
WtTe I!Ol tollc]/t'd /t the S/Hie ti!_l(.
rI_(}/IChth('CLEAR/OFFpIdmd lx,gi/!
ag'4fiL
I_] rFaF' {h( #EUIYSTART pad umil SAb bAtH
app(ars in _I1( displa}:
] 'lbuch/11( START pad a,*d __will app( /r
in/he dispD}
rli_:l_ [1_( BAKE !_:_<]. No signd will
[]
[]
55(RE No sig_ml or/emperamr( x_il! be
'lbuch d!( START pad.
,'\['{er _t t'_tlId()!'[l (/(I;I} t)e]lo(! 0['
approximat(1) 30 s(conds 1o ! mfmu<,
D C wiI1app( /r in tile dispIa_}
indicadngth/I tt*( o_(n is baking!
rousdng. [fD C doesn'_ qpem" h/ the
displa}, stab %4i_ at Step 4.
'Ib a_{jusl dm o_en temper m/_>, u)uch/he
BAKEpad,ei/mr the new temper/lu['e using
the mmfl)e[" pads md to!*ch the STARTpId.
NOTE: The CLEAR/OFF md COOgtNO TtMEp lds
are _cthe dining ttw Sabbath [eram,.
(D@(D(D(D
@@@(D@
When the display shows Dthe
oven is set t7Sabbath. When the
display shows D C the oven is
baking/roasting.
How to Set Sabbath Feature for Timed Baking/Roasting--
Immediate Start and Automatic Stop
Make sure the do&shows thecorrect time of day and "lbud/the START pad.
theoven is off []
[]
[]
[]
[]
[]
"lbuch and hoM both the BAKEand
BROILHI/LO pads, at the same time, umil
the display shol_:'_ SE
NOTE:If bake or broil appears in the
dist)la }, the BAKf and BROIL HI/LOpads
were not touched at the sam( time.
"Ibu(h the CLEAR/OFFpad and begfin
ag_dn.
Tap the DELAYSTART pad until SAb bAtH
al)l)em:s in ihe displa)'.
"Ibuch th( START t)ad and D will at)pear
in the (tispla)
"Ibuch the COOKING TIME pad.
Touch the mm/1)er t)a(ts to sei the
(lesire(t lenglh of ('ooking time 1)etwee11
1 minuie and 9 hom:s and 59 minutes.
The cooking time thai )ou entered will
be displayed.
] "lbu(h the BAKEpad. No sig_lal will 1)e
g]'_ el/,
] U sing the mm/t er pads, enter the
(lesire(1 [e]//l)el'Htllre, No sig|lal 1)1"
temperature wrill be gixen.
] "lbuch the STARTt)ad.
[_ After a random delay t)eriod of
apt)roximatel'_ 30 se( on(Is 1o 1minute,
D C will appear in the displa} indi(aiing
iha| tile o\en is k&ing/roasting. II D C
doesn't appear in tile displa}, start again
at Stop 7.
"Ib a(!just the ()_'n teml)erature, touch the
BAKEpad, enter tile new tempera| m:e using
the mlmber pads and touch tile STAflTpad.
When (ooking is finished, the display will
change trom D c|1) D and 0:_0will apt)ear
indicating |ha| ihe oven has turned OEFbut is
still sei in Sabbaih. Remoxe the cooked tbod.
!/i;;iii i}iiiiili/}!iiii}) ii
How to Exit the Sabbath Feature
f_l "lbu(h |he CLEAR/OFFpad.
I.,'1
] If the oven is cooking, wait tbr a rmldom
(tela} period of approximately 30
se(ol/ds to ] ll/illllie, /|11Iil OI/1% D
is in the display.
] "lbuch and hoM both the BAKEand
BROIL HI/LO pads, at the same time, mull
the (tispla) s]_(>_rsSE
I_ "]hp the DELAYSTART pad until 12shdn
i/i or no shdn apt)ears in the (tist)la }
](_hoose 12shdn, indicating that |he oxen
will a/|tomaticalh tur|J, off after 12 hours
or no shdn, indi(ating that the o_en will
not automatically turn offa/ier 12 hom:s.
"Ib/|(h START_dlen the Ol)tion that you
IL/I Wall| is in the disl)lay (12 shdn or no shdn).
NOTE:I/a 1)ower ou|age occurred while
|he oven was in Sabbath, the oven will
a/ltOH/a|icalh' |llrll ott' al/d Star Ott e\ (.'11
when tile power returns. The oven _
(ontFol IllllSl be reset.

Adjustthe oventhermostat--Do it yourself!
Youmay find that your new oven cooks differently than the one #replaced. Use your new oven for a few weeks to
become more familiar with it. If you still think your new oven is too hot or too cold, you can adjust the thermostat
yourself.
Do not use thermometers, such as those found in grocery stores, to check the temperature setting of your oven.
These thermometers may vary 20_40 degrees.
NOTE,"This adjustment will only affect baking and roasting temperatures; #will not affect broiling, convection or
self-cleaning temperatures. The adjustment will be retained in memory after a power failure.
(D(D(D(D(D
@(5:)@@@
(3
To 4djust the Thermostat
[] Touch d_e BAKE amidBROILBI/LO
pads a[ [he same dine mid1 [he
display shows SE
[] Touch the BAKEpad. _ two digit
m/Im/bet sh ows im/th e display.
Tollch BAKE ;@_h] to ;_lterNlate
between h/creash]g aN/d decreash/g
the ove]/ tempel_mlre.
] The oven tempe_;m_re c;m be
a(!iusted up to (+) 35 _"h}tte_o_ (-)
35°F coolex: Tollch the mm]ber pads
[he s_]/e w_v voll re_d them. For
exm]ljDle, to ch;mge the ovem/
temperature 15<)Ktollch 1amid 5.
[] TVhe]/you have made the
a(!i!/stme_]t, t(}l_ch the srABr t{,
g(t back t(> the time (ff (_y displa}.
[Ise VOllr ove]/ ;ts }o11 woll]d m/oll//;tH}.
Thetype ofmargarine will affect bakingperformance!
Most recipes for baking have been developed using high fat products such as butter or margarine (80%fat). If you
decrease the fat, the recipe may not give the same results as with a higher fat product.
Recipe failure can result if cakes, pies, pastries, cookies or candies are made with low fat spreads. Thelower the
fat content of a spread product, the more noticeable these differences become.
Federal standards require products labeled "margarine" to contain at least 80% fat by weight. I,ow fat spreads, on the
other hand, contain less tht and more water: The high moisture content of these spreads affects the texture and flavor
oI baked goods. For best results with your old thvorite recipes, use margarine, butter or stick spreads containing at least
70% vegetable oil.
2O
Other manuals for Profile JB900
3
Table of contents
Other GE Range manuals

GE
GE Profile PGB918SEMSS Manual

GE
GE JBS03 User manual

GE
GE JGB620DEFBB User manual

GE
GE PGB916DEMBB - Profile 30" - Convection Gas R Manual

GE
GE JB850 User manual

GE
GE JBP89DM User manual

GE
GE Profile JMP31CLCC User manual

GE
GE P2B918DEMWW - 30" Dual Range Manual

GE
GE 168996 User manual

GE
GE JB640SPSS Manual
Popular Range manuals by other brands

GE Capital
GE Capital Monogram Use and care guide

Frigidaire
Frigidaire FGFB74BJBA Factory parts catalog

Frigidaire
Frigidaire FFED3025LBC installation instructions

Frigidaire
Frigidaire FPF311PHSA owner's guide

Frigidaire
Frigidaire FEF316BSD installation instructions

Frigidaire
Frigidaire CGIF3061NFB use & care