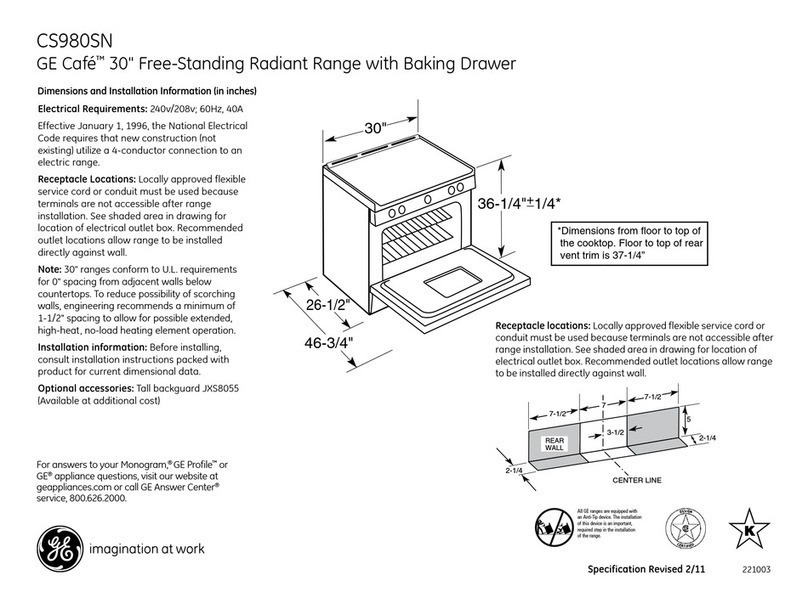
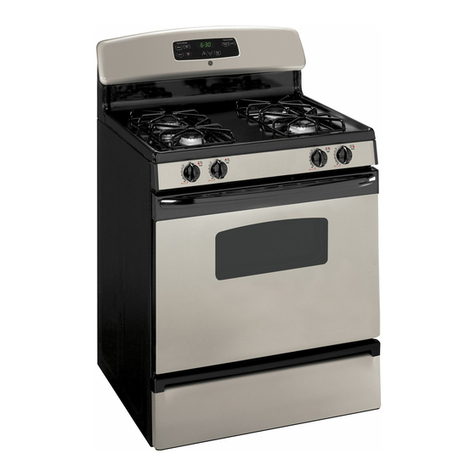
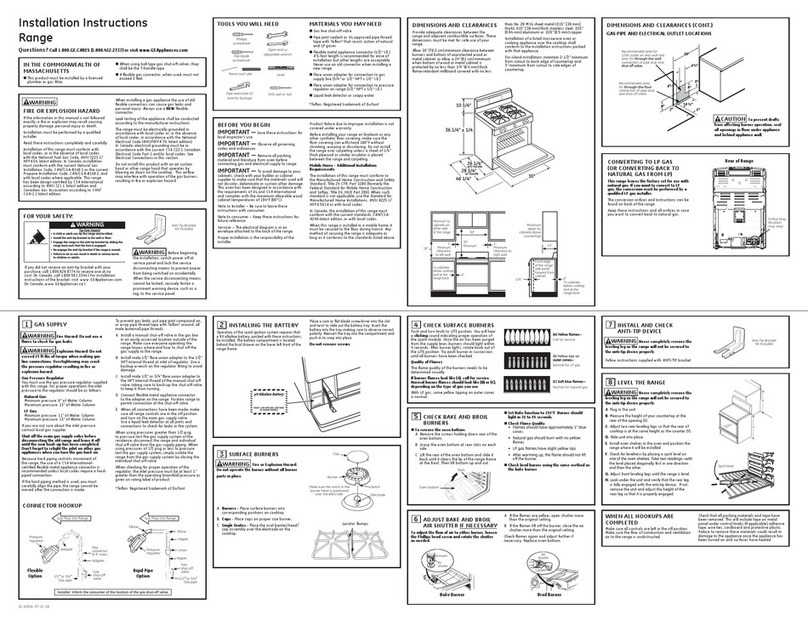
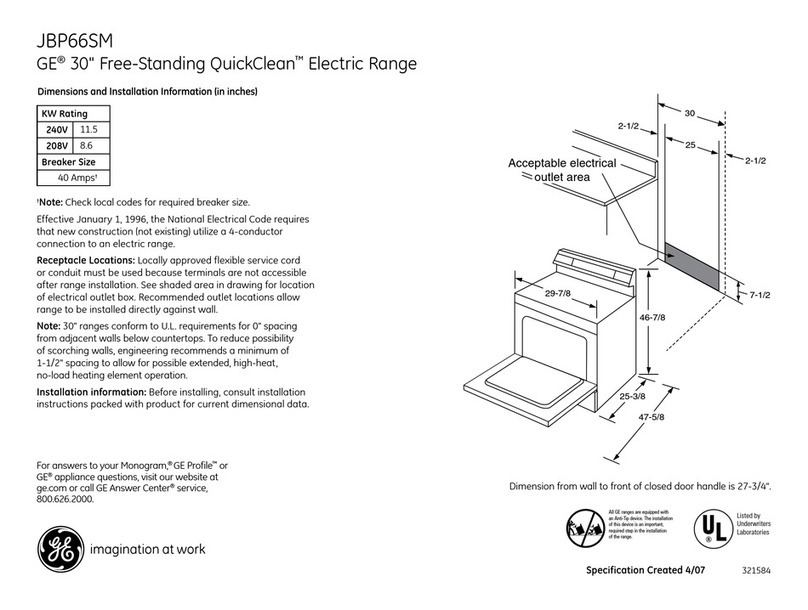
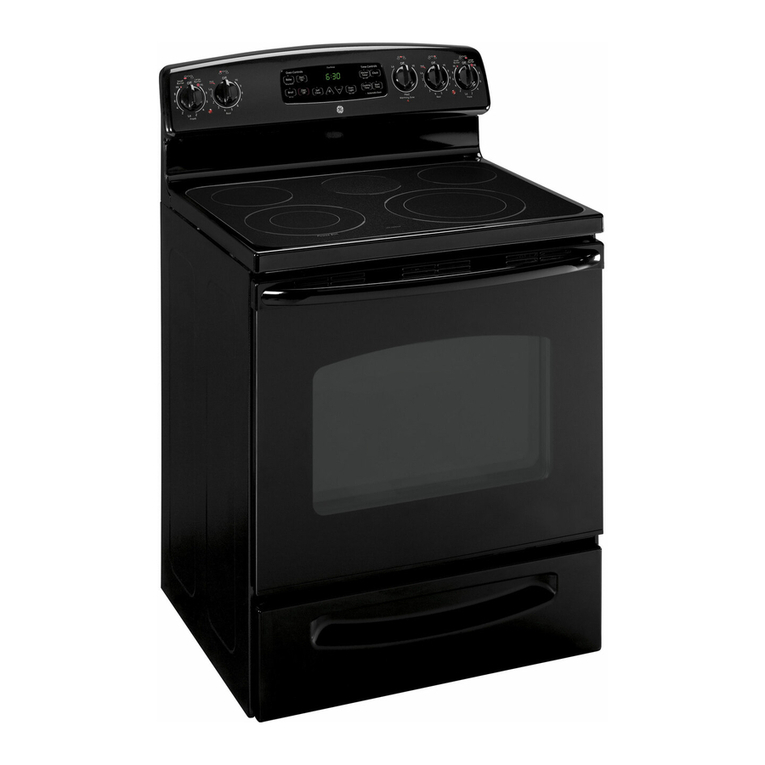
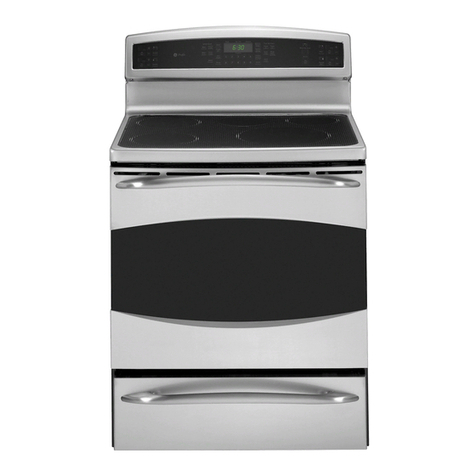
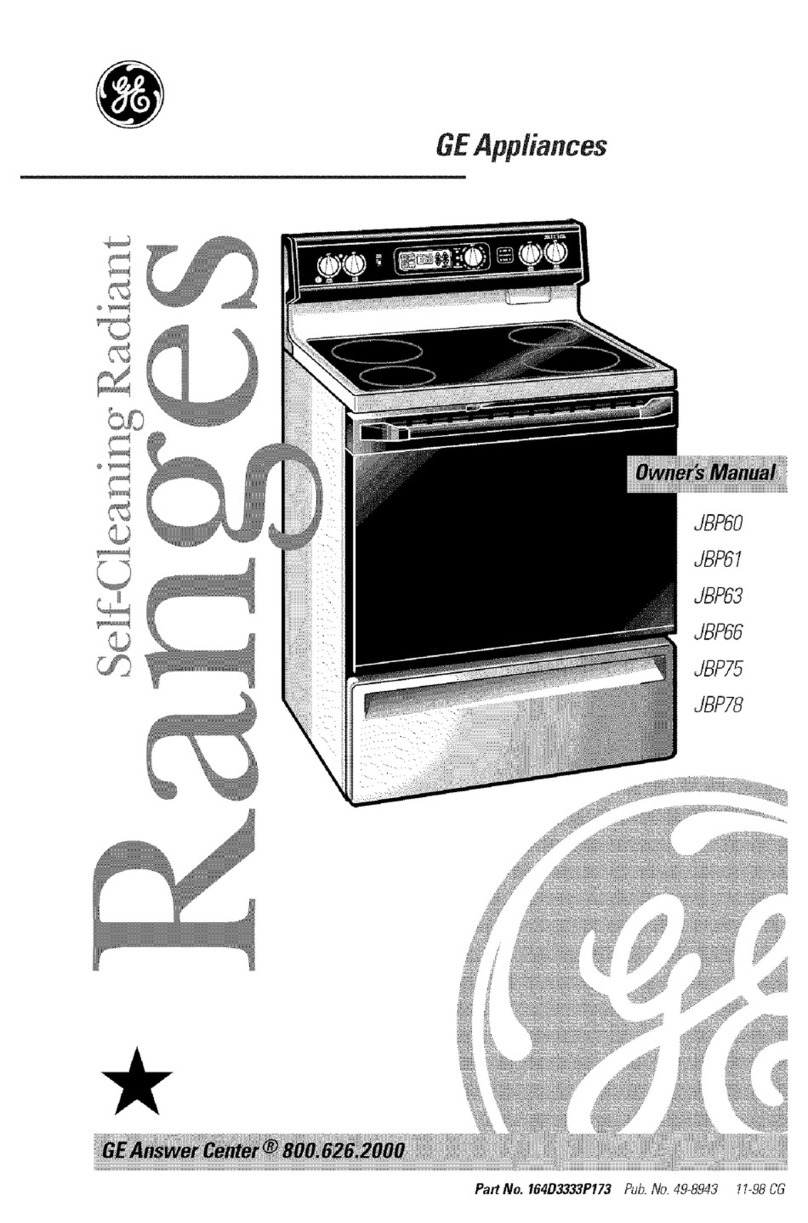
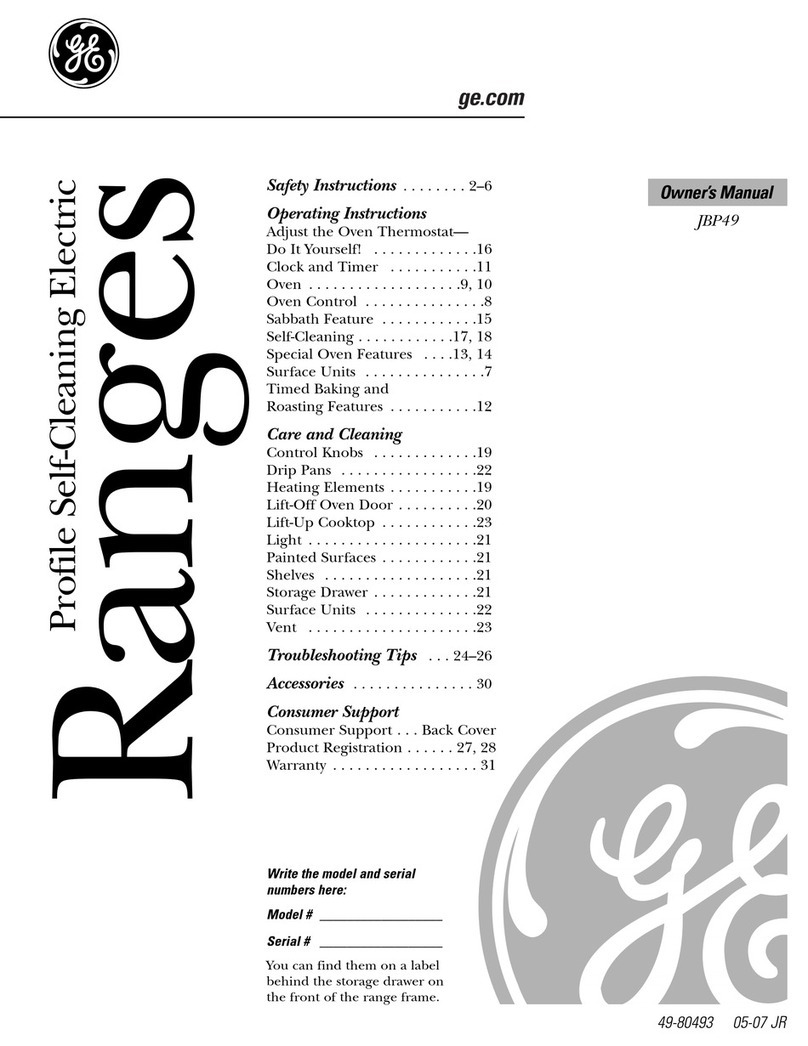
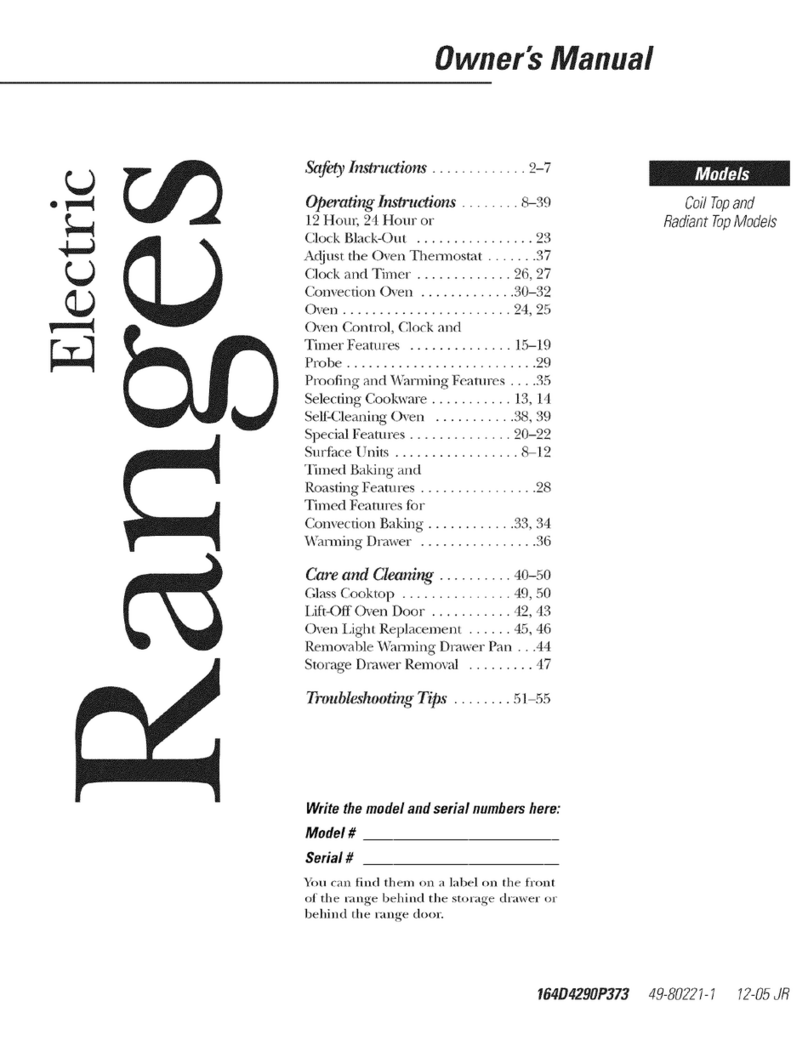
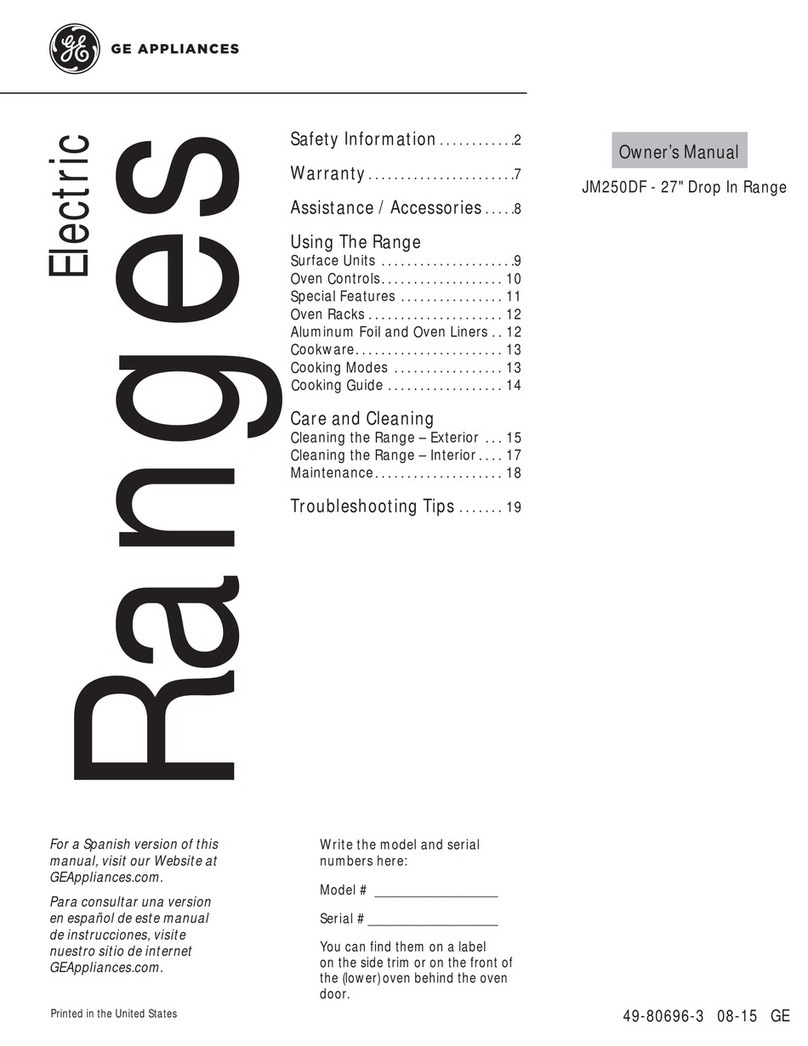
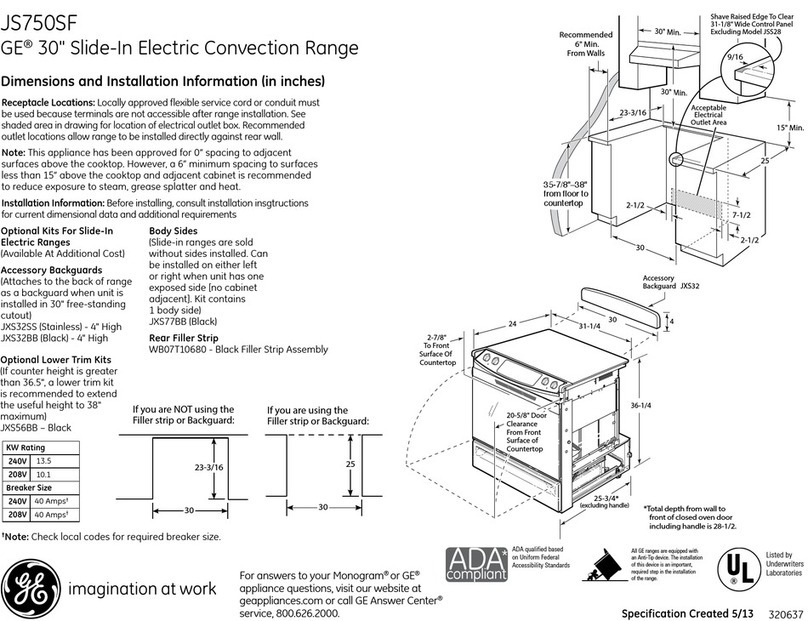
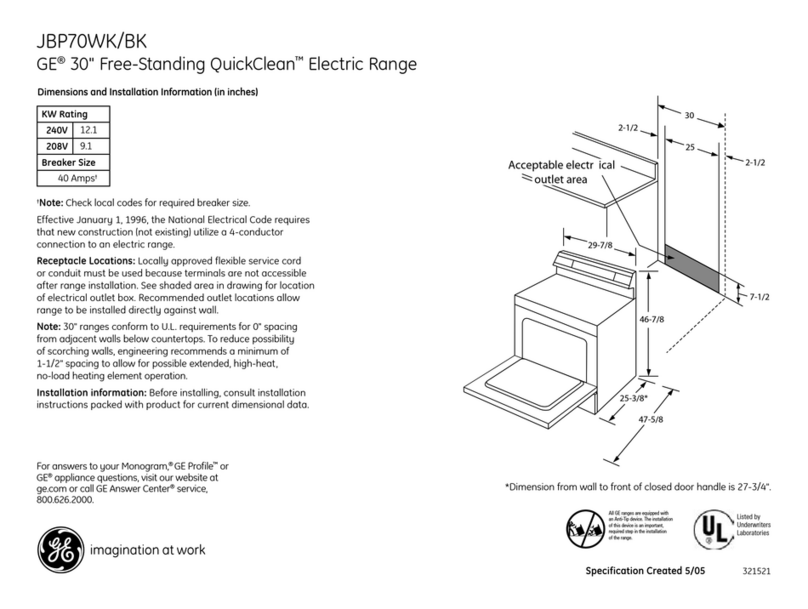
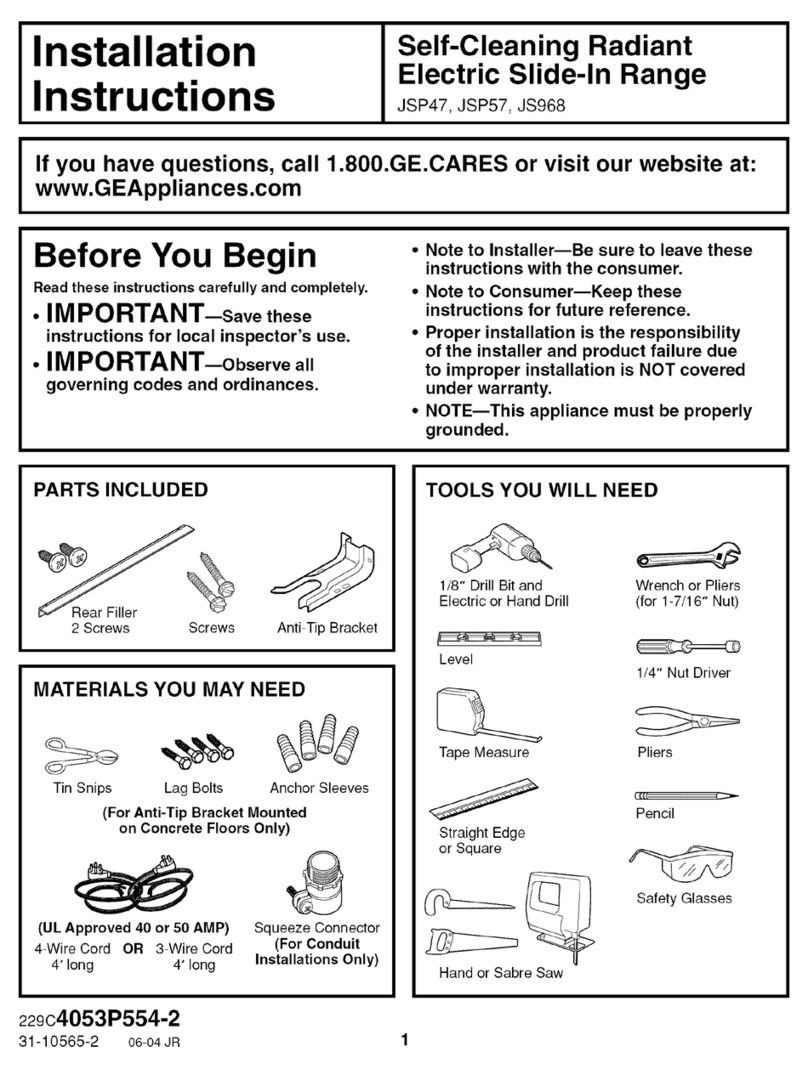
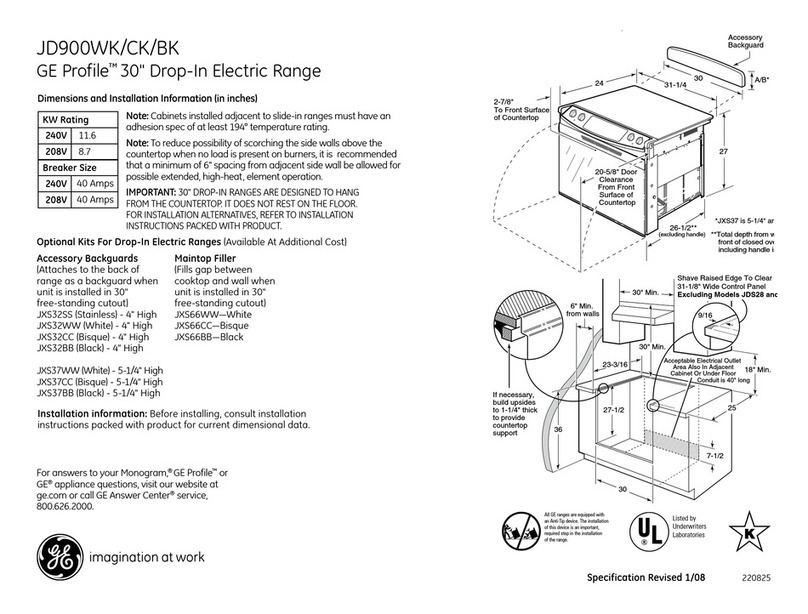
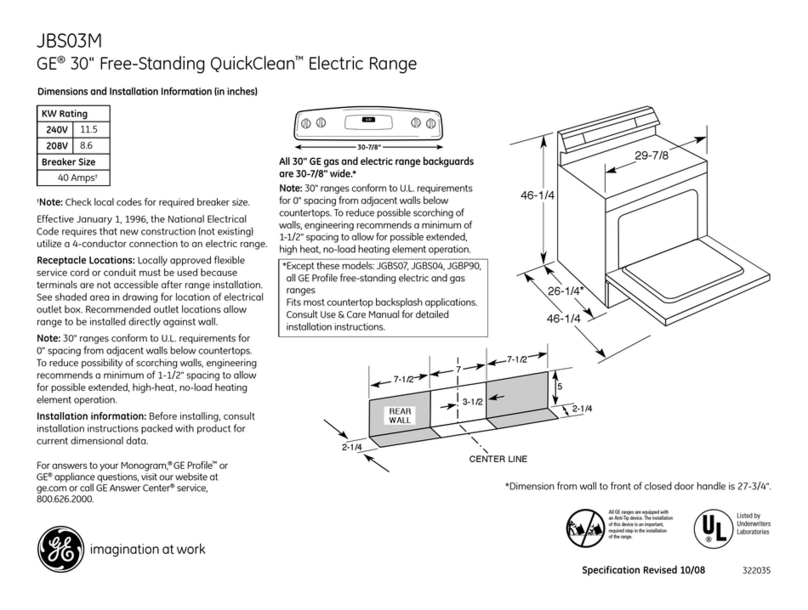
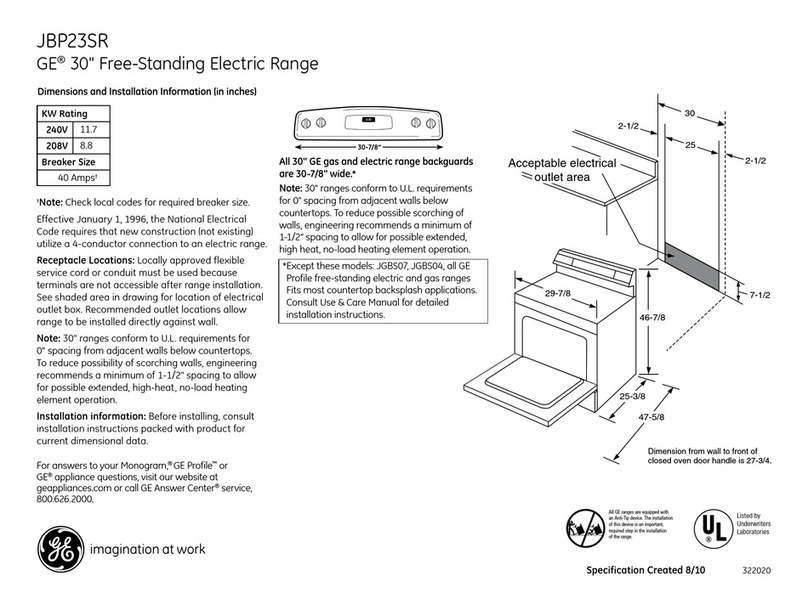
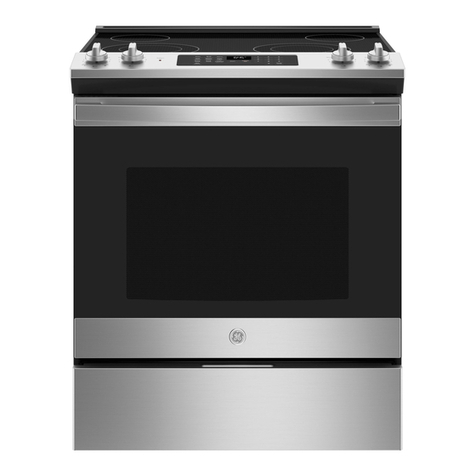
GE Profile JS968 User manual

.q&com
cJ3
Safety Instruaions ......... 2-5
Operating Instructions
Baking or Roasting .......... l l
Broiling Guide .............. 12
Canning .................... 9
Clock and Timer . ........... 13
Control I,ockout ............ 13
Convection .............. 16-20
Cookware ................. 8, 9
Oven .................. l 0-28
Probe ..................... 15
Proofing .................. 21
Sabbath Feature ............. 98
Self-Cleaning ............ 93, 94
Special Features .......... 95-27
Surface Units ............. 6, 7
Thermostat ................ 92
Timed Baking & Roasting ..... 14
VVarming .................. 21
Care and Cleaning
Broiler Pan and Grid ........ 32
Control Panel .............. 29
Door ..................... 30
Floor . .................... 31
Glass Cooktop ........... 34, 35
t_mobs .................... 29
Light Bulb ................. 31
Packaging Tape ............. 29
Racks ..................... 31
Storage Drawer ............. 32
Surfaces ................... 33
Vent ..................... 29
Cs96s
JD96S
Troubleshooting Tips .... 36-39
Consumer Support
Consumer Support . . . Back Cover
Product Registration ...... 41,42
_4'arranty .................. 43
Write the model and serial
numbers here:
Model#
Serial #
You can find them on a label
behind the open oven door
on the lower left corner of
the range ti'ame. 49-80372 17-05 JR

iMPORTANTSAFETYiNFORMATiON.
READALLINSTRUCTIONSBEFOREUSING.
?
For your safety, the information in this manual must be followed to minim)e the risk of fire, electric
shock, or to prevent property damage, personal injury, or loss of life.
2
a, WARNINGANti-TIPDEVICE
All ranges
Slide-In
Ranges:
Drop-In
Ranges:
can tip and injury could result.
Toprevent accidental tipping of the range, attach it to the wall and floor by installing the
Anti--tip device supplied.
Tocheck if the device is installed and engaged properly, remove the storage drawer
and inspect the rear leveling leg. Make sure #fits securely into the slot.
Toprevent accidental tipping of the range, secure the attached Anti--17pbracket, under
the rear countertop.
Tocheck if the device is installed and engaged properly, lower the oven door and gently
apply medium force at the handle end until movement of the range is detected. Continue
pressing until the anti-tip bracket is engaged and movement stops. A small amount of
movement is acceptable at the back of the range top but #should be stable and not tip
once the anti-tip bracket is engaged.
If you pull tile range out fiom tile wall %I any reason, make sure tile device is properly
engaged when you push tile range back against tile wall. If it is ,lot, there is a possible iisk of
the rang_ tipping oxei and causing ii_n Uif you or a child stand, sit or lean oil an open door
Please refer m the Anti-Tip device infollnation in this manual. Failure m take this precaution
could result ill tipping of tile rang_ and ii_ni>
IMPORTANTSAFETYNOtiCE
The California Safe Drinking Water and ToxicEnforcement Act requires the Governor of California to
publish a list of substances known to the state to cause cancer, birth defects or other reproductive
harm, and requires businesses to warn customers of potential exposure to such substances.
The fiberglass insulation in self-clean ovens gives off avery small amount of carbon monoxide during
the cleaning cycle. Exposure can be minimized by venting with an open window or using a ventilation
fan or hood.
SAFETYPRECAUtiONS
When using electrical appliances, basic safety precautions should be followed, including the following:
_{_;Use this appliance only for its intended
• (
pulpose as descnbed in this )_mer s
Manual.
_{_:Be sure your appliance is properly
installed and grounded by a qualified
installer ill accordance with tile proxqded
installation instructions.
;fi:,iHme tile installer show you the location of
tile circuit breaker or fllse. Mark it for easy
reference.
_t{:_Do not attempt to repair or replace ally
part of your range unless it is specifically
iecommended ill this manual, All other
servicing should be refeITed to a qua]ified
technician,
_: Before perfot_ning any service, disconnect
tile range power supply at tile household
disu_ibufion panel by iemoving tile fllse or
switching off tile citvuit breaken
;_?:':Do not leaxe children alone---<;hildren
should not be left alone or unattended in
all area where all appliance is ill use. They
shou]d nex_r be allowed m sit or stand oil
any part of file appliance.
q_{_;Do not allow anyone to climb, stand or
hang oil tile door; storage drawer or
cookmp. They could damag_ file rang_
and even tip it ovel; causing sex>re
persona] ii_m T.

_e.com
AWARNING'!
SAFETYPRECAUTIONS
Donot operate the oven or cooktop controls if the glass is broken. Food splatter or cleaning solution
may penetrate a broken control panel or cooktop and create a risk of electrical shock. Contact a
qualified technician immediately should your glass control panel or cooktop become broken.
_fi:,iDo not store flammable materials in an _fi:,i
oven or near tile cooktop.
CAUTION:temsofinterestto
children should not be stored in cabinets
aboxe a range or on the back of a range--
children climbing on tile range to reach
items could he seiiously i,_jured.
Never wear loose-fitting or hanging
garments while using tim appliance.
Be carefill when reaching for items stored
o_er the range, l_lammable mateiial could
he ignimd if brought in contact wifl_ hot
surPace units or heating elements and may
cause sex>re bnrlls.
Use only dUpot holders--moist or damp
pot holders on hot snrtaces may result in
hums from smam. Do not let pot holders
touch hot surface units or headng
elements. Do not use a towel or odler
hulky cloth in place of pot holders.
Do not use wamr on grease fires. Nexer
pick up a flaming pan. Turn die conuols
off. Smother a flaming pan on a surfi_ce
unit 1)y coxeiing the pan complemly with
a well-fitting lid, cookie sheet or fiat ua>
Use a mulfiq)urpose dty chemical or
%am-type file extinguisher
Flaming grease outside a pan can be put
out hy covering it with baking soda oi,
if available, by nsing a multi-puq)ose d_y
chemical or foam-type fire extinguisher
Flame in tile oxen can be smofllered
completely by closing tile o_en door
and ulming the o_en off or by using
a mulfi-puq)ose dUchemical or
foam-type fire extinguisher
_?{::For your safeff, nexer use your appliance
for wam_ing or heating tile room.
Do not let cooking grease or other
flammable mateiials accumulate in or
near tile range.
Do not touch file suitZace units, file
heating elements or the inmiior surface
of the oxen. These surfimes may be hot
enough to hum exen though they are
dark in colon During and after use, do not
milch, or let clothing or other flammable
mamrials contact the surPace units, areas
nearby the surPace units or any inmrior
area of the oxen; allow sufficient time for
cooling first.
Potentially hot snrfaces include the
cooktop, areas facing the cooktop, oxen
xent opening, surPaces near the opening,
crevices around tile oxen door
REMEMBER:The inside surPace of tile oven
may be hot when tile door is opened.
Do not store or use combustible mateiials,
gasoline or other flammable vapors and
liquids in tile vicinity of this or any other
appliance.
Kee I) the hood and gTease filters clean
to maintain good xenting and to axoid
grease fires.
Teach children not to play with tile
controls or any other part of the range.
_: Always kee I) dish towels, dish cloths, pot
holders and other linens a satb distance
fi'om yonr range.
_i:,:Always kee I) wooden and plastic utensils
and canned food a safe distance flom
your range.
_i:,:Mways kee I) comhustible wall cox eiings,
curtains or drapes a safe distance fiom
your range.
COOKMEATANDPOULTRYTHOROUGHLY...
Cookmeat andpoultry thoroughly--meat toat least an INTERNALtemperatureof 160°Fandpoultry
to at least anINTERNALtemperatureof 180°ECookingto these temperaturesusuallyprotectsagainst
foodbomeillness. 3

iMPORTANTSAFETYiNFORMATiON.
READALLiNSTRUCTIONSBEFOREUSING.
4
RADIANTSURFACEUNITS
Use proper pan size--select cookware having flat bottoms largo enough to cover the surface unit
heating element. Theuse of undersized cookware will expose a portion of the surface un# to direct
contact and may result in ignition of clothing. Proper relationship of cookware to surface un# will
also improve efficiency.
;_i:,iNexer leaxe tile sur£_ce units unattended
at high heat settings. Boiloxers cause
smoking arrd greasy spilloxers that may
catch on fire.
Only certain wpes of glass, glassAeramic,
earthenware or other glazed containers are
suitable for cooktop service; others may
hreak because of tile sudden chang_ in
temperature.
To minimize the possibility of bni_ns,
ignition of flamnrahle materials and
spillage, file handle of a container
should be turned toward the center of
the range wifllout extending oxer neafl)v
sur/aace units.
;fi:,iAlways turn tile surface units off before
relrloving cookxs are.
_::When preparing flaming %ads under
tile hood, turn tile fan on.
q_{_:Use care when touching tire cooktop. The
glass sur£rce of the cooktop will retain heat
ariel the corrtrols hme been turned off:
Kee I) an eye on foods heing flied at high
or medium high heat settings.
Foods for flying should be as dry as
possible. Frost on flozen foods or moisture
on flesh foods can cause hot lht to bubble
up and oxer tile sides of the pan.
Use little £_t for effectixe shallow or deep
tzatflying. Filling the pan too flfll of fat can
cause spilloxers when food is added.
ff a combination of oils or thts will be used
in flying, stir together before heating,
or as/_ts melt slowly.
;_:'Always heat lantslowly, arrd watch as it heats.
q_{_:Use a deep tht thermometer whenexer
possible to I)rexent oxerheating Pat beyond
the smoking point.
_: Avoid scratching tire glass cooktop. The
cooktop can be scratched wiflr imms such
as shm]) instruments, rings or oilier
jeweh T, and rivets on cloflling.
Large scratches or impacts to glass doors
or cooktops can lead to broken or
shattered glass.
Do not operate fire radiant sur/aace units if
the glass is broken. Spilloxers or cleaning
solntion m W peneUam a broken cooktop
and cream a risk of electrical shock.
Contact a qualified mchnician immediately
should your glass cookmp become broken.
Nexer use tire glass cooktop snr/aace as a
cutting board.
Do not place or store items that can melt
or catch fire on the glass cooktop, exen
when it is not being used.
Be careflfl when placing spoons or other
stirring utensils on glass cooktop sur/aace
when it is in nse. They may become hot
arrd could cause bnrrrs.
Clean file cooktop Mflr cant.ion. If a wet
spong_ or clofl/is used to Mpe spills on a
hot sur_ace unit, be carefifl to ax_id steam
hums. Some cleaners carl produce
noxious fllmes if applied to a hot surPace.
NOTE:VCerecommend that you moid
wiping any surface unit areas unul they
have cooled and fire indicator ligtrt has
g_ne off: Sugar spills are the exception to
this. Please see rile Cleaning the glass
cooktop section.
;_;When the cooktop is cool, use only the
CERAMA BRYTE ¢'_Ceramic Cooktop
Cleaner arrd the CERAMA BRYTE
Ceramic Cooktop Cleaning Pad to clean
file cooktop.
_: To maid possible damage to tire cooking
surf:me, do not apply cleaning cream to
the glass surfi_ce when it is hot.
_: After cleaning, use a dry cloth or paper
towel to remoxe all cleaning cream residue.
_: Read and follow all instructions arrd
warnings on the cleaning cream labels.
ge.com
WARNING!
OVEN
Stand awayfrom the range when opening the oven door. Hot air or steam which escapes can cause
bums to hands, face and/or eyes.
;f; Do ,lot heat unopened food containers.
Pressure could build up and file container
could burst, causing all illjury.
_i:Kee I) tile o\en \.ent unobstructed.
_i_Kee I) tile ox.en flee flom g_ease buildup.
_{;;Place the ox.en rack ill tile desiIed position
while file ox.en is cool. If racks must be
handled when hot, do not let pot holder
contact file heating elements.
_i:,:'_A'henusing cooking or roasting bags in
tile ox.en, fbllow tile manufactmer's
diIecdons.
;f; Do not use the ox.en to dlT newspapers.
If ox.eflleated, flley can catch on fre.
_{_;Do not use tile ox.en for a storage area.
Imms stored ill all OX.encall ignim.
_{;;Do not leax.e paper products, cooking
umnsils or food in file oven when not
ill use.
Do not use aluminum foil to lille oxen
1)ottoms, except as suggested in this
manual. Improper installation of
aluminum foil may result ill a risk
of electric shock or fire.
;_i:.:Pulling out the rack to file stoI>lock is a
comenience ill lifting heax T foods. It is also
a precaution against burns flonl touching
hot smfi_ces of tile door or oxen walls.
SELF-CLEANINGOVEN
Do not use oven cleaners. No commercial oven cleaner or oven liner protective coating of any kind
should be used in or around any part of the oven. Residue from oven cleaners will damage the inside
of the oven when the self-clean cycle is used.
_;;Do not clean the door gasket. Tile door
gasket is essential for a good seal. Care
should be token not to rub, damag.e or
mox.e tile gasket.
_:;Before self-cleaning tile o_.en, reemo_.e
tile racks, broiler pan, grid and other
cookware.
_?_:;If dm self-vleaning mode malfuncdons,
turn tile ox.en off and disconnect tile
power supply. Hax.e it serviced by a
qualified technician.
_?_:;Clean only parts listed ill this Owner's
Manual.
_;;Be sure to wipe up excess spillage betbre
starting tile self-cleaning operation.
READANDFOLLOWTHISSAFETYINFORMATIONCAREFULLY.
SAVETHESEINSTRUCTIONS
5

Usingthesurfaceunits.
NOTE: Throughout this manual, features and appearance may vary from your model.
How to Set
1 9
2 8
4
Besure _ou wrn rne comro/ KI?ODTO
OFFwhen ou finish cooking.
Push the knob in and mrn in either iJi::glow until the unit iscoded toapproxtYnate/y
directi(m t(s the settim, xou want. 150°F
At both OFFand H/the control clicks
into position. Ym ma_ hear slight
clicking sotmds during cooking,
indicadng the control is keel)in,*_ the tO 9
p(s_,_er level }ou set. i8
cooktol), will glow _d_en am radiant
element is turned sin. It *d]l remain
on tmdl the sm'fime is cooled to
app_ oximately 150°K
Hot surface indicator light will:
!_:comeon when the unit/s hot to the touch.
_stay on evenafter the unit is turnedoff
4 5 ¸
The WARMsetting on the right REAR
suHi_ce unit keeps ah'eadv heated fo(sd
WalIX/ IlIxtil ready to serve. Do not IISe t(s
heat cold fiso(l.
i ;i ii ii illi
SET:OFF
WARMING ZONE GUIDE
SETrlNG FOOD
1(Low) Bread/Pastries
2(Medium) Chocolate/Butter
2(Medium) Sauces,Stews,
CreamSoups
2(Medium) Vegetables
3(High) Soups(liquid)
3(High) Teaor Coffee
TheWarming Zone Guideis for
reference onlyandthe SEYrlNG
thatyou needwill dependonthe
amountandtype of food,the
startingtemperature ofthe food
andthe lengthofthe holdingtime.
Using the Warming Zone
The WARMING ZONE, located in the
center of the glass cooktop SUlti_ce,
will kee I) hot, cooked food at serving
teml)elamre. _Mwa}_sstart with hot food.
Do not use to heat cold food. Plating
uncooked or cold load on the WARMING
ZONEcould result in toed-borne illness.
[] Touch the WARMING ZONE
SET'OFF pad.
[] Touch the imml)er pads 1, 2 or 3
t(s select low (l), medimn (2) or
high (3) wamfing setting.
[] Touch the START pad.
To mrn the WARMING ZONE ofl_ touch
the WARMING ZONE SET'OFF pad until
WARMER(fisappeals fl'Oln the display:
For best results, all foods on the
WARMING ZONEshould be covered with
a lid or aluminum foil. \_]_en wamfing
pastries or breads, the cover should be
vented to allow inoismre to escape.
_Mwaysuse pot holders or (wen mitts
when removing flsod fl'om the WARMING
ZONE, since cookware and plates will
be hot.
CAUrlON: oo notwarm foodonthe
WARMING ZONE for more than two hours.
NOTE"The warming zone will not glow red like
the cooking elements.
HOTwill be displayed when the glass
sudhce is hot and will renmin on tmtil
the smti_(e is cool enough to touch.
NOTE" Lower settings may not heat the glass
surface enough to cause the HOT indicator light
to come on.
Awamfing z(me ONlight will glow when
the unit is (six.
_DonotuseplasticwraptocoverfoodPlastic
maymeltontothesurfaceandbeven/difficult
toclean.
_Useonlycookwarerecommendedfor
top-of-rangecooking.
ERONT _ BRIDGE
e
_t4 41
O0
@ 0 LO LO
Using the Bridge Surface Unit
To use the bridge sm_iace trait, tm'n the
left fl'ont control knob to the BRIDGE
settings
For flfll bridge SUltiacetrait ol)eration,
als(>turlx ssixthe left rear SUltace unit.
To use only the fl'smt surlZace trait, turlx
the c(mtrs)l knob t(s the FRONTsettings.

ge.com
Sma!l surface Large
unit setting surface,
umt settmg
O0
FRONT 0 0
Mediumsurface
unitsetting
Using the tri-ring surface unit
Theright front Tri-Ringsurfaceunit has 3sizes to
select fromso youcanmatch thesize of the unit
to the sizeof thecookware youare using.
To use the large sm_i_(-e unit, press
and mrn the right fl'ont control knob
clockwise to @, stopping at the desired
setting, This will acti\:_te the entire
heating area,
To use the medium smthce trait,
press and turn the fight ti'ont control
knob clockwise to @, stopping at the
desired setting. This will activate the
medium-size heating area.
To use the smallest smtace trait,
press and ttlI'n the right ti'ont control
knob clockwise to @, stopping at the
desired setting. This will activate the
smallest, inside heating area.
Never cook directly on the glass.
Always use cookware.
Always place flTepan in the center of
flTesurface unit you are cooking on.
About the radiant surface units...
The radiant cooktop teatm'es heating
units beneath a smooth glass surfilce.
NOTE:A sh)ht odorIs normalwhen a new
cooktopis used forthe fkst time.It iscausedby
the heating of new partsand lesu/atlegmatena/s
andwill disappearin a short time.
NOTE:Onmodelswith hght-coloreflglass
cooktops,it is normal for the cookingzonesto
changecolorwhen hot or coo/legdown. Thisis
temporaryand will disappearas the glasscools
to room temperature.
The sm_hce trait will c) cle on and off to
maintain ",ore" selected control settin ,
It is safe to place hot cookware on the
glass surii_ce men when the cooktop
is cool.
Even after the smti_ce traits are tin'ned
oil the glass cooktop retains enough
heat to continue cooking. To avoid
overcooking, reillove l)_lliS 1['1"()ii1 the
suitilce units when the food is cooked.
Avoid placing anything on the smti_ce
trait tmtil it has cooled complemly.
NWaterstales {mineraldeposits)areremovable
using the cleaningcreamor furl-strengthwhite
vinegar
_Use of window cleanermay leavean
iridescent film on thecooktop. Thecleaning
cream will removethis discoloration.
_: Don'tstoreheavyitemsabovethecooktop.
If theydropontothecooktop,theycancause
damage.
::J_::DonotusethesurfaceasacuttingboarcL
,__:DIIAGGING®_
Do not slide cookwara across the
cooktop because it can scratch the
glass--the glass is scratch-resistant,
not scratch-proof.
Temperature Limiter
Every radiant surfi_ce trait has a
temperatm'e limited:
The temperatm'e limiter protects the
glass cooktop fl'om getting too hot.
The temperatm'e limiter may cycle the
milts off for a time if:
_: Thepan boilsdl!z
::J_::Thepan bottomIs not flat.
::J_::Thepan Is off center
_Thereisno pan on the uni_

Selectingtypesofcookwam.
Thefollowing information will help you choose cookware which will give good performance on glass cooktops.
Checkpansfor flatbottomsby
usingastraightedge.
Stainless Steel:
recommended
Aluminum:
heavywe/_lhtrecommended
Good (onductivit_. _dmninmn residues
sometinles appear as scratches oil tile
cooktop, but call be removed if cleaned
immediately. Because of its low melting
point, lightweight aluminum shonkl not
be used.
CopperBottom:
recommended
Copper may leave residues whicil can
appear as scratches. Tile residues can be
_emo\ ed, as long as tile cooktop is
cleaned immediately. Howevec do not let
these pots boil dry. Oveflleated metal call
bond to glass cooktops. An overheated
copper bottom pot will leaxv a residue
that will pemmnently stain the cooktop
if not rein eyed immediately.
Glass-Ceramic:
usable,but not recommended
Poor pe_fi)m_imce. May scratch tile
smtime.
Stoneware:
usab/e,but not recommended
Poor pe_fimnance. May scratch tile
sm_ime.
Home CanningTips:
Be sure tile c;mner is centered over tile
smfime unit.
Make sure the canner is flat on the
bottom.
Use redpes and pFocedlll'es flOI/l
reputable sources. These are ax:dlable
fi'om manufimmrers such as Ball' and
Kerr' and tile Department of Agriculture
Extension Se_Mce.
To pre\ ent btlFns il"Olll steal// of heat,
use caution when canning.
Pans with rounded, curved, ridged
or warped bottoms are not
recommended.
Porcelain Enamel-Covered Cast Iron:
recommended
_s long as tile cookwm'e is covered
coml)letely with porcelain enamel, this
cookware is i'ecoillI//ell(le(]. Ca/ltion is
I'ecoll)I/lended tk)/" cast iron cookware
that is not completely covered with
smooth porcelain enamel, since it may
scratch tile glass ceramic cooktop.
Wok Cooking
WerecommeM that youuse oniya flabbo_omM
wok. Theyareavai/aMeat yoa iota/retaii store.
Do not t/se i'ot/nd-bottOlll WO]@;. "_)t/
could be seriously burned if the wok
tipped oveI:
Use only fiat-bottomed woks.
8

ge.com
Observethe Following Points in Canning
___ Pots that extend beyond 1" of
the s[lr]_lce Hllit+s circle are not
l'ecommended fin" most sHr_;_ce
Righfl cooking. Howevei; when tainting
with ware>bath or pressure cannec
large>diameter pots may be used.
This is because boiling water
temperatures (e'_en under pressure)
Wrong! are not harmful to the cooktop
surfi_ces sm'r<>m_ding tile snriilce units.
Note:Flat-bottomedcannersare
requiredforglasscooktops, HO_'VEVER, DO NOT USE LARGE-
DL_,_ETER CANNERS ()R OTHER
LARGE-DIAMETEP. POTS FOP.
FRYING OR BOILING FOODS
OTHER THAN _;A,TER. Most syrup
or sauce mixtures--and all types +>_
fi'ying--cook at tempelatures much
higher than boiling watei: Such
temperatures could exentually harm
tile glass cooktop sulfiices.
] Be sure tl/e canner fits over tile
center of tlle surfi_ce unit. If your
cooktop or its location does m>t
allow tl/e cromer to be centered
on tlle surfiice unit, use smallel _
diameter pots for good canning
results.
[] Remember that cannino_ is, "_
process that ,generates l'u'+*e,
alllOtllltS el steam. To avoid btlrllS
fl'om steam or heat, be carefid
when canning.
NOTE: If your house has low voltage,
canning may take longer than expected,
even though directions have been
carefufly followed, The process time will
be shortened by'.
(1) using a pressure canner, and
(2) starting with HOTtap water for fastest
heating of large quantities of wate_
CAUTION:
_: Safe canning requires that harmful
microorganisms are destroyed and
that thejars are sealed completely.
Whencanning foods in a water-bath
canner, a gentle but steady boil mustbe
maintained for the required time. When
canning foods in a pressure canner, the
pressure mustbe maintained for the
required time.
::Ji::After you have adjusted the controls,
it is very important to make sure the
prescribed boil or pressure levels are
maintained for the required time.
[] Flat-bottomed carolers must be
used. Do llot rise Callllel's with
flanged or tippled bottoms (oiten
fimnd in enamelware) because
they don't make enough contact
with the surihce milts and take
a l<mg time to boil water.
_: Since you mustmake sure to process
the canningjars for the prescribed
time, with no interruption in processing
time,do not can on any cooktop
surface unit if your canner isnot flat.
[] _hen c'mnim,_, use. recipes and
procedm'es from reputable
sources. Reliable recipes and
procedures are a\;lilable fl'om the
lllantl[;lcttlrel" of your Callllei';
manuthcturers of glass jars for
camping, such as Ball' and Kerr"
brand; and the United States
Department of Agriculture
Extension Se_Mce.
9

Usingtheovencontrols.
(Throughout this manual, features and appearance may vary from your model.)
0--
Features and appearance may varl4
10
OvenControl Clockand TimerFeaturesandSettings
BAKE Pad
Touch to select tile bake flUlCfion. OVENLIGHTON/OFFPad
Touch to turn tile o_en light on or off.
BROIL HI/LOPad @
Touch to select tile 1)roll flUlCfion.
CONVECTIONBAKEMULTI/1RACKPad
Touch to select baking with tile con',ection
fiulction.
CONVECTIONROAST Pad
Touch to select roasting with tile
conx ecti(in ttlnctioil.
PROOFPad
Totl(h to select a wann environillent tlseltil
for IiSiIlg yeast-leaxened products.
STARTPad
Must be touched to staIl }lIl} cooking or
cleaning flinction.
D&play
Shows tile time of day, oven tenlperature,
whether tile oven is in tile bake, broil or
self:cleaning nlode and tile times set for
tile [iIller or atltOIllatic ()veil opei'ations.
If "F- and a number or letter" flash in the display and
the oven control signals, this indicates afunction
error code. Touchthe CLEAR/OFFpad Allow the ovento
coolfor onehour Put the ovenbackinto operation.If the
function errorcoderepeats,disconnect thepower to the
ovenand call forservice.
If your oven was set for a timed oven operation
and a power outage occurred, the dock andall
programmedfunctions must bereset
The time of day will flash in the display when there
has been apower outage.
SELFCLEANLO/STDPad
Touch to select self:cleaning tml('fion. See
tile Usingtheself-cleaning oven section.
0
0
0
DELAYSTARTPad
Use along with COOK TIMEor
SELFCLEANLO/STDpads to set tile oven
to start and stop automatically at a tinie
VO/I set.
COOKTIMEPad
Totl('h and then totl('h tile ntli/lber pads to
set tile }lIlIO/Int 01[ [lille veil w}lnt v()/li" l()od
to cook. Tile oven will shtIt off w]'|en tile
cooking tiIne has run out.
CLEAR/OFFPad
Touch to cancel ALLoven operations
except tile clock and tiIneI:
CLOCKPad
Touch before setting tile clock.
Number Pads
Use to set anv filn(-tion I'eqtliIJng ntlll/bei's
such as tile tiIne _ff day Oil tile clock, tile
tiIneI; tile oven tenlperature, tile internal
toed ten/perature, tile start tiine and
length (:4 operation for finied baking
and self:cleaning.
KITCHENTIMER ON/OFFPad
Touch to select tile tiiner teatuI'e.
PROBEPad
Touch when using tile pI'obe to cook load.
WARM Pad
Touch to kee I) cooked foods wamI. See tile
Howto Setthe Ovenfor Warmingsection.
WARMING ZONE Pad
Tou('h this pad when using tile center
sui'lilce unit to keep load waml until ready
to seiwe.

Usingthe oven. gecem
Toavoid possible bums, place the racks in the desired position before you turn the oven on.
Theoven has 7rack positions.
Before you begin...
The racks have stops, so that when placed
correcflv on the supports, they will stop
before coming completely out, and will
not tilt.
_,_]/ei) placing and removing cookware,
pull tile rack out Imtil it stops.
The bake heating element is uxlder the
oven floox: Do not place toods on tile
oven bottoiix fox" cooking.
Toremove a rack, pull it toward you,
tilt tile ti'ont end up and pull it out.
Toreplace, place tile end of tile rack
(stop-loci<s) on tile support, tilt tlI) tile
fl'ont and push the rack ix).
CAUTION:Whenyouarausingthe
rackin the lowest position(,4),youwill needto
usecautionwhen pulling the rackout We
recommendthat youpuff the rackout several
inchesandthen,using two pot holders,puff the
rackout byho/ding the sidesof it Therackis low
andyou couldbe burnedif youplace yourhand in
the middleof therackand pu//a// the way out Be
verycarafu/not to burnyourhandon the door
when using therack in the/owestposition CA).
How to Set the Oven for Baking or Roasting
[]
[] Touch tile BAKE pad.
Touch tile nmnber pads to set
the desired temperature.
[] Touch tile STARTpad.
[] Check filed fi)r aloneness at
minimum time on recipe. Cook
longer if necessary.
[] Touch tile CLEAR/OFFpad when
cooking, is coml)lete.
TypeofFood Rack Position
Frozenpies(oncookiesheet) CorD
Angelfoodcake A
Bundtorpoundcakes BorC
Biscuits,muffins,brownies, CorD
cookies,cupcakes,
layercakes,pies
Casseroles CorD
Turkey A
NOTE:A coolingfanmayautomaticallyturnon
andoff tocoolinternalparts.Thisisnormal,and
thefanmaycontinuetorunevenaftertheoven
in turnedoff
If baking fi)ur cake la)'ers at rite same time,
place two la)'ex_ on rock B and t_) la)'ers on
rock D. Stagger tTmTson the rock so one is
not direct]) abo_e the ethel:
Do not place foods directly on the
oven floo_
Preheating and Pan Placement
Preheat tile oven if tile recipe calls for it.
Preheating is necessary tot good results
when baking cakes, cookies, pastx T and
breads.
Topreheat,set theovenat the correcttemperature.
Thecontrol will beepwhen the ovenis preheated
and the &splay will show yourset temperature.
Thiswill take approximately15-20 minutes.
Baking results will be better if baking
pans are centered in tile oven as much as
possible. If baking with more than one
pan, place tile pans six each has at least 1"
to 1½" of air space aro/md it.
Cut slits in the foil just like the grid.
Aluminum Foil
You can use aluminmn toil to line tile
broiler pan and brixiler grid. Howevex;
you must mold tile foil tightly to tile grid
and cut slits in it just like the grid.
Without tile slits, the flfil will prevent flit
and meat juices fl'om draining intI) tile
broiler pan. The juices could become
hot enough to catch on fire. If you
do not cut tile slits, you are essentially
fl'_ing, not broiling.
Donot usealuminumfoil on thebottom of
the oven,
Never entirely cover a rack with
almninum fi)il. This will distuO) tile heat
drculation and result in poor baldng.
A smaller sheet el fifil may be used to
catch a spillover by pladng it on a lower
rack several inches below tile food. 77

Usingtheoven.
If yourrange isconnectedto
208 volts,rare steaksmay be
broiled bypreheating the broiler
and positiombgthe oven rackone
positionhigher
How to Set the Oven for Broiling
Leavethedooropento thebroil stopposition.
Thedoorstaysopenbyitself, yet theproper
temperatureis maintainedintheoven.
NOTE:Foodcanbe broiledwith thedoor
closed,butit maynotbrownas wellbecause
theovenheatingelementwill cycleonandof_
[] Place the meat or fish on the broiler
grid in the broiler pan.
Ok I
[] Follow suogested rack )osifions in
the Broiling Guido.
[] Touch the BROILHI/LO pad once tor
HI Broil
To change to LO Broil, touch the
BROILHI/LO pad again.
Use LOBroil to cook foods such as
poultry or thick cuts of meat thoroughly
without ove_q)rowning them.
[] Touch the START pad.
[] X_q_en broiling is finished, touch the
CLEAR/OFFpad.
NOTE:Broil will not work if the temperature
probeis pluggedin.
The size, weight, thickness,
starting temperatm'e
and yore" prelbrence
of doneness will atti_ct
broiling times, This guide
is based on meats at
refl'igerator teml)erature.
+ 7;;;;, [L & l)e[J(ntm_;_t of
D@ubz_; but )ou sho_l/d h_ow that
(:_._)hi_Jz4it m rod) 1401; meres
l_e_a.flu_e 19_5'5. )
The oven has 7 shelf positions.
12
Broiling Guide
Food
GroundBeef
Well Done
Beef Steaks
Rarer
Medium
Well Done
Rarer
Medium
Well Done
Chicken
LobsterTails
FishFillets
HamSlices
(precooked/
Pork Chops
Well Done
LambChops
Medium
Well Done
Medium
Well Done
Salmon Steaks
Quantityand/
orThickness
1 lb. {4patties}
1/2 to3/4" thick
1" thick
1to 17LIbs.
1W' thick
2to 2VzIbs.
1whole cut up
2to 2VzIbs.,
split lengthwise
2 Breasts
2-4
10to 12oz.each
1/4 to 1/2" thick
1/2" thick
2(1/2" thick)
2(1" thick) about 1lb.
2{1" thick) about 10
to 12oz.
2(1VZ'thick)about 1 lb.
2(1" thick)
4(1" thick) about 1lb.
Shelf
Position
F
E
E
D
D
D
C
E
E
E
E
D
D
FirstSide
Time(min,)
9
11
7
9
11
14
18
22
25
25
18 20
10
15
8
10
14
17
10
12
Second Side
Time (rain.)
6
10
5
67
89
11
1_16
20
10
1015
Do not
turll
oveE
78
910
12
1214
78
10
Comments
Space evenly. Up to 8
patties take about the
same time.
Steakslessthan1"
thickcookthrough
beforebrowning.Pan
fryingis recommended
Slashfat.
Broil skin-side-down
first.
Cutthroughbackof
shell. Spreadopen.
Brushwith melted
butter beforebroiling
andafterhalf of
broilingtime.
Handleandturnvery
carefully.Brushwith
lemonbutterbefore
andduringcooking,
if desired.
Increasetime 5 to 10
minutesper sidefor
11/Z'thickor home-
curedham.
Slashfat.
Slashfat.
Grease pan. Brush
steaks witl_ melted
butter.

Usingthe clock, timerandcontrollockout, gecom
Make sure the clock is set to the
correct time of da,¢
ToSet the Clock
The clock must be set to tile correct time
of day fin" tile autonmfic oven tinting
flmctions to work properly. Tile time of
da)' cannot be changed during a timed
baking or sel6cleaning cycle,
[] Touch tile CLOCK pad.
[] Touch tile number pads.
[] Touch tile START pad.
To Set the Timer
[]
[]
Thetimer is a mhTutet#ner onl,¢
Thetimer does not control oven
operations. The maximum setting on
the timer is 9hours and 59mhTutes.
[]
Touch tile KITCHEN TIMER
ON/OFF pad.
Touch tile immber pads until tile
ai//otlnt of time }ou want shows
in tile display: For example, to set
2 hom_ and 45 minutes, touch 2, 4
and 5in that order: If you make a
mistake touch tile KITCHEN TIMER
ON/OFF pad and begin again.
Touch tile STARTpad.
After touching the START pad, SET disappears,
this tells you the time is counting down,although
the displaydoesnot changeuntil one minute has
passed Secondswill not be shown in the display
until the last minute iscounting down.
[] _._hen tile timer reaches :00, tile
control will beep 3 times fbllowed
by one beep eveI T 6 seconds tmtil
tile KITCHEN TIMER ON/OFF pad
is touched.
The&second tonecanbe cance/edby following
the stepsin the Special featuresof youroven
controlsection under Tonesat the Endofa
TimedCycle.
To Reset the Timer
If tile display is still shoMng tile time
remaining, you may change it bv
touching tile KITCHEN TIMER ON/OFF pad,
then touch tile number pads tmtil tile
time w)u want appea_ in tile displa>
If tile remaining time is not in tile display
(clock, delay start or cooking time are in
tile display), recall tile remaining time by
touching tile KITCHEN TIMER ON/OFF pad
and then touching tile ntli//ber pads to
entei" tile new [lille VOli _V;lIlt,
ToCancel the Timer
Toud/tile KITCHEN TIMER ON/OFF
pad twice.
LOCK/UNLOCK HOLD 3 SECONDS
Control Lockout
Yourcontrol will allow you tolock out the touch
padsso theycannot beactivated when pressed
To hxk/tmhxk tile controls:
[] Touch tile 9and 0pads at tile same
time fin" 3 seconds, tmtil tile display
shows LOC ON.
[] To unlock tile control, touch tile 9
and 0pads at tile same time fin" 3
seconds, until tile display shows
LOCOFF.
When this teature is on and tile touch
pads are touched, tile control will beep
and tile display will show LOC ON.
::J_::Thecontrol lockoutmode affectsall touch
pads.No touch padswill work when this
featureis activated
!i> Theadjustment will be retained in memory
after apower failure.
13

Usingthetimedbakingand mastingfeatures.(onsome models)
NOTE."Foodsthat spoil easily--such as milk, eggs, fish, stuffings, poultry and pork--should not be allowed to sit for
more than 1hour before or after cooking. Room temperature promotes the growth of harmful bacteria. Be sure that
the oven light is off because heat from the bulb will speed harmful bacteria growth.
How to Set an Immediate Start and Automatic Stop
Theoven will turnon immediatelyandcook for a
selectedlength of dyne.At the end of the cooking
tlYnethe ovenwill turn off automatlca//y
[] Touch the BAKEpad.
[] Using the number pads, enter the
desired teinperature.
[] Touch the COOKTIMEpad.
NOTE:If yourreciperequkespreheatingyou
mayneedtoaddadditionaltimetothelengthof
thecookingrime.
The display Mll show the changing
temperature (starting at 100°F) and the
cooking time. The display starts changing
once the temperatm'e reaches 100°E
The oven will continue to cook for the
programmed amount of time, then shut
offautomafically, tmless the _M_4
teature was set. See the How to Set the Oven
for Warming section.
Touch the CLEAR/OFFpad to clear the
display.
[] Using the numl)er pads, enter
the desired baking time. The oven
temperatm'e and the cooking time
that you entered will be displa) ed.
[] Touch the STARTpad.
How to Set aDelayed Start and Automatic Stop
Youcanset the ovencontrol to delay-startthe
oven,cookfor a specifc length of time and then
turnoff automafical/g
Make sure the clock shows the correct
time of day:
If vou would like to check tile times you
have set, touch the DELAYSTARTpad to
check the start time you have set or touch
the COOK TIMEpad to check the length
of cooking time you have set.
[] Touch the BAKEpad.
[] Using the numl_er pads, enter the
desired temperature.
[] Touch the COOK TIMEpad.
X_hen the oven turns on at the time of
da) you haxe set, the displa)will show the
changing, ,temperatm'e (startino,_at 100°F)
and the cooking itme. The displa)starts
changing once the temperature reaches
lO0°E
NOTE:If yourreciperequkespreheatingyou
mayneedtoaddadditionaltimetothelengthof
thecookingrime.
[] Using the numl)er pads, enter the
desired baking time.
The {wen will continue to cook fi)r the
programmed amount of time, then shut
off automatically, tmless the X._;M/M
teamre was set. See the How to Set the Over
for Warming section.
[] Touch the DELAYSTARTpad.
[] Using tile numl)er pads, enter the
time of da)}ou want the oxen to
ttlI'n on and st;lI't cooking.
Touch the CLEAR/OFFpad to clear the
display:
[] Touch the STARTpad.
NOTE:An attention tonewi// soundif youare
using tlYnedbakingand do not touchthe START
pad after entering the bakingtemperature.
/4

Usingtheprobe, ge.com
For many foods, especially roasts and poultry, internal food temperature is the best test for doneness. The
temperature probe takes the guesswork out of roasting by cooking foods to the exact aloneness you want.
Thetemperature probe has a
skewer-like probe at one end and a
plug at the other end that goes flTto
the outlet t7 the oven.
Use of probes other than tile one
proxided xdth this product ma) result in
dallla(re_ to tile probe or oxell COlltrok
Use tile handles of tile probe and plug
when inserting and remoxim, them fl'om
tile tood and outlet.
_Ji::Toavoiddamagingyourprobe,donotuse
tongstopuffonthecamewhenremovingit
_;:_Toavoidbreakingtheprobe,makesurefood
iscompletelydefrostedbeforeinserting.
!_ Topreventpossibleburns,donotunplugthe
probefromtheoutletuntfftheovenhas
coolerL
_'_"- Cable
iJi::Neverleave yourprobe /bsidethe ovenduring
a se/f-c/eanlbgcycle.
ij_:_Donot store the probein the oven.
_Mter I)reparing tile meat and placing it
on a trivet or on the broiler pan grid,
tollow these directions for proper probe
placement.
Insert the probe completely into the
meat. It should not touch bone, fat or
gristle.
For roasts with no bone, insert tile probe
into tile meatiest part of tile roast. For
bone-in ham or land), insert tile probe
into the center of tile l_)west large muscle.
Inse_t the probe into the center of dishes
S/Ich as II/eat loat or casseroles.
Insert tile probe into tile meatiest part of
the }ruler thigh fl'om below and parallel
to the leg of a whole tin'key.
How to Set the Oven For Roasting When Using the Probe
[]
[] ]nsell tile probe into tile fbod.
Plug tile })robe into tile oudet in tile
oven. Make sure it's pushed all tile
way in. Close tile o', en dool: Make
sure tile probe cable is not touching
tile broil element.
[] Touch tile PROBE pad.
[] Touch tile number pads to set tile
desired internal fbod or meat
temperature. Tile maximum
internal temperature fi_r tile food
that }ou can set is 200°E
[] Touch tile BAKEpad.
] Touch tile re=tuber pads to set tile
desired oven temperature.
[] Touch tile STARTpad.
Thed/splaywill flashif theprobe/s/bserted
/btotheoutletandyouhavenotsetaprobe
temperatureandtouchedtheSTARTpad
_Mter tile internal temperature of
tile 16od reaches 100°E tile changing
internal temperature will be shown in
tile displa>
[] "_ hen tile internal temperatm'e of
tile food reaches tile nHlllber _otl
have set, tile probe and tile twen
turn off and tile oven control
signals. To stop tile signal, touch tile
CLEAR/OFFpad. Use hot pads to
remox e tile pxobe fl'om tile ibod.
Do not use tongs to pull on it--they
might damage it.
To change tile oven temperature during
tile Roast cwle, touch tile BAKE pad and
then tile number pads to set tile new
temperature.
ij_::If theprobe isremovedfrom the foodbefore
the f/hal temperatureisreached,a tonewill
soundand the displaywill flash until theprobe
isremoved from the oven.
iJi::Youcan use the timer even though you
cannot use timed oven operations while
using the probe. 15

Usingtheconvectionoven.
Convection Fan
In a convection oven,a fan circulates hot air
over, under and around the food
This circulating hot ak is evenly distnT)uted
throughout the oven cavitg As a result, foods
are evenly cooked and browned--often in less
time with convection heat.
NOYE:The convection tim will c_cle on
and off while cooking to best distribute
hot air in the o_,en.
The convection oven tim shuts off when
the oven door is opened. DONOTleave
the door open fi)r long periods of time
while using convection cooking or you
may shorten the life of the convection
heating element.
1-Rack Convection Baking
The convection tim circulates the heated
air evenly over and around the food
using the bake and broil elements.
Whenconvectionbakingwith only I rack,
use CONVECTIONBAKE 1RACKand for best
resultsplace the rackonshelf Cor Dat the
center of the oven. CooktlYnesmay decrease,so
foodshould be checkedearlier thanpackage
directions tomake sure that it doesnot overcook.
Ideal for cooking large casseroles and
lasagna with good results.
Multi-rack position.
Multi-Rack Convection Baking
Because heated air is circulated evenly
throughout the oven, foods can be
baked with excellent results using
multiple racks.
The amount of tiine required for
multi-rock baking may increase slightly
for some tOocLs, but overall time is saved
be(;_use two to three tim es as m tmh fi)od
is cooked at once. Cookies, inttflins,
biscuits, and other quick breads give
good results with multi-rock baking.
To cook toed on i/loi'e than one rack in
comection bake, use CONVECTION BAKE
/lit/L//.
_4]/ell baking on 3 racks, place one
rock in the second (B) position, one
in the fimrth (D) position and one in
the sixth (F) position.
Adapting Recipes...
Y(m can use _our fi_orite recipes in the
con_, ection o_, ell.
_'\]len convection baking, the Auto
Recipe '_Conversion feature automatically
reduces the set reg-ular baking
temi)eratm'e by the recommended 25°E
See Auto Recipg _Conversion in the Special
Features section,
_: Usepansize recommendecL
::Ji::Somepackageinstructionsfor frozen
casserolesor main disheshavebeen
developedusing commercialconvection ovens.
Forbest results in this oven,preheat the oven
andusethe temperatureon thepackage.
/6

ge.com
Roastingrack
Post
Grid
Broilerpan
Convection Roast
i_:!Goodforlarge tendercutsof meat, uncovered
Tile convection tim circulates tim heated
air evenly over and around tile fi)o(l.
Meat an(l poult_ y are browned on all
sides as if tile)' were cooked on a
rotisserie. Using tile roasting rack
provided, heated air will be circulated
ovei; under and around the fi)od being
roasted, The heated air seals in juices
quic!dy fin" a moist and tender product
while, at the same time, creating a rich
golden brown exterim;
_l_en you are convection roasting it is
impmtant that you use tile broiler pan
and grid and th'e special roasting rack fin.
best convection roasting results. The pan
is used to catch grease spills and the grid
is used to prevent grease spatters, while
the rack allows the heated air to circulate
trader tile meat and increase browning
on tile tm(le_ide of tile meat or l)oultr}:
iJGPlace the rack in the lowest rack
posidon (A).
_: Place the grid on the broiler pan
and put the roasting rack over them,
illaking stlre tile posts on tile roasting
rack fit into the boles in broiler pan.
_: Place the meat on the roasting rack.
When baking cookies, you will
get the best results if you use a
flat cookie sheet instead of a
pan with low side&
Cookware for Convection Cooking
Before using your convection oven,
check to see if yore" cookware leaves
room for air drculation in tile oven.
If you are baking with several pans, leave
sp_ce between them. ?dso, be sure the
pans do not touch each other or the
walls of the oven.
Paper and Plastic
Heat-resistant paper and plastic
containe_ that are recommended fi)r
rise in regular ovens can be used in
convection ovens. Plastic cookware that
is heat-resistant to temperatures ot
400°F can also be used.
Metal and Glass
Any D'l)e ot cookware will work in w,ur
convection oven. Howevex; metal pans
heat the filstest and are recommended
fi)I" convection baking.
iJGDarkenedor matte-fblshed panswill bake
faster thanshinypans.
_: Glassor ceramicpanscookmore slowly
For recipes like ovenq)aked clficken,
use a pan with low sides. Hot air cannot
drculate well arotmd fi)od in a pan with
lfigh sides.
(D(D(5)(Z)C
f/_l}
How to Set the Oven for Convection Baking or Roasting
[] Touch tile CONVECTION BAKE
MULTI/1 RACK pad once
(CONVECTION BAKEMULTI Inode)
fin" multi-rack convection baking.
Tiffs mode is used fi)r cooking fl)od
items on more than one rack (i.e., 9
3 or more racks) at tim salne dine in
convection bake. See Multi-Rack
Baking section for more
infimnation.
To uch the CONVECTIONBAKEMULTI/
I RACK pad t_@e (CONVECTIONBAKE
I RACKmode) ti,r one-rack
fi)r cooking fi)od items on on])one
rack in convection bake.
Touch tile CONVECTIONROAST pad
fi)r convection roasting.
[] Touch tile number pads to set tile
desired oxen temperature.
[] Touch tim STARTpad.
To change tile oven temperatm'e, touch
tile CONVECTION BAKEMULTI/1 RACKor
CONVECTION ROASTpad and then tile
number pads to set tile new temperature.
_]_en tile oven starts to beat, tile
changing temperatm'e, starting at l O0°K
will be displayed. When oven reaches tile
temperature you set, 3 beeps will sound.
[] Touch CLEAR/OFFpad when
finished.
iJGYouwillheara fanwhilecooklbgwith
convection.Thefanwillstopwhenthedooris
opened,buttheheatwillnotturnoK
iJGYoumayheartheovencllcklbgduring
baking.Thisisnormal
17

Usingthe timedfeaturesforconvectioncooking.
Youwill hear a fan while cooking with these features. The fan will stop when the door is opened, butthe heat
will not turn off.
NOTE:Foods that spoil easily--such as milk, eggs, fish, stuffings, poultry and pork--should not be aflowed to
s# for more than 1hour before or after cooking. Room temperature promotes the growth of harmful bacteria.
Be sure that the oven light is off because heat from the bulb will speed harmful bacteria growth.
How to Set an Immediate Start and Automatic Stop
Theovenwill turnonimmediate/)/andcookfora
selectedlengthof time.At theendof thecooking
time,theovenwill turnoffautomatically
Make stlre tile clock sho_,_:stile correct time
of day.
[] Touch the CONVECTIONBAKE
MUL77/1RACK pad once
(CONVECTION BAKEMULTI mode)
fi)r nmlti-rack convection baking.
This lnode is tlsed fi)r cooking fl)od
items on more than one rack (i.e., 2,
3 or more racks) at the same time ill
convection bake. See Multi-Rack
Baking section fi)r more infi)mmtion.
Touch the CONVECTIONBAKEMULTI/
I RACKpad mice (CONVECTIONBAKE
I RACKmode) fi)r one-rack
convection baking. This mode is used
fi)r cooking fi)od items on only one
lack ill convection bake.
Tt,uch the CONVECTION ROAST pa d
l()I" convection i'oas[ing.
[] Touch the number pads to set the
desired oxen temperatm'e,
[] Touch tile COOKTIME pad,
NOTE:ffgourreciperequirespreheating,youmay
needtoaddaflfltiona/timeto thelengthof the
cookingtime.
[] Touch the number pads to set tile
desired length of cooking time, The
nfinimmn cooking dine you call set
is 1 minute, Tile oven tempeIatm'e
that you set and the cooking time that
you enmred will be ill the displa)
[] Touch the STARTpad,
The displa) will show the changing
mmperatm'e (starting at 100°F) and the
cooking time, The displa) starts changing
once the mmperature reaches 100°E
Tile oxvn will continue to cook for tile
progTaimned amount of time, then shut
off autonmticalb; unless the _'\_RM teature
_;_s set. See the How to Set the Oven for
Warming section.
[] Touch the CLEAR/OFFI)adto clear
the displa) if necessai T, Remme
the ti)od fl'onl tile o_en, Remenlbei;
even though the oven ttlI'ns Off
automaficall}, loud left ill tile oven
will continue cooking alier the oxen
turns olE
/8

ge.com
CONVEC_ON
OD(D(5)(D(D
(DOD(FXSZD
OD(DG)(DG)
G)(DG)
C (D(D(Z)(D
(DOD(D
How to Set a Delayed Start and Automatic Stop
Youcansettheovencontroltodelay-starttheoven,
cookforaspecificlengthof timeand thenturnoff
automatically
Make sure die clock sho_s the correct time
of de)'.
[] Touch the CONVECTIONBAKE
MULTI/1 RACK pad once
(CONVECTION BAKEMULTI mode)
for multi-rack convection baking.
Tiffs mode is used for cooking food
items on more than one rack (i.e., 2,
3 or more racks) at the same time ill
convection bake. See Multi-Rack
Baking section for m ore infimnafion.
Touch the CONVECtiON BAKEMULTI/
I RACKpad t_dce (CONVECTIONBAKE
I RACKmode) fbr one-rack
convectk)n baking. This mode is used
for cooking filed items on on b one
rack ill convection bake,
Touch tim CONVECtiON ROAST pad fi)r
convection roasting.
[] Touch tile number pads to set the
desired oven temperature.
[] Touch the COOKTIMEpad.
NOTE"Ifyourreciperequirespreheating,youmay
needtoadd additionaltime tothe lengthof the
cookingtime.
[] Touch tile nmnber pads to set the
desired cooking time,
[] Touch the DELAYSTARTpad,
[] T()uch the number pads to set the
time of da)}ou want tile oxen to ttlrn
on and start cooking,
ff youwouldliketo&eckthetimesyouhaveset,
touchtheDEIAYSTARTpadtocheckthestarttime
youhaveset,ortouchtheCOOKTIMEpadto
checkthelengthofcookingtimeyouhaveset.
[] Touch tile STARTpad,
NOTE"An attentiontonewill soundffyouare
usingtimedbakingorroastingand donot touch
the STARTpadafter enteringthebakingor
roastingtemperature.
_'\llen file oven turns on at file tiIlle
of de)you hme set, the displa)will
show tile changing tenaI/eIature
(smrdng at 100°F) and the cooking time.
Tile displa) starts changing once the
tempeIature reaches 100°E
Tile ()veil will continue to cook for the
proglalnmed alnount of time, then shut
off automaficall}, unless the X'\_RM teatuI'e
was set. See the How to Set the Ovenfor
Warmingsection.
[] Touch the CLEAR/OFFpad to clear
the displa} if necessai T. Relno'_e
the food fi'om the oven. Remembei;
even thotlgh the o_,en shuts off
automaticalb, tiled leti ii1 the oven
will continue cooking after tile oxen
turns ott_
79

Usingtheconvectionoven.
For best results when roasting large
turkeys and roasts, we recommend
usflTgthe probe flTcluded f17the
COITVectioI7 oveR,
@
@
@
How to Set the Oven for Convection Roasting when Using the Probe
The display Mll flash PROBE and the
oven control Mll signal if the probe is
inserted into the outlet, and you have not
set a probe temperature and pressed the
STARTpad.
[] Place the rack in the lowest position
(A). Insert the probe into the meat.
[] Plug the probe into the outlet in the
oxen. Make sure it is pushed all the
way in. Close the oxen (loo_:
[] Toud/the CONVECTION ROAST pad.
[] Touch the number pads to set the
desired oven telnpel';itt/l'e.
[] Touch the PROBE pad.
[] Touch the number pads to set the
desired internal meat temperature.
[] Touch the STARTpad.
\A'hen the oven st;u'ts to heat, the word
LO will be ill the display,
?dter the internal temperature of the meat
reaches lO0°K the changing internal
temperature will be shown in the display.
[] _q_en the internal temperatm'e of
the meat reaches the number you
have set, the probe and the oven
tuI'n Off and the oven control
signals. To stop the signal, touch the
CLEAR/OFFpad. Use hot pads to
remove the probe fl'om the fl)od.
Do not use tongs to pull on it--they
might damage it.
CAUTION:ropreventpossiblebume,
donotunplugtheprobefromtheovenoutletuntil
theovenhascooledDonotstoretheprobein
the oven.
NOTE:
iJi::If theprobeisremovedfromthefoodbefora
thefinaltemperatureisreached,atonewill
soundandthedisplaywill flashuntiltheprobe
isremovedfromtheoven.
!i_:Youwill heara fan while cookingwith this
feature. Thefan will stof_when thedoor is
opened,but theheat w/// not turn oft
iJi::Youcan use the t/Ynereventhoughyoucannot
usetimed ovenoperations.
Tochange the oven temperature
during the Convection Roast cycle,
touch the CONVECTIONROASTpad
and then touch thenumber pads to
set the new desired temperature.
Convection Roasting Guide
Meats Minutes/Lb. Oven Temp. Internal Temp.
Beef Rib,BonelessRib, Rare 20_4 325°F 140°Ft
TopSirloin Medium 24_8 325°F 160'_F
(3to 5 Ibs.) Well 28_2 325'_F 170'_F
BeefTenderloin Rare 10 14 325°F 140°Ft
Medium 14 18 325°F 160°F
Perk Bonedn,Boneless(3to 5 Ibs.) 23_7 32R°F 170°F
Chops(1/2to 1" thick) 2 chops 30_5 total 32R°F 170°F
4 chops 35-40 total 32R°F 170°F
6 chops 40_5 total 32R°F 170°F
Ham Canned, Butt, Shank(3to 5 Ibs.fully cooked) 14 18 325°F 140°F
Lamb Bonedn,Boneless(3to 5 Ibs.) Medium 17_0 325°F 160°F
Well 20_4 325°F 170%
Seateed Fish,Whole(3 to5 Ibs.) 3OqOtotal 4OO°F
LobsterTails(6 to8 oz.each) 20_5 total 350°F
Poultry WholeChicken(21/Lto 31/zIbs.} 24_6 350°F 180° 185°F
CornishHens,Unstuffed(1 to 11/zIbs.) 50 55total 350°F 180° 185°F
Stuffed(1to 11/LIbs.) 5R 60total 350°F 180° 185°F
Buckling(4to 5 Ibs.} 24_6 32R°F 180° 185°F
Turkey,Whole*
Unstuffed(10to 16Ibs.) 8 11 32R°F 180° 185°F
Unstuffed(18to 24Ibs.) 7 10 32R°F 180° 185°F
TurkeyBreast(4to 6 Ibs.) 16 19 32R°F 170°F
Sm/]ed bi_ds g_,)_e_wl0n_q_li)_, 30-45 mimm_ addi/im_al nuls/i) time. Shidd h'_:_m_d blz'as/ ,fi/h ]o_l to pnpl,( _t
_t T/u' _LS. i)@aHml,_ t 0/ l_',7(:_z/m_vsrz_s "Ibm, bl,l,/ is /m/)_z/m; but _ou s/m_t/d /,'_ml! l/_al (ookin_ _t to o_ /) 1401" mernz_
some /ood t,oi_o_i_g o*;_zz_Lsmsma) stt)'l@,_'."(Sou_ _': Sail" 1.'ood Book. };)u_ K/t(@ _Guide. [ '€I)A lb,'l,, fiz_ e 19,t¢5.)
20
Other manuals for Profile JS968
1
This manual suits for next models
1
Table of contents
Other GE Range manuals
Popular Range manuals by other brands

Thermador
Thermador PRD486JDGU Use and care guide

Blomberg
Blomberg BGR30420SS user manual

Frigidaire
Frigidaire FFGF3056TSD Use & care guide

Tappan
Tappan TGF605EU1 Use & care manual

Fulgor Milano
Fulgor Milano SOFIA installation instructions

Eurotech
Eurotech EUR-FSC60 Installation and operating instructions