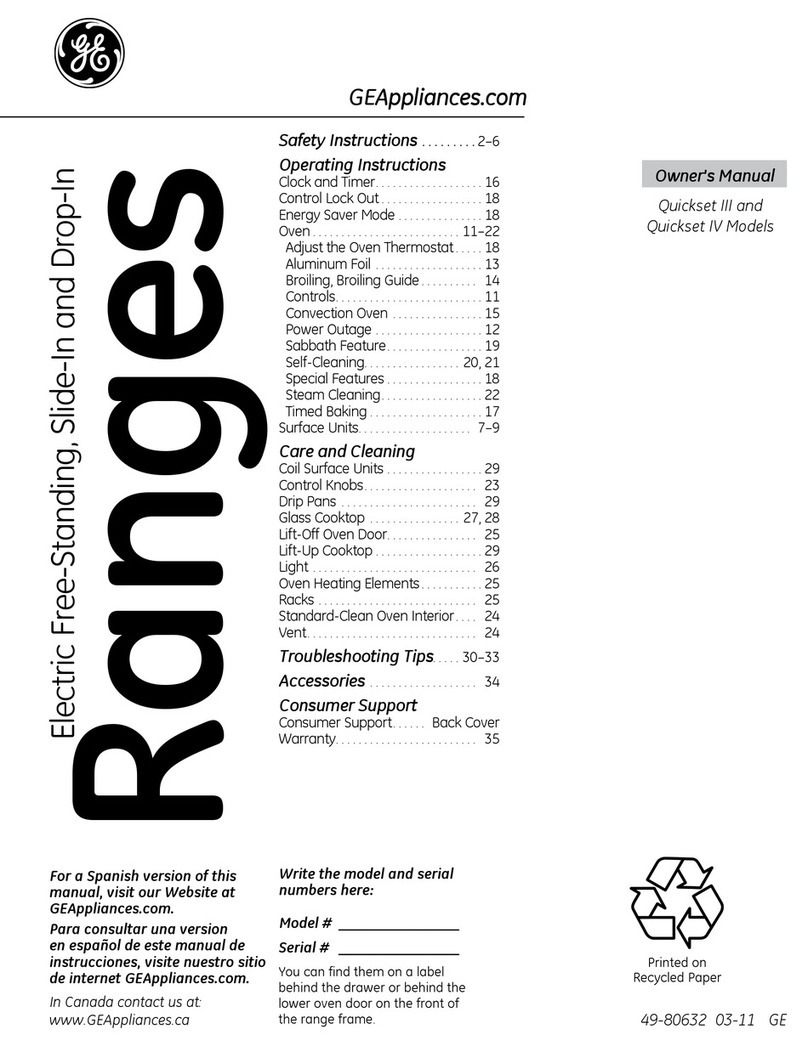
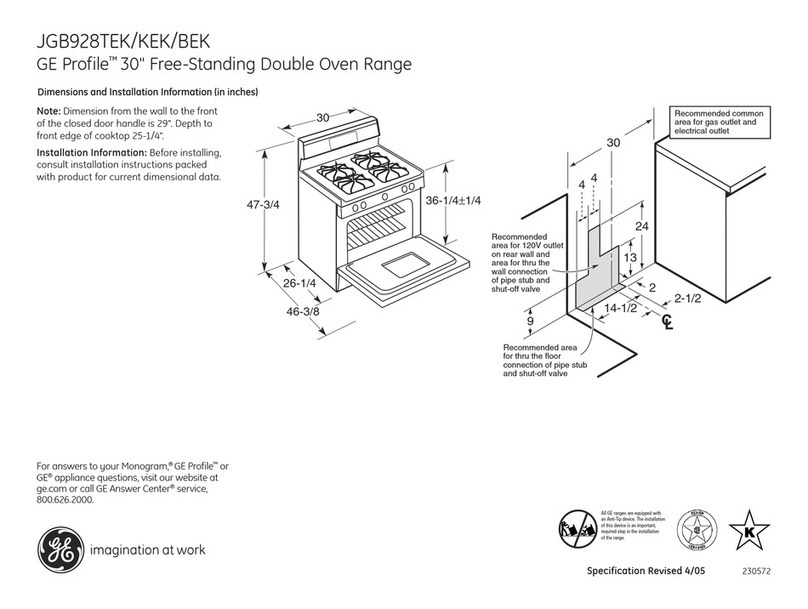
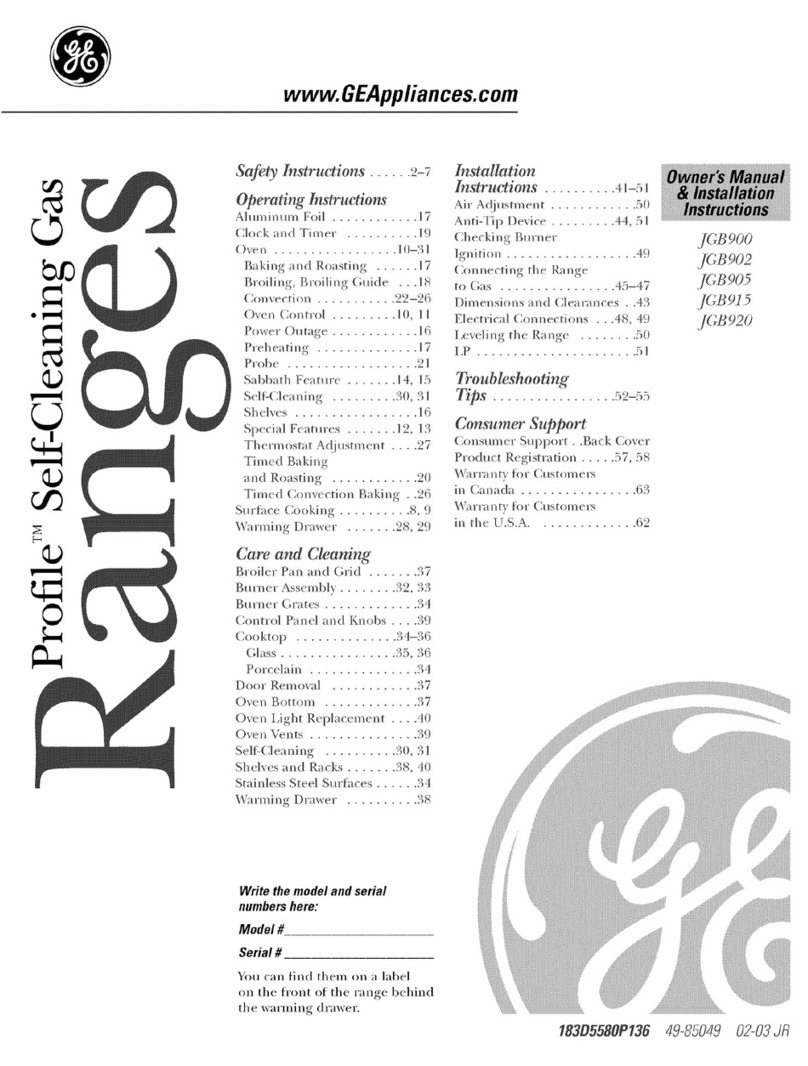
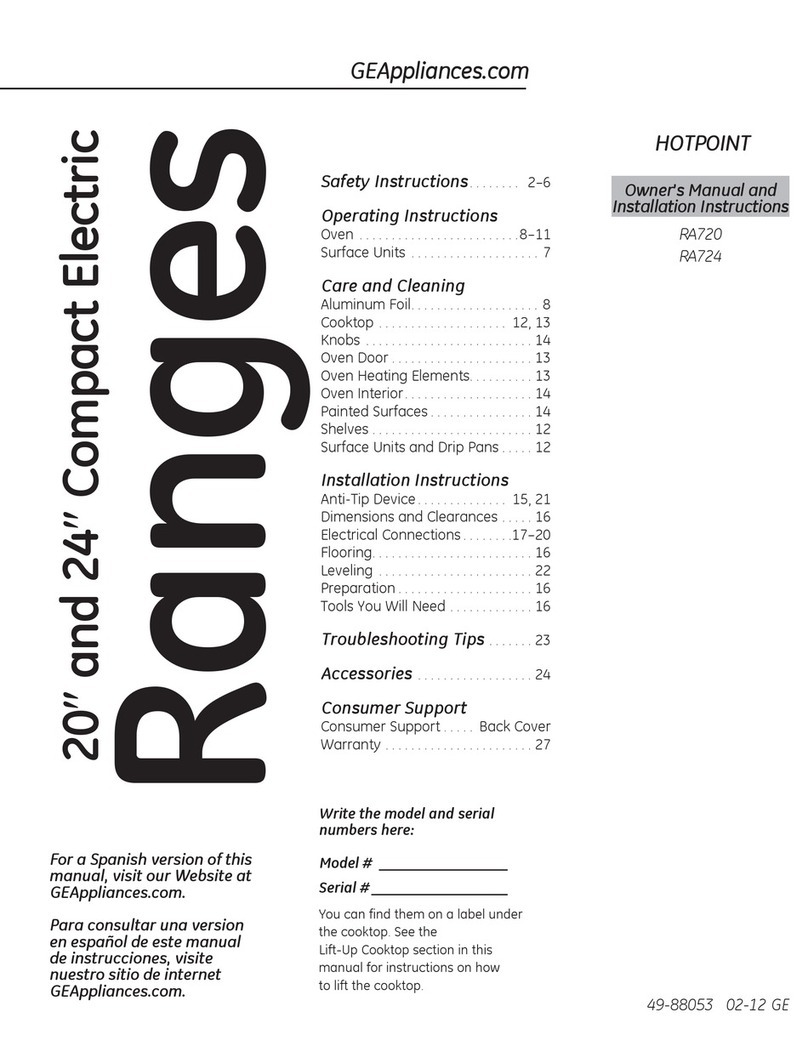
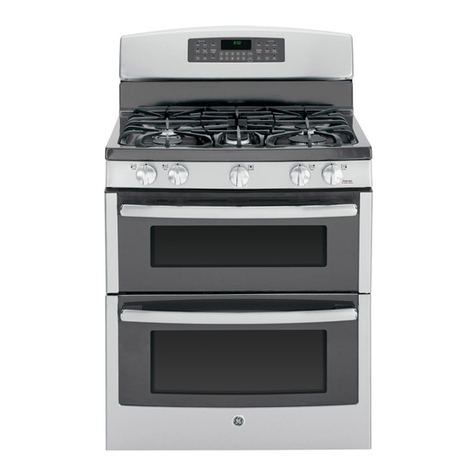
GE Profile P2S975 User manual

ge.com
©
_J
©
L3
v=,,==l
_J
_J
_J
c13
Safety Instructions .............. 2-7
Operating Instructions
Baking or Roasting ............. 11
Broiling, Broiling Guide ......... 12
Clock and Timer . .............. 13
Convection ................. 16-20
Cookware ...................... 9
Oven ...................... 10-28
Probe ........................ 15
Proofing ..................... 21
Range i_ock-O ut ................ 13
Sabbath Feature ................ 28
Self:Cleaning ............... 23, 24
Special Features ............. 25-27
Surface Burners .............. 8, 9
Thermostat .................... 22
Timed Baking & Roasting ........ 14
Warming ...................... 21
Care and Cleaning
Burner Caps and Heads ......... 29
Burner Grates ................. 30
Control Panel ................. 33
Cooktop Sm'face ............... 30
Heating Elements .............. 33
Knobs ........................ 30
Lift-Off Door . ................. 32
Light Bulbs .................... 31
Oven Floor . .................. 33
Packaging Tape ................ 29
Painted Surfaces ............... 32
Racks ........................ 31
Stainless Steel Surfaces .......... 33
Storage Drawer . ............... 33
Troubleshooting Tips .......... 34-37
Accessories ........................ 38
Consumer Support
Consumer Support ..... Back Cover
Product Regisu'ation
(Canada) ..................... 41, 42
Product Regismltion
(U.S.A.)...................... 39,40
Warranty for Customers
in Canada ....................... 44
¼_u'ranty for Customers
in the U.S.A_ ..................... 43
Write the model and serial
numbers here:
Model #
Serial #
You can find theIn on a label
behind the open oven door
on the lower left corner of
the range flame°
P2S975
Convexion fi
double combustible
autonettoyant
Cuisini res
Lasection #anFaise commencea la page 45
Auto-limpiantes de
combustible dual
por conveccidn
Cocinas
la secci6n en espa_o/ empieza en la pagina89
49-8052&1 O&08 JR

IMPORTANTSAFETYINFORMATION.
READALLINSTRUCTIONSBEFOREUSING.
6, WARNING!
ANTI-TIPDEVICE
ALL RANGES CAN TIP
INJURY TOPERSONS
COULD RESULT
INSTALL ANTI-TIP
DEVICES PACKED WITH
RANGE
SEE INSTALLATION
INSTRUCTIONS
AWARNING:If the information
in this manual is not followed exactly,
a fire or explosion may result causing
property damage, personal injury
or death.
-- Do not store or use gasoline or other
flammable vapors and liquids in the
vicinity of this or any other appliance.
WHATTODOIF YOU
SMELLGAS
Do not try to light any appliance.
Do not touch any electrical switch;
do not use any phone in your building.
Immediately call your gas supplier
from a neighbor's phone. Follow the
gas supplier's instructions.
If you cannot reach your gas supplier,
call the fire department.
-- Installation and service must be
performed by a qualified installer,
service agency or the gas supplier.
GAS-HRED
C US
2LISTED

WARNING!
Foryour safety, the information in this manual must be followed to minimize the risk of fire or
explosion, electric shock, or to prevent property damage, personal injury, or loss of life.
ge.com
ANTI-TIPDEVICE
•All ranges can tip.
• BURNS or other SERIOUS
INJURIES can result.
• INSTALL and CHECK the
ANTI-TIP bracket following
the instructions supplied
with the bracket.
Toreduce the risk of tipping the range, the range must be
secured by a properly installed anti-tip bracket. See installation
instructions shipped with the bracket for complete details
before attempting to install.
Tocheck if the bracket is installed and engaged properly,
remove the storage drawer or kick panel and look underneath
the range to see that the leveling leg is engaged in the bracket.
If the range is pulled from the wall for any reason, always
repeat this procedure to verify the range is properly secured
by the anti-tip bracket.
It you did not receive an anfi-dp bracket with your
purchase, call 1.800.626.8774 to receive one at no
cost (in Canada, call 1.800.561._.4344). For installation
insunctions of the bracket, x,isit GEAppliances.com
(in Canada, GEAppliances.ca).
IMPORTANTSAFETYNOTICE
The California Safe Drinking Water and ToxicEnforcement Act requires the Governor of Cafifomia to
publish a list of substances known to the state to cause birth defects or other reproductive harm, and
requires businesses to warn customers of potential exposure to such substances.
Gasappliances can cause minor exposure to four of these substances, namely benzene, carbon
monoxide, formaldehyde and soot, caused primarily by the incomplete combustion of natural gas or
LP fuels. Properly adjusted burners, indicated by a bluish rather than a yellow flame, will minimize
incomplete combustion. Exposure to these substances can be minimized by venting with an open
window or using a ventilation fan or hood.
Thefiberglass insulation in self-clean ovens gives off a very small amount of carbon monoxide during
the cleaning cycle. Exposure can be minimized by venting with an open window or using a ventilation
fan or hood.
3

IMPORTANTSAFETYINFORMATION.
READALLINSTRUCTIONSBEFOREUSING.
4
WARNING!
SAFETYPRECAUTIONS
When using electrical appliances, basic safety precautions should be followed, including the
following:
Use this appliance only fbr its intended
purpose as described in this Owner's
Manual.
Be sure your appliance is properly installed
and grounded by a qualified technician in
accordance xdth the prox,ided installation
instructions.
Before performing any ser_,ice, disconnect
the range power supply at the household
distribution panel by remox,ing the fuse or
switching off the circuit breaker.
Have the installer show you the location of
the circuit breaker or fuse. Mark it for easy
reference.
Do not leave children alone---children
should not be left alone or unattended in
an area where an appliance is in use. They
should never be allowed to sit or stand on
any part of the appliance.
Have the installer show you the location
of the range gas shut-off valve and how to
shut it off if necessa U.
Have your range installed and properly
_ounded by a qualified installer; in
accordance with the Installation
Instructions. Any adjustment and ser\,ice
should be perfbrmed only by qualified gas
range installers or serx,ice mchnicians.
i_ocate the range out of kitchen tratIic path
and out of drafty locations to prevent poor
air circulation.
Be sure all packa_ng materials are
removed flom the range before operating
it m prevent fire or smoke damage should
the packa_ng material i_dte.
Do not leave children alone or unattended
where a range is hot or in operation. They
could be seriously burned.
Do not attempt to repair or replace any
part of your range unless it is specifically
recommended in this manual. All other
ser\,ice should be referred to a qualified
technician.
.....Be sure your range is correctly adjusted
by a qualified ser\,ice technician or installer
fbr the type of gas (natural or LP) that is
m be used. Your range can be converted
fbr use with either type of gas. See the
Installation Instructions packed with
the range.
.....Plug your range into a 120=voh grounded
outlet only. Do not remove the round
grounding prong flom the plug. If in
doubt about the grounding of the home
electrical sysmm, it is your personal
responsibility and obligation to have
an un_ounded outlet replaced with a
properly _ounded, three-prong outlet in
accordance with the National Electrical
Code (U.S.). Do not use an extension cord
with this appliance.
WARNING:Theseadjustments
must be made by a qualified service
technician in accordance with the
manufacturer's instructions and all codes
and requirements of the authority having
jurisdiction. Failure to follow these
instructions could result in serious injury or
property damage. The qualified agency
performing this work assumes
responsibility for the conversion.
Keep the hood and grease filters clean to
maintain good venting and to avoid grease
fires.
Teach children not to play xdth the
controls or any other part of the range.
Always keep dish towels, dish cloths, pot
holders and other linens a s'ate distance
flom your range.

ge.com
SAFETYPRECAUTIONS
Always keep wooden and plastic utensils
and canned food a s_e distance fiom your
range.
Always keep combustible wall coverings,
curtains or drapes a s_e distance from
your range.
Do not clean the range xdth flammable or
volatile cleaning fluids.
iiiiiiiiiiii_iii
After prolonged use of a range, high floor
temperatures may result and many floor
coverings xdll not xdthstand this kind of
use. Never install the range over x,inyl tile
or linoleum that cannot withstand such
type of use. Never install it directly over
interior kitchen carpeting.
Avoid scratching the cooktop xdth
sharp instruments, or xdth rings and
other,jeweh T.
Do not allow anyone to climb, stand or
hang on the oven door; storage drmver or
cooktop. They could damage the range
and even tip it over, causing severe
personal in,jm T.
ACAUTION:Itemso interesttochildren
shouldnotbe storedin cabinetsabovea rangeor
on thebacksplashofa range_hildren climbing
on therangetoreachitemscouldbe seriously
injured.
WARNING:NEVERusethis
appliance as a space heater m heat or
warm the room. Doing so may result
in carbon monoxide poisoning and
overheating of the cooktop or oven.
For your s_ety, never use your appliance
for warming or heating the room.
i,arge scratches or impacts to glass doors
can lead to broken or shattered glass.
Do not clean the range when the appliance
is in use.
Never wear loose-fitting or han_ng
garments while using the appliance.
Be careful when reaching for items stored
in cabinets over the range. Flammable
iiiiiiiiiiii_iii
iiiiiiiiiiii_iii
material could be i_fited if brought in
contact xdth flame or hot oven surfaces
and may cause severe burns.
Do not store flammable materials in an
oven, a range storage drawer or near a
cooktop.
Do not store or use combustible materials,
gasoline or other flammable vapors and
liquids in the x,icinity of this or any other
appliance.
Do not let cooking grease or other
flammable materials accumulate in or
near the range.
Do not use water on grease fires. Never
pick up a flaming pan. Turn the controls
oil Smother a flaming pan on a surface
burner by covering the paw completely
with a well-fitting lid, cookie sheet or flat
tray. Use a multi-purpose d Uchemical or
foam-type fire extinguisher.
Flaming grease outside a pan can be put
out by coveting it with baking soda or,
if available, by using a muhi-purpose dU
chemical or foam-type fire extinguisher.
Flame in the oven can be smothered
completely by closing the oven door and
turning the control m off or by using a
multi-purpose dUchemical or foam-type
fire extinguisher.
Let the burner grates and other surfaces
cool before touching them or leax,ing
them where children can reach them.
Never block the vents (air openings) of
the range. They pro\,ide the air inlet and
outlet that are necessa Ufor the range to
operate properly with correct combustion.
Air openings are located at the rear of the
cooktop, at the top and bottom of the
oven door; and at the bottom of the range
under the storage drawer or kick panel.
Do not lift the cooktop, iJfting the
cooktop can lead to damage and improper
operation of the range.
5

IMPORTANTSAFETYINFORMATION.
READALLINSTRUCTIONSBEFOREUSING.
6
AWARNING'!
SURFACEBURNERS
Useproperpan size--avoid pans thatare unstableor easilytipped.Selectcookwarehavingflatbottomslarge
enoughto coverburnergrates.Toavoidspillovers,makesure cookwareis largeenoughto containthefood
properly.Thiswill bothsave cleaningtimeandpreventhazardousaccumulationsoffood,sinceheavyspattering
orspilloversleft onrange canignite.Usepanswith handlesthat can beeasilygraspedandremaincool
Always use tile LITEposition when igniting
tile top burners and make sure tile burners
have ignited.
Never leave tile surface burners unattended
at high flame settings, goilovers cause
smoking and greasy spillovers that may
catch on fire.
A(!just tile top burner flame size so it does
not extend beyond tile edge of tile cookware.
Excessive flame is hazardous.
Use only di T pot hoMers--moist or damp pot
hoMers on hot surfaces may result in bums
flom steam. Do not let pot hoMers come
near ()pen flames when lifdng cookware. Do
not use a towel or ()tiler bulky cloth in place
of a pot holdei:
h_len using glass cookware, make sure it
is desi_md fbr top-of range cooking.
To minimize tile possibility of bums, ignition
of flammable materials and spillage, turn
cookware handles toward tile side or back of
tile range _@hout extending over adjacent
bum ers.
Carefiflly watch fbods being flied at a high
flame setting.
Ahvays heat fat slowly, and watch as it heats.
If a combination of oils or fats _ll be used
in fD4ng, stir together befbre heating or
as fats melt slowly.
iiiiiiiiiiiii_
iiiiiiiiiiiii_
Use a deep fat thermometer whenever
possible to prevent overheating fat beyond
tile smoking point.
Do not operate tile burner _dthout all burner
parts in place.
Use tile least possible amount of fat fbr
efIbctive shallo_ or deep-fat fi)4ng. Filling tile
pan too till of fat can cause spillovers when
fbod is added.
Do not flame fbods on tile cooktop. If you do
flame foods under tile hood, turn tile fan on.
Do not use a wok on tile cooking surface
if tile wok has a round metal ring dlat is
placed over tile burner _ate to support tile
wok. This ring acts as a heat trap, which may
damage tile burner _ate and burner head.
Also, it may cause tile burner to work
improperly. This may cause a carbon
monoxide level above that allowed by current
standards, resulting in a healdl hazard.
Foods f[)r fi)4ng should be as dIT as possible.
Frost on flozen fbods or moisture on flesh
fbods can cause hot fat to bubble up and over
tile skles of tile pan.
Never t_)_to move a pan of hot fat, especially
a deep fat flTeI: Wait until tile fat is cool.
Do not leave plastic items on tile cooktop--
they may melt if left too close to tile vent.
Keep all plastics away flom tile surface
bum ers.
To avoid tile possibility of a burn, always be
certain that tile controls fbr all burners are
at tile OFFposition and all _ates are cool
bef_)re attempting to remove them.
ff range is located near a _ndow, do not
hang long curtains that could blo_ over tile
surface burners and create a fire hazard.
Kyou smell gas, turn off tile gas to tile range
and call a qualified serxdce technician. Never
use an ()pen flame to locate a leak.
Always turn tile surface burner controls off
bef()re removing cookware.
Do not leave any items on tile cooktop. The
hot air from tile vent may i_fite flammable
items and _dll increase pressure in closed
containers, which may cause them to burst.
h_len disabling range lock-out, make
sure tile surface controls are set to tile OFF
position. This will preclude gas flo_ when tile
range is turned on.
ge.com
COOKMEATANDPOULTRYTHOROUGHLY...
Cookmeatandpoultrythoroughly--meattoatleastanINTERNALtemperatureof 160°F(71°C)andpoultrytoatleastan
INTERNALtemperatureof 180°F(82°C).Cookingtothesetemperaturesusuallyprotectsagainstfoodbomeillness,
AWARNING'!
OVEN
Standaway from therange whenopeningtheovendoor Hot airor steamwhbh escapescan causebums to
hands,face and/oreyes.
Do not heat unopened foodcontainers.
Pressure could build up and the container
could burst, causingan injm)¢
Keep the oven vent unobstructed.
Keep the oven flee flom grease buildup.
Place the oven rack in the desired position
while the oven is cool. If racks must be handled
when hot, do not let pot holder contact the
heating elements.
"_q/enu0ng cooking or roasting bagsin the
oven, follow the manufacturer's directions.
Pulling out the rack to the stop-lock is a
convenience in lifting heavy foods. It is also a
precaution against burns f_comtouching hot
surfaces of the door or oven walls.
: Do not use the oven to d Une_tspapers.
If oved_eated, they can catch on fire.
Do not use the ovenfor a storage area. Items
stored in an oven can ignite.
Do not leave paper products, cooking utensils
or food in the oven when not in use.
AWARNING'.NEVERcover
any slots, holes or passagesin the oven bottom
or cover an entire rack _dth materials such as
aluminum fuil. Doing so blocks air flow
through the oven and may cause carbon
monoxide poisoning. Aluminum fuil linings
may also trap heat, causing a fire hazard.
: Do not use alumimm_ fuil to line oven bottoms.
Improper installation of aluminum fuil may
result in a risk of electric shock or fire.
Make sure a broiler pan is in place correc@ to
reduce the possibilityof grease fires.
lfyou should have a grease fire in a broiler pan,
press the CLEAB/OFFpadand keep the oven
door closed to contain fire until it burns out.
SELF-CLEANINGOVEN
Donot useovencleaners.Nocommercialovencleaneror ovenliner protective coatingofanykindshouldbe
usedin or aroundanypart oftheoven.Residuefrom ovencleanerswilldamagetheinsideofthe ovenwhenthe
self-cleancycleis used.
Do not clean the door gasket. The door gasket
is essential fbr a good seal. Care should be
taken not to rub, Chmage or move the gasket.
: Before self:cleaning the oven, remove shin}¢
silver-colored oven racks (on some models)
and all other cookware.
: Gray porcelain-coated oven racks (on some
models) maybe deaned in the oven during the
self:cleancycle.
: Be sure to wipe up excess spillage before
starting the self:cleaning operation.
: Ifthe self:cleaning mode malfunctions, mm the
oven offand disconnect the power supply.Have
itserdced by a qualified technician.
: Clean only parts listed in this ()x_/er's Manual.
READANDFOLLOWTHISSAFETYINFORMATIONCAREFULLY.
SAVETHESEINSTRUCTIONS

Using the gas surface burners.
Throughout this manual, features and appearance may vary from your model
Before Lighting a Gas Burner After Lighting a Gas Burner
Make suie all g_v_teson the range are in
place before using any burne_.
Make sure to disable the Range
l,ock-Out feaulre befoIe attempting
to light tile suIface buInels.
Do not ope_v_mfile buiner fo[ an
exmnded period of time wifllout
cookwaIe on the glv_m.Tile finish on
tile giam m W chip without cookwaIe
to absorb the heat.
Be suie file bui_leis and glv_msaie
cool befoie you place your hand,
a pot holdei; cleaning cloths or
other mamlials on them.
Push the control knob in and turn it
to the LITEposition.
How to Light a Gas Surface Burner
Push tile control lmob in and turn it to
the LifE position.
You will hear a clicking noise--the sound
of the elecuic spark igmidng the burne_.
After the flame lights, utin tile knob m
adjust the flame size. If tile knob stays at
UTE, it will continue to click.
When one buxnex is rexned m LITE,all
file bumeis spark. Do not attempt to
disassemble or clean around any burner
while anotbex buxnex is on. An elecuic
shock may result, which could cause you
m knock over hot cookwme.
Medium Small Sealed Gas Burners
Large Extra Large
OFF
LITE.
* LO
tl 1 t I
_0_us_w_r_ 65 _' U L)
_RG_RPQTS OQ
FRONT
Your gas range cooktop has four sealed
gas burneis. Tile}, offbi convenience,
cleanability and flexibility to be used in
a wide _vmgeof cooking applications.
Tile smallest bmner in tile dght rear
position is tile simmer buinei. This buinei
can be utIned to LOfor a very low simmer
setdng. It provides precise cooking
pexfomlance fox delicate foods such as
sauces ox foods that xequire low heat fox
a long cooking dine.
Tile medium (left real) and tile lmge
(left flont) burneis are the p_imaD,
burners for most cooking. These geneial-
purpose burnels can be utrned flom HIto
tO to suit a wide range of cooking needs.
Extra-large burner only
Tile extol laxge burner (light flont) is
the maximum output buIneI, like the
other tbxee buIneIs, it can be utIned
flom HI mfO for a wide iwnge of cooking
applications; howeveI, this burner is
designed m quickly bling lalge amotmts
of liquid m a boil. It h_tsa special POWER
BOIL"setting designed m be used with
cookwme 10 inches or larger in di_unem_.
8
How to Select Flame Size
Forsafehandlingofcookware,neverlettheflames
extendupthesidesofthecookware.
Watch tile flame, not file knob, as you
reduce heat. Tile flame size on a gas
bumeI should match the cookwaIe
you are using.
Any flame lalger than tile bottom of tile
cookwaIe is wasted and only serves to heat
tile handle.

ge.com
Top-of-Range Cookware
Aluminum: Medimn-weight cookwaxe is
iecommended because it heats quickly
and evenly. Most foods brown evenly ill
an alunlinum skillet. Use saucepans with
fight-fitting lids when cooking with
mininmm amounts ofwami.
Cast-Iron:If heated slowl); most skillets
will give satisfactory results.
Enamelware: Under some conditions,
file enamel of some cookware may
nlelt. Follow cookware malmfacturer's
reconnnendafions for cooking methods.
Glass:There are two types of glass
cookware--fllose for oven use only
and those for rap-of-range cooking
(saucepans, coffbe and teapots).
Glass conducts heat very slowl):
HeatproofG/assCeramic:Can be used
for eifller surl%:e or oven cooking. It
conducts heat very slowly and cools very
dowly. Check cookware manufacuner's
directions to be sure it can be used on gas
I_tnges.
StainlessSteel: This metM Mone has
poor heating properties and is usually
combined with coppeL alunlinunl
or other metals for improved heat
disuibufion. Combination metal skillets
usually work satisfactorily if they are used
with medium heat as the manufacturer
iecolillilen ds.
Stove TopGrills
Do not use stove top grills on your seMed
gas burners. If you use tile stove top grill
on tile sealed gas burnei; it will cause
incomplete conlbusfion and can result
ill exposure m carbon monoxide levels
above allowable current standards.
Thiscanbehazardoustoyourhealth.
Use a fiat-bottomed wok.
Wok This Way
Werecommendthatyouusea 14-inch(35.6cm)
orsmallerflat-bottomedwok.Makesurethewok
bottomsitsflat onthegrate.Theyareavailableat
yourlocalretailstore.
Only a fiat-bottomed wok should be used.
Do not use a fiat-bottomed wok on a
support ring. Placing file ring over file
burner or glv_minW cause tile burner
to work improperly, resulting in carbon
monoxide levels above allowable
standards. This could be dangerous to
your heMfll.
In Case of Power Failure
In case of a power failure, you can light
tile gas surface burners on your range
with a match. Hold a lit match to tile
burnei; then push in and mrn tile conuol
knob to tile tirE position. Use exueme
caution when lighting burnels this way:
Surface burners in use when an electric_d
power failure occuI_ will continue to
opelvtte nornlall):
NOTE:If rangelock-outisinuseat thetimeofa
powerfailure,thesurfaceburnerscannotbe lit. 9

Usingtheovencontrols.
(Throughout this manual, features and appearance may vary from your model.)
• Nuttill Rack
HilLo
Featuresandappearancemayvary.
10
OvenControl Clockand TimerFeaturesandSettings
BAKEPad
Touch to select the bake function. OVENLIGHTON/OFFPad
Touch to turn the oven light on or off.
BROILHI/LOPad 0
Touch to select the broil fimction.
CONVECTIONBAKEMULTI/1RACKPad
Touch to select baking with the convection
fimction.
CONVECTIONROASTPad
Touch to select ro_ting with tile convection
flmction.
PROOFPad
Touch to select a warm environment usefid
for rising yeast,leavened products.
STARTPad
Must be touched to start an_ cooking or
cleaning fimction.
Display
Shows the time of day, oven temperature,
whether the oven is in the bake, broil or
sell:cleaning mode, the times set for
the timer or automatic oven operations,
and if the range is locked.
O
Ifyour ovenwas setfor a timed oven operationanda
power outage occurred, theclockandall programmed
functionsmust bereset.
If "F- and a numberor letter" flash in thedisplay and
theovencontrolsignals,this indicatesa functionerror
code. TouchtheCLEAR/OFFpad Allow theovento coolfor
onehourPut theovenbackinto operation,ff the functionerror
coderepeats,disconnectthepowerto theovenandcall for
service. 0
Thetime ofday will flashin the display when there has
beena power outage. v_p
SELFCLEANLO/STDPad
Touch to select self:cleaning fimction. See the
Using the self-cleaning oven section.
DELAYSTARTPad
Use along widl COOKINGTIME or SELFCLEAN
LO/STDpads to set tile oven to start and stop
automaticNly at a time you set.
COOKINGTIMEPad
Touch and then touch tile number pads to set
the amount of time you want your food to
cook. Tile oven will shut offwhen the
cooking time has run out.
CLEAR/OFFPad
Touch to cancel ALL oven operations except
the clock, timer and range lock-out.
CLOCKPad
Toucll before setting tile clock.
ONumber Pads
Use to set any fimction requiring numbers
such as tile time of day on the clock, the
timer; tile oven temperature, tile internM
food temperature, the start time and
length of operation tbr timed baking
and sell:cleaning.
KITCHENTIMERON/OFFPad
Touch to select the timer feature.
PROBEPad
Touch when using the probe to cook food.
WARM Pad
Touch to keep cooked fbods warm. See tile
How to Set the Ovenfor Warming section.
RANGELOCK-OUTPad
Touch and hold die RANGELOCK-OUTpad
for 3 seconds to lock/unlock tile surface
burners, oven burners and control panel
so they cannot be activated.

Usingthe oven. gecom
Toavoid possible bums, place the racks in the desired position before you turn the oven on.
Theoven has 7rack positions.
Before you begin...
The racks have stops, so that when placed
correctly on file supports, flley Mll stop
before coming completely out, and Mll
not tilt.
When placing and remo_4ng cookware,
pull the rack out until it stops.
The bake heating element is under the
oven flooL Do not place foods on the
oven bottom for cooking.
Toremovearack, pull it toward you,
tilt the flont end tap and pull it out.
Toreplace,place the end of the rack
(stop-locks) on the support, tilt tap the
flont and push the rack in.
CAUTION:Whenouareusingthe
rackin theIowestpositionCA),youwillneedto
usecautionwhenpuffingtherackout.We
recommendthatyoupufftherackoutseveral
inchesandthen,usingtwopotholders,puffthe
rackoutbyholdingthesidesofit. Therackislow
andyoucouldbeburnedif youplaceyourhandin
themiddleof therackandpuffall thewayout.Be
verycarefulnottoburnyourhandonthedoor
whenusingtherackin thelowestpositionCA).
U] L Fq
_ i_ ii_iiiii _ i_ II iii_ _i
i I i ii:
How to Set the Oven for Baking or Roasting
[] Touch the BAKEpad.
[_ Touch the number pads to set
the desired temperature.
[-_ Touch the STARTpad.
Check food for doneness at
minimum dine on recipe. Cook
longer if neces£uy.
Touch the CLEAR/OFFpad when
cooking is complete.
NOTE:A coolingfanwiflautomaticallyturnon
andoff tocoolintemalparts.Thisisnormal,and
thefanmaycontinuetorunevenaftertheoven
in turnedoff.
Type of Food Rack Position
Frozenpies(oncookiesheet) CorD
Angelfoodcake A
Bundtorpoundcakes BorC
Biscuits,muffins,brownies, CorD
cookies,cupcakes,
layercakes,pies
Casseroles CorD
Turkey A
If baking four cake layers at the same time,
place two layers on rack B and two layers on
rack D. Stagger pans on the rack so one is
not directly above the other.
Be not place foods directly on the
oven floor.
Preheating and Pan Placement
Preheat the oven if file recipe cMls for it.
Preheating is necessary for good results
when baking cakes, cookies, pastry and
breads.
Topreheat,settheovenat thecorrecttemperature.
Thecontrolwillbeepwhentheovenispreheated
andthedisplaywillshowyourset temperature.
Thiswilltakeapproximately15-20minutes.
Baking results will be better if baking
pans are cenmred in file oven as much as
possible. If baking with more than one
pan, place the pans so each has at least
1" (2.5 cm) m 1½" (3.8 cm) of air space
around it.
Aluminum Foil
Donotusealuminumfoilonthebottomof
theoven.
Never entirely cover a rack MUI
Muminum foil. This will disturb the heat
circulation and result in poor baking.
A sm_dler sheet of foil may be used to
catch a spillover by placing it on a lower
rock several inches below the food.
//

Usingtheoven.
ff yourrangeisconnectedto
208volts,raresteaksmaybe
broiledbyprehearingthebroiler
andposifioningtheovenrackone
positionhigher.
How to Set the Oven for Broiling
Leavethedooropento thebroil stopposition.
Thedoorstaysopenbyitself, yet theproper
temperatureis maintainedin theoven.
IMPORTANT'.Toavoidpossibleburns,placethe
racksinthedesiredpositionbeforeyouturnthe
oven on.
NOTE:Foodcanbebroiledwith thedoor
closed,but it maynotbrownas wellbecause
theovenheatingelementwill cycleonandoff.
E_ lace the meat or fish on a broiler
grid in the broiler pan.
[_ Follow suggested rack positions in
the Broiling Guide.
[_ Touch the BROILHI/LOpad once for
HIBroil.
To change m LOBroil, much die
BROILHI/LO pad again.
Use LOBroil to cook foods such as
poulu T or thick cuts of meat thoroughly
without ove_q)rowning them.
[_ Touch the STARTpad.
[_] X_qlen broiling is finished, touch the
CLEAR/OFFpad.
NOTE:Broil will not work if the temperature
probe ispluggedin.
The size, weight, thickness,
starting temperature
and your preference
of doneness will aff>ct
broiling times. This guide
is based on meats at
refligerator temperature.
t' The {LS. De[mrlme, t q/
Ag'riculttm, s_o's "t'mv beq/ is
po/)ula_; but you should know that
cooki_g it to o_('; 140 F(60'C)
mea_s some fl,od poi_o_ing"
org_*_fisn_,_may smwh,e. "(Source:
Sg(/i_I'bod Bo&. _bm Kitche#
Guide. {'SDA I¢_,u..fltne 1985.)
/2
Broiling Guide
Food
GroundBeef
Beef Steaks
Rarer
Medium
Well Done
Rarer
Medium
Well Done
Chicken
Bakery Product
Bread (toast)
English Muffin
LobsterTails
FishFillets
Salmon
Steaks
Fillets
Ham Slices
(precooked)
Pork Chops
Well Done
LambChops
Medium
Well Done
Medium
Well Done
Quantityand/
orThickness
1/Z'to Vg'
(1.3cmto 1.9cm)thick
Vg'to 1"
(1.9cmto 2.5cm)thick
I to1½1bs.(0.45kgto0.68kg
11/2"(3.8cm)thick
2to2½Ibs.(0.91kgto1.13kg
1whole cut up
2to2½Ibs.(0.91kgto1.13kg
split lengthwise
Breast
2to 4slices
2(split)
2-4
1 lb.(0.45kg)(74"to 1/2"
[0.6cmto 1.3cm]thick)
2(1" [2.5cm]thick)
2(1/2"to 3/4"
[1.3cmto 1.9cm]thick)
7Z' (1.3cm)thick
1" (2.5cm)thick
2(TZ' [1.3cm]thick)
2(1" [2.5cm]thick)about
1 lb.(0.45kg)
2(1"[2.5cm]thick)about10
to 12oz.(283gto 340g)
2(1Z" [3,8cm]thick)
about 1lb. (OA5kg)
Rack
Position
F
E
E
E
E
D
C
C
F
F
E
E
D
D
D
D
E
E
E
E
FirstSide
Time(min.)
13
6
8
10
15
18
20
25
25
3
3-4
18-20
10
15
8
8
10
15
7
10
9
14
SecondSide
Time(min.)
4
6
8
10
18
20
25
15
1
Donot
turn
over.
5
8
10
5
4
9
6
10
Comments
Spaceevenly.
SteakslessthanV4"
(1.9cm)thick are
difficulttocookrare.
Slashfat.
Brusheachsidewith
meltedbutter.
Broilskin-side-down
first.
Spaceevenly.Place
Englishmuffinscut-
side-upandbrush
with butterif desired.
Cutthroughbackof
shell.Spreadopen.
Brushwith melted
butterbeforebroiling
andafter half of
broilingtime.
Handleandturn very
carefully.Brushwith
lemonbutterbefore
andduringcooking,
if desired.
Turncarefully.
Donotturnskin-side-
down.
Slashfat.
Slashfat.

Usingthe clock, timerandrange lock-out geoom
CLOCK
Make sure the clock is setto the
correct time of day.
To Set the Clock
The clock must be set to die correct time
of day for die automatic oven timing
tractions to work properly. The dine of
day cannot be changed during a timed
baking or self-cleaning cycle.
[77 Touch die CLOCK pad.
[] Touch die number pads.
[_ Touch die START pad.
JKITCHEN1
jOn lOff
_]
The timer is a minute timer only.
The timer does not control oven
operations. The maximum setting on
the timer is 9 hours and 59 minutes.
To Set the timer
Touch die KITCHEN TIMER
ON/OFF pad.
Touch die number pads until die
amount of time you want shows
in die display. For example, to set
2 hotlI'S and 45 minutes, fetich 2, 4
and 5in that ordei. If you make a
mistake much die KITCHEN TIMER
ON/OFF pad and begin again.
_] Touch die STARTpad.
After touchingtheSTARTpad,SETdisappears,
thistellsyouthetimeiscountingdown,although
thedisplaydoesnotchangeuntiloneminutehas
passed.Secondswillnotbeshownin thedisplay
untilthelastminuteiscountingdown.
[_ x4qien the timer reaches :00, die
control will beep 3 times followed
by one beep every 6 seconds until
die KITCHEN TIMER ON/OFF pad is
touched.
The3-secondtonecanbecanceledbyfoflowing
thestepsintheSpecialfeaturesofyouroven
controlsectionunderTonesattheEndofa
timedCycle.
To Reset the timer
If die display is sdll showing die dine
remaining, you may change it by
touching die KITCHEN TIMER ON/OFF pad,
then much die number pads until die
dine you want appears in the display.
If die remaining dine is not in die display
(clock, del W start or cooking dine are in
die display), recall die remaining time by
touching die KITCHEN TIMER ON/OFF pad
and then touching die number pads to
enter die new time you want.
To Cancel the timer
Touch die KITCHENTIMERON/OFF
pad twice.
[111 LOCK-OuTRANGEJJ
LHOLD5SECONDS
Range Lock-Out (on some models)
Yourcontrolwillallowyoutolockoutthesurface
burners,ovenburnersandcontrolpanelsothey
cannotbeactivated.
To lock/unlock die controls:
%
%
Turn all surface burners off-\
Touch and hold die RANGE
LOCK-OUTpadfor 3 seconds until
die display shows LOCON.
To unlock die control, touch and
hold die RANGELOCK-OUTpadfor
3 secondsuntil the display shows
LOCOFF
When dds feature is on and die touch
pads are touched, die control will beep
and die display will show LOCON.
Thecontrollock-outmodeaffectsa//controls.
Nocontrolswillworkwhenthisfeatureis
activated.
;Theadjustmentwillberetainedinmemory
afterapowerfailure.
73

Usingthetimedbakingand mastingfeatures.
NOTE: Foods that spoil easily--such as milk, eggs, fish, stuffings, poultry and pork--should not be allowed to sit for
more than 1hour before or after cooking. Room temperature promotes the growth of harmful bacteria. Be sure that
the oven light is off because heat from the bulb will speed harmful bacteria growth.
I] ]DDDI I
UI ,JbLI
DDDDI]4
UDbLIbLI
How to Set an Immediate Start and Automatic Stop
Theovenwill turnonimmediatelyandcookfor The display will show the changing
a selectedlengthoftime.At theendofthe
cookingtimetheovenwill turnoff automatically.
[77 Touch the BAKE pad.
[] Using the number pads, enter the
desired temperaune.
[_ Touch the COOKING TIME pad.
NOTE:Ifyourreciperequirespreheating,you
mayneedtoaddadditionaltimetothelengthof
thecookingtime.
[] Using the number pads, enter the
desired baking time. The oven
temperature and the cooking dine
that you entered will be displayed.
temperature (smrdng at 100°F [38°C])
and file cooking time. The display starts
changing once the mmperamre reaches
100°F(38°(;).
The oven Mll continue to cook for file
programmed amount of time, dlen shut
off automatically, unless the _kRM
feature was set. See the How to Set the Oven
forWarmingsection.
[_] Touch the CLEAN/OIFpad to clear
the display:
[_] Touch the STARTpad.
How to Set a Delayed Start and Automatic Stop
Youcanset theovencontroltodelay-startthe
oven,cookfora specificlengthoftimeandthen
turnoff automatically.
Make sure file clock shows the correct
time of day.
[77 Touch the BAKEpad.
_] Using the number pads, enter the
desired temperature.
[_ Touch the COOKINGTIMEpad.
NOTE:Ifyourreciperequirespreheating,you
mayneedtoaddadditionaltimetothelengthof
thecookingtime.
Using the number pads, enter the
desired baking time.
If you would like m check die times you
have set, touch file DELAYSTARTpad m
check the start time you have set or much
the COOKINGTIMEpad m check the
length of cooking time you have set.
When file oven turns on at the time of
day you have set, file display will show the
changdng temperature (stuffing at 100°F
[38°C]) and the cooking imle. The
displW starts changdng once the
temperature reaches 100°F (38°(;).
The oven will continue m cook for file
programmed amount of time, then shut
off automatically, unless the X45kRM
feature was set. See the How to Set the Oven
forWarmingsection.
[_ Touch the DELAYSTARTpad.
[_ Using the number pads, enter the
time of day you want the oven to
mrn on and start cooking.
[_ Touch the CLEAN/OFFpad to clear
the display:
[7] Touch the STARTpad.
NOTE:Anattentiontonewillsoundif youare
usingtimedbakinganddonottouchtheSTART
padafterenteringthebakingtemperature.
/4

Usingtheprobe, ge.oom
For many foods, especially roasts and poultry, internal food temperature is the best test for doneness. The
temperature probe takes the guesswork out of roasting by cooking foods to the exact doneness you want.
Thetemperature probe has a
skewer-like probe at one end and a
plug at the other end that goes into
the outlet in the oven.
Use of probes other than the one
provided with this product may result in
damage to the probe or oven control.
Use the handles of the probe and plug
when inserting and removing them flom
the food and outlet.
Toavoiddamagingyourpmbe,donotuse
tongstopull onthecablewhenremovingit.
Toavoidbreakingtheprobe,makesurefood
iscompletelydefrostedbeforeinserting.
Topreventpossib/ebums,donotunplugthe
probefromtheoutletuntiltheovenhas
cooled.
Neverleaveyourprobeinsidetheovenduring
a self-cleaningcycle.
Do notstore theprobe in the oven.
M_er prepa_ing die meat and placing it
on a trivet or on a broiler pan grid, follow
these directions for proper probe
placement.
Insert the probe completely into the
meat. It should not touch bone, fat
or gristle.
For roasts widl no bone, insert die probe
into the meatiest part of the ro_tst.For
boneqn ham or lamb, insert the probe
into the cenmr of the lowest large muscle.
Insert the probe into the center of dishes
such as meat loaf or casseroles.
Insert the probe into the meatiest part of
the inner thigh flom below and parallel
to the leg of a whole turkey.
How to Set the Oven For Roasting When Using the Probe
[]
[]
DEB EB
%
Insert the probe into the food.
Plug the probe into file outlet in the
oven. Make sure it's pushed all file
way in. Close the oven dooL Make
sure the probe cable is not touching
the broil element.
[_ Touch the PROBEpad.
Touch the number pads to set the
desired internal food or meat
temperature. The maxinmm
internal temperature for the food
that you can set is 200°F (93°C).
Touch the BAKEpad.
Touch the number pads to set the
desired oven temperature.
Touch the STARTpad.
Thedisplaywill flashif theprobeisinserted
intotheoutletandyouhavenotsetaprobe
temperatureandtouchedtheSTARTpad.
AfYerdie inmrnM mmperamre of die
food reaches 100°F (38°C), file changing
inmrnal temperature will be shown in
the displw:
X_qlenthe internal temperature of
the food reaches the number you
have set, the probe and the oven
turn off"and the oven control
signals. To stop the sigmal, touch the
CLEAR/0FFpad. Use hot pads m
remove the probe fiom the food.
Do not use rungs m pull on it--they
might damage it.
To change the oven mmpe_v_une dtning
the Roast cycle, much the BAKEpad and
then the number pads m set the new
temperature.
If theprobeisremovedfromthefoodbefore
thefinaltemperatureisreached,a tonewill
soundandthedisplaywill flashuntiltheprobe
isremovedfromtheoven.
Youcanusethetimereventhoughyou
cannotusetimedovenoperationswhile
usingtheprobe.
15

Usingtheconvectionoven.
Convection Fan
Ina convectionoven,a fancirculateshotair
over,underandaroundthefood.
Thiscirculatinghotair isevenlydistributed
throughouttheovencavity.Asa result,foods
areevenlycookedandbrowned--often in less
timewith convectionheat.
NOTE: The convection fan will cycle on
and offwhile cooking to best distribute
hot air in tile oven.
The convection oven fan shuts offwhen
die oven door is opened. DO NOTleave
the door open for long periods of time
while using convection cooking or you
may shorten the life of the convection
heating element.
1-Rack Convection Baking
The convection fan circulates the heated
air evenly over and around the food
using the bake and broil elements.
WhenconvectionbakingwithonlyI rack,
useCONVECTIONBAKE1RACKandforbest
resultsplacetherackonrackCorDatthecenter
oftheoven.Cooktimesmaydecrease,sofood
shouldbecheckedearlierthanpackagedirections
tomakesurethatitdoesnotovercook.
Idealforevenlybrownedbakedfoodscooked
on Irackandforlargefoods.Additionally,
sometimesavingsmaybenoticed.
Goodresultswithcookies,biscuits,muffins,
brownies,cupcakes,creampuffs,sweetrolls,
angelfoodcakeandbread.
Multi-ra ck position.
Multi-Rack Convection Baking
Because heamd air is circulamd evenly
fllroughout die oven, foods can be
baked with excellent results using
multiple rocks.
The amount of time required for
multi-rock baking may increase digbtly
for some foods, but ovemU time is saved
because two to fllree times as much food
is cooked at once. Cookies, muffins,
biscuits, and other quick breads give
good results with multi-rock baking.
To cook food on more dmn one rack in
convection bake, use CONVECTION BAKE
MULTI.
X_rben baking on 3 racks, place one
tack in die second (B) position, one
in the fourth (D) position and one in
tile sixth (F) position.
Adapting Recipes...
You can use your favorite recipes in tile
convection oven.
¼lien convection baking, the Auto
Recipe'" Conversion feature atttomaficalb,
reduces the set regular baking
temperature by the recommended 25°F
(14 °C). See Auto Recipe'" Conversion in
the Special Feautres section.
;Usepan sizerecommended.
Somepackageinstructionsforfrozen
casserolesormaindisheshavebeen
deve/opedusingcommercia/convectionovens.
Forbestresu/tsinthisoven,preheattheoven
andusethetemperatureonthepackage.
16

ge.com
Convection Roast
Goodforlargetendercutsofmeat,uncovered.
The convection fan circulates the heated
air evenly over and around the food.
Meat and poult_T are browned on all
sides as if they were cooked on a
rotisserie. The heated air seals in juices
quickly for a moist and render product
while, at the same time, creating a rich
golden brown exterioL
When you are convection roasting, it is
important that you use a broiler pan and
grid designed for broiling for best
convection roasting results. The pan is
used m catch grease spills, and the grid is
used m prevent grease spatm_s while
heamd air circulams under the meat m
increase browning on the underside of
the meat or poulu T.
Place the oven rack in the position
that cenmrs the food between the mp
and bottom of the oven.
Whenbakingcookies,you will
get thebest results if you usea
flat cookiesheetinsteadof a
pan with low sides.
Cookware for Convection Cooking
Before using your convection oven,
check to see ifyour cookware leaves
room for air circulation in the oven.
If you are baking with several pans, leave
space between them. Also, be sure the
pans do not much each other or the
walls of the oven.
Paper and Plastic
Heat-resistant paper and plastic
containers that are recommended for
use in regular baking can also be used
for convection baking, but should not
be used at mmpemmres higher than
the mmperamre recommended by the
cookware mamffacmreL Plastic cookware
flint is heat-resistant to temperatures of
400°F (204°C) can Mso be used.
Metal andGlass
Any type of cookware will work in your
com'ecfion oven. Howevei; metal pans
heat the fastest and are recommended
for convection baking.
Darkenedormatte-finishedpanswillbake
fasterthanshinypans.
Glassorceramicpanscookmoreslowly.
For recipes like oven-baked chicken,
use a pan with low sides. Hot air cannot
circulate well around food in a pan with
high sides.
Multi / !Rack
How to Set the Oven for Convection Baking or Roasting
[7] Touch the CONVECTIONBAKE [_] Touch the STARTpad.
MULTI/1RACKpad once
(CONVECTIONBAKEMULTImode)
for multi-rock convection baking.
Tiffs mode is used for cooking food
items on more than one rack (i.e., 2,
3 or more racks) at the same time in
convection bake. See Multi-Rack
Baking section for more information.
Touch file CONVECTIONBAKEMULTI/
1RACKpad twice (CONVECTIONBAKE
1RACK/1GRILLEmode)for ot_erack
com'ection baking. Tiffsmode is used
for cooking food items on only one
rack in convection bake.
Touch the CONVECTIONROASTpad
for convection roasting.
Touch the number pads to set the
desired oven temperature.
To change file oven mmperamre, much
the CONVECTIONBAKEMULTI/1RACKor
CONVECTIONROASTpadand then the
number pads m set the new mmperamre.
_qlen the oven starts to heat, the
changing temperature, starting at 100°F
(38°C), will be displwed. When oven
reaches the mmperamre you set, 3 beeps
will sound.
Touch CLEAR/OFFpad when
finished.
Youwill heara fan while cookingwith
convection.Thefan will stop when the door is
opened,but the heat wifl not turnoff.
Youmay hearthe oven clickingduring
baking. Thisis normal
NOTE:Whenconvectionbaking,theoventemperaturewill be25°t:(14°C)lowerthan
theset temperature.SeeAutoRecipg_ConversionintheSpecialFeaturessection formore
information.Whenconvectionroasting,oventemperaturewill notautoconvert.
17

Usingthe timedfeaturesfor convectioncooking.
Youwill hear a fan while cooking with these features. Thefan will stop when the door is opened, but the heat
will not turn off.
NOTE:Foods that spoil easily--such as milk, eggs, fish, stuffings, poultry and pork--should not be allowed to
s# for more than 1hour before or after cooking. Room temperature promotes the growth of harmful bacteria.
Be sure that the oven light is off because heat from the bulb will speed harmful bacteria growth.
t4ulti / I Rack
How to Set an Immediate Start and Automatic Stop
Theovenwill turnonimmediatelyandcookfor a
selectedlengthof time.At theendof thecooking
time,theovenwill turnoff automatically.
Make sure file clock shows file correct time
of day.
[_ Touch the CONVECTION BAKE
MULTI/1 RACK pad once
(CONVECTION BAKE MULTI mode)
for multi-rack convection baking.
This mode is used for cooking food
imms on more than one tack (i.e., 2,
3 or iilore racks) at the same time in
convection bake. See Multi-Rack
Baking section for more information.
Touch the CONVECTIONBAKEMULTI/
1RACKF,ad twice (CONVECTIONBAKE
1RACK/1GRILLEmode) for orLerack
convection baking. Tiffs mode is used
for cooking food items on only one
lack in convection bake.
Touch tile CONVECTION ROAST pad
for convection roasting.
Touch tile number pads to set tile
desired oven temperature.
[_ Touch the COOKINGTIME pad.
NOTE'.Ifyourreciperequirespreheating,youmayneed
toaddaddtionaltimetothelengthofthecookingtima
[_ Touch tile nmnber pads to set tile
desired length of cooking time. Tile
mininnmt cooking time you can set
is 1 minum. Tile oven mmperature
that you set and the cooking time that
you enmred will be in the display.
[_] Touch tile STARTpad.
Tile display' will show the changing
wmpetamre (starting at 100°F [38°C]) and
the cooking time. Tile display' starts
changing once the mmperature reaches
IO0°F (38°C).
Tile oven will contintle tO cook for the
progratnmed amount of time, then shut
off atltomaficMly, unless the XYARMfeature
was set. See the How to Set the Oven for
Warmingsection.
[_ Touch tile CLEAR/OH:pad to clear tile
display if necessmy. Remove tile food
fi'om tile oven. Remember; even
tboug]l the oven urals offatlmmatir_tUy,
fbod left in the oven will continue
cooking a_ter the oven antis offl
NOTE:Whenconvectionbaking,theoventemperaturewill be25°t:(14°C)lowerthan
thesettemperature.SeeAutoRecipeTM ConversionintheSpecialFeaturessectionformore
information.Whenconvectionroasting,oventemperaturewill notautoconvert.
18

Multi/1 Rack
ge.com
How to Set a Delayed Start and Automatic Stop
Youcansettheovencontroltodelay-starttheoven,
cookfor aspecificlengthof timeandthenturnoff
automaticallg
Make sure die clock shows die correct time
of day.
[] Touch the CONVECTION BAKE
MULTI/1 RACK pad once
(CONVECTION BAKE MULTI mode)
for nmlti-rack convection baking.
This mode is used for cooking food
imms on more than one tack (i.e., 2,
3 or more racks) at the same time in
convection bake. See Multi-Rack
Baking section for more information.
Touch the CONVECTIONBAKEMULTI/
1RACKF,ad mice (CONVECTIONBAKE
1RACK/1GRILLEmode) for one rack
convection baking. This mode is used
for cooking food items on only one
rack in convection bake.
Touch tile CONVECTION ROAST pad
for convection roasting.
_] Touch the number pads to set tile
desired oven temperature.
[_ Touch the COOKINGTIME pad.
NOTE:Ifyourreciperequirespreheating,youmay
needtoaddadditionaltimetothe lengthof the
cookingtime.
[_ Touch tile nmnber pads to set tile
desired cooking time.
[_ Touch tile DELAYSTARTpad.
[_ Touch tile nmnber pads to set tile
time of day you want the oven to turn
oil and start cooking.
Ifyou wouldlike tocheckthe timesyouhaveset,
touchtheOEDWSTARTpadtocheckthestarttime
youhaveset,or touchthe COOKINGTfMEpad to
checkthe lengthofcookingtimeyouhaveset.
[77 Touch tile STARTpad.
NOTE:An attentiontonewill soundif youare
usingtimedbakingorroastinganddonot touch
theSTARTpadafter enteringthebakingor
roastingtemperature.
X_len file oven turns oil at file time
of day you have set, tile display will
show file changing temperature
(starting at 100°F [38°C]) and the cooking
time. Tile display starts changing once file
temperature reaches 100°F (38°C).
Tile oven will continue to cook for file
progrmnmed amount of time, fllen slmt
off a/ttomafically, unless the XYARMfeaune
was set. See the How to Set the Ovenfor
Warmingsection.
[_ Touch the CLEAR/OFFpad to cleat" the
displa_ if necessm T.Remove tile food
from the oven. Remenlbei; even
tbougtl the oven shuts off mtmmatically,
fbod left in the oven will continue
cooking a_er the oven aims offl
NOTE:Whenconvectionbaking,theoventemperaturewill be25°F(14°C)lowerthan
thesettemperature.SeeAutoRecipg_ConversionintheSpecialFeaturessectionformore
information.Whenconvectionroasting,oventemperaturewill notautoconvert.
19

Usingtheconvectionoven.
For best results when roasting large
turkeys and roasts, we recommend
using the probe included in the
convection oven,
Fq
ULdULdrq
DC] [ Fq
Tochange the oven temperature
during the Convection Roast cycle,
touch the CONVECTIONROASTpad
and then touch the number pads to
set the new desired temperature.
20
How to Set the Oven for Convection Roasting when Using the Probe
The display will flash PROBE and file
oven control will signal if the probe is
inserted into file outlet, and you have not
set a probe temperature and pressed file
STARTpad.
[7] Place the oven rack in the position
that centers the food between the
mp and bottom of the oven. Insert
the probe into the meat.
_] Plug the probe into the outlet in the
oven. Make sure it is pushed all the
way in. Close the oven dooL
[-_ Touch the CONVECTION ROAST pad.
[_ Touch the number pads to set the
desired oven temperature.
[_ Touch the PROBE pad.
[-_ Touch the number pads to set the
desired internal meat temperature.
Touch the START pad.
[]
_qlen the oven starts to heat, the word
tO will be in the display.
After the internal temperature of the meat
reaches 100°F (. 8 C), the changing internal
tempemtm'e will be shown in the display.
[_ X_qlen the internal temperature of
the meat reaches the number you
have set, the probe and the oven
mrn off"and the oven control
sigmals. To stop the signal, much the
CLEAR/OtFpad. Use hot pads m
remove the probe from the food.
Do not use tongs to pull on it--they
might damage it.
CAUTION:ropreventpossibleburns,
donotunplugtheprobefromtheovenoutletuntil
theovenhascooled.Donotstoretheprobein
theoven.
NOTE:
If theprobeisremovedfromthefoodbefore
thefinaltemperatureisreached,a tonewill
soundandthedisplaywillflashuntiltheprobe
isremovedfromtheoven.
Youwill heara fanwhilecookingwiththis
feature.Thefanwill stopwhenthedooris
opened,buttheheatwillnotturnoff.
Youcanusethekitchentimereventhoughyou
cannotusetimedovenoperations.
Convection Roasting Guide
Minutes/Lb.
Meats (Minntes/kg) Oven Temp. Internal Temp.
Beef Rib,BonelessRib, Rare 20-24 (44-53) 325°F(163°C) 140°F(60°C)1-
TopSirloin Medium 24-28 (53-62) 325°F(163°C) 160°F(71°C)
(3to 5 Ibs.[1.36kgto 2.27 kg]) Well 28-32 (62-71) 325°F(163°C) 170°F(77°C)
BeefTenderloin Rare 10-14 (22-31) 325°F(163°C) 140°F(60°@
Medium 14-18 (31-40) 325°F(163°C) 160°F(71°C)
Perk Bone-In,Boneless(3to 5Ibs. 23-27 (51-60) 325°F(163°C) 170°F(77°C)
[1.36kgto 2.27kg])
Chops(1/2to 1" 2 chops 30-35(66-77)total 325°F(163°C) 170°F(77°C)
[1.3cmto 2.5cm]thick) 4 chops 35-40(77-88)total 325°F(163°C) 170°F(77°C)
6 chops 40-45(88-99)total 325°F(163°C) 170°F(77°C)
Ham Canned,Butt, Shank(3to 5 Ibs. 14-18 (31-40) 325°F(163°C) 140°F(60°C)
[1.36kgto 2.27kg]fully cooked)
Lamb Bone-In,Boneless(3to 5Ibs. Medium 17-20 (37-44) 325°F(163°C) 160°F(71°C)
[1.36kgto 2.27kg]) Well 20-24 (44-53) 325°F(163°C) 170°F(77°C)
Seafood Fish,Whole(3 to 5 Ibs.[1.36kgto 2.27kg]) 30-40(66-88)total 4OO°F(204°C)
LobsterTails(6to 8oz.[170 gto 227g] each) 20-25(44-55)total 350°F(177°C)
Poultry Whole Chicken(2_/_to31/_Ibs. 24-26 (53-57) 350°F(177°C) 180°-185°F(82°-85°C)
[1.13kgto 1.59kg])
CornishHens,Unstuffed(1to 1_/_Ibs. 50-55 350°F(177°C) 180°-185°F(82°-85°C)
[0.45kgto 0.68kg]) (110-121)total
Stuffed (1to 1_/2Ibs. 55-60 350°F(177°C) 180°-185°F(82°-85°C)
[0.45kgto 0.68kg]) (121-132)total
Duckling(4to 5 Ibs.[1.81kgto 2.27 kg]) 24-26 (53-57) 325°F(163°C) 180°-185°F(82°-85°C)
Turkey,Whole_
Unstuffed(10to 16Ibs.[4.54kgto 7.26 kg]) 8-11 (18-24) 325°F(163°C) 180°-185°F(82°-85°C)
Unstuffed(18to 24 Ibs.[8.16kgto 10.89kg]) 7-10 (15-22) 325°F(163°C) 180°-185°F(82°-85°C)
TurkeyBreast(4to 6 Ibs.[1.81kgto 2.72kg]) 16-19 (35-42) 325°F(163°C) 170°F(77°C)
*Stz{[]},d binls gv#eral('; 7vq_dn_ 30-45 mi)_ute_ additio)_al mastb_g time. 5hidd I_i,_:_a)_d b_vast _ith/bil to p_vve#t
o*o_,rb)vw_ting a_td d_TbN" q/ skb_.
t' The {'.S. Dq)arhn_ nl d Agric_zflmv ,_ays "Ha_, bff/ is p@tdm; bul yotz ,sl_ould k)_ow lhat cookbN" il to o)@' 140 'F (60°C)
mr'arts ,_mne/bod /)oism_bNorg*mism,_ may smwiv_<" (5<,tin'*,:Sq/b I'bod Book. }bto Kitd_e_ Guid_< { 'SI)A H_o.,tithe 19S5.)
Other manuals for Profile P2S975
8
Table of contents
Languages:
Other GE Range manuals

GE
GE Coil Top Operating instructions

GE
GE EER2000 User manual

GE
GE JCS905 User manual

GE
GE JGS750SEF User manual

GE
GE PB975DPBB - Profile 30" Electric Ran Manual

GE
GE Profile JGS968 SERIES User manual

GE
GE JMP28BCWH User manual

GE
GE JGB910 and Operating instructions

GE
GE Quick Set V User manual

GE
GE Profile JD968 User manual